Search the Community
Showing results for tags 'black'.
-
Hi everyone, To make it easier for me, one topic for all my builds. Just a small overview of my builds of the past few years. To celebrate the anniversary of Knights Kingdom. My own version of the set Ghostly Hideout. And of course Forestmens' Hideout. A small confrontation between two wizards in the forest with the Forestmen watching from a short distance. The return of the Black Monarch to the western border of their lands. A small castle for the Black Crows. This was build to inspire people to build for a contest on the LOWLUG forum. Battle of the old ruins of Lyon's Keep. The Storage of Rayne the Red. This was also build to inspire people to build for a contest on the LOWLUG forum. On the road! The carriage of the Black Knights on the road. Be aware of the Wolfpack! My two new additions to the list. A small cart for the "Bear" Knights of the CMF series. And my own interpretation of the Dragon Wagon. For more pictures please look into my Flickr album. Feedback and questions are welcome.
-
A small model I whipped up in LDD in the timespace of about 25 minutes. Based on the Eclipse Dreadnought used by the Empire around six years after the Battle of Endor. Comments? Suggestions?
-
The all time classic toy of the 20th century and to me the coolest toy right after LEGO now finally in brick form! This is my project for LEGO Ideas. It uses a classic blocky body and cubic head design to make it simple and cute. It is, as you can see,decorated with a control panel on the chest, a face with two scary red eyes and a cool little window on it's back that lets you watch the mechanism at work. And it can really walk!!! Let me know which colour and which design (arms, antennas, etc.) you like more Thank you. If you like it, please support on LEGO Ideas.
-
 The first one was posted in the scale forum, but I got the advice to post this here. I have improved some things and now I'm posting it again. I build the truck with no example, just from what I knew how a truck looks like. When I was finished I wondred where I've seen this truck before. Than I checked the internet, and guess what: see this movie Sorry if my English is not correct, but normaly I'm writing in Dutch. Let me know what you think of it.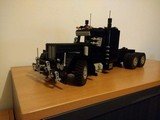
-
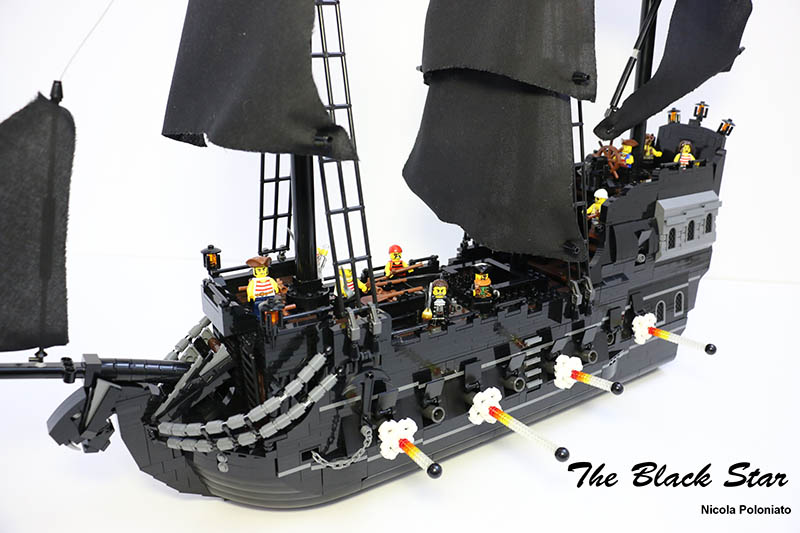
Hi guys! This is my pirate ship, the Black Star! It have more than 2000 bricks and it's longer 80 cm
-
 The second version of the 964 Porsche Video: Features & Functions: Opening doors, bonnet, trunk HOG steering Folding seats Micro fake engine. Building instruction is now available. Check out the Rebrickable: https://rebrickable.com/mocs/MOC-8013/paave/porsche-964911-cabriolet/
 -
 Well, it's been more than a year since I started work on my last locomotive MOC, the China Railways QJ. Having built most of the practical engines (not too big for R40 curves) that I was visually interested in, I had to wait a bit before my interest was piqued again on the locomotive front. My inspiration came from running the QJ at most BayLUG meetings for the past year and change. The QJ isn't necessarily unreliable or difficult to set up, but it's still not very convenient: the model isn't that easy to move around or manipulate due to the size, the tender, and the number of fragile bits. The lengthy drivetrain with its fair amount of friction and torque also prevents the engine from generating smooth low-end torque. Finally, BayLUG still runs 9v at most of our shows, and the QJ can't easily be converted to run on 9v. So this is really my second locomotive to be born of functional requirements (the first was my U30B): 1. It should be easy to transport [from here to there] and move around [a layout] 2. It should be designed with robustness as a key feature 3. It should be easily convertible between PF and 9v operation 3b. The PF components should be easily removable (also helps with charging) 3a. It should run smoothly when pushed [by a 9v power car] Requirements 1 and 3 really insist that this engine be a large tank engine: for 1 I don't need to deal with a tender when transporting or moving and for 3 it needs to be big enough to fit all of the PF stuff. It actually took me quite a bit of time to zero in on the X-10-a as large tank engines are apparently pretty rare in the US and North America: it seems that even most of our branch line and shunting steam engines were tendered. But eventually I found a drawing and the work began! What I learned from the QJ is that if the weight of the loco is properly distributed, one powered (and tyred) axle is good enough to generate usable torque. From this notion I designed the chassis to have exactly that one powered axle, which I could easily remove to remove tyres and gearing for 9v operation. For the same reason, the driven axle isn't cranked either; in the QJ I would have had to remove all of the cranks and all of the wheels to access the tyres or gears. The lack of cranks on the driven axle also lets me keep the chassis articulated, which should help minimize rolling resistance for 9v operation (say compared to a 6-coupled flange-blind-flange configuration for the drivers). The drive rods are made using the half-pin in rod-track technique, and there's a bit of a hack: the connecting rods have to go around a corner due to the articulation, so the travel is longer than the usual three studs, and the connecting rods are both loosely pinned down and made of flex. As far as I can tell this arrangement doesn't add significant friction, probably because the corner is very small. The engine is designed to be powered with two M-motors, but I'm using the E-motor right now for the novelty. Unfortunately it wasn't quite possible to get as much weight as I would have liked over the driven axle: the battery box must go behind the boiler due to its height, and that really limits weight distribution options. The loose 9v motor in the front is simulating the weight of a second M-motor, and it helps bring the net weight over the driven axle to maybe 60 percent? Here you can also see how all the bits come out of the engine: almost all of the top surfaces are detachable. Whether this is convenient enough to fulfill requirement 3 remains to be seen. Construction of the body is actually very similar to that of the QJ: structural integrity is mainly provided by studs-out beams and everything else is studs up. Stickers are created at 300DPI and printed on 3M 3200-L mailing label material. This is a small detail, but it is actually one of my favorite parts, inspired by and stolen from 60052: And finally a video showing the locomotive running. The first 70 seconds is PF running and the last 20 seconds is 9v running. For PF running I'm using the AAA battery box with AAA Eneloops and the aforementioned E-motor. The E-motor is actually pretty neat: it has a wider dynamic range than the other PF motors and it is quite quiet as well. Sadly it is a little bit underpowered as well; I'm geared down 3:5 and you can still see it struggle a little in the corners during the PF segment. The 9v segment is a bit hazy, but we ran out of sunlight because DST. The engine is actually smoother than I would have guessed in the unpowered configuration: you can see how it basically doesn't lose *any* speed in the turns, and the regulator is only turned up to notch 3. Alright, I think that's all the commentary I have on this. There is as usual a full gallery if it ever gets moderated. There's a bunch of build and reference pics there that I didn't show. EDIT: Instructions for this model are now for sale on Rebrickable: https://rebrickable.com/mocs/MOC-61355/NonsenseWars/148-canadian-national-x-10-a-powered-up
 -
Finished my last SWAT TEAM Lego Minifigures . Each Minifigure is made with a Custom Design and parts, I hope you like it!
-
 Starting with a custom framework and a new design and location for the motors, I tried to put as much as I could into as little space. This time I tried to create a cleaner version of my suicisissor doors.This car has working headlights, steering by servo motor, driven by 2 L-motors with 3x differentials bringing the power to the wheels. I have been collecting all black parts for quite some time and am glad I can finally create a totally back supecar. Totally blacked out! Flickr: https://flic.kr/s/aHskxjRSJA Youtube: Black back bandit style Interior :) Front end goodness Suicissors Seats Top View: Bottom View: [ Everything opens Black back Rear hatch Huge shocks for small car
 -
Hi all, Back with my second MOC after some weeks of buying bricks, thinking, scetching, scratching my head, building and buying more bricks. Scorpion house is a modern hillside villa overlooking a lake. Partly built into a rocky terrain it features four levels. The house is designed with basically six boxes of different sizes in just black and white. I do like such designs a lot, so the second proper MOC had to be such a design as well. Initially I wanted to build something rather extreme in terms of technique, based on the design ideas in this house from swiss architect Andre Treina. http://www.schoener-...g-haus-am-hang. I saved that for later with all those angles and massive height. The idea which I finally kept, still stretching my design and lego capabilities, is a house built for a car lover (personally I'm not ;-)) on a hillside terrain and several boxes with concrete and glass. The glass front faces the lake and provides spectacular views, especially from second and third level. The back of the house includes much less windows as it faces a steeper hill. Scorpion house - modern hillside villa by Polar Stein, on Flickr Scorpion house - sketches & layout by Polar Stein, on Flickr The main entrance and big garage is at ground/street level. The owners had ordered the garage door in Ferrari red as they own an Italia GT2 model, which is driven mostly by the wife. The main entrance connects to the house with a six stud wide corridor or tunnel to the main building. The beloved car can be seen through large glas windows walking through the corridor (and also top windows next to the swimming pool). The garage provides a small service access for the pumps and pipes of the pool. At the end of the entrance corridor stairs lead up to the first level. Scorpion house - modern hillside villa by Polar Stein, on Flickr Scorpion house - modern hillside villa by Polar Stein, on Flickr Scorpion house - modern hillside villa by Polar Stein, on Flickr Pictures from above where done by the lady with the quadcopter. Scorpion house - modern hillside villa by Polar Stein, on Flickr At first level we face a small bathroom when leaving the stairs. Turning right either leads up to the second level or two steps down to the kitchen and eating area. Glas doors open to the swimming pool and (way too small!) front garden on top of the garage. Scorpion house - modern hillside villa by Polar Stein, on Flickr On the second level there is a large bathroom with a steam shower and access to the small sauna. The roof is with glas elements just over the bathroom area to provide natural light. Yes, the sauna provides stunning views through a large glas window over the lake. The owners are aware that they could be seen from the street. Those who prefer a different layout may turn the whole left box into staircases or assume the owners use their swimwear (what a sin). The second level also contains the living room, again with stunning views over the lake, the master bedroom and a room for the child. The master bedroom has a glass roof as well to watch the stairs while lying in bed. Access to the third top level is via spiral stairs. Scorpion house - modern hillside villa by Polar Stein, on Flickr Scorpion house - modern hillside villa by Polar Stein, on Flickr Scorpion house - modern hillside villa by Polar Stein, on Flickr Scorpion house - modern hillside villa by Polar Stein, on Flickr Scorpion house - modern hillside villa by Polar Stein, on Flickr The third floor just contains a studio with a working area for the architect owner. As a hommage to his favorite football/soccer club, the color scheme of the studio is again black and yellow. Scorpion house - modern hillside villa by Polar Stein, on Flickr In case you wonder about the name of the house, look again at the garage door handle. It's the wife's star sign. Scorpion house - modern hillside villa by Polar Stein, on Flickr More pictures on Flickr including some interiors (I'm not great with interiors). I'm reasonably pleased with the overall design and shape of the house itself, architecual effects with technic bricks are more reduced this time. I need to think of a way to improve the actual terrain and don't like that it looks a bit packed. I'm also not too happy with the rocks which I wanted to do a bit larger and with a stronger influence on the shape of the terrain, also extending behind the house on the left side, almost reaching into the pool etc. Maybe next time. I also find it difficult to do proper pictures. Comments and critique very welcome!
-

[MOC] The Claw
Eddie_Young posted a topic in LEGO Technic, Mindstorms, Model Team and Scale Modeling
If you like my Claw, please support on LEGO Ideas to make it a real set. In this MOC, I used a system of beams working as levers and push rods to carry the movement from the handle to the claw. I also used springs to make the whole mechanism reset when you let go and a couple of rubber parts to give the claw a good grip. The result is this amazingly useless, yet immensely cool thing that can hold a weight of more than 2 kg! To demonstrate, I made a video of it lifting the huge LEGO Technic bulldozer. (the video can be found on the page linked above) For a further description and some more photos please visit the link and also check out the update when there. Thank you -
its been a while since I posted so I decided I'd post 2x the content. Focus was on maximum motorized functions including front rear clam shell, doors, shifting (via broken servo motor), 2 speed transmission, steering, sbrick and drive. Enjoy! Youtube: Flicker: https://flic.kr/s/aHskAxCnKJ To see the different build styles, Lox built the red supercar, and Dugald built the white one. The red car has actuating doors, V10, working steering wheel and rear wing when turning, 4wd & rwd. 1 servo, 2 xl for drive, 2 m-motors for opening doors, 1 Sbrick. The white car has 1 servo for steering, 2 xl for drive, 2 M-motors for doors, 1 servo for gear shifting, 1 M-motor for rear clam shell, 1 l-motor for front clam shell. Red supercar: White supercar Which one do you like best? :) Interior: Interior x2 Lox's V10 front suspension built by Dugald rear suspension built by Dugald Lox framework Dugald's bottom of car Lox's bottom view View from above: Rear wing: 2 speed transmission: I really like this front hood design Nice flow from top view: Custom seats modular design 2 servos and 1 m-motor - the broken servo sticks left and right (perfect for shifting) complete framework with 8 motors V10 and interior Under the hood: This is the axle that lifts the rear lid for the white car. Slightly too much torque
-
This car has been in the works for a month now. A big thanks to Sariel's Lego model scaler for proper proportion and Brunojj1 for pushing me to use scaling. It is truely rewarding building a detailed car. Dugald built the awesome chassis, and I designed and built the rest. This beast has a custom made supercharged V12, working steering wheel, servo for steering and 2x XL motors for drive, torsion bar suspension. Utilizing the large Porsche rims, we had to gear down the servo so it turns proper. The toughest part of this build were the doors & torsion bar suspension. This car has 1880 pieces, 956 pieces in the framework, and 924 pieces in the body work. Complete instructions: https://goo.gl/photos/yTNQBTbuJEQuso2b7 Professional instructions by Thorsten: https://rebrickable.com/mocs/Thorsten50/ferrari-fxx-supercharged-v12-red Video: Flickr: https://flic.kr/s/aHskJaShgY MOC PAGES: http://www.moc-pages.../moc.php/432696 Front view: Dugald built this whole Chassis - This allowed me to have enough black for the entire car Rear end: Butterfly doors Style All doors, hood and trunk open Top View Bottom View V12 Supercharger courtesy of my Brother IMG_9806 by lachlan cameron, on Flickr One of my inspirations:
-
Finally got my Kylo Ren command shuttle converted to all black with red viewing port and folding wings. I think it turned out decent and is still very playable and swooshable! Started on it last January, but became addicted to Star Wars Battlefront for way too long after getting a PS4 at Christmas. Anyway with the recent release of Krennic's shuttle in mostly all black, I got inspired to pick up the black pieces from many Bricklink orders and finish my conversion of Kylo Ren's shuttle. I wish I could have gotten the red viewing port "fangs" to transition a little better into the top portion, but it still looks pretty good from a distance. Removing all the cross linked technic beams opened up a lot of room in the interior. I added two sets of the technic rotation joint disks to each wing and now they have three clickable positions for folding up and down. 75104 Kylo Ren Command Shuttle MOD by Shawn Minkey, on Flickr 75104 Kylo Ren Command Shuttle MOD by Shawn Minkey, on Flickr 75104 Kylo Ren Command Shuttle MOD by Shawn Minkey, on Flickr 75104 Kylo Ren Command ShuttleIMG_4497 MOD by Shawn Minkey, on Flickr 75104 Kylo Ren Command Shuttle MOD by Shawn Minkey, on Flickr 75104 Kylo Ren Command Shuttle MOD by Shawn Minkey, on Flickr 75104 Kylo Ren Command Shuttle MOD by Shawn Minkey, on Flickr 75104 Kylo Ren Command Shuttle MOD by Shawn Minkey, on Flickr 75104 Kylo Ren Command Shuttle MOD by Shawn Minkey, on Flickr 75104 Kylo Ren Command Shuttle MOD by Shawn Minkey, on Flickr 75104 Kylo Ren Command Shuttle MOD by Shawn Minkey, on Flickr 75104 Kylo Ren Command Shuttle MOD by Shawn Minkey, on Flickr 75104 Kylo Ren Command Shuttle MOD by Shawn Minkey, on Flickr Command Shuttles Comparison by Shawn Minkey, on Flickr Command Shuttles Comparison by Shawn Minkey, on Flickr
-
Hi all Here's another new MOC. Moving away from residential buildings but keeping the style with black, white and grey boxes with a lot of glass to provide a contemporary/modern design, my latest building is a monorail station with a sushi and fish restaurant. The big "M" of the city's fast monorail network isn't just attracting many commuters every day but also sushi and fish lovers all over town. Monorail station & sushi grill by Polar Stein, on Flickr During first week of opening, a student in a shark costume was hired to attract commuters and passengers walking by. The entire building is on pillars. At street level (ground floor) there is a disabled parking space and parking space for bikes. The small sushi and fish restaurant extends over first and second level, accessible via stairs and the elevator. At first level there are also restrooms. The second level connects to the monorail station (right end of the building) and is accessible both via stairs and the elevator. A small roof terrace on top of the restaurant provides views over the city. Monorail station & sushi grill by Polar Stein, on Flickr The monorail station entrance has a vending machine providing cool drinks, which is especially handy if you're sweating away in a suit. Monorail station & sushi grill by Polar Stein, on Flickr "The train now approaching platform 1 is the 14:47 Brickston Monorail service to East End calling at Scorpion House and Dark Age Road. Please mind the gap between train and platform ..." Monorail station & sushi grill by Polar Stein, on Flickr The red bricks in the actual platform is a less-than-ideal solution in absence of grey bricks. The monorail train is supposed to be red though . More pictures including interiors and the connection to a simple monorail platform can be found on my flickr page https://flic.kr/s/aHskzjsG2r. Comments and critique, things to improve etc. more than welcome! Cheers, Polarstein
-
Hey guys , My first MOC when I came out of my late dark ages one and a half year ago was the Batmobile from the first two Arkham games ( well , technically it also cameos in "Origins" ) . It was ok for a first creation after years of absence I guess , but not that great . Some days ago I stumbled upon the LDD file , and I thought " Why not revisit it , make it great and actually build it with real bricks as well this time ". I'm posting this as a WIP because I've finished 80-85% of it but I'm kind of stuck and I need some opinions and suggestions . Here is what I have so far : The tooth piece is supposed to go between the 1x1 plate and 1x1 tile right behind the "tubes" , LDD won't let me put it there but I think I'll be able to squeeze it in there when I actually build it . The tubes / hoses will be flexed so that they're closer to each other and have the angle like the "real" model . As you can see ,the front part is complete , but the back , specifically behind the driver's seat is only a rough draft . So here comes the part where I need your help . I've created two versions of the back "afterburner" area as well as I need your opinion on which looks more accurate , and as many ideas and suggestions as possible for the part behind the driver's seat . Here is the second version of the back area . And , since 2D screenshots can never truly express the 3 dimensions , I'm attaching the LXF file . The one on the right with Batman next to it is what I've been showing so far , the one in the middle has the second version of the back area and the one on the left is the one on the right without the roof , whatever you see there is "complete" ( but of course can be changed if needed). Note : I know some parts don't exist in the colours I use , but I don't like to be limited by the colours TLG produces their parts in , so I'll probably paint them . Also , you may find some "silly " bits in the LXF file , like three 1x1 plates on top of each other instead of an 1x1 brick etc , obviously this won't be the case for the final model , just didn't pay attention to this kind of things and concentrated only in replicating the vehicle's look . Thanks for viewing and please leave a comment of your opinions/ suggestions , it will help a lot .
-
 Hi Everyone, Just want to share a video and some photos of a MOC I recently finished. The aim was to make a compact studless chassis with a studded body over it. The result is that the bodywork can be easily taken off and the chassis can be reused for other models. More photos and instructions can be seen on Rebrickable: http://rebrickable.c...s/night-phoenix Thanks!
 -
A small piece of chaos has always existed, a rouge element that refused to be tamed, lying hidden in the labyrinth of the inner city streets. But when the strange burning light becomes more aggressive, Alex Temnota is tasked with stopping it at all costs. But as the light's influence threatens to destroy everythinghis entire world, it becomes apparent that even the most extreme measures may not be enough. Don't believe that I've ever shared this here before. Hope you like it, and feel free to leave feedback!
-
Hi Everyone, Let me share with you my latest creation. I designed it to my brother for his birthday. He's a big Monty Python fan. It's the the Black Knight from the Monty Python and the Holy Grail movie. The knight is a simple black figure (with black head) with a custom printed torso. I've placed it into an IKEA Ribba picture frame. Hope you like it!
-
This is my Batman Tumbler that was inspired by the UCS set. It is pretty much the same scale of the set, a little smaller but this has no interior because, well I know if you follow me you've heard this enough but...I don't have enough parts. I really wanted to buy the actual set but it was just too expensive so I just decided to make my own. Granted, not as good because I'm not a professional Lego designer but you know, it works. I hope you like it and can get inspired from my mocs. Please be sure to check out my Batpod MOD and LOTR Mocs. Thanks, MovieMocs
-
This is my mod of the super rare, special edition, Batpod. Only 1000 of these sets were made and could only be won via sweepstakes at the Lego stores in 2014. I've always wanted this set but it was always so expensive on ebay ($1000+) so I got the instructions and tried to build it myself. I had 75% of the parts and they were all pretty much the basic Lego parts. I was going to order the parts I didn't have but just the wheels alone cost $22 each! I just didn't have that money so I decided to make my own version, similar to the set but I exchanged some rare parts for more common ones. For example, I didn't have the real Batpod wheels so I used the wheels from my technic MK II crane and doubled them up which I found looked quite nice and was worth not paying an extra $45. There are maybe 10 other mods I added just becuse I didn't have the special parts but I still think it has that "Batman" feel to it. I hope you like it and will maybe even build one of your own. Thanks, MovieMocs
-
Hello, I modded the Lego Technic 42041 Race truck. Here are the modifications : Full black color with grey pin's New exhaust Trucks wheels (2 in the front and 4 in the back with a modify rear axle) French flag on the front intercooler Yellow and red colore on the back intercooler (in reference to the Wroclaw's speedway club) Differents curved 3x11 panels on side One stud lowered trailer attached Some pic's
-
Black vintage car M20 building instructions Parts list
-
Hi eurobricks, here Is a MOC I have started, it will be a 1998 Vauxhall Astra. I hope for it to feature: • Opening doors • Opening boot • Opening hood • Working windscreen wipers • Working lights • Full RC Here is a picture of progress so far: and here is some pictures of the real car: Tell me what you think ;)
-
Minifig scale, I wish I had more chrome but it is what it is. The piece it all stemmed from is 85940 and then the rest of the car just sort of worked itself out. I actually started making a random car stemming from this piece and then by accident discovered that there was one that had the exact same headlight configuration so I continued on with the 1961 Chrysler New Yorker. Lego 1961 Chrysler New Yorker by legomanijak, on Flickr Lego 1961 Chrysler New Yorker by legomanijak, on Flickr Lego 1961 Chrysler New Yorker by legomanijak, on Flickr Lego 1961 Chrysler New Yorker by legomanijak, on Flickr