Search the Community
Showing results for tags 'wip'.
-
 I know I had just finished a bus model (the Orion V 05.505 model), but I figured why not get started on my next one 😂 so here it is: a 2008 Orion VII NG (07.503) bus operated by Fairfax Connector in Fairfax County, VA. This will be my first model of a DMV (DC/Maryland/Virginia) region bus. I took the above photo of bus 9777 in August 2022, right after BrickFair VA that year. At the time, a good portion of them were used on the RIBS (Reston Internal Bus Service) routes; their numbers continue to dwindle as newer 2024 Gillig Low Floor 29' buses enter service to replace them. A year ago, I had the opportunity to ride bus 9789: If I can fit it into my schedule, I plan to go to the NJ Historic Bus Festival again this September. Last year I brought my New Flyer D60HF model there, and since it's an articulated bus, I separated it at the articulation joint and packed the two halves side by side in a duffel bag, which narrowly fit the size constraints of an airline carry-on. For this year's event, I plan to bring this model and the Orion V I just completed; since both are ~1:18 models of 32' buses, I should be able to pack both into a carry-on duffel bag like I did last year. My plan is to first design the model in Stud.io, then wait until after Brickworld Chicago in June to start the building process. I will likely need parts from my New Flyer D60HF model, which I am planning on displaying at Brickworld, so I am waiting after Brickworld when I can disassemble that model to have the parts to build this one. After the bus festival, I plan to save it for display at Brickworld Chicago 2027. The tentative list of functions are: Drive Steering with working steering wheel Pneumatic doors (most likely synced) Wheelchair ramp (?) Cummins ISL engine model with moving pistons Opening engine door (perhaps pneumatic, fed from the same pneumatic circuit that feeds the doors opening) Since most of my bus models thus far have had pretty much the same core functions (drive, steering, opening doors), I want to add another function here that have not been incorporated into previous bus MOCs. A wheelchair ramp may still be quite challenging to add at this scale, but I could probably use the doors' pneumatic circuit to power another cylinder that can open/close the engine door. While they're typically opened manually on real buses, my recent Orion V model demonstrated that it's pretty difficult to include a functional handle at this scale that does not look out of proportion (I resorted to using an axle that you can push on from behind it to open it slightly). So I could probably add a valve that can direct the compressor to opening/closing the engine door. Another challenge I gave myself this time is to design the entire livery using LEGO pieces, i.e. no stickers. I'm pretty impressed with the results so far, but still it's not the smoothest curve (as the white stripe between the yellow front/red rear on Fairfax Connector buses is very well rounded). Still, I feel that using LEGO pieces to achieve is preferable to using stickers, like many official sets are doing these days. This will also be my first bus model to not be primarily white for the livery - it will really get me to be creative with piece usage, and the model already contains a combination of normal brick/plate stacking and SNOT building, especially where the livery is made using wedge plates/tiles. As of right now the wheels look a bit small to me, but the height seems pretty similar to my New Flyer D60HF model (which uses the same tires) so it may just be a matter of perspective as the model really only has one body panel and the doors designed as of right now. Below I've attached some Stud.io screenshots so far. Let me know what you think!
 -
Poor ship. I have to say, I am not a huge fan of its looks. It is like an UPS truck, or a beat-down cab in poorer part of the city. Gets the job done and offers just minimal creature comforts. On top of that this particular ship had no easy life either. If I had to write all the accidents it had I'd basically describe half or more of the story of the Mandalorian show, so to avoid spoilers - go watch it yourself. For now just believe me: Millennium Falcon had really easy and nice life compared to the Razor Crest. I did not plan to build it initially, but Brickvault guys asked me one time if I would and I agreed. After all this is quite a small ship, right? And boxy, easy shape, right? So I'll just do a month or maybe month-and-half detour from my plan, riiight? Oh boy. This aged like milk. We talked in May and, uh, I am not done yet, but more on that later :D This one-and-half month detour took half of the year, almost 5k pieces and was far harder than I expected it would be. Once again, an angular thing proves to be far more difficult in LEGO than a curved one. Got a tiny angle wrong and everything falls apart. And the size? Just about 70 studs. Yeah. There goes "quite a small ship". Btw, would you consider it an UCS or minifig scale, considering it is... kinda... both? So what do we have here? 5k pieces, a bit over 3 kilos of mass, plenty of features, internal frame strong enough to do this: https://photos.google.com/share/AF1QipP6ZbI-UJ09F5vPPMEbTkF1L9q2EZkMnegT8EbEC4fFMUba0WqZii3KR3Pcg_Waag/photo/AF1QipOPONHBr-6ATUGQnvs1n3uJr-Gy7C0HCNvY79DY?key=MmRXMFNjTFVIU3Rmekg3UTZqOUhvTEY1MzB3TUxB I had some fun at, uh, "temporary local beach" (on quite a high floor!) ...and on the Levitating Plate: All the hatches open: there are also additional hatches to access interior details. Truth to be told, access is not great. This is not really a play model because it is so heavy, but you can adjust stuff inside. The cockpit seats three, front seat folds for easy access to the back row: ...and of course there's plenty of space for Mando's quarries: So, why is it not done yet? I probably got the roof angle wrong. Actually, I definitely got it wrong. But is it a big deal? What do you think? Should I just proceed with instructions "as-is" or would like to see this updated? Or maybe you actually like this slightly slanted roof section? Instructions will be available on brickvault when complete, and there's a nice preorder for reduced price for now: https://www.brickvault.toys/products/razorcrest ------------------------------------------------------------ Razor Crest Update #1! I believe that's final design. Roof is now properly flattened, while still retaining minscule but noticeable wing angle, section behind the cockpit has been changed for better shape, and engines were updated thanks to ScottishDave's input on Eurobricks. Now I need to update the studio model (not too hard, should be few hours at worst) and I can get to making instructions. In the meantime, Brickvault will commence their internal review to ensure there are no flaws in the model, parts lists or instructions. I'd like to thank everyone who preordered, commented and liked - fantastic support from you all! Stay tuned for future updates! Thanks for viewing! EDIT: The instructions are released - to be found on brickvault.toys !
-
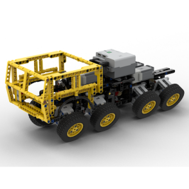 I decided to do this thread because I am tired to open new ones again and again, so enough speaking about me lets go for the almost MOCs. It seems that we are on dumpers time because I am working on this massive small truck. It will be very simple, only 2 axles steering and bed tipping but I had some problems... the angle and weigh of the bed due the lack of room when the steering work, bed itself also was a problem with technic parts and the scheme color will be a imposible to solve problem at least for the real MOC. I think I do not have to say which the truck is.
 -
My fifth bus model will be smaller than my previous ones. It maintains the same scale, but the model is of a shorter bus - a 32ft Orion V (model 05.505) operated by the Bee-Line System in Westchester County, New York. The above photo was taken by Elyse Horvath in January 2023. I decided to model a shorter bus this time because I plan to bring two bus models to Brickworld Chicago this year, one of which is my New Flyer D60HF model. Because I have already used a lot of my white System pieces on that model, I could build this model without having to order as many pieces. It also guarantees that I have enough space to display both MOCs with a good view of both, as display space can be pretty limited at Brickworld Chicago. My original plan prior to signing up for Brickworld was to disassemble my New Flyer D60HF model and have most of the pieces needed to model a PRTC OmniRide 40ft Orion V (model 05.501), which I saw at the NJ bus festival last fall. The tentative list of functions are: Drive (with single PF XL motor or two PF L motors) Steering with working steering wheel Opening doors (pneumatic?) Detroit Diesel Series 50 engine model (removable) Opening engine door I had considered powering the model with BuWizz 2.0, but my BuWizz has been having issues recently, mostly with there being a delay from when a command is sent from the app and when the motor responds. Because of this, I may just end up using PF IR receivers, which I have not used in a MOC for many years now. Unlike my previous bus models, I am starting from the bodywork this time in the Stud.io build. This should reduce the need for last minute revisions to the chassis to accommodate the body panels. As of right now, the Stud.io model largely consists of partially built body panels with the front/rear axles and engine model to mark their locations. By being a smaller bus model, it also serves as a challenge in building compact as there is less interior space to hold all the mechanisms. The livery will be mostly brick-built, as it is largely just two side stripes, but the diagonal section I plan to use custom stickers since it gives it a much cleaner finish than solutions using LEGO pieces, even though I try to avoid custom stickers unless necessary. The left and right side views, as of right now: One of the things I've been most satisfied about so far is the front windshield design. The Orion V has a slanted driver's side window to reduce glare, and since using LEGO window pieces becomes more impractical when building at larger scale, I wanted to have the windshield be outlined in a way that clearly shows how it appears on the real bus. Thankfully, it was not as complicated as I thought, and I really like the way it turned out. Once I have most of the bodywork designed, I could then probably begin designing the chassis and begin the building process from there.
-
Hi ! About a month ago I teased this project, and now I’m opening a topic to follow the WIP of my Shinkansen MOC. My goal is to submit it to the BrickLink Designer Program Series 11 in April. My inspiration is the Shinkansen N700S, the latest version of the high speed train that connects Tokyo to Fukuoka via Nagoya, Kyoto, Osaka, and more. It’s definitely not an easy train to reproduce in LEGO because of its proportions and overall shape. It’s extremely flat and very close to the ground. The nose is terribly very complex. Let’s start with the front end. It took me several months and many iterations to achieve a result I’m satisfied with. I finally got something that works thanks to the many slopes, wedges, and curved slopes LEGO has released in recent years. The second problem I’ve had to deal with so far is the bogies. On the real train, part of them is covered by skirts. That means I had to design bogies without using the LEGO parts normally intended for that purpose. Since I want to submit this MOC to BDP11, I can’t use unofficial parts or illegal techniques. So I had to get creative to design bogies with as little friction as possible. I’m quite happy with the solution I ended up with : the 7L axle only rubs on a single stud. I’ve done some tests and it rolls almost as well as pre-assembled bogies. Here’s where things stand today. There are still a few challenges I already know I’ll have to face: fitting powered bogies into one of the cars (they are much larger than my custom bogies), and making sure seated minifigures can fit inside the train (there won’t be enough space for them to stand). My goal for the BDP 11 is to build, one end car, one intermediate car and one power car with the pantograph. Maybe I will build a second end car for myself to have a full 4 cars consist. If you want more frequent updates, you can follow me on instragram @sebulba_creations ! That’s all for now! Feel free to share any feedback, and I’ll be happy to keep you updated as the project progresses over the next few weeks.
-
UPDATE - March 2023 - INSTRUCTIONS are still available via PayPal donation - just let me know or write me a mail to boonatix@gmail.com :) Prevously: Working on the instructions is close to the finish... WIP - Instructions by Brickmasta on Flickr UPDATE - FINISHED on 22nd of April The Batwing - Front by Brickmasta on Flickr See the Album with details and more: https://www.flickr.c...th/13973416094/ ----------------------------------- I would like to present my current WIP to you all and love to get some feedback on it As soon as I saw the first Trailer for "The Lego Movie" I was in shock... a childhood dream coming true. With so many awesome creations in it. And one was standing out the first time I saw it: "The Batwing". I immediately knew that I needed to build this asap. Even though I just came back out of the dark ages by end of last year and was very fresh to all the building processes, parts and stuff... I thought It can't be that hard with having the model right in front of me on the screen. But it wouldn't be as easy as I thought... I researched all the internet for more pictures / trailers, fortunately there was more released with special scenes and stuff for this Batwing. I did frame by frame analysis and took a whole lot of screenshots, scratching my head how and where to start. I had the best material of one of the turbines, so I just got to work on one of those! But then I was kind of lost... not enough details, not enough shots of the Batwing. And then somebody on Flickr linked me a video to the Lego Movie Videogame. Woah! There was actually a building process you could unlock in there for it. I had to get the game, started gaming until I was able to unlock this plan and rebuild it over and over to see how they did it. And got to the point where I finally started with one of the wings! The Batwing - WIP #003 by Brickmasta at Flickr And the first challenge occured and I knew it would not be that simple / as easy as I hoped. The wing consists of 4 sections. And each section basically just featured 1 connector, making the whole wing completely unstable, bending and nearly breaking apart. That did not look good. So I got to understand that I won't be able to do a 1:1 true copy of it. The physics in the movie and the videogame are just easier / different because there is no real physics So I got to work again and tried and tried and thought and planned... and found a solution! First step was to double and exchange the connections for each section: The Batwing - WIP #004 by Brickmasta at Flickr But that was not quite enough and after some more thinking I had another idea, so I took the shot and gave the second wing a try with new elements in it and a stabilizer under the wing, connecting the sections and holding them together... and it worked out! "The Batwing" is going to be huge...! That is my progress so far. I am now starting to work on the cockpit and will try out the connections from wing to cockpit asap because I have a feeling they also won't hold up that good... each wing weighs around 260gr wich is around 0,6 pounds. That is quite a lot to be held together by slim Lego connectors. Lets see how this will work out then Let me know what you think! Appreciate every comment and input
-
Hi everyone, I present to you my second version of the Renfe S-130 like Ferro-Friki did some time ago. I wanted to remake this train that I made first in 2018 with not the best result so I now made this version in 7 studs. LEGO Renfe S-130 DEF [MOC] by Imanol, en Flickr The set is heavily detailed even in the rear of the power cars and end cars LEGO Renfe S-130 Testeros Interiores [MOC] by Imanol, en Flickr I have made a reduced train set of only 7 cars instead of the 11 that has in real life but it has one of each of the different cars that form the real train with detailed interiors. First the "Preferente" end and "Preferente" LEGO Renfe S-130 Lateral Extremo Preferente [MOC] by Imanol, en Flickr LEGO Renfe S-130 Lateral Preferente [MOC] by Imanol, en Flickr The interiors of "Preferente" cars LEGO Renfe S-130 Interior Preferente [MOC] by Imanol, en Flickr The "Preferente" adapted car and it´s interior LEGO Renfe S-130 Lateral Preferente PMR [MOC] by Imanol, en Flickr LEGO Renfe S-130 Interior Preferente PMR [MOC] by Imanol, en Flickr The cafe car and it´s interior LEGO Renfe S-130 Lateral Cafeteria [MOC] by Imanol, en Flickr LEGO Renfe S-130 Interior cafeteria [MOC] by Imanol, en Flickr And the Turista cars which are the same as preferente but with 2+2 seating arrangement LEGO Renfe S-130 Lateral Remolques Turista [MOC] by Imanol, en Flickr LEGO Renfe S-130 Lateral Remolques Turista [MOC] by Imanol, en Flickr And now that I presented it I want to ask for help to build it as it will be my first lego train in real life. The car coupling mechanism that I have installed is only for aesthetical purposes and will not work in real life. Another problem is that i have seen many models in which all of the rear of the locomotive or power car pivots and I don´t know if it could be necesary to do in this case. Lastly I want to know how to motorize it, being so long I would suppose I would need the two power cars to provide power but I don´t know. Anyway, I hope you enjoy this project as much as I enjoyed designing it
-
 Sharing some images and an imgur gallery of my work-in-progress moc: a minifigure scale model of HMS Leopard, a 50-gun fourth rate launched in 1790. Click the gallery link to see more detailed pictures of the build: https://imgur.com/gallery/wip-moc-hms-leopard-1790-50-gun-fourth-rate-minifigure-scale-nVshSA9 After my last project (HMS Diana in minifigure scale), I wanted to build a 50-gun ship, as I think this might be the upper limit in terms of ship size that can be done really well in a close-to-minifigure scale. I wanted this to be HMS Leopard, and I was happy to discover that one of the reference books I found contained detailed plans to build a model of HMS Leopard. The book in question is Rif Winfield's "The 50-Gun Ship". My goal with this moc is to stay as close as possible to the real construction of a ship like this and to include as much detail as possible. I plan for everything from the lower gundeck and above to be removable as a single structure. For the masts and rigging I am planning to use the same approach I did for HMS Diana while incorporating some significant improvements I have devised. Starboard view of the hull. Getting the shaping right at the bow and stern was a massive challenge, and involved multiple re-builds. The bow and stern are also the areas where I have had to compromise the "realism" of the internal structure the most to ensure stability. In reality these areas would have more open space inside them, but that just wasn't possible for me to achieve. Full view of the removable orlop deck. Almost all of this deck can be removed to access the various compartments of the hold below. The orlop with the removable sections gone, giving views into the hold. This is my current prototyping progress for the lower gundeck, which will support the top half of the ship that can be removed from the hull. I'm hoping to make a lot of progress in the coming weeks with some new shipments of pieces arriving, I'll post more progress pictures once I finalize the design of the gundecks.
 -
Good day! Sometimes I make MOCs that don't deserve a topic, or simply have WIP concepts that I don't publish . This will serve as a place where I post my WIP creations that may end being a MOC , and small sized MOCs which are too simple to post a video or create a topic.
-
 After working this site out a bit better I have decide to give this whole post a redo , so here goes as said outright in the title the model will be to 1:8 scale so that's about 71.5 studs long with a 41.5 studs wheelbase 31 studs wide ( in reality it is more like 30.5 studs but 31 studs prevents a whole bunch of complications ) and 19 studs high . My creation will be based on this picture except the interior which will be tan the car in all its holiness :cry_happy: the interior - Unfortunately I could not find any perfect images :sceptic: ------------------------------------------------------------ The model will most likely way a LOT !! so it will be powered by two RC Buggy Motors driven by a Rechargeable Lipo battery box with an accelerator system { ran by a M Motor } very similar to that of the system used by Sheepo used in his Porsche 911 (997) Turbo Cabriolet PDK link here ---> http://www.sheepo.es...let-pdk_04.html This system has many purposes but for me there is 2 big big reasons 1- using this system allows you to get full power out of the RC Buggy motors 2- It also gives you the realism of a progressive accelerator All in all the creation has 10 motors ------------------------------------------------------------- 2 RC buggy Motors for drive 1 M Motor for the "Progressive accelerator" 1 Servo Motor for steering + working steering wheel and Indicators 1 L Motor for the Disc Brakes in all 4 wheels + working Brake pedal and brake light 1 servo motor for the 7+R sequential gearbox 1 L motor for Race Mode { which lowers the suspension and allows the fake V8 engine to rev higher , and no doubt more things to come like more efficient brakes and such } And lastly 1 M Motor to turn all the lights on ------------------------------------------------------------- The Ferrari will have an ignition system that turns on the the main PF battery box ( with 1 set of automatic LEDs for interior lighting and the 3 receivers and 5 PF switches ) ------------------------------------------------------------ the Ferrari will have 18 LEDs in all -10 LifeLites Leds which are turned on through the use of the the lights RC function as well as 2 sets of Lego LEDs in the taillights and side lights at the front -3 sets of Lego LEDs for the indicators ( some going to the dashboard ) -2 sets for the brake lights also with some going to the dash - and of course the 1 set of LEDs that come on with the battery's and the 1 set that come on with the LifeLites And as a bonus when you turn the ignition pressure is put on 3 Lego Light Bricks that light up the dash and center console -------------------------------------------------------- The model then has 2 more L motors both going to separate 4 way gearboxes both providing 4 other functions { the lever for both are hidden in the dashboard through the means of pulleys and links they should smoothly change the gearboxes The first box provides 4 seat functions -Forwards and backwards on both sides - and the back of the seat moves forwards and back wards on both sides { also as a manual function I want to be able to move the bottom of the seats up and down ever so slightly }\ ----------------------------------------------------- the seats ---------------------------------------------------- The other Gear-box picks between 4 other manual functions 1- windscreen wipers 2- adjustable spoiler 3- pneumatic pump 4- now this is an interesting one I call it disguise the receivers I want to be able to lift and lower the receiver so that when I want drive it around I can seamlessly where as when I wanna display it I can stow the receivers away its kinda like creating the best of both worlds ---------------------------------------------------- Pneumatics I want the pump to provide air to 3 switches all hidden in the glove-box 1- opening the engine cover 2- opening the bonnet 3- an auxiliary output -------------------------------------------------- and I also want 2 gears in the glove-box to adjust the position of the pedals and the wheel and a gear somewhere to lock and unlock the the main battery's and lastly a clever system that flicks on some LEDs ( Lego ones ) when you open the the doors , which by the way have locks and the correct opening geometry :classic: ----------------------------------------------- And now the bit that is most important to me - The looks I want this to look absolutely perfect including a highly detailed engine interior and boot space ( which should be of a decent size ) I know it all sounds a bit much but with a bit of help from the EuroBricks community and fat wallet I will get there in the end and I will update this post as often as possible :classic: The original Car configuration ------------------> http://car-configura...|16b8fe10|1f1e3
 -
Hey Guys,i need some Advice on this one. I`m planning this futuristic Garbage Truck for my imaginative Lego City-Future Theme. The Bodywork is pretty much done and i think it is recognizeale as a Garbage Truck.The two large orange Pieces are already in my Parts Bin and all the little Bits might be in there too.Maybe some Bricks need to be bricklinked or i need to buy them in the little Lego Shop in my Hometown. I`m still not sure how to make this Big Boy hover above the Ground.I would love to use something that fits in the Wheel Wells and only sticks out a little bit, you know,classic sci fi Hovercar Stuff. Maybe some shiftable Dishes or Pods. Feel free to share any Ideas.I also added the lxf File so you can poke around a little bit.Maybe you might have some Ideas to improve the whole Thing.I like it very much,but i still think something is missing.Something catchy....like a Push Bar or Guard Rails.... Any Idea would be much apprechiated. The rounded Rearend calls for a Nickname...Hunchback maybe?Still not happy with the lower rear End (behind the rear Fenders) Scifi-Garbage Hauler.lxf
-
 Hello, For my latest project I'm building a supercar bit by bit, building the separate components first before assembling them. Starting with the Carbon Fiber Monocoque Tub: This one was for a great part inspired by the McLaren MP4-12C chassis, that one is said to weigh less than 80 kilograms (). (And guess what, mine weighs even less! ) This one wil most likely undergo many changes in order to fit with, yet to build, components. I'm considering using a carbon "cage" instead of a "tub" for my car though. But I won't know for sure until I start on the bodywork. Next is the Driveline: A Twin Turbo 3.8L V8 with 7-speed dual clutch gearbox and kinetic energy recovery system (KERS). I used some pictures from the Laferrari engine as reference. Without the intake manifold (those black plugs are where the rear half axles connect to the gearbox). I'm very satisfied with this component, It fits barely in the engine bay behind the tub though but I guess that's how it is supposed to be. If there was room to spare they would have just fitted in a bigger engine . Since I had these nice Ferrari stickers I might as well make this a Ferrari engine . That's it for now, perhaps I'll finish the next component tomorrow.
 -
 Still gotta add in motors and stuff, they are being used in my other moc right now. I also need to add more details to make it look more like a rally car. Its 9v battery is stored in the hood. Constructive criticism is appreciated!
 -
.thumb.gif.ad7c8d88b264ee812194946c07404504.gif) Miniform - A game about a minifigure that got lost on a very strange construction site... Latest version: https://bricksafe.com/files/mocbuild101/my-games/miniform/Miniform_v0.0.7.0.exe Previous version: https://bricksafe.com/files/mocbuild101/my-games/miniform/Miniform_v0.0.6.0.exe Controls: Left = player moves left. Right = player moves right. Space = player jumps. Down = player sits down. Backspace = pause game. Escape = quit game. R = restart level. Main programs I'm using: MLCad - for creating the models used in the game. GIMP - for graphics editing and converting. GDevelop - the main game engine and compiler. (though I think I might change to Unity) Things to add in future updates: A proper level. Game start/exit screens. Adjustable game controls. More types of bricks. (slopes, etc.) Background music. Have fun! Update history:
Miniform - A game about a minifigure that got lost on a very strange construction site... Latest version: https://bricksafe.com/files/mocbuild101/my-games/miniform/Miniform_v0.0.7.0.exe Previous version: https://bricksafe.com/files/mocbuild101/my-games/miniform/Miniform_v0.0.6.0.exe Controls: Left = player moves left. Right = player moves right. Space = player jumps. Down = player sits down. Backspace = pause game. Escape = quit game. R = restart level. Main programs I'm using: MLCad - for creating the models used in the game. GIMP - for graphics editing and converting. GDevelop - the main game engine and compiler. (though I think I might change to Unity) Things to add in future updates: A proper level. Game start/exit screens. Adjustable game controls. More types of bricks. (slopes, etc.) Background music. Have fun! Update history: -
I've started work on the 0-6-6-0 Tank and tender steam locomotive that I was planning, and the first part is complete, in other words, the chasis is sorted. Attaching both sets of driving wheels was quite hard, considering it's going to be a 0-6-6-0 Mallet tank and tender (I believe Blanche of the Ffestiniog Railway is a good example of a tank and tender locomotive). And yes, the finished locomotive will be powered via PF in the tender. At least the basics are done. This is still a Work In Progress. Advice is appreciated.
-
Well, i was proud of it at the time, but i feel now that my ISD isn't sufficient enough. Numerous add ons and additions have made the model a bit unstable and the inaccuracies need to be addressed. The main issue however is the disproportional build! The bridge is too large and wide compared to the rest of the body, and it lacks the correct amount of hangers and indents in the panels. This is all a result of me following along the structure of set 6211, which focused on an interior, messing up the proportions. I talk about it in the original post: Now however i start from scratch, and you guys get to follow on and give out suggestions! It starts now with the gathering of extra parts and deconstructing the original destroyer. The plan is to make it bigger, more sturdy and more accurate. Got to gather up all available reference material for this beast... Last photo of it intact. Major sections now removed. I plan to keep the bridge the same, perhaps with some slight corrections. However the rest needs to be broken up and sorted... Now people can see the frame of the build, and the messy interior...
-
 Hello everyone! Today I'd like to show you the model that I've been working on for more than two years, it's my first MOC in this scale that is actually close to being finished. It was rebuild from scratch dozen times and still requires bodywork. The MOC is LaFerrari in 1:8 scale: Origially I had a lot of ideas and great ambitions, but over time I realized that I just don't have enough skill to make everything I wanted. So current version has following features: independent suspension; 2 L motors for driving; Servo motor for steering; working steering wheel; 8 speed sequential gearbox driven by M motor; spacious interior with low seats positioning; powering with standard LEGO PF. Proportions: width - 29 studs; height - 15-16 studs; length - about 70 studs, don't know yet. Originally I wanted to use bigger wheels but then I stopped on 68.8. The thing is that front section of the car are too low so there won't be any place for arches with bigger wheels. Battery box is located in front of the car because everything behind seats is one huge gearbox. It just lays on its own weight and will be covered on the top with something black. This way you won't see most of gray and light gray parts through the bonnet. Distance between seats is only 3 studs and every seat is 7 studs wide. There's no free space between them - only a few hidden cables there. This is how it looks without seats: Top and bottom views: The whole core of the car is basically done. It's pretty sturdy and doesn't bend when you hold it. In current state it has about 1600 pieces. The most challenging part of the build at this point is a gearbox. It had to be very compact because car is so low. In this LDD file you can investigate all gears: https://bricksafe.com/files/ibessonov/wip-moc-laferrari-technic-2018---1/8 speed gearbox.lxf Here are some renders of gearbox without stepper. Green axles are input from motors. There are 3 clutches here and they give 8 unique combinations of their engagement. L motors are slowed down significantly. This is because they are not powerful enough to make this car fast. Here's a stepper mechanism that I used to move all 3 clutches: Green things should be connected with white rubber bands, they hold axles in fixed 90-degrees positions. There's a strong resemblance with 42056 Porshe's gearbox here, I know it. That model helped a lot with the inspiration. My plan is to finish bodywork but it's the hardest thing for me. This is the exact reason why I'm creating this topic - to get help/critique while I'm finishing the model. LaFerrari has quite complex shape and I should have chosen something more simple for my first MOC. But I already spent way too much time so I have to finally finish it. Leave your thoughts here, I'm very curious of what you might say. Thank you!
 -
 Here is a quick summary of a previous post. Right now I'm planning on a new project and I could use some help. It's a 1:8 scale model of Lexus' LC coupe powered by Lego Mindstorms EV3. Currently, I have the rear axle built off the instructions from the Porsche 911 GT3 RS set. I also made the engine for the LC500 on Lego Digital Designer and I am wondering if it is good enough to buy the pieces for it on BrickLink. I also want to add the following features: Four or six-speed paddle-shift transmission Retractable spoiler Detailed interior Fake V8 engine (but I would like to achieve moving pistons) Full independent suspension I would welcome some helpful comments about the V8 engine, axles, and the gearbox I planned to use before I order pieces on BL. Thank you.
 -
Hey guys, here's a project I've been working on for the past couple of weeks. It will be my second MOC to BrickFair Virginia this summer, along with my Kenworth T600 that I just finished. This MOC will be a sequel to my V6 Supercar from 2017. As you can see the V8 piston engine is already in place. It will, of course, be a mid-engine supercar, with the engine clearly visible from the rear window. It is going to be a motorized MOC, as seen by the two L motors already in place. It will also include SBrick control, although I don't plan on motorizing anything other than drive and steering as it could make things more complicated. At this point the rear of the chassis is pretty much complete, with two L motors connected to a 2-speed gearbox that will be controlled manually. The gearbox's output bypasses the engine via u-joints and connects to the rear differential, while the engine is connected directly to the drive motors via a gear train behind the rear axle. As of right now, my plans for this MOC include: Red body with black roof Red rims with low-profile tires Full independent suspension Servo steering SBrick control Obviously, with less than two months to build this MOC, the building process will go pretty fast. Also because this is a more straightforward build than the Kenworth, I might not do as many WIP updates but the updates will cover more progress. Photos:
-
 Since the beginning of my AFOL-hood, I have been a crane guy, with many mobile cranes built in the past. Now, during the more recent years I tried to diversify, partly thanks to competitions like those on Eurobricks, and built various other vehicles. I think it's time to see if I haven't unlearned how to build a crane :) So, the goal. I aim for a five-axle crane in the same scale of 42009. I think five axles is a perfect balance: enough to be imposing, but not so much it becomes awkward :) I use the Liebherr LTM1200 as a source of inspiration. The extra space between axle 3 and 4 gives me some extra leeway, but I also find it to look better. This image is from the Liebherr folder; I drew a grid over it with 8 studs for the wheels, and some markings in red. Most functions will be manual. Not sure if I can even get a motor in, but I will try. But there is one function I really want: suspension. I think it just looks cool to have a multi-axle vehicle with suspension on all wheels, and it makes my model less of a 42009-clone. To do this, some other functions will have to be dropped, like the motorized double-acting outriggers. This is the progress so far. Each axle is a fixed unit that is connected to the frame by two shocks and two ball joints. As vertical space is limited and Lego suspensions always tend to become taller than desired, I had to find a way to create a sturdy frame, so I went for studded Technic bricks. This makes the frame very strong. Also I think it's a nice deviation from all-studless building :) (This will principally be a studless model, don't worry.) Then, the steering. If you ever want to add and connect the steering to so many suspended axles, let me warn you: it's not fun. Every axle needs two U-joints. I just ran an axle with lots of U-joints (at least 6) through the entire thing. Not optimal, but it works. The outrigger housing is a real pain to work around. Steering angles per axle are varied the 42009 way: by having different steering arm lengths. The ratios are 100% : 50% : 0% : -67% : -100%, or, in easier numbers: 1/2 : 1/4 : 0 : -1/3 : -1/2, where the denominator is the length of the steering arm. Axle 3 is the only axle connected to the fake engine. Speaking of which, there's hardly any room left for that! So I decided I will add a boxer engine (which is lower), and it will still have to stick out one stud above the roof of the cabin. So be it. Driving the fake engine will be a challenge by itself too, because the unwieldy geartrain for the front axle's steering is in the way. I will have to sacrifice a lot of ground clearance for the driving axle. Next up: add the fake engine, add the outriggers, lay out the measurements of the cabin, and see if I can get the first boom segment in place. One note about colors. It will not be yellow. I just don't want to add another yellow crane, but I'm still in doubt about color options. I love trying out weird color combos as you might know, but the boom will probably be white, because of the panels I have (thanks to 42025). So I will probably do a multicolor scheme where white and black/gray are combined with one or two non-grayscale colors. I love to hear what you think of the first take :)
 -
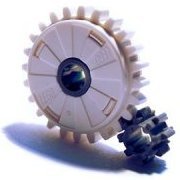 Hey guys! I'm going to try something I haven't so far - a WIP thread for my new tatra 6x6 truck. I'd love to hear all the advice you guys have along the way! The idea is to make a pretty small truck with servo steering and two L-motors, one powering each side to eliminate the need for differentials. Each half axle will be suspended by its own spring. I've already come up with a front axle that I'm happy with. It's solid, good ground clearance, good steering precision despite smaller steering radius, and it's just the right side. If it's not too tall, which I'll have to figure out, the plan is to stick the servo motor vertically right onto the 8-tooth gear, which will give it excellent precision. Another gearing, if I put the servo on its side, would multiply play in the steering system. What do you guys think? IMG_6551 by Teo's Technic, on Flickr tatra-t815-7m0r39-29-306-6x6-2014 by Teo's Technic, on Flickr e4aae418a365981d46bcd6c97723a542 by Teo's Technic, on Flickr 1998_Tatra_T815_7_6x6_military_truck_trucks_q_1600x1200 by Teo's Technic, on Flickr Here are what it will scale like. The 8x8 blueprint I will use for the front view scaling, which I couldn't find for a 6x6
 -
This is my first WIP post on EuroBricks where I will show my progress on my newest build, an EV3-powered 1:8 replica of Lexus' newest flagship coupe, the LC500. The car will most likely be a combination of both the standard and the V6 hybrid LC, but it will have a V8. The body will also be orange. Here's a photo I found of an LC that looks a lot like the one I am shooting for. Features I'm planning to add: Four or six-speed paddle-shift transmission Retractable spoiler Detailed interior Fake V8 engine (but I would like to achieve moving pistons) Full independent suspension All I built so far was the rear axle for the LC. It's exactly like the one in the Porsche 911 GT3 RS set but more reinforced. I also made the V8 engine using Lego Digital Designer. I plan to build the paddle-shifting mechanism used in Didumos' Ultimately Playable Porsche 911 GT3 RS (the one with the tilted wheel) and pair it up with a gearbox. I currently am having trouble whether to motorize his gearbox with the EV3 motors or to pick a different one with less gears and friction. I also am having a little bit of trouble finding the right front axle, though I like the one that Didumos put his Porsche because of the fact that is has two shocks for each wheel. However, I find it very difficult to fit the V8 engine in the middle since the axle is made for a rear-engine car. Here's a poorly drawn render I made of what I'm trying to achieve with the front axle. And here's the chassis in the real LC and the measurements for the LC Lego model. Overall, I'm excited about the build. I would welcome some helpful comments about the V8 engine, axles, and the gearbox I planned to use before I order pieces on BL. Once I start working on the body and aesthetics, I would appreciate some input with that as well. I can also give you the download for the .lxf file of the engine if you'd like to check it out. I look forward to replying to your comments and sharing my progress. Thank you.
-
I'm currently building a larger sized mech. I have acquired 3 turntables. Now these two next images are spoilers for my upcoming mech build. So if you don't want to spoil the surprise of seeing the finished thing first, don't open these. But if you need to see the scale of reference for the shoulder then check them out. And here is the shoulder i'm using: I'm using a blue stud/axle pin to create friction so the shoulder doesn't just plop down from the weight of the gun turret i'm attaching to it. But my question is. How do i make this turntable into a fully functional shoulder for a mech? How do i attach it to a gun so it can also turn sideways. Only thing that is finished are the legs so since this is a WIP the upper half of the whole torso will be subject to change. I'm using Hero factory IFB cockpit + pilot in this since it is very effective and easier to build around. Any tips? Should i use balljoints or technic pieces? I haven't decided what type of guns i'm attaching for the arms. But there will be lots of missiles at the back. And lasers in the front torso around the cockpit.
-
I guess it's time to share my works for TC11. To be honest, I started building almost on day 1, so this means I tried out a lot of things that didn't work, and that I won't show all. Anyhow. So, my first plan didn't work because it didn't fit the box (remember the diagonal question? It was a long thin design.) Secondly, I didn't want to do a spinner. A spinner seemed boring to me. I wanted to do something bit more technical. A lifter? A slammer? I built a lot of (non-functional) battlebots back in the studded age, when I was still a nerdy teen, but I don't have those photos anymore (which is a shame). A few bots I do still remember, so I chose a design from those that I always liked. The concept is this: So, it's a "horizontal dual hammer" bot. I think there are very few horizontal slammers, and I think it's cool. The original was named "Wimbledoom" because it had a flat top with some sort of a stadium with two figs and a tennis net (white fence) and some minifig audience. So let's use that as a working title for now (even though the tennis theme won't return) The idea is that there will be some sort of force built up and then released to slam the hammers forward into an enemy that's in between. The high speeds and sharp ends of the hammer will damage the enemy. Then, a slow return mechanism should bring the hammers back in their original positions. So, how to build up force? The frist thing I thought was "wprings are too weak, I want something better" and I was thinking about a flywheel approach, where a motor tries to let a wheel spin really fast and then somehow make a sudden connection with the weapon. This idea got quite far: The idea was that the orange axles move the gear racks so the green gears mesh with the red gears. If slid back, it meshes with the blue gears, which would be the return mechanism. It didn't work. It had far from enough force, and most energy was lost to the drive train anyway. I tried mechanisms with fewer gears (and using tires as gears) but they all didn't work. So I went back to the idea I originally rejected: Springs. These are all long springs I have except for some black ones from a motorbike set. As if it was meant, the dark-gray ones are half as strong as the other ones, which are about equal. Which means this is the perfect spring: As energy is distance times force, this spring, with a distance of 6 studs and a force of two 8466 springs, should store quite some energy (remember, this is the suspension from three large sets added together). So, now the hammer itself. Of course, this is a mock-up. It needs to be strengthened with plates and tiles, because, well... one particular piece didn't survive a test version... (it was already slightly damaged) OK, so I needed a mechanism to rotate the hammer about 180 degrees (preferably slightly more), and a frame to hold it. For the frame, I learned: if it needs to be strong, make it triangular. This is not exactly Pythagoras correct, because the straight sides are 7^2 + 24^2 = 625, where the diagonal is 25^2 + 1^2 = 626 (due to the 2x2 corner plates at the pointy end), but this difference is so small that noone will notice. To rotate the hammer more than 180 degrees, you can't just attach the spring to the hammer directly - you need a system of beams to amplify the motion in some way. This was a long puzzle and I eventually came up with (the red axle is where the spring will attach) The idea is that this is one half of the bot. It will eventually look like so: which gives plenty of space in the center for PF material and a drive system for some wheels. Doubling the frame gives which, as you can see, stays in place without me having to hold it, so it has an automatic locking mechanism due to the geometry of the beams (it locks over center). Moving the yellow part a little makes it blast away with quite some force. I'm happy! Dimensions of this unit so far: Width 17 (which is half, so width will be 35 or so) Depth 34 Height 8 Well within the limits. Next challenges are: fitting some drive mechanism, finding a way to trigger the mechanism, and maybe most importantly, building the return mechanism (which is where the 40t gears come in).
-
Hello again, Eurobricks! I decided for my second MOC I'd dive in the deep end, the easiest way to learn, right? So I thought that the hammerhead would be a good choice being such an iconic ship in the canon Star Wars universe now. I will be updating this topic when any noticable progress is made, which may be a while because this quite a large project for me. This is where I am so far...I've taken a break due to the rear section being the most difficult. Any comments and suggestions are welcome! Thank you!