Search the Community
Showing results for tags 'MOD'.
Found 466 results
-
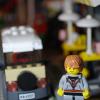
Hello, this is my first new topic post here, altho you may have seen me commenting :D Anyway, the reason for the post is my MOD of the Town Plan Cinema. I am quite a traditionalist and therefore have not made any drastic changes, i have just made it standard modular size so it fits in with the others, and added more of a back including a second screen. I have seen much better versions out there but i like mine :) Anyway, enough talk... The overall building The twin cinemas featuring the '50 Year Brick' and James Bond. And upgraded snack bar with Pick-n-mix and a fridge... MOre deatiled pics on my flickr stream here: Comments and feedback more than welcome :) Tim.
-
After seeing Eurolock's Helms Deep mod/moc I decided I had to do my own. TLG's original set was lacking, in all respects, so something had to be done. Any feedback/comments would be great, thanks a lot! You can check it out on my flickr:
-

42004 B model Mods
Saberwing40k posted a topic in LEGO Technic, Mindstorms, Model Team and Scale Modeling
So I finally opened my 42004 set, and built the B model, so that I would have the mini turntable. Something immediately jumped out at me, and that was the fact that there was no mechanism to control the bucket tilt, aside from moving the thing yourself. I looked at the sizeable pile of spare parts, and thought, why couldn't I modify it to include that mechanism? This mod is incredibly easy, and as mentioned before, only uses the parts left over from building the B model. I'm actually kind of shocked that Lego did not do this originally, as it's very simple, and would not have required any additional parts. Well, enough of my blabbering, let's get to building! Start with the B model: Then, remove the following parts: the bevel gear from the steering control, the 2 L liftarm from one of the steering arms, and the bush above it, and remove the side of the bucket linkage with the axle joiner, as shown. Then, pull the following parts out of the pile of extras: A 9L beam, and a 7L axle. everything else should be easily recognizable. Now, assemble as shown in the pictures: Now, knock out the 4L axle holding the arm to the chassis: And remove the piece from between the arms. (It's a liftarm with both an axle and a pinhole.) Put that piece on the empty steering arm. Put the arm back together, and thread the 7L axle through as shown. Now attach the arm piece, which you built a couple of steps ago. ( I actually made a mistake with this, the liftarm holding the two pieces together should be facing the other way.) Now add the control knob, which should be fairly easy to make. Now put the bucket linkage back together. And you are done! So, do you like this? Edit: Booyah! 300th post! -
I downloaded plans from www.brickcitydepot.com for their Commercial building/Bar combo (http://www.brickcitydepot.com/city-building-instructions.html) and I then decided to extend out the Commercial Building by doubling it in size and stuff it full of a micro-brewery. It's still a Work In Progress and I'd like to add an office and a washroom in the next iteration, but I thought I'd share it with the forum to see if other ideas were forthcoming. Here's the front - I can't claim any credit for the facade. All I did was double the width to 32-bricks. Brick City Depot have done a fantastic job! Here's the Ground floor. The Ground floor contains the large mashing vats. There's a shelf full of sacks of hops ready to be added (via the red doors on top of the vats), there's a water supply, and there's a shelf full of other supplies (that was in the original BCD plans) The Top floor contains the bottling plant There's a tray of empty glasses on the conveyor belt, and as they pass through the filling station they're topped up with beer (though the beer looks a bit orangey - I didn't have any trans-brown!) and then they pass through to the bottling and packing part of the machine. Finally on the downslope belt there's two full box of beers produced and ready for dispatch. Finally, a shot of the rear of the building. I like the grungy, decayed feel to it and as I said the source building is from www.brickcitydepot.com and any credit for the outside must go to them. The plans they provided were excellent! Thanks for reading and comments and criticisms welcome! So, what should I add?
-

8880 MOD:2-mode 4WS and adjustable sliding seats
Kumbbl posted a topic in LEGO Technic, Mindstorms, Model Team and Scale Modeling
Hi, a week ago i have MODed the 8880 with a 2-mode 4W-steering for high and slow speed with different switchable directions of the rear steering - here are the details and pictures: http://www.eurobrick...showtopic=79125 Now i have found a very well fitting and working solution for applying sliding seats to the 8880 - a feature current supercars miss but IMHO a full-featured supercar needs adjustable seats. Applying this to the 8880 has caused my quite a headache because there is really very few space "indoor" the 8880... well, here we go: The construction is simple and sturdy and is based on a worm-gear and 24th gear, whereas the latter one moves the former one... the follwing two pictures show the function: in this modified passanger compartment a new seat-understructure will be installed, which then can be moved by the 24th gear (moved by the black lever): Here you get the results with installed seats (here in back position): And here some more pics (you see the 8880-seats can be used without any modification): Front position: Full indoor pictures: Well, before some building-instruction pics a short summary: Now the 8880 has not only a 2-mode 4WS with direct chainfree engine drive but also slideable seats by a lever - so the feature list of this outstanding technic-set is quite complete (my MODs in bold): - 4WD - 4W wishbone suspension - 4WS with 2 different modes with switchable direction of rear steering (NEW) - adjustable and slideable seats by lever (NEW) - synchronized 4-speed gearbox - V8 engine - HOG - indoor working steering wheel - boot which can be opened - swifeling headlights I can imagine only one more functional feature-MOD: switchable 4WD and RWD - apart from that only the bodywork could be more elaborated with openable doors and bonnet.... Here some pics how to build the sliding seats: Here you see one of the most important modifications: replacing the brick 1x6 with holes by a brick 1x4 with holes (s.a.-step 4 in the building instructions of the 8880) Here you see the final prepared basement: Enjoy! -

Extreme cruiser S / GT spec
rm8 posted a topic in LEGO Technic, Mindstorms, Model Team and Scale Modeling
Extreme cruiser S / GT spec My another modification of one of my favourites technic sets 8081, which I do recommend to every technic car-building beginner;) Real 4WD i have already made. You can watch it here http://www.eurobricks.com/forum/index.php?showtopic=73762&hl=8081 Now it is time for make it low! Get low! Lets begin with S spec version EXTREME CRUISER S (sport) This is a street-legal version with RWD and civil tires 62.2x20. In comparison with original 8081 set it differs by: modified and lowered front independent suspension rear suspension live axle type, like on the 9398 crawler with torque tube and two stabilizing links. Live axle is normal for ford mustang, so it is not so wild, like it can seems. I think this type of suspension is most optimal and compact. Thanks for torque tube, TLG. shock absorbers was substituted to yellow hard version (from 8070). Front receives two independent absorbers instead of one soft. sport exhaust pipe with doubled mufflers sport aerodynamic bumpers with air intake holes. Side skirts also appeared. new front grill with. Number plate is disappeared. Such cars usually can be seen from the back;) spoiler on the third door street-legal tyres 62,2х20 Ground clearance is normal for city using. Ok, say "goodbuy" to this piece of .... It was developed for grandmas:)))) Moving to next version "GT spec". EXTREME CRUISER GT (gran turismo) As you can understand this version is more angrier than S, for real muchos, that know what GT means:) This model is mainly for track days, but of course, you can go for pancakes on it. it differs from S spec by next things: suspension is lowered 1 stid, at the same time its amplitude was decreased. It is really hard, my camera feel sick after driving on it. It can be more harder if you replace shock absorbers by 6L liftarms. widered wheel arches and side skirts (Wide-body), red line on bumpers; sport low profile tyres with wide wheels; larger spoiler for speeds 250+! GT still can be used as everyday car, cause drivers seat is here. No, you cant place your mama at passenger seat. Car also includes dashboard with turbine pressure indicator;) all doors are still openable. Sorry for many photos, but i like it. Ok lets move to serious things. Kids can go sleep, cause nothing interesting comes next. Front suspension Rear suspension: And this GT is with suspension from S spec with increased clearance. For "perfect" russian roads;) Evolution of 8081 *-foto from Kostya Bazdirev's review. Best 8081 review in my mind ОБЗОР Do you think it will stand on shelve? No way. Buggy motor is waiting to burn some rubber. IR v2 receiver, LiPo battery help them at this fun deal. Of course, servo will help us to prevent car wall crash at first 2 seconds of play;) Ok, those who no sleeping yet, my family video: Forget to say: no drift today. But second Buggy motor is waiting. dont forget about 4wd http://www.eurobricks.com/forum/index.php?showtopic=73762&hl=8081 There is nothing new in this model, but it is fun and fast. I was bored reading 25 pages about coming sets. So relax:) and feel free to comment -
I thought the 6-seat Palace Cinema auditorium was a little small, so I built a bigger one! [ Now updated with pics of the complete set:] One minor change to the exterior: I removed the wedge plates under the Wu-clock and ran the snot pillars all the way up. Nice and smooth. As you can see from the posters in the lobby - it's 70's night at the Palace. The concessions stand had to go but at least there's a restroom now: The seats are filling up fast. The Palace is fitted with the very latest in big screen technology: Time for tonight's main feature: by Legoogel, on Flickr
-

LEGO 8043 - Battery Improvement Mod
teleing posted a topic in LEGO Technic, Mindstorms, Model Team and Scale Modeling
Hello everyone at eurobricks! I'm new in this forum. I decided to open an account, so I can share my simple mod. About two years ago I got the Motorized Excavator 8043. The model is awesome, I think it has been one of the most beautiful and complete sets. Since the model needs 6 batteries, I decided to use Ni-MH rechargeable batteries. The only problem is that this kind of batteries provide only 1.2 Volts, therefore, the PF battery pack only achieves 7.2 volts with 6 batteries, instead of the 9 required (and provided by 6 alcaline batteries). I don't want to spend money on disposable expensive batteries. I decided to look for a way to use 8 batteries and provide 9.6 Volts Long ago I found a mod where the user used a standard battery pack. I can't found the post to thank the guy who did it. Here's what I used: 2x Battery Holder 4xAA 2x 9V Battery Clip 8x 1.2 Volt Rechargeable Batteries 1x Switch (I didnt connected it, but you can) Wiring: -You can use a PF cable to do this (Search in the forum/web there are lots of tutorials). -OR you can canibalize the original battery box (PF extension wire is not available in my country D: ) I won't write, since the images explain it clearly: Wiring Diagram por Teleing, en Flickr Connection diagram por Teleing, en Flickr Use a bit of glue por Teleing, en Flickr Overview por Teleing, en Flickr Modifications on the Excavator: From book 1, page 61: Replace Steps 4~8 For the following: New Step por Teleing, en Flickr (You can take the black piece from the spare parts included in the model) With this we can allow the battery pack to have enough space in the excavator. Now it's pretty simple, you connect the battery box and take it in place: I used the grey part to hold the wires in place I also did a little review of the improvements between 7.2 and 9.6 V: 8043test.txt The general improvement was about 30%, You can see immediately the excavator is faster, lifting the boom, rotating, etc. AND, the gear switch moves smoothly. FULL GALLERY http://www.flickr.com/photos/teleing/ Thanks for reading, hope my work is useful to you. -
All, I decided to tear down my 4554 Metro Station from the 1990's and rebuild it into something in a more Modular theme. So I combined it with glass from my Greenhouse http://www.eurobricks.com/forum/index.php?showtopic=76636 , a bunch of 2 x 2 tiles and some odd bits and pieces and came up with the Metro Station Bar. It was 13F/-11C outside so some of the pictures were a bit rushed. Anyway, I tried to reuse as much of the old set as possible throughout. So the greebling at the top looks like the detail work from the original, the Arrival board became the Bar's Sign. On the ground floor a red cupboard from the original became an ice chest, a Train Decorative side (#2871) became the header over the Bar. There's also the Station's clock on the wall and the original Station Chef has been rehired! Here's a shot with the stairs removed. You'll notice that the Metro Station Bar serves both kinds of wine (and it looks like it comes from an industrial source rather than a vineyard ) The rooftop terrace had the umbrella's up, but you couldn't see the detail so here's a shot of that. I reused the benches from the original. The hatchway on hinges leads downstairs. I believe that with the exception of the 2x2 tiles and the glassfront that the two story version is probably 90% original. Then I decided to add an additional floor. And this new floor's interior contains a couple of sofas, a low table and the Coffee Percolator from the original. (That Carpet colour is bright!) Finally, here's a shot from the rear. It's still very, very yellow, but I had a lot of fun transforming it from the original station! Thanks for reading. Comments, suggestions and criticisms welcome! Here's the original 4554 as reference.
-
Ok, time for another posting. I started with the POTC The Mill Set 4183, but decided that what it really needed was some 'mass' and less water wheel. After several iterations I ended up with this - it's an old ruined Bell Tower (the Bell is about the only structures left from 4183). I originally built it without a back so it has a decent interior with good access, but built a quick removable rear facade. It was 13F/-11C outside so some of the pictures were a bit rushed, but here's the front. The Redcoats are using a convenient rock and some salvaged timber to lever up their Cart so they can change the broken wheel. The Horse Coach driver (moonlighting from his normal gig) is taken care of the Horse and the Captain is sitting on a bench in the sunshine drinking wine while he watches the others. And a shot of the rear. I deliberately didn't push the 1x4 wooden planking down - I think it looks like a neglected, old pathway. And here's a shot with the back removed - complete with skeleton and rat. Here's Capt. Jack looking down on the Redcoats Despite Capt. Jack's hope's that they are going to remain undiscovered while the Redcoats work below I think things are not going to work out as planned. Gibbs keeps on losing his fish to that seagull and the Redcoat Captain is going to get dinged with a shovel. I hope you enjoyed it. Comments, suggestions and criticisms welcome.
-
With my recent receipt of a few 1x1 tiles to fill in the sidewalk, I've finally completed my Modularization of two copies of 3661: Bank & Money Transfer into a single building. You'll find the DJ outside most of my buildings. It's a corner building, so here's the view from the Avenue: You can get a little better look at the (admittedly rather plain) roof in this shot: Here are the two floors and the roof pulled apart: This is the ground floor: J. Jonah Jameson, man of the people, does his own banking: Gold bars in the vault: The Branch Manager's office: Another view of the Branch Manager's office: I'm pretty happy with how that last shot turned out considering I shot it through the window pane.
-
The car in this set is one of the better of these new City cars with the truck tires, but those tires still ruin the look. What should be a nice sports car, almost reminiscent of an Audi GT and R8 imo. So I made a few changes to make it look like a sports car and less like the love child of a car and a Jeep.
-
Well it's about time I started contributing more to EB, so here is my first attempt at a MOD? MOC? Im not particularly clear on the definition of MOCs and MODs (can the more experienced EB guys please clarify what this is after reading my post ). The story goes..... After reading very good things about it on here, I was fortunate to pick up the 7744 Police Station (with 400 extra bricks ) set on eBay, A wee Brickset picture to set the scene. To be honest I wasn't convinced about its styling and the general design and architecture of the set. After time spent building it to the original instrcutions, I could see the plus points of the station, with good playability (mini-prison, watch-tower, offices and garage space) and the abundance of pieces and mini-figs. Once built I wasn't happy! I grew up with the classic town sets, where mini-figs could move between floors without stairs and the design bared no resemblance with 'real-world' buildings...but now (and I blame 10 years of Architecture for this) I want a little more substance. I do love the Modular sets and that particular style of building, but I wanted to first address this set and my classic town sets with some MOC/MOD before I move onto modular work. Big shout out to 'lightningtiger' and his amazing work on 'New Mannum' for the inspiration to work at this scale and style. So....apologies for the long winded scene setting intro....I began work on the 7744 police station set. As an architect, I felt I better address the building before I mess up the vehicles. Starting at Ground Level I wanted to address some issues I had with the standard kit: - To create a main entrance to the police station. - To contain the cells in a less 'prison-like' design (even though I do love the way the are done in the 7744). - To maintain the open back and side access for playability A note here, I love the use of a 32x32 and a 16x32 base plate to create the set, Something I'm hoping to add when I MOD/MOC my classic kits. So on with the pictures..... FRONT VIEW OF GROUND FLOOR PLAN: Introduction of Entrance to the left and side entrance for the garage on the right. I maintained the 7744 garage set up and barrier access. GROUND FLOOR LEFT VIEW: The 1x1 space is left for external signage, however I may remove the fence piece adjacent to create something more substantial. ENTRANCE CLOSE UP: I felt the main entrance required a more substantial step to define it from the building line, without being too modular. The technic 1x4s are in preparation for some signs. Though I'm open to less blocky techniques and suggestions? ENTRANCE INTERIOR: My first issue here is purely my architectural brain pestering me. I don't like my window head heights not lining through with the head of the doors, but to maintain the black single course, I think I'll raise the internal floor level (apart from the garage) by a brick. This will allow for a nice entrance step into the station and floor to ceiling glazing . This space in the next stage will also be split by a reception/arresting sergeant desk with a potential double height space over the reception. HOLDING CELL INTERIOR: I wanted to bring the cells inside, therefore I created a larger 2-3 person holding cell. On reflection I may reintroduce the grey panels for the walls, to visually separate where the police work (white walls) and the naughty lego crims go (grey). SECURITY DOOR: This part will separate the reception/sergeants desk space with the main station. I wanted to have a CCTV controlled/Metal Detector here. I quickly popped the 7744 CCTV camera into place and its a wee bit...whats the word....HUMUNGOUS!! I'll have a crack at understating its presence when I work up the interiors. I do love the weird and quirky world of Lego Scale REAR VIEW OF GROUND FLOOR PLAN: The area to the left of the cells will hopefully develop into my vertical circulation space, up to the First Floor where the real police work is done! The small space to the left of the garages will develop into the vehicle maintenance room. Well there you have it so far, Stage 2 will follow fairly quickly as Im now obsessed with Lego again but I look for advice and comment on some of the more glaring errors of judgement, as you know we architects love to be told our designs are rubbish . I look forward to the EB input!!
-
Yes, this is the new XT4. XT5:
-

MOD: Raised roof for 5867 Street Speeder - Lego Club alternate model
Gnac posted a topic in Special LEGO Themes
Creator set 5867 (Super Speedster) is such a great set, isn't it? All three models are really detailed, inspiring, and fun to build. If you are like me, and you have a weakness for Vintage Roadsters, The Lego Club bonus model instructions make the set even better. I rebuilt that model one afternoon, and pondered one aspect of its design - it makes use of some of the spare black and light bluish grey pieces from the kit to give the impression of a lowered soft-top roof. What would this model look like, if the roof was raised? I had a few spare bits that could be put to good use, so I decided to create a raised roof within the limits of my tiny bit bucket (and similarly-sized brainial gland). Here is the result! Now one doesn't need to consider British Precipitation when debating whether to take part in this year's London to Brighton Run. Huzzah! I'm quite pleased with the overall look, considering the limits of my available pieces, and the constraints on the geometry. The roof assembly actually tilts forward by a few degrees to allow the hinge plates at the back enough clearance. I love it when a plan comes together! The roof's tilt really complements the look of this mod - but it was a "happy accident". The windscreen's connection allowed it to be moved back, which created a gap below the black plates used for the top of the roof. The forward tilt for the whole roof assembly was now possible by using the spare red hinge bricks (and plates) from the main Super Speedster model. Just to make sure that what I was making didn't violate building conventions, I recreated it in LDD. The only thing I couldn't place was the black 1x4 tile below the rear windows. Download the LXF for yourself, you dastardly bounder. -
Since centuries ago, the dragons from Historica have had dealings with a number of humans, but never has there been a stronger bond betweenthe two species than the one that can be found among the inhabitants of the secluded Dragonpeaks. In fact, the bonding is so great that the dragons, who live for several centuries, share a fraction of their life force with the rider they choose, thereby allowing those to live far longer than an average Historician. Rhitharg the Young is a red dragon of merely 109 years who hasn't yet fully grown horns to indicate his adulthood. As his potential riders tend to die before the rite can be completed, he hasn't found a rider accustomated to him: Sirdthig, the current rider, seems to be quite affected towards him, though. Maybe because they both share a fairly violent nature even when compared to other pairs. His squire definitely thinks so and, since the rite includes the decapitation of the squire if the bonding between dragon and rider fails, would highly appreciate it if the soon to be held rite would this time be successful. Note: This is a slight modification of the dragon that appeared in set 7017. Unlike most other dragon riders, though, Thoragvil Son of Thror isn't fond of flying, at all. Perhaps that's the reason why he got chosen by Urhark the Fierce, one of the largest two-legged dragons to be known in the annals of Câr Thrakartis. His inability to fly doesn't reduce his might one bit and his surname is not without foundation, either. In fact, enemies reportedly flee the moment they notice that particular pair approaching them. Not that it helps, since despite his bulky appearance, no horse has ever managed to out-run Urhark. And once he engages in melee, nothing can stop him until the last foe is slain: Note: Obviously, this one is a modicifation of 2509 Finally, the Lord of the Dragonpeaks doesn't settle below accompanying the Lord of the Dragons themselves. Therefore, Thror III. has bonded with Thrak the Tall decades ago. Even among his kin, Thrak is unusually large and recently manifested his nickname by towering even above some of the elementals summoned by Victor Revolword. Some of which he fought personally while defending several cities. Unlike most other dragons that rely on their claws, tails and breath as weapons, he additionally uses a giant mace and a shield to increase his arsenal: Note: A modification of Ofnir from 7021 As always, C&C are most welcome and more can be found at Flickr