Search the Community
Showing results for tags 'super heroes'.
Found 74 results
-
Deadshot is Task Force X's greatest marksman, but is his skill great enough for his superiors to forgive his reckless actions? Created by Jack Rizzo. -Cast- Amanda Waller - Caitlin Buckley Deadshot - Jack Rizzo Check out the complete LDCU saga here! Want to see more from Jam Pot Studios? YouTube: https://www.youtube....ampotAnimations Facebook: https://www.facebook.com/jampotstudios Blog: http://jampotstudios.blogspot.co.uk Instagram: https://instagram.co...otstudiosfilms/ Flickr: https://www.flickr.c.../jampotstudios/ Twitter: https://twitter.com/JamPotStudios1
-
A short sketch based on the recent DC film; Batman v Superman; Hope you enjoy, any feedback is greatly appreciated!
-
I am a beginner please write a comment about what you think it will help me .. thanks Why will not my video become visible when I publish ?
-
Hey there, I recently started a photographic series of LEGO Batman travels & adventures and here I am introducing them to you. I will try to keep this side project alive as much as I can and I will upload all the photos to my Instagram account http://instagram.com/alexnocturnal I hope that you will like them, I would really appreciate to hear your opinions, ideas, suggestions, etc. Since the World Cup started few weeks ago, here we go Enjoying a beer at Australia - Olanda Enjoying a Sangria and wondering if Spain will go home so soon And ready for the last game of the day Friday games start. Warming up with a beer. Italy or Costa Rica? Will the Queen kiss Mario? Du fromage et du vin... Switzerland vs France. Already 0-3, any final predictions? Budweiser beer or Porto wine? I can has both? Let's see a good game: USA vs Portugal Explain to your girlfriend the offside rule... :D Chilling... ITA vs. URU Bud meet Krombacher, Krombacher meet Bud! aka USA vs. GER :) Brazil - Chile, 1-1, few moments until penalty shots Aaaaaand the winner is: Allez les bleus! #FRA vs #NGA :) A walk by in Timisoara (Romania) - notice the I (batman) TM - the city abbreviation - with Batman as a heart Working on a flyer design (since I am a graphic designer in my real life) "I'm your father" Because of the lengthy post and in case you want to follow the project on Instagram here is the link again http://instagram.com/alexnocturnal That's it for now, if you like them and want to see more I will keep you posted
-
Like most, I love LEGO Harley Quinn! But I do NOT love the way the official sets have implemented her trademark carnival mallet. In all of the versions released to date, the handles are too small, the hammer ends are too oversized, and the gaps in the middle are distressingly obvious. I decided to try and come up with something a little more aesthetically pleasing by following these steps: 1. Begin with a 1x1 brick, modified with four side studs. 2. Attach a longer bar for the handle, so that it can be more easily held with two hands. 3. Use three 1x1 tiles to fill out the center. 4. Instead of 2x2 round bricks, use 2x2 round plates for the hammer barrel. 5. Add the 2x2 tiles to the ends. This works for both the black/red color scheme AND the reddish brown/tan color scheme. As a nifty bonus, using round plates instead of bricks lets you change up the colors to give the appearance of those bands you frequently see on traditional carnival mallets! Here's classic-outfit Harley modeling four variations for you: Here's another angle for a better sense of scale. These mallets are, IMO, still comically oversized without being ridiculous: Personally, I'm partial to variation #4. Here's Harley posing with a few of her fellow DC rogues... ...and facing off with a handful of familiar heroes... Hope you enjoy! And if anyone else would like to share their own rethought mallets here, I'd love to see them!
-
Has anyone noticed how Lego has so many obsessions when it comes to Super Hero sets. Besides the obvious with making most of the sets based on their favorite characters... Like Spiderman and Batman. For Spiderman there has been 8 Marvel sets based on him. 1 Juniors set, 1 Micro Racers, and 3 more sets to come in the summer with him potentially him in the 4th Civil War set. There has been 8 variants to the character but really a lot of them don't change too much. Out of the 45 Marvel sets (Up to Doctor Strange) he has been in 14 of the sets. Now Batman..... There has been 8 "DC SUPERHEROES that he is not in. 2 Juniors sets, 1 Micro Racers and 2 more sets to come in the summer with the potential R'as Al Ghul set. There has been 20 variants to the character. So out of the 36 DC sets he has been in 24 of the sets. So there are 81 Superheroes sets, they have been in 38 of them which is almost half.... For some reason there has been 4 Quinjet variants (Avenjet included) Also they have the weird tendency to put fire extinguishers in sets. Or maybe they've just been ketchup bottles the whole time! Anyways I just thought I'd everyone know and see these obsessions Lego has. Let me know if you guys have noticed anything!
-
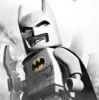
Hey Guys, I finally built the The Tumbler after it sat on the corner of my room for a few months! I know it's an old set and you've probably watched multiple Tumbler builds, I just wanted to share it in dedication to BvS which is coming out soon. Off course it's totally a different universe but for not very big comic fans like myself, anything Batman related is admired.
-

REVIEW: LEGO Super Heroes 'Super Hero Airport Battle' (76051)
Zusammengebaut posted a topic in LEGO Licensed
Hello, this is my Review of the new Lego Marvel Super Heroes Set 'Super Hero Airport Battle' (76051) - 'Captain America 3: Civil War'. I like all builds of this sets (even the tiny Quinjet), but the Giant-Man is fantastic, what a fun build! Best wishes Andres -
Hello, the new Mighty Micros are fun! This is my Review of 'The Flash vs. Captain Cold' (76063) Brick on Andres
-
Hello, Ant-Man is travelling around the world. (LEGO Super Heroes - Super Hero Airport Battle , set 76051) These are the tour images. Best wishes Andres
-
VIDEO: Super Heroes Quinjet 2015 + 2016 comparison! (76032 & 7
Zusammengebaut posted a topic in LEGO Licensed
Hello, LEGO Marvel Super Heroes Quinjet 2015 'The Avengers Quinjet City Chase' and 2016 'Super Hero Airport Battle' comparison! Sets 76032 and 76051. So, which one is better? I like both builds! Best wishes Andres -
Hello, the movie "Batman v Superman" will be fun - I hope. So this is my Review (in English) of the new set Heroes of Justice: Sky High Battle. The Batwing is a fun-build, and the main five minifigs are included. Have a nice day Andres
-
Hey everyone, I feel it is time to attempt to settle the age old debate of "are fake super-heroes worth it?" , To find out i purchased 4 lots of characters ranging from copies of official figures to SDCC fakes and even fakes of customs in order to provide a ranged view into the figures, now after just a mere month they have arrived in a lovely polystyrene box from china. Here is my little box of goodness Decool review by Legocollecter123, on Flickr Each figure comes in a little packet with readily assembled Head, torso and legs, It is your job to add accessories, a stand and hair. Unfortunately there were no instructions so after 16 hours and 195 wrong attempts i assembled my first figure. The figures are more or less the same as lego's with the main difference being the leg assembly Decool review by Legocollecter123, on Flickr The legs will fit into official bodies and vica versa so the unprinted ones i have changed for officials Decool review by Legocollecter123, on Flickr As you can see the connection is the same (i had to do this outside so you could see) Decool review by Legocollecter123, on Flickr And HERE they are! with all those classic accessories such as Mr fantastics chainsaw and the things hammer.... ? Decool review by Legocollecter123, on Flickr To be brutally honest im starting to like these guys.. There is a lot of decent back printing here, they seem to be more generous with printing than Lego themselves. Decool review by Legocollecter123, on Flickr A lot of these guys also have double faces or rear head prints, here are a few random examples. Decool review by Legocollecter123, on Flickr aaaaaaand Kablamo Decool review by Legocollecter123, on Flickr All the parts interact perfectly well with official lego as shown here... Decool review by Legocollecter123, on Flickr Im not sure if you can tell but the arms are a Tiny bit less angled than official arms, Barely noticable though. And of course the other difference that can be seen here is the minor colour differences, I think they all look reasonable enough though. Decool review by Legocollecter123, on Flickr Before i continue i would like to point out the problems i have encountered in these figures 1- Deadpool's head appears to be attatched to his body so will not budge or move, Meaning his sword holster cannot be attached. 2- Some head designs are c**p, I feel this is just due to shoddy workmanship rather than bad printing (namely the FF) 3- Batman's cowel is tight so once it's on don't expect to get it off easily. NOW for a test, Without looking at your official Deadpool figure tell me which is the official one, I will reveal it tomorrow Decool review by Legocollecter123, on Flickr Decool review by Legocollecter123, on Flickr I tried this on one person already.... They got it wrong As this picture shows some are very good copies such as DP and venom, Others, well you can see for yourself... Decool review by Legocollecter123, on Flickr Most however are completely satisfactory and blend into your lego surroundings nicely, Here are some examples. Decool review by Legocollecter123, on Flickr Decool review by Legocollecter123, on Flickr And with minor changes they can look pretty good Decool review by Legocollecter123, on Flickr And now for the conclusion, This could ed the war on fakes forever... let this moment be remembered by AFOLs forever, Now im just dragging this out... PRICE- Ok, so for all 19 of those awesome figures i paid £13.17 including post, Thats under 70p each, Where a normal figure would cost 10x that, Or in a SDCC case 300x that! So i would say these are very good value and provide a reasonable figure for your buck (or pound or yen or euro), so at that price i would grab a few just for the sake of it. 9/10 Quality- Surprisingly these are better than people say, The prints are reasonable, The plastic seems strong and the designs are good, except a couple of slight leg wobbles, Amazingly im going to give these a 6/10 Design, This is difficult seeing as they are all nicked designs, However they have been replicated well (except the FF faces) so i will give this a 7/10 Overall i give these 22/30, These really do fill the hole that lego has dug beneath us so i applaud Decool for there work. The quality is getting quite good now and is constantly improving so these really these will soon be lego standard. If you feel you are missing somthing that these figures provide just get one, Dont look back, its only a few quid after all. One other thing, It is difficult to pass judgment on the figures as a whole, As my GL is great quality, a great figure and looks awesome. However the Decool cap has a poor head design and looks generally bad. Hard to say people... Hard to say... I dont want to say these trump lego as they DO NOT, however they are providing what we want at a price we want so thats good enough for me! If anyone wants extra pics just let me know, Otherwise enjoy your day!
-
Hello Ladies and Gentlemen, and welcome to Aquaman on Ice! No, it's not an ice-skating show. I'm talking about the latest set in the Batman and Friends Super Heroes theme, "Arctic Batman vs. Mr. Freeze: Aquaman on Ice." Is that the longest Lego set name ever? I guess they were trying to squeeze the names of all three characters into the title. Anyway, I was lucky enough to order this set (along with some other 2013 sets) when Amazon had them up for sale for a short time, so I am able to bring you an early review of this set! Set Number: 76000 Name: Arctic Batman vs. Mr. Freeze: Aquaman on Ice Theme: Super Heroes Subtheme: DC Universe Year of Release: 2013 Pieces: 198 Minifigs: 3 Price: $19.99 USD S@H description: Mr. Freeze has trapped Aquaman in a block of ice and only Batman can release him! Speed to the rescue in the powerful Batboat with exhaust flames, deploy the missiles and release the bombs to bust that block of ice. It's time to turn the heat up on Mr. Freeze! Includes 3 minifigures: white Arctic Batman, Mr. Freeze and Aquaman, all with assorted weapons. Brickset Bricklink Brickshelf The Box The box is the same size as that of all sets of this price range this year and it's very blue, which fits the winter theme well. It has a nice illustration of Batman in his nifty new arctic suit in the top right corner. The boxart shows our two heroes battling Mr. Freeze on what is presumably a frozen Gotham City Bay. My copy of this set appears to have a typo in the set title as it says "Artic Batman". Hopefully they'll catch on to this before these are widely released as it is quite embarrassing to have a typo right on the front of the box. The back of the box is mostly orange for some reason. It doesn't go very well with the winter theme, but it doesn't look bad. It shows an alternate action shot and all the play features. Contents Inside the box you'll find an instruction booklet, a relatively large sticker sheet, a comic book, and four bags. Surprisingly, none of them are numbered. The comic is about Batman's enemies escaping from Arkham and Batman, Robin, and Aquaman trying to stop them. There's also a short comic featuring the Tumbler and Bat, but it hardly has any story. The TDKR Bane on the cover looks a little out of place to me. The instructions also have an orange background which doesn't suit this set at all and is a bit distracting, but other than that the instructions are pretty easy to follow. As usual, there's a slight image of three figs from this wave in the top right corner of some of the pages: Aquaman, TDKR Batman, and Arkham Asylum Joker. Quite a random group of characters. I think it would have made more sense if it were the three figs from this set, but oh well. These are some of the notable pieces in this set. The long Ninjago blade appears for the first time in pearl silver and the rock piece comes in trans-light-blue for the first time. The colors of the big flame piece seemed different to me too, but it turns out they're the same. I think there was just a little more red mixed into it than usual. Minifigs The minifigures are the main selling point of this set as they are all new and exclusive. Batman comes in a new, mostly white suit that is supposed to keep him from freezing. I guess that makes him the Light Knight? He looks pretty cool, in every sense of the word, although this specific suit wont be very versatile. Mr. Freeze gets a complete redesign from his previous incarnation. The biggest difference is that he now sports a sand-blue Atlantis diver helmet. It looks pretty good and I really wanted to like this fig since Freeze is one of my favorite Bat-villains, but the face just ruins it for me. He looks more like an angry zombie than Mr. Freeze. He is supposed to be emotionless, so why is he so angry? And where are his goggles? Only the worst interpretations of this character didn't have goggles, so I really don't like that he doesn't have them. There are people who are fans of Aquaman, and then there are people who view him as a joke. Unfortunately, I am one of the latter. I can't believe that out of all the DC superheroes they could have put into this set, they chose Aquaman. I mean, he's just a guy who talks to fish! I would have much rather gotten Green Lantern, or the Flash, or Martian Manhunter, or anyone really. But I guess in the context of the set, it kinda makes sense for him to be included, and I find it pretty funny that TLG seems to think that he is a joke too since he merely plays the role of a damsel in distress in this set. It's even implied in the set name! I would probably feel warmer towards this minifig if it at least looked cool, but it doesn't. It looks like Aquaman, yes, but there's something about the face or the hair that makes him look too boyish. He looks more like Justin Bieber in pajamas than the king of Atlantis. I do like the printing on his torso though. Here are some reference images. Mr. Freeze seems to be based on his Arkham City design whereas Batman's Arctic suit originates from the The Batman cartoon. Aquaman is based on his usual comic appearance. They are all very accurate. Looking at them from the back, you can see that Aquaman also has some nice printing on his back. Batman with his white cape and cowl blends into my white background like a ninja! I have taken off his cape and cowl and Mr. Freeze's helmet so that you can see their back printing too. It's pretty detailed, and considering that they don't really need it, it's nice that TLG added it anyway. Mr. Freeze also has some great printing on the front. Batman and Aquaman have double sided heads with angry expressions. Mr. Freeze, however, doesn't. He's just angry all the time for some reason. This is very disappointing since they could have easily given him a second face too, one with a calm expression and perhaps even goggles. I really don't understand why they didn't do this. Here's a comparison with the old Mr. Freeze. I don't have the trans-clear helmet the old one is supposed to have, so I used the closest thing I had. The suit on the new one better, I think, and so does the freeze gun, although I kinda like the piece they used for the freeze beam on the old one better. Of course, if you have the old Mr. Freeze, you can easily swap their heads, and this is what you get. I think this combo looks very good and makes me wonder why they didn't go for a similar face design on the new head. Perhaps the new face could be explained like this: Here's a lineup of all of Batman's different suits so far. The Arctic suit fits in well with the rest. And here you can see Mr. Freeze next to the Atlantis divers. They look quite good together. One could almost think his suit is a left-over design from a scrapped wave of Atlantis sets. The Build The first thing you build is Mr. Freeze's freeze gun. It looks nice and retro. I like the energy cell attached to it, but I'm not too fond of the overall lance shape. Batman gets two of his usual black batarangs. This seems like a missed opportunity to make Batarangs in new colors like white or blue, but oh well. Aquaman fittingly comes with an Atlantis trident. Next, you build Aquaman's ice prison. The base is comprised of slopes and tiles. Then you put Aquaman in the middle and trap him inside the two rock pieces. See ya, fish whisperer. He fits inside easily, but it can be difficult to close the trap when he is carrying his trident. Overall, the ice block looks pretty good, but I think I prefer the marbled rock pieces from the old Batcave set. In order to save him from becoming a fish-stick, you simply push down the white tab on the side. Since the rock pieces are only attached by one stud, it works fairly well. Then comes the main part of the build, the Batboat. Here's a picture of it in mid-build. As usual, there several randomly colored pieces used during the build, but most of them become invisible in the finished model. And here it is, the completed Batboat! I must say, it looks even better in person than on the official pictures! It looks pretty good from the back too! Like Aquaman, this batboat is almost identical to the one from the videogame Lego Batman 2: DC Superheroes which is pretty neat. The differences are only very minor. Here's a shot of it from the front which has the obligatory Bat-logo sticker. And here it is from the back. Don't get too close to that exhaust port! It looks very sleek and streamlined from the side. There is a clip on each side for attaching the Batarangs which I really like. So far, none of the Batvehicles have had any place to store those things. Much like the Batwing, the Batboat has the shape of a bat when looking at it from above. The "bat ears" are only attached by a hinge and tend to snap off when moved sideways, but they can just as easily be snapped back on. Play Features The Batboat has several features. The cockpit opens up and there is a steering wheel and two control panels inside. It's kind of a tight fit, though, and it's impossible to seat batman inside without wrinkling his cape. Each side of the boat has a pin for shooting discs which I guess are supposed to be some kind of heat-batarangs. It works well and the discs shoot pretty far. On the back, it has two bombs which can be deployed by simply pushing them off the stud they're attached to. It's pretty low-tech, but it works. You can also spin the engine flame. The Complete Set Here's the full set. I think it all fits together nicely. You get a cool vehicle, a nice piece of exploding scenery, and three exclusive figures. It's a worthy opponent to its Marvel counterpart, Spider-Man's Spider-Cycle Chase. Ratings Design: 5/5 - I love the Batboat. It's so sleek and swooshable. It looks like a bat and has several play features, including Batarang holders. I think it's my favorite Batvehicle so far. The block of ice looks good too. Build: 4/5 - The build is varied, not repetitive, and overall quite satisfying. It's a bit of a pain to put on all those stickers though. Minifigs: 4/5 - The minifigs are pretty good for the most part. Arctic Batman looks great and Aquaman looks decent too, although the choice of hair piece could have been better. Mr. Freeze looks pretty good in his Arkham City style suit, but they really screwed up on his head in my opinion. Playability: 5/5 - Like I said before, the Batboat is very swooshable and has 2 disc shooters and 2 bombs. What more could you want? The exploding feature of the ice block is nice too. Parts: 4/5 - You get a good variety of useful parts, some of them in rare colors. Price: 4/5 - 198 pieces is a decent amount for a $20 set, especially a licensed one. Overall: 4.5/5 - This set is a good value. It gives you one of Batman's signature vehicles from the videogame, an exploding piece of scenery, Batman in one of his special suits, a new Mr. Freeze (who will go nicely with the upcoming Arkham Asylum), and another hero to add to your Lego Justice League, as useless as he may be. It's a good buy for Batman fans of all ages and a very fitting set to build during the winter season. The only thing that keeps it from being great are Mr. Freeze's and Aquaman's terrible heads, but that's just my opinion. I hope you enjoyed this review and that it was helpful to you. And to finish it off, here's one more Aquaman joke: Are You Friggin Kidding Me? by Oky - Space Ranger, on Flickr
-

What 2016 Themes/Sets Are You Most Hyped For?
Chilly_Productions posted a topic in General LEGO Discussion
I'm most excited for the new star wars sets and nexo knights. -
Hello, I wish you all a Merry Christmas! But... where is Santa? Best wishes Andres
-
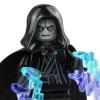
Has anyone else been watching the new Marvel/Netflix show Jessica Jones? She's a former costumed super hero turned private investigator (and alcoholic!) Figured she deserved the Lego figure treatment, but haven't decided on the hair yet. I'm leaning towards 95225 in black but am open to any suggestions: And even though he's officially appeared (in his comic book incarnation) in set 76016, here's Luke Cage based on his Henley-shirt-loving appearance on the show: As always any feedback is most welcome!
-
It is no secret that Marvel is one of the most successful companies right now. From the Avengers to the X-Men and down to even the most obscure characters like Ant-Man, every one of their movies has been a big hit until now. The latest Marvel movie, Fant4stic, was released last month and while I have not seen it yet, I'm sure it's just as great as their other movies. I mean, it has the word "Fantastic" in the title after all! And being the smart business that they are, The Lego Company decided to get in on the hype early and capitalize on this movie's undoubtful success two years in advance by making a set featuring Fant4stic's main villain, Dr. Doom. Now that's what I call forward thinking! But did they do a good job with it or were they being overhasty? Let's find out! Set Number: 76005 Name: Spider-Man: Daily Bugle Showdown Theme: Marvel Super Heroes Subtheme: Ultimate Spider-Man Year of Release: 2013 Pieces: 476 Minifigs: 5 Price: $49.99 USD S@H description: The first thing that comes to mind after reading this description is: Wow, that's a lot of TMs! Anyway, here are some resource links for this set: Brickset Bricklink Rebrickable The Box Since this set is based on the Ultimate Spider-Man cartoon, the box has the usual USM design with the red Marvel Super Heroes background, an illustration of Spidey in the upper right corner, and the USM logo in the lower right. As usual, there is a minifig line up in the lower left, and since this was before the terrible redesign, you can see the full body of the minifigs. I really miss this type of line up. There is quite a lot going on here: Doctor Doom attacking the Daily Bugle in his jet while simultaneously reaching for J. Jonah Jameson below with his jet's claw, Spider-Man (reluctantly) swings in to save him, while Nova fights off the Beetle. It's a pretty cool scene, even though it's not very accurate to the show. In "Beetle Mania", the episode that this set is based on, the Beetle was indeed out to kill JJJ, but it was in order to stop him from exposing his identity, not Spider-Man's (although Spidey was next on JJJ's list). And while he is a recurring villain on the show, Doctor doom had nothing to do with this plot and didn't even appear in the episode aside from a brief cameo. It's awesome that they included him anyway, though, so I'm not gonna complain. Note that the tower is so tall that it wraps around the top of the box. There, you can also see a scale reference with the Spider-Man minifig. On the back of the box, you can see the interior of the Bugle and all of its play features which there are quite a few of since this is a playset. It's all illustrated pretty well, although Lego's choice of sound effects is still a mystery to me. I don't get why they don't go for Spider-Man's signature "Fwip!" instead of "Fazzing!" and I didn't know that a breaking window made the sound "Btoom!" but I digress. Contents Inside the box you will find three instruction booklets (one smaller than the others), a comic book, a fairly large sticker sheet, five numbered bags, and two loose pieces: A white string piece and a gray 16x8 plate. There aren't really any notable pieces and nobody cares about the comic bock (no offense to the artist), so lets get right to the instructions. They are pretty straight forward and easy to follow. Some of the pages have a ghostly image of Spidey, Nova, and Dr. Doom in the top right corner which is fitting since these are all minifigs that appear in this set (which is strangely not something that can be said for many other Super Heroes instructions with this type of artwork). Minifigures As with most Super Heroes sets, most people will get this set mainly for the minifigs, so without further ado, let's talk about them. Spider-Man is the same old bootless one you get in almost every USM set. Not much to say about him. Some might complain that we don't get Spidey's alter ego Peter Parker in this set, but in the USM cartoon, MJ is actually the one who works at the Daily Bugle, not Peter. Curse the creators of this cartoon for ruining our chances of getting a new Peter Parker minifig by trying to mix things up. Next we get J. Jonah Jameson. He appeared in a Spider-Man 2 set before, but this is a complete redesign. He now has a blue suit with a red tie, a unique face print, and that combed-back hair in dark gray. This new hairpiece doesn't suit him at all and the old flat top hair was perfect for him in my opinion, so I don't know why they changed it. The good thing about this change, however, is the fact that this piece is exclusive to this set in that color. Nova on the other hand is spot-on. He comes with a new helmet mold and some nice torso printing. However, he, too, is missing his boots. TLC should have started making dual-colored legs a long time ago. Here are some reference images to compare them to. Okay, so JJJ's hair may not be completely black in the show, but I still think they should have given his minifig a black hairpiece. His suit is also not quite the right color. He rarely appears in person in the show (including the episode this set is based on) and is usually seen on screens around New York, so this is the best picture of him I could find. I guess I should be happy they included a minifig of him at all. In the episode, it was actually Mary Jane who was at the Bugle during Beetle's attack, so it would have made more sense to include her, but we got her in the Spider-copter set one year later, so that's ok. All three of them have back printing. In JJJ's case I'm using that term loosely since it is only comprised of two lines, but it's nice that they went through the trouble of adding them. Both JJJ and Nova come with angry alternate faces. It almost looks like they're trying to out-angry each other. Who do you think looks angrier? Let me know in the comments section below. Now let's talk about the bad guys. Even though he would be better off in a Fantastic Four set, it's great to finally get Victor Van Doom, one of the greatest Marvel villains ever and in comics in general. He comes with a dark green hood which was new and exclusive in that color at the time, and he is the only minifig in this set that has leg printing. Beetle is a regular minifig with wings. The metallic printing on his face and torso is pretty nice, but I wish it would have continued onto his legs as well. The Beetle looks quite accurate to his on-screen counterpart. The only thing that could have improved him is a new helmet mold with pointy eyebrows/antennae. Doctor Doom, however, looks nothing like he does in the movie. I just don't understand how Lego could have messed him up so badly. Maybe they were working off of early concept art or something. Here is a back view of Doom and Beetle. Beetle would be a pretty boring minifig if it wasn't for his wings which are awesome with their holographic texture. They are so mesmerizing, I could look at those things all day. This piece also appeared in trans. light green in the Galaxy Squad sets which came out at the same time. Here they are without their gear. As you can see, they both have back printing as well. And no, Doctor Doom does not come with an alternate facial expression, which is fine since you can't see much of his expressions due to his mask anyway. Here's a look at Dr. Doom and Nova without their headgear. Some say that Doom's face looks too cartoony, but I think it looks fine. Nova is wearing stylish goggles as a way of explaining his white eyes. It's a far better explanation than the Bat-sweatband. They did the same thing with the masked Wolverine later. Here are all the figs with their accessories. JJJ comes with a camera so that he can take "more pictures of Spider-Man!" Beetle comes with one of those overused ADU guns which is a very poor representation of his wrist-mounted blasters. I hate to say it, but even those bulky new stud shooters would have been a better representation of his weapons. Spidey comes with his usual string of webbing and Nova comes with some Iron Man style translucent studs. The weird thing is that they are red while his powers have a blue glow in the show. Doctor Doom sadly doesn't get any accessories, but who needs weapons when you have a jet with a claw and flick-fire missiles. The Build The first bag contains Spider-Man, a brick separator, and the parts to build the ground floor of the DBC building. After a quick and straight-forward build, you get this. The dumpster and street lamp are separate from the building and since the lamp post is not built onto any baseplate and is quite top-heavy, it gets knocked over pretty easily. Maybe it's meant to be that way, but I would have preferred it if you could stick it onto the baseplate of the building on which there is unfortunately not enough space to do so. As you would expect, the second bag has the parts for the first floor of the building. This is also the bag that contains Beetle. After another fairly simple build, you'll find yourself with a two story building with a spiderweb one side and a fire escape on the other. However, you have to apply three stickers during this section of the build which is never fun. Can you guess what's in bag number 3? Yup, the second floor of the building. You don't need superpowers to predict that one. Also, this bag contains Nova and Jameson. The build of this section is a bit repetitive since the second floor is mostly the same as the first and it takes slightly longer to build since you have to build the rooftop as well. Also, in addition to the two window stickers you have to apply ten 2x2 tile stickers! Trying to do this without having any of them being crooked is a real pain in the megablocks. The next bag contains Doctor Doom and the cockpit of his jet. Doom's cape is in the usual square white box and the string for the claw is folded up in a piece of tape. Here's what you get at the end of this section. Looks more like an escape pod than a jet at this point. The final bag is the smallest as it only includes the few parts needed to finish the Doom jet. Once you build the wings and tail, you stick them onto the cockpit via Technic pins and you're done. Spare Parts These are the parts that are left over after the build. There is the brick separator of course, an extra antenna, and the usual little bits and bops. What's really awesome, though, is that they give you an extra pair of Beetle's wings! Considering what a neat piece this is and that this is the only set in which it comes in trans-black make this a very welcome spare that you can use in your customs. The Finished Set Here is the complete set. The DBC building looks quite tall, especially when you count the antenna. Comparing it to a screenshot from the episode, the general look of the building is there, although there are some inaccuracies. Aside from the fact that it is obviously way down-scaled, the screens that show JJJ ranting about Spider-Man should have been hexagonal, not square, and should have wrapped around the building. However, considering how many stickers you would have had to apply if they would have made it accurate, I'm actually glad they kept the screen mercifully small. Much like Doctor Doom himself, the Doom jet didn't actually appear in the Beetle Mania episode. However, it did appear in a later episode titled "Not A Toy" in which Spider-Man plays around with Captain America's shield, accidentally drops it in Doctor Doom's Latvarian embassy and has to try to retrieve it. And yes, that episode was as godawful as it sounds. Here's a screenshot of the jet from that episode. Like with the DBC, they managed to capture the general shape of the vehicle, although it doesn't look quite as good as in the show. The color scheme is too dark and it looks kind of blockier. Let's take a closer look at the jet. There is no real way to reel the claw in unfortunately. However, there is a stud on the back of the jet that you can stick it onto. Needless to say, this is not the ideal way of storing it. I would have much preferred it if they would have attached it onto winch instead. The engines on the wings can be turned, even though they don't turn in the show, and there is a flick-fire missile on each side. Even if it's not much to look at, at least it's a very swooshable vehicle. On top of each wing there is a tile with the emblem of Latvaria. There was no such emplems on the jet in the cartoon, but they are useful pieces that make it clear whose jet it is, so I'm glad they included them. There is nothing inside the cockpit except for a seat and unless you want to ruin Dr. Doom's nice dark green cape, I wouldn't put him inside of it. They could have at least printed a control panel onto that empty 2x2 tile. Play Features Since this is a playset, let's look at all the play features it has to offer. Like all playsets, the building is open in the back so you can play inside. On the ground floor, there is a potted plant and... nothing else. Seriously? Is this all they could come up with for this floor? They could have included a security desk, a lounge, a second plant, or anything else! As it is, it's just a boring empty lobby. The first floor is a bit more interesting. There is a safe, a swiveling chair, and a pin board with various pictures of Spider-Man. There is one tile that reads: "The true identity of Spider-Man" which is supposedly what the villains are after. I wonder how Jameson got this information in the first place. Speaking of Jameson, the second floor is devoted to his office where he can sit and yell at his non-present employees, demanding "more pictures of Spider-Man!" It also has a swiveling chair as well as a desk with a lamp and a computer. There is a Technic beam connecting his desk with the ceiling of the first floor which you can remove in order to take off the upper half of the building, but it's difficult to do, so I don't recommend it. As you may have noticed in the picture above, there are a few red pegs sticking out of the building. These are for triggering the play features. Most of them are on the roof. There is one on what looks like an air conditioning unit. If you place Spider-Man holding is web-string on the jumper plate in front of it and push the peg, Spidey goes bungee-jumping off the building. Wee! There is also one that sticks out of the side of the building which when pulled triggers a trap door. The third red peg on the roof can be used to pop off the DBC sign. Why is it called the DBC, you ask? It stands for Daily Bugle Communications since in this version of Spider-Man, the Daily Bugle is not only a newspaper, but a news TV station as well, one that promotes its own highly biased views. So basically the Fox News of the Marvel universe. I guess if you're an old school Spider-Man fan, you could just leave off the "C" and have it just stand for Daily Bugle. The sign above the main entrance wont be so easily modified however. There is also a peg between the first and second floor which when pushed pops out one of the windows on the first floor. The safe is only attached to a couple of jumper plates and has some jumper plates on top of it as well, so you can easily attach the Doom jet's claw to it and rip it out of the building as seen on the back of the box. There are also some SNOT bricks on the corners of the building that you can attach spiderwebs or Spidey himself onto for some wall-crawling and webslinging action. This is not so much a play feature as it is just a feature, but as I mentioned earlier, there is a fire escape on the left side of the building. This was a neat idea as it helps it feel like a building in New York City, but it is executed very poorly. There is no hole big enough for the minifigs to climb down through, so they would have to climb down the ladders from the outside which makes no sense. No wonder Spider-Man always needs to rescue people from burning buildings. There is one more play feature in the form of the dumpster. You can open the lid, put a minifig inside, and make them jump by hitting a tab in the back. Remember, this is before the introduction of super jumpers, but nevertheless it's a pretty strange place to launch minifigs out of. I guess even Super Heroes like to do some dumpster diving. You don't think this was funny? No? Well, me neither, but that's the type of humor that this show loves to use. Sigh. Anyway, let's get on to the ratings. Ratings Design: 2/5 - The set looks ok. Despite many inaccuracies, the DBC building and the jet somewhat resemble their on-screen counterparts and don't look too bad, but they definitely could be better. Build: 1/5 - A mostly unchallenging and repetitive build with an attrocious amount of stickers. Minifigs: 4/5 - Definitely the strongest point of the set. Some of the figs could be better, but four out of five of them are exclusive to this set. Doctor Doom is easily the best and probably the most desirable one - unless the Fant4stic movie portraits him so badly that nobody will be interested in him, but that's impossible. Playability: 4/5 - As you would expect from a playset, the playability is quite high, although I still feel like there could have been more. Parts: 3/5 - Not many rare parts. If you're looking for parts for building your own skyscraper with tan walls and lots of doors and windows though, this set is for you. Price: 3/5 - At 476 parts for $50, this set is a bit pricey, but it is somewhat justified by all the large window and wall pieces. Overall: 3/5 - This set is mediocre at best. Playsets are always a good choice for Spider-Man sets since they give Spidey something to swing from, but unfortunately they are rarely pulled off well. The jet is blocky, the building is bare-bones, and the price feels too high. The only reason to get this set are the four exclusive minifigs. This set was discontinued early this year, but if you still see it on clearance somewhere, go ahead and get one for the minifigs and parts, or buy multiples and use the parts to build a better DBC building. I hope you enjoyed this review. It is part of the Reviewers Academy's 7th Anniversary. We're not doing a big celebration this year due to other commitments, but look out for more reviews with the 7th Anniversary banner soon. Now, if you'll excuse me, I am off to see Fant4stic. I hope it's as fantastic as it promises to be! (2 hours later) I was wrong! I was horribly, horribly wrong!
-
Finally got around to modifying the Avengers Tower. Version 3.0 (Final Version) LEGO Avengers Tower v3.0 by cmay91472, on Flickr LEGO Avengers Tower v3.0 by cmay91472, on Flickr LEGO Avengers Tower v3.0 by cmay91472, on Flickr
-
The title of the thread is borrowed from the final minutes of Batman Begins between Alfred and Bruce. A lot of my progress on my build has been recorded in another thread found here: http://www.eurobricks.com/forum/index.php?showtopic=86363&st=25#entry1995899, but that thread has laid dormant for almost a year now and rather than resurface it, I felt as if there was enough work done to warrant a new thread. If you haven't seen it, check it out. It'll bring you up to speed. So where I left off was a cave that sits on a 4 foot by 4 foot base and I was quickly running out of room to add bigger and better features, so I tore down the southeast wall coincidentally, added an extra table, some more wood for support and bought three more 48x48 baseplates to get things under way. And then it sat... For months... Untouched by human hands... It looked like this until mid-June... I added in an aqua duct, mainly to support and brace the other and inner walls. I briefly covered this in my other thread... But I hated it. It was functional but not aesthetic and even using Lego physics, I couldn't even begin to justify its existence... So I tore it down and started over and came up with this design. My plans are to tile the sides and the center of the 8x8 grille plates, but I'm waiting on a ton of BL orders to come in and unfortunately, they're all in there. As you can see in the bottom left of that photo, I added a new platform. I was inspired by one of the comics where the cave features a similarly tiered structure, so I went for it. There are going to be three tiers total, with columns supporting each level, eventually. I'm trying to design a stairwell that will reach each tier, that's structurally sound and visibly appealing but I'm not quite there yet. I've got a few ideas up my sleeve, if anybody has any feedback or ideas, I'd greatly appreciate it! I had enough plates in my inventory to completely finish off the second tier to the structure. After a lot of back and forth, I picked up Man-Bat Attack #76011, I liked the helicopter a lot more than my original 2006 model but wasn't entirely sold on the new Nightwing but decided to grab it anyway, so I needed to add in a landing pad somewhere. So I finished off my columns, spanned the gap and added a pad on the top. I think the best feature that I've added so far is something that's not as mainstream with Batman and the Batcave but still an important part of the mythos none the less, access the the subway system of Gotham City, so I built a subway tunnel. The tunnel serves two purposes, one being it looks pretty cool if you ask me. The second is when I was laying out the expansion, to match my existing footprints, things weren't lining up 100% because of the indentations on the cave side walls on the other half whereas this section goes straight all the way down and doesn't indent. It's going to make things look less uniform, as you'll see later on but I'll do my best to blend it in or incorporate something into it so it looks as if it belongs. The tunnel features a manual sliding transfer section, that can join two storage track sections, that will be enclosed at a later time. Storage Position #1. Storage Position 2. I have it designed so when the transfer track is completely over into the second track, the edge of the platform stops on the side buffers. I will eventually incorporate a locking pin to add another level of detail to it. I've got a few ideas with what I want to do with this area, none of which I think will actually work with the space that I have, so I'm going to come up with a happy medium but it will be vehicle storage. I wanted to house a carousel that was featured in A Long Halloween but I don't think I'm going to go down that road. When I come to a final decision with what I'm going with, I'll enclose the tunnel accordingly. It's either going to be a stand alone cave enclosure or somehow built into this open half of the cave. Also, under the PF Battery Box, I blew a section of the wall out and created an entrance way into this half of the cave. Eventually it will be tied into the rest of this expansion using a catwalk system. One final thing I'm working on at the moment is a rotating suit chamber, similar in style to the one seen in the DoJ trailer... My hope is that they will release the battle suit shown in the trailer and I will keep it housed in here. It rotates manually and I'm going to try and hide the mechanism as best as I can. I could throw a motor on it but it seems like a lot of work for a small effect. Anyway, that's it for now. A lot of it is still underway and unfinished but I wanted to get these pictures out so I could post final product images as they're taken. I don't have a desktop at home so my updates and activity on the forums aren't a daily thing. Hope you guys enjoy the work so far, I've put a lot of time into it these last couple of months. The frustrating part is having an idea, executing it, running out of parts and waiting for bricklink orders. Any questions, comments, concerns, or ideas are welcome and greatly appreciated. Enjoy, TGB
-
Hi, I am citizen, a teenage LEGO fan from Hong Kong. I have been following this forum for years, especially the Licensed one, but this is my very first post here, as I have just finally decided that I should register an account here a few weeks ago. As an introduction piece, I really want to have something that can impress you, and I think I just had one recently.(Hopefully, it can impress you :P ) So, here...we....go.....wait, wrong franchise! :o Stark Tower - Front by city son This is a creation I built specifically for a contest of another forum, Toys N Bricks. The topic of the contest was to build a scene right off the screen of either the first Avengers movie from 2012, or from the epic sequel, Age of Ultron, this year. As I haven't got the new sets, and I couldn't really take closer looks at Age of Ultron scenes until its DVD release(Can't wait for it!!!!!!). So I started out planning on scenes from The Avengers, but which one? It's a tough choice as I loved so many different scenes, Cap and Iron Man Rotor scene, Hulk punches the Leviathan, the forest fight.... SO MANY OF THEM!!! However the contest set a size limit without HEIGHT LIMIT, which immediately took me to the idea of building something tall, and when that came into my mind, it didn't take long for me to get to the iconic Stark Tower. Besides, the final battle in New York is like the climax part of the first film, so it makes sense for me to choose it if I wanted to build something impressive. :) Stark Tower - Side 1 by city son Stark Tower - Back by city son Stark Tower - Side 2 by city son Well, I didn't shirk, even though the contest only asked for a scene, I still pushed myself to use up all my brick resources to finish off every last side of the tower. One of the toughest part for me in this process is the lack of source materials, as in the movie, there wasn't much close up scenes of the "back" of the tower, so I just added a bit of my own imagination to fix that part. Sad thing was right after a few days I have finished this beast, LEGO Avengers Video Game new gameplay video on YouTube showed clearly how the back of the tower looks like, yet, I think my version can...well pass myself. Could be better though, could be. :( Cap, Thor and Hawkeye 1 by city son Cap, Thor and Hawkeye 2 by city son Cap, Thor and Hawkeye 3 by city son I tried to fill the whole screen up as much as I could, without making it a big mess, so I put something from the bottom to the top literally. Let's start from the bottom. I picked the scene from the very end of the final battle, where Cap and Thor are fighting side by side with the Chitauri Soldiers. Yeah, I put Hawkeye there as well, which has probably reduced a bit of accuracy here, but I thought it will be weird not to include the full team, while Hawkeye was supposed to be somewhere in/on another building far away and out of the scene. Trying to be original, I built those spear-like weapon in a really simple manner for one of the Chitauri Soldiers, not a big deal, but I am quite happy with that little touch. Chitauri Chariot in action 1 by city son Chitauri Chariot in action 3 by city son For the middle part of the tower, I have built two different Chitauri Chariots, one 2-seat and one 1-seat, which are one of my favourite parts of this MOC. I built them in the very last stage of the project, but they turned out quite pleasing. To be honest, I can't stop playing and flying these little vehicles around my flat! Two-seat Chitauri Chariot by city son Two-seat Chitauri Chariot - Front by city son One-seat Chitauri Chariot by city son One-seat Chitauri Chariot - Back by city son Again, for the sake of originality, I built my very own version of these alien chariots. I browsed through the web searching for tons of source materials, and based on those 2D stickers from the official set, I managed to connect all these gold pieces in every last ways I could think of. And it worked perfectly! Believe me or not, I have tried my best to build these blurry flying vehicles that appeared on the big screen shot by shot out of bricks! XD Stark Tower - Rooftop by city son Puny God face off 1 by city son Close the portal by city son One way trip by city son The last part is the top of Stark Tower, which is the main focus of the whole build, and most of the actions happen right here. I have selected 3 iconic scenes from the final battle to be included here. The first one is the PRE-puny-god scene. Well, I did plan on having the Hulk smashes puny god scene in the beginning, but due to the limited scale, turned out it's impossible to fit the man with anger management issue in such a small room. Then, I chose the scene where Black Widow is ready to close the portal, while Dr. Erik is panicking at the back. (Sorry for not having a grey hair piece for Erik.) And finally, the part where Tony decided to sacrifice himself and take the nuclear with him all the way up, even though he knew it's a one-way trip. S.T.A.R.K. by city son Another "S" by city son Apart from the scene, there were a few challenges I have faced through the build, or stuffs that I really wish you can see my effort. First, it's the STARK logo. I have browsed through the web to look for previous Stark Tower done by other LEGO fans around the world, and first of all, all of them are incredible, but somehow I felt like no one was paying the attention that the logo deserved. It's like the most iconic part of the tower, and it's the greatest fun to work with font. I am very very happy with the outcome myself, no sure what do you guys think. The other major difficulty I faced, was the large outer platform with the "S" in the middle. Took me days to find a way to make a perfect circle(almost ;) ), build an "S", and build smaller yellow circle around the "S" at the same time. Another great challenge is the weird curve "windows" on one side of the building. I didn't go with the way most people do, with trans bricks, coz I don't have those...BUT the real deal is all the angles and Maths. Try to build one yourself and you will find it really tough because bricks are not like paper, you can't really curve them up while placing them at an angle but still want them to have a smooth clear cut "straight" horizontal edge at both ends. I'd say it would have been better if I have enough 2x4 tiles to fill the whole lower half of that pile of windows. I really hope you guys enjoyed reading this long boring introduction of my biggest MOC ever, and I really wish experts and master builders here can give me some constructive comments to improve myself, as there is always room for improvement, especially for a youngster like me :P. Really enjoy all the cool posts and awesome MOCs on this forum, and last but not least, the voting is still on right now, so if you really like my creation and you are coincidentally a member of Toys N Bricks, AND MOST IMPORTANTLY you think mine is better than other really cool builds from other contestants then I humbly welcome one or more votes from you! Thank you once again for taking your time reading my long long post! =D
-
-
I figured to help all around I would ask some things about the "super jumpers". Now I check out the LEGO forums about the "super jumpers". And it seemed questionable if any changes to them are going to be made or if they are going to be discontinued. So I figured make a dedicated topic to help get some thing done with them. Now with my personal experience with them is the legs are griped to tight. And I was to afraid to use it as intended. Now I heard that putting plated on the "super jumpers" before the mini-figure keep the legs from breaking. And that they could also be used as a mini-figure stand. Plus, I think it would help if any pictures of "super jumpers" breaking the legs would be helpful. And I put up a poll in an effort to give an idea what people think of the "super jumpers". Edit - What happen to the poll I put up?
-
Just for the fun of it =) The Reference: Das Dynamische Duo by bricks @ raminator, on Flickr The Figures: Purist Marco Reus and Pierre-Emerick Aubameyang by bricks @ raminator, on Flickr
-

Super Hero "Teleporter" - Pad Printed & Injection Molded
KO-Custom-Minifigs posted a topic in Minifig Customisation Workshop
Hello Everyone, I am brand new to the forum and I wanted to make an account to share with everyone my first pad printed custom minifigure! I give you... "Teleporter" http://s16.postimg.org/43gtrjz39/Teleporter_1_Smaller.jpg It features pad printing on the: head, torso (front/back), hips (front/back), Legs (front/back/sides) The custom red armor and the tail pieces are made of recycled LEGO plastic using an injection molding machine. The tail is fully posable and uses a ball joint to connect to the red armor. If you'd like to see more photos, or are interested in getting one you know where to find it - thanks for looking! Please let me know what you think. -Kyle


.thumb.jpg.d9cbab8618b55e76a6b011927032a695.jpg)