Search the Community
Showing results for tags 'remote controlled'.
-
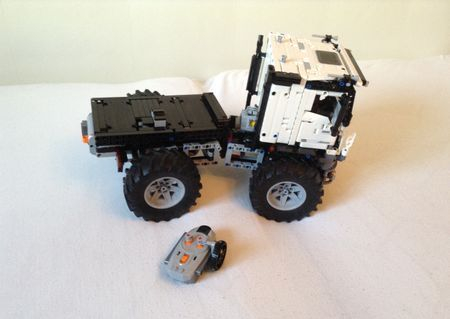
 8860 Studless remote controlled flashback. 5speed with reverse. I still need seats. This is my MOC, not the one by crowkillers. Instructions is being made and shall be uploaded to rebrickable
 -
 Hi, I'm looking for a reliable remote controllable 5+R sequential gearbox or ideas how to build one. If it would have a neutral as well it would be perfect. Please share your ideas and if you are aware of any kind of existing solution please share the link. Thanks, Zoltan
 -
Hi everyone! My newest creation is remote controlled! It's a bus and it's my fifth tiny RC at minifig scale! Hope you like it! My previous RCs on Youtube: , , , Of course I visited the intercity bus station with a camera and the bus again, as I did recently! The type of the bus is Ikarus, but only the body is Ikarus, the engine and chassis is Scania. That's why you see the word 'Scania' on the front. It's possible to travel by it in Hungary. At the area, where I live, the bus company has I guess three of them. So we have more chance to catch it, than to catch . If you read the technical things below, you will see, that it has some disadvatages. But I like it very much and I'm really satisfied with the body! It has some crazy building techniques in every directions. As far as I know, they are my own inventions. Maybe they are already exist, but I didn't know them. My favourite detailes are the headlights, the taillights, the upside-down windows near the gear rack, the covering method of the destination screen and the air conditioner. Technical detailes: It is more difficult to build a bus at this scale, than a truck. For example at a the truck we can use five stud wide frame, and after that we can cover it by tiles, so it won't be too wide. But for a bus we have to use panels to make the windows, they are 1 stud wide on both sides, so if we want to stay in 6 studs, the frame can be only 4 stud wide. And Technic prefers the odd numbers... It's not good if the driven wheels leave the ground, so the rear wheels are not completely fixed. Looks like, if I make something better, something becomes worse. It's the first time, that I used servo motor for steering. The steering features are better, the frame is worse. Below you can see an image without the body. You may notice, that there is an arch in the frame, like a bridge. The AAA battery box is at the back, and its weight causes this deformation. Furthermore there's no possibility to fix the body by studs after the servo motor. Therefore the mudguards touched the rear wheels. I had to raise the rear part of the body by half plate. It causes some deformation, too And finally I have to tell you in secret, that the servo motor moves the gear rack on a little bit longer distance, what the inner things allow. So the motor twists the frame. You can see it in the video at . Therefore one of the front wheels sometimes leaves the ground.And almost all of the weight is on the driven wheels, so sometimes the bus wants to go straight ahead, instead of turning. But it's very rear. And finally you can see the small piece of pneumatic hose, which holds the window in upside-down position. The base and the top of the window panel has a different thickness. It depends on its position, in which height the more space in the body is. If I use the window on a normal way, the gear rack pushes it out, during steering. All in all it looks cool and works well, so I'm happy with the result of my fifth attempt! More pictures: http://www.moc-pages.com/moc.php/425778 Thanks for visitnig!
-
This is a MOC I have made based off of the steiger line of tractors. I have decided to put this project on Lego Ideas, and was hoping many you could support it. I am striving for this to become a Lego set. I do understand that there is less of a chance for this to become a Lego set because it is Technic. I would appreciate no negative comments about this Technic creation being on Lego ideas. Only constructive criticism please. If you could share this around, or just support it. Every supporter counts! Here are a few pictures of the model: Link: https://ideas.lego.com/projects/114366 This MOC functions include: Lights All wheel drive Articulated steering Working steering wheel Openable hood to reveal a in-line 6 engine Working PTO A VIdeo of the Tractor: Thanks for the comments and support!
-
Hi everyone! Fortunately I have the time to share here my newest creation! It's a train and it's the model of an ICE 3. It is 196 stud (157 cm) long and contains more than 3300 pieces, two IR receivers, two battery boxes and two train motors. Hope you like it! Oh, and another important information is, that it will be visible on Zusammengebaut 2016 in November and on Bricks am Meer in April 2017 in Germany!At first please watch these two videos! The first one shows a crash. The place, where I made the video, wasn't horizontal, and on the slope the train got a too high speed The records of the second one were made after I repaired the train. Well, I can say it is quite stable construction, despite the building techniques of the front. During the crash, only the boogies fell down! I'm really happy, that it is ready! It took me almost a year to build and become satisfied with the result. You may know, if someone build a train, the front is the most important thing. If it's not good, it's unnecessary to build the other sections. Everything started with an LDD model from a front-idea. I built something in the program, but I didn't like it. Later it came always into my mind and didn't allow me to be calm. So I started to develope the construction. Some month later it looked nice enough to order some parts and make it in real life. It contained so many interesting and strange techniques, that it was a real challenge to put the bricks together in the program, and with real bricks it was hard, too. And the real 3D model was ugly! But I said, that it has to be possible to find out something, which makes the model better. So I made some changes, and some more, and some more, and finally I liked it, and I thoght that I found the maximum! I stored the train (only the front section) and some other parts on the table in the middle of our house. And one night, I couldn't sleep. I woke up and went out to the table to do something. And I don't know why, but I put an element into the middle of the front. And I said 'wow'! It was perfect (for me of course, for you, I still don't know, but I will read the comments :) )! Some gaps disappeared, some sections got new positions. That element made so big changes on the overall look, that it was incredible! I felt high, but next day I was very sleepy. :D More pictures are available here: http://www.moc-pages.com/moc.php/433076 Thanks for watching!
-
Hi everyone, Here's my modification of 8416, fully motorized and remote controlled. An additional function is the working & tilting steering wheel. The PF elements used are: - 1 M-motor for driving - 1 Servo motor for steering - 1 M-motor for lifting - 1 M-motor for tilting the lifting assembly. - 2 IR receivers - 1 Rechargeable battery box Rebrickable: http://rebrickable.com/mocs/Chilekesh/8416-fork-lift-motorized-rc Bricksafe: http://bricksafe.com/pages/Chilekesh/8416-motorized (*.lxf file can be downloaded here). Any suggestions on improvements are very welcome. Happy building!
-
Hi, Here's my modification of 42008 Service Truck set, fully motorized and remote controlled. I decided to keep the original functions (including pneumatics) exactly as they are while adding some extra features as well. The additional functions are driving, tilting of the driver's cabin, headlights, steering and working-tilting steering wheel. I tried my best to keep the original looks (with some visual improvements though) and made the structure as rigid as possible. The PF elements used are: - 1 L-motor for 8x4 driving (with single, shared differential) - 1 M-motor for steering - 1 M-motor for tilting the cabin - 1 M-motor for functions (included in the original set) - 4 M-motors for switches - 2 for pneumatic switches and 2 for mechanical switches - 4 IR receivers - 1 Rechargeable battery box - 1 Led light set, - 2 x 20 cm extension cables, one for the large motor and one for the battery box. Rebrickable: http://rebrickable.com/mocs/Chilekesh/42008-service-truck-full-rc Bricksafe: http://bricksafe.com/pages/Chilekesh/42008-rc (*.lxf file can be downloaded here) Any suggestions on improvements are very welcome. Cheers and happy building!
-
Hi everyone, Here's my modification of Lego Technic 42024 Container Truck set. In addition to original functions (steering, outriggers and container lifting) it has: - 6x4 driving, - 90° tilting of the driver's cabin, - Working & tilting steering wheel, - Fake V8 engine (working), - Led lights, and is completely remote controlled. I used: - 1 L-motor for 6x4 driving - 1 Servo motor for steering - 1 M-motor for outriggers - 1 M-motor for lifting the container - 1 M-motor for tilting the cabin - 1 rechargeable battery box - 3 IR receivers - 1 set of led lights - 1 x 20 cm extension cable Bricksafe: http://bricksafe.com/pages/Chilekesh/42024-rc (*.lxf file can be found here). Rebrickable: http://rebrickable.com/mocs/Chilekesh/42024-container-truck-motorized-rc Any suggestions on improvements are very welcome. Cheers and happy building!
-
 Hi everyone! I'm happy to present my newest Lego creation, the completely remote controlled K.I.T.T.! I'm still young, but old enough to know and like Knight Rider. It's the reason, why I recreated K.I.T.T., the main character of the series. Of course with a huge amount of Power Functions! Driving, steering, working scanner and headlights. Six motors, two extenision wires, two pairs of leds, two switches, two IR receivers and an AAA battery box. As many electronic parts, as possible! :D It is my third model at a bigger scale. The building was very interesting. There were a lot of technical challenges with the chassis and the body shaping was difficult, too, because usually I make smaller models. Hope, that I can make more MOCs at similar scales in the future. There are a lot of Lego replicas on the net. For example I found out, that I use the black minifig shields for the wheels. After it I saw, that Firas has already done it! The working scanner and headlights aren't new, too. But! As far as I know, this is the smallest K.I.T.T., which contains these functions! At first please watch the video! Below I tell some things about it, and later there are information about the fuctions and technical detailes! Hope you like it! :) At first I send a huge thank you the three persons, whose names are at the end of the video, for lending me some PF parts, a camera tripod and making the music! It's the first time, that I don't use downloaded music, so I'm very happy! :) Kitt has an enemy, called Karr. Karr was the first car, but he was evil. I built at first Kitt, but later it came into my mind, that it would be more interesting and unusual to build Karr. But almost everyone likes Kitt, and almost noone likes Karr. So finally I decided to put more Kitt scenes into the video and upload the car, as Kitt. I started shooting. I brought out to the street two reflectors, the car and the camera. There are scenes, where you can see two cars together. The truth is that I have only one. After every scenes I exchanged some parts of the body, and continued shooting, without changing the position of the camera. Later I cut the pictures near each other. And it was shocking to watch the scenes on the computer! I thought, that the red light in the dark night will be very impressive and will look very cool. But Karr looks much better. The overall look of him, and the yellow light definitely win against Kitt. I went out again, to make some scenes about Kitt, but the result wasn't better I don't know why, but my camera likes the yellow light better, than the red light. The appearance of Kitt is not so strong, as I thought at first. It is weak But the screenplay allows you to decide, who wins! :) Despite the difficulties, I really liked to make this movie and like the result. Hope, you like it, too! Driving: The car is drived by an L Motor, with a gear ratio 1:1, through a differential. Steering: It is very simple, too. I used a Servo Motor. The other two functions are more interesting. Working headlights: I used two M Motors. If I push the button on the remote control, I start to operate both ones. One of them opens the lights, the other one switches them on. It is impossible to push and release the button fast enough, so I had to use slippery mechanisms. For the opening I used a clutch gear, you can see it on the bottomview picture. But at this level of cramming, there isn't enough place for a clutch gear everywhere, so I found out a new solution. Between the two connectors, there is a small piece of rigid hose. If the switch reaches its end position, the hose can rotate calmly further in one of the connectors, and the mechanism waits my reaction time. Working scanner: Two M Motors again. One of them switches on the light and the other motor, which starts to move the light. The switching mechanism is very similar to one of the pneumatic autovalve. After it changed the position of the PF switch, it rotates further and doesnt cause damage. The construction, which transforms the rotation of the motor to the linear motion of the red light, contains three liftarms. More pictures on my MOCpage! Thanks for watching!
 -
 Finished MOC Do you remember my Reform Metrac H7X ? Reform also produces the Muli: As the project of my Citröen DS doesn’t really progresses, I do this project in WIP, to compensate. ^^ The functions will be close to the Metrac ones: 4WD with a 4 cylinders fake engine Steering with 3 modes Front and rear PTOs And I add: A pneumatic pump to add pneumatic tools Central joint (it’s only the front axle on the Metrac) Openable cab with a lever and a pump actionning a pneumatic cylinder. The best function! But this MOC will not be manual, because there is not so much room in the chassis. (I think it’s possible, but the playability will be extremely bad) So it will be remote controlled, using the BuWizz. So: Driving by 1 XL by axle Steering: 1 servo by axle. To have the 3 steering modes: a M motors controls a PFs switch -> it changes the sens of rotation of the rear servo, or it stops it. The pneumatic pump is powered by a M motor That was the start: And now I’m here: On these two pictures, you can see the rear PTO. On this side, the pneumatic pump: And here is the mecanism which allows the possibility to get 3 steering modes: The chassis is very, very compact. I think you can put an elephant on it, it will not move at all. For the tools, I think I’ll make a pneumatic arm (The pneumatic cylinders of the Mercedes truck would be very helpful, but I don’t have this set) And for the front I don’t know, so if you have ideas, tell me!
 -
Hello everyone! I´m really happy to present you my next MOC, the Milka truck, which is my 6th remote controlled vehicle at minifig scale! I have built it between December 2018 and March 2019. I have already shown it on two Lego events in Germany, there is an article about it on Zusammengebaut and there is a video on Youtube, in which I am interviewed. It is in German, so if you understand it, it is worth to watch it! Unfortunately I have found only now the time to make some pictures and an own video: The video is a new record from me. It contains the most visual effects among my other videos. I was very happy during the making of it, because last time I have made only rarely videos. It was nice to spend a time again with the camera. It took a little bit longer, as I planned. Because of the complexity I had to record some parts not only once and it was very time consuming to create some scenes on the computer. I´m really proud of the result, hope you will like it, too. Till now it is the most simple and most difficult tiny RC from me at the same time. Simple, because the technic costruction inside is very compact. Difficult, because the modelling of the Scania front and the letters of the word “Milka” meant a really big challenge for me. Now you can find the electric parts just simply near each other in the truck, and the chassis is under the electric parts. It is only 3 studs high. Earlier in the same vehicles you could find 3 pairs of gears, which brought the power from the motor to the wheels. Now it is only 2 pairs. The servo motor for the steering is exactly there, where we need to have it. It can steers the wheels directly, without any long and big construction. The original plane was that I put the receiver or the battery box in the trailer, but finally I found a place for all the parts in the truck. For the chassis I have used a lot of half liftarms and small pieces of rigid hoses. They are very good here, because I can cut them in for example 1 or 1,5 stud long pieces, too. In the truck the battery box is exactly over the driven wheels, so the truck can go very reliable on terrains, which are unfriendly. I mean, it can go up to the pedestrian area in a Lego City and it can destroy everything. The whole truck contains approx. 1020 parts. Most of the bricks are in the body. You can read the world “Milka” on the sides four times, but all the four sides are different. It is changing, how I could fit the side panels, what kind of other parts they have to hold, or how many place I had in the truck near the motors or the other things. During the designing of the cabin, I was afraid, that it will be ugly with the big white panel on the top, but finally I think, it´s ok. If you would like to see and try the truck in real life, visit the Bricky Way 2020 Lego exhibition in Györ, Hungary. It´s not far from Vienna. 7-8 March, 2020! Facebook: https://www.facebook.com/brickyway These are the infos, which I wanted to share you about my newest creation. Hope you like it! :)
-
 What do you kindly think? (For God’s sake I don’t think there is an already created topic for this! If there is, I am so sorry, again ) Best Regards, Idris
 -
A compact sequential heavy-duty 4 speed remote controlled AWD gearbox Each gear of this remote controlled gearbox approximately doubles the speed of the previous. The output shaft contains an integrated lockable differential for AWD. See the video for a WORKING DEMO | FREE INSTRUCTIONS below. GEAR RATIOS 1st 6:1 2nd 3.3:1 3rd 1.8:1 4th 1:1 FEATURES compact remote controllable sequential gearbox 4 transmission speeds evenly distributed gear ratios differential output (AWD) differential lock single rotary catch many mounting points no half studs INSTRUCTIONS [PDF] https://bricksafe.com/files/hdegroot/remote-controlled-4-speed-awd-gearbox---with-perfect-gear-ratios/remote-controlled-4speed-awd-gearbox-with-differential-lock.pdf [3D MODEL] https://bricksafe.com/files/hdegroot/remote-controlled-4-speed-awd-gearbox---with-perfect-gear-ratios/remote-controlled-4speed-awd-gearbox-with-differential-lock.io REBRICKABLE: https://rebrickable.com/mocs/MOC-83457/hdegroot/remote-controlled-4-speed-awd-gearbox-with-perfect-gear-ratios BRICKLINK: https://www.bricklink.com/v3/studio/design.page?idModel=244834
-
 Hey folks, another Motorization: all Functions of the 1989 Batmobile (LEGO 76139) RC controlled - yep the Batman again... Without sacrificing any of the nice details: Cockpit is still there, steering wheel works, just all motor driven and I motorized the guns and the roof and even made a tailored sbrick profile. Building instructions: Motorized LEGO 1989 Batmobile on rebrickable Driven by 2 LEGO Power Functions L-Motors (1:1 transmission) steered by a LEGO Power Functions Servo Motor guns engaged/disengaged by Motor roof opened/closed by Motor special Sbrick profile with programmig and grafics included a lot of space for up to 2 battery boxes/control hubs easily reachable under the trunk hatch (details on my rebrickable MOC page) Watch a Review of my motorized 1989 Batmobile on youtube: The Batmobile from Tim Burton's Batman 1989 with Michael Keaton is definitely one of the coolest, it's not as funky as the 1960s TV version and not as tank as the Nolan version but in my opinion it's simply a beaute! The 1989 Batmobile is using over 3,300 pieces, and over 60cm long. I added a few hundred bricks, mainly LEGO Technic and reused some others. So I ended up with over 3500 parts and (batteries included) almost 3.5 kg. That's heavy! So I needed a powerfull drive. I was thinking about the buggy motors but these are large and I wanted to put the batteries into the trunk. So i went for a pair of LEGO Power Functions L-Motors. These are some of the strongest LEGO motors and very small and efficient for their power and speed. The 1989 Batmobile is sleak and lies very deep on the road so it is geometrically impossible to move up any small hills (or even carpets). It will get stuck with its floor height of less then a brick. So it will only drive on a flat surface anyway. So it can be build for speed instead of torque power which the 1:1 transmission of the two L-Motors will do: It's a speed build, literally. One reason to put the batteries into the trunk was, to reach it easily for changing/recharging or simply switching on. Another reason was, to not put them into the beautifull cockpit with its nice self opening windshield - self opening? Yes, now it is motor driven ofcourse. And you hardly see the mechanics on the floor. Okay, the Batman minifigure included is way too small for the car but I found a Batman LEGO LED light, that fits into the car. Just be carefull when closing the cockpit to not get stuck. Slide-open is no problem. The car’s turbine exhaust by the way does not drive the machine guns anymore (it does in the original) because now a motor engages them. So I could make the jet exhaust it look like a real jet engine - the only exterior I changed. To make the two machine guns hidden, under the hood pop up, just press a button now. The Batmobile comes with nice little Bat emblems printed on the wheel rim - try not to lose them while driving, they are rare parts. The set of specially designed tyres for the front wheels is steered in a very specific geometry. I took care to keep that working the exact same way because it works very well for steering. The Build was complicated, took me weeks to get it right. I didnt want to change the exterior and as few as possible from the cockpit. You shouldnt see the opening mechanics. And I wanted to have all the features working, even the steering wheel (though steering is handled by a servo motor now) Every time I thought I got it, something else made problems, untill finally it all worked out. You can skip the trial and error (and breaking old LEGO gears) part: I made instructions and made them easily readable, so you can have it speed build in no time. I believe everyone should be able to build a LEGO set and try to make my instructions like that. Now it's hard to say, which one is the best batmobile motorization I ever made: The Lego 76139 1989 UCS Batmobile has more functions: motor driven MGs and a motor driven roof, the remote controlled motorized Lego 76023 UCS Tumbler I modded however has a full steerable front suspension for the independen wheels. my special Sbrick profile with some automated scripts is included I even made a cable layout for the power functions cables and extentions if you ended down here you may also be interested in or
 -
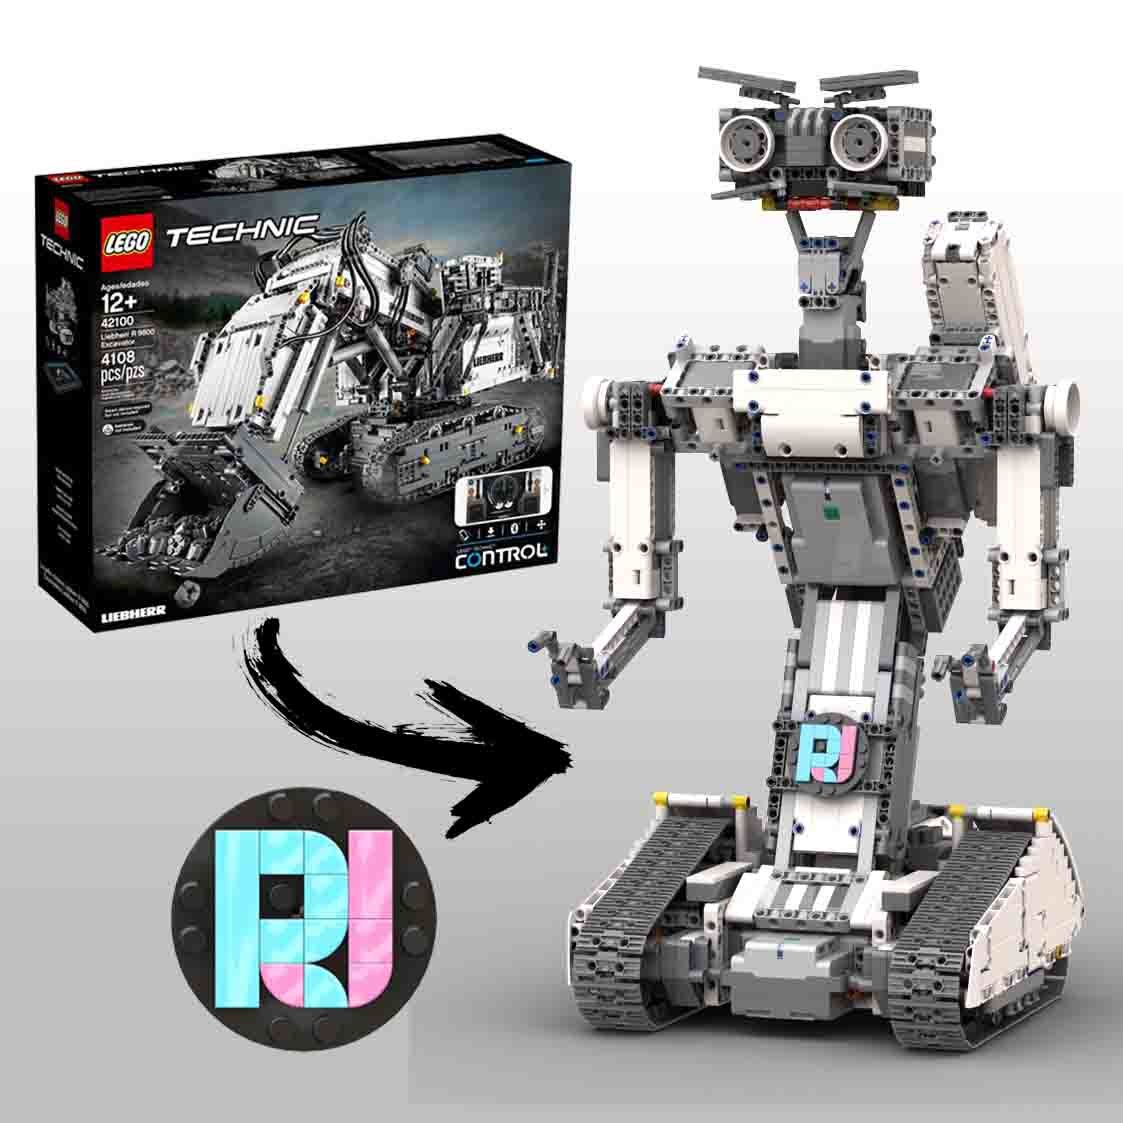
 Johnny 5 needs your support to become an OFFICIAL JOHNNY 5 LEGO SET. Click the link below to support and feel free to share. - Link Removed - Who is Johnny 5? Hello, Bozos! Those who don’t know him, Johnny 5, also known as “S-A-I-N-T Prototype Number 5” or Number 5 for short, is a very lively and inquisitive military robot prototype who’s perpetually hungry for more “input”. He is the star of the 1980’s movies Short Circuit and Short Circuit 2 and a TV special called Hot Cars. He became sentient when he was luckily struck by lightning during a combat demonstration. Although he is designed to serve the military as a robot prototype, he has an adorable child-like behaviour and has a great respect for life. He is a peace-loving robot and refuses to use his military capabilities to harm others. Despite being very intelligent and inventive, his naivety and trusting nature has been taken advantaged of on several occasions. Why Make a Johnny 5 Lego Set? In Short Circuit 2, Johnny 5 set up a new business with his old friend Ben Jahrvi that builds and sells toy robots made in Johnny 5's likeness. This little robot never made it into actual production after the film. Johnny 5’s popularity and the unavailability of access to these cute little Johnny 5 robots made people clamour for this toy. To date anyone can google sites for 3D printing Johnny 5 robots and websites dedicated to producing both life-like and miniature Johnny 5’s. Johnny 5 is one of the iconic fictional robots in cinema to date. He’s part of every child who’s lived through the 80’s like me who are now AFOLs and longed for the Johnny 5 toy that never came out. Design This model is fully motorised using Powered Up motors and hub and controlled through a mobile device using the Powered UP App. It uses Technic parts to ensure stability of the structure, and System parts to capture the look and form of Johnny 5. The following are the playable features of the model: Movement – This model can move around on tank tracks and uses skid steer to change directions. Body – Johnny 5’s body can tilt using a Powered Up L motor and controlled using a mobile. Arms – Arms can be raised and lowered individually using the Powered Up App. The fingers can be adjusted manually as well as the elbows. Head – The head can be tilted and turned using the Powered Up App. Eyebrows – Eyebrows can be manually adjusted to suit the desired facial expression. Laser – The laser at the back can be raised and lowered using the Powered Up App. Total Pieces: 2,711 Dimensions: Studs: W 68.4 x L 36.1 x H 73.5 Inch: W 21.5 x L 11.4 x H 23.2 cm: W 54.7 x L 28.9 x H 58.8 Weight: 99.8 ounces or 2.83 kg
 -
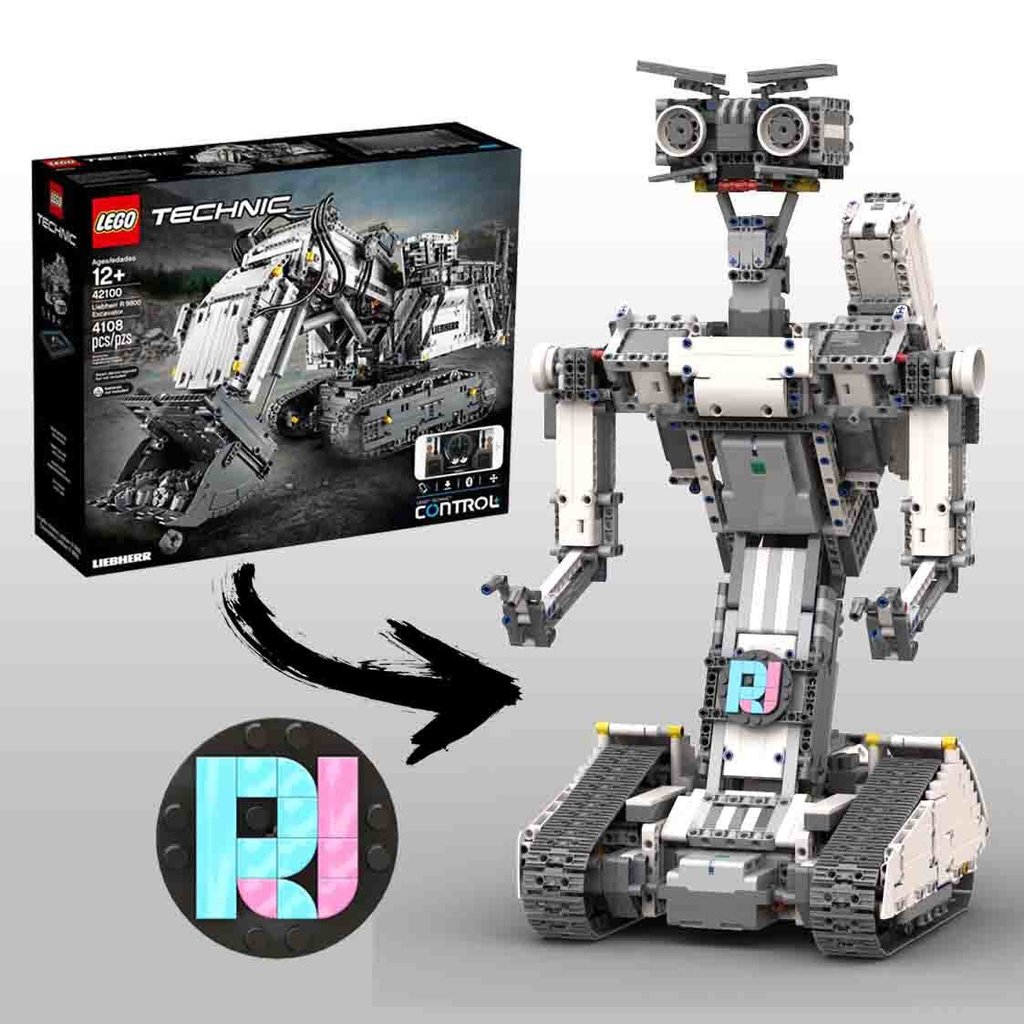
This is an alternate build of the Lego Set 42100, Liebherr 9800. Parts list used in the MOC is listed so you can opt to just buy the required parts instead of buying set 42100.Motorized features include: Tank drive for both tracks Arms upward/downward movements Head turn Head tilt Body tilt Manual play features include: Upper and lower eye flaps can be moved to show facial expressions. Finger movements. Limited manual arm movements Here's a link to the YouTube video to showcase its movements: RJ's Johnny 5 YouTube Video If anybody is interested, building instructions are available at Rebrickable.
-
Hey everyone, As many of you probably already know, I made a WIP topic a while back for a similar kind of buggy, but..... I had not realized all the stuff that I had to do before beginning the buggy project, so finally the weather is getting nicer and I began the project once more. This time, since I've decided to go for a light and durable kind of buggy, I am using 1 L motor directly driving a differential and a Servo motor for steering. Along with a Rechargeable battery box and V2 receiver for the power source. It also has full independent suspension, which needs some modifications at the moment: So that's what I have so far..... The big problem I have is that the suspension is to hard for off road terrain (grass, dirt, small rocks). This needs to be fixed, especially because the chassis is pretty low. Another problem is the tendency to understeer on dirt. I hate understeer so much! Unfortunately I don't have any solution to this problem because I want to keep it as light as possible so adding some kind of weight in the front is out of the question. The only other thing in the front besides the servo, is the receiver which will actually be placed more in the middle of the chassis. ( Also the grey 15L liftarm that is placed over the front axle is just to keep the suspension from bottoming out since there are no shock absorbers at the moment for test driving)
-
Hi! Sometimes we can hear in different Lego communities, that it's an exciting activity to build out of our comfort zone. And it's completely true! Well, it's my second creation at this scale, but the first one, which is a model of a real vehicle. (My Johnny English Truck was a replica of the functions only.) I'm very curious, what you think about it. The bus is a completely remote controlled 1:24 model. (length: 64 studs, width: 14 studs, height: 17 studs, approx 2050 elements) It's possible to drive it, to steer it, and to open and close the doors separately. You can find the technical detailes and a short text about Credo buses below, after the video. Nowadays Credo buses are well-known in Hungary. They are produced by the Kravtex-Kühne group. At the beginning, the group used a Czech license, but the Econell 12 (presented at the end of 2011) is completely Hungarian development. I often travel by Credo buses between the place where I live and the university. Unfortunately, they are usually older types. But I have already travelled by the Econell 12, its very comfortable. Picture of the real: If you search on Google for Credo buses, you may notice, that the wheels look very small. Its the speciality of Kravtex-Kühne group, some of their buses are produced with smaller wheels, so they are lighter and they dont need so much gas. Big buses with small wheels looked a little bit strange, but I think the Econell 12 looks great with the big black mudguards/fenders. I think the new front and rear panels with the black frames around the lights are fantastic, too. Behind this link you can find a lot of pictures about the real Econell 12 and other Credo models, too. Choose option 'Galéria'! And now pictures: The most tricky part of the bus was the front. It's only 3 stud long, but contains as many crazy building techniques as possible, and one more! I'm really proud of it. I will show you later, how I built it. I think it's the minimum. Technical details: The driving mechanism contains two L motors, both motors drive one axle and this axle drives the differential. I used a servo motor for the steering. The doors are opened and closed by two M motors. The chassis is very long, but I had to put two holes in it, because the doors need space. Due to the holes it was impossible to find place for everything at this level. But there are a lot of space under the roof, so the really interesting things are under and around the air conditioner. The spinning of the motors is slowed down by worm screws. The 1x3 technic half liftarms convert the spinning to horizontal motion. The video shows how it works, these pictures below show how it looks like. More pictures on Mocpages, as always! If you visit Hungary, don't forget to try to travel by old Ikarus buses and new Credo buses! Thanks for watching!
-
 Hello! This moc was made a while ago (last year), but I realized, there is no topic about it yet. I wanted to make a heavy and fast trial truck from Zis e134. Original model: My version: folder: http://www.brickshel...ry.cgi?f=496827 Basically, it was built for truck trial race, so it has a "propulsion motor/weight" ratio, each RC buggy motor carries ~ 1 kg. There are 4 buggy motor built in, each axle has one. Only two gearings (40:8 and after that a 24:8 reduction) are in the drivetrain in each axle, so I hadn't problems with efficiency. Total wieght became 4190 g. I used 1957 parts to build it. It's my longest and heaviest trial truck yet, total length is 610 mm (width: 283 mm). The 4 motors give enough power to reach 1,7 km/h top speed (flat surface), I used two RC units to power them. I think the most important part in these 8x8 trucks is the suspension. I tried to make a long travel one, which allows the wheels to make contact with the ground in extreme terrain also. The rear axles are built in a unit, which has a linkage (see pictures). This unit can bend also, but not sideways. The two front axles can bend sideways, and lenghtwise also. So without springs, the suspension does it's job: The second and third axle are connected together with these bars. They seems weak to here, but I can say, there weren't problems with those during the tests and races. They don't hold the axles, only make positioning, but of course, some force can be appear: Bottom: I made some details, like net in the driver's door, flags, grilles to the front: This truck was able to drive in heavy snow. Pictures: http://www.brickshel...y.cgi?i=5398922 http://www.brickshel...y.cgi?i=5398926 http://www.brickshel...y.cgi?i=5398931 http://www.brickshel...y.cgi?i=5398933 http://www.brickshel...y.cgi?i=5398940 http://www.brickshel...y.cgi?i=5398970 http://www.brickshelf.com/cgi-bin/gallery.cgi?i=5399011 http://www.brickshel...y.cgi?i=5398941 VIDEO: SNOW VIDEO: Hope you like it.
 -
Hi everyone! This is my newest creation, a remote controlled minifig scaled monorail, which is not fast, not modern, not streamlined, but old, dirty and slow. Despite or because of these fact, I hope you like it! The video: Maybe you remember my RC STS crane (http://www.mocpages.com/moc.php/380083). The temperature was +1°C in that video, in this video it was +42°C! The bridge and the other things under the track contains approx 1000 bricks! On the last Malug meeting we made a bridge building competition and after that we got the bricks. What a cool thing, without them, the train destroyed the track. And an advice: if you build a monorail, don’t make the video in a rock-garden. Find a flat and horizontal table, and your life will be very comfortable! :D (to make the scenes with the bridge took more than 4 hours, I had to rebuild the whole track after every failed record) The Track looks simple, but it has to be strong and stable, because the train’s centre of gravity is in a high position. Of course the technic pieces are the best for it! The blue 2L pins are necessary. If we use only the small pins (with stud on one of its ends) the system part of the track can leave the technic part easily. Behind the windows: I found out the method I used, while I was building my RC Mercedes Citaro (http://www.mocpages.com/moc.php/349750). The main feature of this method is that the model has an only-technic module inside, and it is covered by system elements and walls. The inside modul is completely independent, it can work perfectly without the system parts. In my Mercedes I used this only at the driving mechanism. The main advantage of the construction is the stability. The technic pins and liftarms (built in three directions) are strong enough against the forces caused by motors and gear ratio (and crashes…). More pictures: http://www.mocpages.com/moc.php/392844
-
Finally, the 2022 LEGO 10300 Back to the Future Time Machine the DeLorean - motorized with powered up ★ Building Instructions on Rebrickable (klick) ★ Features remote controlled motorization - fast driving, 40° steering angle - No scratching gears or rubbing tires Cockpit untouched not flying, but you can still modify it for Back to the future I, II and III version easy to reach Battery box for charging and switching on Off Battery box, Motors and Cable well hidden to not change the looks LED light kit fits in (discount code included) will add Instructions to make your own adapter to power the light kit from the buwizz instead of a seperate battery polygons very close to the movie (not flat as LEGO did it) Multi language instructions: ►english ►deutsch ►italiano ►française ►español ►čeština ►русский The Partfinder: An Inventory of left over parts in all bags to find the without scrubbing through all bags while buildingfor building from scratch Buwizz Profile - my programming for the buwizz included. ★ Details 40° of steering angle with virtual pivot point to not rub against that narrow frame Driven by upgeared large motor No Batteries in the interior, it is still there. Hood is still opening. switch the car on and off and charge from below I added a fix for the gull wing doors to stay up. Also I took the liberty to change the colors of some red/orange/tan bricks that you could see when opening the doors. I will put the bricks needed into the spare parts of the inventory. No instructions for the lights included, but they come with the Light kit. AND: I bought all my light set from Game of Bricks. And (after talking to them) I can give you a discount for a light kit for any of my motorizations. The code is included in the downloads.
-
(1).thumb.png.b4d6c907fe73903aec1adfd3cd481a19.png) i just created some Lego battlebots maybe im hosting a little competition in Singapore during December holidays so far i have made a literal tank of a battlebot (brick on the floor with rotating cylinder) and it works decently here is it going against a smaller bot https://www.instagram.com/s/aGlnaGxpZ2h0OjE3OTYyNzUxNzczNzYxNjg4?igshid=MDJmNzVkMjY= thats the fight of 3 rounds also the smaller one got completely demolished lol
i just created some Lego battlebots maybe im hosting a little competition in Singapore during December holidays so far i have made a literal tank of a battlebot (brick on the floor with rotating cylinder) and it works decently here is it going against a smaller bot https://www.instagram.com/s/aGlnaGxpZ2h0OjE3OTYyNzUxNzczNzYxNjg4?igshid=MDJmNzVkMjY= thats the fight of 3 rounds also the smaller one got completely demolished lol -
 Hello everyone, this model of a Tower Crane is made only with 1166 pieces and controlled with either smart device or physical remote. In order to all functions of that model, you get a complete overview in this article how to build and how to control this crane. You can find instructions here if you're interested in building this model. Summary of Functions & Features remote controlled with PoweredUp 2-way-gearbox to select between functions motorized hook, trolley and 360° crane rotation Hub with batteries as counterweight modular building with extendable tower Minifigure scale to fit City layouts openable cabin 83cm superstructure length 70cm tower height Impressions Electronic components The crane uses the newest PoweredUp electronics to power all the functions. In order to remotely control this model, a physical remote pad is not mandatory because the crane is also controllable with optional smart device and PoweredUp app. Shaped with some system pieces, the PoweredUp 2-port hub with batteries included fits perfectly as counterweight and is easily replaceable. Simply turn on the hub by finger press and connect them to either PoweredUp app or physical remote to let the fun begin. The official set 76112 Batman RC Batmobile offers all electronic PoweredUp components they are needed to control this Tower Crane. Trains (60197, 60198, 60336, 60337) from the City theme are also nice and welcome starting packs for electronics, because they all include one PoweredUp hub and a physical remote pad, which then requires only 2 additional medium motors. Controlling the crane Heart of the design and probably the most interesting part building this model is the controllable gearbox behind the cabin. Where motor A controls the movement of the trolley, the functions of motor B are selected through gearbox. The following configurations are possible when playing with this crane and two motors together: Motor A - Motor B Trolley - Hook Trolley - neutral Trolley - 360° rotation For the crane it is very important to have a neutral position for rotating the superstructure. In case this function is unselected, the crane can freely rotate and prevent from falling. This is a feature that can be also seen on real Tower Cranes. All functions are secured with clutch gears to prevent damage. The winch for the hook has also a safety mechanism included. This holds the cargo even when the function is unselected. Controlling the crane is thinkable easy. In the PoweredUp app it just requires a profile with two slider - one for motor A and one for motor B. That means that this crane is controllable with a custom profile or even with the available one from Batmobile. Keep in mind that controlling the model does not require a smart device by using the physical remote pad. Building the crane Splitted in separately parts, building this Tower Crane feels like constructing the real thing. Official strings (part 37597, 56823) are used in this model that are widely used with many lengths in other Technic sets. Of course you can use any other strings you want. The crane uses a modular building style where each part of the tower fits to each other. The inventory includes all parts that are required to build exactly one middle section, but it is still possible to omit and to create a crane with a lower height of the tower. Furthermore the height of the tower can be extended by replicating a middle section stacked to each other. A higher tower then requires a longer string for the hook for sure. The following inventory shows only the parts they are needed to build one more middle section: Made with Minifigure The cabin can be opened to put a Minifure (without hair or hat) inside. Since this Tower Crane is made in Minifigure scale, it matches perfectly each layout with Trains or Construction vehicles also in the City theme. Instructions Premium instructions for this model consists of 283 pages with high quality images and building steps very close to the Lego Technic ones. The instructions helps alot on how to connect strings and wires correctly. Following are some example pages to show the quality of instructions: Goal with this model was to create a Tower Crane that is not that big and expensive and buildable for everyone. Tons of hours are spent to experience with balancing and stability. The end result is pretty neat, the crane works just perfect but dont expect too heavy loads on it. The model fits all standards for easy building and color-coded components. If you're interested in building this model, you can buy instructions here and support me and my future work. Have fun with this Remote Controlled Tower Crane. Follow me on Instagram for updates and news
 -
Hello everyone, I want to share a new creation. This time it is an alternate build (B-model) for the Liebherr LR 13000 Crawler Crane set #42146. You can find instructions here to build the model by yourself. 100% made out from parts of donor set 42146 with no additional parts needed. 100% controllable with official Control+ Application. In order to all functions of that Liebherr HS 8300 Dragline Excavator, you get a complete overview in the following article on how to build, control and calibrate this alternate model. Summary of Functions & Features remote controlled tracks and 360° superstructure rotation remote controlled boom remote controlled independently hoist-rope and drag-rope controllable with official Control+ App for Smart Device using 6 motors and 2 hubs spinning radiator fans detailed cabin playful details like fire extinguisher, ladder, railings and exhaust pipes brick-built bucket 133 cm / 52 inch long 100 cm / 39 inch high high-quality premium PDF instructions includes guide how to calibrate the model Impressions Main control The Liebherr HS 8300 Dragline Excavator is designed to work 100% with official Control+ Application using the already known interface from its main set. Driving tracks and rotating the superstructure works exactly like the LR 13000 does with the original designed buttons on the app interface. Boom control The giant boom of this alternate model is controlled with the right app lever. It drives the longest rope (shown in blue) through pulley mechanism to raise and lower the boom. The highest and lowest position of the boom depends on the limitations of the app after proper calibration of the model. The boom stops automatically in the lowest position to always ensure a 360° rotation of the superstructure without colliding with the tracks. A linkage mechanism slightly moves the nose who is helding the drag-rope and ensures that the app can detect the highest boom position during calibration. As a nice addition, a spinning radiator fan is connected to the same motor that drives the rope for boom. The second fan spins freely. Hoist-Rope & Drag-Rope Controlling the bucket works like the real machine with an independently hoist-rope (shown in green) and drag-rope (shown in red). The hoist-rope is controlled either up or down with the left joysticks vertical movement. By horizontal movement with the same stick, the drag-rope goes in and out. Since this two ropes are controlled by just one joystick, combinations with both ropes are possible and also needed for proper playing. This requires a bit practice though, but makes it possible to control the bucket and two ropes together with just one (steady) finger. The length of the hoist-rope depends on the app limitations for that joystick movement, meaning that the hoist-rope can't go too long before the app stops the motor. On the highest position of the boom, the bucket can reach the ground with fully extended hoist-rope where boom and hoist-rope are in limited positions controlled by the app. During calibration the app also detects the most inner position of the drag-rope. Working under ground With lowered boom and extended hoist-rope, it is actually possible to dig something below the model. This makes fun by placing the model on a table for example. Calibration For a correct calibration by the Control+ app, it is required to separate the hoist-rope from the drag-rope. In the instructions there is a full guide included how to calibrate the model during building. Additionally there is an extra PDF guide included that explains how to calibrate the model at any time. Please make sure you have completed the calibration to ensure the best playing experience with this model. How to build Building the Dragline Excavator starts with the base from the LR 13000 main set. Make sure you build the undercarriage with book 1 until step 343 is completed. Before you continue building, check the tracks und turntable function. After the correct calibration with Control+ app, the instructions for the HS 8300 takes over to complete the alternate model. The premium instructions for this model comes with 338 pages of high-quality images and building steps to ensure a satisfying and slightly challenging building experience for a 18+ set. Make sure to test all functions and alignments of ropes through the building process. Happy people with sealed parts can open bags 3 to 5 to complete the build. Connecting ropes with spools and making nodes can be an annoying thing even for the main model. If you already have built the LR 13000 main set, you can let the spools with ropes connected. The alternate model starts with wound up spools during the building process. Controlling quick guide To become a real Dragline expert under the sun, here are some quick tips for controlling the model: 1) Place the model from the left to the right At the beginning, place your model driving from the left to the right to match the joystick interface for the Control+ app. 2) Sliding bucket over ground This is some basic control for Dragline Excavators. Slide the bucket over smooth surface by controlling the drag-rope winding inside simultanously with the hoist-rope slightly going down. 3) Moving bucket along the boom As advanced controlling, this requires a bit practice but also avoids loosing cargo when the bucket moves along the boom. The drag-rope should go out simultanously with the hoist-rope going up with a bit tension on both ropes. 4) Unload the bucket On a loose drag-rope, the bucket always hangs in the air on the hoist-rope. Simply give some length on the drag-rope to tilt and unload the bucket. 5) Keep watching the drag-rope The app itself cannot detect outer limitation for the drag-rope. In case the drag-rope goes out too far, it is possible that the rope slips over the spool. Treat the drag-rope always with a bit tension. 6) Avoid tension on same direction This case is also not detectable by the app. When the drag-rope goes in simultanously with the hoist-rope going up, there is too much tension at any point. As a result, the parts holding the bucket are going apart at the weakest pin connection. Giving some length on both ropes and connecting them together solves this. Final note Goal with this alternate model was to create something else from the hard discussed Liebherr LR 13000 Crawler Crane. Rebuild, re-calibrate and having fun is exactly the way how this model works. The app goes hand in hand with the design with a large learning curve on controlling the model. Let's find it out by yourself. Think out of the 42146 box and have fun with this replica of Liebherr HS 8300 Dragline Excavator. If you like the design and you even own the 42146 LR 13000, go for it on rebrickable and build your own.