Search the Community
Showing results for tags 'robot'.
-
 "You are now entering the Blacktron sector! This is the absolute limit of the Classic Space quadrant! You have been warned!" ...sorry about that. Had to get the legal stuff out of the way first! Anyway: Blacktron long-range fighter "Buzzard" Above is the two copies of the Blacktron XL-15, which are now dubbed the "Buzzard" type starfighter. So back in January of 2023, I decided to convert the XL-15 spaceship from the film "Lightyear" into original Blacktron colors. The blue became yellow, and white was turned to black, with all the trans-green removed. I added laser blasters under the wings where some technic pins are and put a different control tile in the cockpit. I was thinking about building a second ship, but then again, getting some of the parts from Bricklink was a total pain due to extremely low quantities in the needed color. (I'm talking about you, 3 x 3 wedge plate in yellow!) Thankfully, I bought one too many of both kinds of the yellow 12 x 3 wedge plates, as they are very rare as well with only one store selling four of each kind in the USA, which made making the second one easier later on. Blacktron command vessel "Executor" In addition to the two Buzzards, I wanted a Blacktron capitol ship. I had no ideas of my own ship, so I spent most of the afternoon of 10/5/23 taking Benny's beloved spaceship from The Lego Movie and corrupting it into a twisted, evil version. I revamped the nose, removed the expanding wing assembly and snub fighters. Of course I then recolored it almost exclusively in black and yellow. (some gray was unavoidable!) I armed it with a turret on the top rear where the sensor array once was, and put the commanders office below where the wing mechanism used to be. To keep with the one-word naming scheme of the original Blacktron, I borrowed the name of Darth Vader's Super Star Destroyer, decreeing this ship the Blacktron Executor. I struggled to think of an engine flame color that fit OG Blacktron, but eventually trans-light blue was selected. Since the wings don't extend anymore, I added a third section for figures with a turret on top in their place. The rear-most section lifts away, but the rest of the roof sections are supposed to fold open. The ship seats seven troops and 1 commander. Blacktron cargo transporter "Vendetta" The Blacktron Vendetta is finally finished! I combined the Renegade with a new cockpit modified from the Blacktron Cruiser GWP, with added parts from a free Rebrickable MOC's instructions for a Cruiser / Renegade adapter . The cargo pod is reverse engineered and modified from one posted in a Brickset article. You can view the Rebrickable MOC by user Brickstertwo here while the Brickset article about modifying 10355 is here. The rear of the vessel. I changed the engines flames from trans-red to trans-light blue to match the rest of my fleet. Same thing with the yellow technic wheels becoming light bluish gray. The cockpit seats one mini-figure, and has two laser cannons just outside the canopy. The removable cargo pod is inspired by one in a Brickset article from late December of last year. It works beautifully with the ship's drop mechanism. The top lifts open on a hinge so you can put cargo inside. Blacktron two-man snub fighter "Avalanche" These ships are Blacktron 1 versions of a classic Star Wars speeder design is mostly taken from set 75204 - Sandspeeder, with portions taken from other snow-based versions of the type as well. All this is wrapped up in a new black and yellow paint job with a trans-yellow windscreen from 75414 - The Force Burner Snowspeeder. I call this ship type the Avalanche class snub fighter, and they will be going with my heavily modified Renegade set and the rest of my Blacktron 1 MOD's. Rear view of the two ships. This type of short-range fighter is usually assigned in massive quantities to defend critical planets with Blacktron bases on them, whereas the much more capable and deadly Buzzard type is usually for capitol ship escort duty, and can take on much bigger vessels with only a dozen or so fighters. The inside seats two figures. Blacktron armored ground transporter "Marauder" The 2021 Star Wars set 75311 (Imperial Armored Marauder) has been transformed into a Blacktron 1 version, complete with revised guns instead of those annoying flick-fire things. I couldn't use space seats inside this one, but there are plenty (four) 2x2 modified tiles with just enough room for air-tanks in the model... at least I hope that will be the case! The rear of the hover-vessel with the laser turrets rotated. There are eight total opening hatches on the all four sides and top to place figures / store cargo. One figure sits in the rotating rear turret, two troopers sit in the main body of the vehicle, while the last fig sits in the drivers seat. Blacktron giant robot "Destructor" For this model, I used parts and ideas from the Eternals line's "In Arishem's Shadow" set 76155 (body / head / upper legs / upper arms) along with claw from the old Agents 2.0' "Robot Attack" set 8970. The lower legs and laser arm are (modified) holdovers from the "Build Better Bricks" Iron Giant instructions. (I need to fix the laser arm's elbow joint but I keep forgetting!) Blacktron "Shadow Runner" space car Recently, while I was on my Blacktron kick, I decided I needed a vehicle for the commander. So, after a few false starts with other models, I dusted off this old TRON Legacy Light Runner model and went to town modifying it. The model originally was made five years ago (was 2018 really that long ago?!?), and is based off the two-seater TRON set 21314 MOD that was made by BrickBrosUK and posted on Brickset here. The name Shadow Runner is a play on the Light-based vehicles from TRON. Blacktron minifigs 1x commander 4x officers 19x troopers 1x robot (E.D.G.A.R.) (Thanks to my brother for giving me ~10 of his unwanted Blacktron torsos from the old GWP that were purchased from Pick-A-Brick back in 2023.) Blacktron robot "E.D.G.A.R." This model is recolored and modified from the E.R.I.C. robot from set 76831 - Zurg Battle - from the Pixar film Lightyear. I call this one E.D.G.A.R. which stands for: Electronic Data Gathering / Assimilating Robot Blacktron space base "Outpost 13" This sandwich-looking model was built from an 2002 Alpha Team set 4795 (Ogel Underwater base and AT sub) but heavily modified to fit into the Blacktron I theme. I had to fill in the spots where the flexible plastic "window' pieces were, replace the skull logo with the upside-down Tri-Force logo of Blacktron I, find ways to make the model almost totally "air tight", and add on a radar dish instead of a harpoon gun. I also made the building a lot deeper - about eight studs. The rear of the model. I took out the fancy spinning wall of the original set and replaced it with a bank of windows. The radar installation and it's tower are my own design. As on the original set, the logo folds down, where it can be used as a ramp. Also as on the original set, the MOD folds open to access the inside details. Special shout out to Jon Mo who designed the brick built Blacktron logo I used on my model (thanks also goes to EliteGuard01 for finding that logo design and recommending it to me). The inside was very hard to figure out, as most space furniture is for me. I decided on six computer stations and a desk for the commander. Another source of trouble was to make the building open cleanly and close without holes. The original set struggled with this, and it failed miserably - however I feel I managed to fix that issue. Inside of the rear with the commander's desk front and center. Blacktron hover tank "Havok" I modified 25 year old Star Wars set 7155 (Trade Federation AAT) into Blacktron I colors. Before that, the original set was very much a mess of too many colors, but now these two look elegant and refined in my opinion. Here is the rear of one of the tanks with turret rotated. The hatch is opened with control details visible and barrel elevated. Thoughts? Snub fighter added 1/21/26
 -
 Update: I published a fifth version of the robotic arm. See this comment farther down in the thread: https://rebrickable.com/mocs/MOC-253928/glaysche/6-axis-robotic-arm-mk5/#details https://rebrickable.com/mocs/MOC-254189/glaysche/6-axis-remote-control-mk5/#details Original post: It's been a very long time since I have posted about my robotic arm. I have been working on it / obsessing over it for several years now and have published multiple versions on Rebrickable. I have now published my 4th revision which is almost entirely different than anything I have posted here before. For this reason, I decided to put it into a new topic rather than resurrecting my ancient topic. Rebrickable pages (free to download Stud.io files and PyBricks code): https://rebrickable.com/mocs/MOC-244253/glaysche/6-axis-robotic-arm-mk4/#details https://rebrickable.com/mocs/MOC-244757/glaysche/6-axis-remote-control-mk4/#details Basic stats for the robotic arm: 9 motors 2 Spike Prime hubs 1 Spike Essential hub Over 100 gears The robotic arm is controlled by a 6 axis remote control. Basic stats for the remote: 7 motors used as rotation sensors 4 Spike Essential hubs 0 gears -- all motors are directly coupled to the components to eliminate any slop Here is a video showing the robotic arm being controlled by the remote: Gearing The gearing has evolved over the years. At first, I was really interested in mechanical complexity and some clever uses of the differential to mechanically compensate for the coupling that happens when functions are transferred through a turntable. This worked but resulted in a ton of backlash and slop in the gear trains. This new version is focussed entirely on reducing slop and making it work as well as I could given the limitations of building out of injection molded parts. Here are all the gears in the arm: This is focussed on making each gear train as short and low slop as I could. The goal is not actually to have the lowest friction. As you can see, there are several redundant gear trains for different axes. This is needed to be able to generate the required torque, especially in axis 2 -- tilting the whole arm. That axis has 8 12t gears driving two turntables. Driving the turntables with fewer gears can result in destroying axles because the torque is too high. Having multiple gear trains also is a great way to greatly reduce backlash. You can "pre-tension" the different gear trains so the axles act as springs pushing against each other. The bottom two tilt axes are each powered by two motors. The was the only way I could get reasonable speed. I needed a ~40:1 gear ratio on Axis 3 (tilt axis at the top of the humerus) with a single motor but was able to use a 15:1 ratio with two motors, greatly improving performance. I used a 3d printed part to be able to pass three functions through a turntable, driving axes 5, 6, and the gripper. This was designed by @efferman. I would have preferred to use pure Lego parts but this was needed to get the functionality I needed in a compact form with minimal slop. Here is a view of this part in place. It's a little hard to see the part going through the turntable. This picture shows how short I was able to make the gear trains to drive axes 4, 5, 6, and the gripper. Another interesting part of the gear train is the 5th axis. I was able to use the blue 20t beveled clutch gear to transfer a function through the turntable. I haven't seen this configuration on another model. The extra 12t bevel gears help stabilize the blue gear and reduce slop. All these gears needed proper bracing to function well. This and making the basic structure more rigid is where most of my effort has gone over the last couple years. Structure If you look at the above pictures or download the Stud.io file from Rebrickable, you will see a very solid structure, especially in the base and shoulder modules. Pieces are form-locked together as much as possible and I never miss an opportunity to fill a pin hole with a pin. 2072 of the 3633 parts are pins. I made the robotic arm modular -- only a few pins attach each of the above 6 modules together. This really helps constructing and improving it. You can quickly isolate the piece you want to work on without taking apart more than you have to. Control I use PyBricks to control it. It is the only software that can run on the Spike hubs and be able to communicate between the hubs. It generally works quite well. I didn't spend a lot of time of the software because it was my least favorite part of the project. It's a bit ironic because I am actually a software developer. It's just the software I write for my job is way more interesting than the software running on my Legos. As part of controlling the robot, I needed to calibrate it. I use a few sensors and the encoders in the motors to do this. This uses color sensors for the 3 rotation axes, and a touch sensor for axis 2 -- the bottom tilt axis. The other axes drive the motor until it stalls to find the end point. This uses one other interesting trick. It uses the tilt sensors in the hubs to point axes 2 and 3 straight up during the initial calibration. This is a quick way to get things into a known state and ended up working quite well. Parts I wish I had Much of the evolution of this robotic arm came because Lego released new parts. The 3x19 and 3x13 frames, for example, revolutionized most of the design when they came out. Similarly, flip flop beams and the 3x5 flip flop L have dramatically improved the structure. I have a list of parts that would have really helped me if they were available: 5L flip flop beam -- there are many places where the structure or axle support would have been much better 3x7 frame -- I think this would be a great boon in several structures 4L pin -- I could improve the strength of many structures with this. Sometimes I am able to use 2 2L pins with a 4L bar but this doesn't work in many places 7x9 frame -- this will probably never happen but this would help make some things more compact 6L and 7L axles with stops would be super helpful in a few places. I currently use the axle with no stop in these cases and the axle can fall out during assembly / disassembly which is unfortunate A few recolors into my favorite lime green, especially of flip flop beams Anyway, I hope you found this interesting. I am happy to answer questions. If you want the Stud.io files, PyBricks code, or STL file for the custom part, be sure to download them from Rebrickable.
 -
Hey all! I just wanted to share a new Lego creation of mine. This one is based on the King Crab mech from the Battletech/Mechwarrior game series! Anyone wanting to see more (including 360 video and free instructions) can check out my website or instagram profile. Thanks! www.HansenBricks.com https://www.instagram.com/hansen_bricks/
-
There is a new thread detailing my latest version of the robotic arm: Update: Here is version 2 of the arm: Studio model available for free on Rebrickable: https://rebrickable.com/mocs/MOC-109607/glaysche/6-axis-robotic-arm-mk-2/#details Original post starting here: This is my first MOC and first time posting on Eurobricks. A few months ago, I got back into Technic by buying the Liebherr set (42100). I decided to design my own 6 degree of freedom robot. In doing research and experiments for this project, I was inspired by this post I found here on Eurobricks: I ended up making a lot of different choices in my model. Here is the big picture: I wanted to optimize for three things: It should work Maximum range of motion -- the wrist axes should be able to turn indefinitely and other axes should have as much range as is possible Built as compact as possible Here's the video with poor production values (and using a simple BuWizz profile to control it): https://www.flickr.com/photos/188456966@N07/49900167801/in/datetaken/ This was quite challenging to optimize it in this way. First of all, in order for the wrist joints to spin, they needed to be axle driven -- pneumatics won't work. In the example of the grabber at the end, I put an axle through the turntable to control the LA for the grabber. When the grabber turntable is spun, however, the grabber will open or close in an undesired way. To counter this, I used a differential and the correct gearing to compensate. Here's a picture of that: This is difficult to see in there. There is a new 2 piece differential (65413 / 65414) inside the turntable. The gears turn the differential at half the speed as the turntable which makes it so the grabber doesn't move when the turntable moves. The control for the turntable and grabber are axles on both sides that go through the next set of turntables seen here: The axle turns the perpendicular axle that goes through the turntable and is driven by another axle in the next stage. The stage has the same problem as the previous one where flexing the wrist will cause the grabber to turn and open or close. This is compensated with an additional two differentials and another set of gears. This one is particularly compact. Here's a picture of that stage: The lage gear there is a 28 tooth double bevel which is needed to get the correct gear ratio to the 28 tooth differentials. Pulling the side off of that, we see: There are three L motors (22169) here to control the grabber and first two degrees of freedom. I particularly like the gearing in the front of this section for the compensating differentials: As noted by Hanso in his series of posts, the end of this arm is actually quite heavy. I would have preferred to send all three functions though the next turntable but I could not find a solution that sturdy or compact enough. This weight caused trouble for the next turntable. To make this work, I used two turntables, one in compression and one in tension. There is a beam that goes through the center of the turntables that takes some of the load here. The next stage is a another stage that I would like to be able to turn forever so I don't want the wires to get twisted. In order to accomplish this, I also put the battery box on a turntable that turns with the rest of the arm. The wires go through this stage and don't get twisted. The humerus (in LBG) is very small (5x5) and it was a bit challenging to get the gears in there. The motors (XL 22172) for those next two axes very neatly attach there. The base has the last two degrees of freedom. The spin axis here uses a mechanism very similar to the Rough Terrain Crain (42082). The final axis uses worm gears to drive the turntables. There's a lot of force on this axis and I experimented with a variety of different gearing. The thing that worked best is displayed above. The center piece is driven and it gets geared down symmetrically to the axles that have the worm gears. Axle support was a bit tricky here: (Still waiting for the remaining black 7x11 frames to clean up the look here.) The 2nd battery box fits pretty nicely here: In conclusion, I think this works pretty well. I haven't explored the software at all yet -- just used BuWizz as a proof of concept. Many of the motors would work much better configured as servos. I wish Lego would release an SDK for Control+ so I could write an app similar to the Liebherr controls. My day job is actually a software developer so it would be pretty fun to build a full featured app to control this.
-
 Please support my fully functional walking Wind-up Robot. I'm posting this to the Technic forum, because it is actually a LEGO Technic/Mindstorms creation. The Classic bricks are only on the outside. I built this for Christmas 2016. It gave out presents to all our friends and family. The product of two months work! The sleigh is driven by two NXT motors (controlled by EV3) and Rudolph's legs are powered by a PF M motor. Santa Claus has an incorporated pneumatic system using two pistons, a pump powered by a PF L motor and an EV3 motor which opens and closes the pneumatic valves. The video shows a case where Santa rejects a naughty kid and, in the end, doesn't give him the present. I hope you enjoy the video as much as I enjoyed building. Merry Christmas !!!
 -
Here a model of Jester from Titanfall 2. Jester is a simulacrum, an AI robot imitation of a person, but doesn't realize or accept that. The model is about 1/10 scale, 7 inches or 18 cm tall. He's packing a couple of weapons that are actually throwbacks to the first Titanfall game, a white, black, and orange CAR SMG (Combat Advanced Round Submachine Gun) and a RE-45 large caliber handgun on his right thigh. Red grenades hang from the green tactical vest he wears. The Wampa/Taun-taun horn hanging from the back of his head is supposed to be a raccoon tail. I haven't seen any art that suggests there is a red rising sun motif on the back of Jester's vest, but I like the red design on that dark green, and the boat-stud keeps those plates together and helps hide their unsightly undersides. The fanny pack is a rocket pack that grants players enhanced jumping and parkour mobility in the game. The model has 14 points of articulation: neck, shoulders, elbows, wrists, abdomen, hips, knees, & ankles. The base holds a polycarbonate bar (light saber) that inserts into the bottom of a ski that forms his feet. I had to shorten that bar by about a millimeter to get the foot to be flat and flush against the tile flooring of the base. The abdomen has a couple of 1x2 grille tiles that aren't attached to anything, but trapped by the geometry of the surrounding parts. These move up and down as the chest and hips are posed to simulate pivoting pistons. Thanks for stopping by and having a look!
-
disclaimer: I do not have any licence for any Matt Groening original work. I only created LEGO Bender for fun and for free. Its LEGO interpretation and LEGO design is my own. info: Bender's Wiki ______________________________________ Hi, I am Bender, I bend girders, I can bend them into any angle. 45 degrees, 30 degrees, you name it... I also want to kill all humans, I smoke, I drink, I steal. This is how I look: As you can see I am not just some stupid bottom to top robot, I am a SNOT robot: And I can move, thanks to softaxles, magnets, pins, balls and sockets: My front door opens, so I can hide all I steal. Look at that nice pile of money I stole: I am getting sick of you humans, with your organs and soft skins. I will have a drink of my beer: Oh, somebody ripped my hand of. But it can be easily attached back: And if you do not like me, you can bite my shiny metal.....oh...you can't, it is plastic: ______________________________________ Video: Instructions (free) (PDF computer generated) will be on Rebrickable (link available when MOC approved on Rebrickable): preview: EDIT: Instructions available Rebrickable - BENDER
-
Breastforce is a team of 6 Transformers from Japanese Transformers: Victory Series, with the ability to merge into a super robot named Liokaiser. Each member has a minion of sorts that can be deployed from their chest. These robotic beast minions can become hand held weapons to their respective masters too. Team members: - Leozack transform into Tomcat fighter jet, partnered with Lionbreast. - Guyhawk, an MiG fighter jet, partnered with Hawkbreast. - Hellbat, a Dassault Rafale fighter jet, partnered with Komoribreast. - Drillhorn, the drill tank , partnered with Hornbreast. - Jallguar, the Baja buggy, partnered with Jaguarbreast. - Killbison, the Gepard anti-aircraft tank, partnered with Bisonbreast. I actually spent weeks in deep thoughts on how to make this work (how each limb combine with each other sturdily with articulations to boot) before I started this project last Dec. The efforts were incredibly tedious (especially Jallguar and Leozack) yet rewarding. I shall use this thread to update more reveals in the coming weeks, and of course... the combined mode. I'm almost done with all of them (99%) except the combiner head. This one needs delicate treatment and I'm taking my own sweet time here. KILLBISON In my quest to fulfil last year's vow of building a Transformers combiner , Killbison is actually the last MOC I started work on (from the team of 6 breastforce members). This is because I have difficulty finding the needed brown parts , Just like his original toy, Killbison transforms into a Gepard Tank (below) with 2 turrets. But the original toy has 4 tank treads instead of 2 like in many typical real world tanks. I choose to follow the latter. Trivia > Initially this MOC was suposed to be a "remold" of Drillhorn I started much earlier, but Drillhorn's drill tank mode is chunky looking. I decided to build Killbison from scratch using a new transformation method. > When I started building this guy about 2 months ago, I used many black parts as a placeholder.In the quest to procure more brown parts quickly (this means not from ordering online), My routine scout in a mall yielded me Mixadel (A Mixel set) . This set has 4x c-clips I needed to complete this MOC. What a stroke of luck! > Some sacrifices were made for the robot mode aesthetics to ensure Killbison form a sturdy looking combiner leg. (one example is the robot arms with bland design facing outwards) For more photos of his "killer" antics and poses (and my "killer" writeups on how he came to being), do pay a visit to blog below! alanyuppie.blogspot.com/2016/03/lego-killbison-from-breastforce-team_19.html TRANSFORMATION Like most of my TransforMOCs from recent years, transformation from vehicle to robot mode doesn't require taking off parts.
-
Mobile Suit Gundam Thunderbolt is the first Gundam series, the first anime series, in a long-time, that I really like. I don't hate anime. I only hate 95% of it, but that other 5%, I absolutely adore. Here's a LEGO model depicting the MS-06R High-Mobility Type Zaku II (Psycho Zaku) from Gundam Thunderbolt. Isn't that a mouthful? I'm about 80% sure 80% of this will work in real-life, and am Bricklinking like mad to compile the bricks and elements for it (almost two-dozen Bricklink orders already). For me, LEGO Digital Designer makes it easier to go through the iterative, refining design process, so I start nearly all my models with it. Here's a progression of a few iterations: I came back to LEGO after a 27-year-long Dark Age, so I don't have a life-time supply to brick with which to play and experiment. I absolutely rely on LDD to help me build, since I don't have a lot of inventory. I usually try to make bookshelf-sized models, hand-sized models. That's the sweet spot for me, a size that allows for nice scale detail and proportions, but not so large that it stresses the LEGO building elements and costs an arm and a leg to make. This one's going to bigger than usual, maybe a foot-and-a-half tall (45 cm). In most of my builds, I can identify an "enabling" piece, that crucial part, from which everything else is scaled or built upon. For example, for these S.P.E.E.D.E.R. bikes, it's the mini-fig helmets. For this Zaku model, it's the pearl gold fez used for the small rocket thrusters. There's almost 50 of those rocket thrusters on this Psycho Zaku! Is it just be me, or do you also read "Psycho Zaku" aloud with a dramatically lowered voice? Try it, "PSYCHO ZAKU!" I plan to make stickers for this model, too. I'm not going to try to replicate all the markings, just the big ones like the "96" on the right shoulder and right toe, and the Zeon insignias on the chest and right shoulder armor. I think the model would look better in dark red, rather than bright red, but not all the requisite pieces are available in dark red, particularly the new 2x2 wedge plates used in sides of the feet that suggest a boot heel.
-
The all time classic toy of the 20th century and to me the coolest toy right after LEGO now finally in brick form! This is my project for LEGO Ideas. It uses a classic blocky body and cubic head design to make it simple and cute. It is, as you can see,decorated with a control panel on the chest, a face with two scary red eyes and a cool little window on it's back that lets you watch the mechanism at work. And it can really walk!!! Let me know which colour and which design (arms, antennas, etc.) you like more Thank you. If you like it, please support on LEGO Ideas.
-
Hello everyone, this is my new LEGO Gundam MOC. This time i want to try to build a Mobile Suit from Universal Century timeline which has similar design with RX78-2 Gundam in the Scale 1/60. This Gundam is from the movie "Mobile suit Gundam F91", piloted by Arno Seabook ( appear again in Cross Bone Gundam ). The "F" in the name stand for "Formula". This is light class Gundam, and of course shorter than other normal Mobile Suit. But this Suit equipped with the very powerful weapon: Variable Speed Beam Rifles (VSBR) on the back. This is my Youtube channel (demon1408): https://www.youtube.com/channel/UC9ZlMk-PW3hKg4ZOzzGd2pg?view_as=subscriber And if you like this, please support me in LEGO Idea : https://ideas.lego.com/projects/8dc1c051-9ba0-4d11-80bd-0ad14a5319a2 Weapon: _Mega Machine Cannon _Beam Sabers _Beam Shield _Variable Speed Beam Rifles (VSBR) References: _Master Grade 2.0 (MG) _Movie art Albums: Flickr: https://www.flickr.com/photos/134378223@N05/albums/72157700972342935 Devian Art: https://www.deviantart.com/demon14082000/gallery/67512324/LEGO-Gundam-F91 ***You can check the Youtube video for full gimmick and articulation : Over view: LEGO Gundam F91 by demon1408, trên Flickr LEGO Gundam F91 by demon1408, trên Flickr LEGO Gundam F91 by demon1408, trên Flickr LEGO Gundam F91 by demon1408, trên Flickr LEGO Gundam F91 by demon1408, trên Flickr LEGO Gundam F91 by demon1408, trên Flickr With Beam Rifle: LEGO Gundam F91 by demon1408, trên Flickr LEGO Gundam F91 by demon1408, trên Flickr With Mega Machine Cannon: LEGO Gundam F91 by demon1408, trên Flickr LEGO Gundam F91 by demon1408, trên Flickr LEGO Gundam F91 by demon1408, trên Flickr The Cannon can be attach on the back: LEGO Gundam F91 by demon1408, trên Flickr LEGO Gundam F91 by demon1408, trên Flickr LEGO Gundam F91 by demon1408, trên Flickr Using the VSBR: After switch the VSBR to the front, you can extend the length and armor of the weapon. At first i just make it extend the length just like the MG version. But then i think its possible to implement the extended armor just like Metal Build version, and this is the result. Maybe you will see it clearer in the Youtube video. LEGO Gundam F91 by demon1408, trên Flickr LEGO Gundam F91 by demon1408, trên Flickr LEGO Gundam F91 by demon1408, trên Flickr Use all weapon at once: LEGO Gundam F91 by demon1408, trên Flickr Or using 2 VSBR: I also implemented the Full Operating mode. You can pull out the Heat Radiations Fins from both shoulder armors and Retractable Thrusters from behind of legs unit. You can only push the back of the leg and all 3 thruster will be bursted out. The beam shield can also be pulled out. LEGO Gundam F91 by demon1408, trên Flickr LEGO Gundam F91 by demon1408, trên Flickr LEGO Gundam F91 by demon1408, trên Flickr .....All weapon again: This is my most favorite pose...because it look so cool and powerful. LEGO Gundam F91 by demon1408, trên Flickr LEGO Gundam F91 by demon1408, trên Flickr LEGO Gundam F91 by demon1408, trên Flickr Thanks for visiting !
-
Mech "MOC" done this week using parts from LEGO sets and orders from BrickLink. https://youtu.be/5b1sqYOdGhE
-
Long before the Iron Giant began hurtling towards Rockwell, there was a prototype model, which landed on Earth close to 64 years earlier than the Iron Giant's 1957 landing. They were very similar robots, made by an Ancient race of beings that wanted to gather as much information about the Universe as possible. They first created this prototype model which was made mostly of brass, copper, and iron, but was powered by a highly advanced Fusion reactor that was powered by metals the robot consumed, usually uninhabited asteroids floating through space. Unlike the Iron Giant, this prototype was not able to re-assemble itself as it had a error in it's programming. In the year 1893, the then un-named Brass Automaton landed in the Pacific Ocean near the long-forgotten Dino Island. It created a tsunami and unhinged the island from the Earth's crust and as such the land began to slowly sink. The robot was first sighted by nearby Australian military sailors, who upon seeing the giant being arise from the water, tried to describe the being the best way they could through their wireless telegraph: they named it the Brass Automaton. Johnny Thunder and his Adventurers crew would later go looking for this great metal being after saving as many dinosaurs as possible from the sinking primeval island in 1923, but never saw it, as it was hiding in South American coastline to gather information on the dominant beings of Earth, also known as Humans. After staying relatively hidden in various secluded ocean floor places around the globe for around thirty years, the Brass Automaton was finished reading the minds off people for information on humans as a species: Our past, our present as of 1924, our origin (as it was then known), and our many languages, along with defenses, politics, and technology. After gathering all that intelligence, the Brass Automaton headed to the North Pole along the sea floor to transmit the required information to it's home planet using a faster-than-light sub-dimensional beacon. (Basically, a fancy radio) That is just about when a major solar storm hit the Earth, with the radiation hitting the atmosphere of the Earth and scrambling the outgoing signal into nonsense. Now the garbled signal was received by the home base, and as a precaution, the Iron Giant version of the Brass Automaton was dispatched as fast as possible to earth. (That would take it nearly 35 years for it to get there at all possible speed, which would require it to refuel once arriving on Earth, which is why the Iron Giant was at the power plant at the beginning of the movie, whereupon it's memory was scrambled by the high-voltage electricity.) After sending the garbled message and being struck by a passing icebreaker-ship on his trip southwards, the Brass Automaton was temporarily incapacitated. It was then discovered washed ashore at the southern tip of Greenland by Dr. Harold Wormwood and brought back in pieces to his stately laboratory / mansion in Legorado, Colorado, where he ran test after test on the alien visitor. By 1926, the mad scientist-type Doctor Wormwood had the resembled robot nearly reassembled, and was preparing to restart it when a Lord Sam Sinister came upon rumors of the robot and wanted it for his own nefarious desires, with Johnny Thunder close on his heels... This steampunk version of the Brass Automaton a recolored and modified version of Build Better Bricks' Iron Giant with the head of my previous @hachiroku version of the model (seen above) of the same robot's head added on... I consider it a mashup of the two models. I made it into steampunk colors (black, brown and dark gray) with an exhaust steam pipe at the back of the neck, and yes, that is a monocle / targeting computer over the right eye for use with the gun arm (it was included in the Build Better Bricks instructions) that I'm still considering trying to use. You also may have noticed, the model is incomplete in places - some things just don't lineup properly in LDD like they do in real life. When fully assembled IRL, it should look much better though. Here is the Brass Automaton's laser gun... probably not going to build this, but I MIGHT place it on a tank or something. This is what I've found so far for this model.... 100 parts down, about 650 left to go. Comments Questions, Complaints are welcome!
-
Spent the last few days using spare blue parts to make this mech. Decided to go with a water theme since it was blue. And why not a trident? And a giant fan thingy? Lemme know what you think. Last photo is a bit grainy cause the sun was going down :p
-
 Rebuild the Sydney Opera house as The Robotics Lab, the new high-tech institute in town, specializing at mech prototyping and AI. Take a sneak peek at the latest robot the folks at the lab are building - and if you want, use more parts to finish it! Transforming this set into a 32w modular was certainly a challenge. As opposed to the Big Ben, which has a lot of small parts that lend themselves nicely to decorations, the Sydney Opera House has a large amount of specialized pieces and technic parts that don't really fit well with a standard modular. When I saw the amount of ball joints included, I immediately remembered my Bionicle MOCing days and thought about making a mech out of them. But I still wanted a modular to add to my city as well, which presented an interesting dilemma. I wanted to use the white roof pieces as armor plates, but their scale meant that the mech would be several feet tall if built like that. And there was no way the modular would be able to house it. I thought about making a scene where the mech was destroying a half-damaged building, but that seemed hard to incorporate into people's towns making it look out of place. So in the end I went with a solution of a Robotics Lab, where pieces of the Mech are being constructed and assembled. That way there is a nice scene in the modular, but it's tucked away and not clashing with the standard town aesthetic. And in case anyone wants to finish the design, they only need to add a body and an arm to have the finished product. The large amount of dark windows are well suited to a "secret" project, keeping it away from prying eyes. With no doors in the set at all, I had to make due with brick-built ones using hinge pieces from the set. I am especially proud of the tilted roof windows that ended up being perfectly LDD legal, which is something that's always a worry when you design with real bricks first. The first floor has the legs mounted on a wall, ready to be attached to the final body, as well as an arm being worked on by a group of engineers. There's also the AI sign, just in case it wasn't clear to everyone what's going on here. The second floor (and the roof) have no floor, accentuating the verticality of the building, leaving enough space for the Mech to be assembled (though they will probably have to airlift it out when it's done). There is an engineer doing final checks on the head of the Mech, using a platform and some adjustable lights. In the end, I am really hope as to how this project turned out. I may go and use the remaining parts to actually build the body and recreate the destruction scene described above, though that will probably take me some time. I hope Lego will release a new large scale Creator Expert set soon so that I can try rebuilding it as well (the Roller Coaster isn't really a modular material :D). The instructions are available on my rebrickable page, where you can also check out some other cool alternate models. https://rebrickable.com/users/Huaojozu/mocs/
 -
 Hello every body. Few weeks ago I was about to go to bed at 2 AM when i noticed some parts left unattended on my desk. I started playing with it and 1 hour later I came up with what turned into one of the funniest and coolest little thing I ever made. :-) I like it very much, so I decide to share it with you. Let me introduce... Hector ! This is the first version of him, built only with some spare parts I had. This is why he misses a hand on this very early picture. When Lego announced their new small ball-joint system, I was very excited and ordered a handful of them off Bricklink, without knowing what to do whit it, just thinking it had some great potential. Hector is the realization of this potential. A small, yet very posable figure with a sturdy build and very lifelike proportions and articulations. I tried to give him an aristocratic and peaceful look, like some kind of tiny butler ^^ (even though he think of him a as some kind of prince). As I mentioned before, what I like the most whith Hector is his amazing posing potential ! His soles are wide enough to balance him on one feet and all the joints stay in place when posed : You may have noticed that hector seems a little different on the last picture, that's because he went trough some improvement since the V1 ! One of the biggest flaw of the prototype was the ability for the knees to bend inward. I solved the issue by adding ''kneecaps". I also made him a lighter face and made his arms and feet more sleek. I ended up liking Hector so much that I made him a friend, Pole ! But I will tell you about him later....
 -
I've been on a steampunk kick recently... here are the fruits of my digital labors. The building's a WIP in the real world, while the rest will come later. From a WHAM product brochure (circa late 1909): "Here at WHAM (Wayne Highly Advanced Mechanisms) we always have our eyes on the horizon of the future. From our humble beginnings designing our first line of industrial hyper-reactors, to our more recent ideas of regular rockets to the moon, we here at WHAM are always striving to make our world - and beyond - a better place for us, our children, and so on out into the great unknown of the distant future. I should know, because as son of founder of WHAM, Dr. Lucius Wayne, I, Floyd Wayne am here for YOU. Don't believe me? You can see inside this brochure of our upcoming products for 1910 and decide for yourself. If you have any questions or requests for specific machines, please write to our Marketing and Public Relations department as shown on the back page and I'll see your special needs are filled. Remember: Don't buy a scam, buy a WHAM!" Here are the models I've worked on / revised: the giant robot, frog translator chair, laboratory building, automobile, and personal rocket. Because why should you not have a steam-powered mobile translator device for your highly intelligent pet Frog? Oh, and the inventor of this and much more is Lord Floyd Wayne, an eccentric Victorian inventor with whom failure is not an option. (In case anyone couldn't tell I was listening to Pink Floyd songs while creating these as that's where the inventor's first name came from. Oh, and as a fun note, the frog's chair actually began life as Davros' (creator of the Daleks) chair from Doctor Who. ) This rocket (named the Golden Bullet) is designed for atmospheric travel only, as it does not have a complete canopy nor air tanks for outer space travel. (actually, it was inspired by LEGO Universe' steampunk rocket, but with more recent parts and several recolors) The ship is powered three smaller booster motors and one larger main engine. (The rocket's original inspiration was taken from the first LEGO MMO from 2010, LEGO Universe.) The Golden Bullet comes apart in three sections, with the nose cone, cockpit and engines all being removable from each other. (NOTE: This print is missing from the dark tan 1 x 6 tiles on the driver's compartment.) This giant robot (named the Brass Man) was created by Lord Floyd Wayne as an tool for outer space exploration. Everything the robot sees is transmitted back to it's home base via a hyperspace sub-channel to be recorded and viewed for scientific study. The Brass Man is powered by a experimental hyper-matter reactor, which gives off steam as a safe and harmless by-product. (The robot was originally inspired by @hachiroku's Iron Giant, seen here) The monocle seen here is supposed to have this print. as a sort of targeting computer for weapons and for long-distance magnified viewing. The robot's main weapon is this laser pistol that disintegrates on contact. Only Lord Floyd (it's inventor) knows how it works, as he doesn't want any Earth governments to discover it's dark secrets. This device is only to be used for self-preservation and at that only as a last resort. I plan on using my version of the 2018 Marvel Comics 'infinity War" set 76108 (Sanctum Sanctorum Showdown) for a 1920's-flavored steampunk take on a mad scientist trying to open a time doorway into the beginning of the universe. What he doesn't know is that creatures from before our universe began were destroyed at that moment, so they will come through the doorway to the mid-1920's as a way of sheltering themselves from that fate. Unfortunately, being from that time frame, of course they want to end our Universe so they can live again in peace. As this takes place in my Adventure-verse, Johnny Thunder is tasked with shutting down the doorway before our universe sinks back to before the big bang... and Sam Sinister is trying to use the time / space doorway to achieve vast riches by robbing ancient cultures of their valuables using the Time Window, which draws the attention of the giant robot seen next to the building, leading to a cascading domino-like series of events that have not yet been written. The rear of the building has a ground-floor conservatory. The rearmost window on the bottom floor opens up 90 degrees to allow for figure placement in the conservatory. As a side note, the original Marvel model's exploding walls and drop-floors have been removed. The means from getting from one floor to another is a spiral staircase, and a small skylight has been added to the roof. The inside feature the following: The lower floor has a fireplace with clock on mantle, table with a pizza, and lamp on a side table. The middle floor features a marble bust on a printed safe, and a bed. The dark red thing in the greenish jar is a beating human heart. The upper floor features a desk with some sort of electricity storage machinery, several flasks, two bookcases, time portal computer and microscope. This early-1900's automobile was designed with the tan off-road model in set 76003 (Battle of Smallville) in mind, with a bit of 7628 (Peril in Peru) thrown in for good measure. I was aiming for continuing my Steampunk theme, but ran into a mental roadblock with regards to this car, and about four other prototypes that didn't make he cut. (Sadly, they were accidentally saved over and are now gone) The rear of the model with the spare tire, brake lights, and dual exhaust pipes. ...And that's it for now! Any questions, comments, complaints, and suggestions are always welcome!
-
 Motor-brain Droid Brothers are: Xtra Large Motor - the eldest brother Large Motor - the second brother Medium Motor - the youngest brother Simple, but Ingenious. Ugly, but Close. A worm drive is a gear arrangement in which a worm (screw) meshes with a worm gear (aspur gear). A worm drive can reduce rotational speed or transmithigher torque. One of the major advantages of worm gear drive units are that they can transfer motion in 90 degrees. The gear ratio is: 1 to teeth of the worm wheel The direction of transmission is not reversible due to the greater friction involved between the worm and worm-wheel. Worm gear configurations in which the gear cannot drive the worm are called self-locking. The eldest brother - Xtra Large Motor-brain The second brother - Large Motor-brain The youngest brother - Medium Large Motor-brain Power - Battery and its tray, Worm Hand and Tummy - Worm gear Feet - Each foot has 4 wheels Back - Antenna and pigtail Profile - Crankshaft and Link Mechanism drive Arms and Legs Three brothers - Red, Blue and Yellow Welcome to Camellia Café http://www.camellia.xin
 -
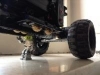 hi all, some months ago i made this video of lego battlebots, and now i'm posting it there because maybe you could be interested also for TC11, you'll find all the bot info in the video but i'll clone them here too, hope to bring up a brickshelf folder asap for the two bots (but i have to rebuild them due to pieces and electronics being used for witch doctor replica, cardiac two, fanmade design, killerhurts and recyclopse chassis, and other 3 500g class bot an grabber a lifer and a flipper) PULSAR weight: 700g size: 23x27x9studs weapon: 73g spinning drum with two single teeth 1900rpm strenghts: really effective wedge shape used to go under the opponent and lift them with the drum energy weaknesses: the drum isn't enough fast to launch the oppnent on the air, wheelholders may break off easily, weak wepon belt CARBIDE weight: 730g size: 32x32x9 studs weapon: 84g spinning bar 750rpm strenghts: great power and though armor, effective rear wedge weaknesses: the armor can e warped or bent and increase friction in the drivetrain, hard to control, high battery consumption here a photos from Ellis (pulsar builder) about size comparison here the video: NB it is really long, if you want, after presentation, you can skip to 11:02 to skip the fist fight (a bit long and boring) and save time without losing the most of the action! i'm keeping editing this with photos and videos from my twitter, it is hard to find them back but i'll try: CARBIDE PULSAR
 -
I was really so busy that is a long time since i created a folder on brickshelf, and now it's time to add my remaining 8 bot: i'm also aiming to create a lxf file for each, but currently waiting for the first folder to become public. What i want to do is to keep this fist post simple with robots thumbnails, link to the future reply about them, descriptions and lxf files, let's start: Really hope that all the files and photos that i'll put there can inspire some TC11 competitors, unfortnately you can't fight bot in the entry video but i will really like to know how a fight between your bots and mine will end (despite my bot being ruled by different and more restrictive rules). Bot-focused replies will be posed one every day starting from tomorrow and then this first message will be updated with thumbnails, lxf files and more info, i'm doing this because i'm progressively dismantle all the robots and i want to keep them at least in digital form (so i'll have more pieces for my new ideas without loosing the previous ones). i also really want to thaks LRW (lego robot wars) group for the support that they gave to me while i was building and posting updates there: https://www.facebook.com/groups/105109289523663/?ref=bookmarks in order not no make this topic only a bunch of writings i have a small video about the first bot that will be showcased tomorrow (asap) so here all the robots: name: LIFTY description: this is the 2nd of the -ITY team, a series of simple robots made to show the archetypes of combat robots and also easy to replicate, they also fight each other but the winner wasn't this one. signature move: LIFTER weight class: 500g notes: despite being a lifter it is not really able to full lift the opponent but by going under it and pushing with the additive weight it can easily lift and flip up to 1kg bots! lxf file: lifty.lxf bot reply link(scroll down here): click here name: BITY description: this is the first of the -ITY team, also the most complex featuring a jaw that can be opened and rotate, it represents grabbers or control robots that aim to grab the opponent and push them into the PIT of oblivion due to the use of lipo BB (i have only one) and the excessive weight (700g) it didn't compete to the secret -ITY championship signature move: CLAW weight class: 500g notes: 4x4 transmission is really powerful but has a lot of friction while steering (even at smaller weight class) so the battle position of BITY is with the claw inclined down and front wheels lifted up and not touching the ground lxf file: bity.lxf bot reply link: click here name: FLIPPY description: 3rd of the ITY team it is a spring powered flipper! inspired by diotor this bot relies to a winch mechanism that is able to load and relase 4 9398 shock absorbers with only one motor! signature move: winch reloaded-spring powered FLIPPER arm weight class: 500g notes: unable to self right was defeated by lifty on the -ITY tournament lxf file: flippy.lxf bot reply link: click here name: CARBIDE description: replica of uk robot wars competitor carbide, grand finalist of series 8 and champion of series 9 signature move: horizontal spinner weight class: 1kg new technic motor used: 2x M for drive, 1x 9V motor (745699) for weapon drive: 2WD and can drive even if upside down! notes: the side armor is really tough but can be detached from th main body, also the bar has a quite good punch but luckily not enough to break lego pieces, it can remove armor and exposed wheels. also it is driven by an sbrick receiver so it has the advantage of PWM motor controls and no line of sight needed, may also join 3-robot matches due to not providing interferences with IR lxf file: carbide.lxf bot reply link: click here name: PULSAR description: again a 2016 competitor, smaller and faster than carbide, but equally lethal signature move:SPINNING DRUm with double single tooth weight class: 1kg replica new technic bricks notes: it requires only two channels to be controlled because the spinning drim is always one and a rubber band belt prevent the motor stall name: WITCH DOCTOR description: this replica is from BATTLEBOTS! unluckily i can't replicate the purple/green color scheme but this time i used old technic bricks so it is completely smash-able! but mind that its deadly single tooth disc smash bot before they can do anything signature move: single tooth SPINNING VERTICAL DISK weight class: 1kg replica with system bricks notes: my first inclined wheel drive (with chains) that really helps the bot steering even if 4x4 with all the wheels on the ground name: CARDIAC II description: the first fan designed bot that i motorized, it will fight witch doctor later this moth (hopefully) and it is armed with a deadly axe that can stop the 2000rpm disk of its opponent signature move: fast AXE weight class: 1kg replica with system bricks notes: it is the biggest bot i've ever built and has a pretty advanced weapon capable of rapid fire with a single M motor name: KILERHURTZ test chassis description: this poor bot was never finished (and used to test all other bots weapon) due to the armor of the original 100kg one being really difficult to replicate, but it's weapon really reflect the power of a 110kg machine signature move: rubber-band powered gearing reloaded AXE weight class: never finished notes: it can be operated with a full auto reload system and a tap firing button from the sbrick APP
-
Hello, sci-fi forum dwellers! I'm new to this subforum and this will be my very first MOC here! After watching Evangelion Neon Genesis and Mobile Suit Gundam: 08th MS Team, I was inspired to build a mech of some sort. Today, I proudly present my first mech: "Handyman". Handyman is a Utility Type mobile suit, built for a wide range of tasks. Its light armour allows for good articulation and agility. Handyman has counterweighted shoulders, to facilitate carrying heavy load around, a multi-tool left hand for salvaging, powerful light units, shoulder-mounted shooters and a retractable arm blade for minor combat. Aside from its utility programs, Handyman also has a recreational mode: All the Soldier Type mobile suits are envious of these breakdance moves! Bloody utility peasants... "Catch!" "You better keep your distance, mate! I have a power dagger and I'm not afraid to use it!" Handyman is operated by a single pilot, who is seated in the torso: Thank you for viewing! I thoroughly enjoyed this build and it has further awakened my interest in sci-fi builds. I hope you like it as well, C&C is very appreciated!
-
Prologue: I must admit, I’ve never thought to be able to reveal a proper entry that soon, but all the sparks came so suddenly and all of those fitted into the concept in my head, that the first digital model was ready in 1 night. Some fine tuning was done during another night, and now it sits beside me in it’s Brick Built Beauty. Excuse me for presenting via digital pictures for now, but this way I can give You nicer overview (according to my actual skills), live pictures and video will be done, of course. As it is basically ready, I decided to share it as inspiration to the community, I hope to see many awesome and fun creatures! Let me introduce my entry for the TC11 contest: Name: Bison - my robot is chubby, robust, has lot of power to push and for butting heads, and has biungulate heels to kick all around – just like a bison. My main objectives were to use 2 motors only (for intuitive control, which is essential in the battle arena), and to build a double sided robot, which is functional upside-down as well. Also, I wanted to follow the regular MOCing rules: ease of build, BB access must be simple, legal techniques (LDD compatibility). Parameters: Skid steering 4x4 drive via friction gears Motorized kick-heels via friction gears (signature move) Massive dozer blade (? signature move ?) Very robust structure (to survive rough beating) Modular build 439 parts (without batteries) 37x26x9 studs 1070 gramms (with Ansmann rechargable batteries) 0 gears The 2995 tyre works here very well, as it is more grippy than the average LEGO tires, and so is the 55978 too, as result I got a nice combo for my friction gear set-up. This can provide quite a lot power, but also works as clutch in extreme situations (motor protection). The only deviance what I had to apply (with staff approval): to fit the 2995 tyre to the inside of the 2996 rim lip (Click for picture - on the right), so I could fit them perfectly on the wheel hubs, without building those in offset with the housing. As here can be seen, it is pretty crowded in the inside, which I am very pleased with. After some minutes of test, I am satisfied with the result, it can easily push 3 kgs (milk cans), quite fast, and really works like I imagined. Let’s get to pictures, update will come! EDIT: video is ready, see post below.
-

[TC11] THUMPER
heyitsdisty posted a topic in LEGO Technic, Mindstorms, Model Team and Scale Modeling
When I heard Eurobricks was holding a contest to build combat robots, I knew I had to join and give it a shot. This is my attempt, THUMPER - a completely Power Functions-driven bot with a spinning disc capable of approximately 1500 revolutions per minute. I was originally going to build a version of the BattleBots competitor HyperShock and call it HyperSuck, but eventually I decided on two wheels rather than four, and the rest of the build grew from there. Unfortunately I have a serious lack of Technic panels, so the armour mostly comprises of Bionicle parts. Thanks for taking a look! -
Hi everyone, First off, I'll do a little introduction. Even though I've been a member for many years I've mainly just lurked in the shadows, probably because I've felt I don't have the time to build or the expertise to make a contribution. But there was something about this competition that has me really excited, and so far I've followed all of the participants closely. Then at the weekend when the first entries started being posted, I thought "what the heck, why not". So (if I manage to complete within the VERY short time frame I've allowed myself) this will be my first MOC in nearly six years and my first ever posted to this forum! I've been building for just four days now, but nevertheless, meet Mr Cuddles. The drive is already working, except I haven't worked out where the IR receivers are going yet. It is very dense and compact; a total of 15 box frames so far! The ground clearance is less that 0.5 studs to protect it from flipper bots. I eventually hope for it to have two large pincers/claws on the front, powered by the LAs, to grip the opponent. This is where the name Mr Cuddles comes from. Then when they are caught and can't escape, a hammer mounted on the top will smash them from above. Wish me luck!
-
type : lego gundam name : Gundam Bael - Base on the first from 72 demons of Solomon code : ASW-G-01 Pilot : McGillis Fareed, Agnika Kaieru series : Mobile Suit Gundam IRON-BLOODED ORPHANS / (機動戦士ガンダム 鉄血のオルフェンズ Kidō Senshi Gandamu Tekketsu no Orufenzu?) Youtube link : Non-weapon view : LEGO Gundam Bael ASW-G-01 1/60 by demon demon demon, trên Flickr LEGO Gundam Bael ASW-G-01 1/60 by demon demon demon, trên Flickr LEGO Gundam Bael ASW-G-01 1/60 by demon demon demon, trên Flickr LEGO Gundam Bael ASW-G-01 1/60 by demon demon demon, trên Flickr LEGO Gundam Bael ASW-G-01 1/60 by demon demon demon, trên Flickr LEGO Gundam Bael ASW-G-01 1/60 by demon demon demon, trên Flickr Weapon view: LEGO Gundam Bael ASW-G-01 1/60 by demon demon demon, trên Flickr LEGO Gundam Bael ASW-G-01 1/60 by demon demon demon, trên Flickr LEGO Gundam Bael ASW-G-01 1/60 by demon demon demon, trên Flickr LEGO Gundam Bael ASW-G-01 1/60 by demon demon demon, trên Flickr LEGO Gundam Bael ASW-G-01 1/60 by demon demon demon, trên Flickr LEGO Gundam Bael ASW-G-01 1/60 (pts just for fun) by demon demon demon, trên Flickr LEGO Gundam Bael & Gundam Kimaris Vidar by demon demon demon, trên Flickr LEGO Gundam Bael & Gundam Kimaris Vidar by demon demon demon, trên Flickr Some upgrade : Weapon set from RX-93 Nu Gundam LEGO Gundam Nu-Bael ASW-G-01-93 1/60 by demon demon demon, trên Flickr LEGO Gundam Nu-Bael ASW-G-01-93 1/60 by demon demon demon, trên Flickr LEGO Gundam Nu-Bael ASW-G-01-93 1/60 by demon demon demon, trên Flickr LEGO Gundam Nu-Bael and Gundam Kimaris Vidar Sazabi by demon demon demon, trên Flickr LEGO Gundam Nu-Bael and Gundam Kimaris Vidar Sazabi by demon demon demon, trên Flickr Thanks for visiting !