Search the Community
Showing results for tags 'powered up'.
-
 INDEX: Introduction (just below) 42099 Turbo Pickup (just below on this same post) 42095 Racing Buggy RC Black Roadster 8048 RC Roadster 42140 Rally Car RC Subtractor Racer RC Small Scale Dump Truck 42109 Le Mans Prototype 42099 Sand Runner 42095 Baja Racer 8048 RC Dune Buggy 42037 Quad Bike 42140 Racing Ripsaw 42049 Telehandler 42109 Racing Cabriolet Introduction: Hey everyone! I'm Dave, and I've been around Technic long enough to remember when the 8880 Supercar came out and amazed me! It was unlike anything I'd seen so far: the independent suspension, the gearbox, the V8 under the hood... I was hooked immediately and picked up a few other sets from that era, but life got in the way and I started my LEGO dark ages, which lasted for about twenty years. Coming back after such a long gap is a strange experience. The joy of building is still there, if anything it's sharper now because I'm choosing to do it rather than just being a kid with bricks, but the design philosophy has shifted substantially from what I grew up with. The vintage sets I knew had everything exposed, that was the way! You could see everything working. Modern Technic tends to wrap the whole structure in bodywork, which changes the building experience considerably and, honestly, I'm still learning how to think in this studless style. It's a different puzzle. I'm into RC, so most of my builds end up motorized if the source set allows for it, combining a limited parts inventory with remote control functionality is where the problem gets interesting for me. I see that alternate building (taking an official set and rebuilding it into something completely different) is quite a big thing now, with many people publishing their creations under a designer name and growing their following on social media, amazing stuff, how things have changed since I last checked... I don't have any fan base and I couldn't care less about that: I build to have fun, and the problem-solving keeps my brain busy. If anything I put here is useful to another builder, that's a bonus, but it's not the point. The point is the build. This thread will serve as a sort of behind-the-curtain look at my design process, the decisions, the dead ends, the things that worked and why, or at the lack of those, just a simple presentation about the model, and also as a discussion hub for all of my MOCs. If you're interested in my finished designs, all my published MOCs with PDF building instructions and parts inventories are over at davejsptechnicmocs.com. What you'll find here is more about how they came to be. First one up: 42099 Turbo Pickup This is an alternate build for the Lego Technic 4×4 X-treme Off-Roader (set 42099), rebuilt into a Turbo Pickup. Functions: Remote-controlled drive and steering Independent suspension on all four wheels A few things worth noting: The drivetrain ended up being RWD with a gear ratio of 1.4:1 -> The two PU XL motors drive the rear differential directly, one on each side. That turned out to be a clean and efficient layout, and it's probably the part of this build I'm happiest with. Ground clearance is decent for light off-roading: 4 studs at the front axle, 6 at the rear. The planetary wheel hubs aren't used on the rear wheels. The power button for the hub is accessible from inside the driver's cabin without flipping the model over, which matters more than it sounds once you're actually using it. One thing that made this easy to get running: it uses the original Control+ profile for the 42099 set. No app setup, no reprogramming, you can drive it straight out of the box. Full parts list, a vieo, and the pdf bulding instructions are available at davejsptechnicmocs.com Photos: Let me know what you think!
 -
 BrickController2 is an Android and iOS application that allows you to control your Lego models using a compatible gamepad. It supports the following devices: - SBrick - BuWizz 1-2 - BuWizz 3 (basic support) - Lego Powered-Up devices: Boost, PUP HUB and Technic HUB (or Control+) - PF infrared (on Android devices having infrared emitter). Features: - Multiple profiles for a single creation - Multiple motor (or output) assignment to a single controller event - Different types of devices can be used at the same time - The same motor (or output) can be assigned to multiple controller events - Different joystick characteristic settings - Different button modes: normal button, simple toggle, ping-pong toggle, carousel toggle, ... - Train mode on joysticks - Normal and servo mode for the new Control+ motors - Sequences (like for flashing light) BrickController 2 on the Google Play Store: BrickController2 android BrickController 2 is also available on the Apple App Store. BrickController2 iOS Video tutorial created by @kbalage (many thanks for this): And another great video by @kbalage: Older versions: BrickController Android application. It lets you to control Lego creations via Lego infra-red, SBrick and BuWizz V1 and V2 using any Android compatible game controller: Current version: BrickController 0.6 User guide: BrickController User Guide Minimum system requirement: Android 4.4 and bluetooth low energy support on the phone (or tablet) Video on the older SBrickController application:
 -
 I love Lego's "Car transporter gang" scale of cars. However, they simply have to be motorized, like my Porsche 911 from ages ago. Another fun bit to figure out was a car transporter that could load a car completely by remote control, without any manual help. This type of car typically doesn't have much ground clearance, so that had to be accounted for. Also, securing the car also had to happen automatically. I managed to find a compact solution I'm very pleased with. The video also includes some "making of" bits, with the specific camera vehicles used to film everything. Hope you like it! More pictures on Flickr
 -
The last year I've been building a "fleet" of 7-wide locomotives...and here's a cavalcade of five new/or updated/ designs. 1. SJ vintage locomotive, 7*32 studs. Fully motorised with 4ch Technic hub, 2x train motors and 2x LED:s. Design is a "Frankenstein" with design elements taken from old Swedish electric locomotives like F-/Da- and Rc. Here pictured with a same era SJ coach 7*48 studs. 2&3. SJ and Green Cargo locomotives, 7*32 studs. Both, fully motorised with 4ch Technic hub, 2x train motors and 2x LED:s. Design is meant to be a typical modern sleek European electric loco, but it is not based on a certain prototype. They are technically identical except for the splash of color on doors and decals. 4. Vossloh DE18 diesel electric, 7*36 studs. 2ch city hub, 1x train motor in front. Rear bogie has a remote decoupling function driven by a medium motor in the above compartment. 5. Saddle tank steam locomotive Krupp Knapsack. 7-wide, but without any motorisation. This is just a side track "decoration" to stand near my train engine shed...
-
Hi everyone, I present to you my second version of the Renfe S-130 like Ferro-Friki did some time ago. I wanted to remake this train that I made first in 2018 with not the best result so I now made this version in 7 studs. LEGO Renfe S-130 DEF [MOC] by Imanol, en Flickr The set is heavily detailed even in the rear of the power cars and end cars LEGO Renfe S-130 Testeros Interiores [MOC] by Imanol, en Flickr I have made a reduced train set of only 7 cars instead of the 11 that has in real life but it has one of each of the different cars that form the real train with detailed interiors. First the "Preferente" end and "Preferente" LEGO Renfe S-130 Lateral Extremo Preferente [MOC] by Imanol, en Flickr LEGO Renfe S-130 Lateral Preferente [MOC] by Imanol, en Flickr The interiors of "Preferente" cars LEGO Renfe S-130 Interior Preferente [MOC] by Imanol, en Flickr The "Preferente" adapted car and it´s interior LEGO Renfe S-130 Lateral Preferente PMR [MOC] by Imanol, en Flickr LEGO Renfe S-130 Interior Preferente PMR [MOC] by Imanol, en Flickr The cafe car and it´s interior LEGO Renfe S-130 Lateral Cafeteria [MOC] by Imanol, en Flickr LEGO Renfe S-130 Interior cafeteria [MOC] by Imanol, en Flickr And the Turista cars which are the same as preferente but with 2+2 seating arrangement LEGO Renfe S-130 Lateral Remolques Turista [MOC] by Imanol, en Flickr LEGO Renfe S-130 Lateral Remolques Turista [MOC] by Imanol, en Flickr And now that I presented it I want to ask for help to build it as it will be my first lego train in real life. The car coupling mechanism that I have installed is only for aesthetical purposes and will not work in real life. Another problem is that i have seen many models in which all of the rear of the locomotive or power car pivots and I don´t know if it could be necesary to do in this case. Lastly I want to know how to motorize it, being so long I would suppose I would need the two power cars to provide power but I don´t know. Anyway, I hope you enjoy this project as much as I enjoyed designing it
-
 Hello all, after year and half hiatus of my Lego activities and attached stuff here I got back as I have found finaly time to do even proper building, not just LDD model like last time (ye, that Frankenstein Tatra Pacific). I havent hesistated with thinking what to build as Dakar has just started (I am big fan of truck category, especialy Martin Macík) and also I wanted to finaly use that Dakar tires from Audi RS-Q etron Dakar car which we have ordered with other parts. So I decided to make model of Macík's truck in rough scale 1:12 which off course woulde be powered by Powered Up motors and to challenge my brain I added working gearbox with possibility of "power-shifting" as side goal. To introduce inspiration: Dakar itself probably doesn't need introducing, same as truck category. Last two editions has won Czech team MM Technology with Martin Macík Jr. behind wheel of their own truck called EVO4 and with nickname Bohouš. This year they have updated version nicknamed Pepa, but both are based on Iveco Powerstar. Only bonneted Iveco today. Bonneted trucks slowly showed to be better due better weight distribution and this Czech team, which started with cabover Liaz, has switched to bonneted Iveco. Last year truck Bohouš Regular Iveco Powerstar They started as family team and now they are in fact biggest truck team on Dakar-9 trucks, from which 5 were made last year. Enough was said about inspiration, let's pull out some bricks. After dedusting and disassembling legendary John from even more legendary Grand Tour to source H and rectangular frames and also Xerion wheelhubs (my first contact with them was Claas Xerion set, since that I use this name for them), as first I made front and then rear axle. Legendary John built by R. Hammond, J. May and kinda J. Clarkson Half-done front axle, I still was not sure about steering mitor placement Finished front axle (sadly no photo of rear one) After axles were done, I moved to most difficult part-gearbox. I wanted at least 2 speed one with big reduction and fast gear, to prevent Zetros-like outcome (great set, insane climbing abilities but insanely slow for everything else). And also ability to shift under load/almost under load. My head for designing such thing was too much exhausted, so I decided to look on Rebrickable for some inspiration, but nothing was appealing to me. However, then I remebered on Volvo dump truck, which had quite complex gearbox and when I saw, how it is done, I said to myself that I will do 4 speed gearbox. At start was tricky to make some holding frame for it, but slowly I somehow made quite compact gearbox, which even worked when operated by hand. However, after addition of motor combiner (just two beams and some gears) I found out, that my design has some flaws-4th gear was non-shiftable due colliding stuff, whole gearbox was twisting and few others. Gearbox v0.9-without any frame, just demo Another day gave me some ideas (and my dad too) to fix issues and afyer few hours of coursing how stupid I was final product was born-working 4 speed automatic (not entirely, kinda like sequential) gearbox compact, sturdy and light enough to hide in truck frame (or superstructure-anyways it will be empty box to minimize weight). I dedusted also my coding skills in Powered Up app and made controller for shifting. I tested result and I was quite satisfied. Completed gearbox before fixes were implemented-v 1.0 After that I made descent gearbox with integrated interaxle diff and quite ridicolous total gear ratio (around 6:1 if my memory is right). "New" diffs and "new" cv joint shafts are gift from god-they are perfect for this use. I tested gearbox once again and measured some things, which forced me to flip descent gearbox due total length. But after that everything was perfect. Only one thing was bogging my mind. How that thing attach to frame. Gearbox demo run Size and stuff position approximation (panels are marking 7.5m length as real thing) That was Saturday state and today (yesterday I was working on something different) I made frame (once again I saw opportunity where to fit it) for rear axle first, as it was easier-front axle has integrated steering motor and drive motors were at front too. It was quite easy to do-I was actualy pleased with quick progress and then I got even another idea-flip motor layout-shift motor will be in front and drive ones in rear. Why to bother? Well, if drive ones would remain in front, then would be almost impossible to make correct bonnet (which will be anyway fun to do due curvature). To my luck, I was kinda future-proofing gearbox and I counted that layout could be changed in future, so it was not problem and also in reality thus way was easier to pack drive motors into frame and also to make frame merged with shifting motor for front axle (due steering motor). Suspension was fun part-at start I didnt know how to properly attach shocks from live axle to frame, as my every older model was independent double wishbone, but after while I figured it out. Front was little harder due to already mentioned steering motor, but also this went suprisingly fast. I made some quick cable managment (not much, just one cable was moved and clipped to not get eaten by gears from gearbox), added Panhard's link to rear axle and two links to front axle as well. Only structural thing missing is hub holder. Rear axle succesfully attached to frame, font one demo fitted and already swapped motor layout Rolling frame done, note driveshafts-exactly placed as on real truck Top view Driveline detail I have made some quick drive testing, but due poor battery condition (rechargeables) test was short and not final, but already with almost dead batteries it climbed smooth plank at 35° angle in 1st gear without bigger issues-initial accel was on flat and on 4th gear, after half of chassis was on slope I downshifted to 1st without releasing throttle (autoshift and throttle reduction are not programed yet but layter one will not be needed as test showed) and it smoothly continued forward without stopping. Speed in 1st gear is bit slower than Zetros, 2nd is comparable (if memory serves right), 3rd is 1:1 in gearbox and 4th is slight overdrive in gearbox. That all without planetary hubs. And also thats all for today, see ya later
 -
 Hello! After a while, I decided to rework my fireplace: (original post can be found here - ). The main goal was to rebuild the back of the model to make it look more realistic. Given that now it utilizes a Powered Up hub and it can be programmed, the flames have and effect of blinking/flickering. The build uses one Powered Up L motor and one pair of LEDs. Also the inner mechanism was changed too and it allowed to make the model less thick. Also #2: a simple option to remove the front border was added to allow it to be a standalone model or a part of the modular build. Here are some other photos and an animation: Also #3: here is a smaller and non-motorized version of this fireplace: Also #4: not a final version, but still may be interesting - an addition with dancing minifigures (the male one rotates and the female - rotates and jumps): Thank you for attention! :)
 -
 Based on the chassis of the Mid trophy truck, I created 2x new models. First is the Ford Bronco ULTRA4 from the King of Hammers, which has all the features of the Mid trophy truck, but uses a modified chassis, new bodywork and can have all the lights functional (both rear and front). You can see more details on Rebrickable. Second model is the Toyota FJ in the style of the FJ ”Bruiser” SEMA 2023 build, made by TRD. It uses about the same chassis as the other models, but has a new bodywork, paired with a new front axle with other 2x buggy motors and the usual 1x PU L motor for the steering. The instructions are already on Rebrickable.
 -
Soo, I finally managed to finish one of my W.I.P.s - the Mid trophy truck. Here are the final specifications: 2x buggy motors for the rear drive and 1x PF servomotor/ 1x PU L motor for the steering (I still need to test the PU L front chassis) stock gearing is 1:1, but it can be modified using the 2x 12T and 2x 20T gears independent suspension at front and a realistic 4-link axle at rear with a total of 2x hard 9L, 2x soft 9L and 2x hard 6.5L shocks a fairly easy-to-detach bodywork, that will reveal the detailed roll cage both the headlights and the taillights can be illuminated space for 2x BuWizz 3.0. The PF version is already on Rebrickable.
-
 I finally had time to play with the Powered Up elements from the new Train sets. They surely don't represent the complete PU system yet, but we can draw a lot of conclusions from them:
 -
Introduction: Thanks to @Jim the brand new Cargo Train has arrived early in LEGO City. Here a review of the set. I was very excited to get my hands on the set, not only because it offers a large potential but also because of the Powered Up system. Set Information: Number - 60198 Name – Cargo Train Theme – City (Trains) Year – 2018 Minifigs – 6 Pieces – 1226 Target age – 6+ (6 – 12) Price – €189.99, CA$ 269.99, $ 229.99, £ 179.99 Available from: July 1rst 2018 Links: Brickset - https://brickset.com/sets/60198-1/Cargo-Train Poll on the review: https://www.surveymonkey.com/r/GTQWQVX (suggestion: fill it in after you finished the review). LEGO Product Information Load up the powerful LEGO® City 60198 Cargo Train and deliver the goods on time! This cool LEGO City set features a motorized engine with 10-speed Bluetooth remote control, accessible driver’s cabin, a crane wagon with rotating and extendable boom arm, container wagon with 2 containers, and a log wagon, plus an armored truck with opening doors, and a forklift with opening roll cage and lifting forks. This cool LEGO train set also includes a full circular track with 16 curved rails, 16 straight rails and a railroad switch with lever, plus a control center with ladder and 2 buildable pallets with money bills, gold bar elements, a snow scooter and 6 LEGO minifigures. Includes 6 LEGO® minifigures: 4 train workers, a security officer and a crook. Features a motorized engine with 10-speed Bluetooth remote control, pantograph on the opening roof, and driver’s cabin with control panel. Also features a log wagon, crane wagon with rotating and extendable boom arm, and a container wagon with 2 containers with hooks on the roof for loading and space for pallets. Includes a control center with ladder and signal lights, a full circular toy train track with 16 curved rails, 16 straight rails and a railroad switch with lever, a money transport truck with opening doors, and a working forklift with opening roll cage. Accessory elements include a wrench, 12 gold bar elements and 4 money bills, plus 2 buildable pallets, 3 logs and snow scooter. Open the roof to access the engine car filled with cool details. Operate the cargo train with the 10-speed Bluetooth remote control. Lift and load logs onto the log wagon with the crane's rotating arm and hook. Push the lever on the railroad switch to drive the train to a different track for loading or unloading. Load pallets into the containers with the forklift before lifting them onto the container wagon with the crane. Set up the tracks in different configurations to load or offload cargo around your city. This product requires batteries (not included). Please refer to the product packaging for type and quantities. The included Bluetooth remote is not compatible with older infrared remote-controlled LEGO® train sets. Cargo Train in total measures over 4” (11cm) high, 32” (82cm) long and 2” (6cm) wide. Engine measures over 4” (11cm) high, 10” (27cm) long and 2” (6cm) wide. Log wagon measures over 1” (5cm) high, 5” (15cm) long and 2” (6cm) wide. Crane wagon measures over 4” (10cm) high, 8” (22cm) long and 1” (5cm) wide. Container wagon measures over 3” (9cm) high, 7” (18cm) long and 1” (5cm) wide. Armored truck measure over 2” (6cm) high, 6” (15cm) long and 2” (6cm) wide. Control center measures over 8” (21cm) high, 3” (8cm) wide and 4” (12cm) deep. Forklift measures over 2” (7cm) high, 2” (5cm) wide and 4” (12cm) deep. The Box: The box is huge, feels filled and heavy. This is the front of the box: and this is the back: They clearly mention that set is not compatible with older systems (read: Power Functions). They also promote the upcoming app(s) and the passenger train (+ the track sets). I found it a bit odd that they did not include the Bluetooth Low Energy logo and standard they use on the box. They mention Bluetooth but that could have meant Bluetooth Classic. Not too easy to see in the smaller resolution of the image, but they mention near the lightning bolt: "The Bluetooth technology is not compatible with older train products". For kids I think the box would be very appealing since they give a lot of hints on how to play with the set. Inside The Box: The box contains 12 numbered and additionally four unnumbered bags (three with tracks, train bases and a few other parts including the ladder, and then the PU train motor). Two stacks of four curved track sections and the PU controller and receiver came loose (interesting since the PF parts always came inside cardboard I think). The Instructions: The six booklets and the stickers came in a separate plastic sealed package, good thing since that keeps both stickers and booklets in much better condition of course: The Build: It is a massive set so I decided to take it on in a very structured way. Booklet 1/6: The Forklift The first pages of the forklift booklet contain some instruction on how to move forward bag by bag. It also explains the brick separator and scanning the QR code will even lead you to a tutorial video about the separator. Ok, well these are the parts of bag one: For the price of the set they really focused on money, so while you spend quite some money on the set, you also are rewarded with a lot of money related items. Some nice modern parts, a lot of familiar parts. They could have used the goldish version of the 'bars' (Piece 99563) but apparently they didn't (the piece was included in other 2018 sets though) and just used jumper and normal tiles. They have a lot of color variations, especially the jumpers, I thought that was a minor draw-back. At first I also found the "Bright Light Orange" parts looking somewhat poorly (reminded me of some clone bricks) but it worked out very well in the end. First one needs to build the minifig and the pallet. Here is what the figure and pallet look like. To the left the base of the forklift: Here is the final forklift together with the minifig and pallet full of cold uh, gold and banknotes. Here you can see for yourself that it wasn't a bad decision to make the forklift Bright Light Orange after all: Booklet 2/6: The Bank Truck Bags 2 and 3 are needed to build the bank truck. I guess they did this to make the set suitable for the 6 year olds. This is the heap of bag 2 after I structured it: Not that many special parts, really straight-forward. There was one interesting step: You build the driver seat / engine compartment as 'one piece'. The engine is place in the middle of the truck as it appears. I guess they looked at real car factories and their "Hochzeit"-moment (German for marriage) moment when the bottom of the car and the body are coming together. That is it for the first part of the truck. This pile represents the contents of bag 3. The left-hand corner is the finished first half from bag 2. I always build using 'heaps' but I must say restructuring the parts means one can build very fast so I would recommend it to kids from now on: I like these parts better then the base parts. They did a very neat job with the smooth nose of the vehicle: it is basically a four-wide car piece and integrates very well. No bulky 'Jack Stone'-era like parts, but still a smooth and very buildable truck. I thinks kids and T/AFOL's alike will enjoy building it! Here is what the truck looks like when completed. A really nice and easily accessible cargo bay, nice for the 'players', but they did in fact also include those nice doors at the back. So fortunately they did not save on details making the set also interesting for a more mature audience. As you can see the pallet with money and gold bars will fit right in! The only draw-back I could think of is when the bay is closed you can see the gaps on the top. Hope it doesn't rain in your LEGO city and the bank notes are water proof (well, they are made from ABS so I guess they are ;)). A view from the front: you see how smooth and detailed it is while still using relatively small pieces. I did not apply the stickers yet, later you'll see why (and a neat trick). I would advice that also for kids, wait till your have built everything and ask a 'pro' to apply your stickers. Booklet 3/6: A stopper, crossing and... Part one of the Locomotive! Finally, the first real train builds! First some 'battery management'. The set needs a staggering amount of ten AAA batteries! Four for the controller and another six for the receiver / motor controller. I did only have for when I started and the shops were already closed so you'd better prepare and get good deals on AAA batteries before you start your PU (Powered Up) adventures. You need to pair the Bluetooth devices first. The controller and receiver probably have some initialization periode where they are able to pair to each other. We will see how that works if we will power on more than one controller or receiver in the future :) Maybe they rely on the signal strength though and will only pair to the closest devices that just booted up, just speculation, we will need to see when PU parts become more readily available and further experiment with it. As Sariel showed, powering of is easy: The receiver will apparently (from the video by Sariel) also power down after one presses the controller momentous switch for +5 seconds. Hope the troubleshooting guide will appear there around July 1rst, for now it does not exist (https://www.lego.com/themes/city/trains). Here are all the PU parts together: From top to bottom: - the receiver / battery box / motor controller combination - the remote control for two motor channels - the PU version of the train motor Now we should have started building the loop with the 'dead-end' behind the switch. The set comes with 16 straight and 16 curved tracks, and a (left hand side) turn out. Interesting to see that they included quite some straight track compared to older sets, but also that they did not include an extra curved track to make the 'dead' section behind the turn out in line with former LEGO guidelines that suggested us to always add a curved piece right after the diverted section of turn outs and never directly connect a straight section. B.t.w. booklets 3 and 4 show a yellow / orange tile on the turnout so you can remember that train will react to what side of the controller, but they included a green tile and correctly show you to add that green tile to the controller for 60198. Maybe they should have included a sticker that looked like 60198 for that tile as well but they didn't. You then are instructed to build the (unsafe) railroad crossing, more or less just like the one from the winter village station. There is also a rail stopper for the end of the dead section. Here are the parts for both builds: This is the rail stopper: The crossing is plain but effective: They could have added barriers for even more playability but I guess in freight shunt yards like this, have a crossing without barriers is most common. Bag five contains the first part of the engine. The baseplate is 6 x 28 which is very common for recent trains (see: BrickLink). The inside of the train is very colorful. I know from designers that they typically do this for sets targeting a younger age, I don't mind it since the outside is still very acceptable. You see already quite some typical Train parts, so the LEGO Train story just continues with this set. The engine is very much symmetric as you can see, I value this very much since for children it helps them to better understand concepts like symmetry (I'm a beta teacher after all). Here is the half way built engine, I actually made a mistake with the yellow 1 x 4 panels, they should have been facing towards the inside of the train. The head is more or less a fusion between typical US and EU trains. We all know of course that the leaked initial images very much looked like typical EU engines, I think this way the train appeals to a wider audience (remember Jamie Berards recents comments on trains). Since the nose is SNOTted, it would be very doable to modify it without a lot of problems to suit one's taste maybe even better. The tile on the front will be fitted with a 'cargo' instead of the typical Train ('Northern') logo (<-O->). That was the end of booklet 3. Booklet 4/6: The rest of the Locomotive Booklet 4 lets you start with bag 6. You need to add the buffers and the motor as well. Here you see the parts from bag 6: Yellow bogie plates this time. The green train windows are not unique but after all most parts would also be reusable for MOC's etc. Here you see the finished bogies, one with the new UP motor, the other entirely brick-built: The buffers for the locomotive are of the snowplow variety. After finishing bag 6 we have this: The cockpits are easily accessible and the battery bay is very spacious: we don't have an IR receiver anymore of course :) There are two train parts in bag 7 that I have never seen before: the new pantographs! They look really neat I think. Here is the finished train with the controller next to it: You can see that the vertical part of the panels are now facing the inside. The 1 x 3 panels on top make a the entire engine very sturdy while it is still very easy to remove the entire middle section, just remove the four panels and one can lift the entire thing. It looks very much like a real cargo engine after all I think (although it appears a fusion between a continental and US train as we already discussed earlier). The roof section acts like a lever (comparable to what we have seen in e.g. the yellow and red cargo locomotives) for the battery box. Booklet 5/6: Crooked trees and a female operated rail crane Bag 8 contains the crook with the rail car and lumber. Not spectacular, but they did a nice job. I like the dark tan 1 x 6 fences. Looks like the crook is up to no good! Here the finished lumber rail car. The lumber fits very well and won't fall off that easy. Apparently this car is also the crooks ideal place he can observe from. Bag 9 contains the base for the rail crane. We have seen quite some rail cranes already (1972, 1975, 1977, 1980, 2006 and 2015 (I might have forgotten one or two), I already owned one (set 7814) when I was 2,5 years old, but I think (arguably) that only set 4552 from the 9V era tops this one. These are the parts, another (6 x 24) train base, the typical train railings again. The female crane operator has the same uniform as the train driver. Here you can see the finished base: The stabilizers are fully retractible as you can see and have a sturdiness to it as needed for performing heavy lifts common in railroad situations. This is also true for the bogies, very compact, really appropriate for a genuine real crane I think. This is what the crane base looks like after being but on it's bogies: Bag 10 contains the crane itself: I like the large round turntable. Also those technic parts. A good starter for engaging youngsters in Technics. This is what the finished crane looks like: M(r)s operator is now totally ready for every conceivable heavy lifting duty. B.t.w. those 'stamps' that you see connected to the hook are also used as joysticks for the operator. Behind the 'container' doors on either side are 2 x 2 tiles that will get a human machine interface / operator panel (stickers). Booklet 6/6: Rail yard control tower and container rail car. The final booklet contains the instructions for a duo container rail car and the yard control tower. First up is bag 11 that contains the rail car, containers and even a snow scooter. All the parts for the train car and the containers. No very special parts but nice color variations. First we build the rail car itself. A very straight-forward open rail car with a somewhat heavy duty base. Then the bank container that also doubles as a safe. Wondering why the crook only has binoculars, maybe he wants to steal the combination? I guess no explosives this time :). The container has a hook so the rail crane can easily lift it. The 'money pallet' will fit in just like with the truck. The second container comes with a pallet that can fit a snow mobile. The back of booklet 4 already promoted the arctic explorer sets so I guess they wanted to link the set also to the arctic theme enthusiasts! The snow mobile next to the car and both containers. The last bag! Number 12 contains the following: There is one peculiar item that was new to me: It fits a cross axle to the side and can fit a 20482 part to both other sides. Although the signal tower might not be that realistic, it adds extra playability and is quite fun. We can always MOD it of course work more like the real deal. Initially I though, did they finally reintroduce the yellow helmet again to a train set after about 40 years, but alas, although the female hairpiece of the operator also looks very neat. The back of the tower has a knob so you can signal the train engine driver that he can start / stop shunting in the rail yard. So that was it for building. Here are most of the left-overs: There is also an extra small chain piece (from the lumber car). This is what the entire set looks like from a 'helicopter' vantage point: The Minifigures: Here is the line up of the minifigs: Having some diversity in the LEGO train world isn't that bad I would say. I like the uniforms, a lot of details in their prints. All torsos also have a printed back: Apart from the 1 x 4 train cockpit, 1 x 2 money tiles and these torsos all other artwork is done using stickers. Stickers, love them or hate them?! I think without the stickers the train would not look that great at all, but we have them so we can upgrade the looks of our set by applying them. Here they are: The artwork was done quite well, I like the metallics in the bank logo's. Nothing too complicated but nevertheless making the set much more appealing. The sticker paper does then to curl better put it somewhere safe till you are ready to apply the stickers. I obviously have a lot of experience applying stickers, my wife always ask me to help out on e.g. her technic sets for applying them, so do my cousins and nieces. But that does not mean that I never fail at applying the stickers just perfectly. Fortunately I know a trick and used that trick to apply the stickers on set 60198 as well. The solution: adding some drops of (mild) dishwashing soap to some water: You then moisturize your finger and apply the solution to the place where the sticker(s) need to be applied. The thin film soapy water prevents the sticker from immediately sticking to the ABS. You can then readjust the sticker till you are satisfied, squeeze a little to make the sticker stay in place and just let it dry. Applying the stickers makes all the difference don't you think? I just wanted to finish off with a last view from the yard tower: What a job, a great view... and: Even your own coffee maker: I just love that they added this detail! Summary: Playability: 10/10 Design: 7/10 Price: 6/10 Parts: 8/10 Minifigures: 9/10 Overall: 7/10 Wrap-up and some final notes: Hope you like the review, I did not have my photography tent / spots up and running at the moment so sorry about the differences in colors / shading, hope it wasn't too disturbing in the end. At my flickr page you can see more pictures I took while building the set. Now I just need some AAA batteries to start the engine! And remember: don't forget to fill in your opinions on the set: https://www.surveymonkey.com/r/GTQWQVX The quality of the video could be better but at least you get the idea I hope. One more thing: I have started a Powered Up review that includes a tear-down here. Hope many more will contribute to that! I'll do that in a separate topic since it is of course not only about set 60198.
-
My apologies if there's a tutorial on the recent updates to the Powered Up app somewhere - I haven't been able to find one. Having spent a couple of days playing with recent updates to the app, here's some stuff I figured out so far. I'm sure somebody can contribute with more: how to create custom control profiles with drive & steering motors (also works for the C+ Servo motor) how to set up joysticks, end-to-end buttons, sliders and how to enable controlling motors by tilting your device how to set up display of a motor's speed or position
-
 I'm puzzled over very similar specs of Powered Up L and XL motors, according to Philo's research. I believe I'm not the only one though )). It looks like a good move to invest only in L motors, since they are lighter, smaller and just as powerful. But what's the catch? Are there any insights on the subject? Any additional field test results? Looking forward, thanks!
 -
For the last 5+ years I have been running a train under my Christmas tree, powered by a LiIon PF battery box and double motors. I recently answered a question on Bricks.stackexchange.com where someone asked for advice on which power system to buy, and the answer I had to give surprised me so much, that I went ahead and changed my own strategy immediately as well. I am now the proud owner of an oval (16+ curves, 12 straights) with a L+R set of points of 9V track, including transformer, wall wart and power-to-rail connectors. Total cost were around $120, however, this is after deducting the going BL price for other train components that came with my purchase. If I didn't exclude those, my total would have been $190. (All US dollars). This prompted me to do a quick compare on the costs of a fully working train oval for under a Christmas tree. The Oval consists of 16 curves and at least 8 straights. The cost of whatever Christmas train you choose to run is not included: Powered UP: Battery Box: $50 at LEGO S@H, $35+shipping at BrickLink (only 1 US Seller) Motor: $14 at LEGO S@H Wheels & Axles: ~$3+shipping on BrickLink for 2 axles and 4 wheels Decorative sides: ~$2.50+shipping on BrickLink Tracks: 1 Track Pack (8 straights, 4 curves): $20 at LEGO S@H, $16 on sale occasionally at other stores; 12x Curved tracks: $6+shipping at BL or: Buy set 60197 ($160 at LEGO S@H, occasionally on sale for less at other stores (e.g. currently $128 at Target) plus 4x Straight track ($7+Shipping on BL) - used ones run about the same cost as the promo prices. Depending on how you count, this is $100-$160+tax for this setup, and you need to keep a mobile phone around (or pony up another $15 for the remote control), have to keep the connection alive, and will have to replace/recharge batteries every 2-3hrs. Power Functions: Battery Box: $13 on LEGO S@H ($15+shipping on BL), or the LiIon pack which has no US-based sellers currently neither on EBay nor BL, but should go for $100-$150 if available. IR Receiver: $10+shipping for a used one on BrickLink Decorative sides: ~$2.50+shipping on BrickLink Tracks: 1 Track Pack (8 straights, 4 curves): $20 at LEGO S@H, $16 on sale occasionally at other stores; 12x Curved tracks: $6+shipping at BL or: Buy a retired Power Function set (used) such as 60051, which with patience can be bought used, complete on EBay for $125-$150. You'd need extra straight track though (see Powered Up), which runs ~$7+Shipping. Again, depending on how you count, this is a $70-$150 purchase. Likely the cheapest option currently, until prices for Power Functions start skyrocketing once all components have officially retired. You get 2-3hrs run time, and unless you add $100 to your total for a LiIon battery box, you will need to buy rechargeable batteries and a charger (or cycle through alkaline AAA's like a madman). 9V: Get a used but working copy of 4561 ($100-$150 on EBay) Buy some extra straight track: 4*$5+shipping on BL (let's call it $25) Total: $125-$175 Suddenly the convenience of never having to change batteries or recharge with a $150 9V purchase sounds pretty attractive, doesn't it? Quite fascinating, for a product that has been discontinued for almost 15 years.
-
I like to power my Technic models to make them move. However, I am very confused about current powered up compatibility: 1. I've read that Lego powered up family include spike prime system (such as Lego 45678 and 51515), and Boost creative toolbox (Lego 17101) 2. If above is true, there are total 4 categories of hubs in powered up family: large "move hub" (88006), common hub (88009), "tech hub" (88012) and "spike prime hub" (45601). They all have Bluetooth function 3. There is one Remote controller (88010) which can control common hub (88009) by Bluetooth. This remote controller is standard component in Powered up Train series (60197/60198). I'am very curious if we can control other powered up family hub such as Tech hub (72099/72109) or spike prime hub ? 4. There are also many motor in powered up family: Boost Medium Linear Motor (88008), Simple Medium Linear Motor (45303), Technic Large Motor (88013), Technic XL motor (88014), Spike prime Technic Large Angular Motor (45602), Spike prime Technic Medium Angular Motor (45603). There is one train motor in powered-up family, too: 88011 5.I wonder if all these motors could be used in all hubs? For example, can I use Technic Large motor (88013) with Spike prime hub (45601)? Can I use Spike prime Technic Large Angular Motor (45602) in Move hub (88006) or Tech Hub (88012?) 6.If I want to control with these motor/hub combination by app, control + app seems to be the most restrictive because it only provide 3 original Lego set panels without user define interface. Powered-up app seems to be more flexible choice?
-
 Technic App-Controlled Top Gear Rally Car Thanks to Lego and EB for this review set - I'd seen the rumors and leaked images, so I was thrilled to get to try it out. Name: App-Controlled Top Gear Rally Car Set Number: 42109 Pieces: 463 Price: $129.99 Minifigs: 0 Theme: Technic The Box Front There is a LOT going on here. Logos everywhere, and not just on the car. But overall, that's a pretty nice looking set. I'm worried that it's over-reliant on the stickers though. I get the Top Gear branding - it makes sense for a car. Except they've never had a rally car on the show driven by the Stig. There were SO many opportunities for a more fitting car - any of the "reasonably priced cars" that they had stars race in (but that would've required more licensing deals), or the Reliant Robin, or the ridiculous P45, or the Hammerhead Eagle i-Thrust, or best of all, the indestructible Toyota Hilux. This feels more like Lego designed a rally car set and then got TG to do a licensing deal and just slapped stickers on it. The Box Back Yep, it's the Stig. With so much Top Gear branding, I feel like this set is Euro-targeted. Yes, people here in the USA have sometimes seen Top Gear on the internet, and there was a few episodes of "Top Gear America," but it's still not a popular thing here. I think the average person seeing this on a shelf won't know the reference. And sadly, no sign of a B-model.... even worse, no Stig is included. This would have been a GREAT opportunity to bring back the Technic figures and have an all-white one. The Box Side Here's the electronics included. You get a Powered Up hub, a large motor, and an XL motor. Yes, this is the bigger hub that has FOUR ports. It's previously only available in the Off-Roader set and the massive Leibherr Excavator. That alone will probably sell some of these sets. The Contents Nothing shocking - a manual, sticker sheet, non-numbered bags of parts, and an inner box that has the electronic stuff. The Stickers Yep, there's a lot of them. And they're full of puns and TG references. But being Lego, not the inappropriate TG jokes (sorry, no Penistone or anything like that) The New Parts Yes, there is a new differential in the set. It's actually pretty nice - it's easier to use than the old one, since you don't have any of the inner gears falling out while you're trying to put it in place. And it's the same size, but with a double-bevel gear so you've got more flexibility in driving it. As for other new parts, the only thing I noticed was the mudguard panel in white, which you get FIVE of. The Build, 1 The build starts with the simple drive system. It's upside down in the photo - you've got the rear axle with the differential. It'll take advantage of the new diff gear by using a simple drive. The motor will get a gear attached and directly drive the diff. I also appreciate the new cable management clips, which come in a couple colors in this set. The Build, 2 Here is the chassis basically done. It has a fair bit of decorative bits - brake discs on the rear axle, engine components up front (around the L motor which handles the steering), and dual exhausts. The Build, 2B The steering is directly done, like the drive setup. The L motor has a small gear that meshes with a gear rack to steer. The Build, Done All that was left is adding the body panels. And stickers. So many stickers. There's big ones, little ones, all over. The car looks really naked without them. The Underside From the bottom, the car looks pretty boring. There's no drive train, suspension, etc. Having the two motors so directly driving their functions makes it mechanically a pretty simplistic set. The batteries are easily accessible, and you can see two of the new larger 7x11 frames in white. Those give the car a lot of strength without needing many parts to reinforce it. The Side View There's a few cosmetic misses, IMHO. There is a gap in front of the black panels at the rear, behind the "door" - it's necessary due to how the beams behind it are placed, but that panel with "The Stig" on it would look better a stud or two forward. I don't like the different tire sizes either. It's partially to give the car an aggressive posture, and it's partially for easier clearance on the steering mechanism. The larger tires do fit the front wheel wells, but they just barely rub when the steering is turned to the max. I just think the littler tires look too small. The App Yes, you MUST have an Apple or Android device to use this set. Well, perhaps the Powered Up remote could control it, but I didn't test that. They completely expect you to use the app. So before you buy the set, make sure you can get the Technic Control+ app on your device (I don't know how old of devices it'll work on). This is the primary interface. You use your left thumb to steer, on the corner steering wheel. Your right thumb controls the throttle on the right. There is a handbrake, but it doesn't do much (the car stops pretty fast on its own). And you can switch to "manual transmission" where you select one of 3 gears, which do affect the car's speed. There are also some "races" you can do, driving the car following onscreen prompts and trying to beat a set time. The Video So how does it drive? Well... it's a mixed bag. Personally, I think it's too slow. It's a race car, Lego. Not a piece of construction equipment. It does maneuver well and the app works well to drive it. One perk is that the new motors have position sensors built in, so the steering automatically returns to center. It's not perfect though - it would typically be still curving slightly any time I tried to go straight. The Results Overall, how is the set? I think it's a nice set. The cost seems high, but that's driven by the new Control+ system. Lego doesn't currently sell any of the included parts alone, but for comparison, the smaller PUP Hub retails for $50. The Medium motor retails for $17. So I'm sure Lego would value the hub and motors from this set at $90+. Given that, the value of the set is good. However, on Bricklink, the current selling price is $25-30 for this hub and $15-20 each for the motors. There's a lot of people parting out the Liebherr set! One huge benefit to Technic builders is that there's now a car in the app. You could easily design your own car, and as long as you have an L motor for steering and an XL for driving, the app would work. There are definitely things that I think could be better on the car, it needs a B-model, it's expensive, and I seriously wish it came with a Stig to drive it. Overall though, I'd give it a solid B. Whether it's a good buy for you depends on your wants - do you want a Technic app-controlled car? If yes, go buy it! Then mod it to go faster
 -
 Inspired by the Volvo EC750 Excavator with the new Powered Up motors All motors in the rotating platform Tracks with subtractor mechanism and two differentials Tensioner regulated tracks
 -
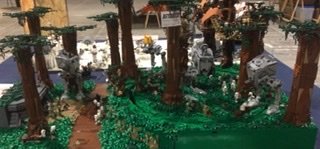
Hi! One year ago create this MOC. You can see working in https://www.flickr.com/photos/blackfalcon81/ Thanks!?
-
I think we can all agree that Lego's own 42109 Top Gear Rally thing wasn't really all that. In order to improve it a bit I set out to build a rather popular car with it. Turns out someone beat me to the punch Some trickery was used to create the GIF- the Porsche itself is stationary, while the light moves. Functionally, the model is identical to the 42109, with some added lights. Luckily, performance has been improved by using Imurvai's Brickcontroller app. In a pinch, Lego's own app will work as well if you don't mind about the lights staying off. The dimensions are the based on the 42093 Corvette, so it should work with the 42098 car transporter. Underside with differential. (What, like it's hard?) Also note the extremely tidy cable management Given my typical production speed I should have a video out somewhere around christmas.
-
 The idea with this is project is to get speed from buggy motors, and torque from PU XLs, which have a very convenient shape. Powering the hungry buggy motors from 2 buwizz units and the PU XLs from the big technic hub, which will be in the rear and controlling it with the buwizz app. Servo for steering, PU L for fake v8. Perfect car. I would enter it in the mad max contest but 2 things stop me. 1, I doubt I will finish in time and 2, I don’t have any real buggy motors and will be using fake ones.
 -
Hi All, I'm new to this forum, and new to the Lego RC train world. I have just started collecting this range with my son (who's 5) so this is mostly about me.... :) In all seriousness, he is over the moon with these trains and the sets in general and we have 3 already (60051, 60197 and 60198). I'm looking for some expert guidance as to the best and most cost effective way to be able to remotely control/motorise the switch tracks (points). Having done some research online, I see there are many ways, although i haven't found a definitive step by step guide yet. It would be good to get some valuable feedback and guidance from someone who has been through this process if possible (i.e method and functionality vs cost and practicality). Appreciate the time spent reading my post and any feedback received. James.
-
 I just found this (kudos to zusammengebaut.de for posting this). I thought those informations would be welcome here as well. Powered UP AFOL Community Answers https://lan.lego.com/news/overview/powered-up-afol-community-answers-r146/ I haven’t made up my mind yet but I have to admit I have some mixed feelings about Powered UP.
 -
It's a bird, it's an App-Controlled Batmobile, it's a... oh it is an App-Controlled Batmobile. Ok then! Set Name: App-Controlled Batmobile Set #: 76112 Theme: DC Superheroes - Batman Parts: 321 Minifigures: 1 Year of Release: 2018 Price on Release: 100 USD, 140 AUD, 90 GBP, 900kr, 100 EUR (varies by country) Flickr Set LEGO Brickset Bricklink (not yet) Thank you to LEGO for providing this set for review. The review is an expression of my own opinions. INTRODUCTION The latest in a long legacy of stunningly gorgeous remote-control LEGO sets, 76112 App-Controlled Batmobile rolled out to much skepticism and bewilderment when information first became available, at least from what I read online. "$100 for that weird looking thing? You've gotta be joking mate!" But actually, if you check that handy link to a list of remote-control sets on Brickset, you'll see that this one lines up perfectly with what's come before in terms of cost for content. And while I'm clearly being a bit sarcastic about some of the horrendous-looking RC models that have come before, it seems from the user reviews that at least a few people quite enjoyed them. So, how does this stack up? As a Powered Up (tm) set, one you build and then drive with your phone because you needed more screen time with your LEGO, is it worth your hard-earned pennies? Let's find out! BOX I don't think I've ever seen a LEGO box with a picture of human hands holding a smartphone on the front before, so that's very striking right off the bat (geddit?). They've also used a completely different colour scheme than the rest of the DC Superheroes line and a modern stylish Batman logo that evokes the Rocksteady Batman games logo because this set feels vaguely "inspired" by the Arkham Knight Batmobile. All-in-all, it's a design that will surely stand out on shelves for its uniqueness. However for a 100 USD product the box is quite small, compared to another recently released 100 USD product. It's interesting to highlight the difference, but this isn't a regular set. The back is quite sensibly all about highlighting the functions, though I have no idea what some of those symbols near the bluetooth hub are meant to be because they don't appear in the app or anywhere else. I do appreciate that it opens like one of the more premium sets, and it forces you to Hashtag because all of the kids these days are Hashtagging and LEGO is for kids didn't you know? In other words if you don't have Instagram don't bother buying this. PARTS and THE BUILD Inside the box you'll find three numbered bags (ymmv on if all of the numbering styles will be the same), four loose balloon tires, the bluetooth/battery box hub, and two motors. Plus the instructions of course, but honestly there's nothing worth photographing in these instructions so I'll just say that I found it interesting that there are no written directions for how to download the app, just a page showing the app logo and an arrow pointing to your phone, and the name of the app to search in your app store. Bag 1 contains a bunch of technic-type stuff, random bright colours you didn't expect, the minifigure, and the juicy bat-cessory pack which I've covered in depth in this separate article. When you're finished with Bag 1 it's quite a colourful mess that could be anything (besides like a castle but ok you get what I mean). Bag 2 contains parts to start building up the shaping and look, and also one 1x2 teal tile for no reason whatsoever besides that the designers seemed to get a mandate this year to use as much re-introduced teal as possible I guess. There's also a sand green hinge base and tan cheese slopes which in combination remind me of Harry Potter, and the opaque black windscreens which are slightly but not all that rare, especially compared to many of the other opaque colours for that part. Here's that teal plate sticking out quite conspicuously: And then it's gone, never to be seen again unless you're looking down into the open cockpit from behind. Bag 3 finishes off the model, so naturally it contains mostly black and grey, and of course the red windscreen which has come in three sets in that colour so is nice but not particularly rare. I was surprised to see that the Nexo-shield On button was printed, though it's a kind of raised print application that has the resultant effect of looking like a sticker. But we know it's not, so it's great! The single technique that stood out to me most in the build was the on button. It's activated using just the natural give in long plates - no hinge, technic bit to push, or anything. The button on the bluetooth receiver is designed to be pressed with just the lightest touch, so depressing a plate with a boat plate attached is enough to activate it. On the less nice side of things, the back struck me as messy right away even with the wires as neatly folded as I could get them. MINIFIGURE Sadly for Batman minifigure collectors, this set contains an exclusive, very detailed Batman, so people who fit that collector description will have to buy it just for the minifig. Or, y'know, Bricklink. I do love the level of detail here from the torso all the way down through the toes. From glancing at images I expected both torso and legs to be gunmetal grey, but the torso actually is moulded in black. The figure looks perfect from the front, but the difference in colour is a bit more noticeable and jarring from the back. The face has some nice stubble originally made for grimdark Batfleck, but now good for grimdark other Batmen as well. Batman comes with the typical one Batarang and one spare, which he brandishes with a grimace. THE COMPLETED BATMOBILE Putting aside the functionality, which of course we'll get to, the model looks... weird. I'm not super-up on Batman vehicles throughout the years, but I know that Batman has had a wide variety and recently several tank-like cars like the Tumbler and the Arkham Knight Batmobile. This one certainly isn't out of line with those completely. Still, it looks a bit awkward in person. From the back things get worse as it becomes apparent that the set is more built for the RC functionality than for aesthetic purposes, though it doesn't have a huge antenna sticking out of it so that's good! You probably wouldn't look at it from this angle ever in real life, but this isn't real life. From this low angle it looks quite aggressive. The bigger Bat-symbols don't do much for me but the little one on the front is ace. It's quite tank-like when viewed this way. Aaaand it's a bit stubby and odd when viewed straight from the side. The back also sticks out in a strange way. Like in lots of vehicles, Batman has to lie down quite dramatically to fit in the cockpit. Luckily in this instance he doesn't have to operate his Batmobile though, since the human overlord (namely, you) does it for him from the app. The cockpit also dangerously opens down into the wheelbase which is surely quite loud and unpleasant for Batman, but the tan trim and printed control panels are nice details that let you know at least a little bit of design work went into it. APP-CONTROLLING THE BATMOBILE By this point I've established that the parts in this set aren't too interesting, the minifigure is great, and the completed looks of the thing are so-so, but obviously the real test and also point of interest of this set is how it functions. It's easy to find the LEGO Powered Up app in the app store, which will hopefully work with whatever smart device you have, and once downloaded and opened it gives you the option to choose the train control app or the Batmobile control app. There's space on that screen for more, so I presume we can expect more sets coming with the Powered Up control system. I've never had any motorised LEGO before (besides ZNAP... don't ask), but I've watched the development of the various systems over the years and the amazing thing that strikes me with this set is how it relies on so few specialised motor-parts for the functionality. A battery box is a given, but most previous RC LEGO cars have had some sort of big base, while this just uses two motors which can be used for anything that needs rotation really. I know nothing about app programming but I know that obviously these two motors have to be rotating in opposite directions to get the Batmobile to drive forward as they're mounted 180 degrees from each other. That in itself is probably easy to achieve but to a newb like me it feels really built from the ground up out of parts that could do anything, which is exactly how LEGO should be. Of course, that all fails if it doesn't run well or isn't fun to play with, so that's what I'll be looking at now. The app has two different modes for controlling and driving the Batmobile. I haven't found official names for these, so I'll call the red one the Driving mode and the blue one the Function mode. Here's the Driving one. You can slide the controls up and down to change speeds, and hit buttons to pop a wheelie, sort of turn around, or quickly drive forward and then turn around. Unfortunately you can't use the button functions in conjunction with driving, so if you want to pop a wheelie you have to stop, pop a wheelie, stop again, and then continue driving. In Function mode you can't pick a speed but the Batmobile actually controls more easily. Every tap of the plus or minus buttons makes it lurch, or if you hold them down it will go forward or back, as you would imagine. The function buttons here allow it to kind of shudder backwards in a fright, pop a wheelie (of course), or vibrate and jitter around. But you want to see it in action, don't you! That's why I've put together a couple of different videos. The first shows me demonstrating the app with minimal editing so that you can just see how it runs. Overall, as you can hopefully see, it is fun to drive, but there are some annoyances. In Driving mode it won't run at any speed under 40, which makes the numbers under 40 a bit misleading (they're effectively 0). Also when trying to drive just one of the sides it only works sporadically. I've tested this on a nice carpeted surface too and it has the same result, so it's not a problem of it having too little traction on my smoother studio surface. Driving in Function mode works better and is therefore more enjoyable, but I wish the Driving mode worked better because in theory getting to choose speed is the way you'd want to drive. As far as the pre-programmed functions in each mode go, the ones in Driving mode are more useful in theory because it's nice to do various turns at the touch of a button. The various jerks in the Function mode are cute novelties but would get a bit old. Like I've said, though, you can't continuously drive and touch a button and have it go straight from driving into the pre-programmed turn. Instead, you basically have to take your fingers off of the drive controls to properly hit the button, and no matter what the Batmobile stops before doing the function. Therefore the turns are rendered a bit useless, and I think kids will have a better time with the blue Function mode overall given the problems with the red Driving mode. Perhaps LEGO will work on making the app better with updates, but we'll see. The other major thing to mention is speed. In either mode, at full throttle it just doesn't go all that fast. Now, you wouldn't exactly want it to because it's made out of lots of fiddly bits that definitely will fall off if you crash, unlike those old not-really-LEGO RC cars that were super sturdy and could survive crash after crash from what I've read. So on the one hand, I'd get frustrated if it went fast and I had to fix it all the time. On the other hand, you just kind of want an RC car to go fast. It's a conundrum. But don't get me wrong. It still is fun to drive it around especially given that you've just built something out a bunch of parts that looked nothing like a drive-able car when you opened the box, and now you're controlling it with your phone! What a world we live in. CONCLUSION & RATINGS Ultimately having built and tested the App-Controlled Batmobile, it's no longer perplexing to me like it was when I first got wind of it. It's proving the versatility of LEGO's newest motors and battery box system, and I can see the wisdom in LEGO making their newest RC car a tie-in because, while a plain RC Car is somewhat cool, an RC Batmobile for (every kid's favourite character) Batman to drive around in is awesomesauce!! The exclusive, highly detailed Batman minifigure is icing on that remote-controlled cake. The price, while high, seems justified in the context of LEGO's previous RC offerings and of RC toys in general. I did a few quick searches for other remote-controlled Batmobiles on the market, and you can easily spend more for a toy that you can't deconstruct and turn into something else, or at the very least customize with other LEGO parts! Still, there are drawbacks. First of all, the model just doesn't look that good and it isn't really recognizable as anything. I get why it has the short wheelbase and big tires that it does, but without those slapped-on new bat-cessories it wouldn't even look like a Batman vehicle. We'll see how it fares on the market, but I can't help but feel that if it was based on a Batmobile from some media, any media, it might have a better shot than it does now. The driving functionality and app also have a variety of negatives, as I've detailed above. Parts: 8/10 - Nothing exceptional, but the new Bat-cessories and a few other parts like the windscreen are nice, and the battery box and motors are obviously where it's at. Minifigures: 9/10 - The minifigure looks great from the front but odd from some other angles due to the colour difference between torso and legs, and an additional villain minifig would've been nice so you'd have someone to run over repeatedly! Build/Design: 7/10 - It's quite frustrating trying to fold up those wires while building, and the finished thing doesn't look great from a variety of angles. The fact that it doesn't look very Batty besides the Bat-symbols also brings this down. Functionality: 7.5/10 - Obviously as far as LEGO sets in general go this one has amazing functionality because, y'know, it drives, but the driving functions have a number of issues and the car just doesn't go all that fast. Value for Money: 9.5/10 - It can't be judged against regular sets; as a whole package, building a solid vehicle (without any particularly specialised parts) that you control from your device, plus a great minifigure, makes it actually fair for the money especially compared with other RC Batmobiles out there. Overall: 8.2/10 - Ultimately this score reflects that the App-Controlled Batmobile is not without faults in both model design and app functionality, but it's conceptually and functionally a strong and fun enough set that I would recommend it even at full price if an RC LEGO car or LEGO's Powered Up system interests you. They've come a long way, though there are improvements to be made yet. Until next time!
-
 Recently our LUG got the new Powered Up passanger train which was a great fun for the kids at the holiday LEGO camp to assembly. However it seems that TLC will keep the big, one-part train fronts for all upcoming passanger trains, in other details the new City set seems a really good deal even for my AFOL-eyes. The color scheme, the easily removeable battery compartment solution is really nice, and the improved remote handles the speeds better (train not stopping at curves with speed 1). It is a real drawback, that only two outputs can be handled by a single battery box and connectors can't be stacked, but I hope there will be an official solution from TLC to put more motors on the same port (and maybe AA battery box). But back to colors... this bright orange, dark blue and light bluish gray combination is just perfect, I think it looks better than the 75% of real train colors. So I decided to make a try in LDD how this color scheme would look like on my Stadler FLIRT3 EMU (which was build for real recently). I had to change bright orange to simple orange - bright orange parts are still very limited. So, here are some screenshots from LDD: 1. The overall look: 2. Front pattern (light bluish gray cheese slopes missing but could be fit for real): 3. Overall look focusing on front: 4. Next to my GySEV FLIRT3: Basically only small details have been altered - the hinge connection by the front needed to be changed since the 1×2 plate with bar (closed ends) doesn't exist in orange. Also the side detail next to driver's cab and front window have been changed a little. However FLIRT trains have two different levels (upper one next to driver's cab and articulation, lower one anywhere else) I kept all color patterns horizontal through the train. Some lines with 1 plate height in Powered Up set have been increased to two plates (white on side and darb blue on the top), and made the full-orange front to have a line back at the bottom just like Railjet locomotives are painted with the red pattern curving back to the bottom. The doors became orange, sincs new TSI standards require to make doors with outstanding pattern to be easily identifyable to people with damaged vision. For this train I decided to make the plan with 3 cars - most LEGO passanger trains are given with 3 cars. Battery compartment could be hidden at toilet section. Tell me your opinion. :)
 -
Hi All , I want to start this one with thanking JopieK for his powered up tear down ! Without this info I would have had to do a lot more work before doing this. So instead of having a lazy sunday afternoon , I decided to take up one of the challenges TLG gave us with powered up. I'm in the proces of modifying a 60197 with longer bases and 7 cars at the moment. I wanted to power this beast with 2 motors so I could add even more cars in the future. So I took apart 2 PUP motors and removed the wiring from the PCB on the motor. I then soldered a piece of flatcable in place to get me through the base plate. I had to modify the base plate a little (...) to able to fit 1 motor as a jacobs bogie. Then i soldered the 2 flatcables to one of the removed motor cables , effectively switching both motors in parallel. In one of the motor assemblies I also turned the electrical motor around 180 degrees to get both motors rolling in the same direction. Some heavy mechanical modding had to be done to achieve this. I can probably find a better way if I put my mind to it. Anywayzz... without further ado, 2 pics of the result below and a WIP of the beast itself :) Have fun doing this for yourselves and don't hesitate to ask !