Search the Community
Showing results for tags 'crane'.
-
 42213 Rough Terrain Crane Model Info Size: 39L x 15W x 18H cm Weight: 496 g Parts: 657 Video Features HOG steering Working V6 engine Opening cab door Working outriggers 360° superstructure rotation Boom elevation Boom extension Hook hoisting Instruction: https://rebrickable.com/mocs/MOC-266243/paave/42213-rough-terrain-crane
 -
Hi Eurobrickers! I'm back with the new MOC - this time it's a new Mammoet SK 6000 crane! Current configutation is Mammoet SK6000 + Mammoet SK350 Fixed jib (which is compatible in real life) Original ring crane was just recently released by Mammoet in Netherlads! This is fan work. For built used only open source resources from WEB! Ok, also this MOC was built with unofficial consulting with Mammoet engineers, because it was a lack of the info in WEB, so I have to ask some thiings to match the real masterpiece crane. UPD: I was invited to the real crane's world presentation on last (or prevois) Friday to the Netherlads with my Crane MOC to show it at the mass media day near the real SK6000! Unfortunately I was on vacation that time and lost this once in a lifetime chance.. How it works: Centered counterweight is fixed and non movable, around it there are two train racks (imne are almost 180 degrees), so the crane is rotating arong the ballast. Real SK6000 does not have it, but from SK350 I took the jib which was surprisely fix and not luffing - it has no adjustments. Machine is able to lift 6000 tons and lift 2000 tons at the lenght of the footbal field from the basis !! The main feature of this crane is that it does not use winch to operate the boom - it uses special mechanism with chain, so I implemented this also :) Please enjoy the video first: Built with genuine Lego technic parts + 3rd party strings + 2 BuWizzBrick 's. I refused using trixbrix curved rails because found a solution with genuine lego parts. The model has 7500 parts which makes it the biggest MOC in my career! It has 8 L motors for smooth operating, powered by two buwizzes. Crane weights 8,3 Kg excluding power sources (battery boxes) and counterweights!! And the height is about 2.3-2.4 meters. More images are available: https://bricksafe.com/pages/Aleh/mammoetsk6000 Building instructions already available. Built took 1760 steps, which required a lot of effort to prepare it. https://rebrickable.com/mocs/MOC-195537/OleJka/mammoet-sk6000/#details
-
42175 Mobile Crane Here's my new alternate MOC! Video Features Opening doors Working 6l engine HOG steering Working outriggers 360° superstructure rotation Boom elevation Boom extension Hook hoisting with lock Instruction: https://rebrickable.com/mocs/MOC-258700/paave/42175-mobile-crane
-
 Improved 42042 Crawler Crane. Banana Man for scale. It's hard for me to overstate how much I love the Technic Crawler Crane 42042. I've been constantly tinkering with it and making improvements since I got it about 6 months ago. My method is basically to lift heavier and heavier stuff until it falls over or something breaks. Then I rebuild. This is how it got to where you see it today. I don't really care about the tracks or the slewing. I want to lift heavier stuff, higher! So far my mod/improvement list reads like this: Upgraded the block & tackle harness for better mechanical advantage Added a quick-adjust system for efficient rigging changes to the harness, main hoist, and hook Beefed up gantry or A-frame: wider, taller, and much stronger Improved existing back hitch and added a second back hitch Counterweight box Strong, longer boom Paid almost (!)$20 for stupid Technic metal hook Integrated claw storage on gantry XL Motor upgrade Boom foot return damper thing Replaced LEGO string with synthetic cable (from Chin-a) Here it is in action. Read on for a more thorough description and photos of each mod/improvement. Click through on the photos to view them at larger sizes. Block & Tackle The first thing I did was add blocks to the block & tackle system allowing me to really turn up the mechanical advantage the motor has over the load when raising and lowering the boom. This of course comes at the cost of speed, but I'm OK with that. The nice thing about this is I don't have to actually use all the blocks. Quick Adjust Rigging on Harness and Main Hoist You can see my bright red and yellow-handled quick adjust axles with the red and yellow grips on the side of the harness assembly. This makes it easy to slip the rigging in and out of the blocks to fine tune my power/speed balance for the specific load. I also have these at the end of the boom and on the pulley so I can adjust the speed/power tradeoff on the hoist line. I added this quick disconnect system after I'd re-strung the rigging for the hundredth time. I can re-thread the rigging on both the harness and the main hoist line to go from "high gear" with max lift speed to "low gear" for max power in just a minute or two. (I had originally made these with axles that have stoppers on the end, but ended up using regular axles, because I have a ton of them.) A couple of timelapse (YouTube) videos of the quick change. Stronger & Wider Gantry The gantry in the stock model is really weak. It is wholly comprised of 4 Technic lift arms held in place with 6 friction pins. As I added heavier loads this system was quickly outgrown. I was bending lift arms and even popping the entire assembly off the superstructure. So I rebuilt. The new gantry is wider, allowing for more blocks in the harness. It is many times over more rigid and is taller, allowing the harness mount to be further back over the body, which in turn allows the main boom to be drawn up higher to a much steeper final angle. This piece took a long time and has been through the most revisions over the months. I did a lot of research by looking at other LEGO models, other and peoples crane MOCs. Both arms of this gantry are heavily inspired by the gantry on LEGO Crawler Crane 8288 (http://brickset.com/sets/8288-1), which I would love to own a copy of someday (not today). Improved Back Hitch The back hitch (the two black lift arms supporting the gantry) also quickly became insufficient. The anchor it was tied into was bending and getting stress cracks, so I created a stronger attachment system for it elsewhere. I also added a second back hitch that ties directly into the improved counterweight... Counterweight Box One of the challenges with cranes is counterweight. As the amount of load it can lift and move improves, their is a corresponding increase in risk of tipping. The original model cleverly uses the battery box mounted all the way at the back edge of the body. It's literally the furthest element from the tip of the boom. I added a weight box behind it that is open and easily filled with ballast of my choosing. C Batteries work extremely well because of their density and modularity. It has an open design so it's easy to adjust the weight on the fly as needed depending on the load and the angle of the boom. After building it, I added a the second back hitch directly attached to the gantry to remove stress from the body connection of the weight box and from the first front back hitch (heh). When the gantry starts carrying a lot of load, I don't know that the front hitch bears any at all. Stronger, Longer, Better Boom Maybe the most noticeable feature is the length of the new boom. The original is 30 studs long, not counting the butt and tip, with an optional section to extend it to 45 studs. This booms main section is 75 studs long. At this length, it had some really concerning droop/bending at full extension. However, I was also able to easily reconfigure the inner supporting structure to be much stronger since I didn't care about the ability to easily add and remove sections. I also added the outer white panels to help with rigidity as they span the weak links between the blue 15L lift arms that are the main defining component of the boom. The boom tip received an upgrade in the form of a smoother operating block and tackle system (with quick disconnect axle just like the harness) controlling the main hoist. I also added an aviation warning light, obviously the most complex and impressive mod thus far :) Main Hook/Claw Storage I purchased a Technic Large Metal Hook (http://www.bricklink.com/v2/catalog/catalogitem.page?P=70644#T=P) for like $15. It's easily the most I've ever paid for a single LEGO piece. Considering the time I've spent on this model, though, I thought it was worth it. It's mounted to the main hoist with the smallest of my quick adjust rigging axles. I can attach the hook directly to something of course, or I can use it to hang the functional claw the system came with. When the claw is not in use, I have a storage peg for it that can be placed on either side of the gantry. I built this after I got tired of it sitting on the bench next to the crane most of the time. Much like the quick adjust rigging system, it's a simple mod that has a high convenience impact when moving this thing around for play, improvements, and storage. More Power (XL Motor upgrade) After removing the clutch gears and incrementally strengthening everything else to lift progressively heavier and heavier loads through probably hundreds of lifts at this point, the 9V Power Functions L Motor (99499) that came with the system finally died (predictably). To LEGO's credit, they're already shipping me another. They didn't even ask if it had been systematically subjected to increasing levels of abuse since purchase. Rather than wait for the replacement to arrive I hooked up an XL I had laying around. It's slower, but has more torque. As you can see it is mounted almost all the way at the front of the body, which is not ideal considering the weight. I may end up routing it further back if I can figure out a way to that looks this good. I did have to git rid of the ladder that was here on the original model, but this is Technic, so whatever. It's not like I'm bouncing minifigs around and doing voices when I play with the thing. Boom Return Damper/Helper If you increase the mechanical advantage of the harness too much, the boom has trouble releasing from very high angles. There just isn't enough weight to pull the cable off the spool on the base. I added this spring mechanism to the butt of the boom to help push it out when there is very little lateral load. I may be swapping these gray Technic springs out soon for the stronger yellow ones as it could be more effective. They will also look better matching the contrasting yellow parts of this assembly against the blue. Rigging Cable Through many rounds of adjusting and rebuilding I replaced the rigging cable several times. As I added to the superstructure more cable length was needed. Going down certain oaths and backtracking also had me replacing the cable with different lengths over and over. LEGO string is expensive, so I ended up buying a small spool of this stuff off Amazon: https://www.amazon.com/gp/product/B00LDIKURQ/ref=oh_aui_search_detailpage?ie=UTF8&psc=1 after seeing it recommended elsewhere on these boards. It works well. It's thicker than LEGO string, so be aware, but it's also stronger and it has a bit of a metallic shine, so it looks more like the steel cable you'd see on the real life inspiration for this model. Conclusion That's about it. The major takeaway is that this thing can now lift 750 grams up off the floor below my bench and place it on the bench right next to it (from up to 80 cm away). Good stuff. I also think I retained most of the good looks of the original set. I'm not done tweaking yet, but I wanted to do this write up and show it off a bit before I break it again, because my next mod is likely going to happen in the gear box, if at all.
 -
 For a while now, I'm working on a crawler crane. As discussed elsewhere, progress has stopped and this topic is an attempt to jump start the build again and finish it so it can join my collection. So here it goes: The project started with the launch of the 42042 Crawler crane and was a simple MOD at first, but quickly evolved into two MOCs. It didn't like the proportions of the body and cab of the 42042 and wanted to add some features like expandable or removable tracks. The first LDD sketches looked something like this: As some will probably notice, at this point I was still considering to make its larger brother the Liebherr LR1250 as well as a HS855HD. The LR1200 plan has been dropped, because it was simply a bigger version of the 8288 and brought nothing new. During my research, I found the HS855HD was more interesting, because it's a so-called duty cycle crane, a very versatile machine designed to do repetitive tasks efficiently, for example dragline work, soil compacting, (un)loading bulk materials etc. One of the consequences is the fact it has a free fall function on some of its winches, making it possible to drop the bucket or tool to either save time or to provide impact force (you can see this feature in and ). This seemed a nice function to try to implement in my MOC.After a few trial and errors, I came up with this internal mechanism: (The newest clutch parts are not used yet in this image) The controls are very similar as in the 42042: each winch has one switch with two positions: one for winding up the winch, one for winding it down. It is powered with the L motor of the 42042. My addition is the clutch system (in yellow) for the green and blue winch. Push the lever and the winches are simultaneously disconnected form the rest of the system and will unwind under the weight of the tool attached. Releasing the lever will allow the spring to re-engage the yellow clutches, linking them again to the drive. Meanwhile, I also wanted to capture the looks of this machine. It has linked manual expandable tracks, a tiltable cabine, and a inspection hatch. This is the current state of the tracks and body: At the moment, the bottleneck is the fact that the clutch system has too much back-lash or too much play to fully disconnect. I need to move the spring closer to the lever I think, which is rather challenging due to the compact build. Another issue to be solved is the expandable tracks which seem to snag on the chassis when under load. I would like to make my MOC as versatile as the real machine and design the parts to convert it in a dragline, double hook, clamshell bucket or foundation excavator configuration. To be continued ...
 -
 Hi eurobrikers, Here is my current project. A Volvo FH truck destinated to be part of a larger play set using the TLG Volvo EW160. The whole model will have a crane truck full RC, a trailer and the EW160 official lego excavator. As always i build this for my son and so i t needs to be really playable set with lots of function fun to play with. Regarding to this the new Volvo EW160 inspired me. So the concept is to have a fully rc truck with manuals function added to it. The toy will have pneumatics, PFS, RC, manuals functions.... so much for a child to enjoy! My goal with it : Truck : 7 motorised functions + RC PF light = 8 channels on standards Rc official system. Propulsion by L motor Direction by servo on first and second axle with reduction . report to the cab Deploying stabilisator by rotation. Able to set up the stabilisator on 180° : M motor Stabilisator up and down: M motor Crane rotation: M motor First section of the crane arm: M motor Second section of the crane arm: M motor All the these functions are realised and integrated into the framme actually. All working very smothly and with corrects speeds. Time for some pictures of the WIP : I have now to face some difficulties and have to answer some question. What is your opinion guys on these points : 1 Color of the rear crane ? actually thinking for black, to fit with the EW160 design or orange? 2 Position of the two PF receivers, actually in trouble with that, no neat solution 3 tilting bed. The EW 160 is equiped to load a bedactually. Cannot imagine not being able to lift it. The problem is Zero place for an additionnal motor into the frame. Thinking to lift it manualy ? Thanks for your feedback on these points.
 -
 I am working on a creation of combining the 42070 6x6 tow truck and the 42042 crawler crane by putting the crane on the back of the truck. It is mostly complete, and I'm just detailing it at this point. There is only one problem with it, though. I made the crane fully automized by removing all of the gears in the back half of the crane and put motors there instead. I also had to move the large turnable rotating piece on the bottom of the crane forward and matched the teeth on the edge with the tan 12t bevel gear. It turns, but the teeth slip and it turns a little too fast, which I couldn't solve. I removed all of the gears for turning and the turnable and tried putting in this: and connected it to some gears to gear it down, but it didn't even turn under the weight of the crane. Any ideas to make it work? Also, an L motor is powering it
 -
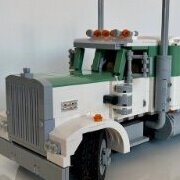 See this post for pictures of final result After having put a number of projects on the back burner due to being too lacking skills and/or parts, I figured I should try to build something a) smaller, b) simpler and c) using (mostly) parts I already have. I decided on a small-scale mobile crane, based on the 49.2 mm wheels. I also decided I should start a WIP topic to get feedback and stay motivated to finish (or abandon ship if it turns into a disaster ). I first did some prototyping of the undercarriage in LDD: I'm fairly happy with the prototype, although I'm not fully convinced about the styling of the engine compartment. It looks a bit untidy, but I'm not certain on how to change that without resorting to system bricks. Any advice? This being a WIP topic, I also started building, of course. I violated point (c) above a bit, since it turned out I don't have all the parts, but most is there: So far so good, except the steering long is really poor: (Bricksafe is cropping the image for some reason: find the full picture here.) You can see that the fat tires and the pivot offset in combination with the close spacing does not allow a lot of space for the wheels to turn. I could space the wheels one stud more, but I think that doesn't look right: Upper is the current spacing, lower is one stud more. What do you think, form or function?
 -
 Hi, Probably not the wisest move with three other projects ongoing, but a couple of weeks ago I couldn't resist starting again on designing the Liebherr LTM11200 crane: Some of you may remember the first version of this, which I designed a couple of years ago: This time however I try to iron out all the kinks that were present in the earlier version. It is still work in progress and even though the performance has improved over the earlier version I am still far from a smooth operating, well working machine. Especially the retracting of the outriggers and the whole steering system are still pretty poor performance wise. As you can see I have changed the colour scheme to a more available white with orange livery. Comments, questions and advice are welcome Leg godt Jeroen
 -
The upcoming 42082 Rough terrain crane has inspired a whole list of possible improvements because I believe that at this scale some cool functions could/should be modeled (in random order): Two stage outriggers, preferably PF controlled Multiple steering modes (minimal 2: 4WS and front wheel steering) Pendular front axle Luffing jib, folding away against the boom Second winch for secondary hook Replace LA’s which lift the boom with an actuator with a longer stroke for bigger range in the boom angle Cosmetic changes to cabin, engine cover and upper structure to resemble real cranes more like Grove or Terex Some of these are probably overly ambitious and I’m not claiming to be able build all these MODs in one single model, but I am curious to see how far I can take this. My first step is to take a look at possible two stage outriggers. So far I’m tinkering in LDD to find mechanisms for the horizontal stage which are rigid enough to support the Crane and compact enough to fit on both ends of the 42082. I think it must be possible to fit the outriggers in a module measuring 5x7x23 studs. The ultimate goal would be to lift the crane from its wheels, but considering the size and weight of the 42082, I would be happy if the outriggers can simply provide actual support. Progress so far:
-
 I' ve decided to make an alternative model for 42054 CLAAS XERION 5000 TRAC VC set. I' ve wanted to design something different from all those excellent c models already made, so I made a truck capable of off-road conditions, with crane and many other functions. The result: Functions: rear axle drive with 4 piston engine steering live axle suspension side outriggers cabin tilting rear PTO (power take off) crane arm rotation crane arm 1st stage elevation crane arm 2nd stage elevation grabber closing/opening Please watch the video to see this machine in action and for more details. This model is powered by one m motor with rotation direction selection. It powers main selector, crane selector. and PTO. Main selector switches between worm gear powered functions and arm rotation. When worm gear functions are selected, there is another switch to choose between outriggers and cabin tilting. The crane selector switches between 1st and 2nd stage elevation. I had to use some interesting (I think) solutions because of parts selection in 42054 set: Piston engine There are no piston engine parts in the set, so i made them from some connectors. You can see it working in the video. Suspension There are no shock absorbers or wishbones too. So I' ve made a suspension based on twisting axles: Every wishbone is suspended independly. 3 of those connected to axle make a well-working long travel soft off-road suspension: Grabber There was a grabber in original set, but when building the grabber I've already used the worm gear for more important functions, so I' ve designed a different locking mechanism: Turning the green axle makes the red grabber frame move up and down and becouse of engaging the blue knob gear with h-frame opening and closing blue grabber. Instructions Instructions are already available here on rebrickable! I hope you liked this model.
 -
I would like to build something like this crane. Remotelly controlled. With camera in cabin. Inspiration is similar video simulator in visitors centra at Maasvlakte || (Rotterdam). Basic concept: control center: Tablet for view + (tablet for control with SBRICK |or| Mindstorm cube with joysticks builded on motors ) crane: 3 axes of movement + un/lock container (similiar to real one Twistlock) , PF or Mindstorm motors + Sbrick/Mindstorm cube For now I have working twistlock. And trying to figure out how move it from above by string, so no motor will be on locking frame. See pictures in G album https://photos.app.goo.gl/MFoRXg1i62n1gXPd7.
-
Hi guys, I hope you won't mind a Technic guy playing with Trains a little. I have created something very ugly, but at the same time quite playable: More info & pics: http://sariel.pl/2017/04/railroad-crane/
-
Hi to all,i want to show some Moc i've copy on the web, everybody know from where,so i hope you enjoy . For the Faq section: -i know they need maintenance... -some of that don't like curve rail -all of that have motor(s) only the vagon is not motorized http://www.brickshelf.com/gallery/Gioppa/Moc/15822720_10211966408462383_3717618998909934913_n.jpg http://www.brickshelf.com/gallery/Gioppa/Moc/15823096_10211957821007702_7794404687042551044_n.jpg http://www.brickshelf.com/gallery/Gioppa/Moc/15825983_10211957821167706_5693201005748168199_n.jpg http://www.brickshelf.com/gallery/Gioppa/Moc/15894575_10211958371981476_5654221170962921986_n.jpg http://www.brickshelf.com/gallery/Gioppa/Moc/15895116_10211975259443652_4850018211721826768_n.jpg http://www.brickshelf.com/gallery/Gioppa/Moc/15894277_10211975259763660_7430962327455997237_n.jpg http://www.brickshelf.com/gallery/Gioppa/Moc/15873173_10211975260163670_6839830510790996445_n.jpg http://www.brickshelf.com/gallery/Gioppa/Moc/15823158_10211975259963665_2793402147847989315_n.jpg http://www.brickshelf.com/gallery/Gioppa/Moc/15894827_10211996697339586_3228203699980362107_n.jpg http://www.brickshelf.com/gallery/Gioppa/Moc/15894901_10211996698059604_1545772469532524943_n.jpg http://www.brickshelf.com/gallery/Gioppa/Moc/15966061_10211996697619593_3871656147752834898_n.jpg
-
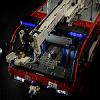 Hi to everybody! I'm here to present my new Moc. I started building this crane truck about 6 months ago with the main idea of solving the problems related to a failed attempt of a crane for my previous truck. IMG_1608 by Lucio Switch, su Flickr Starting from the cab...despite the undeniable resemblance to the cab of the dump truck (with a bit of the tractor truck), it has slightly different dimensions, and the add of some new details/functions, forced me to revise it completely. In fact, in addition to the "standard" opening doors, this time, as on real trucks, the cab is suspended, while maintaining the tilting function and the working steering wheel and the front grid is openable. Moreover the seats are pneumatically suspended via 2 (1+1) 1x5 pneumatic cylinders. The chassis has the tractions on the 2 last axles, they are driven by 4 XL Motors and uses 2 Servo Motors to steering the first two axles (with different turning radius). The first two axles use independent suspensions. In this case I was inspired by the Mod of the chassis of my Tractor Truck done by Efferman ... that has a perfect shape for a fake v8. On the back there are 2 live axles (with a total of 24 hard shock absorbers). Between the first two axles there are two small pneumatic pumps moved by two L Motors. In addition to that, on the chassis are present 2 Li-Po Battery, 5 Leds for lights and 2 SBricks. Behind the cabin there is the base of the crane, it contains the front stabilizers, extendable via a M motor (connected to one SBrick), 6 pneumatic valves, moved by an M motor each, 4 IR receivers to control the 6 valves motors plus 2 other M motors, one to rotate the crane and one for the winch. The 4 receivers take power from a port of an SBrick. Finally the crane ... well, the classic design of this type of crane with the upper arm offset (as on 8258 for instance) built on this scale, gave me big problems twisting the whole structure ... and a lot of headaches. One day I came across by chance in a truck with a Cormach crane, it presented a unique design that would solve the twist problem. So inspiring to this design, I have developed my crane, which consists of a telescopic upper arm (extension via 2x 1x11 pneumatic cylinders) supported by two side arms moved by 2+1 2x11 pneumatic cylinder each. It isn't able to lift heavy loads, but it works and, considering the masses involved, I'm fine with that. Now some numbers: Length: 86,4cm 108studs Width: 24,8cm 31studs, 28cm 35studs with mirrors Height: 39,2cm 49studs Weight: 8.6 kg Total number of parts: 8000 PF elements: M motor: 9 L Motor: 2 XL Motor: 4 Servo Motor: 2 PF LED: 5 Lipo Battery: 2 ..and a couple of wire extensions Pneumatic Elements: Small pumps: 2 1x5 Cylinder: 2 Medium Cylinder old: 4 Medium Cylinder new: 2 1x11 Cylinder: 2 2x11 Cylinder: 6 Valve: 6 ..and several meters of pipes. For more pictures check my Flickr Album: Crane Truck Flickr Album And this is the video: To conclude, I would say that, in some way it was a new and interesting experience for me. Due to circumstances beyond our control, I was forced to transfer my Lego room in the basement, comfortable although perhaps a bit rustic but not directly connected with my apartment. This, coupled with the fact that my free time has been drastically reduced, has led me to review my usual workflow. So this is my first model built before digitally and then physically. This way allowed me to use better my free time and to select and pick up only the needed parts to build, reducing drastically the mess in the living room. Also part of the work for the BI is already done, I'll done them for sure, but I don't have idea when they will be ready. I'm afraid that it will be a huge job! I hope you like it!
 -
[MOC] Tower Crane RC
paave posted a topic in LEGO Technic, Mindstorms, Model Team and Scale Modeling
I'd like to present the Tower Crane - PF: 3x L-Motor, 2x IR, LiPo - Trolley movement - Hoisting - Turning. The goal of this creation was to make a playable machine with optimal movements speed. The body is made of sections, it may be higher and longer. -

SBrick Towercrane
juGSI16V posted a topic in LEGO Technic, Mindstorms, Model Team and Scale Modeling
Hello everyone I build a Towercrane powered by SBrick It's have 3 motors: 2 "L" and 1 "M" - 1 "L" for the rotation of the crane: - 1 "L" for the shuttle: - 1 "M" for the hook A vidéo come soon -
Hi guys, Have a mod'd 42042 (Catweasal MOC) and then added more boom, larger tracks + extra counterweight. Decided to add a few more sheaves to assist the motor boom up with a load on the hook but am having trouble getting the sheaves to distribute the weight evenly across all 12 / 14 sheaves etc. I've made sure all the sheaves have free play in them and are not binding up..... also made sure to reduce the angle of the rope from the motor to the first sheave to 0 degrees so that there is no side pull on the sheaves. I was thinking maybe I need to grease the shaft and side of sheaves to reduce the friction further but now that I think of it, could it possibly be due to flex in the shaft / frame at both ends that loads up the sheaves unevenly? On the other hand when I had the sheave designed 4 wide but 2 rows on both sides (so 8 sheaves wide in theory), I still had the problem with the last few sheaves / ropes having no tension on them... Any ideas????
-
.thumb.jpg.050f28ccd893f68d8416233f594d9f3d.jpg) I was always inspired by the multi-functionality of backhoe's, and I always imagined ways to improve upon it and now I finally did. In this MOC I challenged myself to make the most multi-functional vehicle I could, using all the motors and sbricks I had, naturally I ended up buying more motors XD The final build includes 17 LEGO power functions motors (5XL motors, 6L motors and 6M motors), 4 LEGO power functions lights and 1 DIY LEGO laser! It's powered by 4 LEGO PF battery boxes, controlled by 5 SBricks and operated by a 20 channel SBrick profile. The drill/laser arm is operated by 5 channels 1 channel for rotating the arm (PF XL motor) 1 channel for tilting the arm out (PF L motor) 1 channel for extending the forearm (PF M motor) 1 channel for spinning the drill head (PF M motor) 1 channel for activating the DIY LEGO laser (TOPIC HERE) The excavator arm is operated by 4 channels 1 channel for rotating the arm (PF XL motor) 1 channel for tilting the arm out (PF L motor) 1 channel for extending the forearm (PF M motor) 1 channel for moving the bucket (PF M motor) the bulldozer scoop is operated by 2 chanels 1 channel for raising and lowering the scoop (PF M motor) 1 channel for tilting the scoop (PF M motor) The crane is operated by 3 channels 1 channel for rotating (PF M motor) 1 channel for extending the crane (PF L motor) 1 channel for operating the winch (PF L motor) The plow/ trailer hook is operated by 1 channel 1 channel for lowering and raising the plow (PF M motor) The drivetrain is operated by 3 channels 2 channel for driving forwards and backwards (2x PF XL motor) 1 channel for steering (PF XL motor) The lighting is operated by 2 channels 1 channel for headlights 1 channel for rearlights Weight: 4.6KG Length: 62cm With: 32cm Height: 31cm building time: 4 weeks A special thanks goes out to my friend Bas for helping me edit and my amazing girlfriend for her everlasting support.
I was always inspired by the multi-functionality of backhoe's, and I always imagined ways to improve upon it and now I finally did. In this MOC I challenged myself to make the most multi-functional vehicle I could, using all the motors and sbricks I had, naturally I ended up buying more motors XD The final build includes 17 LEGO power functions motors (5XL motors, 6L motors and 6M motors), 4 LEGO power functions lights and 1 DIY LEGO laser! It's powered by 4 LEGO PF battery boxes, controlled by 5 SBricks and operated by a 20 channel SBrick profile. The drill/laser arm is operated by 5 channels 1 channel for rotating the arm (PF XL motor) 1 channel for tilting the arm out (PF L motor) 1 channel for extending the forearm (PF M motor) 1 channel for spinning the drill head (PF M motor) 1 channel for activating the DIY LEGO laser (TOPIC HERE) The excavator arm is operated by 4 channels 1 channel for rotating the arm (PF XL motor) 1 channel for tilting the arm out (PF L motor) 1 channel for extending the forearm (PF M motor) 1 channel for moving the bucket (PF M motor) the bulldozer scoop is operated by 2 chanels 1 channel for raising and lowering the scoop (PF M motor) 1 channel for tilting the scoop (PF M motor) The crane is operated by 3 channels 1 channel for rotating (PF M motor) 1 channel for extending the crane (PF L motor) 1 channel for operating the winch (PF L motor) The plow/ trailer hook is operated by 1 channel 1 channel for lowering and raising the plow (PF M motor) The drivetrain is operated by 3 channels 2 channel for driving forwards and backwards (2x PF XL motor) 1 channel for steering (PF XL motor) The lighting is operated by 2 channels 1 channel for headlights 1 channel for rearlights Weight: 4.6KG Length: 62cm With: 32cm Height: 31cm building time: 4 weeks A special thanks goes out to my friend Bas for helping me edit and my amazing girlfriend for her everlasting support. -
 Here is my latest creation!! The tracked crane! I recently bought a bucket and 2 l motors so I thought I would build a crane, logically . The crane goes up and down with a LA, and the bucket moves on a LA both connected to separate m motors. The drive is through direct driven l motors on tracks. This is in no way final, and I would like to make instructions for the final model. What do you think? better pics soon.
 -
This RTG crane was built to give me a second intermodal option, one not tied to a specific location. In this case, I have it with the current rail yard setup, but it can be used anywhere. As seen in the rail yard pictures, it can load double stack containers, yet is still wide enough for two 6 wide trucks to pass underneath. It's based on the Kalmar RTG crane, but scaled to fit LEGO landscapes better. More information is available here: https://en.wikipedia.org/wiki/Rubber_tyred_gantry_crane
-
Hello, This is my first MOC post that I'd like to share. Inspired by my childhood growing up with my Dad's Meccano (Apologies for the swearing there), I felt this was a subject that's not really been covered in Technic - I didn't find any other creations when researching it, so maybe this is something new! Anyway, here is my attempt at a Giant Block Setting Crane, Meccano's (sorry again) figure head model. It's a bit of a colour vomit, but my funds don't stretch to buying new parts of builds like this. I tried as much as possible to colour code sections. It is IR controlled with 2 XL motors driving the tracks, an L motor each for turning the upper structure and the winch drum, and an M motor for the travelling carriage. Tensing in the carriage cable is adjusted manually using two large LAs. The claw is pinched from the Crawler Crane. It all works pretty well, although the worm/24t gearing for the carriage travel is a bit slow compared to the rest of the functions. I've put a few images in this post. More are on brickshelf: http://www.brickshelf.com/cgi-bin/gallery.cgi?f=566487 Hope you like it. Paul.
-

12 Axle mini crane
Kman860 posted a topic in LEGO Technic, Mindstorms, Model Team and Scale Modeling
Here's my 12 axle crane, it has lowering/lifting and swing in/out outriggers, a lifting/lowering arm, lifting lowering hook, and rotating superstructure. The wire functions are colour coded instead of me running wiring 12 Axle crane 1 by kristiankocjancic, on Flickr 12 Axle crane 2 by kristiankocjancic, on Flickr 12 Axle crane 3 by kristiankocjancic, on Flickr -
 My submission for the crane contest: the candy crane. The candy crane has been inspired on a harbor container crane. The name points to its functionality: picking up candy and drop it in a wagon (it is part of a fully automated train layout, see siouxnetontrack.wordpress.com). The crane uses 5x EV3 M motors: 2 motors to move the body (X-movement) 1 motor for the Y-movement 1 motor for the Z-movement 1 motor for opening/closing the grabber Next to that, 6 sensors are used for the positioning: 2 touch sensors at the base 1 color sensor for the Y-movement (5 stopping places) 1 color sensor for the Z-movement (3 stopping places) 2 touch sensors to stop the hoist at the end positions Two EV3's (one to control the base, one to control the hoist). Using the EV3 daisy chain functionality, the crane can be controlled as one construction. It get's its input from a PC application, but it is easy to rewrite the software that it can be controlled by another EV3 brick. Images can be found at https://flic.kr/s/aHsjZ6uZix and a video at ./Hans
 -
Grove Shuttlelift CD3339: (This is the 3340 version, not the 3339, but they are very similar) My inspiration for this little crane is that I see it working on a bridge crossing the Mississippi river on my commute to work. It is constantly busy lifting this and that down to the crews working below the road deck. The first time I saw this little crane, I instantly knew I wanted to model it in lego technic, so I added it to my list of MOCs to create. This contest was just what I needed to convince me to start the project. Here is my version of this little crane, in 1:10 scale: Here are the functions: 1 Servo motor for 4 wheel steering (also turns the steering wheel in the cabin). 1 XL motor powering the wheels. This thing is 4 wheel drive implemented using 3 differentials 1 Large motor for lowering the four stabilizers (one on each corner). 1 Medium motor for rotating the boom structure. 1 Large motor for raising/lowering the boom. 1 Medium motor for extending the boom. 1 Medium motor powering the winch to raise/lower the hook. 1 PF Lights used for headlights. More pictures and a video to come. I also plan to share some retrospective on this build.