Search the Community
Showing results for tags 'conversion'.
Found 14 results
-

[MOD] PF Conversions for C+ sets - Directory
Ngoc Nguyen posted a topic in LEGO Technic, Mindstorms, Model Team and Scale Modeling
I already planned to open this topic back in March or April, but I got caught up in work and stuff. Recent discussions in the 42129 thread makes me feel that inow is the good time to start it. My vision for this thread is that it will be a directory that contains the PF conversion mods for all of the Control+ sets so far. I have created a few mods myself as well. And I'll try to keep the information organized by updating this first post. If you have any mods, feel free to contribute. This thread can also be the directory for Studio models for the C+ sets, so that anyone with a mod idea can give it a try. ------------------------------------------------------------------------------------------------------------------------------------------- 42099 Available PF mods on Rebrickable: https://rebrickable.com/mocs/MOC-28766/olivierz/4x4-x-treme-off-roader-42099-power-functions-base/#details ------------------------------------------------------------------------------------------------------------------------------------------- 42100 There is currently no PF conversion mod available on Rebrickable. I've designed two PF mods for this set in Studio, but I haven't published yet because I haven't made the mod instruction. They will be published later this year. The mods are: - Full RC PF conversion: This mod replaces two hubs with two PF battery boxes, replaces all motors with 7 L motors, and adds 4 RC receivers. - Motorized PF conversion: Because a big empty box with 7 motors engaged in direct transmission is boring, I want to add something more Technic-ish, more mechanically interesting. This mod removes all hubs and motors for the base, which makes slewing and driving manual, and add 1 PF battery box, 1 L-motor, and a gearbox with 4 multi-directional switches for the functions of the super structure. Thanks efferman for sharing the base 42100 Studio file. ------------------------------------------------------------------------------------------------------------------------------------------- 42109 My free mods: - L-motor steer: https://rebrickable.com/mocs/MOC-84883/nguyengiangoc/42109-pf-conversion-l-motor-steer/ - Servo-motor steer: https://rebrickable.com/mocs/MOC-84884/nguyengiangoc/42109-pf-conversion-servo-motor-steer/ ------------------------------------------------------------------------------------------------------------------------------------------- 42114 My free mod: https://rebrickable.com/mocs/MOC-85933/nguyengiangoc/42114-pf-conversion-servo-motor-steer/ ------------------------------------------------------------------------------------------------------------------------------------------- 42124 My free mods: - L-motor steer: https://rebrickable.com/mocs/MOC-84954/nguyengiangoc/42124-pf-conversion-l-motor-steer/ - Servo-motor steer: https://rebrickable.com/mocs/MOC-84955/nguyengiangoc/42124-pf-conversion-servo-motor-steer/ ------------------------------------------------------------------------------------------------------------------------------------------- 42129 My free mods: - L-motor steer: https://rebrickable.com/mocs/MOC-84984/nguyengiangoc/42129-pf-conversion-l-motor-steer/ - Servo-motor steer: https://rebrickable.com/mocs/MOC-85004/nguyengiangoc/42129-pf-conversion-servo-motor-steer/#details ------------------------------------------------------------------------------------------------------------------------------------------- 42131 My free mod: https://rebrickable.com/mocs/MOC-92919/nguyengiangoc/42131-pf-conversion/ ------------------------------------------------------------------------------------------------------------------------------------------- 42160 My free mod: https://rebrickable.com/mocs/MOC-161275/nguyengiangoc/42160-pf-conversion- 62 replies
-

More up-to-date ldraw.xml LDD/LDraw conversion file
SylvainLS posted a topic in Digital LEGO: Tools, Techniques, and Projects
I propose to keep here an up-to-date ldraw.xml, the file used by LDD to convert to and from LDraw files. Download: latest version On Windows 32 bits: download and replace the one in “C:\Program Files\LEGO Company\LEGO Digital Designer\” On Windows 64 bits: download and replace the one in “C:\Program Files (x86)\LEGO Company\LEGO Digital Designer\” On Mac: download and replace the one in the “Contents\Resources\” folder in the app (open “Applications” in Finder, right click on the “LEGO Digital Designer” package and select the “Show Package Contents” option to explore the pakage folders). (Thanks manglegrat!) This file is also used and distributed with these tools: lxf2ldr C++/Qt version (both CLI and GUI), more options but needs to be compiled lxf2ldr.html HTML/JS version, works everywhere! If you have other modifications or additions, post them here or send me a personal message and I’ll include them to the benefit of all. If you need a part, feel free to ask here and I’ll try to add it (provided it exists in LDraw and LDD). History and Contents It’s based upon gallaghersart’s latest version (see this thread). It includes the modifications shutterfreak published in his thread. It uses some of the LDraw unofficial parts (mainly for new parts in LDD Brick version 2075). It includes some name corrections (because LDraw renamed or moved some parts, added new variants, etc.). I tried to more accurately convert the colors (now mainly according to Ryan Howerter’s conversion table). It’s not easy because all sources (Swooshable, Mecabricks, Ryan) don’t agree, and there are holes and overlaps. But as these differences, holes, and overlaps occur for rare colors or colors that aren’t available in LDD, it should be okay. In a megalomaniacal way, all the entries I have modified have an “SLS” at the end of their heading comments. New entries have an “SLS” at the front of the comments. So it’s easy to know when to blame me. As of 2016-09-16 and the big overhaul, I assume all the errors. Know Limitations As of LDD 4.3.9, flex parts (hoses) are not exported anymore (even unflexed). Minifig arms and hands are not connected in LDraw. I don’t know whose geometry is off (both?) but the shapes differ a lot. At least, hands are correctly connected to whatever they clip and arms are correctly placed in their sockets and somewhat wrap around the hands’s stems. Some variants are not recognized by LDD (e.g. clips, or tiles with/without groove, etc.) In those cases, I prefer to use the most recent variant in LDraw as it generally is easier to find and cheaper. Sometimes, several LDD parts correspond to a unique LDraw part. Sometimes, the transformation is accurate for one variant but not for another. For example, the Flag 2 x 2 is known to LDD as 2335, 11055, and 60779, but LDraw only has the 2335 variant. 2335 and 60779 use the same transformation but 11055 is vertically offset. I preferred to badly convert 11055 to 2335 rather than not convert it at all or badly convert 2335 and 60779. ldraw.xml is used both ways (LDD to/from LDraw). It’s not something I do frequently (too many resulting collisions) so it’s not well tested. One problem I can see is that, when several LDD parts correspond to a unique LDraw part, the conversion that’s listed last is the one that will be used. The reverse (first written is the one used) is true for assemblies that use the same subparts, in the same quantity (like electric cables). A lot of LDraw parts are simply wrong. Almost all the parts that combine System (studs and anti-studs) and Technic (pins and axles, and their holes) are wrong in that they assume the technic holes are at the same height than side studs (on the picture below, the circles are concentric). LDD assumes the holes are 0.2 mm (0.5 LDU) higher. In ABS, the holes are 0.12 mm (0.375 LDU) higher (dixit Jamie Berard in his famous presentation). In order to limit the number and magnitude of errors, LDD is considered to be right. How to write a new transformation for a part in ldraw.xml What? ldraw.xml is an XML file that defines how LDD can export to (or import from) LDraw files. It does so by defining a match between the part’s IDs and how to rotate and translate the part from one geometry to the other. Matches are defined by “Brick” XML elements. For example, this one says to LDD that the Brick 1x1 that it knows as 3005 is also known to LDraw as 3005: <Brick ldraw="3005.dat" lego="3005" /> (Note the “.dat” in the ldraw ID.) Matches are not needed if the part IDs are the same: the transformation element is sufficient for LDD to know the part exists. (So the example above is useless ) Rotations and translations are defined by “Transformation” XML elements. This one says to LDD that the Brick 1x1 just needs to be moved up: <Transformation ldraw="3005.dat" tx="0" ty="-.96" tz="0" ax="1" ay="0" az="0" angle="0" /> The translation (tx, ty, and tz) is in centimeters (0.8 cm is the width of a brick, 0.96 cm its height). The rotation is given by its axis (the line passing through and ), and its angle in radians. And all the coordinates are in the direct (“riht-handed”), Y points up, coordinates system of LDD. The transformation explains what should be done to import from LDraw besides changing the axes (LDD’s Y is up and XYZ is a direct basis, LDraw’s Y is down and XYZ is an indirect basis; so changing the axes only means changing the sign of Y). So, in an LDD to LDraw point of view, the transformation is reversed: it says what happens to a part if you don’t do anything to its coordinates besides changing the sign of Y. In other words, the opposite transformation has to be applied to the LDD coordinates of the part in order to get the LDraw coordinates (with Y reversed). Why? Each part has an orientation (which way up? which way left?) and a center, point of origin, or reference point (we’ll use “reference point” from now on). But LDD and LDraw don’t always agree. To know the orientation and reference point in LDD, insert the part without rotating it nor attaching it to any other part. It will be aligned along the scene’s axes (LDD’s axes). The reference point is near the mouse pointer’s head. To know the orientation and reference point in LDraw, I find LeoCAD the easiest tool: just select the part and its axes are drawn (X red, Y green, Z blue), starting at its reference point. Okay, LeoCAD’s «X, Y, Z» is LDraw’s «X, -Z, Y» but what’s another little change of basis? Sometimes, their disagreement is trivial. For example, for the simple 1x1 brick (3005), both LDD and LDraw agree: the stud is on top and the reference point is on the vertical line going through the center of the stud. But they differ for the height at which the reference point should be: LDD says it’s at the base of the brick, LDraw at its top (but at the base of the stud). (On every picture, X will be red, Y green, and Z blue.) So the transformation for that part is straightforward: if the LDraw part is imported as is, with only Y reversed, it will end up 0.96 cm (the height of the brick) higher than it should. So we have to lower it by 0.96 cm: <Transformation ldraw="3005.dat" tx="0" ty="-.96" tz="0" ax="1" ay="0" az="0" angle="0" /> Sometimes, their disagreement is more profound and the transformation is therefore more complicated. For example, for the musket (Minifig Gun Musket 2561), LDD puts the reference point in the handle and “up” means the handle is vertical but LDraw puts the reference point in the barrel and “up” means the barrel is vertical. Even more, the stock is on the wrong side, so X and Z are different too. With an identity transformation, the part is rotated by an eighth of a turn (X to Y) (π/4) around the Z axis to put the barrel vertical, and then by a quarter turn (X to Z) (-π/2) around the Y axis. After that, it has been translated up and horizontally. After calculations (see below), we’ll end up with this transformation: <Transformation ldraw="2561.dat" tx="0" ty="-1.72" tz="0.336" ax="-0.3574067443365933" ay="-0.8628562094610169" az="0.3574067443365933" angle="1.7177715174584016"/> How? So, how do we find the right values to have the correct transformations? What’s the ID? Having the right part Check the ID of the part in LDD. Check the ID of the part in LDraw. Beware of variants, LDraw uses a letter suffix (a, b, c…) where LDD totally changes the ID or keeps the same ID for new variants. Don’t hesitate to look on BrickLink for the part ID: BrickLink keeps a list of alternate IDs (when the same part has several IDs) and links to variants and notes. If the IDs are the same. Nothing to do. If the IDs differ. We add a Brick element: <Brick ldraw="123a.dat" lego="456" /> Don’t forget the “.dat”! That was the easy part. Which way is up? Finding the rotation axis and angle We start in LDD. Up is Y, or Y is up. X and Z are a bit harder to see on the LDD scene unless you use LDD’s developper mode (which has the LDD axes drawn at «0,0,0» as red X, green Y, and blue Z lines). Or, if you’re sure you didn’t move the camera in a brand new model/file, X is pointing bottom right, and Z bottom left. We place our part among other parts that we know will be correctly converted (like 1x1 plates, or harpoons ) to have references. Using different colors greatly helps! We export to LDraw… … and look at the results: We decompose the transformation in multiple simple rotations, around the X, Y, or Z axis. If it has been turned around X, a quarter turn from Y to Z is a positive π/2 angle. If it has been turned around Z, a quarter turn from X to Y is a positive π/2 angle. If it has been turned around Y, a quarter turn from Z to X is a positive π/2 angle. To make it short, it’s a direct (right-handed) basis. If you can’t figure out the problems with an existing transformation, “clear” it by using an identity transformation: <transformation tx="0" ty="0 tz="0" ax="0" ay="1" az="0 angle="0"/> (All zeroes but one of the a_ which is 1.) You can try each simple rotation one by one to be sure of their angles (especially their signs ). Beware, combining rotations change their axes (e.g. turning around first X then Y is equivalent to turning around first Y then Z). So if you check that the Y rotation is okay, then the X rotation, don’t forget to combine them as Y then Z. For the musket, we need two rotations: an eighth of a turn (π/4, 45°) around the Z (blue) axis that puts the barrel vertical, and then a quarter turn (-π/2, -90°) around the Y (green) axis. Or we can first make the quarter turn (-π/2, -90°) around the Y (green) axis, and then an eighth of a turn (π/4, 45°) around the X (red) axis. Remember, “import”-wise, we’re trying to find what should happen to the part in the LDD scene to be like the LDraw one, with the LDD axes (the harpoons ). My head is turning. Combining rotations If more than one simple rotation is needed, we have to combine them. For that, we’ll use quaternions. Eh come back! That’s not that difficult! A quaternion q can be written as q = a + b.i + c.j + d.k, where i² = j² = k² = i.j.k = -1 (so i.j = k = -j.i, j.k = i = -k.j, k.i = j = -i.k). a is the real part, b.i + c.j + d.k is the imaginary part. A rotation by the angle angle around the axis «ax, ay, az» is the quaternion q = cos(angle/2) + sin(angle/2).(ax.i + ay.j + az.k) Do note the 1/2 factor on the angle! To combine two rotations, we just multiply their quaternions and apply the rules above to end up with a a + b.i + c.j + d.k form (or, more accurately, a C + S.(ax.i + ay.j + az.k) form, where C and S are cosine and sine of the same angle and ax² + ay² + az² = 1 ). If we rotate first by q and then by p, the result is the rotation by p.q. Note the order: q then p is p.q. Multiplication is not commutative with quaternions: if you do it the wrong way, you’ll end up with the correct values but the wrong signs. There’re lots of fun to have with quaternions and rotations as quaternions. But what is said here is sufficient for our purposes. An example: Most of the times, we do π/2 rotations (quarter turns, 90°). angle = π/2 therefore cos(angle/2) = sin(angle/2) = cos(π/4) = sin(π/4) = √2/2; So, for a “horizontal” quarter turn (yaw, around Y): q = √2/2 + √2/2.j (as j/Y is the “vertical” axis). Let’s combine it with a half turn (π, 180°) around the X axis (IOW, upside-down): cos(π/2) = 0, sin(π/2) = 1, so p = 0 + i p.q = (0 + i) . (√2/2 + √2/2 j) = √2/2 i + √2/2 i.j = 0 + √2/2 ( i + k ) Now, let’s get the resulting angle: The real part of p.q, 0, is the cosine of angle/2. 0 is also the cosine of ±π/2 (±90°). Therefore, the resulting angle is π (180°). Now the axis, «ax, ay, az»: It’s the √2/2( i + k) imaginary part. That’s the vector «√2/2, 0, √2/2». We need to remove the sin(angle/2) factor. That’s easy as the sine of π/2 is 1. So our axis is «ax = √2/2, ay = 0, az = √2/2». Written in ldraw.xml: ax="0.707…" ay="0" az="0.707…" angle="3.1415…" Another one, a quarter turn around Y and then around X: q = √2/2 + √2/2 j = √2/2 (1 + j) p = √2/2 + √2/2 i = √2/2 (1 + i) p.q = 1/2 (1 + i) (1 + j) = 1/2 + 1/2 (i + j + k) We rewrite it as p.q = 1/2 + √3/2 (√⅓ i + √⅓ j + √⅓ k) to have a unit vector (ax² + ay² + az² = 1) in the parenthesis and to clarify the cosine and sine: 1/2 and √3/2. They are the sine and cosine of π/3 (60°). Therefore, the resulting angle is 2π/3 (120°). In ldraw.xml: ax="0.577…" ay="0.577…" az="0.577…" angle="2.094…" Back to our musket: An eighth of a turn (π/4, 45°) around the Z axis that puts the barrel vertical: q = cos(π/8) + sin(π/8).i = C + S.k Then a quarter turn (-π/2, -90°) around the Y axis: p = cos(-π/4) + sin(-π/4).j = √2/2 (1 - j) p.q = √2/2.(1 - j)(C + S.k) = √2/2.(C - S.j.k - C.j + S.k) = √2/2.C + (-√2/2.S.i - √2/2.C.j + √2/2.S.k) Wow! Hum, okay. So √2/2.cos(-π/8) is the cosine of half our angle. Get the calculator out… angle/2 = Acos(√2/2.cos(-π/8)) = 0.8589 Our angle is 1.7178. We “remove” the sine of angle/2 from our vector, so that p.q = cos(angle/2) + sin(angle/2).(ax.i + ay.j + az.k): ax = -√2/2.sin(-π/8) / sin(0.8589) = -0.3574 ay = -√2/2.cos(-π/8) / sin(0.8589) = -0.8629 az = √2/2.sin(-π/8) / sin(0.8589) = 0.3574 As an exercise, you can verify that ax² + ay² + az² = 1. So we did it right! Et voilà: ax="-0.3574067443365933" ay="-0.8628562094610169" az="0.3574067443365933" angle="1.7177715174584016" One step to the left. Getting the translation right Now that the part is correctly oriented, it may need to be moved. The translation is in centimeters (cm). 20 LDU = 0.8 cm. Values are often multiples of 0.4 (half a stud) for tx and tz and multiples of 0.32 (height of a plate) for ty. Other, finer, tunings are often in multiples of 0.008. If the rotation is complex, all bets are off In LDD, we try to place the part so that its LDraw up axis ends up up in the scene, and we try to align its LDraw X and Z axes with X and Z of the scene (at least, that it is not rotated by a weird angle). That way, moving the part along its axes is also moving the part along the scene’s axes. It will be easier for getting the translation right. For our musket, that means the barrel up. (I didn’t align the X and Z axes here because, yeah, I’m a warrior, I don’t need that. Besides, you’ll see what happens because of that. ) Again, I find it easier in LeoCAD: the key bindings, the coordinates clearly shown in the status bar, etc. The thing is, LeoCAD uses a direct Z up basis. So if you move «dx, dy, dz» in LeoCAD, you’re moving «dx, -dz, dy» in LDD (and vice versa). Confusing? Noooh. Anyway, choose your own poison but beware of its little quirks. To help fine tuning, using transparent colors greatly helps, especially for clip-bar connections. Now, we note the coordinates of our part in our LDraw editor and move it so that it ends up the way it should. We look how much we moved it. That’s it! Just convert it to cm (= LDU × 0.8 / 20) and we have our translation. Well, mostly, the signs are wrong. Remember: the transformation is what should happen to the LDD part to end up like the LDraw part, we just did the opposite and moved the LDraw part to be like the LDD one. Besides the signs, if you didn’t correctly align the axes, you’ll have to find which is which For our musket, we need to go up and sligthly to the “left” (from bottom right to upper left when your LDraw view is oriented as a new LDD file, as are all the screenshots here). That means negative dy and dx. But as the part is not aligned on X and Z (but still not badly rotated), the negative dx becomes a positive dz. Et voilà! <Transformation ldraw="2561.dat" tx="0" ty="-1.72" tz="0.336" ax="-0.3574067443365933" ay="-0.8628562094610169" az="0.3574067443365933" angle="1.7177715174584016"/> (So, okay. I had to try first tx then tz, both negative and positive, before I found the right one. But I didn’t want to have to remake the pictures! There: I’m not a warrior, I’m just lazy.)- 321 replies
-
- ldraw
- conversion
-
(and 1 more)
Tagged with:
-
WIP On-Road to Off-Road Chassis conversion
CrazyKreations posted a topic in LEGO Technic, Mindstorms, Model Team and Scale Modeling
Hey everyone, I stripped down my Dodge Demon MOC to the chassis and I want to modify it in a way that will make it look more rugged and potentially even have some RC components added! Do you all have any suggestions that you could please give to support the build?????? Here is a before and after of the chassis as of today: The Changes I have made are the following: - Improved central ground clearance - Components of the chassis have been removed to allow the fitment of bigger tyres - Larger Tires - Some reinforcement of the suspension struts and how they connect to the chassis I have a workbench post on rebrickable with a video! https://rebrickable.com/users/CrazyKreations/workbench/6109/ What should I add or change next????? -

lxf2ldr.html, the even more awesome lxf2ldr
SylvainLS posted a topic in Digital LEGO: Tools, Techniques, and Projects
Hi all, I just released an extra portable version of lxf2ldr: lxf2ldr.html (still on gitlab, next to its brother, and also in GPLv3+). Yes, .html like in HTML/ECMAScript (aka JavaScript) but it’s totally local and self-contained! No compilation, no dependencies, no web server or arcane application (well, except for a d/recent web browser). Just download the zip (or tarball…), unpack it somewhere and open the file lxf2ldr.html in your browser. (See the senseless green/yellow coloured bar ? Click on the little cloud just below, on the right, just next to “Find File.”) Okay, okay, the look is spartan but it gets the job done. Tell me what you think… or not BTW, this is the initial release, I haven’t tested all the cases / stumbled upon all the of the language (two days on this and I know why I hadn’t touched JavaScript since the last century), so any issue, bug, glitch is welcome.- 16 replies
-
- conversion
- ldraw
-
(and 1 more)
Tagged with:
-

Converting parts with textures from Studio to LDraw
Lasse D posted a topic in Digital LEGO: Tools, Techniques, and Projects
Studio 2.0 (or rather, "Part Designer") is able to export to LDraw. Unfortunately Bricklink has chosen to roll out their own standard for texture mapping, rather than following the official spec. I do not care for the reason for Bricklink to go this way. It personally took me almost a month to implement it, so I fully understand if they wanted to choose something less complex. Instead I would like to dedicate this thread to converting between the two formats. In order to do this, we have to understand the format that Studio exports to. If you want to jump directly to a live demo, then please click "3D" on the page I have set up here. When creating a new part in Part Designer, you can choose either "Minifig", "Decorated Part" or "Create Part From Scratch". I will start with "Decorated Parts" and take the two other options later. Update! The new location for Studio2LDraw is https://brickhub.org/i/apps/studio2ldraw.htm Using the checker.png by Nils from the LDraw forum and some basic gradient picture, I have created test files for most of the decorated parts currently available from Part Designer The Studio "LDraw" File Format - Findings Exporting to LDraw from the Part Designer will result in .dat files containing something along the lines of: 0 FILE studio_test_1_8_checker.dat 0 Brick 1 x 8 checker 0 Name: studio_test_1_8_checker.dat 0 Author: 0 !LICENSE Redistributable under CCAL version 2.0 : see CAreadme.txt 0 BFC CERTIFY CCW 0 PE_TEX_PATH -1 0 PE_TEX_INFO iVBORw0KGgoAAAAN(...)uQmCC 1 16 0.0000 -24.0000 0.0000 1.0000 0.0000 0.0000 0.0000 1.0000 0.0000 0.0000 0.0000 1.0000 s/3008s01.dat 3 16 -80.000 -24.000 -10.000 -80.000 0.000 -10.000 80.000 0.000 -10.000 0.045 0.955 0.045 0.045 0.955 0.045 3 16 -80.000 -24.000 -10.000 80.000 0.000 -10.000 80.000 -24.000 -10.000 0.045 0.955 0.955 0.045 0.955 0.955 Please note that I have inserted the "!LICENSE" line in order to ensure that the files may be shared and used. The commands "PE_TEX_PATH" and "PE_TEX_INFO" are proprietary from Studio. I have not yet found a "PE_TEX_PATH" command that does not say "-1", so let's ignore it for now. The other command has a base64 encoded picture as the argument. The geometry lines have one sub part (in this case "s/3008s01.dat") and 2 or more triangle lines. I have yet to see any file being generated with quads, lines or any other content after the encoded picture. The Encoded Picture The base64-encoded picture is not simply the picture you upload to Part Designer. It will be processed. I have found that the encoded picture is scaled up and has been given a transparent border. I do not know why the border is added - perhaps someone can give me some insight here. Computing Projections In the LDraw specification you have to specify how to project a texture onto underlying geometry. Unfortunately the exported LDraw files from Studio do not contain any other information than what I have stated above. You thus have to take each part one-by-one and compute your own LDraw TEXMAP projections. I have found the following heuristic works for most of the supported parts (see exceptions in the section below): 1) Take the minimal axis-aligned 3D bounding box of all the points of the triangles. Call this box B. Let Bx, By, and Bz be its length along the X, Y and Z-axes, respectively. 2) Expand B by 10% in each direction to account for the border introduced to the picture. 3) If 2*By < Bx and 2*By < Bz, then assume the projection should be performed on an XZ plane. Otherwise, project onto an XY plane. 4) No matter the projection, choose the points for the planar projection defined in the LDraw specification to be corners from B. Exceptions: 2x4 Brick and 2x2x2 Slope For the parts "Brick 2 x 4" and "Slope 2 x 2 x 2" you can choose two pictures for decorating the front and back of the part. For the 2x4 brick, the two pictures get merged into a single picture - the front picture on top and the back picture below. There will be 4 triangles in the LDraw file - the two first for the front side, and the other for the back side. For the 2x2x2 slope, the two pictures also get merged into a single picture, however, this time they are side-by-side: Front picture on the left and rear picture on the right. For both exceptions, I have had to introduce "magical numbers" in order to get a proper alignment of projections. Please see the source code here for how to compute projections in JavaScript for the buildinginstructions.js project. Non-Standard Alignment of Sub-Part and Geometries Please take a look at the line for the sub part: 1 16 0.0000 -24.0000 0.0000 1.0000 0.0000 0.0000 0.0000 1.0000 0.0000 0.0000 0.0000 1.0000 s/3008s01.dat The positioning is off: Normally you would place the sub part at (0, 0, 0), but here it is at (0, 24, 0). This position has to be translated so that the sub part is at (0, 0, 0) in order for the custom part to appear correctly. You have to subtract the position of the sub part from all the positions of the triangles as well. By following the observations above, I have been able to create the converter from Studio LDraw to standard LDraw as seen in the source code here for. This is what powers the 3D viewer here. As you can see, there are still some precision issues - most noticeably on the 1 x 8 tile where the "10% rule" doesn't seem to work perfectly. Another issue is that I cull textured surfaces on transparent parts, while Studio does not. Please tell me if you have other observations. My plan for now is to continue with Minifigs.- 26 replies
-
- conversion
- ldraw
-
(and 1 more)
Tagged with:
-

MPD file to LXF conversion
Hoth Rebel posted a topic in Digital LEGO: Tools, Techniques, and Projects
Hello, I've been searching for a while now, but can't find anything that really helps me out. I would like to convert a Multi Part Document (MPD) file to Lego Digital Designer (LDD/LXF). I've imported the MPD file into LDCad (from what I read online this is the way to do it), but when I save (as) it's still a MPD file. Can someone tell me how to convert the file so that I can open it in LDD? Thank you in advance. Ps. I've searched this forum for answers, but couldn't find any. If there are than excuse me for making this topic.- 7 replies
-
- conversion
- mpd
-
(and 2 more)
Tagged with:
-

Convert textured 3D models to .ldr files
pennyforge posted a topic in Digital LEGO: Tools, Techniques, and Projects
Hi there, I've been working on some code to allow of the conversion of textured 3D models into coloured ldr files (with brick optimisation - so it creates the ldr model with 10 different types of brick). I've put my python code and instructions on how to use it on GitHub, you can get all the details from my blog...https://cultofthebrick.blogspot.com/2019...ithub.htmlHope you like it- 7 replies
-
- ldraw
- conversion
- (and 8 more)
-

Matching LDD decorations with LDraw patterns
SylvainLS posted a topic in Digital LEGO: Tools, Techniques, and Projects
Hi all, has anyone ever compiled a matching table between LDD decorations and LDraw patterned bricks (or stickers)? (Something like 95551 = 3005pf0.dat) There’re about 2000 decorations in LDD and it’s highly disrespectful to redo the gruesome work someone has already done -
The Friends Heartlake Cupcake Cafe (41119) has been out for more than year and I did a review of it some ten months ago. At that time, I had a vision of what the modular version would look like and it had been sitting on a shelf in my lounge room since then, waiting for me to do the conversion. Better late than never, I guess. As with my other Friends conversions, I did this one open-backed and with lots of clear panels to facilitate playability. I loved the entrance for the Heartlake Cupcake Cafe, especially the stained glass window above the front door and the windows framed using the ornamental arches. This section of the building was 16 studs wide and was therefore a natural starting point for the conversion to a modular building. The other part that I really liked was the outdoor seating area, so I incorporated that into the rooftop terrace. C&C welcome, as always! More images on flickr and the instructions for the structure are available to download here.
-
Hi! I'm not a coder but I'm very familiar with the Unreal Engine 4's visual scripting system which I used to create a tool that will help you to convert Rebrickable part lists to LDD user palettes, This is how it looks right now: Features: One-click converting of Rebrickable CSV files to LDD user palettes Features coming soon: Converting decorations (prints) correctly Converting rarely used colors correctly to colors available in LDD Merging mold variations to bricks available in LDD Support for old colors Limitations/Disadvantages: Since it's running on a video game engine, it's quite heavy in terms of file size (102 MB) and requires a modern PC All bricks are placed at 0 0 0 so if you try to open the palette file, LDD will remove all but one brick. Every part of a multi-part brick like power function components will have everything colored in the main color. DOWNLOAD Decide yourself if the relatively large file size is worth the time you may save in comparison to LDD manager's palette process (which is still a great tool!). Right now it only uses Rebrickable IDs for the LDD IDs but that is going to change when I get through each file and check it for mold variations and decorations. The colors IDs have been translated manually which is why I need feedback regarding the colors. Sometimes It wasn't easy to decide which color in LDD is which color on Rebrickable. Is it worth continuing? Let me know what you think!
- 1 reply
-
- Rebrickable
- LDD
-
(and 5 more)
Tagged with:
-

LDD and BrickLink Colors Naming Conversion
KamalMYafi posted a topic in Digital LEGO: Tools, Techniques, and Projects
Since i see there are a member/people that don't know a BrickLink colors in LDD or used a color wrong. That's make me want to make a conversion. Conversion [HINT: Use Browser's search function (usually CTRL+F, or command+F for MAC) to search a colors] Light Aqua (BrickLink) = 323 - Aqua (LDD) Black (BrickLink) = 26 - Black (LDD) Tan (BrickLink) = 5 - Brick Yellow (LDD) Blue (BrickLink) = 23 - Bright Blue (LDD) Dark Turquoise (BrickLink) = 107 - Bright Bluish Green (LDD) Violet (BrickLink) = 110 - Bright Bluish Violet (LDD) Bright Green (BrickLink) = 37 - Bright Green (LDD) Orange (BrickLink) = 106 - Bright Orange (LDD) Dark Pink (BrickLink) = 221 - Bright Purple (LDD) Red (BrickLink) = 21 - Bright Red (LDD) Light Purple (BrickLink) = 198 - Bright Reddish Lilac (LDD) Magenta (BrickLink) = 124 - Bright Reddish Violet (LDD) Purple (BrickLink) = 104 - Bright Violet (LDD) Yellow (BrickLink) = 24 - Bright Yellow (LDD) Lime (BrickLink) = 119 - Bright Yellowish Green (LDD) Medium Orange (BrickLink) = 105 - Bright Yellowish Orange (LDD) Dark Flesh (BrickLink) = 217 - Brown (LDD) Pearl Light Gray (BrickLink) = 296 - Cool Silver (LDD) Metallic Silver (BrickLink) = 298 - Cool Silver, Drum Lacquered (LDD) Bright Light Yellow (BrickLink) = 226 - Cool Yellow (LDD) Salmon (BrickLink) = 123 - Bright Reddish Orange (LDD) Copper (BrickLink) = 139 - Copper (LDD) Speckle Black-Copper (BrickLink) = *306 - Defused Copper (LDD) Dark Yellow (BrickLink) = 180 - Curry (LDD) Dark Azure (BrickLink) = 321 - Dark Azur (LDD) Dark Brown (BrickLink) = 308 - Dark Brown (LDD) Green (BrickLink) = 28 - Dark Green (LDD) Dark Gray (BrickLink) = 27 - Dark Grey (LDD) Earth Orange (BrickLink) = 128 - Dark Nougat (LDD) Dark Orange (BrickLink) = 38 - Dark Orange (LDD) Dark Blue-Violet (BrickLink) = 196 - Dark Royal Blue (LDD) Dark Bluish Gray (BrickLink) = 199 - Dark Stone Grey (LDD) Sky Blue (BrickLink) = 232 - Dove Blue (LDD) Dark Blue (BrickLink) = 140 - Earth Blue (LDD) Dark Green (BrickLink) = 141 - Earth Green (LDD) Brown (BrickLink) = 25 - Earth Orange (LDD) Bright Light Orange (BrickLink) = 191 - Flame Yellowish Orange (LDD) Light Gray (BrickLink) = 2 - Grey (LDD) Lavender (BrickLink) = 325 - Lavender (LDD) Light Blue (BrickLink) = 45 - Light Blue (LDD) Aqua (BrickLink) = 118 - Light Bluish Green (LDD) Light Violet (BrickLink) = 39 - Light Bluish Violet (LDD) Light Green (BrickLink) = 6 - Light Green (LDD) Very Light Gray (BrickLink) = 103 - Light Grey (LDD) Light Flesh (BrickLink) = 283 - Light Nougat (LDD) Earth Orange (BrickLink) = 12 - Light Orange Brown (LDD) Bright Pink (BrickLink) = 222 - Light Purple (LDD) Pink (BrickLink) = 9 - Light Reddish Violet (LDD) Bright Light Blue (BrickLink) = 212 - Light Royal Blue (LDD) Very Light Bluish Gray (BrickLink) = 208 - Light Stone Grey (LDD) Light Yellow (BrickLink) = 3 - Light Yellow (LDD) Light Lime (BrickLink) = 120 - Light Yellowish Green (LDD) Medium Azure (BrickLink) = 322 - Medium Azur (LDD) Medium Blue (BrickLink) = 102 - Medium Blue (LDD) Light Turquoise (BrickLink) = 116 - Medium Bluish Green (LDD) Medium Violet (BrickLink) = 112 - Medium Bluish Violet (LDD) Medium Green (BrickLink) = 29 - Medium Green (LDD) Medium Lavender (BrickLink) = 324 - Medium Lavender (LDD) Dark Purple (BrickLink) = 268 - Medium Lilac (LDD) Medium Dark Flesh (BrickLink) = 312 - Medium Nougat (LDD) Dark Pink (BrickLink) = 22 - Medium Reddish Violet (LDD) Light Bluish Gray (BrickLink) = 194 - Medium Stone Grey (LDD) Chrome Gold (BrickLink) = 310 - Metalized Gold (LDD) Pearl Dark Gray (BrickLink) = 148 - Metallic Dark Grey (LDD) Metal Blue (BrickLink) = 145 - Metallic Sand Blue (LDD) Flat Dark Gold (BrickLink) = 147 - Metallic Sand Yellow (LDD) Pearl White (BrickLink) = 183 - Metallic White (LDD) Dark Red (BrickLink) = 154 - New Dark Red (LDD) Flesh (BrickLink) = 18 - Nougat (LDD) Olive Green (BrickLink) = 330 - Olive Green (LDD) Maersk Blue (BrickLink) = 11 - Pastel Blue (LDD) Glow In Dark Trans (BrickLink) = 294 - Phosphorescent Green (LDD) Glow In Dark Opaque (BrickLink) = 294 - Phosphorescent White (LDD) Reddish Brown (BrickLink) = 192 - Reddish Brown (LDD) Blue-Violet (BrickLink) = 195 - Royal Blue (LDD) Sand Blue (BrickLink) = 135 - Sand Blue (LDD) Sand Green (BrickLink) = 151 - Sand Green (LDD) Sand Red (BrickLink) = 153 - Sand Red (LDD) Sand Purple (BrickLink) = 136 - Sand Violet (LDD) Dark Tan (BrickLink) = 138 - Sand Yellow (LDD) Flat Silver (BrickLink) = 315 - Silver Metallic (LDD) Yellowish Green (BrickLink) = 326 - Spring Yellowish Green (LDD) Pearl Dark Gray (BrickLink) = 316 - Titanium Metallic (LDD) Trans-Clear (BrickLink) = 40 - Transparent (LDD) Trans-Dark Blue (BrickLink) = 43 - Transparent Blue (LDD) Glitter Trans-Purple (BrickLink) = 129 - Transparent Bluish Violet (Glitter) (LDD) Trans Purple (BrickLink) = 126 - Transparent Bright Bluish Violet (LDD) Trans-Bright Green (BrickLink) = 311 - Transparent Bright Green (LDD) Trans-Orange (BrickLink) = 182 - Transparent Bright Orange (LDD) Trans-Pink (BrickLink) = 230 - Transparent Bright Purple (LDD) Trans-Purple (BrickLink) = 236 - Transparent Bright Reddish Lilac (LDD) Trans-Bright Green (BrickLink) = 227 - Transparent Bright Yellowish Green (LDD) Trans-Black (BrickLink) = 111 - Transparent Brown (LDD) Trans-Light Orange (BrickLink) = 231 - Transparent Flame Yellowish Orange (LDD) Trans-Medium Blue (BrickLink) = 143 - Transparent Fluorescent Blue (LDD) Trans-Neon Green (BrickLink) = 49 - Transparent Fluorescent Green (LDD) Trans-Neon Orange (BrickLink) = 47 - Transparent Fluorescent Reddish Orange (LDD) Trans-Green (BrickLink) = 48 - Transparent Green (LDD) Trans-Light Blue (BrickLink) = 42 - Transparent Light Blue (LDD) Trans-Very Lt Blue (BrickLink) = 229 - Transparent Light Bluish Green (LDD) Trans-Dark Pink (BrickLink) = 113 - Transparent Medium Reddish Violet (LDD) Glitter Trans-Dark Pink (BrickLink) = 114 - Transparent Pink Glitter (LDD) Trans-Red (BrickLink) = 41 - Transparent Red (LDD) Trans-Light Purple (BrickLink) = 284 - Transparent Reddish Lilaq (LDD) Glitter Trans-Clear (BrickLink) = 117 - Transparent with Glitter (LDD) Trans-Yellow (BrickLink) = 44 - Transparent Yellow (LDD) Pearl Gold (BrickLink) = 297 - Warm Gold (LDD) Metallic Gold (BrickLink) = *299 - Lacquered Gold/Warm Gold (LDD) White (BrickLink) = 1 - White (LDD) Glow In Dark White (BrickLink) = 329 - White Glow (LDD) _Colors not show in the paint tool, but will show correctly if use LXFML colors edit. *Brick not show correctly, but description yes. This conversion is from Brickset and my research. This conversion is just for color that exist in both LDD and BrickLink. -
Hi all, I've finally bought a 7897 Passenger Train, which I want to run alongside my PF setup. I haven't received it yet, but I'm interested if it's possible to route the power from the included: "white train chassis 6x30 with IR Receivers integrated battery (6xAA)" (see below pic from LEGO/toysperiod). through to a PF IR receiver, then to either the included motor or a PF train motor (preferably without a (permanent) physical modification). From what little I know about IR, the unit may have to be receiving an "ON" IR signal from the remote by 'line of sight', to work....so I guess my question is: Is there a logical/natural/clear/obvious/sensible way to bypass this? Thanks, LLL
-
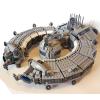
J-type 327 Nubian Royal Starship [Conversion from 7961 Sith Infiltrato
darththeling posted a topic in LEGO Star Wars
There's something suggestive about the figures assembled for the third incarnation of TLG's take on Darth Maul's Sith Infiltrator. We've got Padme, Panaka and Qui-Gon Ginn. They were all aboard the queen's ship of course! Why hasn't TLG made a royal starship yet? Everyone knows we don't have a ship for Queen Amidala from Phantom Menance and despite the incredible amount of screen time we spend aboard that ship (most of the film moves forward with the action centred on that very ship) I wouldn't bet on getting an official release anytime soon. This is also the screen time vs. Lego kit issue with Cloud City, but that's a discussion for another thread. ;) I've read elsewhere and on these forums that it is "unbuildable." Well, every AFOL knows that there is no such thing as unbuildable with a construction toy like Lego! I am light on a few key grey pieces... please imagine in the pics below that they are all the same grey color. ;) Allow me to present a very rudimentary attempt to convert this latest Sith Infiltrator to a ship that closely resembles the royal starship. The overall shape of the Infiltrator lends itself to the character of the Nubian ship, really just getting the engines correct was key. Of course the scale is off, but that is a problem with the entire Star Wars line in general, nothing to lose sleep over. I cloned the configuration of the engines from the instructions from the 7660 Naboo N-1 Fighter. Special care was taken to maintain the overall shape of the ship from the top view, trying to make the lines of the ship connect with the royal transport. This meant an extended nose, a rounder aft section and a smoother transition from the neckline to the main core of the ship. I still haven't figured out how to include the cockpit... should it be a printed piece? At the moment I can't remove the piece in the space in question as it keeps the front and the back part of the ship together! The result is a ship that, at close glance, passes for the royal cruiser and at the very least, gives Queen Amidala a place to be stored! I hope that TLG figures out that they can do this ship on a reasonable minifig scale but until then, this will do. I have plans with all that dark red so I intend to scoop it out and replace it with white and beige like the throne room. I added a very small landing ramp specifically so that Maul could have a place to escape; the door doesn't really lead into the ship. The non-Queen, non-Jedi characters still fit crammed into the interior of the front section. Decked out in white in may better resemble that area of the ship from the film. Gotta find a decal that represents the hyperdrive generator, any ideas? I figure a few 1x4 bricks should form it nicely. We need a reason to land this ship on Tattooine! This was not a very difficult conversion, it took a number of flat grey pieces but you'll need to Bricklink a grey version of the 7660 type engines. The engines could have gone a bit bigger but for now I'm satisfied with these. If I ever find a goldmine I may send this away to get chromed up! Shout outs to other great builds on this ship - setechnic's incredible chromed ship with video, as well as Gunner's incredible LLD model!! I find both of these projects to be exciting and inspiring. -

MOD: 4511 & 7740 Power Functions AA Battery Box (Orange Switch)
Luke_likes_Lego posted a topic in LEGO Train Tech
Hi Everyone, Many PF users would be familiar with this battery box: Pro's : Takes AA batteries (6xAA should last longer than 6xAAA) Cheap (about 1/3 to 1/4 of the price of the AAA 8x4x4 version) I seem to have lots of spares Cons: Awkward shape Too large to fit in the 'compartment' section of most trains Not many studs Anyway, as I had some of these battery boxes sitting around, and I wanted to convert my: 7740 12V to PF; and 4511 9V to PF using the 9V motor with PF attachment, I have made the following attempts and shown the approach below with some pictures. Please take note.... I'm not suggesting this is better or even equivalent to using the AAA or rechargeable battery box...... ....just something I have done to make use of my AA battery boxes . Hopefully it might be useful to someone !! 4511: World City High Speed Train New Carriage: Tha AA battery box revealed: Held in place by four pins in each end (and gravity): And the flawless (get it? ) reason this battery fits : 7740: Inter-City Passenger Train I'm not as pleased with the look of this one - which is a bit over utilitarian....but hey...on a practical level it does the job !! Roof is modified in the front for the IR receiver and in the rear for the protrusion of the battery: The switch is integrated into the pantograph, which slides into the three different positions (camera also shows my 1x6 black plate in need of a good clean ): Removal is easy enough: From the rear: All the best. Please feel free to fire any questions at me. I have the lights working in the 4511 and my next project is to do the equivalent in the 7740. Cheers LLL- 2 replies
-
- 12v to PF
- conversion
-
(and 5 more)
Tagged with:

