Search the Community
Showing results for tags 'hero factory'.
Found 141 results
-
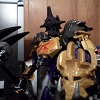
I did hint at this MOC in my Stringer Sonic Machine thread, so I thought it'd be only fair to show my rendition of Nex's machine here too It's actually an extremely heavily modified Evo Walker (a slightly terrible set only really bought for completeness and the jumpers imo) which wasn't really a walker. This MOC is essentially a heavy artillery on legs, with a large plasma cannon and a couple of plasma guns. It's cockpit can move freely, which means Nex can move the cockpit around for an unrivalled view of his surroundings, and the guns all rotate too. The colour scheme is pretty much classic Nex: green, orange and white. It might have some very odd styling and shaping, but there's a reason for it... Here's some pics: Front: LEGO Hero Factory MOC - Nex Walker Turret (1) by TheOneVeyronian, on Flickr Back: LEGO Hero Factory MOC - Nex Walker Turret (2) by TheOneVeyronian, on Flickr Pose: LEGO Hero Factory MOC - Nex Walker Turret (3) by TheOneVeyronian, on Flickr The Walker Turret also has another function: the exposed ball cups on the arms allow Nex's machine to attach to Evo's XL machine to create one extra-powerful XL machine (note my Evo XL machine is also modded, partly becuase I had to borrow the XT4 torsos for something else and never bothered to return them, and partly to allow these two machines to attach. Notice I mod practically every set I buy?): LEGO Hero Factory MOC - Nex Walker Turret and MODded Evo XL Machine (1) by TheOneVeyronian, on Flickr LEGO Hero Factory MOC - Nex Walker Turret and MODded Evo XL Machine (2) by TheOneVeyronian, on Flickr I would have preferred to use 2 trans-black windscreens, but unfortunately they're rare in my country on BrickLink so far and I didn't have enough spare... so 2 trans-blue windscreens it had to be! That's all for now. Hope you liked it!
-
My latest MOC, a Splitter Beast alternate build : MOCPage C&C are welcome. :)
-
The biggest Beast seen yet, this Hydra Beast is not one to take lightly! With four heads that spew knockout gas, corrosive liquid, molten lava, and electricity enough to shut down a Hero, this proves that four heads are tougher than one!
-
Here's my revamp of madness on wheels - Speda Demon! Whole construction (with the exception of the collar on the neck, which is an idea taken from MOCs by Fenrek) is my own. I don't know, what more can I tell... Photos would be better than words, links to photos on Flickr below: Speeda Demon with Nitro Rocket Motorbike Revamp Speeda Demon Revamp 1 Speeda Demon Revamp 2 Nitro Rocket Motorbike Revamp 1 Nitro Rocket Motorbike Revamp 2 Comments are welcome. -H.unter
-
Hello everyone! It's my first post on this forum, but I'm ambitious man and I'm starting from showing you my latest Hero Factory MOC It shows this bady guy from the 10th episode of Hero Factory Series: Brain Attack. Build him took me some time, but I did him as best as I could. More information about him will appear on LEGO Ideas site of project Hero Factory: Dark Creator, when I'll publish it on LEGO Ideas (I want to motiwate LEGO to do something with Hero Factory story and characters like our Brains creator... I think that we must to know more about him (and or another characters in HF storyline), so why don't do him as a set? ). Here are links to photos of Dark Creator on Flickr. https://www.flickr.c...07/13937138247/ https://www.flickr.c...in/photostream/ https://www.flickr.c...in/photostream/ https://www.flickr.c...in/photostream/ https://www.flickr.c...in/photostream/ https://www.flickr.c...in/photostream/ https://www.flickr.c...in/photostream/ For now, that's all. Thanks for attention. -H.unter
-
Hey guys, I just turned in a project for English class relating to the Odyssey and I thought I would share it! Anyway, I built a Polyphemus MOC that utilizes the old Build-a-Bob eye, and is constructed mostly of Hero Factory and Bionicle parts! Best of all, I only had to take apart Witch Doctor and three Visorak! I also used the Mindstorms NXT to make his arm move and Odysseus's arms move. Here it is! A close up on the buttons Here's the head Here's the feet. I used two Avak heads for the spikes on the sides... Here's his back, I sort of emulated the style of Tuma's and Toa Mata Nui's arm structure... And the Mindstorms bit, notice how it is connected by strings. And here's Odysseus. His crew consists of 5 Furnos from 2011, I was a bit Furno crazy when he came out Thanks for viewing! Any comments/suggestions are welcome! Thanks, legozebra PS -- the golden leg piece on his back is custom, my friend had decided to make a golden Skakdi and gave it to me... Which I promptly took apart for this project
-
Hi all reading. I'm gonna try something a little different today. Here's my latest revamp of a MOC I've had for a while, Wretched-Stare. Instead of of linking to the many photos I have posted on Flickr, I grabbed the photo collage I posted on Deviantart and will be posting that. The clickthrough link on the photo will also take you to Deviantart. This is an update for both Wretched himself, the computers, desk. and all the other accessories he previously had. The only things to remain the same are his little desk fan, and the action figure collection(not much I could do about those really) There are also a few notable additions to Wretched's Arsenal of PC Gaming and Hacking nirvana. Added features: Head set. Wretched-Bones(AKA Greg) once told me that he practically lives in his headphones, so comfortable ones are needed for him. This inspired me to include a head set for Wretched. Coffee Mug(more like oil drum ) Complete with coffee in it. It spilled when he freaked out about his desk top crashing. Dual Mini-Fridges. This was a feature I wanted to add to the first iteration of Wretched's actual desk (not counting that puny thing I made for him at first). Inside the top fridge are some energy drinks. These are the canisters that used to be on Wretched's belt, which I did away with because it felt more in the way than useful now that he's got a Mini Fridge and new weapons. The bottom fridge has some kind of "Xtreme" snacks. :shrug: Yay using printed tiles. Printer. Pretty much any PC user needs a printer at some point for something. So I felt his desk wouldn't be complete without one. I wasn't just content with a printer, that would have been to simple for Wretched. Everything he owns is upper class high tech. So he needed at least a <i>printer/scanner</i>. Considering how big this desk is, I'm surprised at the fact this is the most SNOTy part of the build. It was a bit of a technical challenge getting something that looked right, didn't look too blocky or bulky, but also worked. Sadly, paper could go through it but only if its 2 studs wide, though it looks as though it should handle 4 studs wide. Oh well still looks awesome in my opinion. Desk Drawer. Something I first did on Matteo's Desk, but expanded upon with Wretched.'s. Now he has a place to keep his rocket Launcher. Dual Wielded "Data Blades." I decided that butter knife I gave Wretched before wasn't acceptable now that he's getting all these badass upgrades. So I sought out to find him a new weapon. I was initially going to go with a Hack Hammer, but this just kinda worked out for the better. Greg while a really great tech dude who knows his stuff about computers, also studied martial arts when he was younger, so he's told me his preferences for weapons are axes, hammers and daggers. Well these are too big to be daggers so they're data blades. It was daggers that inspired me to try something and the skrall blades just happened to really fit his look I think. Plus getting the color scheme in the weapons was pretty cool toMore on these in his Bio Upgrades. Desk. Its kinda obvious that the desk itself is actually different. The middle section with the grated plates are from the original desk though. I thought those looked cool so I kept them. Chair. The chair is somewhat the same as before. It was always a bit too tall for wretched so I shortened it by one round 2x2 Trans-neon-Green brick. I added some 1X2 tiles to give it some color. Then I redid the bottom rollers to be actual wheels that spin, not just black Beveled gears. It rolls a lot smoother now. You should see Wretched going WEEEEEEEEEEEEEEEEEEEEEEEEEEEEEEEEEEEEEEEEEEEEEEEEEEEEEE around my kitchen table, its quite funny. :lol: PC tower. With the new desk being bigger and taller that allowed for more room to have a bigger PC tower, so now its bigger and has two Disc Drives in it, how fancy. :D:D:D Monitors. Its pretty much the same exact design as before just tripled. What serious gamer doesn't have at least a gagillion monitors? Greg does. Keyboard. Moved some things around to try and make it look like it'd be back lit. Mouse. It has a mouse pad now, nothing special, just something to add a little more color to the desk. Speakers Mostly the same but now they're mounted on the shelf Laptop. I reworked the Laptop on both sides. Its now running Windows8, and like any sane being with half a brain...Wretched hates it. This was actually Greg's idea. When I told him I didn't like the way I did the computer screen using printed tiles, he suggested the basic colored square thing. Which was genius(Go Greg) Bio Wretched Stare is a member of the Skakdi race. Wretched is perhaps one of the tamer of the Skakdi, but that's not saying much. He can still be characterized as "quite prickly." Wretched spends 90% of his time in doors at his computers and other technological devices. Even amongst the Skakdi he's a bit of an oddball. He plays games and sits in a dark room in front of screens instead of fighting and doing the many various malicious things Skakdi are know to do. Because of this his fellow skakdi think him odd. Once Wretched is in "manual butt kick mode" as he calls it he can be competent fighter, though he's not the most strong or fastest. Outside of battle he can be a bit of a bumbling goof.Wretched-Stare utilizes his vast knowledge of technology to aid him in fighting. This can be seen mostly through his use of hi "Data Blades." These unique weapons have an energized core that can transmit bits of code into a being to disrupt it mentally and physically. The code can overload and kill weaker beings or simply paralyze stronger beings. Zakaz, the island the Skakdi live on is pretty barren with many fortresses dotting the landscape. Wretched holds up in a smaller fortress of his own employing small drones to keep a look out and fend off any intruders. When those don't work, he'll refer to his "manual butt kick mode," meaning he has to get off his butt and go take care of the problem himself. Being a Skakdi, Wretched has worked for the Dark Hunters. He joined the Dark Hunters to gain access to high grade equipment and technology since Zakaz had little to nothing to offer him. Being skilled at identifying talent and potential, the dark hunters didn't really utilize his ability as a fighter, but exploited his wealth of knowledge with computers to help many of the other mechanically or technological savvy members develop new weapons for the Dark Hunters. Though he would never hand over the schematics for his Data Blades. This lead to some growing tension between him and some of the other Dark Hunters and a fight broke out amongst them. Many of the experiments they were working on were destroyed and Wretched ended up killing several of the participants. None of the other developers questioned his authority after that and he became the leader of the R&D department within the Dark Hunter's Guild.
-
These are my revamp/modifications to all 7 of the Brain Attack Villains. Gallery When Public http://www.brickshelf.com/cgi-bin/gallery.cgi?f=541230 LXF file of all of them http://www.brickshelf.com/gallery/takanuinuva/herofactory/BrainAttack/Villians/hf_brain_attack_villian_revamps.lxf Starting with Pyrox Not much is changed with him. More dark red was added along with using A Drilldozer torso piece to add bulk. Front http://www.brickshelf.com/gallery/takanuinuva/herofactory/BrainAttack/Villians/001.jpg Right Side http://www.brickshelf.com/gallery/takanuinuva/herofactory/BrainAttack/Villians/002.jpg Back http://www.brickshelf.com/gallery/takanuinuva/herofactory/BrainAttack/Villians/003.jpg Left Side http://www.brickshelf.com/gallery/takanuinuva/herofactory/BrainAttack/Villians/004.jpg Pose http://www.brickshelf.com/gallery/takanuinuva/herofactory/BrainAttack/Villians/005.jpg Next is Scarox. The thing unique with him is I've changed the swinging arms gimmick to use one of the spring piece from the hockey player sets. I've also added more gold. Front http://www.brickshelf.com/gallery/takanuinuva/herofactory/BrainAttack/Villians/006.jpg Right Side http://www.brickshelf.com/gallery/takanuinuva/herofactory/BrainAttack/Villians/007.jpg Back http://www.brickshelf.com/gallery/takanuinuva/herofactory/BrainAttack/Villians/008.jpg Left Side http://www.brickshelf.com/gallery/takanuinuva/herofactory/BrainAttack/Villians/009.jpg Closeup of back showing the piece I used http://www.brickshelf.com/gallery/takanuinuva/herofactory/BrainAttack/Villians/010.jpg Pose http://www.brickshelf.com/gallery/takanuinuva/herofactory/BrainAttack/Villians/011.jpg Next is Bruizer. His main change is his bashing arm is now poseable while still retaining the bashing gimmick. I used friction adders on his right arm so the arm can stay in place when using the gimmick. I've also removed all gunmetal grey and made his right leg bulky as well along with giving him more beast like feet. Front http://www.brickshelf.com/gallery/takanuinuva/herofactory/BrainAttack/Villians/012.jpg Right Side http://www.brickshelf.com/gallery/takanuinuva/herofactory/BrainAttack/Villians/013.jpg Back http://www.brickshelf.com/gallery/takanuinuva/herofactory/BrainAttack/Villians/014.jpg Left Side http://www.brickshelf.com/gallery/takanuinuva/herofactory/BrainAttack/Villians/015.jpg Closeup of back showing a locking feature that prevents the gimmick from working when you want to pose the arm http://www.brickshelf.com/gallery/takanuinuva/herofactory/BrainAttack/Villians/016.jpg http://www.brickshelf.com/gallery/takanuinuva/herofactory/BrainAttack/Villians/017.jpg Pose http://www.brickshelf.com/gallery/takanuinuva/herofactory/BrainAttack/Villians/018.jpg Next is Ogrum. The main change with him is how his mace is constructed and attached. I used a flick missile to connect his mace to his hand leaving the ball joint free. The way the mace part is attached to the chain isn't purist but I think it looks better this way. Front http://www.brickshelf.com/gallery/takanuinuva/herofactory/BrainAttack/Villians/019.jpg Right Side http://www.brickshelf.com/gallery/takanuinuva/herofactory/BrainAttack/Villians/020.jpg Back http://www.brickshelf.com/gallery/takanuinuva/herofactory/BrainAttack/Villians/021.jpg Left Side http://www.brickshelf.com/gallery/takanuinuva/herofactory/BrainAttack/Villians/022.jpg Pose http://www.brickshelf.com/gallery/takanuinuva/herofactory/BrainAttack/Villians/023.jpg Next is Frost Beast (Or as I like to call him. Chillax) Not many changes here. Just a change to the back construction to allow back armor and new feet since the hero feet did not suit his beast design. Front http://www.brickshelf.com/gallery/takanuinuva/herofactory/BrainAttack/Villians/024.jpg Right Side http://www.brickshelf.com/gallery/takanuinuva/herofactory/BrainAttack/Villians/025.jpg Back http://www.brickshelf.com/gallery/takanuinuva/herofactory/BrainAttack/Villians/026.jpg Left Side http://www.brickshelf.com/gallery/takanuinuva/herofactory/BrainAttack/Villians/027.jpg Pose http://www.brickshelf.com/gallery/takanuinuva/herofactory/BrainAttack/Villians/028.jpg Next is Aquagon. Small changes here as well. I replaced the gunmetal armor with yellow, Swapped the feet out for shadow matoran feet and gave him some chest decoration Front http://www.brickshelf.com/gallery/takanuinuva/herofactory/BrainAttack/Villians/029.jpg Right Side http://www.brickshelf.com/gallery/takanuinuva/herofactory/BrainAttack/Villians/030.jpg Back http://www.brickshelf.com/gallery/takanuinuva/herofactory/BrainAttack/Villians/031.jpg Left Side http://www.brickshelf.com/gallery/takanuinuva/herofactory/BrainAttack/Villians/032.jpg Pose http://www.brickshelf.com/gallery/takanuinuva/herofactory/BrainAttack/Villians/033.jpg Last up is Dragon Bolt (I never got the actual set so his pics are all taken in LDD. All parts used exist in real life) The changes with him are bigger wings and a longer tail. Changed build to lower jaw and added in a tongue. Replaced the red button with a yellow one. And the back legs are more dragon like. The most unique thing about this modification/revamp is that it uses exactly 222 pieces (Counting the rubber band which doesn't attach in LDD Front View http://www.brickshelf.com/gallery/takanuinuva/herofactory/BrainAttack/Villians/034.png Side View http://www.brickshelf.com/gallery/takanuinuva/herofactory/BrainAttack/Villians/035.png Back View http://www.brickshelf.com/gallery/takanuinuva/herofactory/BrainAttack/Villians/036.png Top View http://www.brickshelf.com/gallery/takanuinuva/herofactory/BrainAttack/Villians/037.png Bottom View http://www.brickshelf.com/gallery/takanuinuva/herofactory/BrainAttack/Villians/038.png Pic showing how tongue is attached http://www.brickshelf.com/gallery/takanuinuva/herofactory/BrainAttack/Villians/039.png Comments and Criticism appreciated. I will be doing revamp/modifications to all the Brain Attack Heroes
-
Hi everyone, I'm finally posting some of my many revamps of my Hero Factory sets, starting with the newest released series. I'll get things started with Furno's Jet Machine: Mods done: * Added 1x2 plates to fill in gap on foot * Replaced bone pieces that made lower legs * Replaced armor shells on lower legs * Replaced torso piece with the one with narrow shoulders * Modded back of torso to removed the pod and bring shoulders closer to the body at the cost of the originals builds design Front: http://www.brickshel...chine_mod_1.jpg Back: http://www.brickshel...chine_mod_2.jpg Random: http://www.brickshel...chine_mod_3.jpg Update: I've added the squared armor attachment pieces to the machine http://www.brickshelf.com/gallery/vakama18/herofactory/IFB/jet_machine_mod_4.jpg Jaw-Beast is up next: Mods done: * Bone pieces replaced and rearranged in arms * Flipped armor shell on chest around * Added parts to fill back of head Front: http://www.brickshel...beast_mod_1.jpg Back: http://www.brickshel...beast_mod_2.jpg Random: http://www.brickshel...beast_mod_3.jpg Flyer-Beast flys in next: Mods done: * Added bone extender part to make lower legs longer * Removed 2x2 brick with socket from back and added parts to fill in back * Replaced hands with Ben 10 hands * Flipped Connector joint on its narrow side to move head closer to its body Front: http://www.brickshel...beast_mod_1.jpg Back: http://www.brickshel...beast_mod_2.jpg Random: http://www.brickshel...beast_mod_3.jpg Splitter-Beast is now next, but instead of fusing them together like I said before, I've made them two separate beast that don't combine, so I decided to name the two Chibi-Beast (don't ask) and Titan Beast: First up is Chibi-Beast: Front: http://www.brickshel...ibi_beast_1.jpg Back: http://www.brickshel...ibi_beast_2.jpg Random: http://www.brickshel...ibi_beast_3.jpg and now, Titan-Beast: Mods done: * Added smaller beast feet to the back of the larger feet * Added more bones to make him taller * Added armor shells to fore-arms * Added parts to shoulders * Made tail longer * Stuff I'm too lazy to add Front: http://www.brickshel...tan_beast_1.jpg Back: http://www.brickshel...tan_beast_2.jpg Random: http://www.brickshel...tan_beast_3.jpg Chibi riding on Titan: http://www.brickshel...B/best_buds.jpg Beast group shot: http://www.brickshel...roup_shot_1.jpg Sorry if my mod descriptions don't make sense, and if my pictures didn't out that well.
-
Hi everyone. For those of you interested, here's the first MOC I've completed since joining Eurobricks and marks the beginning of posting my MOCs on Eurobricks as well as Deviantart, Flickr, and MOCpages(when I remember to ^^;). About the MOC: This is a MOC that happened kind of by accident or on a whim. After seeing Alex-Darkrai:'s Grind Star I was inspired to use my Dark red and black Marbled/gradient parts to make something. The end result became a chopper style motorcycle. I suppose thinking about how the wheels come from the Furno Bike or Speeda Demon's motorcycle is what led me to go the direction of a chopper. I started with an initial idea for the front forks which turned out very well. Then I spent three days on the rear wheel. I didn't illustrate it here in the photos but when you turn the rear wheel, a series of gears connected to the turntable part on the other side make the hub/rim counter rotate. So if this chopper was roaring down the street the back rim would be spinning the opposite direction. This is probably one of the most complicated pieces of functional design I've ever created. I spent three days just working on this section alone. I first got it, then I spent two days refining it so that the turn table and rim were closer to the wheel. Now I had sort of a back and a front and had to bridge the two. I struggled with this until I finally scrapped the front fork design keeping the ideas I liked(like the Pyrox mask and the Piraka feet), doing a lot of research by looking up many photos of the key areas of a chopper to really understand how they work and build the MOC like an actual chopper(i.e making the frame, then connecting the forks, building the engine, transmission, gas tank, etc). This was quite an interesting build in the sense that it's both symmetrical and asymmetrical at the same time. It was a lot of fun chunking through this build one actual part of a motorcycle at a time. I felt like one of the guys on those chopper shows like Orange County Choppers or Biker Buildoff that used to be popular on The Discovery channel. :lol: This is the first MOC of mine to really benefit from me moving my laptop into my MOC room. I relied heavily on photo searching Google to look at the different aspects of choppers. Looking back on it I realize I went for a "simplified realism" approach. The chopper features things like head and tail lights, license plate, gas tank with spout, brake controls and brake lines on the handle bars, functional drive line(wheel connected by Technic chain to "transmission" which is connected via belt drive to motor), engine with fuel line and semi-realistic foot controls(clutch). Though I didn't get too obsessed with the details. I thought about adding things like gauges and other technical bits, but felt they would have distracted from the simpler edgier look of the bike. Thinking back on it, the license plate is probably a bit much as well. =P The nice thing about Choppers is there's a great many kind, from very commercial to customization to the extreme of impracticality and everything in between. This in a way was freeing because I could make it as long or as short as I wanted, make the gas tank or seat however I wanted and I even came across some that had an open sided wheel like this one has. This also presented a bit of a challenge as I had to look at many different kinds of cycles to see what the "common denominators' where. At the end of the day. I think I did a good job recreating a chopper fairly accurately thanks to having a laptop handy to reference photos. Man I shoulda gotten into the habit of taking my laptop in with me ages ago. Now it'll be a permanent fixture in my MOC room. I got the idea to call it Cerberus fairly early on, but the reason for it changed about midway through. Initially I was going to call it Cerberus thinking that it would figuratively have three heads, the Pyrox mask on the front wheel, the Kalmah head as the gas tank, and the rider's actual head. However several other head pieces were added as I finished out the build. So now I count the pyrox head and the two wolf heads on the handle bars as its "three heads." For those of you who might not know, Cerberus is a rather famous figure in ancient Greek Mythology. He is typically depicted as a three headed dog with serpents all over his body, though modern depictions show him mostly as three headed dog of some sort. The serpents don't tend to stay. Cerberus guarded the gates of Hades to keep anyone from escaping. The Twelfth trial of Hercules was to subdue Cerberus without the use of any weapons. Thank you for reading, viewing and commenting. :D I hope you enjoyed my first official MOC posting on Eurobricks.
-
evo and rockas brawler machine (xl+stealth combi model)
mrfang2 posted a topic in LEGO Action Figures
hey, so i was abe to pick up the xl, the jet, and the stealth mechs yesterday! i decided to try to throw the stealth and the xl together, so this is the result. sorry for the pics, my cam is busted, ill try to get better ones soon. this build can be made using the parts from the aformentioned mech sets, plus 2 extra y-joint parts in the hips. "EVO, ROCKA, COME IN! The auto-builder prototype has been damaged severely, we cannot produce the parts to replace your fallen mechs! you may be able to use it to re-attatch the usable parts of your old mechs into one larger machine, rocka, see if you can fix the machine while evo designs the machine!" first moc posted up here, so give some feedback if you dont mind! i will replace the pictures once i can get better pics, but i may need to rip this one up for parts, so the next pics may have a slightly different build. -

BRAWN BEAST, MAGMA BEAST AND STEALTH BEAST (MOCs)
Logan McOwen posted a topic in LEGO Action Figures
Three new Beasts have come from the mineshaft to threaten Anthropolis... But they're not like anything the Hero Factory could even hope to expect... BRAWN BEAST A huge, hulking mass of techno-organic muscle, the Brawn Beast can lift the heaviest of structures, and squish the strongest of Heroes! MAGMA BEAST Short and stout, but still mighty, the Magma Beast's ability to superheat it's claws and body allow to melt through any Battle Machine! STEALTH BEAST An incredibly fast runner, the Stealth Beast has an unparalleled stamina... But sometimes it's speed can be it's shortcoming! More pics Battle pics -
HI everyone I just wanted to post a thread linking to my Deviantart Gallery and Flickr Photostream Just to give a general access to my MOCs. If you'd like to discuss any specific MOC here in this thread though I think that's okay(its okay with me if its okay with the moderators). I didn't want to just start throwing up random MOCs all of a sudden since I'm new here and I've got so many already. If you've got a flickr or DA account I certainly don't mind comments there, but a thread with some discussion here would be nice to. Still trying to get the hang of posting here. I guess a question might be helpful to get a discussion going huh? (hey what do you know a question ) My question is, if you know of me already what's your favorite MOC of mine, if you've never seen any MOCs from me, does any particular one stand out to you the most? Thanks for any faves, watches, and comments in advance.
-
I am not quite sure if I already posted it - the system does not show up in the search for my content. An Explosive B-stard by The Mugbearer, on Flickr So it is what it is - an XPlode remake. Enjoy. LXF is in the attachment. XPlode re-formatted.lxf
-
If somebody actually remember, there was an actual MOC of mine with the same name. I honestly don't like the 'eternal remake' approach to MOCs (one of my friends has like tons of remakes of his character, and not only one), but I couldn't resist the urge to make an LDD version of Furno Marine. Furno Marine by The Mugbearer, on Flickr Such a pity that LDD palette does not have all the parts to fulfill my needs for that MOC, but I tried hard to keep the same aesthetics.
-
Violet Bolt is an electric female hero. She even has electric hair. Her weapon is a double-ended lightning staff. Violet has a ferocious hatred of Voltix and a crush on Mark Surge. She often fantasizes about giving Voltix the shock of his life while saving Surge from him. Click any picture for a larger version. {LXF File} - {Brickshelf Gallery} -Toa Of Justice
-
Caitlyn Gauss, a magnetism-themed Hero. She stands 12 inches (30 centimeters) tall and uses 168 pieces. Her skeleton is heavily inspired by this MOC of Christoffer Raundahl's which I reverse-engineered back in Spring and has been a work-in-progress for about that long, though it was Pate-Keetongu's Zero-Suit Samus that inspired me to rebuild the model (which I had scrapped for parts) and bring it to a state of completion. All images link to Flickr. Caitlyn has an impressive amount of articulation, as you can see in the following photos. Her shoulders, hips, knees and elbows can all bend well beyond 90 degrees, and she can even stand on her tiptoes. Full Flickr Gallery Since building her, I have swapped the mask for Furno XL's based on feedback from other MOCists, but I don't want to take new photos unless I make some more substantial changes. Anyway, thoughts? I'd really love to get as much feedback as possible because I certainly intend to continue refining and perhaps even completely re-imagining parts of this model. It's easily the largest humanoid model I've ever designed, and I'm sure that in the coming months I can improve it even further.
-

Why is North America getting the new HF sets so late?
Zenerius posted a topic in LEGO Action Figures
As you may already know, the new 2014 Invasion from Below sets aren't getting released until March 3rd in North America. This is a real disappointment, since I was planning on going to the LEGO store this week to get the new sets. Anyone know why we are getting them so late? I think that it has to do with sales or something related to demographics. It is possible the other themes will cannibalize the HF sales, so LEGO is planning on releasing the new sets later. -
I'd like to begin this review with a (slightly modified) quote from Gandalf the Grey: "AFOLs. You can learn all there is to know about their ways in a month, and yet after a hundred years they can still surprise you." When I asked you which set I should review first, I had never expected the polybag to be the most requested set. I thought you'd go for Dragon Bolt or one of the heroes (well, Stormer was mentioned at least once, same goes for Frost Beast). But I don't want to complain about that. It's just a funny surprise. Set name: Exclusive Accessory Pack* Set Number: 40084 Price: ** Pieces: 9 (but only 6, according to the instructions) Year of release: July 2013 (Europe) *Well, I guess it's the name, since there's no specific name on the bag itself. **The pack itself is free, but you can only get it with another Hero Factory purchase. The bag The front of the polybag shows the black brain and the fire sword on a green background. One thing I find noteworthy on this bag is the title in another language (I guess it's French, but I'm not sure). The bag shows the title in yet another language, but otherwise it's relatively dull. So let's slice this up! The parts I was pleasantly surprised to find out that all of the TECHNIC pieces are included two times in the bag, especially the sword hilt piece - it really grew on me in the last wave, so I'm happy to get even more of these. This is also most likely not a particular case, since my other bag contained the same pieces. Here we have the exclusive black brain slug, which makes this pack so interesting. The slug itself is a redeco of the other brain slugs, cast in black rubbery plastic with a solid red eye section, so aside from the (solid) colour, it's identical with the regular brains. That means of course it got the same amount of detail as the others. I really like the brain-like detailing on it. It connects of course in the exact same way like it's less exclusive brethren. Pictures of interest from the instructions Due to the small size of this set, the instructions are not a booklet but just a single sheet of paper. Here we have the actual building instructions for the sword (ironically, there's an error in the assembly if you look at the steps 2 and 3). Turn the instructions around and you'll find a nice poster of the previous wave's bad guys and their brain slugs. A smart move, since that poster encourages kids to upgrade those guys with the flame sword and the black brain too. Building the set I guess that picture shows clearly the proper assembly of the sword. It's basically assembled in a way similiar to Furno XL's sword, only far less complex. Design and playability Well, both the sword and the slug look pretty nice. However, both of these can't really interact with eachother since the slug doesn't have any hands or such. But that doesn't matter, because you can get this set only with another Hero Factory set, which you can of course upgrade using these extra parts! Here I replaced Furno XL's default sword with the sword from this set. I could of course also try to combine both blades to make an even bigger sword. Final thoughts What can I say about a free parts pack aside from the obvious fact that it's a cool idea? The Accessory Pack is a very nice parts pack (even if you put the brain slug aside). If you happen to know a LEGO store near you (or decide to order Hero Factory sets online), I can only recommend you to get this pack, since it comes with a small yet versatile number of parts.
-
Anyone Prefer Hero Factory Over Bionicle? Reasons Why I Do.
Mephek posted a topic in LEGO Action Figures
I've loved Bionicle as a product line since 2001 when they first came out. I remember my mom giving me Tahu and Lewa Mata back in christmas of 2001. Shortly after I got the Boxor set. Loved the things since. When I first saw Hero Factory I was on a hiatus from buying Bionicle after being disapointed with Onua MISTAKEa in 2008. I didn't like it, being the immature brat I was back then I even yelled a little bit saying ignorant things such as "EW THIS THING TOOK OVER MY CHILDHOODS TOY" but no, Hero Factory didn't replace Bionicle. It was made in RESPONSE to Bionicles end. Anyways.. not the point. I instantly fell in love with Hero Factory when I friend bought me Evo 2.0, and I bought a Stormer 2.0. The new parts were just amazing to me. Something completely new. The parts didn't break a week after I built them, they wouldn't fall apart every 2 seconds like Bionicle sets did (Inika pads) Plus the fact that Hero Factory did something no lego line has ever done before: Make 100+ new parts in one release. That was pretty cool. I loved messing around and building gigantic creatures out of the bone parts. I just found the sets more expansive than Bionicle. Now I just collect the sets, but still am stuck with between 2-10 of each set (10 witch doctors :L) Will sell those on ebay sooner or later because I don't moc anymore. against the point though. I just really liked how all the parts worked together. They all shared a common texture and provides moccers a much more sleek look. The sets look much smoother too. Overall, the toyline is much more expansive even if it is repetitive. The Inika builds all were basically the same toy with some minor differences. Very boring to me. HF may use a lot of the same parts, but the 3.0 sets have shown us the potential these limbs have. I'm pretty sure that's why the 3.0 was made, to show that you could build more than just a generic action figure like the Inika builds were. You could build a giant, you could build a scorpion, you could build huge things just by using HF limbs. You can even infuse it with Technic parts/Bionicle parts. It's something nice and new to me. Now on to story.. (COMPLETELY OPINIONATED, I DON'T WANT TO BE CALLED A TRAITOR/IDIOT OR WHATEVER FOR THINKING THIS) I've read almost all the bionicle books, almost all the online stories, ect. and personally I think Bionicle is just cluttered. The existing story is very fragile when it comes to expansion and moccing in canon. Most any action will contradict something in the story. It's too complicated for children to follow, and too much to keep up with in my opinion. Hero Factory has both a story, and a LOT of room for making your own story. It's a simple concept, Hero characters built in a factory that go arresting villians and fight mindless monsters/evil brains. Hero Factory has books for those who want stories, and a simple concept to base stories off of for those who just want to moc and make a story. Nothing like "ONLY 2 OLMAKS EXIST" or "MATA NUI IS DEAD", "MAKUTA CANT BE UR DAD" or whatever like most Deviantart people whine about in moccers comment sections. It's simple and clean, just like the toys. I like both toylines a lot,but hero factory has much more for me than bionicle does. Sure my HF parts break sometimes, but not as bad as the one week life of a bionicle. You also don't have to worry about a limb cracking and it being impossible to replace without ordering. Most sets use common limbs. Simple and easy to work with. These are just my opinions, I don't want comments calling me an idiot, traitor to bionicle, moron, or a paragraph explaining why I'm "wrong" Mephek out. Peace. -
Attention Hero Factory! The evil brains have infected a local toxic waste disposal drone and turned it into the TOXBOT. Watch out for its Corrosive Claws and its Shredding Chestplate that will consume anything that comes near it. Remove the evil brain and restore the drones programming. Features removable light-green evil brain, transparent razor toxic claws and shredding chestplate! Includes highly durable and poseable design and translucent elements! Attach the light-green evil brain to make the transformation complete! Open and close the Shredding Chestplate! Attack with the Corrosive Claws! Battle with 40015 NEX! Combine with 40015 NEX! Contains 58 pieces! Pricepoint- $12.99 Report for duty NEX! The evil brains are rampaging in Makuhero city. Get equipped with a Brain Remover, Kinetic Claw, Spiked armor Opening Visor, and Hero Core locking clamps. Now get out there and pry those brains loose! • Features Brain removing tool, Kinetic Claw, back mounted sheath, spiked armor, opening armored and decorated visor, hero core with locking clamps, poseable design and translucent elements! • Pick up rubble and fire it with the Kinetic Claw! • Pry the brains loose with the Brain Remover! • Lock the clamps to protect the hero core! • Battle with 44014 TOXBOT! • Combine with 44014 TOXBOT! • Contains 65 pieces! • Pricepoint- $12.99 Warning Hero Factory! Evil Brains have invaded our planet! They've turned a docile bat into the ear shattering DECIBAT! Watch out for its Razor Sharp Wings Draining Fangs and Sonic Scream. Cage this flying monster before all of Makuhero city goes deaf! • Features removable Black brain, Draining Fangs, Wing blades, poseable joints and translucent elements • Launch a Sonic Scream • Divebomb with the Razor Wings • Attach the black evil brain to complete the transformation! • Battle with 44017 STRINGER! • Combine with 44017 STRINGER! • Contains 46 pieces! • Pricepoint- $9.99 Report for briefing Stringer. There are evil brains out there taking control of innocent beasts. We've provided you with a shoulder mounted Sonic Cannon, Sonic Mace, back mounted sheath. spiked armor, opening sound dampening visor and hero core locking clamps. Go now and gives those brains the headache they deserve! • Features a shoulder mounted Sonic Cannon, Sonic Mace, spiked armor opening sound dampening visor, hero core with locking clamps, poseable design and translucent elements • Bash the brains in with your Sonic Mace • Fire the shoulder mounted Sonic Cannon • Lock the clamps to protect the hero core • Battle with 44016 DECIBAT • Combine with 44016 DECIBAT • Contains 45 pieces! • Pricepoint- $9.99 LXF flie (Some parts in the mocs are not available in LDD) http://www.brickshel...nd_stringer.lxf Galley when Public (Contains more pictures) http://www.brickshel...ry.cgi?f=535240
-
So a while ago( what was it, last year?) I had an idea, before the "Breakout" episode came out and the idea of a 'Villain Factory' wasn't so talked about in Hero Factory, I decided to build a drone 'prototype' for some bad guy army. Basically just wanted to use the canister-thing in the Nitroblast set as a helmet. It worked.. sort of.. and I went from there. Used some older 'Bionicle' parts on there as you can tell. The Skrall blade for an antennae, the Whenua Metru masks for the shoulder-pads(wish I'd done that better), and the Barraki feet. Mantax I think? I added the Hero Cuffs on later, once I'd gotten a hold of a Breakout set that included them. I think they were from Rocka's set. Man that was cool. It's been nearly a year since these were taken, but I wanted to share my creations anyway. Now that the computer is deciding to behave itself.. here they are! (I've resized the pics and for some reason they still keep coming out too big. Apologies in advance) Front: Back: Alongside Hero "Citrus" Using Citrus' cuffs against her I had a photo of "Citrus" on the ground after, but sadly it has been lost. And "Citrus" was your average Hero build with a foot on the back. Nothing special, but one of my favorites for some reason. Later, like December later, after "Breakout" had been released, I decided to get a little creative with my pieces. I looked at the Super Hero add-on part and thought 'hmm, what can I do with this?' So I did this: I hope I haven't posted this already! It's just a face with a mustache. And bling. Hope you enjoy, hopefully I'll have some new things to share(or new photos of new MOCs to share) very soon :)
-
(I'm terribly sorry for the huge delay of this review. I was just either lacking the time or the muse to write it until now. Luckily, Brickthing got us already covered with a review earlier. Also, it's somewhat ironic that I start to write this review now after we already got reviews of the new wave - which I initially wanted to avoid.) Dragons. I think we all agree on the well-known fact that dragons are easily among the most awesome creatures of the fantasy genre. They are somewhere between sleek lizards, giant dinosaurs and hungry crocodiles. And very often, they can fly and even spit stuff like fire at their prey. Yeah, dragons are awesome. But even if Dragon Bolt wouldn't have been a thunder-themed dragon, but a different creature, he would have gotten my attention anyway for the mere fact of being a blue coloured set. Alongside with the wonderful new version of Stormer and the very great Frost Beast and Surge, Dragon Bolt and his glorious amount of blue is yet another reason why I can happily declare this wave the best wave ever in my eyes. I guess that intro is long enough now - time to find out if Dragon Bolt does justice to the reputation of dragons being awesome! Set name: Dragon Bolt Set Number: 44009 Price: 24.99 Euro Pieces: 149 Year of release: Summer 2013 Size class: Titan set The bag Even the largest bag isn't large enough to show the mighty Dragon Bolt in his whole majesty, as his wings disappear at the edges. The brain slug in the lower right corner (which is unfortunately not really visible) features also one of those glows in the dark-symbols. Dragon Bolt (or Sárkányvillám, to pick his name in some other language) doesn't bother himself with showcasing his combi model with Surge. His bag instead highlights his flapping wing feature, his dragon head and the brain slug. And, of course, the 1000 game points he comes with. Inside the bag - the parts Sweet Quaza power core, dudes. Dragon Bolt comes with plenty of very cool and useful pieces. For starters, there's a truckload of those small lightning things, and three of those ball joint things and 4 friction joints and blue shells and trans-yellow shells and yellow NINJAGO katanas and a small torso and a large torso and... In more comprehensible words: Dragon Bolt is a great parts pack if you have a serious lack of blue and yellow in your collection, and he also comes with a very healthy dose of TECHNIC pieces. Let us take a look at Dragon Bolt's fancy Brain Slug first. The slug's body is an odd (and certainly unique - your slug may look somewhat different) mixture of yellow, green and blue, giving it a very slimy look. The eyes of the slug are white since the solid eye plastic is actually the part that glows in the dark. In other words, most of the slug doesn't glow. I'm 100% positive the horns aren't new, but I just took a picture to show that the horns I got with my Dragon Bolt are not all identical, as some have the small hole on the left, others on the right, but these two variants are evenly numbered, so I guess it's because of the creation process for these that they are asymmetrical. Dragon Bolt's head piece got lots of details aside from the obvious horns and teeth. It looks really cool and beastlike. The cross axle on it points downward, which might make it difficult to use it with most Bionicle heads though. Oh my, I'm so in love with those katana swords, they look just so awesome, and they are so ridiculously large. It still bugs me that they are not on Pick-a-Brick in any more blade-like colour, but only in rather expensive NINJAGO sets, which I just don't want to buy only for those (best example is the Rattlecopter, mostly because if I would've bought it, I would have ended up with yet more lime green - and since Breez never ceases to get cool sets, I'll get enough lime anyway). Since I'm one of the few around here who actually passed on Voltix and Speeda Demon, I get these little parts for the first time with Dragon Bolt now. And he comes with a fair share of them, which is pretty neat. A few pics from the instructions The cover is of course pretty much identical to the art on the bag, only with less advertisements. I think it's kinda odd that Surge is shown flying, while Dragon Bolt actually stands in his picture. Dragon Bolt's instructions have a rather large mini-comic at the beginning, which is kinda nice, even if it mostly shows sets from the winter wave. Building the set If you remember the first building step in my previous reviews for this wave, you might expect that Dragon Bolt's built starts with adding something to his back, and this picture also looks like that - except that it's not his back... ...but his underside! You might wonder why there's a single connector first, but it does serve an important purpose - more on that later. Then Dragon Bolt's torso get turned around and we start building the basis for his back (or his wing joints, to be more specific), the neck and his front legs. Then Dragon Bolt gets already his legs, which is quite convenient for the rest of his built. His legs get also already shells. But he doesn't look very dragonlike yet, so let's move on. Next limb on our to-do-list is the tail. The build for it is rather simple, but effective. Then the tail gets already attached, and after that... ...he gets already shells on it. Note there's also a spikey plate on the shell at the beginning of the tail to cover the construction there. Now we continue with the neck and the head. This is also the place where the small torso (a really cool piece) comes into play. This grey balljoint will eventually become the neck joint, but it's first time to give Dragon Bolt some more shells. Yeah, now he already starts to look dragonlike, doesn't he? The built of the head starts with his jaw, which is actually a 2.0 Hero foot. The foot gets turned around then, and now it's time for a fair share of TECHNIC assembly. The Hero head piece functions as the connection between the lower jaw and the upper part of his head (it's practically the center). Don't worry about the hollowness of the foot or the lack of teeth, as both gets fixed. Where are almost done with the lower jaw. It just needs some lightning, and then... ...voilà! The lower part of the head gets attached. Now it's time to put some parts on Dragon Bolt's upper side again. We start with some shells on his neck. Then the Brain Slug gets attached on the head piece, the same way it's done with the other villains. Of course, that means the head needs another piece to be attached. The Brain Slug's tail gets attached. As you know, I'm not too keen on this, but at least this connection is far more stable. Oh, I actually forgot to take a picture of adding the upper part of the head. Oh well, let's move on to building the last section of Dragon Bolt... the wings! The wing assembly is dominated by classic TECHNIC building, which is a nice change from the rest of the built. You know, it's really hard to remember what I wanted to comment to all these pictures, since I took them maaany months back then in summer. It also feels somewhat redundant to commenting every picture by stating the obvious, which is also the reason why I decided to ramble here a bit instead of just saying something like "Well, we add some more TECHNIC pieces (whose names I don't know right now), slowly building the mechanism for the wings.", because I'm sure most of you can tell that just by looking at the picture, right? XD Every mechanism needs a button to trigger it, so it's the next thing we build. It's a red button... is it safe to press red buttons? Well, technically, punching a dragon in his back by pressing this button, and I guess punching dragons isn't very smart, so yeah... Now we put all of this together for a nice little mechanism. Isn't it beautiful? Of course, a wing-flapping mechanism needs wings to make sense. You can also already see the rubber band here. Before Dragon Bolt reaches his entire wingspan we add some additional greebles to the wing bones. The assembly for both wings is identical, but mirrored, so I won't show the assembly for both wings, and I won't talk much about it, as the pictures explain it rather well. Anyway, here we go: There we have the wing construction, and if we add this to Dragon Bolt's back, we get... The finished set! Behold! The fearsome Dragon Bolt is about to attack us! All dragons have a treasure, Dragon Bolt's spare parts are a good starting point for his I think. Design and playability Once built, Dragon Bolt looks very impressive. He is very large, mostly because of his long neck, the tail and the wings though, as his legs are somewhat short. But even without long powerful legs, Dragon Bolt is still a very convincing dragon. A side view. He looks also pretty cool from the top view. The red button stands out a bit, but it's easy to fix if it really bugs you. (And yes, I assembled one of his wings wrong, it's supposed to face in the other direction) His jaw can be opened quite far, so he can shoot lightning bolts at those pesky heroes or attempt to bite their limbs off. Here's a nice demonstration of how poseable his tail his. Dragon Bolt is overall very poseable, and he can hold most poses up very well. But enough about poseability, it's time to try his fun features! Because if you push down the button on his back... Dragon Bolt's wings move downward, so if you push the button repeatedly, his wings flap up and down like he's flying. While I've preferred if the wings were down (and not up) in his neutral (not-pushing pose), I can understand why it's not, since it would have required a different mechanism. Anyway, it's a pretty neat feature! Swoooosh! Yeah, Dragon Bolt is very swooshable. He's comfortable to hold, and the button can be also easily reached. Oh hey, remember the little connector from the very beginning of the built? Well, it's there to hold the armour on Dragon Bolt's underside in place even while you're holding him. It's simple, but genius! Dragon Bolt vs. Surge! As I said earlier, Dragon Bolt is stable enough to stand on his hind legs, though I'm using his tail as an additional stand here. Size comparison time! On this picture, Dragon Bolt looks rather small... ...once we lie Surge down, the size difference between the two sets becomes very obvious. Even Furno XL looks rather short when he's lying next to Dragon Bolt. Of course, if we stand him next to the dragon, Furno is still the taller of the two. Final thoughts Dragon Bolt is overall a pretty cool set... and yes, he does justice to the whole "Dragons are awesome"-thing. However, I can't shake off the feeling that Dragon Bolt would have worked a tiny bit better if he'd been the largest set of the wave instead of Jet Rocka, simply because I wished that he'd be a bit bigger. But even now, he's a very impressive set with an unique built and great parts, so I can recommend him. Also, in case you haven't noticed yet... he's a freakin' dragon.
-
This is my Revamp of Jet Rocka. I've built the actual moc in LDD. I also made a half built version in real life as well. The real life version is just to show the new functions that the LDD one can't show. .LXF file http://www.brickshel...ocka_revamp.lxf Gallery when public http://www.brickshel...ry.cgi?f=537362 Changes from original set 1. Swapped trans green windscreen for larger trans clear windscreen. (Windscreen won't attach in LDD but I will in real life) 2. Modified wing unfolding gimmick. It also makes the jet engines move. 3. Changed handle to add stand so Jetpack can stand on its own when Rocka isn't attached. Stand folds up and extends handle to be held better. 4. Changed Rocka to be built the same as his bag set. Only things changed are removal of silver and both shoulders have armor 5. Zamor blasters can be moved up and down (Similar to LEGOJANG's JET NEX) 6. Red short beam handle replaced with longer blue one Real Life pics (Not actual revamp. Just to show functions) Front- Cockpit open http://www.brickshel...t_rocka_001.jpg Front- Cockpit closed http://www.brickshel...t_rocka_002.jpg Front- Wings extended (Wings can't be locked open. I just put a pin in a beam to hold it open for pics) http://www.brickshel...t_rocka_003.jpg Side- Wings folded http://www.brickshel...t_rocka_004.jpg Side- Wings extended http://www.brickshel...t_rocka_005.jpg Back- Wings folded http://www.brickshel...t_rocka_006.jpg Back- Wings extended http://www.brickshel...t_rocka_007.jpg Zamor cannon position 1 http://www.brickshel...t_rocka_008.jpg Zamor cannon position 2 http://www.brickshel...t_rocka_009.jpg LDD Pics (Actual Revamp) Front http://www.brickshel...t_rocka_010.png Back http://www.brickshel...t_rocka_011.png Landing gear folded up when in flight mode http://www.brickshel...t_rocka_012.png Comments and criticism appreciated
-
Set name: Jet Rocka Set Number: 44014 Price: $35USD , 35 Euro Pieces: 290 Year of release: 2013 Peeron Bricklink Brickset The Packaging The second half of the Hero Factory sets this year continue the Brain Attack theme and style set by the first, with bright green packaging seeping with the infectious yellow influence of the brain slug creatures. Jet Rocka is the largest set of the year, and is the only set to come packaged in a traditional cardboard box, since both Funro XL and Dragon Bolt have made the transition to the resealable plastic packet. Front When you walk into the LEGO aisle of your local toy store, the Hero Factory sets should be easy to spot with their bright high contrast colours. While you may have trouble singling out a specific Hero Factory packet, Jet Rocka stands out with a very large (but thin) box, showcasing Rocka heroically jetting through the city, firing at multiple unseen villains in the sky and on the ground below! The background art isn’t terribly colourful or interesting compared to previous years, but it conveys the scene well and puts all the focus on what’s actually in the box; Jet Rocka. Back Flipping the box around, you get a clear demonstration of the jetpack’s play features, which include Zamor launchers, flick fire missiles, trigger controlled wings and a pivoting windscreen. Rocka’s Hero Core comes with a code worth a tremendous 3000 Game Points, for use online. Inflation must be rampant during the monster crisis, since last year the comparable Speeda Demon only came with 900 Game Points! The cynic in me thinks that this is a devious marketing strategy to make the new sets seem more valuable than the old sets, but the other side of me thinks it’s working! Buying Hero Cores on Bricklink for their Game Points will be complete anarchy if it wasn’t already. The sides of the box contains the usual warnings and disclaimers, plus some odd alternate language names; Rocka Reactor and Rocka Ultrasónico. I personally preferred BIONICLE’s use of fictional names for vehicle sets, because it avoided a set in story needing multiple distinct names due to a word or pun not translating properly. Contents Pry open the cardboard flaps, and you’ll find the contents of the set split between three bags, with the large Power Miner wheels thrown in separately. One bag is for Rocka, so there’s the potential challenge to bag build him! Also included are the instruction booklet and a dreaded sticker sheet, although the stickers are excellently designed and generic enough to be useful for other creations. Pieces Bag One contains Rocka’s parts, which are a healthy mix of armour, bones and smaller pins/detail parts. Compared to previous vehicle sets (aside from Speeda Demon), the focus has always been on the vehicle over the rider, but Rocka “Five” manages to include a fair selection of useful shells in Gold and joints in Dark Bley, unless you already have most of the previous iterations of Rocka. Bags Two and Three contain the pieces required to build the jetpack, and they consist largely of Technic beams, connectors, pins and axles. This set is invaluable for creating larger MOCs with a Technic based construction, but you get very little in the way of weapons and armour parts compared to a regular sized Hero Factory set. Pieces of note include 8 total Phantoka/Makuta – Matoran connectors, 6 White panel fins and a large selection of Light Bley connectors/beams, including 6 new 1x3 beams with perpendicular axles, which serve the purpose of the 1x2 beam versions, but without the half-stud offset on the perpendicular axle. This set only features one recoloured part – an Apple Trans-Green windshield, which isn’t very exciting for Bionicle MOCists, but would be of interest to Spaceship builders. However, there are a fair number of interesting pieces especially if you don’t have many Brain Attack sets yet, particularly the Trans-Green shells and 4 rubber reinforced bone sockets. Rocka comes with the same helmet, head and visor as his other iteration earlier this year, which is great for using the helmet as a shoulder armour piece. Instructions There is only a single instruction booklet, which is large in area and satisfyingly thick. I’m glad it wasn’t split over multiple thinner instruction booklets, although the model probably wasn’t large to warrant it. The instructions are clear and easy to follow, and I had no trouble differentiating the different colours. It’s a bit strange at first to see the Technic beams rendered without the inter-pinhole recesses, but it’s necessary to keep the instruction images clean in the later stages of construction, otherwise all the overlaying beams and holes could become a maze of meaningless black lines. In the back of the booklet there are the usual adds for the other sets of the wave, in this case the menacing Dragon Bolt and the Stormer/Frost Beast pair. The Hero Factory show and this page suggest that Dragon Bolt is Rocka’s pair, but there is no combiner model to affirm that (and there is a combiner model between Dragon Bolt and Surge). Jet Rocka is the odd set out in that sense, but hopefully he might receive his own combiner/alternate model instructions online or as part of the Club magazine There is also an add for the Chima constraction sets, who we find heroically battling it out in the jungle, amongst scenic skies and floating mountain rocks. There’s a QR code as well, which leads to a TV Spot on the Chima website. Finally there are ads for a Brain Attack warping app, and the LEGO club. I won’t spoil the image on the back of the booklet. Now, onto the set! Build First, let’s start with Rocka… Rocka comes together in a matter of minutes, and despite being a simpler build than a normal Hero or Villain set, his construction is interesting in the way it differs, with a long torso bone and multiple reinforced joints on the sets. It’s great to see the useful Technic motor shaft 1/2 offset axle pieces being used as handles for the jetpack. Next up is the jetpack! The first half of the construction process starts off with a confusing array of Technic beams, and it’s difficult to discern the purpose of what you’re making, but gradually as you add the gears and hook up the colour coded red trigger it becomes clear what each beam structure does. Once the Technic frame is complete, you add wings, a tail fin and the display windscreen. The Apple Green swords suit the wings perfectly and demonstrate that even though some of the new Hero Factory pieces feature very little connection points, they are still tremendously versatile and supportive of creative use. We then attach the jetpack to its rider, but it’s still missing something… Of course, jet boosters! Sadly they’re unable to rotate, but they’re fixed at a nice angle and are very well connected. Finally we add weapons, and with that, the build is complete! Finished Set After swooshing it up and down the house, I've found that Jet Rocka is an impressively sized model that looks great and handles fantastically. First let’s look at the two parts individually; Rocka and the jetpack. Rocka ‘n Roll There’s no denying that Rocka is a basic figure – a skeleton of bones with some colour appropriate shells on top. The Constraction system is amazing though, because a simple build such as this yields a completely playable action figure, with proper proportions and 13 points of articulation (18 if you count the visor and core claws). In a way it’s a shame that this set didn’t introduce a Brain Attack form for a character currently lacking one such as Stringer or Nex (or introduce a new character entirely), but Rocka’s colours do suit the jetpack wonderfully. Reinforced Joints It’s great to see that while Rocka has several design oddities, they all exist to allow Rocka to fit into the jetpack better and with less hassle. His reinforced leg joints are great for posing on one leg, but more importantly they support the weight of both Rocka and the massive flight pack. Don't Look Back Rocka suffers from a horrible case of open back syndrome, but it creates more space when connecting to the jetpack, and it’s not a problem once Rocka is installed. The torso shell is also placed further forwards and higher than usual to allow the size 3 shells on the shoulders. It looks odd from the back, but it does provide the set with an extra 3-beam w/ balljoint. Eagle Droid The jetpack can’t stand in an upright position on its own, instead adopting a form that looks a bit like a bird of prey. The jetpack attaches to the back of Rocka via a Phantoka-Matoran connector, and the windscreen fits comfortably over his shoulders. One unfortunate problem with the connector is that it has no preference over whether it will stick to the jet pack or the rider when you detach the two again, but it’s only a minor hassle and you’ll spend most of the time with this set with the two paired up in flight, not continuously linking up and breaking apart. A red trigger on the handle at the back of the jetpack flings the wings up and the Zamor launchers forwards. If you pull the trigger quick enough, the launchers can knock the windscreen closed in the same swift motion. Load up process (Trans-Green under Blacklight! ) Being a Brain Attack hero, Rocka has a core cage and safety visor, which become superfluous once he’s safely behind the jetpack windscreen. Still, they look cool and contain some great parts, so it’s a pro that they’re included instead of not. There is no frictional resistance in the trigger for the wings, so they will fall into a closed position when the jetpack is upright, and an open position when the pack is horizontal. From the side you can see how large the thrusters of this jetpack are! The tail fin ingeniously functions as the handle for swooshing, and the third point of a very stable tripod stand when on the ground. It’s possible for Rocka to balance the jetpack without the tail fin, but the fin allows Rocka to stand normally with no tedious balancing required. Again we see the size of the thrusters, and the impressive wingspan of the set. (The wings have been propped open with a 1x2 plate lodged in the wing folding mechanic.) Flying through the sky! The real highlight of the set is the playfeature that isn’t explicitly directed on the back of the box; swooshing – the art of running a LEGO model around the house while making plane noises. With enough imagination (and recklessness), even the LEGO Taj Mahal can be fun to swoosh, but this set is an absolute joy to swoosh, right out of the box. If you enjoy Hero Factory and swooshing, you owe it to yourself to get this set, because Jet Rocka has the perfect weight, balance and handle controls to provide a fantastic swooshing experience. Alternate Pilots Since Hero Factory has deviated from clone builds, not every Hero fits into the jetpack, but it’s usually as simple as removing the back armour to expose the appropriate connection pins. Ultimately since it’s all made of LEGO, there’s always room to make the adjustments required for any character, set or MOC, to take a joyride through the skies! Final Thoughts Colour Scheme - 10/10 – The colour design on this set is excellent – the aeronautical White and Light Greys of the jetpack neutrally fit with a wide variety of potential pilot colours, while the Apple Green cohesively ties Rocka and the Jetpack together. There is a clear separation between the White aerofoil areas and the Light Grey mechanical underworkings, and while there are the usual blue and red pins, they don’t stand out in garish locations. Parts - 6/10 – At 290 pieces, Jet Rocka definitely gives you an appropriate amount of pieces for your dollar, but it isn’t a good parts pack for most builders. There are a lot of Technic beams and connectors, but there are better Technic set part packs for Technic builders, and the set doesn’t offer as many useful Hero Factory bones/shells/special parts as what an individual Hero Factory figure would include. The primary recoloured part – the windshield would be easier to pick up on Bricklink, for the System builders that might find it more useful. Design - 10/10 - Text Articulation - 9/10 – Rocka comes with all the standard points of articulation you’d expect from an action figure, and the jetpack only lacks rotatable thrusters, something which I’m sure was considered but was ultimately deemed unfeasible for a model this size. Quality - 10/10 – There are no problems with the quality of the joints or plastic, and the set is sturdy enough to take a good beating from many ill-fated Buzz Lightyear dives from the second story railing. Overall - 45/50 – As a model, this set is fantastic, and I would highly recommend it. It has a solid, functional design that is extremely fun to play with, and looks fantastic as well. It carries a bug-like vibe that suits the Brain Attack theme, but it would work well for a Hero on any mission, either Rocka or any character of your own choice. The set falls down with the parts that it offers, but only because the design is so tight that there is no room or need for superfluous and extravagant pieces, other than on the pilot who is generic by design, since he’s not the focus of the set. If you’re looking for pieces, opt for buying a couple of the smaller sets instead, but if you’re looking for a high speed jetpack swooshing adventure (and let’s be honest, who doesn’t want a jetpack? ), Jet Rocka is definitely the answer. HQ Brickshelf Gallery