Search the Community
Showing results for tags 'supercar'.
-
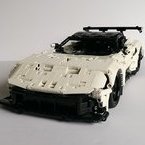 Hi, I’m excited to share my latest MOC, a new build I’ve been working on recently—a replica of the newest Porsche 911. This project was both a design and engineering challenge, as I wanted to make it not only visually accurate but also highly playable and functional. Unlike a static display model, this MOC is designed to interact with, explore, and motorize, which required balancing realism, functionality, and structural efficiency. In addition to the standard features you’d expect - independent suspension, fully working steering with HOG control, an opening front hood, and spring-loaded doors, I focused on two key goals that I think make this model unique: A removable body: The entire body shell can be easily detached from the chassis, just like the real car, making maintenance, motorization upgrades, or interior access simple and straightforward. A full-size cockpit: The interior is scaled large enough to comfortably fit a 1:8 action figure, allowing for more immersive play and display possibilities. To achieve the spacious cockpit and maintain a manageable weight, I made a deliberate trade-off: this model does not include a gearbox or shifting mechanism. Removing these components freed up the interior space and helped reduce the weight, which is critical for motorization. The model is fully ready to be powered with one PU 4-channel hub, three PU L-motors, and a set of PU LED lights. While it won’t achieve high speeds due to its current mass, the motors provide enough torque for smooth, realistic movement, and I’m still exploring ways to trim weight and improve efficiency. Speaking of the PU system, I did encounter an interesting design challenge with the new LED lights. Unlike the old Power Functions bulbs, which could be securely pressed into a Technic pin hole and stay in place, the new PU lights are slightly thinner and no longer lock in by friction. This means I had to think carefully about brackets or support structures to prevent them from sliding out. It’s a small detail, but it highlights how subtle changes in LEGO parts can impact design decisions - especially when working in tight spaces like the headlight area. Overall, this MOC was a fun exploration of both aesthetics and playability. I’m excited to continue refining it, experimenting with weight reduction, and exploring creative ways to integrate the PU system without compromising the design. Here are some pictures of the build. Your comments and feedback are very welcome! Update on 11/28: Fixed the headlights based on comments:
 -
 42143 Ferrari SC40 My new creation Model Info Scale: 1:8 Size: L58 x W28 x H18 cm Weight: 2555 g Parts: 2898 Features Opening doors with lock and limiters Opening front trunk with support rod Opening rear trunk with support mechanism Working V6 engine 8 speed sequential gearbox F-N-R selector Independent suspesion Modular construction Video Gearbox Gears setup by Didumos69 - Jb70 - Nico71, connections and speed limiter by me, stepper mechanism is the same as on the Daytona set Instruction Step by step Bricklink Studio detailed instructions consisting of 3 parts with overall 1000+ pages https://rebrickable.com/mocs/MOC-261024/paave/42143-ferrarl-sc40
 -
I’m excited to share my latest project: a 1:8 scale LEGO Technic Koenigsegg Agera RS MOC. Functions include: Independent suspension on all wheels for authentic movement Fully functional dihedral synchro-helix doors, trunk, and hood Removable convertible roof Adjustable body height 8-speed gearbox with Drive / Idle / Reverse stick Paddle shifters and working steering wheel (HOG control) Here is the full demo video on Youtube: Power Functions compatibility: PF motors can be added to achieve driving, steering, lights, and body height adjustment. In theory, the components can be installed directly; in practice, it’s easier to remove a few pieces first to save your fingers. Gearbox development: The gearbox was by far the most challenging component. I wanted it to withstand high torque — tested with two L-motors. Early designs failed due to axle locking during part shifting. After multiple iterations, I refined the mechanism and reinforced the gearstick so it no longer pops back to idle under load. The final result is solid, and you can see it in action in the video. Dihedral synchro-helix doors: The doors are a signature feature of the real car, moving outward, forward, and upward at the same time. I achieved this by combining a Technic 28-tooth turntable with a hanging arm — a lifesaver solution that enabled smooth motion across all three directions. Bodywork: Designing the large-radius curves of the hood and roof was another headache. After much trial, I turned to Znap elements, which LEGO no longer produces. Despite being unconventional, they achieved a far better curvature than standard Technic or System parts. Height adjustment: The adjustable suspension relies on a complex gear train, including mechanisms to prevent over-rotation. Clutch gears are included in both the front and rear systems, so when torque is too high the clutch will slip, protecting the fragile bevel gears (especially the 8-tooth ones). Instructions: If you have an iPhone or iPad, the full instructions are available for free via the app: https://apps.apple.com/us/app/agera-rs/id6751605748 (or search “Agera RS” in the App Store). For convenience, the app includes a missing parts tracker and can generate an XML file for BrickLink orders. ⚠️ Note: Two panels (4446 and 4443 – Technic Panel Curved #54 Left/Right) are not available in red from LEGO. Options include painting them or sourcing from third parties. I’d love to hear your thoughts on both the design and the instruction app, so I know where improvements can be made. Thanks for checking it out!
-
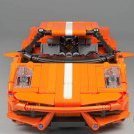 Hi everyone! Happy New Year 2026 to all of you! It’s been a while, hasn’t it? To kick off this new year, I’d like to present my latest creation, inspired by a slightly crazy project started by a guy in his garage. A project from someone who first built a GT40 replica from scratch, then took on the wild challenge of designing and building his own hypercar. I’m of course talking about the Hyperpilote by Benjamin Workshop a very famous home made French builder. I’ll let you check out his YouTube channel—he’s quite active and regularly shares updates on the progress of his project: https://youtube.com/@benjaminworkshop?si=HpPa3anAV1SEwS1X On my side, I started designing the LEGO model toward the end of his Kickstarter campaign in 2022 and completed it at the end of 2025. Initially, the real car was meant to be fully electric, before switching to an internal combustion version in 2024. This major change ultimately didn’t have a significant impact on my development, which I was carrying out in parallel, as I had quickly decided to focus my efforts early on the exterior design, using the body panels from the Lamborghini Sián 42115. Here we go—time for the photos! I. General Specifications 6-speed gearbox + Neutral + Reverse by @Anto (https://rebrickable.com/mocs/MOC-171508 ... s/#details) Gear indicator Steering-wheel-mounted paddle shifters Independent suspension Elytre doors opening mechanism Integrated lifting rams (“Air Jacks”) Front and rear anti-roll bars Self-locking differential mechanism when steering Functional front radiator Opening features: doors, hood, and trunk II. Design The design of the real car is heavily inspired by the McLaren P1. This influence is evident, on the one hand, in the unique three-seat cockpit layout, and on the other hand, in the teardrop-shaped canopy, which gives the rear wheelbase a much more pronounced and muscular stance.I reused the P1 body panels in light bluish orange to achieve this overall look. The front end is a blend of panel placements inspired by @Charbel Charbel’s McLaren 720S (https://www.eurobricks.com/forum/index.php?/forums/topic/172734-moc-18-mclaren-720s-w-instructions/&tab=comments#comment-3134415), used to shape and frame the headlight line. The headlights themselves are made from DBG barrel elements, similar to those used on the LaFerrari MOC by @T Lego: https://www.eurobricks.com/forum/index.php?/forums/topic/193303-moc-ferrari-laferrari-18/ As a small nod, I tucked a nitrous bottle behind the driver’s seat, in the spirit of Need for Speed II—for those who remember… The rising beltline between the front and rear wheel arches was quite challenging to resolve. The slope is very subtle and integrates into an opening body panel. I wanted the door opening mechanism, inspired by the Ferrari Daytona SP3 42143, to be completely hidden within the overall design. Each door opens independently via a push-button that actuates a linkage system with friction and an over-center mechanism, allowing the door to remain open. The door is then closed by pushing it back and breaking the over-center point. The door can also be opened without using the push-button; however, the lever must then be engaged to lock the door in the raised position. For added realism, I wanted to incorporate a realistic version of Nissan’s famous twin-turbo V6, the VR38DETT, complete with the full exhaust plumbing as well as its two side-mounted turbochargers. Its red engine cover contrasts nicely with the car’s orange bodywork, in my opinion. The chassis is extremely rigid despite the absence of a central spine, thanks to the 3×19 frames on each side: https://www.bricklink.com/v2/catalog/catalogitem.page?P=67491#T=C The gearbox located behind the cockpit also plays a structural role. For reference, the car weighs over 2.5 kg. And the French touch ! You want the same in Green ? Wait... III. Features To explain all the features of the model, let’s start with the schematic below: Blue: Main transmission, RWD, and radiator rotation Light Green: Gear-shifting mechanism and indicator Yellow: Anti-roll bars Red: Steering via HOG or wheel and coupling to the differential lock mechanism Green: Elytre door lifting mechanism Blue: The gearbox is based on Anto’s version: https://rebrickable.com/mocs/MOC-171508/Anto/ultimate-6nr-gearbox-with-forks/#details Go check it out—his system is brilliant! It’s a 6-speed + Neutral + Reverse gearbox. The gear indicator is visible through the rear hood (I simply forgot to add the sticker for the photos ^^). I also extended a driveshaft to operate the radiator fans at the front of the car. Light Green: The paddle-shifting mechanism is angled and uses the rotation of Wheel 2474: https://www.bricklink.com/v2/catalog/catalogitem.page?P=2474&idColor=3#T=C&C=3 A rotation stop is also included to prevent infinite spinning. Yellow: The car features anti-roll bars on both axles. Red: I designed a differential lock system that engages when the wheels are straight. During steering, whether left or right, the system automatically releases the differential. This solution combines efficiency with simplicity of use. Green: Each elytre door opens independently via a lever that actuates a linkage system with friction and an over-center mechanism, keeping the door open. Finally, not shown on the schematic, this model version features a pneumatic circuit that powers four actuators—one at each axle—allowing the car to be lifted a few centimeters off the ground. The effect is impressive when the car rises! The system is powered from the rear via a manual pump, and the selection lever is cleverly hidden beneath the horizontal suspension elements. IV. Specifications Scale: 1:8 Dimensions (L × W × H): approximately 54 × 24.5 × 12 cm Weight: 2.6 kg Number of pieces: 4,260 Development time: 3 years V. Inspirations McLaren 720S @Charbel: https://www.eurobricks.com/forum/index.php?/forums/topic/172734-moc-18-mclaren-720s-w-instructions/&tab=comments#comment-3134415 LaFerrari 1:8 @T Lego: https://www.eurobricks.com/forum/index.php?/forums/topic/193303-moc-ferrari-laferrari-18/ McLaren Senna @langko: https://www.eurobricks.com/forum/index.php?/forums/topic/181511-moc-mclaren-senna-18-2nd-version-finished/&page=4 1:8 Ford GT LM GTE 2016 @Jerry LEGO Creations: https://www.eurobricks.com/forum/forums/topic/208996-moc-18-ford-gt-lm-gte-2016-68/ VI. Useful Links HD Photos – Orange version: https://www.flickr.com/photos/147164115@N07/albums/72177720331075173/ HD Photos – Green version: https://www.flickr.com/photos/147164115@N07/albums/72177720329313566/ Building Instructions – Only Green version: https://rebrickable.com/mocs/MOC-245958/Levihathan/hyperpilote-18/#details Disclaimer : For those who are observant, you’ll notice that in the orange version, some pieces are not officially available from LEGO in Light Bluish Orange. Most of these are simple connectors, and it’s unfortunate that LEGO doesn’t offer a wider range of parts when releasing a flagship set. I do not encourage the use of third-party shops, but if you plan to rebuild this car, be aware that you may need to source parts from suppliers like Webricks or Godbricks to complete the inventory. Unfortunately, Rebrickable does not allow the publication of instructions containing non-LEGO parts, but the instructions do exist—so if you prefer the orange version, please contact me privately or via Rebrickable/Instagram. The car also features 3D-printed wheels and custom stickers. I personally designed these pieces, matching the wheel diameters of the Sian 42115 but with the design of the P1 42172. These files are included with the instructions, as are the stickers. Here’s a preview of the instruction manual’s table of contents. The design is fully modular to make assembling the car as easy as possible: 360° video : Thank you for your attention and see you !
 -
 Lego technic Chaos supercar! A supercar with several functions like reverse ackermann steering, suspension, opening doors, a gearbox, and a working steering wheel! Watch the video for more details: The pictures are under the videos. Thank you and happy new year to all! BrickbyBrick, Dec. 26 2016
 -
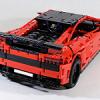 Hello! Im glad to present my new model for LEGO Technic Porsche contest. I hope it will be published soon at rebrick =) Porsche Carrera GT Features: - 1:10 scale - realistic Carrera GT V10 piston engine in mini scale - full independent suspension - rear wheel drive - HOG steering with working steering wheel - openable door, hood and trunk - rising rear spoiler Video below shows some of these functions. I recorded very simple video just for the contest, without any titles and sounds.
 -
 This is my entry to the Porsche contest: The Porsche Mission E concept car! This model features: openable doors, hood, and trunk, the arc of light in the rear, steering controlled by the steering wheel, full independent suspension, four speed sequential gearbox, and the option to choose forward, neutral or reverse. Sadly I couldn't motorise it because I had no motors able to be used... This model also has no fake engine, because in real life the Mission E has no piston engine, it's all run by electric motors! Many other things have been left out too, like mirrors, just to keep the realism. Anyway, I put a lot of thought into it, and hope that you like it! Questions and comments are welcome!
 -
And a short video to showcase some of the most interesting parts of the construction Racing version
-
I will let the pictures do the talking >>> + a video tutorial how to build one Yourself http://www.youtube.com/watch?v=www.youtube.com/watch?v=va26M29tGCE Thanks for watching! #keeponbricking !!!
-
 Link to MOCPages: http://www.moc-pages.../moc.php/426649 VIDEO FOUND HERE: Hello, this is my first post on Eurobricks. Anyway, here I present my custom supercar RHM (Rage Hobbit Motors) Wutzwerg. Note: this model is on Lego Ideas, the link for which is here: https://ideas.lego.com/projects/136011. I'm not really expecting the model to get either the necessary votes or to get turned into a set, but hey, I like to be surprised. Propulsion: 1 x L motor Steering: Front wheel with 1 x Servo motor and working steering wheel Drive Type: RWD Transmission: 4-speed sequential synchronized V2 Weight: 1.3 kg (2.87 lbs) Length: 41.5 cm (16.3 in, 52 studs) Width: 18 cm (7 in, 22.5 studs) Height: 10 cm (3.9 in, 12.5 studs) Power source: 7.4v 8878 Li-Po rechargeable battery box Estimated part count: 1800 pieces Suspension: All-wheel dual-wishbone independent Opening hood, doors, and engine V10 piston engine connected to drivetrain through transmission Build time: ~60 days Short Description This is my first vehicle to be built without a real subject vehicle in mind. It has less of a focus on performance than my other vehicles, with only a single L motor for propulsion. It also has front-wheel steering with a working steering wheel, a new version of my 4-speed sequential synchronized transmission (link here: http://www.moc-pages.../moc.php/422999), and a motorized rear wing. Introduction For this car I was trying something a little bit different. I had just designed a new version of my 4-speed sequential synchronized transmission (link here: http://www.moc-pages.../moc.php/422999) and I wanted to use it in a car, but I also wanted to build something a little less performance-oriented than usual and thus fit in more functions. This time, there is no original vehicle; make what comparisons you will, this car is entirely a product of my imagination. I think. Drive Train Part of my plan for this vehicle was to eliminate one of my customary 2 drive motors, leaving only a single L motor for propulsion. This freed up space for another M motor, as well as allowing room for the V10 piston engine. The V10 piston engine located behind the front seats, and was connected to the drive system through the transmission; as such, it varied with whatever gear the transmission was engaged into. Because of space restrictions, I had to replace the usual cylinder brackets with a custom rig, after spending a solid hour determining the exact geometry of the original brackets. The transmission used in this vehicle works off of the same principle as my previous 4-speed sequential synchronized transmission; this transmission is also a dual-sequential transmission. What this means is that the transmission actually contains TWO separate transmissions which are shifted in such a way as to produce 4 distinct speeds. What differentiated this transmission from the previous versions is that the switches were not hinged: instead, they moved back and forth in a straight line. This can be seen and understood better from the video above, and you can expect instructions sometime sort of soon-ish. The transmission itself was shifted by an M motor geared 10:1. Because of the lessened power from using a lone L motor, the motor had a gear reduction of 1.25:1 before being fed into the transmission, and then another reduction of 2:1 before the differential at the rear wheels. The car wasn’t fast, but it did pretty well for a single motor. Steering and Other Motorized Functions Steering was simple as usual - with a Servo motor and rack-and-pinion system - but this time I added a working steering wheel. That’s just about all there is to say for the steering system. The final M motor was for the rear wing. This was no fancy job, just a linear clutch and lever mechanism to raise the rear wing, but again space restrictions made the implementation of this system difficult. The rear aesthetics were somewhat compromised to make room for the rear wing & mechanism. Aesthetics With this being the first time I’ve ever come up with my own large-scale car, I didn’t really know where to start, and all the online comments saying “Making your own car is SO hard!” were not particularly encouraging. The front was actually the first area to be built (because of the awkward and inconvenient position of the battery box) and the rest of the car was built using the front as a reference point. Obviously, I can’t give my own unbiased opinion on the car’s aesthetics - many hours spent designing it have probably compromised my opinion as well - but I think the aesthetics turned out pretty well. Please, give me your honest opinions in the comments section! Reflections Not bad, I think, for a first attempt at making my own vehicle. Space was a little bit cramped because of the scale I chose to build it in, but everything mostly fit together in the end. It functioned really quite well: the transmission, rear wing, steering, and propulsion systems all worked without malfunctioning even once in the final vehicle, despite considerable use. That may be a first for me. Despite having fun crafting my own vehicle, I can’t see this as being something I’ll repeat frequently. That’s not to say I’ll never do it again, but I do enjoy recreating existing cars, and of course brand familiarity with my viewers gives people something to compare to. Enjoy the pictures!
 -
 Hi, I would like to present to you my latest MOC, the BMW 328 Hommage: It features the standard functions for a Lego Technic supercar: - 4 wheel independent suspension - steering geometry including Ackerman, positive camber and minimal (0.5 stud) scrub radius - V6 fake engine - Opening hood - A 4+N+R sequential gearbox This was the thing that has given me the most headaches during the build. But after 3 months of trying way too many designs to mention I finally succeeded. It is operated by the gearstick in the center: The stick can be moved sideways to switch between drive (D), neutral (N) and reverse (R ). If in drive the stick can be moved forward and backwards to switch gearing up or down. A mechanical lock prevents switching from 1 to 4 or vice versa. This model started when I cleaned up my workplace to make space for the SS Amsterdam. The BMW was already lurking in my head, but I hadn't figured out how make the iconic headlights. But during the cleaning I saw this: and suddenly I knew how to make the lights and forgot the ship completely: I have tried to replicate the flowing asymmetric design of the interior within the limits of the Lego system: A picture of the rear: More photos can be found on my Flickr page: https://www.flickr.c...157665220014892 Payed instructions are on their way as well. Some trivia to finish with: Since 19L flexaxle is available in black again I felt no inhibition to use 6 of them in this model The pin with pinhole is rapidly becoming my favorite part: I used 58 of them (it helps that the model is black) I have tried to hard to use only parts that are readily available, the only really old parts are the wheels I think I used 'only' 51 panels if I counted correctly Leg godt, Jeroen
 -
Video Found Here: Specifications: Number of Gears: 4 Gear Ratio Spread: 5:1 - 1:1 Shift Reliability: 99% Friction Level: Low Transmission Type: Dual-Sequential Synchronized? Yes Auto-stop? No Optimal Transmission Motor RPM: 15 - 40 Length: 10 studs Width: 11 studs Height: 5 studs (6 with optional support) Note on dimensions: dimensions are measure to the furthest protruding point of the transmission; that is to say, the transmission does not actually occupy all of the space designated above. Also, I know that the measurement for width is greater than that of length, (which is against their very definitions) but length was measured as being parallel to the drive axles. This is the transmission I used in my RHM Wutzwerg (http://www.eurobrick...opic=125571&hl=) supercar. It is a dual-sequential transmission, meaning that it is actually a pair of 2-speed transmissions (one with ratios of 3:1 and 1:1, the other with ratios of 1.67:1 and 1:1) which are shifted in sequence to produce 4 distinct, sequential speeds. It is very smooth and very reliable, the only potential concern being that it can slip under <b>extreme</b> stress situations; this can be remedied by added a gear reduction later in the drivetrain. It does also lack an auto-stop function, however I will be posting an appropriate stepper-motor shortly. Instructions are here: https://drive.google...XVFRGc. Before building, please read the following important notes: -Instructions are in *.lxf (LDD - Lego Digital Designer) format. Sorry, I am horrible with other Lego CAD programs. -Green marks the drive input, red marks the drive output, and purple/pink marks the transmission shifting input. -I do ask that if you use this in a model, you give me credit as the designer of the transmission. -Elastics have to be fastened like this: http://www.moc-pages.com/image_zoom.php?mocid=426942&id=/user_images/116595/1459193308m …so that the yellow part (orange in the instructions) is pulled on axis towards the shifting axle. -The yellow ribbed axle connectors in the instructions need to be replaced with the part below: http://www.moc-pages...595/1459193300m -Any questions, comments, or otherwise can be addressed to me in the comments and I will make an attempt to respond as quickly as possible. This thing won't accept pictures at the moment, so here's a full catalog of them: http://www.moc-pages.../moc.php/426942
-
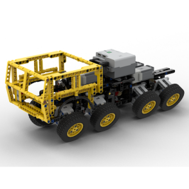 I started for the chassis without know the car yet . IMO my best chassis until now, AWD, compact, few pieces, some rare solutions in the hard suspension and very important for me with a good output for the steering wheel (I usually have problems with it). I built it AWD because it was more difficult but I am still looking for the car, it can be or not AWD. There is an obvious error, is my trademark in first assemblies . http://www.youtube.com/watch?v=otIHXDS_dS0&feature=youtu.be '>http://www.youtube.com/watch?v=Hght26AHqfw&feature=youtu.be
 -
 Since November of last year I have gotten back into Lego. After many years away, I had received a new motorized 9398 4X4 crawler and fell in love with Lego again. There is something so simple and calming about sitting there trying out new designs, functions and models. I very quickly became interested in building model Lego cars because they seemed to replicate the real thing in so many ways. Now my two boys absolutely love Lego and have been a fan of playing with my cars around the house. (Of course occasionally crashing them into the wall ) Car dimensions: 47 long x 27 wide x 18 high I may not spend a lot of time building my creations, but after a few days I just can't wait to tear down my last one and start fresh with a new one. That being said, this forum has taught me to have patience to take the time to create the right design. And have also learnt that quite often extra power functions compromise the beauty of the design. So I went a bit back to the basics with this RC and only have rear wheel drive and steering. That will always allow for more room to create a better design. Anyway, enough about me, here is a Lamborghini Murcielago that took me 3 weeks to make. To all of the purest's out there, this is not a perfect replica by any means. It has Gull-wing door, which Lamborghini's do not have. But I can assure you, this is a 100% Lego MOC. (Even the blue rubber band that hold the doors open is from Lego) Browse through the pics, check out the video and enjoy!
 -
 Hello, For my latest project I'm building a supercar bit by bit, building the separate components first before assembling them. Starting with the Carbon Fiber Monocoque Tub: This one was for a great part inspired by the McLaren MP4-12C chassis, that one is said to weigh less than 80 kilograms (). (And guess what, mine weighs even less! ) This one wil most likely undergo many changes in order to fit with, yet to build, components. I'm considering using a carbon "cage" instead of a "tub" for my car though. But I won't know for sure until I start on the bodywork. Next is the Driveline: A Twin Turbo 3.8L V8 with 7-speed dual clutch gearbox and kinetic energy recovery system (KERS). I used some pictures from the Laferrari engine as reference. Without the intake manifold (those black plugs are where the rear half axles connect to the gearbox). I'm very satisfied with this component, It fits barely in the engine bay behind the tub though but I guess that's how it is supposed to be. If there was room to spare they would have just fitted in a bigger engine . Since I had these nice Ferrari stickers I might as well make this a Ferrari engine . That's it for now, perhaps I'll finish the next component tomorrow.
 -
Hi, Here is my latest model (it is again an exclusive commissioned model, sorry for that), an Aston Martin DB9 Volante: It has the regular features: - Independent suspension on all wheels - Steering with Ackerman geometry and caster angle - A 5+R manual gearbox - A V12 fake engine - Adjustable seats - Openable doors, hood and bonnet And as a special function it also has a convertible roof. The mechanism inside is not automated, like I did on my Ferrari 458, but it does fold itself like the real thing. Which means that the top part of the roof folds in three parts on top of each other. It was a real puzzle to get that mechanism working, but I am very pleased with the end-result. The cover is custom made from a thin cloth. Some more pictures: I hope you like it Leg godt Jeroen
-
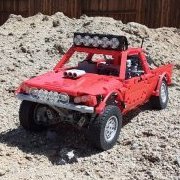 Hi everyone! I'm happy to share my newest MOC, the 2018 Supercar! So I started work on this right at the beginning of the year. I had some ideas in my mind that I wanted to include. The best real- life car I could find that had what I imagined was the Lamborghini Sesto Elemento, so I used those blueprints to assist me in making this car. I worked on and off up to here, and I'm happy finally have it complete. Rebrickable: https://rebrickable.com/mocs/MOC-14205/offroadcreations/2018-supercar/#comments Features: Opening suicide doors Opening trunk to reveal engine Fake V8 engine Sariel's 4 speed gearbox RWD HoG steering and working steering wheel Detailed interior Independent suspension on all wheels. Some more pics: Interior with touchscreen is the dashboard, as I always like to include: Other colors: I personally really like how this turned out. As this is my third attempt, I think I'm starting to get the hang of this supercar thing. But tell me what you think!
 -
 That's my entry for Buwizz fast car contest. The model is a mix of supercar and offroad truck. No, Lamborghini Urus is a bad example. I have heavy duty suspension of Baja truck and rear wheel drive. Body type (not design!) is inspired from Ferrari GTC4 Lusso - long Shooting Brake. I have only one seat - driver's. Other side is reserved by Buwizz. There is a place behind the driver, but long travelling rear axle with Buggy motor need a lot of space in the back. Specs Propulsion motor - RC Buggy motor Steering motor - Servo RC and power - Buwizz 2.0 Front independent supsension with postive caster angle and negative camber in the lowest point (different length suspension arms) Rear live axle suspension Fake winch and roof lights Brown "leather" luxury seat and dashboard (that's luxury Trophy truck) openable doors and bonnet Front suspension arms are 5L and 6L, so in the lowest point frone suspension have negative camber angle. Don't know if it help or not, but it is a fact. In addition, postitive caster should help in straight fast driving. But it is not. Thank you for watching.
 -
 Hello everyone! Today I'd like to show you the model that I've been working on for more than two years, it's my first MOC in this scale that is actually close to being finished. It was rebuild from scratch dozen times and still requires bodywork. The MOC is LaFerrari in 1:8 scale: Origially I had a lot of ideas and great ambitions, but over time I realized that I just don't have enough skill to make everything I wanted. So current version has following features: independent suspension; 2 L motors for driving; Servo motor for steering; working steering wheel; 8 speed sequential gearbox driven by M motor; spacious interior with low seats positioning; powering with standard LEGO PF. Proportions: width - 29 studs; height - 15-16 studs; length - about 70 studs, don't know yet. Originally I wanted to use bigger wheels but then I stopped on 68.8. The thing is that front section of the car are too low so there won't be any place for arches with bigger wheels. Battery box is located in front of the car because everything behind seats is one huge gearbox. It just lays on its own weight and will be covered on the top with something black. This way you won't see most of gray and light gray parts through the bonnet. Distance between seats is only 3 studs and every seat is 7 studs wide. There's no free space between them - only a few hidden cables there. This is how it looks without seats: Top and bottom views: The whole core of the car is basically done. It's pretty sturdy and doesn't bend when you hold it. In current state it has about 1600 pieces. The most challenging part of the build at this point is a gearbox. It had to be very compact because car is so low. In this LDD file you can investigate all gears: https://bricksafe.com/files/ibessonov/wip-moc-laferrari-technic-2018---1/8 speed gearbox.lxf Here are some renders of gearbox without stepper. Green axles are input from motors. There are 3 clutches here and they give 8 unique combinations of their engagement. L motors are slowed down significantly. This is because they are not powerful enough to make this car fast. Here's a stepper mechanism that I used to move all 3 clutches: Green things should be connected with white rubber bands, they hold axles in fixed 90-degrees positions. There's a strong resemblance with 42056 Porshe's gearbox here, I know it. That model helped a lot with the inspiration. My plan is to finish bodywork but it's the hardest thing for me. This is the exact reason why I'm creating this topic - to get help/critique while I'm finishing the model. LaFerrari has quite complex shape and I should have chosen something more simple for my first MOC. But I already spent way too much time so I have to finally finish it. Leave your thoughts here, I'm very curious of what you might say. Thank you!
 -
What with a certain company ripping off my Koenigsegg One:1 and making a pretty bad job of it at that if you have seen some of their marketing photo's where the flex axles bend into strange shapes. Also due to the fact that my own Lego version started to look a bit shabby when parked next to the more recent Ultimatum GTR V10, i decided to do a major upgrade, basically start over, but this time without trying so hard to replicate the real Koenigsegg, but rather with the aim of making a Koenigsegg based car that is designed more with the aim of making it look good in Lego Technic (we will see how that turns out!) I will be aiming to replicate the Koenigsegg suspension, slight tweaks to my previous rear suspension and a major improvement to the previous front suspension to make it stiffer. I am looking at a combination of my previous 3+R (fake) paddle shift gear box from the Koenigsegg, and the Ultimatum's improved 5+N+R. I have already designed a compromise 4+N+R to fit under the 8 cylinder engine. I just have to work out the shifter mechanism. The engine will be 1 stud lower than the previous Koenigsegg The doors MUST use the same mechanism as the previous Koenigsegg, but I am looking to change the method to actuate them. The roof needs to be at least 1 stud lower than previous (that was my main issue with the bodywork of the previous Koenigsegg when standing it next to the Ultimatum) and here I may move slightly away from the real Koengsegg design, I will see where it all takes me. Again it will be 1:10 scale or thereabouts as I am not yet that inspired to work at 1:8 as I like the challenge of less space to work with. The back end is in progress, and while it looks similar to the previous Koenigsegg, virtually every part has been re-designed and I think significantly improved, so far, I am having fun.
-
 Here is a quick summary of a previous post. Right now I'm planning on a new project and I could use some help. It's a 1:8 scale model of Lexus' LC coupe powered by Lego Mindstorms EV3. Currently, I have the rear axle built off the instructions from the Porsche 911 GT3 RS set. I also made the engine for the LC500 on Lego Digital Designer and I am wondering if it is good enough to buy the pieces for it on BrickLink. I also want to add the following features: Four or six-speed paddle-shift transmission Retractable spoiler Detailed interior Fake V8 engine (but I would like to achieve moving pistons) Full independent suspension I would welcome some helpful comments about the V8 engine, axles, and the gearbox I planned to use before I order pieces on BL. Thank you.
 -
The American Club Racing (ACR) model was introduced in 1999, starting with the Viper GTS (Phase SR II). Exclusive 1 by lachlan cameron, on Flickr This model had suspension and engine enhancements focused on maximizing performance in road racing and autocross environments. Horsepower was bumped to 460 hp (370 kW) in these models, while torque increased to 500 lb·ft (678 N·m). Weight was reduced by over 50 pounds (23 kg) by stripping the interior and removing other non-essential items such as the fog lamps (replacing them with brake ducts). Dodge Viper ACR by lachlan cameron, on Flickr In an attempt to stay true to its heritage, I've left this beast without bells and whistles in the name of speed.It sport a front clam shell hood, opening rear trunk, and spring back doors. The real catch here is in the speed and options. Dodge Viper ACR by lachlan cameron, on Flickr This Viper packs 2x Buwizz 2.0 (with Ludicrous mode) that power this monster directly to 2x Buggy motors. The gearing is accessible and can be swapped for a higher or lower gear in minutes. Ratios avail: 1:1 and 1:1.7. This model also has many build options: 1. 1 or 2 buwizz / 1 or 2 Lipo / 1 or 2 Sbrick 2. 2 Buggy motor or 2 XL motor 3. Fully manual car (just remove the electronics 4. Swap out the engine on the fly for a new one! Dodge Viper ACR by lachlan cameron, on Flickr The Viper also has a rake to it that I also replicated. 1 stud off the ground at the front, 2.5 studs at the rear. Dodge Viper ACR- open hood by lachlan cameron, on Flickr Its been a pleasure playing with this car OUTDOORS (don't even think of play indoors, I smashed it over 10 times) and I hope you guys enjoy the video! Dodge Viper ACR by lachlan cameron, on Flickr Dodge Viper ACR by lachlan cameron, on Flickr Dodge Viper ACR - Overlay by lachlan cameron, on Flickr Flickr Album: https://flic.kr/s/aHsmeHa4rL Instagram: https://www.instagram.com/loxlego Crash compilation: Dodge Viper - Crashes by lachlan cameron, on Flickr
-
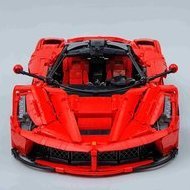 Hello everyone, I'd like to share my latest MOD: Koenigsegg Agera RS1 This car is one of my favorite road-going super/hyper/megacars, and therefore I decided to build it. To me and many others, Koenigsegg is a very special car manufacturer: It was founded in the nineties by Cristian von Koenigsegg, a man without any engineering education background and budget. On top of that, all Koenigseggs are handcrafted and are produced in limited quantities. I like the RS in particular, beceause it is IMO the most beautifull Koenigsegg and it holds the top speed world record. This car is not fully designed by me. @Pvdb build the Koenigsegg one:1 more than two years ago. The RS1 and One:1 have very similar Bodyworks and since Pvdb nailed that on his One:1, i decided to use his bodywork as a shell around my disigned chassis. In addition to that, I also used his door meganism, beceause I could not imagine me designing a better one Specifications: Dimensions 59x27x15 Studs Weight: 2600 g Estimated parts quantity: 2500 parts Powerfuntion elements: 2x PF AAA batteries, 2x PF V2 reciever ,4x PF L motor, 1x PF Servo motor, 1x PF M motor, 2x PF 50 cm wire The RS1 is basically the same as any other RS, but it has the one MegaWatt engine upgrade. The RS1 is specced in white with a black center stripe and it has many blue accents such as the interior, skirts, spoiler, diffuser and front splitter. Many of those parts of the RS1 have just a very thin stripe of blue painted on it. This means you can not replicate that with regulare LEGO parts. Stickers seemed like the only solution, but at some point the idea to use rubber bands for some accents popped in my mind. I only used this trick in the front splitter. Features: Easily removable Roof, like the real car Openable front trunk and engine bay Motorized dihedral synchro-helix actuation doors, Powered by a PF M motor Front double wishbone suspension with negative caster angle Rear triplex suspension with double wishbones Steering with working steering wheel, powered by a PF Servo motor Propulsion with working V8 engine, powered by 4x PF L motor I wanted both doors to be opeable by just one motor. This meant I had to make selector for wich door is connected to the motor. I had some free space in the center tunnel, so I decided to use the handbrake as a selector. Just behind the front wheels there is a driving ring wich can engage in two different clutch gears. Both clutch gears are connected to different doors. The motor and this meganism is placed underneath the trim. Here is the full 'transformer mode'. The front trunk and engine cover can be opened manually. If you look closely, you can see the battery and The L motors behind the seats. The recievers are placed behind the rear axle. Replicating the triplex suspension was for me a 'must have' on this car. It consists of two inclined shock absorbers and a horizontally placed pneumatic cilinder. The pneumatic cilinder is definately the most realistic looking way to make the central shock, but it is not practical. It offers resistance when extending and retracting, so I mounted some springs behind it to ensure that the model doesn't sag. In addition to all of that I also put some links on the suspension system. They are only there for an aesthetic reason though. finally, a video demonstration. Enjoy! Comments and questions are welcome!
 -
 Well I finally unearthed the old girl from my east coast repository (my brother’s house) and yes by the yellowing of the white, you can tell she has been displayed for a few years on my shelf. I built this around 2000, but I only know this by the use of the bent studless liftarms that I had just gotten when I built her, and those came out in 2000. Here is the list of my modifications/functions. See my Flickr pages for lots more photos and close ups. I didn’t have time to take any video. Electric proportional 4 wheel power steering Electric drop top convertible - operated by switch on dashboard Electric micro motor controlled spoiler- operated by switch on dashboard Pneumatic ride height adjustment- from switch in center console utilizing: Front - shock mount point adjusted to maximize suspension travel Rear - pneumatic spring compression to maximize traction Opening doors with internal and external handle/latch Supercharger - belt driven Intercoolers Working brake pedal and brake lights ( no real brakes ) Fiber optic ignition with real timing (simple firing order) Improved body styling and stretched wheelbase. Only original function lost was HOG steering, but since the steering wheel was now proportionally electric controlled, you could steer and push from the steering wheel with no problem with the top down. Hope you enjoy! Joke mode on- And just a note, I am not really looking for any criticism unless you have been doing this since 2000 or 2001 and can remember having to try and add all these features and functions using what we had at the time. Joke mode off-
 -
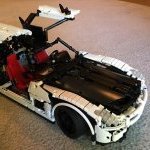 Hello everyone, This is my new MOC, a 1:10 scale model of a Mercedes-Benz SLS AMG. It has the following manual functions: HOG steering with working steering wheel Fake V8 engine Independent suspension on all wheels Opening hood Opening gullwing doors, operated by gears behind cabin Retractable rear wing, operated by gear on roof Driving selector in cabin, shifts between drive, neutral, and park Comments and questions are appreciated, thanks!