Search the Community
Showing results for tags '2013'.
-
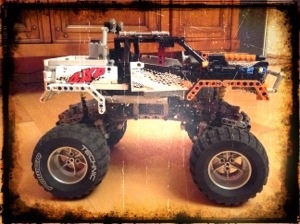
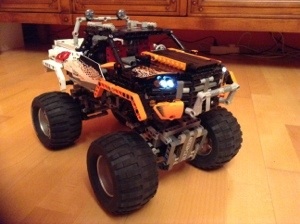
 Hello everybody and let me present my version of a modified 42005 Monster Truck. It was my second set after my "dark age", that I've bought many years ago, after 42029 as supplementary set with a lot of useful pieces and planned to use for a live axle suspension and some other features for 42029 model. However, I liked the set as a simple and functional model and re-assembled it several times. Here is the model and later I'll provide the all details: A month ago, when I tired of infinite attempts to turn 41999 into a Muscle Car (the chassis isn't rigid enough, but I already did a great progress and hopefully will share it once) I returned to this model and set the task to motorize it adding 4WD, but keeping 4 wheels steering and current suspension (keep the original construction as possible as I can). First, I've analyzed the all existing attempts that I could find over EB, Rebrickable and YouTube and it happens that there were several MODs by different authors: First of all, it's @Splat’s MOD with all steered and driven axles (see topic here). I see no reason to duplicate its description, so let me just note that he saved the necessary features with adding Servo + L-Motor mounted under the hood and trunk. The chassis configuration is 4x4/4 or 4WD-4WS. It’s the best motorized model, I think, because of amazing simplicity and performance, but unfortunately it has a kind of “articulated” steering that isn't real, so was trying to made a "real" 4WD-4WS version, using this model as reference. Another one is Jan Dvorak’s (is he on EB?) MOD with all original features supplemented by on-axle L-Motor that drives the rear wheels and Servo for the 4WS. He added an additional 5X7 frame with differential that provided a necessary rigidness. The chassis configuration is 4x2/4 or RWD-4WS. Personally I don't like such a long axle sub-frame. However I've found a good idea of vertical gears inside the central shaft. The third one is @codefox421's MOD, inspired by Splat’s version, with the original front axle and non-steered custom rear axle with on-axle L-Motor. His custom rear axle, based on two portal hubs, is a quite compact and simple, but has no steering. The chassis configuration is 4x2/2 or RWD-FWS. It looks trial-ready with the portal hubs, but it's nearly impossible to add the steering here, so I got nothing from this model. An unusual @Tommy Styrvoky's MOD with an interesting feature: he modified the front axle, not the rear one, by adding a solid drivetrain with worm gear and on-axle M-Motor, so result is a front-wheels driven Monster Truck with oversized fake engine. The chassis configuration is 4x2/4 or FWD-4WS. Very aggressive! WRRRRR Daniel Wirasantosa’s (is he on EB?) MOD that differs from the previous ones by using of chassis-mounted L-Motor that drives the rear axle (that has a bit low ground clearance due to the 5x7 frame) and, moreover, he used a custom steering shaft that comes directly to the steering rack. The chassis configuration is 4x2/2 or RWD-FWS. Starting this version, I got a more or less defined plan: 4WD with off-axle (chassis-mounted) L-Motor that drives the both axles through the existing “drivetrain” (former steering shaft) and the off-axle Servo that steers the both axles through the custom steering shaft above the driveshaft. There were two more versions: Michael M’s stretched one and LEGOTechnic360’s solid-chassis version with no suspension, but they didn't help me with any new ideas. Nothing personal, guys, if you're reading it, I just had a full and consistent vision of my further MOD: Hull - the original with no changes. Axles geometry - original. I tried to save the all things like the wheels location, suspension mounting points, ground clearance, steering angles (that are even bigger a bit now)… And I still can't believe that made it, after a thousand tries! Suspension - original, with no changes. However I put the hard shock absorbers in the rear end, as the default ones were too weak to keep the BuWizz battery. Wheels - original. I decided to keep the original wheels and tires with no giant crawler ones or even Claas, that are too big even for a Monster Truck. Frame - mostly original, but possibly modified since it will have an L-Motor and Servo mounted above the axles (right under the cargo platform and hood). Drivetrain - it must be the ex-steering shaft that comes through the cardans inside the "big" ball joints to the both axles, connected to the L-Motor via the set of normal and clutch gears. Steering - for the all wheels, like in the original model, but the steering shaft comes above the drive shaft, in parallel with it and can slide a bit while the suspension moves. Enough the words...The most interesting part starts here. Following my plan, the bigger challenge was to modify the original axles - I tried several options, even trial-like with solid axles, but 4WS provides an amazing maneuverability due to big steering angles, so axle diffs are likely vital for such model (solid axles were making a permanent clicking noise in the transmission even with motor stalling sometimes) and I decided to make a fast Monster truck, not a slow crawler with a high torque. The drive train. There you can see how I did it: L-Motor rotates a set of 8T and 16T normal and clutch (required for the steering shaft) gears and then the main horizontal shaft, that were used for steering in the original model. After that the shaft rotates the 12T double bevel gears (ex-pinon gears from the original model), than 20T gears below, single-bevel 20T and the differentials. As result, the gearing ratio is 1:1.667 X 1:1.4 = 1.2334, and provides about ~100 RPM with 15.12 N.cm torque. The wheels connected by a wheel hubs, since I wasn't able to use the universal and CV joints with affordable steering angles, wheels position (I kept exactly the same position as in 42005) and rigidness. The steering. Here you can see the servo (mounted upside down in order to provide more space for the battery block above, steering shaft that goes above the driveshaft, 12T gears (pinions) and 13L racks joined to the wheel hubs. In order to allow the suspension travel, the gears has 1/2L offset from the racks and slides together with the shafts along the mounting points when the suspension compresses. It's a fully legal, but still allowed in LDD and works like a charm! The only mistake that the hubs must be from Claas, but they aren't presented in LDD unfortunately: Just to explain why I used the clutch gears (but with no gearbox actually, ha-ha ), the drive and steering systems intersects so hard, so followed TLG way and used the same solution that they did in the official models (42029, for example) - passed the one through the other. Green is a drive subsystem, blue - steering. The Axles. Here you can see how the steering shaft slides by 0.5L (notice the gap between the 12T black gear and LBG liftarm) - it provides about 1L suspension travel for the both axles. Other images, the story of a modified hull (by Phil), LDD file and instruction in PDF are coming soon...
 -
I have seen others recreating the sets from the 2013 Castle line. Here is my take on "Forest Ambush." I made a small recreation of it. Unfortunately, in mine, there is no gold cart, puppy, and the bad guys win And here is a link to my FLICKR to see the first picture in the photostream: http://www.flickr.com/photos/92878490@N03/12914198254/ There is also a story attached to this in my FLICKR, as it is a build for my character Silas in the Lands of Classic Castle found at www.classic-castle.com I tried to incorporate new tree techniques and small foliage in ways I had not totally seen yet. I would appreciate any comments or criticism on the build itself.
-
Vic Vipers are cool! Sci-fi, because Nick and Simon told me too. Here is my first vicviper and creations for charity donation, ill paste a link when it shows up in the store. stickers are from lego universe sticker book, many thanks to Sean and Steph! larger versions can be seen on my flickr (link in my signature) Well simon? :P David
-
 I would like to present my motorized and remote controlled (IR) version of this year's Monster Truck set (42005). My first goal was to keep the overall look and dimensions the same as the official model: The wheels, chassis and body are in the same positions, Only the axles, inner workings, and battery box have changed. My second goal was to somehow get the vehicle to have both steering and 4WD: As you can see above, I achieved the steering by making the entire front and rear axles turn via the use of gear racks and 6L links, while the drive goes through the ball joints, differentials, and portal hubs. Steering is handled by a PF Servo Motor, while drive is handled by a PF L motor. It is powered by a PF Rechargeable Battery, and a PF IR Receiver V2. My third goal was to increase the vehicles clearance as much as possible: And my last goal was to maintain a good amount of articulation: I had to modify the suspension attachment to allow an extra degree of movement to allow the suspension to operate smoothly. It runs quite well over small obstacles, however it is very top-heavy, so it does roll over quite easily. This isn't helped by the fact that as it turns, it leans outwards (opposite to how a skateboard works). Here are the parts (guts) that I had to remove from the original model: All pictures can be clicked on for larger versions at Brickshelf (once moderated). Here are some more pics: And last but not least, here is a link to the LDraw file: 42005_motorized_monster_truck.mpd Overall I am pleased that I was able to get this motorized given that there was only a small space to work with, and the model is very sturdy. I hope you like my motorized and RC 42005 Monster Truck. Any and all feedback/constructive criticism welcome. Edit: I have submitted this MOC to Rebrickable. Edit: I have created a quick video: Sorry about the audio quality - it was a very windy day!
 -
My home LUG - CoWLUG, the Colorado-Wyoming Lego User's Group - was asked to put up a display at the Laramie Train Depot Open House two weeks ago. Our setup took two and a half hours, and we ran the show more or less all day over the course of the weekend. Stuart of lifelites.com was this show's organizer. He hacked together some PF IR receivers and a couple of barrel connectors as an experiment. What we ended up with was an awesome fully remote-controlled layout for both 9v and PF trains. This allowed us to not have to take shifts in the center "pit" where all the regulator gubbins were at. In addition, we also had interactive arcade buttons set up that allowed the visitors to control various functions in the layout. This was also the button's first outing and we plan to have more functions at the next display. This year, one button controlled the track power for the elevated Chicago-style trains, another controlled the pumpjack on top of the Steampunk district, and the third controlled the steam plant for "Peter Piper's Pickled Peppers Plant". The buttons also helped keep the kids from glomming onto the trains as they went by. Of course, now you'll want images I suppose. *sigh* ok Cows are indeed a running theme, considering how the name is "CoWLUG". Hide yo' kids and hide yo' cows. Grumpy Thor is grumpy. Lego displays = srs bsns (CoWLUG displays =/= srs bsns, however). This is where the real fun happens. I feel my camera car is especially graceful. Just look at that low profile! Did I mention Stuart also had a CNC and engraved bricks for a while? It broke though and he hasn't gotten it working again yet. So there is a use for those Dino Attack pieces, at least. I still think the squid in the lower middle is the best bit of this picture. Among other things not pictured, there was a Doofenshmirtz Evil Inc. skyscraper (from the show Phineas and Ferb of the Disney Channel) and a prison complete with prison riot. There were guards dual-wielding bananas in one hand and tommy guns in the other. Ostriches were involved. Well, that should about wrap it up. Feel free to ask questions! Edit: D'oh, I forgot - I'll be posting my custom trains that I built for this event in their own thread. Look forward to that, I know I will Edit2: Oh snap, I forgot another thing. My mom took the pictures, which is why they're so good. Thanks Mom!
-
I'm Back!! After forgetting to finish last years advent calendar after Day 18 or something like that, I came back! This year I will try my best to be punctual and get everyday in there! .... I hope .... Anyway, let's get started: Day 1: We have a police officer with his standard cup of joe. Baseball hat inclueded. Spares (Not pictured): Extra Black Hat Extra Red mug Oh, and i forgot to include a picture of the instruction sheet that just wanted to tell me about choking hazards and winning!
-
I've been wanting to get the funny lettered tiles for quite some time now, and this year, with little interest in other theme sets, I decided the time had come to explore this 'Office & School Supplies' section of the LEGO S@H website. I must admit the set did look a bit too colourful and childish at first glance, but the price was good, and it had a nice pieces selection. So, let's see how the set grades fro parts, appearance and 'playability'. Theme: Gear/Office & School Supplies Set name: Business Card Holder Set Number: 850425 Price: 14.99 $, 11.39 £, 12.99 Euro Pieces: 151 (+ 1 gear) Minifigures: 2 Year of release: 2012 Links: Bricklink and Brickset The Box Front Matching the set name, the box has a pretty clean, business-like design. The almost plain yellow background is split in the upper portion by a wave-y white line which separates the LEGO logo and set name from the rest of the info. I suppose this is a standard box for all countries (contrary to usual sets which have regional differences between NA and European versions); in fact, the set information include age range, pieces count and the words 'Building toy' (in three languages), just like the North American standard. On the other hand, the set number is conspicuously absent from the front of the box, probably due to the fact that this is a 'Gear' set and is sold in a different category from the normal themed ones. The size of the box is approximately that of a medium-small standard set. Back The back is quite bare as well, with only the set name (in 5 new languages this time; of course, Italian is not there!) and a shot of the minifigs and business card together with the parts callout. LEGO designers really wanted to keep things simple in this design. Sides Not much to say about the sides. The upper one (the only I photographed), sports a 1:1 mug shot of the smirking male minifigure, the LEGO logo and the usual info about production. Apparently parts in this set come from Denmark, Hungary, Mexico and China. Surprise! You may have notice the standard 'Put your finger here to open the box' spot on the back of the box. Well, that's a totally useless addition, as this box comes with not-glued side flaps and can be open normally, without any need to indent the back side. I can only suppose the box designers simply used a common template and did not bother to check the actual product they where working on... Contents Inside Inside the box, we find three thick polybags, one for the instructions and business card, one of the lettered tiles and one for the other pieces. All the polybags are made of recyclable plastic, but the bigger one includes some more ink for the usual LEGO safety warning in a plethora of languages. The parts' selection isn't spectacular, for the normal bricks, but includes ever useful parts in a number of colours. Of course, the raison d'etre of this set are the printed tiles, and there's plenty of those! New pieces The new pieces include all the special characters and number tiles (all of which in Black): Tile 1 x 1 with Silver '-' Pattern, Tile 1 x 1 with Silver '.' Pattern, Tile 1 x 1 with Silver '@' Pattern, Tile 1 x 1 with Silver '_' Pattern, Tile 1 x 1 with Silver Number 0 Pattern, Tile 1 x 1 with Silver Number 1 Pattern, Tile 1 x 1 with Silver Number 2 Pattern, Tile 1 x 1 with Silver Number 3 Pattern, Tile 1 x 1 with Silver Number 4 Pattern, Tile 1 x 1 with Silver Number 5 Pattern, Tile 1 x 1 with Silver Number 6 Pattern, Tile 1 x 1 with Silver Number 7 Pattern, Tile 1 x 1 with Silver Number 8 Pattern, and Tile 1 x 1 with Silver Number 9 Pattern. I'd also like to notice that , for some reason, the set includes (or, at least, this particular one does) 3 Q tiles, whereas the parts list only shows 2. It's also interesting that you cannot write a whole web address with these tiles, as there are only 2 W there... Maybe next version will include a special 'www.' tile as well. Instructions Upon opening the instructions and card polybag, I felt a rush of nostalgia for the old times, as the instructions 'booklet' is no booklet at all: it's an old style folded sheet. Now, I'm well aware we get plenty of these in polybags of all themes, but I haven't see something like this in bigger sets for a very long time. The back of the business card has blank spaces where to write your name, address, e-mail/web address, phone number and (I suppose) birthday. The instructions have a nice and relaxing light-blue background, almost no pieces call-outs (see next picture) and are easy to read and follow. Again, as on the back of the box, the last part of the instructions sheet is dedicated to the parts list. Minifigures Nothing spectacular in the minifigs compartment. These business couple sport some plain overalls, very common in the City theme nowadays and cured bill red caps, probably to give them a window-cleaner or bill sticker look to either make you feel as big boss or movie star. The faces, too, are very common, with the smirking male and soft-eyed, cherry-lips female. Always an useful addition to ones collection, but definitely no news at all. The back printing of the torso is no surprise even with such simple designs, nowadays. And, of course, the heads do not sport back printing, since the caps could not cover them. Building We start off by building a sort of small swimming pool-like, tiled box with a rainbow-ish back wall. We go up until al the 2x1 and 1x1 coloured bricks have been used, and top both sides with the 1x12 white plates. Do not worry, though: you won't have to look at the mix-matched wall for long! In fact, the business card will cover up most of the build and you will be able to rest your eyes on those smiling minifig faces (or your own personal info) for as long as you'll wish. Speaking of the two workers, they will have their personal stands to be impaled, well, stand on, while... ...they'll guard your bill-board yellow 6x10 plate. Here, I used up all the Es for the first word, so had to resort to a flipped 3 to complete the second word. Bonus images Let me introduce myself It's quite funny to browse through the tiles to pick up your letters and compose bill-board announcements and such. Just be aware of the limited number of letters at your disposal. Again, I had to resort to a little trick (photoshop, in this case), to complete the second word, having used all the (2) Rs in the glorious Eurobricks name. I would advise people to buy a second copy of this set if you think you'll need many of the same letter for your compositions. Final comments Overall, this is a nice little set, with pretty unique parts and a fine number of more common, ever used bricks and two generic worker minifigs. Design & Colour scheme – 8/10 (Very well proportioned and efficient. The only con is the somewhat too childish colour scheme, considering the business-oriented look of the set, as shown on the box.) Minifig – 8/10 (A happy working couple to set up our business card holder and guard the bill-board. Minus points for the very common parts, though.) Parts – 9/10 (All useful parts here, with the big plus of the printed tiles. The new special characters are an interesting addition, and the letters will be useful in any collection.) Playability – 6/10 (From an AFOL's point of view, this set is pretty poor in sheer playability. I mean, there isn't even a secret compartment of flick-fire missile! On the other hand, I suppose kids can have lots of fun with the little workers setting up and tearing down the bill-board.) Build – 6/10 (Very very simple and plain.) Price – 10/10 (Considering almost half of the parts are printed, this is a very good set price-wise.) Overall: 7.8/10 Very good As always, questions, comments, and pic requests welcome! If you like my reviews, and would like to learn how it's done, please consider joining the Reviewers Academy:
-
Hi, everybody. I submit to your attention the photoreview of a remarkable set of 79110 Silver Mine Shootout from the Lone Ranger series. Set details: Theme - Lone Ranger Year released - 2013 Pieces - 644 Minifigs - 5 RRP - £69.99 / US$69.99 Price per piece - 10.868p / 10.868c Age range - 9 - 14 Packaging Dimensions - 35.4 x 37.8 x 9.4 cm Weight - 1.34Kg Box of this set of very impressive sizes. And it is rather heavy. On the face, except the set, it is possible to see: - all heroes of this set - recommended age rating and the set name - company logo Disney, belonging the rights to "Lone Ranger" On the back party of a box are shown both game, and functional components of a set which in a set very much and there is a lot of! The face parties of a box - as scale here are represented... all minifigs of a set! Having opened a box, we see that she is almost completely killed! Its rather big weight also is explained by it. Box contents: - 7 big packages with details - instructions - are packed into packages and laid by a piece of cardboard that weren't rumpled! In the same place lie both falls imitation, and stickers. - Falls and stickers Instruction. In this set there are 2 parts of instructions. List of details: In a set there are many rare, interesting and simply necessary details! I want to pay your attention that the set justifies the name "Silver Mine Shootout" as here really there are a lot of silvery details! On a photo the part them is only small. Also in a set there are a lot of transparent details! And even there are rare Trans-Clear Tile 1 x 4! Minifigs. In a set of 5 minifigs, but all of them are interesting! - Chief Big Bear - the most remarkable minifigure of the Indian! Hairdress, torso, the head - everything in it is simply magnificent! The head at a figure the bilateral. Pay attention to a mouth - when it is closed, looks as though toothless and when it is open - all teeth on a place! The torso is also ornamented from 2 parties. The hairdress is executed from rubber. - Tonto - this Tonto differs a little from all other versions in sets of this series! The raven, hairdress (also rubber) and a tomahawk - all this meets and in other sets of "lone ranger". Distinction in drawings on the head, торсике and feet - all of them in dust \dirt! Ordinary Tonto's comparison with Tonto from this set: Thanks to sets of this series it is possible to collect quite good "army" of Indians! - Lone Ranger - this figure also differs from the standard ranger drawing on a face, a torso and feet. Comparison of rangers: - Kyle - quite interesting bandit. Hat, the weapon and scarf - all this already saw. And here a torso ornamented from two parties, quite interesting! Head, by the way, the unilateral! - Butch Cavendish - a figure remarkable and charismatic. But differs nothing from same in a set of 79111 Constitution Train Chase. Both the head, and a torso - bilateral. The hat with hair is uniform and executed from plastic. Bandits from all which are available for me, "Lone Ranger" sets! We pass to assembly. During assembly I will show you and functional features of a set. And them as you will see, there is a lot of! At first separate elements of a set gather. The cart car - is used for transportation of silver ore. Parts of mine which disappear at "manual explosion" Elements of a design and mine interior. Mine basis. Here the first function - car pushing. Function of "explosion" of a wall. "The second floor" mines. Function of "explosion" of the rock. "The third floor" mines. "Magic floor" function. One more feature of the "magic floor" function. Final part of assembly. Dynamite throwing. Firing function... cow skull! And so, assembly is finished! Let's consider mine on - in more detail. Let's "recover" mine, having added minifigs. In a set surprisingly there is a lot of spare details! Result: - Minifigures and a mine design in a set - are smart! In general, all sets of this series - ideal "revival" of the Western (IMHO)! I wait for your responses and comments! Also excuse for my bad English!
-
The First Architecture set for 2013 will be: 21017 Imperial Hotel Designed by Frank Lloyd Wright from 1916-1922, the Imperial Hotel of Tokyo, Japan was commissioned to bridge the divide between the Western and Eastern worlds. This modern masterpiece exemplifies Frank Lloyd Wright's imagination and genius, designed in the shape of it’s own monogram logo and strong enough to withstand Japan’s frequent and devastating earthquakes. Today, the main entrance and lobby are all that remains of this icon, displayed in the Meiji Museum in Nogoya, Japan. This highly detailed LEGO® model, co-developed and designed by LEGO architects, captures all of the distinctive features that made the Imperial Hotel an architectural landmark for generations. The assembled Imperial Hotel model stands over 11" (28cm) wide on a base with printed name label. Set includes a booklet with facts about the building, its construction and its history. • Replica of real-world architectural landmark • Booklet included with details on design and history (English language only) • Explore advanced building techniques • Collect all of the LEGO® Architecture series models • Measures over 4" (10cm) tall, 11" (28cm) wide and 9" (24cm) deep Pictures link to HR images 2500+ .pxl! 1188 pcs. and range in the $90-$100 I can only think this will be Frank Lloyd Wright hotel in Tokyo which has been sadly demolished! 21015 The Leaning Tower of Pisa (From TLG official website) March 15th. 2013 The Leaning Tower of Pisa (Torre pendente di Pisa) took almost 200 years to complete and has stood beside the Cathedral of Pisa for over 600 years. Thanks to its famous tilt, it has become one of the world's most recognizable architectural landmarks. The story behind the bell tower spans over 800 years of European history and provides a fascinating glimpse into a miracle of medieval engineering. While the Tower of Pisa is most known for ”leaning”, it would still be a remarkable architectural structure without this famous feature. Constructed at a time when there was very little building of this kind being carried out in Europe, the intelligent use of columns and arches demonstrates an in-depth understanding of weight and load characteristics that was way ahead of its time. What the architect overlooked however, was the clay-based soil and the need for a foundation capable of supporting a bell tower that would eventually weigh 16.000 tons (14.500 metric tons). The eight-story tower was built with limestone and lime mortar, with an exterior covering of marble. Interestingly, the limestone is probably why the tower has not cracked and collapsed – the rock is flexible enough to withstand the pressures placed on it by the tilt. The bottom story of the tower is an arcade of 15 closed marble arches. Each of the following six stories contains 30 arches, while the final story, or bell-chamber, has 16 arches. Facts Location .....................................................................................................Pisa, Italy Architect .....................................................................................................Various Date ............................................................................................................Started 1173 – Completed 1399 Construction type .....................................................................................Bell Tower Architectural style .....................................................................................Romanesque Tower/Gothic Bell Chamber Materials ....................................................................................................Limestone, Lime mortar, Marble exterior Height .........................................................................................................8 stories, 185 ft. (56.4 m) Diameter of base ......................................................................................50 ft. 9.6 in. (15.484 m) Weight ........................................................................................................16,000 tons (14,500 metric tons) Angle of tilt .................................................................................................3.97 degrees 12 ft. 10 in. (3.9 m) from vertical Designing the Model As an Architectural Artist, my desire is to capture the essence of a particular architectural landmark into its pure sculptural form. I first and foremost do not view my models as literal replicas, but rather my own artistic interpretations through the use of LEGO® bricks as a medium. In an attempt to appeal to the vast admirers of the Leaning Tower of Pisa, our specific aim was to ensure that it could be both afforded and constructed by anyone looking to enjoy displaying a miniature Pisa they can call their own. To do so, I needed to adhere to a minimal element/part pallet, which would affect the model’s scale, level of detail and construction techniques while maintaining structural integrity.' Adam Reed Tucker 21018 United Nations Headquarters Not much info on this yet! but........ HR images added 21.06.2013 Enjoy! :classic:
-
 This topic is for people to discuss what people would like to see in the avengers 2 sets (I mean why wouldn't they?) What figures will finally be made into the official category? Will we see LEGO Wasp, Ant-Man, Black Panther or Ms Marvel? Obviously we can't know for certain but we can always guess!! Also this is also a place for people to display some of the avengers mocs they have made of scenes and figures both from comic, the first movie or even made up scenarios!
 -
I love LEGO® trucks. I just can't help myself when a new civilian range comes out; last year's range was great, and this year's looks set to continue the current trend. My love of, specifically, petrol tankers can be traced back directly to this set - one of the first sets I remember owning, and ground-breaking for its time. But time has moved on, and LEGO sets have become far more intricate. The release of an Octan tanker relatively soon after 2010's 3180 Tank Truck is rather surprising; in this review I'll check out the latest offering and see how it compares to its (slightly) older sibling. Incidentally, 3180 was one of the first sets I reviewed early in my EB Reviewers Academy career. If you compare to my earlier review, you can see how I've (hopefully) improved! Review: 60016 Tanker Truck Set Information Name: Tanker Truck Number: 60016 Theme: CITY Release: 2013 January Wave Parts: 191 Figs: 1 Price: GB £17.99 | US $19.99 | EUR 19.99 - 22.99 | AU $29.99 | CA $24.99 | DKK 179.95 Links Brickset ... Shop@Home ... Bricklink ... Peeron (not yet listed) The Box Click for a full-frontal view in various sizes Once again, Orthanc dominates the LEGO CITY skyline, while our Tanker breaks the fourth wall into the familiar blue CITY livery. It's a tried and tested formula, dating back a full ten years to the advent of World City in 2003, but still looks fresh. The box is deep, measuring 260 x 188 x 70 mm (W x H x D); it's the same height as 3180 but considerably narrower and shallower. This set is GB £3 pricier than 3180, which had 30 more pieces; the smaller box size therefore represents an environmentally-conscious move by TLG (or, for the cynics among you, a cost-saving in logistics ). HEY! Look at these features! Ladder, gun-on-a-hose, coffee mug replete with petrol fumes, ladder again, and cab the dude can sit in! What more could you want? We'll examine these features in depth in due course. Click for larger sizes The usual CITY modular build is alluded to, rather than demonstrated this time: we are shown two bags falling from the box but not what they build. However, LEGO's new subversive 'Pokemon' Collect Them All! strategy once again appears, but there are only two other civvy sets this year, so you'll have to go back and complete your collection with last year's. And you should - they're good! The little petrol pump that accompanies the tanker gets its moment in the limelight on the top of the box: Quite why it's isolated in a field on the City outskirts is anyone's guess, and I'm still uncomfortable with the driver's delight at drinking coffee in the close proximity of flammable liquids, particularly as it occurs to me now that the black tubing might well represent Diesel. At least he isn't smoking! Apologies, by the way, to Americans: please substitute 'gas' for any appearance of the word 'petrol'. Contents The thumb-tab box opens to reveal two polybags, instructions, and sticker sheet fitting quite snugly inside. They are accompanied by two loose parts: the hose-and-gun combo. Only one is required in the set; whether the second will appear in everyone's, or I've just been lucky, remains to be seen. Decal Sticker Sheet Oooh, shiny! The sticker sheet is printed on white material that is rather reflective, and required careful photography to remain clear. As has been the trend of late, the front of the cab is stickered, but as we shall see it doesn't entirely replace the usual grille tiles. There's a sticker for the petrol pump (top left); the rest go on the truck. The Instructions The single booklet is of good quality, and features a display very similar to the box front, but with a slightly broader panorama. The Gagne Kid guards the rear, presumably to deter people from sneaking a look at the inventory. The Modular Build is demonstrated on the inside front cover: Bag Two's cab and tank builds don't connect directly without Bag One's chassis; obviously the disembodied wheels don't. Having looked at this page, naturally by now you would have poured all the parts onto the carpet, albeit in separate piles. Too late, the opposite page warns us not to do this. Winding the hose onto the reel could prove challenging to younger kids; or at least doing it neatly (it's tricky enough for adults). Maybe I'm underestimating the capabilities of the average 6-year-old. I should remember that programming the VHS caused young Rufus far less trouble than his elders! [VHS = archaic system for recording moving pictures onto magnetic tape, for those interested in ancient history.] You might have noticed the part call-outs on the previous picture. Yes, they are present throughout: This surprised me, in such a small set. With typically only 1-3 parts per step, it isn't strictly necessary, but I for one won't complain. Towards the rear we find the latest CITY range diorama, showcasing the new yellow cement mixer , and the strange 1950s-throwback recovery truck : The two sets from 2012 promoted in the 'Collect Them All!' series also feature here: 4433 Garbage Truck and 4432 Dirt Bike Transporter . The latter is a great set! I'm secretly hoping the garage at the left appears as a set soon. The set inventory is found on the last two pages: you can see them here and here. The Parts Bag One builds the chassis, along with the petrol pump and solitary figure: There isn't a huge amount of interest here. Most of the incongruous blues and browns will be buried in the final model. I'm pleased to see the black flexible tube make another appearance here; it was in 3180 too. The yellow taps, not surprisingly, are the modern variety, without the little hole at the end; one of them is spare. I have a sudden inexplicable desire for spaghetti carbonara followed by biscotti with Vin Santo: Opening bag two, I was momentarily alarmed at the prospect of flick-fire missiles appearing in CITY sets. Fortunately, that is not their use here, though the cynic in me wonders whether TLG is trying to demonstrate alternative uses for these ubiquitous pieces. Otherwise, there isn't really anything of note here, with the possible exception of ... ... this piece, which is found once in both bags: It's a 2x2 brick with studs on one side. It's new to me, but I note that it first appeared in Bag End at the end of last year, and in several sets this year. It's potentially very useful for SNOT work. The Figure The sole figure included in this set wears blue overalls, unlike the 'Oil' jacketed figure from 3180. Let's call him Diesel Dave. He has a rather bland, amiable countenance; I'd rather he had an unshaven scowl. The torso is nice, with some lovely detailing; the black vest under a medium blue shirt, all surmounted by the darker blue (presumably denim) overalls with wrenches and a pencil in the pocket. But it's nothing new: this torso first appeared in 2006. The back is featureless. The Build The first thing built is the little free-standing petrol pump. We'll see it complete later; here I've part-disassembled it to show a simple but nice technique: Three 2x2 white jumpers are used to centre the upper part, and allow attachment of the bluish-grey wheel. The 2x2 black tile is attached to the two white 1x1 bricks with stud on one side; I had wondered why one of the new 1x2 bricks with side studs wasn't used, but you can see that another of these white 1x1 bricks is used in the model, and it makes economic sense to use as small a part variety as possible. The black tile itself will be stickered, and represents the pump's display; the whole is capped by a 2x4 tile offset via its centre anti-studs. The black tube is a little too rigid to allow posing of the figure holding the pump unless both are connected to a baseplate or other studded surface, unfortunately; about the only viable pose on a smooth surface is shown here. Building the chassis will be a familiar routine to anyone who has experience of LEGO's trucks. Long plates form the spine; 2x2 axle plates are separated by either 1x2 tiles or plates; I'm not sure why the tiles were used rather than the 1x2 green plates along the length. Note the black 2x6 modified SNOT plate at the end: this is surmounted by a 1x4 SNOT brick, forming a 2x4 grid of studs for the secure attachment of the rear SNOT panel. The spine is strengthened with more long plates and the rather incongrous brown bricks, which don't show in the final model. I didn't think the 'mustard dispenser' would fit into the cupboard, but it does! Getting it out again requires nimble fingers or vigorous shaking. The front-end SNOT panel has a green modified 2x6 SNOT plate; the top studs mesh with the black 2x4 tiles for extra strength. There's a lot of tiling (or part-tiled plates) on the upper surface here; this allows the cab section to be removed easily should you wish too. The rear end is topped by a 4x10 plate; this leaves a gap underneath which would indeed be found on many trucks, but there's a visible red plate under there. In the final inset you can see the rear-end SNOT panel; the grille-tiled area is a plate lower, which looked a little odd, but there's a good reason for this, as we shall see. I took a lot of extra pictures; if you want to see more steps, check out the pseudo-timelapse in the Flickr display in the spoilers: Bag Two starts with the cab, which is based on a green 6x6 plate. Two friction cylinders form the exhausts; it is into these that the flick-fires will go. I remember a lot of complaints from about three years ago about the lack of doors on LEGO CITY vehicles; it's good to see that TLG has listened and they appear to have returned to stay. The rear of the cab is formed from large wall panels; this leaves a couple of gaps but they aren't too obvious on the finished set. Note the use of the 1x2 SNOT brick here, allowing placement of the steering wheel, and permitting easy reconfiguration to right hand drive for those parts of the world where British influence persists. Yet another of those rather useful modified SNOT plates allows a strong attachment of the windscreen: The obligatory coffee mug takes pride of place, and the whole is capped by the usual 4x6 wedge panel. I like the new wing mirror technique; it means the mirrors can't be adjusted, but this also means they're unlikely to get knocked out of place when you're posing for display or photos. The tank itself is an Octan-themed sandwich which will be familiar to owners of 3180. There is a slight difference: the red plates are the same length as the big green bicurved slopes, meaning that the front and back halves can be separated until the top 1x8 tiles are applied. The two bluish-grey wheels on the top are an aesthetic improvement over the 2x2 round plates on 3180. Cab and tank are applied to the chassis, the wheels are attached ... ... and the truck is complete! We'll look at the overall appearance in the next section. The Complete Set Look! I put the stickers on! Actually, I enlisted the help of a passing monkey who did a demonstrably better job than I'd have done. Let's take a look around, starting with the sides. Both sides are similar; the right side has the 2x3 cupboard and a dark bley grille brick in place of the reel and clip found on the other side: The lines are smart; there are a few exposed studs above the reel/cupboard sections, but at least they are a consistent colour unlike the rear section of 3180. I particularly like the step in the red stripe from the cab to tank sections. The back end is a little 'square': made more apparent by the slight inward slope of the ladder. This can of course be corrected, but as we shall see the ladder tends to prefer this position. The cab looks quite imposing from the front, and is very realistic. It's helped by the sticker over the white 2x4 tile; if you look back to the first picture in this section, you can see how the sticker continues neatly the red and green stripes from the sides. From the back, you can see how the recessed grille tiles of the lower SNOT panel accept the end of the ladder. This is the cause of the inward-sloping ladder; if you don't like this, you can easily insert a 1x4 plate under those tiles, but this will cause the ladder to slope slightly the other way. You might prefer this. The exposed Technic holes of the large green and white curve-slope blocks are a little ugly - a fault carried over from 3180 - but it isn't too obvious. Features Now we can analyse how the features so proudly espoused by the box rear stand up to scutiny. Dude sits in cab, and doors open. As is frequently the case with LEGO trucks, getting the dude into the cab takes a little work - often you have to remove the windscreen as well as the white roof panel, which means the doors will come off too. In this shot, the gap in the black layer between the front headlights is a little obvious, but it isn't the end of the world. [There should be a little recess under between the two sets of headlights, caused by the cab suspension in this type of vehicle, but it's more pronounced because the black plates at the sides are set a stud back from the tiles; I don't think it would be possible to correct this. - Thanks Phazon for pointing this out.] Dave climbs the ladder in the second shot. I don't have much else to say about this. The hose-reel is really the centre-piece of Tanker sets. I remember being amazed by the hose in 1978's 671 Shell Tanker. As I recall, that one was simply a length of hose that you had to stuff into the cupboard - no winch mechanism there - but it was an awesome feature. Here, as in 3180, the reel winch is super. Dave's got a bit tangled here. Fancy a hot dog? Dave has mustard if you need it. Yes, I know, it's a fire extinguisher. As I mentioned before, it can be a little tricky to remove. It's not really an intentional feature, but the flick-fire parts atop the exhausts can be extended slightly for that 'RC' look, should that take your fancy. The bley parts on top of the black exhausts look a little odd. This is a good angle to admire the roof on the tank: the wheels are a smart improvement over 3180. Again not a feature, but it needs pointing out: The rear axles have an open space above, which exposes a red plate from the chassis. On the plus side, with the white 2x2 jumper and green 1x2 plates, this continues the Octan theme; I'd expect a real truck not to be painted in this area, and you can easily substitute these parts for bley or dark bley if the exposed colours bother you. Comparison I never applied the stickers to 3180, so in the interest of fairness I've made the comparison with the 'bare' 60016. To see the stickers on 3180, there's an official picture on Brickset. I actually prefer the newer cab front - even without the sticker, it's neater and more imposing than the heavily-grilled 3180. Here you can see the difference in the wing mirrors; each method has its advantages: 3180's mirrors are adjustable, but more fragile and prone to getting knocked; 60016's are longer, which may be more realistic, and rigid. Obviously, 3180 is a tractor-trailer (semi-container) arrangement compared to 60016's single chassis. 3180 is therefore longer, and more manouverable; in addition, it is perhaps a little more realistic: while examples of both types exist in real life, in the UK at least most tanker trucks you'll see on the road have a tractor-trailer configuration. The single-chassis tankers might be found more commonly at airports, for example. Less obvious is that 60016 is a taller model. It's also neater: a complaint of mine about 3180 was the exposed studs at the rear (see this picture from my rather embarrassing early review). As I've mentioned previously, the white tiles and bley wheels on top of the tank are smarter than 3180's studded round plates. Sadly, the little pump from 3180 has done a runner so I can't compare those. The difference in height is made clear in this front-to-front comparison: 3180's cab livery is a little fussy. I prefer the staggered red stripe on 60016; the red stripe on 3180 is absent at the front. 3180 gets a point for having a footplate enabling easier access to the cab; 60016's dark bley wheel arches are arguably less jarring than 3180's white ones. I'm not really sure about the necessity of orange beacons on the cab roofs of either; however, the rounded lights on 60016 are more realistic - and less obtrusive - than 3180's cones. Visible here are 3180's gearstick, and the provision of both mustard and ketchup! Conclusion 'Here - that'll be £2.98 for your five millilitres of petrol, sir.' Tanker trucks are a staple - a necessity - of the LEGO Town/CITY range and have been since 1978. 2013's latest addition provides a smart, attractive addition to the range, and its Octan livery is compatible with other fuel-carrying vehicles or features from the CITY and even Trains lines; it will even sit quite happily alongside the earlier 3180. As a standalone set, it's a little lacking in play features, though perhaps there is no less than we should expect; it is crying out for a new Octan petrol station to be added to the CITY range - we haven't seen one since 2007. I hope you'll agree 60016's tanker is a beautiful truck - the livery is clean and flatters the shape of the vehicle; its lines are smart and a definite improvement over some of 3180's rough edges; even the stickers look great! My only real criticism, aside from the somewhat lacklustre figure, are that as an single-chassis vehicle it lacks a degree of realism compared to most articulated tanker trucks that I see on a typical British road. Scores Design: 10 I think this is a beautiful truck. I simply love the colour scheme, which is brought to life by carefully-designed stickers, and which flatters the clean lines of the truck. The cab's front is tastefully rendered, and the whole very realistic - you could almost imagine you were looking at a scale model. Build: 8 Never repetitive, and with a few interesting techniques, it's a fun build, albeit perhaps better suited to a younger builder if you prefer a challenge. There are a good few tricks in SNOTting to be admired, and a minor lesson in offsetting in the build of the pump. Parts: 6 There really isn't much you probably don't already have in your collection, especially if you own 3180. The figure is rather old-hat and a little disappointing if you're on the lookout for new faces or torsos; I'd have preferred a quirkier set of facial features, for a start - as he is, Dave is a little devoid of personality. Playability: 7 Compared to some other CITY vehicles, there isn't much to do with this set on its own. It comes into life as a service vehicle for a larger town, and would be particularly happy accompanying the recent Airport set... but most of all, it's pining for a new Petrol Station. Please! Value: 7 £17.99 represents a significant hike of this price niche. The similarly-sized 'Collect them all!' sets from 2012 were all £14.99, as indeed was the 30-piece larger 3180. Inflation sucks, and I'm sure TLG knows what it's doing, but it's a little pricey for the collection of parts. The whole, however, is a thing of beauty, and I for one won't regret the outlay. Overall: 75% My score: 9/10 Aesthetics wins over arithmetic here - I love this. I think you will too. Thanks for reading - I hope you enjoyed the review! Please leave comments. Rufus Compare the evolution of the Octan tanker and my reviewing skills in my 3180 review! My flickr set If you like my reviews, and would like to learn how it's done, please consider joining the Reviewers Academy:
-
Official Press release 18.01.2013 10232 Palace Cinema (Available March 1st. 2013, for VIP Customers 14th. of February!) US $149.99, CDN $199.99, DE 139,99€, UK £119.99, DK 1,099.00 DKK Build a grand premiere at the Palace Cinema! It's premiere night at the Palace Cinema! Illuminate the night sky with the spotlights as the child star arrives in a fancy black limousine! Gather the crowd on the star-studded sidewalk, then head into the detailed lobby with a concession stand and ticket area! Take the grand staircase into the theater with a large screen, movie projector and reclining chairs for 6 minifigures. Introducing the latest addition to the LEGO Modular Buildings series, the highly detailed, 2-story Palace Cinema corner building. This collectable model features a sidewalk of the stars, brick-built entrance doors, posters, sign frontage, a tower with spires and rooftop decorations. Includes 6 minifigures: child actress, chauffeur, female guest, male guest, photographer and cinema worker. Includes 6 minifigures: child star, chauffeur, female guest, male guest, photographer and cinema worker Features brick-built entrance doors, posters, sign frontage, tower with spires and rooftop decoration, lobby, concession stand, ticket area, staircase, big screen, projector and reclining seats for 6 minifigures Vehicles include classic-style limousine Hard-to-find elements include a red baseplate and dark tan, dark red, and gold pieces Seat a 6-minifigure audience in the reclining seats! Play on the star-studded sidewalk, in the detailed lobby or in the big-screen theater! Collect and build an entire town with the LEGO® Modular Buildings collection: 10224 Town Hall, 10218 Pet Shop and 10211 Grand Emporium! Palace Cinema measures 15" (38cm) high, 10" (25.5cm) wide, and 10" (25.5cm) deep Limousine measures 1.6" (4cm) high, 5.9" (15cm) long, and 1.9" (5cm) wide Images link to HR pics +7000.pxl Download Designer Video in HD (29.7 MB) Enjoy! :classic: VIP members may purchase the set starting on February 14th. S@H and Lego Brand Stores!
-

LEGO Batman: The Video Game code from 2013 sets
piemaster1446 posted a topic in Culture & Multimedia
I saw in the Licensed forum that The Bat vs Bane Chase With Tumbler came with a code for the PC version of the original Lego Batman game. The code I saw was: QWIH4 - M6EQM - J986Y It also said to unlock it at the website LEGO.com/batmangame which wasn't working. What should I do? -
Now that the the 42010 + 42011 'Dragster Combi Model' instructions have been provided by DLuders, and have finally made their way onto the Lego Technic Website (here or here, but not on the Lego Customer Service Building Instruction page yet), I present my pictorial review of this model. I won't spend too much time talking about the boxes or parts as I have already covered those topics in my pictorial reviews of the individual sets (42010 Off-road Racer and 42011 Race Car). All pictures can be clicked on for a larger view, and are viewable in my Brickshelf folder (once moderated). Set: 42010 + 42011 Name: Dragster Combi Model Theme: Technic Year: 2013 Pieces: 231 (+100 spares) Price: US $39.98 (US $19.99 + US $19.99), CAD 49.98 (CAD 24.99 + CAD 24.99) Links: 42010: Lego Shop@Home (US) Lego Technic Website Lego Technic Instructions Brickset Bricklink Rebrickable 42011: Lego Shop@Home (US) Lego Technic Website Lego Technic Instructions Brickset Bricklink Rebrickable Pictures: Brickshelf (once moderated) Related Reviews: 42010 Off-road Racer 42011 Race Car The Boxes The back of both boxes shows the Dragster Combi Model, and states 'This building instruction only at: LEGO.com/technic'. This message is also reiterated in the building instructions for each set, as well as the supplementary booklet that comes with both sets. Building Instruction The instructions for this 'Dragster Combi Model' don't come as a printed booklet with either of the two sets, but must be downloaded from the LEGO.com/technic website, via this direct link to the PDF, or via this link provided by DLuders. The PDF is listed as a 7.77MB download, and contains 45 pages. The quality of the PDF is a lot better than the quality of the A Model instructions of either set, and, as is typical for download-only B Model instructions, these instructions feature a white background which will save ink/toner when printed. Random page from the instructions (Page 41, Step 28): Pieces To make this 'Dragster Combi Model' you will either have to: pull apart both the 42010 Off-road Racer and 42011 Race Car sets, buy another copy of each set, or already have the pieces available in your collection. The last option might be a bit difficult at the moment as both of these sets contain new pieces. For details of the new pieces, please refer to my previous pictorial reviews (42010 Off-road Racer and 42011 Race Car). I took the second option, and bought another copy of each of the sets. The pieces from 42010 Off-road Racer (on the right) and 42011 Race Car (on the left): The build This 'Dragster Combi Model' uses more pieces than either of the A Models, so there are slightly more pages of instructions, and a few sub-models, but it has about the same difficulty as the A Model of either set. In my previous pictorial review, a request was made by Lost_In_Noise to have some shots of the build process. So here they are... (remember that you can click on each picture to see a larger version) Page 4, Step 5, and Page 5 Step 8: Page 8, Step 10, and Page 13 Step 15: Page 16, Step 18: Page 24, Sub-model, and Page 25 Step 19: Page 28, Step 20: By turning an axle, which turns a worm gear, which then turns one of the new 8 tooth gears, the driver's cage opens and closes. Page 35, Step 27, and Page 40, Sub-model: The sub-model also features a mechanism using a worm gear and the other new 8 tooth gear to enable to rear wing/spoiler to be adjustable. Page 45, Step 32: The completed model. The Dragster Combi Model I like that TLG added the shift indicator light into the cockpit of the Dragster: Spare Pieces The 42010 Off-road Racer contained 160 pieces, with 7 spares. The 42011 Race Car contained 158 pieces, with 6 spares. That adds up to a total of 331 pieces for both sets combined. The 'Dragster Combi Model' has a total of 231 pieces (if I counted correctly), utilizing about 70% of the pieces from both sets, and leaving 100 spares left over. I would have liked to see a higher percentage of parts used, and would have liked to see both pull-back motors used in this model. All Three Models Conclusions First of all, I would like to re-state that I wish TLG would release the instructions for the B Models and Combi Models' at the same time that the respective A Models sets are available to purchase! The instructions for this 'Dragster Combi Model' only became available about one month after I had already received my copy of the 42011 Race Car. I'm not sure that the wait was worth it either, as this model is a little bit disappointing in a number of ways. Although the combined model uses more pieces then either of the A Models, it only uses 70% of the total number of pieces available, and I was hoping to see both pull-back motors used at once. This model is also heavier that either of the A Models, which means that it doesn't perform as well either. 42010 Off-road Racer: low-pile carpet = 9.60m (31.45'), smooth tiles = 11.50m (37.75') 42011 Race Car: low-pile carpet = 7.85m (25.75'), smooth tiles = 8.55m (28.05') 42010 + 42011 Dragster: low-pile carpet = 5.65m (18.55'), smooth tiles = 6.30m (20.65') If you want the best performing model, I suggest getting the 42010 Off-road Racer. I think TLG did an okay job with the use of colour in this model, and while I didn't use the stickers, most of them look okay in the combined model (see below), except for the stickers on the rear wing/spoiler which look a little bit out-of-place. This model does have some nice details though, such as the engine air intakes and exhaust pipes, shift indicator in the cockpit, and even 'pedals' for the driver. However, while this model is easily recognisable as a dragster, it is still out of proportion when compared to real dragsters. The back is way too big, the chassis isn't skinny enough, and the rear tires aren't large enough. On the plus side, it is nice that both of the extra features (opening/closing of the driver's cage, and the adjustable rear wing/spoiler) can be controlled via axles sticking out the back of the vehicle. So given the above comments, is this model greater than the sum of it's parts? I would have to say 'no'. If you can only afford one of these sets, I would choose the 42010 Off-road Racer. If you can afford both sets, I would keep them built as the 42010 Off-road Racer and the 42011 RaceCar. If you can afford to get two of each set, then the 'Dragster Combi Model' is still an ok model, but I don't think that it is a 'must have'. As always, you're opinion may vary.
-
Following on from my review of the 42011 Race Car, I now present to you my pictorial review of the 42010 Off-road Racer. All pictures can be clicked on for a larger view, and are viewable in my Brickshelf folder (once moderated). Set: 42010 Name: Off-road Racer Theme: Technic Year: 2013 Pieces: 160 (+7 spares) Price: US $19.99, CAD 24.99 Links: Lego Shop@Home (US) Lego Technic Website Lego Technic Instructions Brickset Bricklink Rebrickable Pictures: Brickshelf (once moderated) The Box A fairly standard looking Technic box, measuring 26cm x 14cm x 6cm (10.25" x 5.5" x 2.4"), which is slightly thicker than the box for the 42011 Race Car which was 4.5 (1.8") thick. The back of the box is exactly the same as the box of the 42011 Race Car, and shows you how you can combine the two sets together to create a Dragster. The left side features French (translated as 'The off-road buggy') and Spanish (translated as 'Off-Road Racing'). Front and back: Top and bottom: Left and right: Boxes from both 42011 and 42010: The Contents One small bag of pieces One medium bag of pieces One larger bag of pieces What looks to be a new pull-back motor for 2013, the same as in 42011 Race Car Four Tire 43.2mm D. x 26mm Balloon Small loose in the box One sticker sheet A supplementary booklet (12 pages) A single building instruction book (48 pages) New and/or Interesting Pieces Four of the new smaller panels, numbered 21 and 22. The Lego part numbers for these in blue are 6022764 and 6023035 respectively. Close-up pictures of these parts can be seen here and here What looks to be a new pull-back motor. I don't have any previous ones to compare, but it looks similar to Pullback Motor 7 x 5 x 3 (Motor 6) or Pullback Motor 8 x 5 x 3 (Motor 6a), although it has different mounting points. What looks to be a new Technic, Gear 8 Tooth, as shown in my 42011 Race Car Pictorial Review. Six Dark Bluish Gray Technic, Axle and Pin Connector Hub with 2 Axles. While not new, these were released in 2012 and have only appeared in four other sets so far. Two Black Technic, Panel Fairing Small Smooth Short #1 and #2, but I wish that these were blue instead Two Black Technic, Panel Fairing Small Smooth Long #3 and #4, and again, I wish that these were blue instead Four Black Tire 43.2mm D. x 26mm Balloon Small One Light Bluish Gray Technic, Gear Worm Screw Blue pieces! While not a whole lot of them, it is nice to see beams in a colour that isn't LBG, DBG, Black, Red or Yellow. The Blue Technic, Liftarm 1 x 9 Bent (7 - 3) Thick is quite rare, having only appeared in one other set before, back in 2002. As the chassis of the Off-road Racer is blue, the seat in this model deviates from the standard blue seat, and is red. The full list of parts can be seen on the inventory page of the instructions, or on the Bricklink inventory page. Sticker Sheet There are eight stickers on one sheet. The sticker sheet is 10.5cm x 8.3cm (4.1" x 3.3"). I did not apply the stickers to my model. Supplementary Booklet The booklet has 12 pages, and shows a few 'play' situations together with the 42011 Race Car, some pages showing other sets in the 2013 line-up, and the back page shows how the two sets can be combined (similar to the back of the box). This is the same booklet that was also in the 42011 Race Car set. Click the images if you want to see larger pictures of the pages. Building Instruction Book The building instructions are fairly standard, presented with part call-outs and the typical light blue background. We get the new graphics on Page 2 reminding us to sort our pieces, which was was also seen in the 42011 Race Car Pictorial Review, and we still get the GEWINNE! kid on the back page. Only some pages are shown here (there are 48 pages in total), and the instructions can be downloaded in PDF format from the Lego website, although the resolution of the PDF is quite poor. Page 7, Step 2: Here we have a mistake in the instructions, but hopefully my copy of the instructions were just part of an early batch and this will be fixed soon. It was easy enough for me to guess what was supposed to happen, but I hope kids in the target 7-14 year-old range don't have too many problems with this. The PDF instructions that are downloadable from the Lego website do not show this error, which suggests that TLC is already aware of the error. Page 17, Step 14: Half way through the build process. Page 43, Step 28: The completed model. Just like the 42011 Race Car, there are two pieces shown left over in the last step of the instructions, one Worm Gear and the new 8 Tooth Gear. Page 46: The inventory page, showing all of the parts and the Lego Element IDs. The Race Car Apart from the pull-back motor, the only other feature of this model is that the cage at the top can open up. Spare Pieces There are seven spare pieces, but just like in the 42011 Race Car set, the only two gears in the set are spare pieces (one Worm Gear and the new 8 Tooth Gear). They are shown in the last step of the instructions, and I can only imagine that they are used when combining this set with 42011 Race Car. The rest of the spares are fairly standard pieces. Conclusions This is only a small Technic set with 160 pieces (two more than the 42011 Race Car), but it is just in time for Christmas so I can imagine this set ending up in lots of kids hands on Christmas morning. With it's slightly larger wheel diameter, this set travels further than the 42011 Race Car: 9.60m (31.45') vs 7.85m (25.75') on low-pile carpet, and 11.50m (37.75') vs 8.55m (28.05') on smooth tiles. The larger diameter wheels also mean that this set takes slightly more space to pull-back than the 42011 Race Car: 1.07m (42') vs 1.02m (40'). So which set is better, the 42010 Off-road Racer, or the 42011 Race Car? Aesthetics: Personally I think the 42011 Race Car looks better, but this is a very subjective opinion, and your opinion may vary. I am glad that we are seeing some more pieces in blue though. Performance: The larger diameter wheels on the 42010 Off-road Racer clearly enable it to out-perform the 42011 Race Car in all of my tests. Functionality: Both sets have the pull-back motor function, although the 42010 Off-road Racer also has the cage at the top that can open. Parts: Both sets feature a very similar set of parts. The 42011 Race Car has two extra panels (Red Technic, Panel Fairing Small Smooth Short #1 and #2), whereas the 42010 Off-road Racer has six of the Dark Bluish Gray Technic, Axle and Pin Connector Hub with 2 Axles and blue beams. It is a close call, but personally I like the 42010 Off-road Racer just a little bit better. Unfortunately TLG hasn't released the building instructions to make the Dragster by combining the two sets yet, but I look forward to building it and seeing how it performs once the instructions are available. Update: The building instructions to make the 'Dragster Combi Model' are now available here or here or here (thanks DLuders). Update: My 42010 + 42011 Dragster Combi Model Pictorial Review is now available. Hopefully I have covered most angles, but if you want any more photos or info, just let me know.
-
Hello all, I bring you a possible World Exclusive review of the 60010 Fire Helicopter. Shipped in from LEGO.com it arrived today, so sit back and lets commence the review! Description: Fight the factory fire with the LEGO® City Fire Helicopter! The factory is ablaze! Fly the LEGO® City Fire Helicopter in to bring it under control! Hover into position and lower the brave firefighter down with the LEGO Power Functions winch. Put out the flames with the onboard water cannon before the whole factory goes up in smoke! The LEGO City firefighters are always ready to save the day! Includes 2 minifigures: a pilot and a firefighter with fire extinguisher. The Box The box is a square box much like the Star Wars boxes for £20 sets. It features a brave firefighter putting out the burning oil containers possibly causing havoc for LEGO Cities oil supplies! The box also has a circle showing the winch which we will get onto later. Back The normal box with all the features and action shots of the set. Side The side with the Pilot and Firefighter once again tackling the burning canisters. Manuals Two manuals for this, with a total page count of 105. Basic piece callouts and general 2 parts per step. Inventory. Minifigs The 2 figures supplied are very nice. Two new torsos (Well to me) and some nice printing on the legs too! (Which seems to be more common now) The backs are printed too. Both are very similar which is good assortment for your army of firefighters. The set This is the so-called factory that is put in the description. It doesn't look like a factory more like a section of storage. I wonder how it could have caught fire? Knowing LEGO we would be seeing no smoking signs or don't go beyond here kind of signs. Oh well. It has a large flame piece from Space Police set.(Freeze Ray Freezy is the set.) and some smaller classic flames. It also has the large barrel pieces seen on the Wind Turbine Set from 2009. The Helicopter Now the reason why we want the set! At a quick glance it looks like a hybrid of the 2010 Fire Helicopter and the 2010 Cargo Train. It has however fit very well and looks neat without too many large pieces. The set resembles the Sea King helicopter as seen here: You can tell it is based of this beacuse of the cockpit and wide open side near the back. Front Features Well this is it. Pretty basic! A water cannon and a tow rope. The water cannon pivots not too well and is only for decoration. The other side is empty. So what did I buy this set for? Well a small piece of function last seen on the 2008 Coast Guard Helicopter (Which I own) It has a small orange button on the side. When you pull the rope down it winds it up. When you press the button it pulls it back up. Pretty cool stuff. So it goes from this: to this! Also I wouldn't miss a time to show you a video too! The usual opening cockpit with levers and a double cheese with sticker. The front seems to have some domes, possibly equipment for measuring things, or locating, tracking etc. Ratings and Comments This set is my first 2013 set. As my first I think it is a good set and worth the money.(£30, Can't find for other counties). The minifigs are good and the helicopter is not another boring helicopter. (Although LEGO do seem to love them!) Some nice parts and accessories and it fits in with the new sets. Ratings Parts- 9/10 - Good new colours and new parts all round. Minifigs- 7/10 - Would have been nice for a worker that is trapped or something of that sort. Build- 8/10 - Not boring but not fantastic. Overall a good: 9/10 A great set worth the money and one to be picked up. Notes: Brickshelf (When modded) Brickset: This Set - Freeze Ray Frenzy - Coast Guard Heli - Wind Turbine Thanks For Reading!
-
To all hello I Bring to your attention the review of one more novelty of 2013 - 60007 High Speed Chase! Little general information: Theme - City Subtheme - Police Year released - 2013 Pieces - 283 Minifigs - 3 The box of a set of time in one and a half is more than boxes from 60017 and 60018! On the face the set is represented: Also here it is possible to see an inscription about existence in a set of an exclusive minifig and a code for game! On the back party of a box too there is a lot of information! Functional and game features of a set: Also there is information on where to find a code for the game City Undercover as to use it and that it gives in game: Face party of a box: Let's pass to box contents! Having opened a box, we find out that it is filled on only two thirds! We find in it: - three packages with details - three parts of the instruction - stickers In instructions there are some interesting pages! These are new police sets of the beginning of year: Game City Undercover advertizing for Wii: The next information on a code for game: It is a little advertizing of sets of City: We pass to minifigs. Them in a set of only 3 pieces - on one on each HARDWARE! - the police officer on the motorcycle - new торсик very much pleases: both a bullet-proof vest, and "police" inscription on it, and a handheld transceiver and in general new colors! The only thing that very much isn't pleasant to me is a sticking-out part of a yellow body in area a breast throat! Also please feet - pockets, various fasteners! The torso is ornamented from two parties! - exclusive minifig - in what I didn't understand its exclusivity, probably in a hairdress? ! But all the same - a minifig excellent! - the bandit - at last updated this minifig! The new torso became more gloomy - dark colors dominate. Also on a torso you can see a rope and a belt! The torso has drawing from both parties - the part of a rope, various keys and master keys is behind also visible! Also the bandit had a new physiognomy - with short moustaches and a mask on a face. Why that it reminds me the Frenchman?! In a set are available new details are rare also: Assembly of a set is divided into three parts - according to instructions and packages! At first we collect the motorcycle and obstacles! Pay attention that at the motorcycle the design of fastening of a handheld transceiver and handcuffs changed! Sticker I didn't begin to paste since they can it is useful in other homemade products! Both we more than once saw the motorcycle, and protections! The following stage - assembly of the jeep which is very similar on Hammer! The jeep is built! Well to tell... On the picture it looks where it is better, than alive! At such huge sizes in it there isn't enough place - everything "is eaten" to cubes 2х4! What for?! To put in a cabin of 2 minifigs - it is unreal! Even doors aren't present, and after all not difficult to put them (see below)! General view of a car: In comparison with a minifig: To put a minifig inside, it is necessary to remove a roof again: Let's consider Hammer in all its aspects: It is possible to put at most 2-3 handheld transceivers in a luggage carrier, 2-3 couples handcuffs and pair of guns - all! Agree - for Hammer it very little! Now a comparative photo together with the motorcycle! Also you know... they look harmoniously and on a substantial scale! Assembly of a sports car of the bandit goes the last - the third - a stage! At assembly I was discouraged - so the car was colorful! But the final version was pleasant! The design of a car isn't difficult, but the total option was pleasant to me - reminds remotely any sports race car, something like Ferrari! In comparison with a minifig the machine turned out tall for a sports race car! But when the minifigure sits inside - everything looks perfectly! In a set there are a lot of details "money" and only one gold ingot - and all this is offered to be sent in a car! Also there is a strip representing thorns! But the sports car can't pass on them since it has very low landing! The set is built! After assembly there were many extra-details! Let's consider all set assembled! By the way, all three cars nearby look very much even harmoniously! The set makes ambiguous impression - on the picture and even all assembled looks well, harmoniously - any complaints! But separately is something unclear: such feeling that the motorcycle is added for show, the jeep strongly isn't finished, a sports car too big! As a bonus I will show as I made doors and I changed minifigs! Addition of doors which here on not to obvious reasons aren't present! Though to add them it is structurally possible very much even easily! Change of minifigs: On it all! I wait for your comments! PS: Excuse me for my bad English!
-
 Hi, On the 26th of December I got the Lego 42000 from a local store after being informed that it is available in a certain store. I got it for £79.99 which I think is fair as today I finished building it and decided to do A review so without further do: General info: The set box is quite good with the images as it captures the whole car with good detail in a smallish box size, it also demonstrates its features, its ad-dons using PF and other usual information such as dimensions, it has a total of 1135 parts (26 spare from A model) and it is 58cm long by25cm wide by 13.6 cm tall, the B model is not available in the set but maybe online as PDF. The instructions are in three books its features are independent suspension, HOG steering, rear diff and working engine, tilting rear spoiler and engine body cover with a hinge. The engine cover and rear wing can either by adjusted manually or electronically. Mechanisms/construction: The mechanisms feature: linear actuators, gears+differentials, springs, motors, linkages on either beams or ball joints. they are either controlled by motor, by hand, the switch between rear wing and engine cover is done with a clutch that is hooked up to a selector switch, if you have the motor with it it only reveres whatever is selected. like that the linear actuators have build in slip clutches so you cant overdrive it and break it however when it goes off with lifting the engine cover is is quite wobbly and noisy, also when the engine cover lifts up it goes get slightly obstructed by a body panel and the mount of the actuator which does slow it down opening and closing half way though but it isn't a huge problem for me, after all it is still a set of standardized parts, nothing custom designed. The rear diff and engine work very well as usually when you spin the wheels they don't run for very long but these ones do so the parts have little friction, the rear spoiler is also good and I don't have any issues with it, its design is clever and a bit different maybe which is what lego is about. The suspension is smooth but I was hoping for more travel than this even if it is an F1 car, the fact that they can be seen operating is good too. The steering is also a bit of a problem as it has quite a poor turning circle, with these new steering parts which came out in this set first but it is even worse than other lego F1 cars. Since it is quite big and looks good this is a + but I don't think much of the stickers and they generally get damaged anyhow so I left them off but they do match with the shape and colour of the parts. The new parts are good , larger tires which I long for since the tires from the power puller and Williams f1 car are hard to get and expensive these new ones are better for sets about as large as the 42000 , I even think these tires will fit with other rims too. Another nice part is the 5L lift rm thin with cross holes both ends as trying to have a lift arm and support it that is 5l and thin is not easy, I used to use the triangular lift arm (old or new) before this part came out, and that is important because it will help get over problems and limits in future sets. This model is compatible with the power pullers battery box and M motor and you don't need to add or remove any other Technic parts to change it so the PF parts fit but I was expecting the clutch and sleeve to drive the rear wheels when it was in the middle position but it doesn't do anything which is odd, and there is plenty of space in the car too. I would also have liked to have the servo motor in the large space in the cockpit as that only requires the steering wheel to be taken off, I suppose for the price it's OK that you don't get any PF parts Pricing of this set is OK/slightly steep and I say this because of the above points and because it doesn't take that long to build which isn't too good for me as I like spending days building like with the Unimog U800 and that has PF too The design is good, I particularly like how the body contours match on either side of the air intake/grills on either side and the back engine cover is nice too as the back does have to go up on an angle slightly and when reading the instructions it looked like the back end was white tall but its fine. The colours are nice too kind of looks like a Honda/McLaren, the new body panels looks really sleek and will help with other models, my favourite is the 1.4x4 body panel in red The conclusion: My conclusion is that I give this car 7.5/ out of 10, you get three new linear actuators, newish tires (appeared in 1 other set I read),new steering/wheel hubs, body panels but it could be more complicated and have more features and have the 'new price' follow this perhaps, however there is a lot of good body work and some clever features and mechanisms so that's where i put it. For good measures here are some videos and images of the set: :), feel free to ask for any other information or photos of this model. https://www.dropbox....12 20 01 18.mov
 -
My local legoshop let me see in the catalogue. Moderators: Feel free to change this post. 50003 Batman Picture from LEGO cache - thanks to GRogall 257 pieces, age 6+, 2-4 players, 15-25 minutes, $29.99 US, August Info thanks to Artanis I 50004 Storymixer For a short video, and to discuss what appears to be a new LEGO game concept, go here. age 7+, 3-5 players, 20-30 minutes (no other info known) Info thanks to Artanis I 50006 Legends of Chima Picture from LEGO cache - thanks to GRogall (A Tribal Battle Game To Collect Chi): 211 pieces, age 7+, 2-3 players, 10-20 minutes, $19.99 US, August Info thanks to Artanis I 50011 Lord of the Rings: Battle of Helmsdeep Picture from LEGO cache - thanks to GRogall The Battle Of Helm's (Deep): 338 pieces, age 8+, 2/4 players, 15-35 minutes, $29.99 US, August (FBTB has $34.99 as the price in their set, but the card in the image states $29.99) Info thanks to Artanis I The last one looks much like a heroica game. edit: coming in august.
-
I don't know if there is already a thread for this stuff but we can put in all our info about the second half of the 2013 Technic sets. here is a picture to get you guys started. http://img593.imageshack.us/img593/2125/img0346rp.jpg There is going to be a mega mobile crane (5 axles!), and 9397 scaled pneumatic tow truck, and some small sets that I do not know about.
-
 ----------->>>Dear Admins... please change the title to "...2013" .... forgive my ignorance to proofread the title... When going through the new Galaxy Squad pictures of Flickr user "Cupishalfempty" I came across this one which shows an interesting part getting System and Technic together. Look in the top row of parts: fW
 -
It's that time of the year again! No, not Christmas, but the time when the new Star Wars Advent Calendar is released. Becoming a bit of a tradition for me reviewing the past two, I bring you our newest Advent Calender which seems to become a new standard, selling alongside the City Calendar. Being released no where near Christmas is strange, but only one/two of the windows are actually Christmas themed, so everything else is pretty nice to have just for the parts or collecting value. Set Name: Lego Star Wars Advent Calendar Set Number: 75023 Pieces: 254 (there are about 20-30 extras) Minifigures: 9 Price: $49.99 CDN $39.99 USD Year of Release: 2013 Onto our review, the box photographs very strange because some of the printing (on Jango most notably) is textured. Making the light reflect off it in quite a positive way. The box does however give away the surprise exclusive minifigure. The top of the box shows us some of the minifigures we'll be getting in their "actual size". The back shows us the proper way to open the box and some of it's contents plus a code for the Yoda Chronicles. So you have two options, cut the tape on the sides and pull out the tray, or cut the tape on the back and flip it open thusly. Sidenote: save the black tray, it's great for sorting pieces in larger sets. The instructions are found on the inside of each door, some of the larger micro models can be a bit difficult at first, but some of them just need a second look. Day 1: Yellow astromech, same guy we got in the most recent Y-Wing. I like him. Day 2: Count Dooku's Solar Sailer (I didn't know what it was at first) Day 3: Count Dooku's Pilot Droid Fitting in with Day 2, this inclusion is a bit weak. I don't see the need for two of these. Day 4: Zam Wessel`s Speeder Seems like a missed opportunity not making a redone Zam, or to build Anakin and Kenobi`s speeder. Bag 5: Cloud Car Day 6: Boro-wait..Endor Trooper Much angrier than any previous Rebel we`ve had. But he does have a reversible head. Settling down. Day 7: Weapon rack. It`s become a theme in Advent Calendars to not supply the minifigures with weapons, but to just throw them all together later on... Day 8 Republic Attack Gunship Ok, so this is a huge pet peeve of mine, I saw many comments praising this model, even though it is a complete rip-off of the other Gunship we got in the first advent calendar except this one has the binocular piece on top. Day 9: Acclamator It`s very tough to build large scale ships in micro, but this is a fairly good rendition. Day 10: Clone Trooper Fitting, seeing our last two builds. Day 11: AT-TE That strange stud on top? Patience grasshopper. Mother and child. Day 12: LAAT Dropship As you probably guessed, these two can hook up, quite well actually. Day 13: Battle Droid Nothing special here. Day 14: Geonosian Fighter Personally I hate this, I feel like the geonosian fighter is just to difficult to re-create in Lego, in any scale. Day 15: Geonosian No wings? Day 16: Another weapons rack. Day 17: Naboo Starship (before it's blown up at the beginning of Episode II Day 18: Scout Trooper Only seen in the new Ewok Village, this guy is a gem. Day 19: Separatist Shuttle. We've gotten one of these in the first calendar as well, but a little different build and different colour. Day 20: Obi Wan's Jedi Starfighter. Day 21: Jango Fett's Slave 1 Built in the same way as the first advent calendars Slave 1...but different colours obviously. Wings can rotate. Day 22: Boba Fett Lovely figure, exclusive to this set and I can't imagine being added into another set in the near future. Plus a reversible head when he's busy shooting Obi Wan. Day 23: A silly rocket sled dealy. Day 24: Jango Fett These seems to fall along the lines of the Santa Darth Maul, having a villain as the Santa character doesn't make any sense to me. The colours go horribly together and the torso is pretty much useless for anything else. Even with Jango being a popular character. I feel having Obi Wan being the Santa making more sense. (he does have the beard after all). Here is the entirety of the calendar all laid out. It's fairly lackluster to me, but oh well. Someone else will like it. Looks like the Kaminoans didn't give Jango enough money to provide his family with a large enough sled. In previous years the Advent Calendars have been a decent mix of the movies, but clearly thing one focuses much more on Episode II. With only 4 days being something other than AOTC related. Overall: Obviously the Advent Calendars are following suit with the regular sets, where the minifigures are the main draw to the set with the sets being less than average. Personally I would be much happier if TLC just hired Legostein to create all their new micro and mini models. Build: 7/10 It goes by pretty quick, but I imagine it being a lot more fun building it one per day like you're supposed to. Design: 3/10 Most of these builds are just awful, not to mention the ones that we've seen already. Come on, we've only had 3 calendars so far. Price: 8/10 I'm impartial to prices Pieces: 8/10 We do get a good array of small pieces, plus lots of extra goodies. Playability: 9/10 One of these days I'm going to make a huge battle scene consisting of micro scale vehicles. A lot of these do go together. LAAT/AT-TE, Clone/Battle Droid, Slave 1/Jedi Starfighter, Solar Sailer/Pilot Droid. Minifigures: 8/10 The plain old battle droid and the pilot droid bring down this mark a bit, but the Boba and the Scout Trooper more than make up for it. Total: 43/60
-
Well again for the Holidays LEGO will be giving away 2 Holiday sets with a purchase. These sets will be available through S@H as well as official Brand Stores But only in those countries where a LEGO brand store exists! The First set will be available from the 14th till 31st of October! 40082 Holiday Set 1/2 (Winter Village Tree Shop) Celebrate the 2013 festive season with a limited-edition buildable LEGO® set, featuring a Christmas tree shop, gate, 3 trees and 2 minifigures! Christmas 2013 will be one to remember with this limited-edition LEGO® set. And it all starts by picking the perfect tree from the festive Winter Village Tree Shop! Features an easy-to-build shop with hinged shutters that open and close, 3 trees, tool rack with axe and broom and 2 minifigures: shop owner and customer. Plus, red and green “ornamental” LEGO® bricks and money elements to get you in the holiday spirit. Makes a great gift or seasonal decor for home or office, especially when combined with 10235 Winter Village Market. • Includes Christmas tree shop, gate, tool rack, axe, broom, money elements and 3 trees • Also includes 2 minifigures: shop owner and customer • Hang a “string” of festive red and green LEGO® bricks from the shop roof! • Close the shutters at the end of the day! • Chop down the perfect Christmas tree! • Sweep up any needles that fall with the broom! • Makes a great gift or seasonal decoration! • Combine with 10235 Winter Village Market for even more holiday spirit! Warning main image links to HR version which can be +5000.pxl 40083 Holiday Set 2/2 (Available on "Brick" Black Friday in November!) Instructions for the two sets! 40082 Black Friday 2013 No. 1 Brick-based Specials 40083 Black Friday 2013 No. 2 Brick-based Specials All images ©2013 The LEGO Group and used here with permission! 2011 Holiday Sets 1/2 2/2 2012 Holiday Set Enjoy! :caroler:
-
Hi Eurobrick, My NickName is SanLouis and i love LEGO. This And my other sites are still under construction, if you like what you see leave a comment and please visit my Youtube cannel. In next time i will upload more. Thank you This is my new custom crawler 1.0 Big Bear from LEGO Technic set 9398. The crawler has 2 Xl Motor and LED lights, chassi, body and engine is not the same as the Original. And the driver train is very solid. Diff are normal no Lock. I dont like the knob gears. The weight is 2 kg Power Puller Wheels on the Back and on the front from 4×4 Offroad set. More videos on my You Tube cannel. Please vote and subscribe. Sorry the video is not so Good but the other ones are in HQ My Sites https://brickwave.wordpress.com
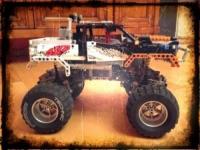
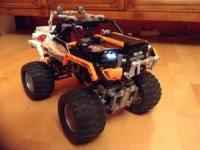
-
Hi, I haven't found any information regarding participation of Eurobricks Members in the Legoworld event in Utrecht (used to be in Zwolle). http://www.legoworld.nl/ Are there any EB activities? EB members going?