Search the Community
Showing results for tags 'Technic'.
-
 It is important to respect original builder's timeline on when they want to post things..... and i wanted to make sure that I wasn't beating the build to the punch, but this creation: http://www.moc-pages.com/moc.php/428544 was posted more than a week ago....so I think I am good. Here is a video: I have no connection with this builder I just saw it and thought it was a great, unique build. We often get lamentations that there are too many wheeled technic MOCs or at least vehicle-type MOCs and this is something quite different.
 -
Here's my latest creation, and yes it's another sports car. Yay! I wanted to have another go at building a small RC Sports Car, but this time loosely based around a 2009 corvette. This car is wide and low so I was expecting it to be a challenge. I also wanted to use some of the ideas from my other models, such as the L motor setup in the Mini Truck. Features - 2x L motors at 1:3 - 1x Servo - functional doors, boot & hood - battery access under dashboard - working front lights - 36Lx17Wx10H (chassis, in studs) - 804g Like the mini truck, the two L motors make this car move! The extra width seems to give it some extra traction as well. Design wise it isn't perfect, but I did the best with what I had available. Hope you like it. EDIT: Video is up!
-
 Hello everyone, let’s me introduce my latest MOC: All terrain with 12 WD Liebherr LTM 1350 6.1. Mobile Crane informations: Weight: only mobile crane: 9480g + 1550g Speed:11cm/s Width:18cm / 23 studs Length:92cm heigh:28cm Tire:81.6mm (LEGO Wheels with Third party Tires) Crane MAX Heigh:195cm Crane MAX Capacity: from 300g to 2000g (Macbook Pro retina 15”) Crane MAX Extend: 125 studs Driving:4 X XL Motor::960N.cm Steering:2 L Motor ::972N.cm XXL Linear Actuator:1XL Motor::960N.cm (MAX Extend 27 studs) Turntable:1 L Motor :1152N.cm Extend Boom: 1 X XL Motor::960N.cm Lifting:2X XL Motor::400N.cm Which part is difficult do? the one of big problem how to create a strong power Linear Actuator for my super heavy 3KG boom? before I start my crane project, I had wanna to use third party company’s pneumatic, although it has extend 19 studs but it failed, it cannot made crane up. When I want to give up then chat with my friend, and he inspired a new idea how to create a LEGO XXL Actuator only using 1 XL motor. I really happy I can done a big big crane. let’s see the movie… … https://www.facebook.com/shineYucorner/videos or
 -
 REVIEW - 42054 - CLAAS XERION 5000 TRAC VC INTRODUCTION First of all my apologies. Sorry it took so long for this review to be published. Sometimes there are other things in life that need attention. Next year I will try to keep July free for LEGO reviews With all the news about the 42056 - Porsche GT3 RS and the 42055 - Bucket Wheel Excavator, you would almost forget there are two other great sets coming up during the second half of 2016. One of which is the 42053 - Volvo EW160E, while the other is the 42054 - Claas Xerion 5000 Trac VC. Today we will be reviewing the latter. Like LEGO it seems that CLAAS also likes its name spelled with capitals, so from now on I will happily oblige. While I live in an area which is flooded by tractors and farm equipment, the CLAAS doesn't seem to be very popular in Holland, while CLAAS is a brand which originated in Germany, not too far away. I have never been a real fan of LEGO Technic farm equipment models. To be honest; I have skipped all of them. They just didn't look interesting enough. How different the CLAAS is. I'll just throw it out there...this is love af first sight. Sometimes the real model looks even better than in the pictures. If this is the case with the CLAAS, it's definitely one of the best looking models ever made. Usually you don't draw conclusions in the introduction, but I simply felt the need to address the feeling that I have when I look at this model. CLAAS being one of the biggest (if not THE biggest) manufacturers of combine harvesters, we might be treated with another CLAAS model in the future. So, not having bought a single farm equipment set, combined with my limited knowledge of real farm equipment, I had to invest some time to get acquainted with the CLAAS XERION 5000 TRAC VC. In case you are wondering what VC stands for, it's the designation for Variable Cab, meaning the cab can be rotated backwards, to facilitate driving backwards....or is it forward?! At CLAAS, VC stands for Variable Cab. The rotating cab is the most convenient reverse-drive system imaginable. At the press of a button, the entire cab moves from its central position to the rear-facing position above the rear axle in seconds. The controls rotate automatically with the cab, so all functions remain the same when operating in the rear position. For high driving comfort on the road, the cab is centrally positioned between the axles. In the silage clamp, on the field, in the forest or in the mountains, the XERION with the cab rotated over the rear axle becomes a user-friendly self-propelled machine with a unique view of the job in hand. If you are looking for more information, here's the Brochure and Technical data. Funny fact about this set is that it's simply addressed as one of the 2H 2016 sets, while with almost 2000 parts, it would definitely have qualified as a flagship a couple of years ago. This is a clear indication that the Technic product line has been evolving rapidly. I start to wonder how big this model actually is. Let's open the box and find out. SET INFORMATION Number: 42054 Title: Claas Xerion 5000 Trac VC Theme: Technic Released: 2016 Part Count: 1977 Box Weight: 2834 gr Box Dimensions: 58,0 cm x 37,2 cm x 9,8 cm Set Price (MSRP): € 159 Price per Part: € 0,080 Links: Brickset, Bricklink THE BOX Having the Porsche and BWE around almost makes you forget that this isn't the Prima Donna of 2016. The box doesn't help either, since it's quite a big lady. A few years ago it could have easily passed as a flagship set. As usual, the front shows a nice picture of the model. The right side indicates that this is a PF powered set, where the M-motor and PF Battery Box are included. Bottom right tells us the crane arm and cabin are motorized. At this point it's not exactly clear what the motorization entails, but I bet the backside of the box will show us more details. BACK The back of the box (click to enlarge) shows us that the boom of the crane can be raised and lowered using Power Functions, as well as rotating the crane. Also, the cabin can be rotated using Power Functions, which is obviously super cool! I'm really anxious to find out how this works. The lower left corner shows us the three steering modes of the CLAAS XERION. Yes, you heard it right, three steering modes! Just like the Porsche should have had The lower right corner shows a picture of the B-model, which is actually the same tractor, with a different attachment. The crane has been transformed into a silage plow. As you can see, the cabin (and thus controls) are facing a different direction than in the picture of the A-model. Like the Unimog I expect lots of modifications and attachments for this model! CONTENTS OF THE BOX The box contains the following items: 1x Sealed instruction manual and sticker sheet 11x Bags for step 1 4x Bags for step 2 1x Unsealed PF battery box 1x Sealed PF M motor 4x Red rims 4x Awesome new tires This is how it looks when you throw everything on one big pile. INSTRUCTION MANUAL AND STICKERS The instructions are provided in a square bound book, sealed in a bag with the stickers. I really like this way of packing the manual and stickers. Keeps both the book and sticker sheet unharmed. Below are detailed pictures of the book and sticker sheet. The latter contains lots of little stickers for switches and controls. This means the model will have lots of functions....yay! PF COMPONENTS A PF Battery Box and a sealed PF M-motor. RIMS AND TIRES Without a doubt the single most eye-catching elements when opening the box are the new tires! 11 BAGS FOR STEP 1 4 BAGS FOR STEP 2 HIGHLIGHTED PARTS Back by popular demand is the Highlighted parts section. For this set it's quite elaborate. Not because it contains loads of new parts, but it does contain quite a few new-ish parts in large numbers. This indicates that the designer used some of the new building techniques in this set. And there's something funny going on with the axles, so let's start with those. AXLES Red and Yellow axles have been introduced in most of the 1H 2016 sets. What's striking though, is that this contains axles in both the regular black and grey color, as well as the latest yellow and red versions. Here you can see that we get both the grey and yellow 5L and 7L axles. I have included only a single grey version to make my point. Actually there are 11 yellow and 5 grey 5L axles and 6 yellow and 15 grey 7L axles. Same goes for the red 4L and 8L axles, which have a black counterpart (also a single one included in the picture). This set contains 9 red and 4 black 4L axles and 2 red and 2 black 8L axles. Makes sense, right?! At this point I am really starting to wonder what the strategy behind the axle color distribution is. Is TLG getting rid of their old stock or is there a better explanation? Hopefully we will discover some logic, but I highly doubt it. On the left you can see the new (2016) 3L Axle with Stop and on the right you see the 2012 4L Axle with Center Stop. Inclusion of the latter is not so special, if it weren't for the quantity. A total of 12 are included, which is more than in any other set. And even a single 11L axle in yellow, which completes the uneven yellow axle family (3L, 5L, 7L, 9L and 11L). Fun fact; the 3L axle in yellow has been introduced in 2015 (in the LEGO Ideas Wall-e set) and has been used in quite a few 2016 sets, but not in any of the Technic sets. Same goes for the 9L axle, which has been used in three non-Technic sets. Adds another layer to the axle mystery. Let's talk Pins and Pin Connectors. 3L PIN WITH 1L/2L AXLE This set includes 20 3L Pin with 2L Axle from 2015 and a whopping 31 3L Pin with 1L Axle from 2014. AXLE/PIN WITH PIN HOLE If you are in need of Pin with Pin Hole from 2014, look no further. This set contains 49 of 'em. Yes that's right, 49!! And 14 of its axle counterpart Axle with Pin Hole from 2016. AXLE AND PIN CONNECTOR HUB WITH 2 AXLES This set also comes with 12 Axle and Pin Connector Hub with 2 Axles. Already introduced in 2012, but relatively new in black. 1L PIN CONNECTOR Introduced in 2015, received with some surprise from the community. Why do we need this 1L Pin Connector?! Well, there's 54 in this set so we are bound to find out why it's useful. H-FRAME (DOG BONE) In my review of the 42023 Construction Crew (one of my two first reviews) I introduced this part. The Liftarm 3 X 5 Perpendicular H-Shape Thick a.k.a. Dog Bone Frame or H-Frame. A compact versatile frame which appeared in quite a few sets but never in such quantities. This set contains 10 of them. CURVED PANEL The 3 x 6 x 3 Curved Panel was already available in blue and yellow and now it's also available in black. You only get a single one in this set though. TURNTABLES This new turntable was introduced in 2015 and it's the first time it appears twice in a single set. It's comprised of two parts, The Top and The Base. STEERING WHEEL HUB Introduced in the Porsche (only because it was available first) and now also available in the CLAAS. Two of them in the Porsche but if you like to build 4W steering this is the set for you. It contains 4 Steering Wheel Hub Holder with 2 Pin Holes and 2 Axle Holes. LIME GREEN IS THE NEW YELLOW A reasonably large selection of lime green parts. Not sure if it's visible in this picture but apparently lime green is the new yellow, when it comes to parts being identically colored. Variation in lime green is significant. This picture shows a detailed view of the color difference. It's clearly visible near the 2x1 plate. The connectors and liftarm do differ as well. Good news is that there are some new parts available in lime green: 1x Panel Fairing # 5 Long Smooth, Side A 1x Panel Fairing # 6 Long Smooth, Side B 1x Panel Fairing # 1 Long Smooth, Side A 1x Panel Fairing # 2 Long Smooth, Side B 2x 16L Soft Axle (Flex Axle DISHES This 6x6 Inverted Rader Dish isn't new, but it's the first time we see it in red. This picture also shows the reflection of the light bounced off the ceiling. RIMS The rims are your run of the mill 56mm D. x 34mm Technic Racing Rims, with the unique feature that, like the 6x6 Inverted Dishes, these come in red for the first time. TIRES Four brand new 107 x 44R Tractor Tires! PART LIST Here's the complete list of 1977 parts. THE TRACTOR The build consists of two phases, the tractor and the crane. Obviously we will start with building the tractor. Get your #1 bags, rims, tires and PF components....we are about to begin! We start by building the chassis. The back side of the chassis to be specific. You can already see part of the steering mode selector mechanism taking shape. REAR MOUNT The manually operated rear mount which will later be used to attach the crane (or other attachments). Manual operations include raising and lowering the attachment. There's a PTO (Power take-off) which will be connected to the PF motor, so it's not operated manually. Here you can see the rear mount attached to the chassis. The bottom view shows the PTO drive shaft. STEERING Since this tractor has 4 wheel steering, the rear axle also needs to be steerable. To accomplish that, the new wheel hubs are used. No rack and pinion yet?! Or no rack and pinion at all?! I was wondering why the blue Axle Pin is used in favor of a Pin without friction. Normally my best guess is that these parts are used in the B-model, which isn't the case for this model. The only possible thing I can imagine is that the friction is needed to prevent wobbling, and the axle end makes sure the steering is smoothly. Best of both worlds kind of thing. The yellow 1/2 bush limits the steering angle. A limited steering angle is something that's bothering me frequently in Technic models. So I tried to remove the bushes and replace the 3L axles with 2L axles. This does improve the steering angle. However, as you can see in the pictures below, there's a reason the steering angle is limited. The left tire is touching the chassis. We will need to work with the default setup. Which actually isn't that bad in the end. The following picture clearly explains why we need red 4L axles, while there are also black 4L axles in this set. Or does it? Clearly no rack and pinion steering. Instead there's a cleaver mechanism transforming rotational movement into linear movement and back into rotational movement again. The linkage on the red axles can be moved into three different positions for the three different steering modes. Here's a short video demonstrating the mechanism: A manually operated lever on the back sets the linkage in one of three positions, selecting the steering mode. Stickers are used to indicate the different modes. Another short video of the steering mechanism: The pictures below show the different steering modes, respectively: Crab steering Front wheel steering Four wheel steering The video below shows a demonstration of the different steering modes: The bottom view of the chassis: The video below shows the bottom view of the steering mechanism: BARMAN Of course this mechanism is no surprise at all, since our good friend Barman already figured it out ages ago. Obviously a variation of the setup, but the basic are definitely the same. Well done Barman! PTO In the picture below you can clearly see that the PTO runs from the front to the back. Even though this model doesn't have a powered front attachment, it's prepared to have one. Kudos to the designer for this feature! GEARBOX This gearbox is used to power the different functions. As you can see there are two Clutch Gears. One is for the PTO and the other one is for the cab rotation. Here's how the gearbox will be attached to the chassis. Switching the change over catch results in changing direction of the function. This is confirmed by looking at the left side of the gearbox, the "differential like setup". MOTORIZATION A Power Functions M-motor is used to power all the functions. Since there's no driving or steering involved, the M-motor is just fine! CHASSIS Picture below shows the chassis without the battery box, but with both front and rear mounts Here you can see a video of how the battery box switch works. This is a rather ingenious mechanism. CONTROL PANEL In the images below you can see why we need 54 1L Connectors. They might not be necessary, but I do like 'em. They are aesthetically pleasing and avoids having gaps in the model. Otherwise bushes would be used, which definitely don't look as good as the 1L Connectors. Here's a detailed view of the control panel on the side of the vehicle. One switch will turn the battery box on and off, while the other rotates the cabin back and forth. Here's the control panel attached to the vehicle. This surely is one of the best looking control panels I have seen. HOOD The lime green hood, combined with the white roof and red rims, is one of the most recognizable sections of the CLAAS. Unlike other hoods this isn't just a couple of panels and done. It's actually quite a big build. The front of the hoods actually needs a CLAAS stickers, which I forgot before taking pictures. The hoods can be lifted and held up with a support axle. Usually you will see the fake engine, but now there's a battery box. To be clear; there's no fake engine at all. Which is perfectly fine given the fact that the battery box is well hidden inside the model. Closing the hood results in this pretty picture. I am already starting to like the looks of this model. The build also gets more interesting along the way. In the beginning there's much going on without really making sense. Seems like a bit here and a bit there. Some constructions seem rather flimsy. However, the further you progress, the better the builds get, to a point where it's actually a great building experience. CABIN Here you can see the base of the cabin, which actually has a nice feature. When the cabin rotates a little wheel underneath lifts the cabin a stud or two. This results in the cabin freely rotating around its axle. When it has turned 180 degrees, it falls in place again. Here you can see the up and down mode of the base of the cabin. The finished cabin looks stunning!! The back of the cabin has some intricate details, like the fire extinguisher and the 50 km/h sign. In the cabin there a computer display showing the field. I think you can even fit a minifig on the chair. Here's a sequence of images demonstrating the rotation of the cabin. You can clearly see the raising and lowering of the cabin when it rotates. FINISHED TRACTOR After finishing the cabin, you end stage 1 and the tractor is finished. I can only come to this conclusion: Yes, it looks great in real life too! And great is an understatement. This is one of the best looking Technic models ever! I wasn't a big fan of lime green, but it just went up a couple of notches on my ladder. Especially in combination with white and red! I can't think of a single thing I don't like about the tractor. Even the battery box is nicely hidden inside the model, while it still can be easily switched on and off. Cabin rotation is how it's supposed to be and there's a front and back PTO. Simply amazing! OOPS! I missed two of the headlights. Thanks to Charlesw for pointing this out THE CRANE After the 1st stage, you enter the 2nd stage...building the crane! I have included a picture of the crane on my work desktop, instead of my photography desktop. Looking at the pictures, it appears that I have no OCD when it comes to arranging parts before the build. On the left side of the crane (where I already applied the stickers) you can see the controls for the crane. Two levers, both with an up and down mode. One of them will rotate the crane, while the other will raise and lower the boom. For all you photography enthusiasts; these two pictures are taken with f14 instead of f20, resulting in a sharp picture but slightly blurred (out of focus) background. This draws attention to the model, while still being able to figure out what's going on in the background. I used to shoot everything with f20, which would have resulted in an entirely focused picture. Three more images of the base of the crane. This time without the unnecessary cluttering with extra parts. FINISHED CRANE Lo and behold, the crane! First of all, I am not the biggest fan of cranes. Why not? Because they have a tendency not to work properly, especially the Pneumatic ones (apologies to the Pneumatic fanboys). Therefor it's worth to mention that I actually like this one. A decent design with functions that actually work. Admittedly the manual functions are not that great and maybe a bit flimsy, but that will always be the case when building in this scale. Most important are the two motorized functions, which work like a charm. The mechanism to attach the crane to the tractor is nifty too, although it can be a bit of a struggle to attach it to the PTO. This takes some practice. FINISHED MODEL Meet the CLAAS XERION 5000 TRAC VC! I have said it before and I will say it again; this is one good looking model. The shapes, the design, combined with the CLAAS color scheme makes it really stand out. Admittedly, the crane doesn't improve the looks of the model. Being an attachment, I don't really mind. The nose of the CLAAS looks so cool. Especially with the weights on the front attachment and those new tires. I really love this picture. Another think I absolutely love is the cabin of the model. All kinds of small details and the overall look is stunning. The crane is....well.....a crane. It's not ugly, nor is it a beauty. Technically it's working properly, which is the most important thing. It does kind of bend over a bit, but it doesn't bend the chassis. It's caused by the way it's mounted to the rear attachment. Raising the attachment will straighten the crane a bit. The rear attachment is quite solid, which is good thing. The outriggers need to used for extra stability. This side view show what I mean by the crane leaning over. The rear view of the entire model. I love the fire extinguisher and the 50 km/h sign! Another front view of the model. LEFT OVER PARTS Quite a few 1L Connectors left. Makes you wonder whether I skipped a few. Or they are used in the B-model. FEATURES AND FUNCTIONS So the model looks good. Does it function properly?! And what exactly are the functions?! After the last building step, the manual shows four pages with functions! The first two pages concentrate on operating the crane and cabin, using the PF functions. The other two pages focus on the different steering modes. Let's take a look at the video to see these functions in action: The front attachment is manually operated and can be raised and lowered. Attaching to the chassis is easy, so it can be easily changed for another attachment. There's a front PTO, which leaves you with loads of options. I'm sure we will see some nice MODs being published in the future. Rotating the cab is quite fun to do. It works as expected and the automatic raising and lowering of the cabin adds coolness to the operation. Thumbs up for the rotating cab Then there's the three mode steering. Basically the steering modes work fine. The mechanism is very clever. So it all good? Well, there are some minor issues. Turning the steering gear needs quite a bit of force, which can result in accidentaly turning the cabin instead of steering. Another issue is the significant amount of slack in the steering mechanism. New wheel hubs were introduced this year, but they are no improvement in terms of slack. This model is best steering when driving it. This will reduce the amount of force on the steering linkage and it will also diminish the slack. All in all the steering modes work properly and the entire steering mechanism is awesome. This makes up for the lack of rear wheel steering in the Porsche! Like I said earlier; usually I am not a big fan of cranes. However, this one works properly. The motorized functions have been implemented very well. They are easy to operate, without confusion about which function does what. The manual functions work as expected, nothing special. I haven't paid much attention to the tires so far. I reckon they deserve a review of their own. Enough has been said about them already, so I will simply echo what other have been saying; they are awesome! Best tire since the Unimog tires. They have enough grip for Truck Trial. One thing I am not sure about though is how well they will stick to the rim. As you can see in the video, they detach pretty easily. Something which might happen when driving through rough terrain. I hope TLG will release a smaller version of these tires in the near future, for other tractors or even combine harvesters. Both the attachments can be mounted and dismounted easily and the mechanisms to do so are nifty. Attaching an axle to the PTO can be tricky, but it will get easier after some practice. B-MODEL When building the B-model the tractor remains intact. The crane turns into a silage plow, which actually looks quite good. I will leave this one for you to build SUMMARY To summarize how I feel about this set is pretty easy. I love it! This set has everything a proper Technic set should have. Stunning looks and lots of great functions. Not sure if this is the best Technic set ever, but it is the best Technic set I ever reviewed. PROS Looks amazing Lots of functions Super cool three mode steering Functions working properly Lots of playability Front and rear PTO Suitable for MODding Lots of new pins and connectors Cool new tires Some parts in new colors Battery box nicely tucked away inside the model CONS Slack in steering Steering needs some force and can result in turning the cabin instead Makes you want another one I'd like to stress that these cons are really minor cons! SCORE Okay, so how do I grade this set? 9 DESIGN CLAAS written all over it. Looks amazing. 9 BUILDING EXPERIENCE Starts a bit unstructured, but ends well. 10 FEATURES Can't do any better than this. 9 PLAYABILITY All the cool functions offer lots of playability 9 PARTS High quantities of new pins and connectors. Oh, and them tires! 9 VALUE FOR MONEY This is what to expect of a big Technic set. 9,2 PINNACLE OF LEGO TECHNIC FINAL WORDS This set will be modified heavily, utilizing the front and rear PTO. Can't wait to see what people come up with. It's only a matter of time before we see a double wheeled version: Well, that didn't take long (posted by ctx1769, see next page): And what to think of a potential new CLAAS Lexion Combine Harvester with new smaller versions of the CLAAS tires in the rear. Yes please! Thanks you for reading this review. All pictures can be found in my album.
 -
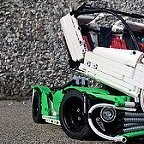
[PORSCHE] GT X
marceriusLV posted a topic in LEGO Technic, Mindstorms, Model Team and Scale Modeling
Hi! Yes, you have stumbled upon another Porsche in this forum :D Built for LEGO Technic Ultimate Contest "BUILD THE PORSCHE OF YOUR DREAMS" I present you my dream Porsche. A blend of past, present and future: sleek and curvy lines, rear mounted flat 6 engine, 4 gear manual transmission, rear wheel drive, full independent suspension grand tourer - Porsche GT X. I did not base on particular car, just went with flow. What started as a base for something like 911 developed to something Targa like car and ended up as next gen 928? I am quite satisfied what I managed to achieve as this is first completed so called supercar for me. Yes there were tons of things I wanted to put in the car, but I decided to scrap them, because they worked like crap (for example: raising rear spoiler in high gears, sequential gearbox). I believe that the greatest challenge to implement high number of functions is to make all mechanisms as small as possible and at the same time incorporate them in chassis and that takes time. For me it takes 2-3 months to figure out how to fit all wanted things in small places :D It was great experience to build this car, I hope, that next supercar will be better looking and more functions packed :) Some WIP pictures Gallery with more pictures here Just wanted to share my creation and get some feedback from other members, so please share your opinion. Cheers! -
 Last week, I've finished my new scale model: It's a John Deere 75G excavator. I've chosen built it in in the Model Team style. The chassis and boom were the easiest part of the excavator. The cabin and rest of the upper part were challenging. It was a nice challenge to get the excavator in the correct shape. It took four month’s to complete the excavator with display. The 75G scale model has several functions from the real one: · Dozer blade · Rotating 360 degrees · Cabin door opens · Yanmar Tier 4 engine · Engine doors opens Pictures: 01_John_Deere_75G by Mathijs Bongers, on Flickr 02_John_Deere_75G by Mathijs Bongers, on Flickr 03_John_Deere_75G by Mathijs Bongers, on Flickr 04_John_Deere_75G by Mathijs Bongers, on Flickr 06_John_Deere_75G by Mathijs Bongers, on Flickr 13_overview_functions by Mathijs Bongers, on Flickr Many thanks to JaapTechnic for making the custom stickers for this John Deere 75G scale model. More pictures at my Flickr page: https://www.flickr.c...157665389978183 I hope you like this scale model
 -
Notes on the figure itself: I do not have a ton of Bionicle parts to work with, but I am happy with what I was able to make. :) I tried my best to build her around her character traits. She is suppose to be young and childish. So I made her torso short, gave her smaller feet, narrower shoulders and chose Kopaka's mask because it was the least threatening mask I had in white. She was originally to be white with green highlights, but that just didn't turn out how I wanted. So I went with my second choice, blue. The peg on her back is to hold her sword. Bio: Toa Makanii was once a mere scholar, learning all she could about the universe, but with the reunification of Spherus Magna and the arrival of new threats, a new breed of Toa had to be created. One that could not only fight, but learn, and adapt. Makanii was chosen not only because of her enthusiasm for learning, but also for her compassion. A necessary tool in showing the Agori that the Matoran peoples have come with only good intentions. But Makanii's outward joy and enthusiasm masks her deep seated fear that she will not be able to live up to both the Legends of old and Mata Nui's expectations. Weapons: Toa Makanii is armed with a duel-sided sword and a disc launcher. Mask: Toa Makanii wears a great Mask of Clairvoyance, in the shape of an Akaku, to pay homage to the late Kopaka. Abilities: Toa Makanii is not very agile or strong, but she possesses great mental powers. She is able to control the minds of weaker-minded beings and is also capable of subtly influencing others by planting thoughts into their heads. However, this is very exhausting on her, and she cannot do this for long.
-
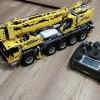 We would like you to introduce RCBricks – and at most, our first project – ServoBrick PRO. LEGO compatible RC Servo. Have you ever imagine to put together LEGO and RC Hobby? Then your dream is coming true ;-) But we need your help to get the idea be alive. Together with my friend we just started our crowdfunding campaign on PolakPotrafi.pl – it is Polish crowdfunding portal (like Kick Starter) - with PayPal payments and accepting also the customers from other countries than Poland. We already translate the campaign to English - gray text below original Polish text. http://www.polakpotrafi.pl/rcbricks There are two option: 120 degree servo (f.e. steering) and continuous rotation 360 degree (like motor). Visit our website to get more information: http://www.rcbricks.com https://www.facebook.com/rcbricks See also the product review posted by Sariel - the most popular LEGO fan in Poland Emotikon smile.
 -
 Hello! This time I'd like to share my latest project: a drawing machine that is inspired by Joe Freedman's Wooden Cycloid. The LEGO version uses freestanding boxes that can be moved around the turntable. A slight change in position creates a different pattern. Further adjustment is possible by placing the drawing arm onto the different pins on either drive box or changing the position and distance of the pen. Placing one end of the arms further from the center can create a pattern up to 20cm in diameter. The variation possible with this setup makes it almost impossible to repeat exactly the same pattern. Now since I'm a huge fan of psychedelic music and digital art, I wanted to make the video resemble some of the artwork we always see at the outdoor parties. Without giving too much away, I'll let you grab a drink, turn the volume up and enjoy the video! Full write up with more images here. Thanks, Mik
 -
 NEW from Llwyngwril Systems: an innovative high speed solution to all of your rough terrain personal transport problems! Bug Runner by David Roberts, on Flickr Bug Runner Film by David Roberts, on Flickr I hope that this little MOC contains enough Technic and isn't too silly for this forum. On a vaguely serious engineering note; I'd be very interested in any suggestions that experienced Technic builders might have for replacing the cams that I've used. They're 1x2 45deg slope bricks. After long-term use, they detach from the Technic connectors with studs that attach them to the big gear. I'd like to build a motorised model using this technique but the current cams won't sustain it. Any ideas please?
 -
 I made a simple camera dolly out of Technic to film a MOC. It has a turntable for compound panning shots. The point and shoot camera is held in place by Technic shock absorbers and rubber double axle flexible connectors. It can be MOD to hold a cell phone too. Simple Camera Dolly v2.0 by dr_spock_888, on Flickr I did a test run on carpet. As you can see, I didn't contract a professional dolly grip to operate it. Hopefully, the union won't get too upset with me.
 -
 I've been trying without success to figure out how to make a compact mechanism that translates normal rotation into back-forth rotation. Any thoughts on how to accomplish such a thing?
 -

[MOC] RC Micro Truck
Chade posted a topic in LEGO Technic, Mindstorms, Model Team and Scale Modeling
Hi everybody, It's been quite hectic for me over the past 3 months, but I finally got some time to build over the Easter break. I wanted to see if I could build a small RC vehicle using the cargo plane's back wheels (42025). I settled on a truck as it was the easiest vehicle to fit all the PF components in. Below is the result. Specs - 1x L motor at 1:1.33 - 1x Servo - functional hood - functional doors - battery access at back - working front lights - 28Lx11Wx11H (chassis, in studs) - 588g The truck is 4 studs smaller in width (11W vs 15W) compared to what I'm used to and it certainly presented some interesting challenges. It's loosely based on a GMC truck. It's not perfect, but for its size I'm quite happy with it. Unfortunately due to the small size of the wheels, I had to use a 2 stud high technic part from 20 years ago for steering (part 4261). I don't believe there's any new parts that can accommodate this (Please let me know if there is!). More images at bricksafe Once again, any feedback is appreciated. -
A smaller, studless version of the classic 853, keeping all that set's best features and losing the flaws. The idea here is to create a smaller, cheaper set so it uses around 500 pieces. 42853 by Nick Barrett, on Flickr 42853 by Nick Barrett, on Flickr The engine / transmission unit is easily removable, it runs fairly fast in forward, faster still in reverse just like the old one. Seats adjust and there's that all important rear armrest! 42853 by Nick Barrett, on Flickr 42853 by Nick Barrett, on Flickr
-
 Hello for a project I'm lookibg for concepts to solve some problems. One particular problem I have is building a V8. Fir the project I want to build a Cosworth DFV engine. It has a bank angle of 90°. The standard lego parts have an angle of 120° and when I want to use pure lego I'm out off ideas how to solve this. The none lego approach is doing the 'efferman' and construct your parts fir 3d printing but I'd like to solve this with pure lego. Thanks fir the help.
 -
I just built the Mercedes Arocs (set 42043) and it seems that the crane drops hard on the table or truck bed when I set the switches to lower it. Is this the expected behavior, or did I do something wrong in my assembly? If it is the expected behavior, are there any mods with instructions on how to remedy it? I'm wondering if swapping out the lift pneumatics for linear actuators might be viable? Also, if there are any other mods with instructions for the set I'd be very interested in those as well. Thanks so much for the help
-
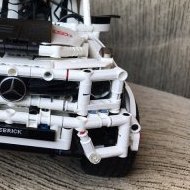 Hi everyone! Today i finally introducing to you my greatest at my poing of a view MOC: Lego Technic Euro Tractor Truck Please, enjoy the video! Dimensions: Width - 31 studs (without mirrors) (24 cm) High - 43 studs (without antenns) (34 cm) Lengh - 70 studs (54 cm) Weight - 4.725 Kg Build with thousands of 100% original Lego parts. ~1/10 Scale Power functions used: - 4 XL motors for driving - 1 Servo motor for steering - 1 M motor for gears shifting - 1 m motor for the fake engine and the pump - 5 LED for the lights - 2 Polarity Switches - 3 9V Remote Control Units - 3 Receiver Unit V2 -2 AA Battery boxes -1 AAA Battery box -2 Extension Wire (length 20cm) Functionality: - Driving and steering - 4 speed Sariel's gearbox (RC) - Front independant suspencion - Rear suspencion Cab: - Cab tilting - Doors opening - Working fifth wheel - Detalized cabin (devices, pedals, heater, mirrors) - Suspended seets - Adjustable and working steering wheel - Working V8 fake engine (connected to the pumpl All pics are clickable! Thanks for your attention!
 -
 HI guys I'm entry for TC10 I build is Wheel Loader Functions that will be included: -AWD -Steering (complete) -4clynder boxer engine -Working bucket (complete) -Pneumatc open engine hood -engine detail progress
 -
Like the title says, my name is Robert. I came out of my dark age two years ago, after the kid grew older, tree was plant and the house was build. I was always interested in the technic theme, so I started slow with 42042 Container Truck. This set is still the only one on my shelf unmodded and still assembled (motor is missing and some parts have different colors meanwhile). Then I found 42009 Mobile Crane as a perfect Christmas present for me. But two days before Christmas I saw this wonderful 42025 Cargo Plane which makes me very curious and I had to buy it also. It was build during Christmas Eve in one rush, but I wanted to modify it somehow. Two days later I had two more copies of 42025 and modded the original one to a four motor cargo plane with a wing span of almost one meter! From that point I was hooked on Lego Technic! The build of 42009 had to wait for two more month ... While I'm a motorcycle enthusiast I had to buy 42036 next. Make a long story short: at the moment I owe five copies of 42036, all heavily modded with gearbox, brakes and other things. More motorcycles will come! At the moment I owe about 30.000 pieces and more then 50 sets ... My shelf is changing every month and all of my rooms are crowded with Lego parts. My last big thing was building 42056 Porsche with my own parts in white. Special thanks to Lego for this great hobby and EB and all their nice members for supporting it! This forum is the best and nicest I've ever joined. I just can't say thank you all enough! Robert from Germany P.S. MegaRoi is a nickname from old computer games that I can't forget. Stupid, but easy to remember for me.
-
 [MOC] INSTRUCTION Motorcycle SportBike NZ Lego Technic Instruction: https://goo.gl/OFHbLN The first time I did the instructions of such complexity, I'm sorry if you find an error somewhere. sorry for the English. I use a translator) All Foto: https://www.flickr.c...157669168217032 Review Engine: Functions: 1. The front and Rear Brakes (Arm and leg) 2. Clutch (pen) 3. Modified Transmission of a set of 42048 Two Transmissions + Neutral 4. Drive Throttle Throttle 5. Steering Damper 6. Tripping 7. 3-Cylinder Engine to Simulate the timing (within two shafts) Subscribe to the Shannel YouTube: https://goo.gl/rmEAjx
 -
 Hi! This is my first topic on the forum, I would probably not have posted at all if it weren't for the pneumatic contest. A combination of me seeing the 42053 EW160 and finding my old lego technic from late 90's and early 00's led me to this forum filled with nice people playing with arguably the most versatile toy ever. I'm a trained mechanical engineer, though not practicing my trade yet, and looking back I believe Lego Technic was one of the big inspirations that made me choose that career path. Back in the day I had (and still have) a 8459 pneumatic wheel loader, and now I was leaning towards buying the 42053 EW160. But why not test my skills (and luck?) by making a nice little MOC for the contest. Enough drivel about the good old days, over to what I've come up with so far. Please bear with me, I am aware that you guys are way better at this, have more parts at home etc. The point of this project was to make something that I actually wanted for my already existing sets without costing a fortune for me to buy and build. It's a trailer suitable for both the 8459 and 42053, inspired by the Swedish-made trailers from Metsjö. I wanted it to be more than just a regular trailer with tipping function, so I'm aiming for a two-step high tip function which raises the rear of the bed before tipping it. The tailgate is automatically opening and closing with the tipping, thanks to a lever on each side which are connected to the frame. The final "function", so far, is a parking support in the front. This is what I've come up with so far, I must say that LDD is really bad when you want to try the functionality of your model. I still haven't figured out how to make the pneumatic circuit work as intended. The goal is to put the main switch on the Digger/Loader/Tractor pulling the trailer, leaving the two-step function automated and built into the trailer. So when you pull the lever to tip your load, it first lifts the rear, then tips. I'm hoping that my old friends, the laws of physics, will solve this for me without the need of two extra switches on board to route the air, but I suspect that Murphy's law will decide my fate in the end. So what do you guys think? Too simple and easy? Too predictable? Put on a LA and paint it gray and you'll end up with half an Arocs? Awesome? Improvements? Other ideas? If the feedback is good enough I'll just have to convince my bank account that I need to make an "investment" or two on bricklink to build it IRL. There's still a lot of things that needs testing which is not possible in LDD, so I'm a bit scared that I will have bought a bunch of bricks that won't work... metsjo-trailer.lxf
 -
 Hello Eurobrickers! This is my the biggest project. In this year, we celebrate 130 years of Coca-Cola, when the druggist J.S. Pemberton invented the recipe for this popular soft drink, so I decided to build a Coca-Cola truck with a wing body semi-trailer. Also truck was an inspiration to build my MOC. I know, that is not Xmas time and if you do not like a music, which I used in my video, you can choose one of them: , or this .Some technical informations: Truck: Dimensions: length: 52 cm, width: 22 cm, height: 22 cm, weight: over 2.3 kg, Power Functions: drive – PF XL motor, steering – PF servo motor, up/down 3rd rear axle – M motor, locked/opening fifth wheel – M motor, 1 x PF battery box, 2 x PF IR receiver, 2 x PF IR remote control, 4 x PF lights, 1 x PF extension wire 20 cm. The truck has drive, steering, up/down 3rd rear axle and a fifth wheel is locked/opened. The truck has also opening doors, opening door in second cabin, a hood can be lifted up to access the engine, which is eight piston engine connected with a rear axle. The second cabin has a removable roof to access a battery box. The stairs you can use as a toolbox or you can put a fire extinguisher Semi-trailer: Dimensions: length: 70 cm, width: 19 cm, height: 25 cm, weight: over 3.1 kg Power Functions: opening wing doors – PF M motor with gear box, lift in/out – PF M motor, lift up/down – M motor, outriggers – M motor, 1 x PF battery box, 2 x PF IR receiver, 2 x PF IR remote control, 1 x PF lights, 2 x PF extension wire 20 cm. The whole set is 106 cm long. I think, that is wrong weight both of them, and truck and trailer are heavier The semi-trailer has opening side and rear doors and also opening doors to a locker and an extension ramp. I hope you like it. Full BS gallery Some pictures:
 -
TECHNIC PNEUMATIC CONTEST By popular demand the next Eurobricks Technic Contest is all about Pneumatics. The new Volvo EW160E has been released recently, so it seems like a logical moment to focus on Pneumatics. In the past we've had several great Pneumatic models and recently we kind of lacked a nice manually operated model. TLG stepped up and released the Volvo. They even created a new hand pump for this model. So Pneumatics V2 is very much alive! DESCRIPTION Design a pneumatic model operated by one or more hand pumps and/or one or more (PF) motors powering one or more pneumatic pumps. So you can use motors as long as they are used to drive a pneumatic pump. They can't be used for other functions (not even to operate a pneumatic switch). There's no limit on the number of hand or motorized pumps and you can use. Third party hosing, strings and rubber bands are allowed. No other 3rd party parts. LEDs (and other LEGO lights) are permitted when you are using one or more motorized pumps. Since this contest is all about Technic and Pneumatic, Model Team entries are NOT allowed. A studded model is okay (like the excavator in the picture) but don't turn it into a Model Team entry. DEADLINE Deadline date is Monday 31st of October, 2016. Contest will be closed on Tuesday 1st of November, OR LATER. Disclaimer: I will close the contest when I see fit and when I have the time to process the results. This can be later than the deadline date. Please don't complain about this not being fair and all. RULES AND REGULATIONS The following section describes the contest specific and general rules and regulations. But before that, please take notice of a simple motto regarding the Eurobricks Contests: CONTESTS ARE FOR FUN! Of course there's competition, but at the end of the day, LEGO is just a hobby and the main goal for each of us is to have fun! CONTEST SPECIFIC RULES AND REGULATIONS Model Team entries are NOT permitted. Studded is okay, but no model team. One or more PF motors ARE permitted as long as they operate pneumatic pump(s). You CAN combine hand pumps and motorized pumps. Umbilical cords for hand pumps, switches or other operations ARE permitted. You can use ANY type of motor, as long as it's operating a pump. PF or other motorization is NOT permitted for non pump functions (not even operating a pneumatic switch). LEDs (and other LEGO lights) ARE permitted ONLY in combination with a motorized pump. There is NO limit on the number of pumps or pneumatic cylinders. 3rd party strings, hoses and rubber bands ARE permitted. Other 3rd party parts are NOT permitted. Linear actuators are NOT permitted. Electronics (PF elements used for non pump functions, SBricks and Mindstorms) are NOT permitted. Pullback motors are NOT permitted. There is NO size limit. GENERAL RULES AND REGULATIONS The contest is open to all EB members (also new members). Members who joined EB after the start of the contest can be banned from voting (when vote rigging is suspected). Voting rules will be explained later in the voting topic. One entry per member. Entries need to be new (never posted anywhere previously or shown at an event/LUG meeting). Only physical builds, so no LDD or other virtual entry. If you have any doubts about the suitability of your entry contact me, or Milan. All entries are to include only real LEGO. No clone brands, 3rd party parts, or digital entries allowed. Custom stickers are allowed. No cutting, sculpting or modifying parts. Entries are to be placed in the entry topic in this forum. Entries not in the entry topic are not eligible for voting. The entry post may be edited at any time up to the end of the contest, so feel free to make improvements if you wish. The contest might be closed later than the deadline. Don't complain about this not being fair. You have enough time to build. Don't ask for more time. We reserve the right to disqualify any entry that does not follow these rules. These rules can be changed whenever we see fit to ensure that people follow the intent of the contest. Staff members are Jim is not eligible for winning prizes. WHAT DO I NEED TO ENTER? All participant need to create a discussion topic and create a post in the entry topic. DISCUSSION TOPIC A discussion topic starting with [TC10]. A discussion topic needs to show some actual progress (i.e. pictures of the build in progress) and should NOT be used to "reserve an idea". ENTRY POST The entry post in the entry topic should contain: Entry name Short summary of the functions. One or more pictures Embedded video (mandatory) Link to the discussion topic PRIZES Prizes will be sponsored by the guys from Vengit (SBrick), for which I am of course very thankful. Keep up the good work guys. WINNERS The Top-3 contestants will receive a copy of the new Volvo EW160E! And of course they will be rewarded with a medal tag. CONTESTANTS Each contestant will be rewarded a pneumatic tag as well.
-
 I present to you my Lego Technic Chilli Crawler! This is a complete makeover and overall improvement from my previous Carrot Crawler: http://www.eurobrick...howtopic=112037 Yes, I know. This is the second crawler that I named after a vegetable; expect more! Features: - Triangulated 4-link live axle suspension using 4 soft, black shocks. - 4x4 with one PF XL motor mounted parallel* to each of the two axles. A final gear ratio of 1:5.001, yes this may seem slow, but the enormous Super Swamper tires make up for it. - Speaking of that, 4 RC4WD Super Swamper tires. No, they are not Lego, I got them from a nearby hobby shop. - One L-motor for steering in the front axle, geared down via worm gear to 8 tooth gear, then a 12 tooth gear to a 40 tooth gear. The 40 tooth gear drives another 12 tooth gear that moves a 13L gear rack. - Portal hubs for all four wheels. Standard Lego Unimog for the rear axle for rigidity; custom triangular plate portal hubs on front axle for a steering pivot point closer to the center of the tire. - Good articulation, about ~55-60 degrees. - Controlled with an SBrick. - Powered by a Lego rechargeable LiPo battery. - Green Chilli Stem** * The mounting of the drive motors parallel to the axles was a must for this crawler. By doing so, I have not only eliminated gear slippage as there are no perpendicular gears, but there is also a ton more ground clearance in both the front and rear axle. The rear axle especially as the motor is actually on TOP of the axle. Crazy, huh? ** Makes the crawler look so much cooler. Challenges: - As with all 4-link suspension setups, the mounting and placement of both the links and the shock absorbers proved to be a rather annoying, tedious part of the process. I have, however, managed to make a VERY rigid triangulated setup where the shocks are not bent or warped in any way. - The mounting of the two lower links on the front axle was also difficult as there was virtually nowhere I could mount these links onto. I was able to (somehow) securely mount both the lower links and the shocks of the front axle onto 7L and 9L beams on either side of the motor. - Mounting the motors parallel to the axles proved to be hard, but actually somewhat straightforward when it came to the rear axle. I had been so used to having drive axles perpendicular to the axle like on my previous crawler. The mounting of the front drive motor was difficult in the fact that its power is transmitted through various gears and the motor itself is connected to the axle by two plate beams and a pin or two. Although the front drive motor is still not completely rigid, I have had no problems with gear slippage whatsoever in either axle. Some pictures: And finally, here is the youtube video: I welcome any suggestions or comments you may have. I will, however, say in advance that I DO NOT plan on making a body for this crawler as I designed it for performance purposes mostly, a Lego "comp-crawler" as you may call it. Thanks, pt
 -
 I just bought a mini air pump today and an extension wire with the intention of splicing the pump to the wire. I wanted to know which wires on a PF cable carry current, and which carry signal for RC controls. I know there are two wires to carry current and two to carry signal, I’m just not sure which wires do what. Thank you in advance for the help.