Search the Community
Showing results for tags 'Review'.
-
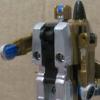
 REVIEW - 42043 - MERCEDES-BENZ AROCS 3245 INTRODUCTION So here we are, finally. Last year the Volvo review was published at the beginning of June, so you all needed to wait a little bit longer for this one. Rumors started early December of a licensed Mercedes set. What could it be, a truck, a car? Christmas Eve revealed the LEGO Technic 42043 Mercedes-Benz Arocs 3245. The eager anticipation of news about a new model always has its special moments. This time Paul (Boratko) had seen a first glance of the model. This resulted in one or two questions being asked. What's the color scheme? Does it have pneumatics? Does it have new pneumatic parts? Does it have double wheels on the rear axles? Does it have front suspension? Does it have this, does it have that? Was I excited at the moment? Hmmm not really. To be honest; I figured this would be the Unimog all over again. It's a public secret that I am not the biggest fan of the Unimog. A pneumatic crane that doesn't work too well, flaws in the steering mechanism and the model is leaning to one side, because of the battery box. Don't get me wrong; it is a decent model, and it definitely looks great, but it just doesn't cut it for me. So my initial thought was "will this be better than the Unimog?". We will find out at the end of this review The model is designed by Markus Kossman, who is lead designer at TLG and is known for some other flagship sets (among other models): 8421 - Mobile Crane (2005) 8275 Motorized Bulldozer (2007) 8110 - Mercedes-Benz-Unimog-U-400 (2011) 42009 - Crane Mk II (2013) It's safe to say that Markus has some experience when it comes to designing trucks. At the beginning of each stage, I state how long it took me to finish it. Mind you, that when I'm building for a review, I lose a lot of time shooting pictures. So your building time will probably be 70% to 80% of my time. Note: Pictures, taken with a Canon 70D with 50mm Canon prime lens, can be clicked for hi-res versions. SET INFORMATION Number: 42043 Title: Mercedes-Benz Arocs 3245 Theme: Technic Released: 2015 Part Count: 2793 Box Weight: 4455 gr Box Dimensions: 57,8 cm x 47,8 cm x 12,2 cm Model Dimensions: 54 cm x 23cm/51cm x 15cm (wo crane/w crane) Set Price (MSRP): Approximately € 200 Price per Part: Approximately € 0,072 per part Links: Brickset THE BOX The box is the same size as last year's 42030 - Volvo L350F (review). It's huge and it's heavy. Weighing in at almost 4,5kg, this actually does feel like the biggest Technic set ever. Unfortunately my box was severly damaged upon delivery. Even the outer box was damaged, and looked like someone had opened it. Luckily, the actual box was only damaged, instead of opened, so all the parts where still there. FRONT SIDE The front of the box shows the model (nothing new here), the Power Functions logo AND the new Pneumatics V2 logo. Hopefully we will see the last logo more often in future sets. Under the Pneumatic logo, all new pneumatic parts are shown. Three of the five parts are simply redesigned parts, but the two 11L cylinders (1x1 and 2x2) are brand new. INSIDE The inside of the box shows most of the features and functionality, combined with some fun facts about the real Arocs. The model will measure 54 cm upon completion. SIDES One of the sides shows the model and the two logos, while one of the other sides shows all the Pneumatic V2 and Power Functions parts. CONTENT OF THE BOX Being the biggest Technic set to date, means lots of parts. 2793 to be precise. 2 bags with 6 wheels 1 bag with instructions and stickers 1 bag with pneumatic parts 1 bag with L motor 1 battery box unbagged 4 bags #1 2 bags #2 5 bags #3 2 bags #4 6 bags #5 2 bags #6 SQUARE BOUND BOOK Like the 42039 - 24 Hours Race Car (some of them) this set has a square bound book sealed in a bag together with the sticker sheet. I really do like a single bound book, but when TLG divides the build into 6 stages, providing 6 booklets also makes sense. This would make building with your children a great deal easier. The instructions for the A-model count 105 steps, covering a whopping 471 pages! The sticker sheet with stickers for the A-model and two stickers (#25) for the B-model, apparently a Mercedes-Benz Actros 1845. For the first time (to my recollection) the 62.4mm D. x 20mm Tires are packed in bags. Normally they are scattered between the sealed bags. The new Pneumatic (V2) parts have been neatly packed together in a single bag. The hoses are cut to length, which makes assembly more straightforward. There's no need to measure and cut the hoses yourself. The L-motor comes in a bag, while the battery box doesn't. Normally the battery comes in a bag too. Since it has a slightly different color than the previous version, maybe the manufacturer or manufacturing process has changed. NUMBERED BAGS A total of 21 numbered bag, divided over 6 build stages. You can click on the bag to show a hi-res version of the picture. HIGHLIGHTED PARTS This chapter describes the interesting and/or new parts in this set. BATTERY BOX The color of the new battery box is slightly different than the old one. The dark bluish grey is much darker and the light bluish grey seems to be slightly different too. VERY SMALL SMOOTH PANELS IN WHITE For the first time a set comes with very small white panels (#21) and very small white panels (#22). These two panels complete the range of white panels available. WHITE PANELS Four other types or white panels are used in the cabin. NEW 60T TURNTABLE That kinda looks like a new turntable under the crane. Allanp was absolutely right about the introduction of a new 60 teeth turntable, resembling its smaller brother (bottom and top). As you can see in the comparison shot below, it's not much bigger than the old version. The design is much better, resulting in a smoother operation. The potential downside is that the new turntable doesn't have teeth in the inside, which can be limiting. That being said; I still think that this design is better than the old one, so thanks to TLG for bringing us this new turntable! Hopefully TLG will some day release an XL version with this design. TIRES Nothing special about these tires, besides coming in a sealed bag. So, why am I showing these tires anyway? It has nothing to do with the tires itself, but with the quantity. For the first time an official LEGO set contains more than 10 of these tires. The 42009 - Mobile Crane Mk II counts 10 of them and the same goes for the 8285 - Tow Truck from 2006. The latter also had double wheels on both rear axles, but it only had two front wheels. CRANE AND OUTRIGGER LIFTARM BRACKET AND GEARRACK I'm not sure what the part names will be, but crane arm outside and crane arm center are used for similar parts in the City theme. I will stick to Liftarm Bracket and Gearrack. These two new parts are perfect for outriggers and crane sections, but I am eager to see what MOC-ers come up with. I do see an application for Mindstorms Robots or TC7 Contest entries. The red section, containing the gear rack, is 15L. The gear rack itself is 14L. CLAMSHELL BUCKET Two clamshell buckets are introduced in this set. After the Grabber Arm Claw, this is welcome addition for crane enthusiasts. PNEUMATIC V2 Save the best for last, the new Pneumatic parts! Some people like pneumatics, some people don't. Nonetheless, it's great that TLG hasn't abandoned Pneumatics in favor of Lineair Actuators. They have redesigned some of the existing parts and even designed brand new ones. Some people on this forum will be so thrilled with these new parts. The outlets of every element have been redesigned in a way that the hose will be easier to attach. This means the existing elements do have new moulds too. SMALL PNEUMATIC CYLINDER The Small Pneumatic Cylinder isn't a new part, but it has been redesigned with new outlets. On the right you can see a comparison between the old (right) and new (left) cylinder SMALL PNEUMATIC PUMP 6L Like the small cylinder, the Small Pneumatic Pump 6L has also been redesigned. And TLG has used blue again, instead of the Unimog pump, where they used grey. I do like the blue version better, although you will probably not clearly see the pump in the finished model. The right pictures shows the three different versions of the pump. NEW 2x2 11L PNEUMATIC CYLINDER The new 2x2 11L Cylinder is 4 studs longer than the old Pneumatic Cylinder. I wonder if TLG will release a new version for the 7L cylinder as well. The picture on the right shows the 7L (right) and new 11L cylinder (left). NEW 1x1 11L PNEUMATIC CYLINDER When you do need length, but not a lot of power this new 1x1 11L will perfectly fit your needs. PNEUMATIC SWITCH The new version of the switch is simply a redesign of the old Pneumatic Switch with modified outlets. The pictures on right shows the comparison. PART LIST The part list, spreading over 3 pages, counting 2793 parts. THE BUILD The build consists of 6 stages: Front-end of the chassis Outriggers and gearbox Rear-end of the chassis Crane Cabin Tipping bed STAGE 1: FRONT-END CHASSIS Bags: 4 Duration: 120 minutes You start by building the front section of the chassis, with a small part of the cabin. No new parts are introduced in this stage, except for some newish parts from 1H 2015 and 2014, like Pin and Pin Hole and 3L Axle Pin with 1L Axle. The Arocs has a 6 cylinders inline fake engine. Of course the piston will move when you drive the vehicle. Here's a picture of the actual engine, used in the new Arocs. New 6-cylinder in-line engines with a particularly robust design and a longer life. An 88003 - PF L Motor is placed behing the fake engine, facing backwards. This motor is connected to a gearbox, which we will build in the next stage. This single motor will power all the motorized functions. Below you see the first front axle, with suspension. The 9L Technic Link is used to steer the front wheels. The front suspension uses the yellow Hard Spring Shock Absorbers, resulting in pretty stiff suspension. When the assembly is connected to the chassis, the 9L Technic Link is connected to a pivot point. Rotating the pivot point will move the link back and forth causing the front wheels to steer. The second axle is connected to the chassis. This axle uses a 6L Technic Link for steering. Using different links results in different steering angles for both axles. I did notice a strange anomaly; the front axle does have 1L Round Pin Connectors, while the second axle doesn't. The leftover parts only show one extra?! The video below shows how the steering mechanism works. Make sure the 12 Teeth Bevel Gear on the right is placed properly. I placed the gear in the same position as the one on the left, resulting in one of the lights making the model steer to the left side when turned right, and vice versa. The two pictures below show the model after stage 1. The build is okay so far. The most interesting thing about this stage is obviously the steering mechanism, attached to the pendular suspension. The mechanism is unlike steering mechanisms found in other models, so this required some out of the box thinking. STAGE 2: OUTRIGGERS AND GEARBOX Bags: 2 Duration: 45 minutes The first step of the second stage starts with the new bracket and gear rack. The outriggers could easily have been designed without this new gear rack, but since TLG designed it for the crane (probably); why not use it here. The stabilizers on the outriggers are operated manually. It would have been great to have motorized pads too, but it's not a big deal. The two outriggers are linked together in opposite directions. The new parts provide a compact solution, but there are no fixed mounting points for the driving gears. The gearbox consists of two layers with gears. The lower part of the gear box contains the Pneumatic Pump, much like the one found in the Unimog. Two black 12T Bevel Gears are driving the gear racks. The upper layer of the gear box contains the white Clutch Gear. This gear prevents the motor from stalling and overheating when the end of a function has been reached. At the end of stage 2 the gearbox and outriggers are connected to the front-end of the chassis. The truck is slowly taking shape. At this stage I was still not 100% convinced what I would think of the complete model. STAGE 3: CHASSIS REAR-END Bags: 5 Duration: 135 minutes With 135 minutes, the second longest stage in the build. In this stage you will build the rear-end of the chassis, with suspension and drive train. Four Flexible Rubber Axles are used in the base of the chassis. I am not entirely sure why TLG used these parts, since you will lock the assembly using liftarms. Possibly, it's a construction used in the real Mercedes, or these parts will be used in the B-model. I would love to hear your thoughts. The tilting mechanism for the bed uses a Linear Actuator, instead of Pneumatics. I have made a mistake by placing two of the Pin Connectors in a wrong angle. Won't be the last error with these connectors. The Rear suspension on the real Mercedes is actually a leaf spring suspension. TLG is mimicking this suspension type, by using the relatively new Steering Arms found in the 42021 - Snow Mobile and 75060 - Slave 1. Picture of the real rear suspension. The steel suspension on the Arocs impresses in every situation with its robust, solid construction, high performance and loadability. Two differentials are linked together using a small turntable. Although being linked together, the two axles still have the ability to move independently. The model will have two live axles, linked together by a drive train through the small turntable. Live axle vs Dead axle A live axle is a type of beam axle in which the shaft (or shafts, since live axles, while connected to move as a single unit, are seldom one piece) also transmits power to the wheels; a beam axle that does not also transmit power is sometimes called a dead axle. While typically used in vehicles with Hotchkiss drive, this suspension system can also be used with other types of power transmission. Or, to quote Allanp, who was right again: The rear axles are a single unit (suspended by 4 springs) that pivots longitudinally to allow the two axles to twist independently from each other by means of a 28t turntable piece allowing full suspension and both rear axles to be connected to the engine whilst all fitting between the dual rear wheels. Simples! Here's a video showing the rear suspension and drive train. WARNING We've all been there, a model with two differentials and one of them is turning the wrong way. TLG has published an explicit warning in the building instructions. Pay attention to the position of the differentials! After building the rear-end of the chassis, you will be merging it to the front-end of the chassis. This was the point where I needed to move my camera backwards a lot. The model is growing big. Double rear wheels on both axles, suspension and two live axles is quit a feat, especially regarding the limited available space. For me this stage was the turning point in the build. From now on you actually see the impressiveness of the model. STAGE 4: CRANE Bags: 2 Duration: 120 minutes Only two bags are provided for this stage, but it still took me quite some time. Connecting the pneumatic hoses does take more time than simply adding connectors. This stage did offer a variety of new parts, like the Pneumatic V2, new Turntable and the two Clamhell Buckets. Pre-cut hoses are quite convenient. The instructions clearly show which length you will be needing. There's little difference between 216mm and 240mm so watch out. The new 60 Teeth Turntable is mounted on the base of the crane. It turns a lot smoother than the old version. TLG really nailed this one! Normally I build in my LEGO room, but this time I was building in the living room. I was building, combined with reading topics on Eurobricks. At that moment I was reading Drakmin's response in the Technic Photography topic. He stated that he'd like to see making of pictures, combined with the end result. This made me take the next picture, where you can see my working place. And as you can see, sometimes a LEGO model needs a little spicing up The bottom view of the crane shows lots of tubing, which will add difficulty when you connect the crane to the chassis. The tubing is touching one of the gears, so you need to push the hoses aside. There's quite some stress on the hoses, so it can be difficult to get everything into place. A lot of Pneumatic Hose Connectors are used to guide the various tubes alongside the jib and booms. Instead of using a single longer hose, the sections are linked together using these connectors. The picture below shows the complete crane assembly. Normally I am not the biggest fan of pneumatics or building the crane on a truck, but I had a lot of fun building this one. Not sure why, but the size of the crane is very impressive and the techniques/parts used are pretty cool. STAGE 5: CAB Bags: 6 Duration: 150 minutes Stage 5 is the longest stage in the build. And it's probably the most rewarding, since you will see the truck come to life. You start by building the front bumper. The rear view shows how the slanting grill is achieved. The name Kossmann is clearly visible on the plate, making no mistake that Markus Kossmann designed this model. The front bumper is connected to the chassis by simply using connectors. The axles with the gears are sliding into the 7L liftarm, keeping them in place. At this point the chassis with crane is mostly done. You only need to add the rear bumper, before you can start building the cabin. The cabin grill is comprised of lots of Perpendicular Double Split Axle and Pin Connectors. I really like the design of the seats, because of its simplicity. The printed Mercedes logo adds a lot of value to the cabin. Here you can see another mistake I made with the pin connector. No way the steering wheel will fit like this. The Mercedes introduces two new white panels. They are used as "cab side edge turning vanes", which improve aerodynamics. There was some discussion about the looks of the cabin, but seeing it in real life, I can only draw a single conclusion; this cabins is one of the most beautiful cabins LEGO has ever designed/released. The front view is stunning! Here you can clearly see that I accidentally moved the head rests and didn't return them to the proper position. You will see this discrepancy returning in multiple photo's. I found a mistake in the manual, which can be somewhat confusing. I didn't look at the image when connecting the cab to the chassis, but when I did take a look when I was shooting pictures, I noticed this small flaw. The circle with the arrow, doesn't match the outlined image on the right. The circle with the arrow needs to be placed lower than its current position. Here you can see the tilting mechanism on the actual model. Front view of the cabin and grill. It does make you wonder whether this could have been the right moment to introduce a Dark Bluish Grey 11x3 Curved Panel. The front is instantly recognizable as a Mercedes. Obviously the Mercedes emblem helps a lot, but without the star it would have been clear too. At first I wasn't too happy with the white and dark bluish grey color scheme, but seeing it in real life makes a world of difference. Here's a picture of the actual cabin. The main difference is that the LEGO version only has three bars, instead of 4. I can live with this. The bottom front section of the cabin seems to be some sort of metal, so maybe Markus was right by using the light bluish grey panel. The radiator grille designed in a bucket tooth look lends the Arocs a striking, unmistakeable face and underlines its power and robustness. The leftover parts, I forgot to add to the previous shot. STEP 6: TIPPING BED Bags: 2 Duration: 30 minutes This is by far the easiest stage of the build, consisting of mainly grey panels and liftarms. The intersection shows the simple construction of the tilting bed. The finished bed looks....well uhhmm grey. A cool thing about the tipping bed is the lock at the end. This locks the tailgate of the bed to prevent cargo falling out. FINISHED MODEL After 10 hours of building the model is finally finished! I reckon most of you will do this in 8 hours (or less), if you don't rush the build. Markus delivered a great looking model, which is even more impressive in real life, than in pictures. As you can see in the picture below, there is quite some strain on the base of the crane assembly, where the pneumatic switches are mounted. Some of the hoses at the base can probably be cut a little shorter, to save space. BOTTOM VIEW The bottom view shows the entire chassis, with suspension, steering and drive train. Some of you said the wheels are too small and there's too much space between the wheels and the arches. Looking at pictures of the real Arcos, the second front arch, could have been placed a stud lower. Those minor details set aside, the finished model resembles the Arocs a lot! Even the rear view gives you the feeling you are looking at a real truck. With extended outriggers and stabilizers and operating the crane. I forgot to put the wheel chocks between the rear wheels for extra safety. My reviews always contain pictures taken in a photo studio. Unfortunately, this doesn't do this model real justice. That's why I left my comfort zone and went out to shoot some pictures at a local construction site. A friend of mine is the manager of the site and he happens to be building his own new house over there as well. There's no better excuse to take the Mercedes for a drive in his natural habitat. And while we are at it, why not let the Volvo tag along for the ride. FEATURES AND FUNCTIONS This set has quite a few features and functions. Controlling them is done by a combination of using the L-motor as a pump for the Pneumatic functions or by switching it to control three other functions. Switching is done by moving the levers on either side of the model. Reversing the function is done by the switch on the battery box. In the beginning this can be quite confusing. Since you are used to using a lever to switch between back and forth, I ended up switching between functions, instead of reversing the current function. MOTORIZED FUNCTIONS The Mercedes uses a single L-motor to motorize 4 functions: Rotating the crane Extending/retracting the outriggers Tilting the bed Compressor pump PNEUMATIC FUNCTIONS When the motor is driving the compressor, again 4 functions can be operated (as shown in the two images above): Opening and closing the bucket(s) Lowering/raising lower boom section Lowering/raising upper boom section Extending/retracting the jib MANUAL FUNCTIONS There are also quite some manual functions on this model: HoG Steering Tilting cabin Working fake enginge Wheel chocks Opening doors Stabilizers Tailgate tilting bed lock FEATURES Below is a list of the most important features: Double wheels on both rear axles Leaf sprung suspension on rear axles Two live rear axles Independant pendular suspension on front wheels OPERATING THE FUNCTIONS The long list of functions and features is great, but the most important question is "do they work properly?". Operaring the functions takes a little getting used to. Maybe it's just me, but I tend to get confused on whether to move the switch on the battery box or the lever on the side. For example; when you extend the outriggers and you want to retract them, you need to switch the battery box, instead of the lever, resulting in rotating the crane. Actually, I know that I am not the only one, since the guy demonstrating the model, didn't quite get it right too. Of course, after making the same mistake several times, you get used to it It helps a lot when you manage to use the right switches and levers. All the motorized functions work perfectly. The pneumatic functions do work a lot better than the crane on the Unimog, with a side note that movement can be a bit jerky sometimes. This is caused by gravity or strain on the pneumatic hoses. Besided the incidental jerky movement, you can actually fully operate the crane, which is something you'd expect from a flagship like this. Before we go any further, let's take a look at a video I shot demonstrating the functions: The video seems to be slightly out of focus. Sorry for that. As you can see in the video, I still need to find my way around the functions. The jerky and sometimes slow movement of the pneumatic functions is also visible. However, I still think the crane is as good as you will get using LEGO and Pneumatics. Lifting the entire crane simply requires a lot of power. All in all I am very pleased with the playability of the model. Here's an extra image, showing the truck with the cabin and bed tilted. B-MODEL Since the building instructions are not available yet, I couldn't build the B-model. This appears to be a Mercedes-Benz Actros 1845, as you can see on the back of the box. The cabin has more or less the same design, but the chassis is different. SUMMARY Here we are, at the end of this review. The main question I posed at the beginning of this review "Is this set better than the Unimog?" can be answered with a loud "Yes!". Your milage may vary, but the pneumatic crane is more advanced and it is working better than the one on the Unimog. There's no problem with the model leaning to one side and steering, although not perfect on this model either, works better than the Unimog. Which brings us to the obvious next question. Is this set also better than the 8258 - Crane Truck? The 8258 is absolutely a fantastic set (probably the most highly acclaimed truck to date), but to be honest; I think the Mercedes just kicked it from the throne. Without stickers, the 8258 doesn't look nearly as good as the Mercedes. Add the ongoing list of functions to the mix and the only possible conclusion is; the Mercedes is the best LEGO Technic Truck TLG has ever released. Aren't there any negative remarks? Of course there are, but they are minor. Because the steering mechanism uses more gears than usual, there's more torsional strain on the axles. Pneumatic control of the crane can be a bit jerky or slow. There are a lot of hoses between the switches and underneath the base of the crane, which requires applying some force when you attach it to the chassis. You also need to be mindful that the gear on the chassis doesn't touch one of the hoses. Here's a complete list with Pros and Cons: PROS The model looks awesome Biggest Technic set to date New Pneumatic (V2) parts 4 Motorized functions 4 Pneumatic functions The crane actually works Double wheels on rear axles Leaf sprung rear suspension Pendular front suspension CONS Steering causes torsional strain on axles Pneumatic controls can be a bit jerky (or slow) Lots of hoses underneath the base of the crane The last question I need to ask myself, is this set better than the Volvo L350F or the 8043 - Motorized Excavator? I'm not sure about that, but I will conclude this review by saying that the Mercedes did land a spot in my Top-3. SCORE How do I grade this set? 9 DESIGN Resembles the real deal a lot. 9 BUILDING EXPERIENCE The model grew on me during the build. 9 FEATURES Packs a ton of features. 9 PLAYABILITY The model offers lots of playability 9 PARTS Pneumatics V2 and lots of other interesting parts. 9 VALUE FOR MONEY You get a lot of Mercedes for your money. 9 BEST TRUCK TO DATE Thanks for reading and feel free to ask questions! More pictures can be found on my Flickr page. FINAL WORDS For those of you who are interested, I have tracked the time working on this review. I ended up putting around 35 hours in it, divided over: 2 hours of unboxing and taking pictures of contents 10 hours of building 3 hours of photo processing 18 hours writing the review 2 hours on construction site
 -
Stop motion review of 6264 Forbidden Cove. Subtheme: Islanders Year: 1994 Pieces: 214 Minifigs: 4 Price: $29,75 BrickSet, BrickLink
-
In honor of the impending marketing bonanza that The Force Awakens will inevitably inflict upon the world, I'd like to take a trip back in time. Just imagine... it's 1999: the release date of Star Wars Episode I: The Phantom Menace is dawning. A new Star Wars movie? Can you believe it?! The trailer had everything you could ever dream of: heated space battles, a demon with a double-bladed lightsaber, a young Obi-Wan Kenobi, a little kid, a cartoon rabbit... oh, wait. So on May 3, 1999, the entire population of the Earth was subjected to a marketing campaign unlike anything ever seen before (or since). Star Wars was everywhere! Everywhere. And in the immortal words of little Ani, "it [was] working!" I apologize, that reference was a bit of a stretch. So anyways, put yourself back into the shoes of your younger naiveself, before May 19, 1999 - before the deepest core of your being was challenged by The Phantom Menace. The Naboo Starfighter was the first in the new line of LEGO sets based on the film to be revealed, teased in a little catalog included with the early 1999 releases. As the catalog suggests, it was "so wizard, Ani." * (*Is the slogan "It's so wizard" an early reference to Episode I? Or was that just a random coincidence?) This tease blew me away as a kid. But did the model follow through? Was it wizard? Or did it suffer the same fate as the film it was based off of? Without further ado... Name: 7141 Naboo Starfighter Year: 1999 Pieces: 179 Minifigures: 4 RRP: USD $19.99 Links: Brickset, Bricklink 7141: Instructions Scan by montgomery.cloud, on Flickr PACKAGING I don't have any of the packaging for this set anymore, but I can extrapolate from other sets in the line that the box was rectangular and included a slide-out cardboard tray. Boxes in this era were a double-edged sword. On the one hand, the cardboard trays were a wonderful way to store parts and had a classy(ish) feel. On the other hand, the actual boxes were extremely flimsy and cheap in comparison. They were paper thin and ugly shelf wear was almost guaranteed (even with the utmost care). The actual graphic on the box/instructions portrays the scene where Anakin finds himself trapped inside the hanger of the Trade Federation doughnut. Subsequent versions would stray from this and instead focus around the blaster fight in Theed Hanger. The classic LEGO Star Wars logo is beautifully nostalgic - it's a shame that this type of logo was abandoned for the post-2001 releases. (Courtesy of toysperiod.com) The back of the box is typical for the classic line. On the left the figures are building the model. How nice of the Battle Droids to help little Ani and R2 out. Or they could be disassembling it. Whatever. The right showcases two alternate models: a racecar and a mech. Unlike the larger sets in the classic line, a comic highlighting various other alternate models is not included at the end of the instruction booklet. 7141: Instructions by montgomery.cloud, on Flickr The 1999 Episode I wave is curious in that it does not show screencaps from the film in the instruction manual like the first OT wave did. This is most likely because Lucasfilm wanted to keep Episode I a mystery... even though they released a novelization for the film on the same day as the rest of the merchandise. Later, the 2000-2001 sets would add in the screencaps. Something else of note: the little graphic behind the step numbers changes based on what you're building. Nifty! MINIFIGURES The set includes four minifigures: Anakin, R2, and two Battle Droids. Below I'll highlight some fairly wizard details about each. 7141: Anakin Skywalker by montgomery.cloud, on Flickr 7141: R2-D2 by montgomery.cloud, on Flickr 7141: Battle Droid by montgomery.cloud, on Flickr THE CART 7141: Cart Build by montgomery.cloud, on Flickr The build begins with this little tan cart for the Battle Droids. It's quick, only 10 steps, and it isn't too complicated either (unless you consider a two-piece hinge mechanism complicated). But there's a nice selection of parts here, including a tan 4x4 wedge (which is exclusive to this set!). 7141: Cart by montgomery.cloud, on Flickr The final product is... interesting. I don't really understand it and I don't remember it from the film, that's for sure. In a previous review by Mischa07, a user posted that it could be seen in the background somewhere. I can't confirm nor deny this claim as I haven't gone frame-by-frame through The Phantom Menace (because I value my sanity). If someone could provide a screencap to solve this sixteen year-old mystery, it would be most appreciated. Taking the cart by itself, I suppose it's a decent enough model. The top hinges up to reveal two printed 1x4 tiles which represent the engines. There's an awkward bare black bracket on the back (I'm proud of that sentence). I thought maybe it could serve as a gun rack by putting the handle into one of the hollow studs, but alas, it doesn't fit. So it's useless. Without any context to what this cart is or what it's supposed to do, this is the best I could come up with: 7141: Cart (2) by montgomery.cloud, on Flickr People probably didn't buy this set for the cart, though; they bought it for the real meat: THE NABOO STARFIGHTER 7141: Starfighter Build by montgomery.cloud, on Flickr The build is just as memorable as the cart's which is to say it isn't. It's a lot of stacking plates and slopes. There is one clever building mechanic used, however, which will be covered later on. Now some may label me something along the lines of a "hatorz" for my opinions on the prequels, but I'd like to think they're fair and balanced. Not everything The Phantom Menace did was terrible; in fact, one thing it excelled at was ship design. Doug Chiang deviated from the utilitarian and practical design of the Original Trilogy and instead (at the behest of ol' George) opted for a beautiful hand-sculpted look. The Naboo Starfighter is a great example of this: the craft is truly majestic in its simplistic, natural elegancy... 7141: Front by montgomery.cloud, on Flickr ...and the LEGO version is not. The shape of the Naboo Starfighter is very dificult to capture in this medium, and in 1999, LEGO's parts catalog and engineering was nowhere near sophisticated enough to pull it off. Most of the early Episode I sets suffered from the same problem:while the OT's angular vehicles were perfect for the simple and blocky design philosophy of the era, vehicles from The Phantom Menace were too complexly rounded. Now, keeping all that in mind, let's delve into what works and what doesn't: 7141: Dynamic Front by montgomery.cloud, on Flickr The model is accurate enough to be recognizable, but it has some flaws. Namely, it’s far too stubby; the back of the nose should really be extended by a few studs so the cockpit and the rest of the ship is shifted further back. It just doesn’t manage to capture the sweeping, smooth hood of its source material, no doubt due (in part) to the twin trans-green cones meant to represent the laser cannons. They look out of place and break up the flow. I see what the designer was going for, but I would’ve preferred additional slopes with a print of the barrel. I recognize that a fourth exclusive print is a lot to ask for in a $20 set though. 7141: Side by montgomery.cloud, on Flickr Moving farther back, we arrive at the cockpit. The printed parts provide some much needed detail and bring a modicum level of believability. I hate the use of 4x3 yellow slopes. A nice part to have, sure, but they bring an unnecessary width to the midsection. 7141: R2 Slot by montgomery.cloud, on Flickr Behind the cockpit is a slot for Ani’s Astromech aid. Unfortunately, while the “real” ship covers the droid up to the dome, the model leaves R2 almost entirely exposed. It’s extremely awkward. But, to be fair, although later versions have come close to achieving this effect, none have been completely successful. 7141: Cockpit by montgomery.cloud, on Flickr Inside the cockpit, things start to look up again. I love everything about the interior. It might be simple, but something about it feels real to me - I think it’s the consistency of the color scheme. Having recently bought its 2015 successor, I can say for certainty that the 1999 version’s cockpit is superior in almost every way. 7141: Dynamic Back by montgomery.cloud, on Flickr This is by far my favorite angle. It (mostly) hides the lack of length and the jagged slopes, and emphasizes its relatively smooth tapering on the engines and main section. For 1999, it’s rather impressive. 7141: Engine by montgomery.cloud, on Flickr The engine tails were accomplished using a simple but effective technique: a black technic bar is inserted into the end of the engine and allows for the 2x2 cylinder to be placed in the opposite direction. 7141: Bottom by montgomery.cloud, on Flickr Finally, we go below the ship, revealing another misstep - a confusing misstep as it sort of adds to the model in a way. This odd missile construction looks like garbage when the fighter is in the air (where it’ll be most of the time during play), but when it’s on the ground, it produces a nice levitating effect. It’s extremely flimsy as well; I imagine it would be a nuisance to kids who want to play with this thing. FINAL THOUGHTS 7141: Complete Set by montgomery.cloud, on Flickr All in all, this is a decent set… by 1999 standards. The Naboo Starfighter has already been remade three times... so which version should you buy? Well, it all depends on what you’re looking for. Are you a classic LEGO Star Wars fan? Do you have an odd fixation of the hype leading up to The Phantom Menace like me? Then you most likely have this set. Do you want an accurate representation of the ship? Are you interested in dozens of pointless side builds? Then there’s an excellent version in stores now that I wholeheartedly recommend buying. The point I’m trying to get at here is that you probably own this set if you have any interest in it. But, if you’re a relatively new collector with an open mind (and an open wallet), there’s a lot to like here. It’s one of the cheapest ways to get Anakin, there’s some Battle Droids to add to your collection, and most importantly, the Naboo Starfighter is arguably the most iconic vehicle from Episode I. If you’re looking for a set to represent the first wave of Episode I products, then look no farther: this is the set to get. It isn’t accurate, even considering the time period, but it’s charming. FINAL SCORES Playability – 8/10: This thing has everything you would want in a play set. I suppose instead of a useless cart LEGO could’ve given the droids some sort of attack vehicle. Minifigures – 10/10: Everyone integral to the scene is represented here. The battle droids are wonderful (and the set includes two!). Design – 7/10: Apart from the flimsy missile, the model is very sturdy. My issues mainly lie in the aesthetics of the Starfighter, which are just “okay” even by 1999 standards. Price --- 10/10: $19.99 for a ship… a cup… a ship… a speeder… what a bargain! Overall --- 8/10 And with that, this review has been concluded. If you’re nostalgic for the good ol’ days of hilarious Episode I speculation or just extremely curious like me, then check out the links below. I hope you enjoyed the review as much as I enjoyed writing it (which I did not). Be sure to tell me what you think of the set and my review of it. I'm a big boy, I can take the criticism. Probably. Prequel Rumors Dark Ocean Spider Butt The Silencer
-
Ever wondered what LEGO set 264 looks like? BrickGrrl Hailee Hollingsworth reviews 3 sets from LEGO's 1974 lineup. LEGO set 264 Living Room, 272 Mirror and 293 Piano. Leave a comment to tell us what you think of these Throwback Thursday episodes of BrickGrrl.
-
Hi,everyone!This is my first review on Eurobricks and i sorry if there is any mistake in this review.The set i will reviewing is 60042 High Speed Police Chase that released in December 2013. As one of the 2014 City Police sets,this set featuring police officers in they normal blue police uniform busting crime in the city,same like the other 2014 City police sets.Different from 2011 City sets that also featuring police officers that wearing normal police uniform,2014 City Police sets feature blue police uniform and dark blue coloured police cap,which helps to set apart from the 2011 police sets.Same like High speed chase set from 2013 City theme,this set also featuring a scene that shows police officers that chase down crooks with the police forces vehicle,but smaller.many people asked that why I choose to buy this set instead of 60007 that featuring a exculsive minifigure,a unique game code,a police 4x4 vehicle that looks like a Hummer,a beautiful red sport car,and higher piece count?With the questions mentioned at up there,you may think this set is not needed,but are this set are seriously not needed,or this is a underrated small set? Let the review begins and enjoy reading this review! General Information Set name : High speed police chase Set number : 60042 Pieces : 110 Age recommended : 5-12 Theme : Lego City Police Year Released : 2014 (December 2013 in U.S) Price : $19.99 The Box At here,we have the front view of the box itself,with a police car chasing two crooks with their awesome dirt bike.At the left side of the box,the set number 60042 and the age range showed there.The design of the box is nothing new and special. At the back at the box,you can see some simple illustration about the features of the set itself.Nothing too special here,because most of the City sets has a simple illustration of the set like this . If you see the box patiently,you can see a 1:1 scale minifigure picture at the upper section of the box.here is a SWAT female Police minifigure as a comparision with the 1:1 scaled minifigure picture.Wow,it's exactly the same size! The instruction At the picture provided at down here,you can see the instruction booklet itself.At the front page,it's almost the same picture like the front view of the box.The instruction book itself has 48 pages. ( Including the front pages and back pages) A random page of the instruction book itself. At the rear pages of the instruction booklet,once again we meet the extremely annoying kid. The Set This small set is coming with two packet of the bricks and a sticker sheet.I applied all the stickers and i started build this small set. New/Interesting Parts Some interesting parts in this set. Bag one content The bag 1 contain the bricks to build the crooks,the ramp,and the motorbikes. Bag One Results Bag 2 At bag 2,we will build the police car and the police officer itself. Bag 2 Content Bag 2 results (Stickers applied) Completed Set The whole set in all glory. Minifigures This set comes with 3 minifigures,1 police officer,1 male crook,and 1 female crook.The police officer has a new designed torso printings.The crooks also has a new printing that shows they are wearing black jacket in a light grey and dark grey striped shirt.No alternate face printings in any of the minifigures. The back of the minifigures.All minifigures in this set have back-printing.No printing available at the minifigures leg. The Motorbikes This set also comes with 2 dirt bikes and 1 police car.Both motorbikes has golden rims,but their comes with different color.The black color one is my favorite. The crooks riding the dirt bikes. (Sorry of the blurry picture) The police car At here,you can see how the police car look from the front,side,and rear.Nothing too special here. When i first finished this set,i found a issue about this set is:Where is the backrest for the minifigure? But later I found out,Ah-ha !The police minifigure can put into the car with a sackbag at his back!This provides extra luggage spaces for the car,since the car lacks a luggage space. Because this car lacks a pair of door,you need to open the roof the put the police officer in the car.Why it's so difficult for the designers to include doors for the cars!? The ramp The ramp itself is simple but looks good.Nothing special here. Conclusion and rating Minifigures 6/10 : Nothing special in the minifigures in this set,but the printings are very detailed and we finally have a female crook. Parts 7/10 : Most of the pieces that have in this set are not dificuit to found,but we get 4 golden motorbike rims,1 green dustbin,2 recoloured dirt motorbike shell,1 recoloured motorbike frame and a neat-colored police hat. Playability 8/10 : This set is small.but it provides great playability for kida and this is a good set for your children's birthday. Build 6/10 : Nothing too challenging,but the final result is good. Price 5/10 : A little bit overpriced,will be better if lowered the price. Design 7/10 : The police car looks good and looks more like a real car,the ramp is good designed too. Overall : 76% - I'm am happy with this set because of the police car and if you want a low-costed lego Set for your children/friend,this set is suitabe for you and your wallet.Except for the price,I'm happy with this set and i want to keep it.
-
Firstly I’d like to mention the biggest controversy with this set. It had been delayed for about two weeks here in the UK due to a production problem. The friction between the Technic pieces and the legs of the ant model were very loose. The updated sets have extra ‘2M Cross Axle W. Groove’ and ‘Nose Cone Small 1X1’ for each leg to make them more stable and it’s a successful change. I did try and use it without those two addition pieces (how it was originally produced) and they were not strong enough to hold the model with a little pressure on it, it would just want to get squashed. Nothing else was changed besides the instructions; the boxes are the same, without any changes, It’s hardly noticeable. I’m not sure if this is the same case for the U.S. as they have been available there since the June 1st release date. I’m not sure it they would go up in value or not. The Brick Fan has a picture of the two different instructions manuals for anyone who is still curious: http://www.thebrickf...tle-76039-issue When I first heard that that a set would be produced based on Marvel’s Ant-Man film I was shocked like many others because LEGO only releases sets based on one Marvel movie per year as shown in recent years ever since the ‘Super Heroes theme has been around . I hope that this trend continues in the future. So next year we would have an entire wave based on ‘Captain America: Civil War’ and at least one set based on ‘Doctor Strange’ around the same price as this set. It is a shame that LEGO never produced more sets based on the ‘Ant-Man’ movie, it has much more potential but I guess it could have got overloaded like the ‘Avengers: Age Of Ultron’ sets. Packaging Once again we have the Marvel Super Heroes banner across the top of the box which has the Ant-Man picture on the top right hand corner. The artwork showing the set is great as Ant-Man comes to the rescue to stop Yellow Jacket throwing screws and LEGO bricks across the floor or table. I would just like to point out that if this is indeed the final battle in a kid’s bedroom as the trailer suggests, then why on earth are there loose screws? Sometimes designers could have poetic licence so that may be the reason why. The bottom right has the movie logo as well as showing you the Minifigures included in the set. The new addition of the super jumper graphic makes it seem like only two Minifigures are included and they are showing you the ant-man Minifigure again as an example since the Ant-Man and Hank Pym figures are very similar in design. Minifigures This set contains three exclusive Minifigures: Ant-Man, Yellow Jacket and Hank Pym. The Ant-Man (Scott Lang) Minifigure’s printing is spot on in comparison to the movie however it could have easily had arm printing. The main problem I have is the helmet, in the movie it’s completely covered hoover in this set it looks like they when between the comics and the movie with the mouth opening. I personally think it could have been how early LEGO designs these sets. Not many people know that the studios send them early concept art which is why some scenes that sets depict which don’t appear in the final cut of the movies because changes were made in the production of the movie. These toy and product designs are done way before the movie is even filmed. Another problem with this set is the reuse of existing Minifigure heads in this case its Ezra Bridger’s head from Star Wars: Rebels. The printing on Yellow Jacket (Darren Cross) again is spot on besides not having arm printing. Its problem lies with the dark silver colour chosen, in the movie its black. This time LEGO has decided to reuse typical bad guy head which has also been used in many other sets, it suits him so I cannot complain. His mechanical harness is my biggest problem, it’s great for kids with the ability to move them and to shoot the studs, for collectors and perfectionist like me I would have recommended that they should have used ‘Leg W Ø3.2 Shaft 1/2 M’ in Black with yellow printing on it. I’m currently trying to figure out the design of my own. The harness itself is really bulky and it’s annoying that they used a tan piece which does not fit will with the contemporary design of the figure. Finally the most controversial figure: Hank Pym. This Minifigure is the most basic of the three with minimal printing since he was the original Ant-Man before hiring Scott Lang. He uses the Gandalf’s head which was also reused in the new Jurassic World sets. Hank Pym also comes with an extra black head piece to presumably cover his entire face since the helmet didn’t? I believe he might have flashbacks in the movie of him as Ant-Man. This could also be a figure that never shows up in the movie as it could have just been a scraped idea during early production. I don’t believe an old Hank Pym could shrink anymore which is why he retired; we have to wait until we see the movie in about a month! The complete set took about 30-45 minutes to assemble. This set contains 2 numbered bags (1-2) you also get the pair of wings loose in the box. Thankfully mine were not creased. This set has one instruction manual, a comic adventure which features all three sets from the Summer 2015 Marvel wave. The comic for Ant-Man is nothing special other than showing the same thing as the box where Yellow Jacket is tossing around screws and LEGO bricks. Most people normally dread stickers but I’m so thankful for LEGO making the graphics as stickers since The ‘LEGO’ logo can be used on other colours of ‘Flat Tile 2X2, Round’ pieces since they are clear backed. Someone did mention they are not but that may be for certain countries. I defiantly need to Bricklink a couple of the sticker sheets for my upcoming MOC’s! Bag 1 features all the smaller builds and accessories including the white base with the ‘giant’ LEGO bricks representing a ‘Bright Red, Brick 1x1 and a ‘Bright Yellow, Plate 1x2’ The set also comes with the regular ‘Bright Red, Brick 1x1 and a ‘Bright Yellow, Plate 1x2’ to scale back when the figures are at their normal sizes. When pictures first surfaced of the set these quickly caught my attention. The LEGO bricks really set a scale for the Minifigures in context but you can also use them as regular Minifigures. Now it makes me wonder if the LEGO bricks will be in the movie, or if it's just a nod to the LEGO brand! The trailer does feature some simple blocks and other toys but I guess this made the most sense for a LEGO product to have ‘giant’ LEGO bricks. The screws are a very nice small build; it makes you want to build some large tools to go with them. The bag also contains two small ‘Earth Blue’ ants which are really cool. As I mentioned before, a super jumper is included. I would really discourage you using them since they chip the back of the legs. I really hope LEGO fixes this for those kids; otherwise they will have broken Minifigures within a few months of play. It also contains Ant-Man (Scott Lang) and Yellow Jacket (Darren Cross) Bag 2 features the Hank Pym Minifigure and main ‘flying ant’ build which I over looked. The model starts with building the main framework for the legs and wing attachments. The legs have very limited movement due to the large leg pieces uses. The second part is the abdomen which is defiantly the heaviest part of the build. I partially like the why the designer rendered the back as it’s so sleek. The head is the final part of the ant’s main body with its cool transparent yellow eyes and small mouth details at the front. The wings are attached last which are connected to the main body with a single ball joint each which allows for full articulation. One problem I did come across is that that the ball joint areas are besides the seating area for Ant-Man so the legs slightly rub against them when placing him in and it also limits you from moving the figure forward or backwards. It’s an easy adjustment though, you can use a ‘Cross Axle 7M’ and place a ‘1/2 Bush’ at either side before you place the ‘Ball Cup 3M Ø10.2.’ The wing pieces themselves are really cool and realistic since they have the small textures. I also dislike how the Technic beams are exposed on the wing joints; you could easily fix that by replacing the two ‘Crossaxle 3M With Knob’ with two ‘Cross Axle 3M if you are going to keep the wings tightly attached. I guess with the why LEGO have designed it gives you an option on how tight you want the wings attached. I really like that they didn’t be really lazy and included grey or black pieces for the bottom, instead the when realistic and added the ‘New Dark Red’ pieces across bottom of the entire build of the flying ant. You can also see some small amount of pink pieces which are not just there for fun, do believe they are added as realistic details. The actual build was pretty decent for its price. The model is very sturdy and nothing has fallen apart after swooshing it around for a couple of hours. Final Analysis/ Conclusion I absolutely adore this flying ant, is size is fairly small for the price of the set. Since this is a singular set from a specific movie the production value of the pair of wings and the two new helmets greatly affected how much the designer could put into the set. I’m not complaining about the size of the ant, it’s a perfect size and I wouldn’t change the size or the model, even those minor quibbles because I won’t be playing with it. I just feel it’s slightly small for the price. The addition of the ‘giant’ LEGO bricks and catapult feature, small ants, screws all set the scene and give a full sample of what you can expect from the movie. For £19.99 you cannot go wrong; it’s a great impulse buy from a movie and you don’t need to get tons of sets to get all the characters. The Minifigures, model’s and playability is all there. This is defiantly one of the best set around this price that LEGO has released in a few years. Good job designer. It appeals to me more than the current larger models on the market for sure. I got it for the Minifigures; boy was is a surprise and a successful set overall! Design: 9/10 – The design of all the elements in this set are amazing and the way they have been rendered and executed in the movie context is just outstanding! There are a few small clever details, references and jokes in this set. Build: 9/10 – The build was quite refreshing from the normal cars and boats in the Super Heroes theme. Minifigs: 9/10 – Ant-Man, Yellow Jacket and Hank Pym are all exclusive and will mostly likely never be rereleased in future sets in these variants, as Marvel is guaranteed to update and alter the designs for future movies. Playability: 9/10 – A great playset, including a ‘flying’ ant and a catapult; what else can you get for £19.99! The ant model is mostly adjustable besides the limited movement on the legs. Parts: 9/10 – This set mostly consists ‘New Dark Red’ and ‘Earth Blue elements ‘as well as a hint of dark pink. It does include one or two odd exclusive recolours and don’t forget the exclusive helmets. Price: 9/10 – The overall models feel slightly small but the price is somewhat higher due to possible costs for new helmet moulds and the wings, the fact the price is fairly low it’s hard not avoid. Overall: 9/10 – Defiantly everything a young kid would want, some small nit-picks may frustrate AFOL’s and fans of the movies/ comics. I really hope you enjoyed this in depth review; feedback and criticism is much appreciated. You can find the full album of pictures here: https://www.flickr.c...157652352125904
-
Hello, this is my review of the Lego Ideas Set "The Big Bang Theory" (21302). And if you like, a lot of sunny images you can find right here, with many details. Bazinga! :-) Best wishes Andres
-
Hello everyone! I was browsing the forum for some reviews of the sets I bought during the May the Fourth sale and I noticed many were missing. So I thought I would make a review to fill that gap and contribute to the LSW community. So here is my first review : 75085 Hailfire Droid Name: Hailfire Droid Theme: Star Wars / Episode II Year: 2015 Pieces: 163 Minifigures: 3 Price: USA 19.99$ (Target exclusive), ENG 19.99£, CAN 24.99$, EUR 26.99€ Ressources: Brickset Lego store description The box The front of the box with the new 2015 art: A stormtrooper helmet tagged with a rebel alliance crest. On the back, we can see the play features and images of the lone clone trooper fighting. Inside the box there is 3 numbered bags, the 2 loose printed wheels and the instruction booklet. There is only one instruction booklet with the same image as the box on the cover The back Spare parts The build The build after bag one. The middle piece of the model. The build after bag 2. The inside part of the wheel holders The build after bag 3. The outside part of the wheel holders. The model is now complete. The completed model (back view) The completed model (side view 1) The completed model (side view 2) The completed model (top view) The wheels in straight mode. The model is not stable and will roll back and forth if you surface is not 100% flat. The wheels can be folded down 90 degrees but more than this and the wheels don't touch the ground and the model doesn't roll anymore. The minifigures Now on to the minifigures. We get 3 of them. One clone trooper Lieutenant and 2 Super Battle Droid. The Super Battle Droid. The same as the one release with other episode 2 sets. The 'incomplete' back The clone Lieutenant compared to the polybag version we got in october 2013 Note: The sets comes with only one clone trooper. The one on the left is from the polybag. The one on the right is from this set. As you can see they are both exactly te same except the newer version as leg printing. ( I just noticed the printing on my new lieutenant's helmet is a bit off. Maybe I should call and request a new helmet.) The back is exactly the same Rating --------- These two point are not included in final score.I will still rate them as they are important for some people. Let me explain: Price: Too much dependent on where you live and your Lego budget. Also, Lego is kid oriented even with the big AFOL community. Most Lego sets are gift to childrens so the price will not affect the overall feeling of a kid toward is play set since they don't pay for it and generally they won't know the price. Parts: only affect the overall score for MOCCERS who need pieces for their mocs. This should not affect the rating of people who display their model and/or play with it and don't dismantles them for parts. Price: 5/10 – 163 pieces for 20$ is under the 10 cents per piece ratio. Still if you are interested in the clone Lieutenant, 20$ is the price you would have payed on the aftermarket for one. I feel another clone trooper should have been included at this price. Parts: 6/10 – The printed wheels are exclusive to this set. They are the highlights in term of parts, depending if you like them or not. We also gets some pieces in 2 different shades of brown. But most pieces are small grey and black bricks that don't seem that interesting. We also get a lot of technic pieces. --------- Build 6/10 – Except for the middle section, its a pretty repetitive build. It should take around 15-20 minutes to build this set. It's an easy build. Design 6/10 – I think this all comes down to if you like the printed wheels or not. It does look somewhat like the source material but it should have bigger wheels and more rocket launchers. Also you cannot leave the spring loaded missiles in the launchers because they will damage the spring if you leave them in too long. It won't damage the spring but I don't leave my spring launcher loaded because I don't like having "loaded" shooters on display. Thus it diminishes the value of this set as a display piece. Minifigures: 5/10 – The Clone Lieutenant is a great minifigure and the highlight of this sets. This is a good way of getting the Lieutenant for those who missed the polybag and don't want to pay the ridiculous aftermarket prices. The two droids are a bad selection for this set. We should have gotten 2 brown battle droids instead of 2 SBD. In the worst case t least 1 brown battle droid and 1 SBD. Also a fourth minifig should have been included. Playability: 6/10 – You get 4 spring loaded missiles shooters and wheels to roll around. So this is pretty swooshable. But by itself there is not much to do because you get 2 SBD and only 1 clone trooper. This set is clearly meant to complement other Geonosis sets from the 2013 wave. OVERALL 5.75/10 – Definitively not one of the best set of the winter wave. I would not recommend this set alone but it's decent complement to your Geonosis collection. Also even if the minifigure selection is not the best, this set is worth getting for those who missed the clone Lieutenant polybag. I am pretty sure we won't get a third chance to get a blue phase one clone trooper. Here is a little bonus for those who got through the review Thoughts and critiques welcomes! I tried my best for the lighting while I took the pictures. I tried pretty much all the lamps in my house and this is the best result I got. Are they too dark? Also if there is any grammar mistake burning your eyes, please PM me and I will edit. Thanks for reading! PS: Could a moderator please PM me. I would like to add polls.
-
Firstly I'd like to apologise for the white fabric used as the backdrop; at the time of photographing it I didn't have any paper that was large enough, it didn't stop me though. Now on to the review! When The Simpsons theme was announced many people were very surprised and shocked that LEGO would be making sets based off The Simpsons TV show. We all expected several smaller playsets however it turned out that LEGO as brave enough to kick off a brand new theme with a direct to consumer set and a licenced collectable minifigures series. Here we are a year later with the second Simpsons set which is also a direct to consumer set and well as a second collectable minifigures series. If this keeps going then this could easily be the best theme LEGO has ever done! When I first saw the Kwik-E-Mart set and saw the theme's early trend I committed myself to collect every set that comes out of The Simpsons theme (hopefully this theme won't have any exclusive minifigures or promos that are out of reach; don't get any ideas LEGO!) Packaging The Simpsons yellow banner is still the same which is nice to see. I like that it has studs all the way across it with an odd appearance of a pair of eyes. The front has a basic shot of the set in context and two small windows showing that it opens (top right) and the minifigures in the bottom left. Don't be fooled that most of the accessories that are shown in the minifigures hands aren’t additional ones; the coffee, Doughnuts, Squishee and the black sack are all placed in the set as the instructions state. The ones I didn't mention are separate from the actual set. The biggest surprise about the box is the back; they decided to give you two different shots of recordings from the two security cameras in the store which is very cool and convincing. The other scenes and scenarios are boarded with rectangles or circles. In the top right it has two planes of the set; top without roof and the roof removed. At the bottom they give you a very small bar with all the exclusive pieces and the quantities. And finally at the top of the box it gives you a selection of some of the impressive sub-assemblies in the set. Build Experience It took 12 hours, the care and patience to apply over 50 stickers took up a good chunk of the time. This set contains 16 numbered bags (1-8) and one unnumbered with several 8x16 Sand Blue plates; you also get two 8x16 Medium Stone Grey plates and three train bases loose in the box. This set has the square bound instruction manual and two large sticker sheets hat are sealed in a plastic sleeve. When I first saw pictures of the set it seemed quite simple just like The Simpsons House, but actually Marcos has incorporated some pretty neat building techniques. These Simpsons sets are exactly like Modular Buildings but with simple designs from the nature of the show; they have their own unique style and charm. I enjoyed the build; it's pretty straight forward with very nice small assemblies and accessories that make these Simpsons sets stand out. Normally LEGO sets focus on the exterior but this has a jam-packed interior, much more than the Simpsons House. The build is very similar to the Simpsons House. I was disappointed to find several pieces that have dented corners; however I did manage to hide them away in the internal structures. The number of extra pieces for this set is insane! I'm guessing close to 100 pieces. The best thing about them is that you get an extra can top and a doughnut as well as those other three common printed 1x1 round tiles. Everything else it fairly common and useful for people like me who make microscale MOC's ...Don't forget the very handy Brick Separator! Since I built it in the evening (I couldn't wait) therefore no pictures of the contents before the build. Here are the sticker sheets (one on white and one clear.) Minifigures Arguably the weakest aspect of the set is the minifigures. This set recycles three members of the Simpsons family: Bart, Homer and Marge. For those like me who are collecting the entire Simpsons theme it would be a waste to get multiples of the same figures. This would have been a great opportunity to include different facial expressions or different clothing. On the other hand if you are getting this as a one off or you missed out on the first Simpsons collectable minifigures series, now is your chance to catch up! Since I haven't reviewed or ever expressed my thoughts on the Simpsons minifigures in a set review, I thought now would be a good time for me to express my thoughts on The Simpsons minifigures. I like the Simpsons head molds because they give a wacky and comical feel to the minifigure with all the odd shapes and sizes. Having the traditional minifigure head wouldn't have worked as well however it does concern me that LEGO will produce less minifigures and recycle the head pieces in the years to come since they have make a new mold for each character. Judging the way it's going with the Simpsons collectable minifigure series I don't see that happening but it's a shame that when you pay for a set this size you do expect a couple of exclusive characters and minifigures. Homer and Bart are perfect minifigures they both have their respective clothing. The colour of Bart’s torso is wrong but that's going to happen since it's not like LEGO has every shade of each colour. The red torso works just fine and the new addition of molded sleeves, shorts and shoes really make these minifigures stand out. Marge is wearing her traditional lime green dress and her beaded necklace which continues on the back of the torso. Her towering hair is perfect and has a small hole on the top for possible customisation using the LEGO Friends accessories. One huge problem I have with her design is that she is bare foot! They could have easily molded her legs in two different colours as shown with Bart. This is the third Marge and still no updated design. Like many others I also don't like that the fabric piece has a gap, maybe if it was a little longer that could easily be covered. We get two new variants of Chief Wiggum and Apu. Chief Wiggum's has his police uniform covered with the left overs and crumbs of the doughnut he just ate, interestingly the also added some around his lips. This is the kind of updated variants I don't mind getting, they are small but they are effective. Apu comes in a different outfit with is name tag. His torso is a very pale blue almost aqua. Snake is exclusive to this set. His torso's is one of few that are much more detailed than the other Simpsons characters with his blue t-shirt and dark blue jacket. As with all the Simpsons head molds this is no exception; it’s pretty accurate to the actual show. His tattoo is separate from his t-shirt; it must have been an error in production. This set has three great exclusive minifigures that we properly won’t ever get again. I just wished we got a Lou minifigure to pair him up with Chief Wiggum. Playability This is another dolls house playset which great for both playability and display. Like the Simpsons House this set also gives you both options of accessibility: hinged and removing the roof. Marcos has decided to split the back sections in to halve which I believe gives you more access for play. Having the doll's house effect makes these models feel classic and vintage. In the Jasper section of the freezers you can pop out the door and take out Jasper and make him melt on the floor. You also have a Chief Wiggum's police car other than that it's just loads of detailed interior which you can play with and most of them can be removed for easy accessibility. Again it’s how toys used to be where it was just one simple feature and your imagination does the rest. I wish we got Marge’s car in this set as she is doing some shopping. Display Attributes Chief Wiggum's Police car is much like the Simpsons pink car. At least this one has a roof! The front of the car is a very unusual way of building up details on cars normally it's just a plate or slopes but this one has the 1x2 plate with rail near the centre. It's very funky looking. You can fit two minifigures at the front and one at the back. Nice detail that the used the classic fence piece. I see many people adoring the doughnut sitting on the dashboard but I hate it, it's very out of place and doesn't match with the doughnut piece in any way. You will need to deconstruct the roof and the windscreens to easily place your minifigures since Marcos has cleverly made the base of the car very low. Chief Wiggum's Break... The front details of the Kwik-E-Mart store are dead accurate besides the colours. We have three purple creates at the left hand side. The bike rack at the front is cleverly done but it's a shame we never got at least one bike (the one pictured is NOT included.) My personal favourite is the phone booth; it's very interesting how it's constructed. The front also has two stickered 'Flat Tile 2x2' with 'Kwik-E-Mart Parking Only' I don't understand why these were not printed. I like how Marcos has offset the windows and used SNOT between the yellow walls and the main entrance using the plates with slides, something that could have easily been simple and boring. The main entrance has two stickers on the windows 'Jackpot, Play To Win Here!' and 'Drink Up! Buzz Cola.' On the show it's a Duff poster but for obvious reasons it was replaced; I guess no Moe’s Tavern in the future… One complaint I do have is that the structure to hold the entire Kwik-E-Mart signage should have been grey but it would be very hard to do since how cool the sign is assembled, plus it's not necessary since the sign pretty much covers it from most angles due to its size. The stickers for the sign were exactly the same size as the 'Brick 1x2x5' and look much brighter than the white bricks which is very unfortunate. I like the way the signage is constructed, if it had brick built all the letters it would have been way too large considering it's already the perfect size. One thing Marcos avoided and that wasn't necessary was the same signage on the sides of the roof. They use a blue turntable base for the fan/generator on the right side wall of the store with more piping details going into the roof. I like the fact it has worn brickwork and several piping details on the walls. Continuing along the right we see another poster '30 Lost Cats...Call Me' referencing to the 'Replaceable You' episode. The dumpster area has a blue opening door which can be locked in place with a Technic piece and inside you will find the iconic blue dumpster. On the exterior walls of the dumpster area you will find some 'El Barto' graffiti, a 'No Dumping' sign and a 'Wanted For Treason' poster referencing to 'Lisa The Iconoclast' episode. The blue dumpster can open to reveal two 'new' black sacks. Another mouse would have been nice behind the dumpster. It would have been nice if you could also remove the dumpster area; for me it's causing display problems because it's too wide. The poster at the back 'The Leftorium...Next Right' is a reference to the episode 'When Flanders Failed.' The right hand side of the back has the back exit which has a blue door with an 'Employees Only' sticker. Next to it we see more weathered wall at the bottom and a mouse hole. Moving to the last side of the store can see more of the pipes and weathered effect to make it more interesting. We see a purple poster 'Spider-Pig: The Musical' a referencing to 'The Simpsons Movie.' The final poster on the exterior the store is the 'Springfield Seafood...50% More Eyes' a reference to the episode 'Homer the Father.' The posters/ads on the exterior walls are really cool Easter eggs and referencing to the show; I just wish they gave us some extras! Before all of the pictures were unveiled I said that if that roof is hollow it needs to have pipes and fans on the roof. Well they have gone to extra work to incorporate: Apu's secret utopian vegetable garden Skylights (ironically they don't let much light in at all) and the purple fan or ventilation. I very much like the roof and it also brings back how classic LEGO houses were built, they could have easily made them with plates like the Simpsons House but they tried to differentiate between the two. Below is a few pictures of the roof detached: This set is very similar to the Green Grocer with the fridge/freezers. They are full decked out with food and groceries. Most of them consist of 1x1 Bricks and cones as well as studs, 1x1 round tiles and cheese slopes. However they contain several printed pieces: four green cartons of orange juice, four blue milks, four chocolate milks and four Buzz Colas. I very like that they included a reference of Jasper however he could have easily been another minifigure instead we are given a sticker of him to be applied to the half cylinder. I'm pretty sure they could have just placed a minifigure behind the glass or it wasn't blue enough they could have made him completely transparent or light blue (that would have been very cool.) One thing to note about the hinges in this is that they don't detract from the interior wall unlike the Simpsons House which did due to the chimney. This set it's all covered by the details that cover the walls and are only shown when the set is opened which is a much better improvement. The back of the store you can see the storeroom which contains a grey mouse and a slice of cheese. It's pretty small to get a photograph of when it's built. The door uses two stickers to give it the Keep out sign and the detail of the door. On the right from that we have a 'Powersauce' area with six bars of 'Powersauce' Note: all of those are stickers in this area. The E•Z Money machine is one of few builds that are incorporated into the model itself. It used three stickers and one printed 'Roof Tile 2x2.' The coffee machine is fairly simple but the two cups are very neat. On the side we also have to plain white coffee cups. The next machine has red and yellow dispensers and it’s design is by far the simplest. The Buzz Cola machine is another clever build which makes use of ‘Brick 1x1 W.Handle’ for the dispenser and it has studs used as cups at the bottom. The two arcade machines are very cool, I completely missed that these were included in the set when pictures first released. They get the idea of arcade machines very well but feel they should have tiled the sides and added more stickers to complete the look. To be honest I don't think it's really possible fitting two that are wider, if they would have their would have only been one plus now that I think about it, it's already a tight squeeze and they aren't too revealing unless you take them out of the store. On the first aisle we have a sign 'Kwik-E-Mart: Yesterday's Food At Tomorrow's Prices' below that I suspect we have 11 packets of some sort. On left hand side we have the bakery which has a yellow sale sign above it and has four Strawberries, four candy spirals and four biscuits. Below that we have a pile of green 2x2 jumpers and three copies of 'Soup For One' You may as where the other one is...you will have to wait and see. On the right hand side we have perfumes and a few other random things. At the bottom we have three 'Dry Diapers' (two have stickers) The second aisle starts off with three chocolate milks (I guess they are those powder mixtures since they aren't in the fridges. Below that we have two boxes of 'Dog Food' (one with a sticker) and another random product beside it. On the right of the aisle we have transparent bottles which are also on sale. Below them we have a fruit area with three copies (each) of bananas, green apples and red apples. The left side we have some more random builds and finally we see the forth copy of Soup For One' which as misplaced by a customer, it's such a small detail but I really much appreciated it since it does happen occasionally when grocery shopping. The final product on this aisle is three copies of 'Krusty O's' which are printed on a 'Brick 1x2x2' I don't know why they never tiled off the top to hide the studs. On the counter I would firstly like to start with the doughnuts, it's a very nice assembly which holds six doughnuts. The 'Heat Lamp Dogs' section of the counter is a nice assembly however the sausages are loose so you have to be careful not to tip the set over. In front of it you can see another stand with three copies of 'The Springfield Inquisitor' and two copies of 'Let's BEE Friends.' In between the counter when it's split into two halves is a a fallen sausage. Coming towards the front we have the counter covered in a few products and on the other side we have two separate racks with two 'The LEGO News' three copies of the 'Springfield Shopper' three copies of 'MOM Monthly' three copies of 'Angry Dad' and two copies of 'You're A-Peeling.' Do note the 'Welcome' mat. The back of the counter we have a Jackpot machine and two Squishee's (lime and purple) besides that we have the actual Squishee machine which has a large squishiee cup. This is built is many different directions with uses of angle plates. This is what it would look like if Apu had been robbed badly! Although I don't know why they wouldn't also take the jackpot machine and cashier... Here is a closer look at the tiles that are placed on the counter racks: · 3x Springfield Shopper · 3x The Springfield Inquisitor · 3x MOM Monthly · 3x Angry Dad · 2x You're A-Peeling · 2x Let's BEE Friends · 2x The LEGO News All of those are exclusive to this set besides the two copies of 'The LEGO News' which are pretty common. Value for Money This retails for £169.99 in the UK and contains 2179 pieces. The price surprised most us but in fact the footprint of the model is larger than The Simpsons House; then saw the designer video and was impressed with the size; now that I own its damn huge. The small details make the set pop out from other sets. Growth Potential Currently it's only available to LEGO VIP members but as of May 1st it his set will be available to the general public at LEGO Stores and http://shop.lego.com/ This will do very well as an investment since it's a large set it may be over looked for its price. When I was at my local LEGO Store I saw many people admiring the model on display at the store but most people did overlook it. Another factor for this set would be its licenced pieces, stickers and minifigures as well as the other rare coloured pieces. Size Comparison Final Analysis/ Conclusion Overall this set is properly one of the best collectibles out there in Simpsons merchandise. I would like to say a big thank you to Marcos Bessa who I hope stays on this theme as a designer, his love for the show is clearly presented with a very unique building style as well as all the small references from the show and minifigures. I would call this one of the best LEGO sets currently available on the market and in line with the Modular Buildings; for the younger crowd (excluding the price.) Design: 9/10 – The unique comical style and colours are fun, its exterior is defiantly not detailed as the exterior but its transition between the show and the product is outstanding. There are lots of small clever details, references and jokes all over this set. Build: 7/10 – The walls, roof and the fridge/freezers get slightly repetitive but other than that the small sub-assemblies and details are the most fun to build. Minifigs: 7/10 – Homer, Marge and Bart minifigures are nothing all that special, but that's to be expected since they are the main characters, next time I hope we see different facial expressions or clothing. The two exclusive variants of Apu and Chief Wiggum are really nice and I hope to see more like them in the future. Finally the exclusive brand new character: Snake is a very cool addition to the Simpsons line up. Playability: 9/10 – This is exactly how old toys used to be where it was just one simple feature and your imagination does the rest. The addition of the police car would be great for little kids to have a small car chase with. Parts: 9/10 - Like the Simpsons House, this set has many bricks in new and/or rare colors such as the Sand Blue plates. It also has several exclusive printed parts and a ton of those roof tiles. Price: 9/10 - 2179 pieces seems low for the price considering the Simpsons House had over 300 pieces more, but I'd still say it's a fair price for a model of this size, plus is licensed. Overall: 9/10 – Yes the total average doesn't add up but to be honest it’s close to perfect beside some small things. I got this before the Simpsons House simply because it’s got much more to it. It’s got so many more references and small details from the show which makes these sets much loved my fans of the Simpsons and people who are building LEGO City layouts. Next year I hope we see The Android's Dungeon & Baseball Card Shop with tons of comics and maybe even an exclusive Radioactive Man minifigure. I really hope you enjoyed this in depth review; feedback and criticism is much appreciated. You can find the full album of pictures here: https://www.flickr.c...57652124134275/ "Thank You For Coming! I'll See You In Hell!" Oops wrong quote... "Thank You! Come Again!" Adeel Flickr: https://www.flickr.com/photos/115928480@N03/ Youtube - www.youtube.com/user/WebheadStudios Instagram - www.instagram.com/adeel_zubair Twitter - www.twitter.com/Webhead_Studios
-
 Hello, in March, I have been to Billund and bought an exklusive Billund-Architecture-Set: The "LEGO House" (4000010). Beside the nice building, a fine booklet and a minifigure are included, as well. This is my video review - in German language. But if you have any questions, please feel free to ask me at any time. The "real" Lego House will open in about two years from now. Have you already seen this set or have you visited Billund in the past? Best wishes Andres
 -
So I told myself when I bought 60036 last year that I wouldn't buy any more Arctic sets, and that I didn't need 60034 because I probably had all the parts anyhow. But then I went into Smyths, and they had a sale, and well....err... here is my review of 60034: Arctic Helicopter Set #: 60034 Year Released: 2014 Piece Count: 262 Minifigs: 2, plus 4 dogs RRP: $39.99, £24.99 I must admit the first time I saw images of 60034 I was quite excited; a lego helicopter not in police or fire colours. Not only that but clearly based on a real helicopter; the Sikorsky S-65 (CH-54) Skycrane, and almost in the livery of a real operator; Erickson Air-Crane. Also the huskies looked awesome! So did the set live up to expectations? The Box: A surprisingly compact square number: The front shows the helicrane doing what it does best, coming to pick up a crate under radio direction from the explorer on the ground. The husky team stand firm despite the rotor downwash and somehow avoid an unplanned swim. A nice touch is the pilot visible in the cockpit as this pose is not really possible in the actual model and he just disappears in the dark behind the trans-blue glass. Note the city skyline hiding just behind the mountains at the back. The back of the box is extremely busy as the left half is entirely taken up by the modular build and city online adverts leaving the right side to demonstrate the action/play features of the set: Take your husky team, detect the crystal block, call in the chopper, then race it home. The top edge is less action, more science with the team photographing and sampling the ice. A 1:1 pic of the helicopter pilot is shown for reference at 90° to the rest of the image as the box is barely a minifig tall. The Contents We get 3 bags, two booklets and a sticker sheet which between them pretty much fill the box (it barely rattles when you take it off the shelf): Sorry no printed parts in here! Here are the contents of Bag 1 which makes the crate, minifigs and dogsled: The ice block and crystal (in this colour) are unique to the theme, there are some 1x1x2s in light bley, we get a couple of ice picks and this is the first time I have seen the new style radio and metal detector pieces. Compare for example the new parts on the left with their classic equivalents on the right: I think the older radio looks much better, I'm also slightly disappointed by the loss of the stud on the detector as this reduces the MOCing potential of the part. Bag 2 & 3 give us too many parts to photo so here are my highlights: 3 2x2 round tiles with hole, 1x2x2 orange windows (though only 1 piece of glass), some orange Technic arm pieces and grey 1x2 plates with Technic axle holes. The Instructions The first booklet is about half the size of the second and covers the husky sled and crate build from bag 1. The cover shot is exactly the same as the box, but removes the helicopter and photoshops in the pilot: The second booklet cover also replicates the box art the same but photoshops out everything but the helicopter. The instructions are clear with good colour differentiation and a wavy pale blue background. My only possible gripe is that, as with 60036, the 'sticker' icon is missing from some steps so stickers magically appear on parts such as: The shot below shows the good colour differentiation between dark bley and black and light bley and white which is occasionally poor in other sets (including 60036). The instruction steps are all very clear and provide part callouts and plenty of pointers so your are unlikely to miss anything. The Minifigs Here we have our pilot with standard smug aviator sunglasses face and the Arctic pilot torso; I still love the leather jacket and parachute printing even if it is identical to that for the 60036 pilot. The explorer fig is the same female fig found in 60036 with the, in my opinion, unnecessary torso hourglass print; the details of the rest of the print are great though as noted in my 60036 review the goggle print limits use of the head to winter MOCs. A view from behind, I do very much love the Arctic logo: The Build and Model: Dog Sled and Crate The crate comes first and there is not much to it- plates over the base stack 2 bricks per support then add the roof, done: It does look quite effective, though lacks some realism in that the contents are not secured in any visible way. The sled is a very similar size to that of the one in 60036 though featuring some design differences. Oddly the sled features a much larger radar screen than the 30036 offering but no visible radar dish. Believe it of not this shot is the sled finished except for accessories and dogs: With everything on the sled looks quite good, and as ever the huskies are brilliant with each having a slightly different appearance due to the grey/white plastic mix: Although it looks good the sled has some drawbacks over that of 30036. Firstly there are no 2x2 round boat studs or similar on the underside to reduce friction so it tends to get caught in carpets. Secondly the camera attachment is rather flimsy and as the equipment in the crate is loose you tend to lose pieces if mushing too vigorously. Finally the crate attached direct to the large orange piece and so has a low of clutch power, so changing loads to the ice block (as shown in the instructions) requires quite a bit of effort and can lead to unplanned disassembly of other parts. 30036 got around this issue with jumper plates though that resulted in some loads being offset due to the different footprints of the 3x4 crate and 2x2 ice block (a problem this set does not have). Here is the sled carrying the ice block: The Build and Model: The Helicopter The helicopter starts with the spine, I was slightly confused at this point about the two 1x2 plate with hinge facing each other: It tuns out that these are a clever method of holding the engines (which I should note are the 2x2 stud versions not the older versions with the same shape but 1x2 pylon attachments): The spine grows very quick and suddenly you realise this model is going to be huge! Notice the winch, which passes through a gap in the spine: The cockpit is a separate build to begin with, and the reason for having 3 windows but only 1 glass element becomes clear: I assume this build method was chosen over using the equivalent 1x2x2 panels to reduce the overall number of unique parts required in orange. I suspect for this reason we also see 1x1 and 1x2 bricks used where we would normally see a 2x2 corner brick: You can also spot in this shot that I was mistaken, we do get 1 printed part after all, the instrument panel which is fairly common to city era aircraft. As with the 60036 helicopter the pilot gets a single control stick rather than the classic 90's two. The rather heavy build at the back of the cockpit gives the model some strength but unfortunately makes the rear window and spotlights feel a bit redundant as the pilot cant really get to them. The real skycrane had a rear facing operators station from which the winch operator could control the aircraft during winching operations. The snot plates of the cockpit are used to provide additional structural attachment to the spine via some 2x6 plates with a few bits of greebling: The landing gear is then built from a variety of Technic parts and some snazzy stickered wedge parts for decoration. The landing gear is probably the only fiddly bit where younger builders might need help (aside from sticker application of course) as parts have to be correctly aligned when inserting pins/axles: Finished, and my is it a big helicopter, although the crate just fits underneath. This is not helped by the fact the model actually sits a few degrees nose down as the nose gear is 2-3 plates higher than the main gear: As the winch is a single point attachment your loads will tend to swing around, though his can be temporarily fixed for the crate by attaching it to the plate at the bottom of the spine when winched fully in. And to justify having this set as well as 30036, well what happens if the mini helicopter from 30036 breaks down and needs rescuing: One last shot of the helicopter from the front: I think lego did a great job in capturing the feel of the skycrane in this model. It looks convincingly like a heavy workhorse and makes me think this model is what 60021 should have been (tilt-rotors don't make sense for logging operations). I must however, note two small deviations from the instructions I made in this build: 1 - I build the rotors with the opposite offset of the blades to produce an anticlockwise (Sikorsky type) rotor rather than the clockwise (Airbus type) the instructions showed. 2 - The rotor mast has an empty Technic pin hole behind the engines which I filled with a pin and 1x1 clear round tile from the spare bits in the set to simulate a gearbox oil sight glass. Finally a beauty shot of the whole set: Conclusion and Scores Parts: 7 - Good selection of bits but nothing unique except in terms of colour. The Figs: 8 - Very nice printing on both figs despite the unnecessary hourglass torso effect. If I hadn't already got the same figs from 60036 (admittedly different pilot face) I would be extremely happy so have rated accordingly. The dogs are simply great, very cute and the individuality of each due to the colour mix is a real bonus. Build & Model(s): 8 - The Dog-sled build disappoints slightly (until you get to adding the dogs) due to its simplicity. The helicopter has enough interesting techniques to please seasoned builder without being complicated; and when finished it just looks great! It would also be easy to use this helicopter in a city/forest scenario by simply swapping the skis for wheels. Playbility: 8 - Should be 10 but points lost due to the issues with changing loads on the dog sled and running it on carpet. A few extra parts could easily have solved these issues. The accessories (metal detector etc) allow for some play before the helicopter swoops in, but let's be honest, that's where the action is! The helicopter winch is easily controlled one handed whilst flying with the other and the model is very robust and swooshable. Value for Money: 8 - Though I think this score depend on whether you have any of the other Arctic sets as you could easily find yourself with many duplicate figs and vehicles fulfilling the same functions which will determine your view on the value of these element and also affect how long each particular set may be played with. Certainly for the sale price (£21) I was very happy, for RRP I would probably still be. Overall: 8 - Excellent helicopter, let down slightly by issues with the dog sled, but not enough to seriously affect the playability or enjoyment of the set. So what's your view?
-
Summer is almost here, and the ice-cream shop at the old Heartlake Lighthouse has opened for a new season. Join Stephanie and Kate and enjoy your favourite ice-cream flavour. Basic info of the set Set no.: 41094 Name: Heartlake Lighthouse Theme: Friends Year: 2015 Pieces: 473 Minifigs: 2 (plus a seal) Age group: 6 - 12 Price: £ 39.99 / US$ 39.99 / EUR 39.99 Price per part: 8.455 p / 8.455 c / 8.455 c Links: Bricklink, Brickset, LEGO S@H The box The front of the box is a standard Friends design, with curved sides of the box. The top right corner has a cartoon picture of the five main Friends characters, while at the bottom right there's a picture of the two Friends, Stephanie and Kate, included in this set. The box art is lovely, and I like the balloon in the background. In the bottom left corner, there's a small picture of the back of the lighthouse, which I find a bit redundant. It's too small to see the details, and as most of them are shown on the back, this picture could be omitted from the box art. The back of the box is nicely showing all the wonderful details, and is actually very appealing. Almost half of the box is covered with small windows showing different details and play features of the set. Although these little windows reveal much of the details of the set, and take away the element of surprise, I find them really useful in presenting the set. My favourite feature window on the back of the box is the one showing set's accessories. I admit I was simply captivated by all the ice-cream flavours available in the ice-cream shop. In addition, there's a new hair pin in the shape of a flower, and a coin of 5 FMU (Friends Monetary Unit). The sides of the box are following the standard box design. There are typical hearts, paws, butterflies, stars, flowers and musical notes on a lavender background. On one side, there's also a smaller picture of the set. The top of the box has a picture of Stephanie as a measure of size. This is a nice feature, but I would expect something more catching here, as there are plenty of other interesting parts in the set. The booklet The front art design of the two instruction booklets copies the box art. If you have a sharp eye, you can notice the bottom left corner of the booklet is torn. That's how I got it. Also, the booklet was twisted a bit, and stayed like this even after a couple of days under a box full of parts. Inside the instruction booklet, there are no surprises. The background is lavender, and the odd pages have a small heart watermark, which is a typical feature in Friends' instruction booklets. Individual building steps are simple, and if needed, placement of some parts is emphasizes with arrows. The back of the instruction booklet surprised me with an image of the new series, the Elves. I bought and opened the set in late January, so the Elves were still an upcoming series. In a way, they are connected to Friends series (the Elves use the same minidoll design) so this shouldn't be a surprise. The parts Inside the box, there are two instruction booklets, a sticker sheet, and a 8x16 medium azure plate. Parts not being inside the polybags is becoming a fashion, and I'd really like to know why is that. At least in this case, the plate is not that big, and could easily be packed inside a bags. Also, with its sharp edges it might contribute to damaging the instruction booklets. The parts are organized in four numbered bags. Considering the part count (473) numbered bags are expected. Each of the numbered bag had inside one smaller bag with the small parts. The sticker sheet was only slightly bend in my case, and I was happy not to see it damaged. In general, I don't like stickers as much as I like printed parts, but with the Friends series, there are some neat design. However, this is the first set where I actually applied only some of the stickers. If you read through the review, you'll see what I mean. Inside bag no. 1 the majority of the larger parts are in white and tan. Medium azure plates stand out a bit, but only due to the bright colour. When organizing the parts for the picture, I was surprised to see that Kate's torso was not packed inside a smaller bag as Olivia's torso and both of their legs were. Other special and interesting parts in the first bag are the bright pink boat, ice-cream cone, reddish brown plates with swirl top and a bright pink flower with pointed petals as hair accessory. Inside bag no. 2 the most parts are in white and medium blue, but there's also a fair amount of bright pink. An interesting part here is the bright pink 2x2 macaroni brick, and it appears in this set only. In addition to bright pink, medium lavender is another Friendly colour in this bag. I also like the flower plates in green, red and dark pink. Another rare part are the white doors, as they are available in four sets only. Bag no. 3 contains roof slopes in dark blue, and more of bright pink bricks for the lighthouse tower. I was excited to see inverted corner slopes in dark blue and the 2x3 and 1x2 slopes in dark blue. These are not very common, but they'd allow more dynamic roof tops in every city. In addition to flower plates in green, red and dark pink, a bright light orange flower plates are included as well. Bag no. 4 has more specific parts than the first three. Also, the most interesting parts can be found here. There's a lot of white parts included, but the most interesting parts are in other colours. An exciting recolour is the quarter round fence in magenta, which appeared in 3 other sets. Starting from left to right, there's a lot of the flower plates, and they come also in lavender, which is a new colour for this part in 2015. There are also some ice-cream parts included, such as a trans-neon green popsicle, ice-cream scoops in bright light orange and lime, and round plates with swirled top in bright pink and white. The most interesting parts in this set are shown on the picture above. Most of them are recolours of the existing parts, while some are completely new and unique to the set. Some of them I mentioned before, but just to emphasize my favourites. It's really nice to have a boat hull in yet another colour. If you're after bright pink bricks, this set is worth having for the variety of them. But then there's also the ice-cream cone and scoops, (not so) new plant, lavender flower plate and a printed coin plate. In my opinion, this set has a great value in these small and special parts. There's a lot of extra parts in this set and they are a nice selection. Mostly, they are the usual combination of small and easily lost parts, but there's are also some really nice extras. I really like the amount of extra flower plates, 5 FMU coin plate, and the round plates with swirled top. The minifigs Stephanie (left) and Kate (right) are the main characters in this set. Stephanie is one of the 5 original Friends, while Kate is not. I was a bit surprised to find out that Kate is not unique to this set, but she appeared in two other sets, namely 41000 Water Scooter Fun and 41037 Stephanie's Beach House. Kate is enjoying a scoop of chocolate ice-cream, while Stephanie seems to be more interested in taking photography. Stephanie is sporting a medium lavender wrap around skirt unique to this set and green top with stripes. She also wears modern trans-purple sunglasses, available in only 3 sets. Kate is wearing a bright light orange layered skirt, which is common in this theme in other colours as well, and a bikini top which she wore also in 41008 Heartlake City Pool and 41034 Summer Caravan. It's really nice to have more variety in Friends' clothing and the wrap around skirt in lavender will fit nicely with other tops. There's no printing on the back, but it would be nice to see the striped pattern on Stephanie's top. Both of them also have hair accessories. Stephanie has sunglasses, which are different from the ones that appeared in previous Friends sets. Also, they look more realistic being a trans-colour. Kate has a flower hairpin, which is a new design. I wouldn't mind using this part as a real flower. The obstacle for this is the small pin, which doesn't fit the holes in plant leaves, but it fits the flowers and can be then attached to the bottom side of the leaves. The build The building of the set starts with a minibuild setting for the seal. It's a small rocky island in the middle of the water. It's a very simple build, but it's effective for the purpose. I'd prefer a grey jumper plate on the top or if it has to be green, dark green would be great as well to present a wet algae on the top of the rocks. Reddish brown seal is rare, but not unique to this set, and has appeared first in the Friends Animal series 6. It looks really cute seating on top of the rocks. I'm guessing Stephanie is observing him/her through her binoculars. There's no printing except the eyes, which are not so realistic, but they do give the seal a cute look. The next minibuild is the boat. It's hardly considered a build on its own, as only few parts are added as equipment. There are wooden benches for sitting, and a special tile so hold the minidolls in place while enjoying the boat ride. I really like the brown bars as an extension of the paddles, as they allow minidolls to hold the paddles and actually row. What I don't like about the boat is the flags colour. I'm not sure red and pink go together, and almost every other colour would fit better. Stephanie likes taking a boat out to the lake (or sea) to observe the seals. The boat is big enough to accommodate also her equipment, the camera and the binoculars. And if she wants company, she can move her equipment to the front of the boat to free seating for one of her friends. The building then continues with the base for the lighthouse. My favourite part here are the brown pillars, on which the pier is latter build on. These are hidden in the next steps, and I wanted to show that the designers also had in mind these hidden details. The finished base for the island has three different areas. There's a small patch of grass on which the lighthouse tower will be built on, and a large wooden area for the adjacent building and the pier. The medium azure plates are nice for the water, as they create a more tropical atmosphere. The building of the lighthouse starts with the base of the tower where a small toilet is. White dome bottom is used for the toilet, which is simple design, but works fine. A weird detail is the dark pink flower on top of the toilet tank, but I'm guessing it's there as decoration, and not a part of the toilet tank. The details of the toilet are hidden as soon as the walls are built up. It's here where the white door is used, and I have to say that this is the most appropriate door colour and design for toilets. When I first put a toilet in one of my MOCs, I had a huge dilemma which door to use. It's really great TLG started making this door also in non-transparent colours. Initially, I was sceptic about bright pink walls of the lighthouse, but the colour fits nicely. The door should have a sign to indicate the toilet behind them, but I decided against using the sticker. I plan to use those door in MOCs, and I'm not sure they'll be used as toilets only, so I'm also glad the door is not printed to have a choice to used them as something else as well. Next the base of the adjacent house is build. It's a combination of white and medium blue. I like this choice of colours, as they complement bright pink nicely. A cute design are also the floor lamps, two are positioned at the base of the walls, and latter more are added to the patio area. I was surprised to see that the building continues with the front wall, as it felt a bit unstable. Another colour is introduced as the canopy, and it blends in with the colour scheme really nicely. The front door to the ice-cream shop is ''decorated'' with an ''open'' sticker sign. Left wall is latter build, and the window on the side has the same canopy. The odd parts here are the yellow window panes. The really look out of place. I wish white panes or a glass would be used instead. Additional pillars that give more stability to the walls are built, and they partly cover the cute floor lamps. Later on, the building of the lighthouse continues with the second floor. This floor act more as a storage space than actual floor, as it's a place where Kate stores various bottles. I'm guessing these are soap and air-fresheners used in the toilet bellow. The house part is finished at this point, and the colour scheme pops to life here. The combination of blues and pinks is really pleasant to the eye. The plate above the roof window has a sticker on, so that everyone can see from a far that this is where the ice-cream shop is. Only thing out of place, at least in my opinion, are the yellow window panes. More details are added also to the back of the building. There's a loft area above the shop with a makeshift bed and a wonderful view through the window. In the lighthouse tower a map is added to the top floor together with very simple ladder. The map is the same as in the 41097 Heartlake Hot Ait Baloon. I consider myself an experienced builder, yet here I made a colossal mistake when building the cooler case for the ice-cream in the shop. I used the larger trans-clear panels. I discovered this mistake when I was looking for those large panels in latter steps. Obviously, the instructions to open one bag at a time make sense even if you're a bit older. This is how the lighthouse and its adjacent building looks in the winter. The patio is empty, and more details can be seen that way. The new magenta curved fence is used at the top of the lighthouse, and the radar dish in magenta is used as a roof. Overall, despite the pink and magenta not being traditional lighthouse colours, the colour scheme is really pleasant, and even the yellow window panes don't looks so disturbing. In the last few steps, more details are added to the patio in front of the house. There's a small table where Kate is enjoying her chocolate ice-cream, and as it seems she has another portion of strawberry ice-cream waiting for her. In the back, there's an advertising board showing the ice-cream selection. While this is a lovely detail, it's a bit hidden in the back. Also, the before mentioned floor lamps are added to the patio, and I can almost imagine the atmosphere in the evenings. On the right side to the door, there's a large model of an ice-cream cone with 4 scoops of vanilla, pistachio, chocolate and strawberry ice-cream. It's a nice decorative element, and uses technic cross axle to position the scoops at different angles. Also, some greenery is added to the walls of the lighthouse tower. The finished product After 103 building steps the Heartlake Lighthouse is finally finished. Considering the small patio, it looks full. In addition to Stephanie arriving to the lighthouse in her boat, and the little seal sunbathing at the rocks nearby, there's not much more room for any other visitor. For some reason, while building the set I had an impression that the lighthouse is accessible only by boat, and that it is not build on the shore of the lake or sea. I'm guessing the tile map helped with this perception. There's not much details left to reveal on the back side. The coolers in the shop are filled with the various ice-creams. A lamp is added to the loft area. It's a simple design, and has a handle to carry the light around. All in all, there's easy access to the back of the building, and the various areas allow lots of play action. There's a cashier in the shop close to the window, so you can sell/buy the ice-creams outside the shop... ...or you can go inside to have a better look at all the tasty ice-cream flavours. If you had too much to drink, you can use the toilet in the lighthouse tower. The space is tight, but at least the toilet seat is down. That's actually the only place for the minidolls to stand in the lighthouse tower. The other two floors are too low, and too small to fit a minidoll in, and it would be much better if only one floor was made instead of two. Kate has access to the loft above the ice-cream shop, where she can have a quick nap on the bed, or just sit and watch the view through the window. Stephanie enjoys the view from the top platform, observing the seal, and taking photographs. I tried to position her with a camera taking a selfie, but apparently with no wrist movement, that's not possible. A view from the right side shows the plants growing at the bottom of the lighthouse tower. I like the leaves climbing on the walls, and there could be more of the new grass stems at the bottom, not so much to fill the space, but more to increase their availability. A view from the left side reveals the details on the patio. The advertisement board stands out more from this side, and it has a rotating base, so you can position it whichever way you like. At the table, there's seating for two, so Kate can invite over some of her friends. The Final Verdict Design: 10/10 The overall design is great and I cannot think of any flaws or improvements. Considering the target population of 6-12 year olds, the build is simple and well done. Also, it takes a while to actually build this large set, and the process is very enjoyable. Some of the parts included in the set are available in few sets only, and they add more value to the set. Overall, the colour scheme is lovely and amount of details is great. Parts: 10/10 The parts in the set are a nice selection of various bits and pieces in interesting colours. The not so common parts makes this set also a nice purchase as a parts pack. I like the variety of parts in bright pink, the magenta fence, and the ice-cream scoops. When I was deciding on buying the set, the parts list was an extra reason to get the set. Also, you get a lot of extra small parts, and there's a bunch of flower plates in 5 different colours. Build: 8/10 The building of the set is relatively simple and straight forward, and is appropriate even for the less experienced builders. The advanced level of the set can mostly be considered due to a large number of parts, as it takes more time to assembly it. The finished product is stable and allows lots of play action, however when building it, it didn't feel this way all the time. The walls of the tower are built by stacking bricks without offsetting them. Due to the curved walls of the tower, there's no other way to do this, yet I'd still prefer the sets to teach the kids how to build stable walls by offsetting. Playability: 10/10 As it's standard for the Friends sets, aimed mostly at young girls, playability is the most important feature of this set. However, there's enough action for everyone, and the set doesn't feel as it's only for girls. There are not many moving features, the playability is based more on the imagination of the player. You can row the boat around the lighthouse and search for seals though. Also, the ladder at the back can be moved to allow access to the loft above the shop. The value of the set is in playing out different scenarios. You can play shop, or watch the view from the tower, or tell scary stories in the loft at night, or simply enjoy the ice-creams. Minifigs: 9/10 Stephanie wears a lavender skirt, available only in this set, and both Stephanie and Kate have accessories that are not so common. The flower pin Kate is wearing can also be used as a real flower, although it can be connected to leaves only in combination with classic flowers. Also, their torsos are available in few different sets only. However, there's always need for different tops and bottom of minidolls. Price: 9/10 It's a large set, so the price is not that surprising. The price per part is great actually, but if the size of the parts is considered, it's not so great anymore as there's a lot of very small parts. However, keeping in mind there's some rare parts included in this set, the selection of parts is actually great for this prize. I'm not considering getting an extra copy, but the set as a whole is a great parts pack for builders oriented in creating houses and landscape. Overall: 56/60 (93.3%) As the overall score implies, this is a set worth having. The design is interesting and pleasing to the eye and offers a lot of playability. Building it is appropriate for both beginners as well as more experienced builders. The parts selection is nice, and has rare parts attractive to AFOLs. Considering the price, it's not the cheapest, but it offers a lot of interesting colours and rare parts. The parts have a potential to be used in different themes, and the set is a great buy also for the parts alone. It's not the distance, it's the goal that motivates you.
-
"Why So Serious? This Baby Works Just Fine!” "Let's put a smile on that face!" - The Joker by Adeel Zubair, on Flickr First Impression 2014 was a very impressive year for LEGO fans; a huge number superb sets that were released including this impressive and outstanding recreation of the Tumbler from The Dark Knight Trilogy. It was first mentioned by Jason from The Brick Show on Youtube that we have a UCS Tumbler on the way. Since then many have speculated the set would be released because last year was the 75th anniversary of the Caped Crusader and we would see a Batman vehicle based off the classic Batman comics or movies such as Jerry Robinson’s, Batman 66’s, Batman Animated Series or even a redesign of the Batman & Robin Batmobile. In fact I would love for LEGO to release those but the popularity of The Dark Knight movie made this model happen. After many fans have trying to replicate this iconic vehicle and many LEGO Ideas submissions we have finally got a UCS Batman Tumbler from LEGO themselves! I was super pumped for this set: one hand it's a large scale car model (which I enjoy) and it's based on a very much loved film franchise and character that I and others enjoy; the price just put me off until now! Was it worth it though? Unique Parts Besides the obvious exclusive minifigure parts there are two exclusive pieces those being the Tyre Wide Ø81,6X44 (front wheels) and the Pearl Gold Wheel Bearing Back. Surprisingly the Batman head is exclusive. Minifigures This set includes Batman and the Joker minifigures, I guess they are only included to boost sales for rather large set; even though they are not in scale with the model as the box states. Those minifigures will drive collectors and people to purchase the set who are not even interested in the model (who wouldn't be?) which is pretty sad if you ask me. I got it purely for the model; the minifigures and stand are bonuses! They both can be displayed on a sleek and simple display stand with the information plaque in the centre which has many different stats and information about the vehicle. I like that The Dark Knight logo isn't placed at the top of the plaque, were it could have been cheesy. The plaque is instead titled 'Wayne Industries - Applied Science Division' which makes more sense as the Tumbler was known for all its cool facts and makes the model feel authentic. This is my first set with a display stand and plaque so I can say it took about 15-20 minutes to get the sticker right but it did catch some dust after multiple times so I have very few bumps on the stand but it's very minor. I like that it's not that sticky as other stickers which made it much easier to apply. The Christian Bale Batman is based on the Batman Begins suit since we have already got The Dark Knight Rises one in 2013. I'm really digging the level of details on the front and back of the torso; it's very movie accurate and doesn't look cartoony which 2013 one did. The most disappointing part about this minifigure is the lack of leg and arm printing, if this was based off a comic version of Batman it wouldn't be a problem but the fact it's not as detailed as the Marvel movie variants it's really disappointing for such a large set. Batman comes with a Batarang but it's the one that we have always had, I would have liked an exclusive Dark Knight Batarang instead. The main highlight for this set is the first ever Heath Ledger Joker who has been a fan requested minifigure for a very long time. He is pretty much perfect unlike Batman; he has a detailed torso and legs. I really like that just front of the head has white faded printing to give it the face paint effect, whereas normally he has a white head instead. His smirk is so sinister. I'm not sure if the Earth Blue hands are accurate. Like the Batman minifigure he also doesn't come with an exclusive accessory but at least Batman came with one but the Joker doesn't have anything; maybe an exclusive knife or Joker card would have been cool. I have put the pair of very precious minifigures free from dust so they are not on the display stand but it still does look good without them. Playability Besides rolling it backwards and forwards, several adjustable flaps, some movable interior details and the two sections of the removable roof it doesn't have anything else. It's hasn't got is primary features from the movie; those being an ejectable Bat-Pod, opening doors and steering. I understand and can see that the main goal was to get all those angles and shapes that we see on the actual Tumbler which the designer at LEGO has achieved. It's such a shame as it would have completed the model but I guess LEGO have given the fans an opportunity to modify the model and do it ourselves. I must say that getting its wheels to turn and motorize it must be really difficult. Not to mention ejecting a Bat-Pot from the model. Maybe there is a person out there who could figure it all out and make it work successfully and keep all the great angles and shapes Adam has put into the model. I had problems with adding the sub-assemblies during the end since they can be fragile which means it's not recommend for play. Build Experience This set contains 18 numbered bags (1-11.) This set contains five instruction booklets and two sticker sheets which come in a cardboard sleeve to keep them straight. To note, I got an extra sheet of the smaller stickers for some odd reason? Really, for a set this size they could have made it into a thick square bound book like they have done with a few sets already and included some facts about the movie vehicle and the LEGO design process. Boy was very challenging, I really enjoyed the build, it took me around 8 hours to build which was very surprising since most people took about 4-5 hours; it's very different to the models I normally build which are rather simple like the Modular Buildings. It takes a while to build the main frame of the model but after that it quickly comes together with many sub-assemblies. I understand that most of the time man made things are symmetrical so this had a mirrored build and it does get slightly repetitive but at least I didn't see more than 'x2' in the instructions. I had a hard time attaching the front wheel assembly that attaches to the Technic panel; it took some time to actually make it stay on since it's held on with many studs. I also found out that the design could have easily made that area stronger with a few of Connector Peg W. Knob; we get loads of extras of those so it's not really a problem. I also thought a few more of Slide Shoe Round 2X2 could have been used to make some of the assemblies much stronger like the chairs. The stickers where the only down side to the build which slightly stressed me out but I found out that sticking a corner of the sticker on the back of the actual sticker sheet makes it much easier and fingerprint proof. The main frame is very study when complete but like I said the sub-assemblies are the weak areas in terms of stability but I don't know how else it would have been possible. -What makes this model different from many other LEGO models is that you cannot easily tell how it's built; due to all the non-linear shapes and angles achieved throughout the model. I can say we do have two elements in the front wheels which are visible, that’s not intentionally part of the design but that fact that only the black is visible throughout the whole with a few hints of grey and gold details; normally we would have exposed blue or red LEGO Technic pins which normally takes away from most LEGO models but in this case it's only very minor which is great for a model at this scale. Value for Money This retails for £159.99 in the UK and contains 1869 pieces. The price shocked me; then I saw the designer video and was impressed with the size; now that I own it I can say it’s damn huge. It's beauty is the size and details; just speechless. The Dark Knight and Batman fans will really appreciate this model, it delivers a different and educational build experience, compared to your average set as it’s aimed towards adults and collectors. The other day I checked the price for the Tyre Wide Ø81,6X44 and I discovered that they are on the LEGO Bricks and Pieces feature and they go for about £8 each! Now I can understand why the set costs so much, the large tires must be very hard to make and manufacture so therefore the price reflects that. I added all the tires and rims and it came out close to £40. What this means is it would have cost £120 without the tires and rims. You have to understand that's the main reason why the set costs so much. Just like real cars. I plan to buy two more for a Bat-Pod MOC in scale with this Tumbler. Theme Popularity LEGO Batman sets always to well and this will make a great collector’s item. Exclusivity This set is available at LEGO Stores and Shop.LEGO.com and other selected retailers. Surprisingly it’s still listed 1 per customer online which means resellers will be upset and tells us that there is limited availability. Packaging I like the fact they changed the colour of the banner for this set and made is a mix of grey and black. The way they presented the model is just like it's jumped off the screen. On the back of the box we see a main image of the model in the basement, and just below it we have several technical views of the Tumbler. The back also gives us a good look at the interior which is pretty much impossible to see once built. Growth Potential This will do very well as an investment just because LEGO Batman has always done well in the secondary market plus the popularity of The Dark Knight will make it stand out. I can see its price tripled when it's discontinued since LEGO has limited one per customer on Shop.LEGO.com. Display Attributes Yes, this is a great collector’s item and display piece with minor flaws like: It's hasn't got is primary features from the movie; those being an ejectable Bat-Pod, opening doors and steering. I understand and can see that the main goal was to get all those angles and shapes that we see on the actual Tumbler which the designer at LEGO has achieved. The model looks how you would expect it to look, it’s definitely looks like a Tumbler and is instantly recognisable; it's not a very pretty model as it's a military tank therefore it's won't be target to some individuals who like models from LEGO Creator Expert but it's a great and cool vehicle and a great addition to any LEGO Batman collection. It would be a nightmare dusting this model as it has many different angles whilst using elements with visible studs. Whist having all those studs showing takes away from the Tumbler look and looks like random selections of elements put together; one way they should have avoid this if they tiled the entire model, but it would have greatly affected the RRP making it harder for us and costs to make new molds and colours would have been as issue for LEGO. So in a nutshell it had to be done like this. The back view is its most comfortable and standout area in the entire model. The tires are another standout in the set they are so sleek; I wouldn't want those catching any dust! I can see people modifying this in ‘5 - Brick Yellow’ and ‘138 - Sand Yellow’ for the Tumblers used in The Dark Knight Rises, it would take quite a bit of planning to accomplish. Final Analysis/ Conclusion Overall this set it is a must have set for every Batman or The Dark Knight fan. If you’re a LEGO collector of cars this will also be a unique model and it will stand out from other LEGO cars since it's probably one of the biggest car or vehicle of this scale. This set has two unique and exclusive minifigures so if you’re a Batman fan it’s defiantly worth. It also leaves you hanging to try and modify it because it wasn't realistic enough for the designers to get all its primary features into a model of this size but purely as a display pieces it defiantly triumphs as a model and stands out to the other exclusives that are currently available. This set is a best seller so get your hands on it while you can! Hopefully with the success of this set we get a UCS Batmobile from Batman V Superman: Dawn of Justice next year! Adeel
-
Thank you to Eurobricks for allowing me to review this set, sorry about taking forever. When I first saw this set, I though it looked pretty decent, but didn't plan on getting it. I was curious to see if it would be strong enough to swoosh around. ZCeberus has written a wonderful comparison review here. Set Information: Name: Slave I Set Number: 75060 Pieces: 1996 Price: $199 Ages: 14+ Minifigures: 4 Theme: Star Wars Year of Release: 2015 Bricklink Brickset S@H My Flickr Set of the photos from this review. Box: Overall the box is very clean looking, the gold outlines fit very well. The background shows Bespin, which is the main setting for this set, as well as a flying shot. The back shows a landing shot as well as some nice shots of the functions. As the box is so large, there's a 1:1 image of all of the minifigures in the set. Continuing from the image of the minifigures is this shot of the set in a blueprint from; it shows the length, height, and width. This was on the side of the box, I love what LEGO did with this. It fades out from the set image to an almost schematic picture. Contents: I thought these two parts were interesting, they're new to me and I can see quite a few uses for them. There is a myriad of extra parts in this set. I was rather surprised to see so many, but with a set that has close to 20 different bags in it, it shouldn't be too surprising. There are 23 stickers in this set, but I think LEGO did a pretty good job of deciding what needed stickers. Manual: The front of the manual is virtually the same as the box, but it has some information about the manual languages on it. As this is a large UCS set, LEGO has done some research on the model used in the movie and spends several pages talking about the design and other things at the beginning of the manual. Seeing the animators from Ep. V, is pretty cool. I suspect this shot is some concept art from the designing of the ship. There are two pages that show what bags build what. The art and colors inside the manual are set out nicely, it's easy to see what parts go where, and I found no color issues. A whole page at the end of the manual is on a nice shot of the UCS Sandcrawler. Minifigures: While anyone buying this set is most likely not interested in the minifigures as much but I think LEGO did a great job providing a good selection of figures that fit well with the set. The Stormy and Han are the only ones not new in this set. This Boba is just such an upgrade from the 2012 one, with his arm printing. The Bespin Guard, while simple, is definitely one of the better figures in the set. LEGO did a great job keeping him simple while still capturing his look perfectly. I must say that I much prefer the print on the back of the Bespin Guard more than anyone else's. You can just see Han's alternate print sticking out from under his hair. Only Han has an alternate head print. Boba looks fairly close to the trooper. LEGO has once again brought back arm printing for Boba. I must say that it adds another high level of detail to him. Not much on his back, just a printing of a metal plate and a belt. There is SO much detail on his helmet, the paint is chipped in several places, and he's got some markings on his helmet. I know this piece has been out for several years now, but it's my first one. I must say that LEGO did a really good job translating it to a usable LEGO piece. And finally a quick comparison of the Boba from this set with the only other Boba Fett I have; White Boba. I must say that this helmet is much nicer than the old way. The Build: The first bag starts the construction of the main base of the ship. Bag two starts adding some shape. By the end of bag three, you've finished one sub-assembly. Bag four builds the front section of the Slave I. At the end of bag five, the base of the ship is completed. Bag six starts building up. Bag seven adds the side wings. At the end of bag eight, you've started on the cockpit. Bag nine adds one small sub-assembly. Nearly done! Finished! Finished Model: As usual with a UCS set, there's a 8-by-16 tile with some rather interesting facts on the Slave I. Two stickers in the cockpit, and there are spots in the cockpit for both of Boba's guns. Boba fits into the cockpit with his jet-pack on, I think they did a great job with the control area. This is the only sticker on the green curved slope, oddly enough. But I do think this area looks very much like the real ship. There are six stickers on this end, only two of them are rather small. But I do like what they add to the look of the set. The end is rather open, just a result of the angles. It's a bit bothersome, but you don't usually see this area. It has a great stand presence. It's most of the height of my Orthanc tower. (Makes Orthanc look kinda small too) Boba looks great in the cockpit, this is as far back as the chair rotates in the cockpit. Functions: The hatch on the left side. Opens to show some laser guns. However this side should be another missile launcher as opposed to guns. Then over on the right side. To show a missile launcher. Which is in the right spot. The main entrance to the ship opens. It can be a little hard to get your hand in there to open it. To reveal Carbonite Han. Finally the guns are adjustable, LEGO has it set on another gear so that it doesn't move unless you want it to. Conclusion: So I really do think this set is great; even with its few inaccuracies. LEGO did a great job capturing the overall shape of the ship, just a few of the functions don't agree with the actual ship. Oddly enough the ship is easily swooshed, but it can be rather interesting to get it on the stand; there's not really a good spot to hold it from. The minifigures are fantastic; Boba can't get any better. One thing I would have liked to have seen was the mines from Attack of the Clones; though I know they weren't in Ep. V. Ratings: Playability: 6/10 There aren't a whole lot of play features, but I don't really expect them for this set. Design: 10/10 LEGO has nailed the likeness of the ship at this scale. Price: 8/10 $200 is a fair price, and it has great shelf presence. Minifigures: 9/10 Boba is the best minifigure in this set. The Bespin guard is a bit plain for me. Parts: 10/10 I absolutely love all the selection of parts in dark red and dark green. Total: 43/50 Don't forget ZCeberus' comparison review here. Like this review? Want to learn how to make good reviews? Then join the Reviewers Academy!
-
Set name: CHI Razar Set number: 70205 Pieces: 68 Price: $14.99 Release date: 2013 Packaging and Instructions Bag Front On the front of the bag, we see that Razar now uses his Chi to fight forest fires… Bag Back And on the back, Razar is staring of into the sunset as Gorzan sneaks up behind him. We also see a size comparison of his head, the combo model of Razar+Gorzan, and a comic of Razar using Chi to power up. Instructions Nothing special here. As usual, the same picture as on the front of the bag. Random Page No transparent Eris heads this time, just the standard light blue background. Advertisements Ooh, an ad for all the 2013 Chima ultrabuilds. After that, a display of some of the normal Chima sets. Then there’s an ad for Hero Factory sets. Parts Dumped Out The big parts in the big bag, small parts in the small bag, head in it’s own bag. I wonder why they leave the torso skeleton out of the bag. Interesting Parts First off, the black clawed foot, which I suppose isn’t that interesting, considering that it’s in 17 other sets. The new head mold, of course. A lovely “CHIed” up chest piece, which is printed. I would consider the 5M shell in silver fairly rare, appearing in 6 sets. The lovely 3M shell in a nice purple (medium lilac, according to Brickset), that only appears in this and the Constraction Joker set. That odd weapon piece is only in red in this set, and is in the CHI Eris set as well. And finally, the wing pieces from some of the Mixel and Chima sets, in both black and purple. Head The head is pretty cool, but I really think it would have looked better if there was dark red around the eyes. It has some rivets and cracks in it, which looks good. Building Action Frame Besides the wings, it’s pretty standard. They plug this piece into the back of the skeleton to attach the wings. Finished Build Front The black and purple color scheme here does look good. What would really make it look good would be if there were some dark red pieces in there. I actually like those spike pieces on Razar, they give him a nice look. They kind of remind me of talons. Profile I like how the head is slightly hunched over, contributing to his sly, sinister look. His wings don’t stick too far back. Back Wouldn’t it have been nice if they had included an extra shell back here? It looks sort of bare, but the wings do a decent job of bulking up the shoulders. Posing Like most CCBS sets, it has quite a few points of articulation. As one would expect, the wings can move around pretty well, just like extra limbs. Weapons I’m not really sure about those red pieces. On the Lego Shop description it says that they are supposed to be scythes. And those blue pins look pretty bad up close. I think it would look better if these were dark red though. Overall Razar looks pretty neat; He’s rocking a nice color scheme, and if they wanted him to look sinister, they succeeded. But reviewing him made me appreciate Bionicle 2015 so much more. This set is lacking the complexity and uniqueness of Bionicle, as well as the battle in a box idea (the Skull Spiders). Overall, it’s definitely not the best set Lego has ever made, but it is pretty good. I would suggest picking it up if you can.
-
REVIEW - 42039 - 24 HOURS RACE CAR INTRODUCTION When the preliminary images of the "Le Mans Racer" surfaced somewhere last year (2014) it got a lot of praise. This changed dramatically when the final images of the 24 Hours Race Car showed up. The front side of the car, especially the head lights, and the curvature of the side of car had changed a lot. The car obviously still resembled the prototype, but the new design raised a lot of eyebrows. The new design was considered a step back instead of forward. Eventhough I still liked the design, I must admit I liked the earlier design better too. With the emphasis on past tense liked. I am not sure anymore and this review will show you why. Like the Arctic Truck this set has a B-model which is well worth checking out. That's why this review includes both the A-model and B-model. For people who are on the fence, the B-model might actually convince them to buy the set after all. Let's see what this set is all about! Note: All images can be clicked for hi-res versions. SET INFORMATION Number: 42039 Title: 24 Hours Race Car Theme: Technic Released: 2015 Part Count: 1219 Box Weight: 2110 gr Box Dimensions: 47,8 cm x 37,3 cm x 8,7 cm Model Dimensions: 40 cm x 18 cm Set Price (MSRP): €99.99 / $? / £99.99 Price per Part: €0.082 / $? / £0.082 Links: Brickset, Bricklink THE BOX The box measures 47,8 cm x 37,3 cm x 8,7 cm and weighs well over 2kg (2110 gr to be precise). The width of the box is the same as the box of the Arctic Truck. This box also feels like it's filled to the brim. THE FRONT The front shows a picture of the main model in action, with radial blurred wheels to emphasize the motion of the car. The lower right section shows the dimensions of the model. Upon completion, it will measure a length of 40cm and a width of 18 cm. THE BACK Like the front, the back side has exactly the same setup as the box of the Arctic Truck. The top shows the functions of the model, while the lower left side shows the B-model and the lower right side shows the motorization options. The picture of the B-model looks so cool, it could be a model of it's own. At this point I was very eager to build both models and compare them. THE SIDE One of the sides usually shows a part in 1:1 scale. This time it's one of the wheels indicating the size of the model. CONTENT OF THE BOX The box contains: 1 Book(let) 1 Sticker Sheet 13 Bags 4 Tires INSTRUCTION BOOKLET Since I own two copies of the set, I also received two instruction booklets. What's catching my eye is that my second copy is supplied in different packaging than the first one. It's for the first time (that I am aware of) that the instruction booklet and stickers come in a sealed bag, without cardboard back. Hopefully this will be a new standard for all sets with sticker sheets. Instead of multiple booklets, this set contains a single square bound book. In earlier reviews I have epxressed my preference for a single book. I don't see any advantage in having 2, 3 or even up to 6 booklets. STICKER SHEET Like the actual model, the sticker sheet looks very vibrant. The bright green, white and black color combination has found it's way to the stickers as well. Either you love 'em or hate 'em. Since I started writing reviews I have been applying stickers and I am happy I started doing it. Stickers do give the model it's finishing touch. BAGS WITH PARTS Thirteen bags with a total of 1219 parts (give or take a few) are supplied in the densily packed box. The rims and flex are sealed in a bag as well. Sometimes looking at the bags makes you wonder what the logic is, behind the distribution of the various parts across the different bags. Well this time it really got me confused. Take a look at two of the bags below. There's a bag containing all the 3L Blue Pins. Then there's a bag with various parts....and a single 3L Blue Pin. I figured this might be an error, but both of the sets have the same anomaly. TIRES The tires have been supplied unbagged, as usual. HIGHLIGHTED PARTS This chapter describes new and interesting parts. This set actually contains a lot of them. This set also contains an abundance of panels. If you aren't into panels, this isn't the set for you. CHANGEOVER CATCH This year (2015) the new changeover catch parts were released. It's a combination of three parts. The advantage of the new parts is that the red gear is the same on both sides, which avoids mounting it the wrong way around. It also avoids the changeover catch slipping out of the driving ring, like it used to do. You can apply lots of pressure, but the catch doesn't slip out. PINS Some of last year's new pins are also included in this set. 12 x Pin with Pin Hole and 21 x 3L Pin with 1L Axle. Securing Technic Beams can be quite simple with the new Pin with Pin Holes. The new 3L Pin with 1L Axle gives you more possibilities when connecting Beams and other parts. Below are two example situations where the new pins have been used. Granted, the examples below can be accomplished by using other techniques. However, some predicaments from the past can be easily solved by using these new parts. Like me, you will most likely appreciate the ease of use. ENGINE AND SUSPENSION Also included are two Steering Portal Hubs and Steering Portal Hubs with Ball Joint Arms and four Steering Portal Axles for driving and steering the vehicle. These parts are commonly used nowadays. The picture below also shows some other parts, like gear rack, steering arms and suspension. FRAMES This set comes with a single 5x7 Frame and three 5x11 Frames. PANELS This set contains a whopping 47 panels in three different colors. I personally like panels a lot and I do appreciate the variety we have at our disposal lately. This set even contains a new 13x3x2 Curved "Mudguard" Panel. NEW 13x3x2 CURVED PANEL This is the first set to contain the new 13x3x2 Curved Panel. Looking at the pictures doesn't do these panels justice. In real life they are actually quite big. I figured they would be smaller, but they are even longer than the 11 x 5 frame, with a length of 13 (including the attachment points). Hopefully this part will be available in other colors as well, preferably white, for adding variety to your EV3 robot. 19L WHITE FLEX-AXLES The White 19L Flex Axles have only been released in a single set, the 8461 Williams F1 Racer in 2002. Current prices on Bricklink are as high as 15 Euros! Needless to say we are very happy with the return of these White Axles. Now we can build Jeroen Ottens' awesome Alfa Romeo 4C Spider for a decent price as well. I am really happy that useful rare parts are being used more often by TLG designers PART LIST Here's the complete list for all 1219 parts. As you can see in the Highlighted parts section, this set contains a lot of interesting and useful parts. If you don't own sets like the 8070 - Supercar, this might be the set to pick up if you want to start building your own supercar. THE BUILD Enough with all the set and part information, let's build the model. REAR SUSPENSION The build starts with the rear suspension and drivetrain. As you can see in the picture below, the length of the Axle between the Steering CV Joint is 4L, where it usally is 3L. This is an indication that the finished model will be a bit bigger than usual (8070 for example). The finished suspension is one of the cleanest suspension setups I have seen in an official model. It's pretty basic, but it works like a charm. This setup is defintely worth using in your MOC. Here's a video: After attaching the suspension to the frame you rotate the module and secure it. At this stage the rear section of the chassis with suspension is almost finished. V8 MID-ENGINE Extending the chassis forward results in the picture below, where the front spoiler is already visible. What's also visible is the V8 engine placed right in front of the rear axle, resulting in a Mid-engine setup, perfectly suited for sports and race cars. Two exhaust pipes have been fitted on either side of the engine, together with two hoses attaching them to the engine. The instructions are easy to follow, although you sometimes you need to bend the beams a bit. Minor improvements are possible here and there, but nothing shocking. FRONT SUSPENSION The front suspension is a bit more complicated than the rear suspension, which makes sense considering the fact it contains the steering rack. The shock absorbers are placed in a different angle than the rear ones, resulting in a somewhat stiffer front suspension. All in all the front suspension is well designed and the steering rack can be easily powered with a Servo Motor. The picture belows shows the front suspension attached to the chassis. If you follow the official instructions to motorize the model, the area in front of the suspension is used to mount the battery box. When you are modding this model to make it Full RC this area can be used to mount the servo motor. GEARBOX Like the gearbox in the 8070, it's not used to switch gears powering the drivetrain. It's used to switch between two functions, opening the doors and the hood/bonnet. The gearbox is located at the left of the vehicle, near the cockpit. The mechanism to open the doors is located on the left side, while opening the hood/bonnet is taking place at the right side. To accomplish this, some axles traverse under the cockpit to the other side of the vehicle. Following the axles to other side of the vehicle and adding some gears, results in the situation below. The video below shows the gearbox in action. DOOR OPENING MECHANISM The mechanism to open the door is comprised of some Knob Wheels, Links without Stoppers and Pins with Towballs. Take a look at the doors opening and closing. THE FRONT Using the new mudguards and various other panels you finish the front of the car. The front is probably the most controversial part of the car. This is caused by the preliminary pictures shown before the release of this car. In the early pictures the front of the car had smooth curves and beautiful lines, while the final car lost these smooth lines and got a more blocky look in return. I must admit that at a first glance, the new design lost some of it's appeal. However, this model grew on me pretty rapidly. The headlight design can be found, in more or less the same way, on several real Le Mans type race cars. THE REAR The rear of the car looks great, with the stickers continuing from the mudguards to the panels underneath the spoiler. The two exhausts sticking out give some details to the back. I absolutely disagree with all the negativity surrounding this car. Maybe it's one of those models which needs to grow on you. FINISHED MODEL Here it is, the finished model. I know some of you don't like the looks of the car, but I think it looks great. The color scheme is outstanding. The new (for Technic) bright green parts, combined with white and black make this car look very vibrant and colorful. I am not a big fan of the green used in the 42008 - Service Truck, but I do like this bright green a lot. It fits perfectly well with the Mindstorms EV3 set. The curves on the side of the car are not as smooth as some of us hoped, but I still think the car looks more than acceptable from the side. The stickers add some nice details to the car, giving it that characteristic race car look. The model looks great in pictures, but it does even look better in real life. I love this picture of the front of the car. However, I do wonder if a dedicated 24 hour Le Mans Racer has the seat and steering positioned off-center?! Using the good ol' Google Machine I come to the conclusion that they do have centered seating and steering, at least the majority of them. There's ample space in the cabin, which makes me wonder why TLG decided to place the seat off-centered. The rear view looks cool too, with some of the suspension showing and the two exhaust pipes clearly visible. The bottom view is very useful to determine the size of the car in studs. It measures approx 59 x 27 studs. The chassis looks organized and well designed. The engine has been placed close to the ground, which is perfect for the weight distribution. A low center of gravity improves the handling of the car. I really enjoyed building this baby. The build is very clean and organized, although there are some steps where you need to bend the beams a bit to get things into place. Seeing the model come to life and seeing it grow to pretty impressive proportions is very satisfying. For me it was fun, but I reckon kids will go nuts over this set and the build. SIZE COMPARISON What became obvious during the build, but what's emphasized when you have finished the model, is that it's quite big! The size of the car is pretty impressive. The pictures below show the car next to the 42030 - Volvo L350F. The side view emphasizes the size of the car. It's even longer than the Volvo, if you dismiss the bucket. PARTS LEFT Some parts left. Nothing out of the ordinary. FEATURES AND FUNCTIONS Unlike the B-model, this model doesn't implement any unexpected features. The functions it does implement are exactly what you would expect from any car. Steering (HoG) Working fake engine Suspension Opening doors (gullwing style) Opening bonnet/hood Opening trunk Gearbox for switching between functions Unfortunately the steering wheel hasn't been linked to the HoG (Hand of God) steering mechanism. Placing the seat in the center would have provided an easy way to link the steering wheel to the steering mechanism. it's a shame we hardly see actual steering anymore. Opening the hood actually opens up the entire rear section of the car, providing you with easy access to the motor compartment. The mechanism to open the hood works properly, which results in smooth opening and closing of it. The same goes for the gullwing style doors. Both functions are operated manually and you need to switch with the lever to the left of the cockpit. These two functions are also the ones which can be motorized by placing an M-motor near the cockpit and a battery box in the trunk. All things considered I think this car offers lots of playability. The model is solidly built and the functions are easy to operate. I'd say it's pretty safe to let your kids play with it. B-MODEL Unlike the A-model, the B-model for this set received (almost) universal acclaim, and I can see why. Often the B-model is a pale shadow of it's part donor. In this case the model looks so good, it could be a model of it's own. It even incorporates a neat feature, which actually deserves to be in the A-model. There's a lot a variation in the quality of digital building instructions TLG is providing, but these ones are of very high quality. The picture below shows most of the chassis with suspension, fake engine and gearbox in place. FINISHED MODEL Some concessions have been made, but overall the car looks fantastic. The black of the roof has been extrapolated from the hood, which definitely works for me. The rear section of the car feels a bit empty, but the panels do cover up most of it, so it's hardly noticeable. The V8 stickers will be upside down if you use the parts from the A-model. Since I could apply new stickers, I have placed them using the proper orientation. The bottom of the car shows the chassis. It's obviously a bit smaller than the A-model's chassis. FEATURES AND FUNCTIONS Taking the functions into account, this model isn't playing second fiddle to the A-model. Besides the obvious functions like steering, opening doors and hood, this car features folding fog lights, which deserve a better podium than a B-model. Steering (Hog) Working fake engine Suspension Opening doors (manually) Opening hood/bonnet (manually) Opening trunk (operated by gear) Folding fog lights (operated by gear) Gearbox (used to switch functions) FOG LIGHTS One of the most interesting features of the B-model are the folding Fog Lights. It almost feels a bit weird that a feature like this is implemented in the B-model, instead of the A-model. Below are 4 steps showing how the mechanism works. I have also included a video. The mechanism is somewhat reminiscent of fork mechanism used in the 8109 - Flatbed Truck, which has been described in Efferman's Review. Take a look at the video to the fog lights in action. PARTS LEFT A fair number of parts left, which isn't uncommon for a B-model. SUMMARY To summarize how I feel about this set, you need to take a look at the picture below. The combined image reflects the quality of this set....or better yet....sets! You actually get two great models, for the price of one. You don't like the A-model? No problem, you can have lots of fun with the B-model. I can't stop playing with the fog lights, it's mesmarizing. The color scheme on both models is outstanding. I simply can't emphasize enough how well this color scheme pleases the eye. The regular green is dull and boring, but this bright green really pops out, especially when combined with black and white, and possibly some red details. Black, white and a little red?! Sounds familiar? Yes, bright green can easily be combined with your EV3 robots. So while you are combining the bright green with your robot, why not use the great new curved "mudguard" panels. These new panels are introduced in this set and they look great. They open up a lot of possibilities in the design department. The build of the A-model is outstanding. It is fairly simple, but since it's so clean, I really enjoyed it a lot. I think the build should be entertaining, which doesn't mean it needs to be a real challenge. And let's be honest; when is a build really challenging?! The rear suspension is a good example of why I liked the build. It's very simple, yet very effective. Works like a charm. The same goes for the other functions in both models. And the star of the entire show can be found in the B-model. How's that for a surprise?! Being aware of the fact that I like this model a lot better than most of you seem to do, I really encourage you to give this model a chance. The sheer size is impressive, the color scheme is awesome and you get a bonus model, which is actually worth building. SCORE Okay, so how do I grade this set? 8 DESIGN Open to debate, but I like it a lot. 8 BUILDING EXPERIENCE Fun and clean build. 9 FEATURES Superb function in B-model steels the show. 9 PLAYABILITY Both models offer lots of playability 8 PARTS Lots of new parts and cool existing parts. 10 VALUE FOR MONEY Two models for the price of one. 8,7 TWICE THE FUN I hope you enjoyed this review! More pictures can be found on my Flickr page.
-
''Help a baby tiger in trouble at the LEGO® Friends Jungle Falls Rescue with Olivia mini-doll figure, cliff hut, dam function and caves.'' But... ...did the TLG get the right story? If you're interested, scroll down (and read the review) to find out. Basic info of the set Set no.: 41033 Name: Jungle Falls Rescue Theme: Friends Subtheme: Jungle Year: 2014 Pieces: 183 Minifigs: 1 (plus a tiger and a chameleon) Age group: 6 - 12 Price: £ 17.99 / US$ 19.99 / EUR 19.99 Price per part: 9.831p / 10.923 c / 10.923 c Links: Brickset, Bricklink, LEGO S@H The box The front of the box is (as always) in bright Friendly colours, with the main five characters on the top right corner as opposed to the main set's character, in this case Olivia, in the bottom right corner. The sides of the box are typically curved, as seen in larger sets from the Friends series. The landscaping on the box art is tropical and acts as a nice background for the set. Interestingly, there are many features that set the box(es) in the Jungle subtheme appart from the classic ''Town'' Friends. The five characters are dressed in tops seen in the Jungle subtheme, the box art is framed with bamboo and tropical flowers. I also noticed that the set as shown on the front of the box differs slightly from the set as seen in the instruction booklet. Can you spot the differences? The back of the box reveals other aspects of the set, most importantly the playability of the set. The Friends theme is aimed at female population, young and less young girls like me, and playability is an important factor. Individual play set-ups are framed with a bamboo pattern. There's a mechanism that allows sliding the waterfall panel to the side, Olivia saving the baby tiger, exploring the cave in the rocks and giving him a treat. In addition, Olivia can enjoy a meal with her chameleon. Same as seen at the front of the box, the most obvious box art are the bamboo and tropical flowers, clearly distinguishing the Jungle subtheme. The same jungle box art is seen on the sides of the box and it looks really nice. Of course, the mandatory hearts, butterflies and dog paws are seen in subtle print. The top of the box has a bamboo framed picture of Olivia as a measure of scale. The tropical flower pattern nicely rounds up the top of the box. I'm only missing the butterflies here. The booklet The front art design is repeated on the front page of the booklet instruction. It's slightly bend on the left side as a result of bags of bricks being pushed against it. Luckily, the instructions were not damaged. I know it's just a small set, but having more protection for the instruction booklets would be nice. On the inside, the booklet is as neat as ever. The background is in lavender, again a typical Friends colour. Building steps are simple, with not many bricks to add in each step. What I liked specifically, in some steps, such as step 18, there are red arrows emphasizing the right placement of some bricks, where it's a bit hard to see. This is a nice addition, not so much for the experienced builders, but for the beginners. The odd pages differ from the even pages in that they have a small heart and butterfly design in bottom right corner. Again, this kind of watermarks is typical for Friends. Although, it's not a necessary one, it became a traditional, and the page would look a bit empty without it. A positive surprise in the instruction booklet was the promotional page for the Jungle subtheme sets. Apart from the pictures of all 4 sets, there's a lovely presentation on how to combine those sets into one larger setup. Although it's more of a MOD, I see this feature as a promotion for MOCing. It also shows nicely how the TLG planned the individual sets to allow for combining them together. The pieces Inside the box, there are two numbered bags of similar size, a 16x16 plate in medium azure, a sticker sheet and two lime plant vines with leaves. Medium azure plate of this size is available in only 4 sets of the Friends and Disney Princess themes. Since the standard base plates in blue are not available any more, this medium azure plate can be considered as its substitute to create water. The lime plant vines are the highlight of this set - they're a new mold and one of them is an extra part! They're flexible, and can be placed in different positions. Sticker sheet is included, but again it could easily be avoided. While it does make some of the rocks slightly more interesting with the printed flowers, the set would be just as nice without it. I have two copies of this set, and chose to use the stickers only in this one for the presentation purpose. In general, I like the flower designs, but I'd rather see more plants and flowers included. The build starts with the bag no. 1. The parts found in this bag form the base of the rocks and the waterfall. Here, the torso and legs for Olivia are found, but I forgot to include them on these photos (they're discussed in more detail later on). The parts to point out include the dark bluish grey rock panels and the trans-light blue waterfall panel. The latter is actually quite rare, it's included in 3 sets only. These are my first parts of the kind, and although I'd prefer smaller parts for the rocks, in the end, these do their job just fine. Most parts are in light and dark bluish grey, and from the colours seen on the picture I'd never guess this is a Friends set (where's the pink?). Inside the bag no. 1, there's a smaller bag with the smaller parts. These parts are more colourful, and surprisingly there's only 3 parts in pink - again, is this a set aimed at girls? Yes, it is! My favourite parts here are the trans-light blue ones, they complement the waterfall nicely, and I only wish that more of them were included in the set. The 1x1 bricks were re-introduced in 2014 after a 12-year gap. The other interesting parts are the 1x1 round bricks in dark orange, appearing in 5 sets, but only 2 of these sets are currently available at the stores. Bag no. 2 contains slightly more colourful parts, but again, there's not as much pink as I'd expect from my experience with the Friends series, which is not necessarily a bad thing. The dark pink plate is the only part in a girly colour. The interesting parts here are the lime palm trees which were introduced in many sets in the last two years, two inverted tan tiles and the chameleon in bright green with medium lavender pattern. Inside the bag no. 2, there's another polybag with smaller parts. There were only a few. The most interesting (and anticipated in my collection) were the 1x1 round bricks in dark orange (there's a total of 6 in the set). Other parts are not that excited, apart from the round tiles - they are the new types with a bottom stud holder. The best parts in this set are the the panels for the rocks and waterfall. I might be too excited over those, but these are the first ones in my collection, and I'm looking forward using them in future MOCs. Also, the trans-light blue bricks and tiles are interesting and useful parts to build various water features. In addition, there are the newer molds, the 1x1x3 brick, the round tile with bottom stud holder and one with a hole in the middle. The dark orange 1x1 round bricks are welcomed too, as they allow for more variations of bark colour when making trees, and the highlight for me is the new plant vine. Did I mention you get two and one of them is an extra? Chameleon with the lavender pattern is also a new (recoloured) LEGO species. The extra parts are the usual small bricks that could get easily lost. As mentioned before, there's an extra plant vine. I won't complain about that one. I was positively surprised to see one, but I wonder why it was included as an extra part. Is it possible it breaks more easily when under stress? Never the less, it's a great part to have as extra! The minifig Olivia is the main and only character in this set. Her outfit is a uniform of the Red Cross Friends Jungle team. The dark pink printed scarf is a lovely addition to add more feminine touch to the uniform. Her hair has holes for hair assessories, but there are none included in the set. If I could choose, I'd go for some type of large pinkish tropical flower as seen on the box art. Well, I guess Olivia knows better than to pick wild jungle flowers just to put them in her hair. I didn't include the parts of Oliva in the parts section, so here they are. We all know the Friends anatomy, so there's nothing new here. Everyone would look so thin with an empty stomach, right? In addition to Olivia, two animals are included in this set. The baby tiger is the first one presented in the set. It's the same type as in the Friends Animals series 4, Tiger's Beautiful Temple. It has a nice back printing. I only wish the dark brown pattern would be printed also on the sides of the torso. It has cute written all over him/her. Beware if you have a soft spot for blue eyed kitties! The tiger has the main role in this set, as Olivia seems to be rescueing him/her from the waters in the waterfall lagune. The tiger is placed on this simple raft, that could be easily thought of as a drift wood. What I like about it, is that the underside of the 2x4 plate has inverted tiles attached to it. This way, the raft moves more rapidly over the studded water surface. The other animal in this set is the chameleon. It's a new LEGO species that was introduced in the 2014. One of them is Pascal, the chameleon from the Rapunzel's Creativity Tower. Chameleon in this set differs from Pascal in two ways, both obvious. He/she doesn't have a name, and he/she has a more realistic chameleon-like pattern. It comes in bright green with a medium lavender pattern. Since I own two copies of this set, I thought to compare the lavender pattern, and it's actually different. For me, this is really great, as it's easier to distinguish between them in case you name them. The build The set is targeted at girls from 6-12 years old, and it's basically an intermediate build. There are some more complex aspects of the set, where you need to be careful when placing parts in the correct positions. Contrary to some other Friends sets, where smaller subsets are included, the Jungle Falls Rescue is a one build set. The building process is divided into two parts as already indicated by the two numbered bags. It's starts with forming a base for the rocky landscape or the cliff, as TLG described it. The tiles seen here are where the waterfall slides into the cave, and the black jumper tile is where the crystal stone can be found. What I found interesting at this step, is that the stickers were applied to parts which are not visible from the front. This is why I think the sticker sheet could be easily omitted from the set. However, in a way it feels nice to have some details included also at the back side. At the end of the day, each builder gets to decide for him/herself whether to apply the stickers. As for me, I applied them in one set only. Few steps on, part of the mechanism for sliding the waterfall is built using Technic gears. Also, the first rock panel part is included and it's decorated with a stickered butterfly. My least favourite parts, the 1 x something x 5 bricks are included here, and although I'd prefer smaller bricks, I have to admit these parts are efficient when trying to gain some height. So far, all the building was on the baseplate. The next step is building the highly anticipated waterfall. While having a completely brick built waterfall would be amazing, I'm liking this panel-built version just as much, although it's more simple and less realistic. The trans-light blue colour of the panel with a rocky pattern works great as a water feature. Different views of this minibuild show part of the sliding mechanism. Another panel is included here, and I can not blame the TLG for using a panel instead of bricks. This is a part that's not visible in the completely build set. The LBG gear rack connects to the gear and allows movement. The waterfall is then placed on the tiles, and its only connection to the rest of the structure is by gears. The only thing I'd change here is the base of the waterfall. Instead of white plates, I'd go for blue or even trans-blue plates, and then use white, trans-clear and trans-blue 1x1 round plates for the splashing water at the bottom of the waterfall. . A view from the back shows how the gear rack connects to the gear. It looks simple, but I have to admit, I wouldn't think of such mechanism. Well, I'm one of those AFOLs who think Technic bricks are too complicated to use correctly. Here you can see that a medium azure tile was used as the top of the waterfall and it looks much better than the white plates at the bottom. My favourite choice here would be a trans-light blue tile, but you can't have it all. The right part of the sliding waterfall is nicely hidden by a LURP with addition of some slopes and dark orange bricks. Considering the size of the build, this large element fits just fine. To me, it even seems as if the set planning was based on this part, and then build around it. The only thing missing here is some more greenery. More details were added to the water. The LBG tiles look great as stones, and the trans-light blue tile at the bottom of the waterfall creates an effect of splashing water. I would add more of them, though. When opening bag no. 2, another interesting minibuild pops up. It's the handle for the sliding mechanism and is camouflaged as a dam. It has a gear rack on the later hidden side, and dark orange and reddish brown bricks and plates on the visible side. The handle is very colourful, and I really wonder why TLG uses these colourful parts in hidden places. In the end, only the parts above the 1x8 reddish brown plate are visible, so the use of yellow and blue bricks is not a big problem. With the above handle in place, the waterfall can already slide to the right. Here's a view from the back side, showing an ''open'' waterfall. At this point the mechanism doesn't run very smoothly, but this gets better after addition of extra bricks, that help keep the handle in place. Ok, I admit I had to try sliding the waterfall as soon as the handle was added, and I had much fun doing that. It's a great feature, and adds so much to the playability of the set. A view of the sliding mechanism from the top. The yellow handle is used to slide the gear rack to the waterfall slide, and by moving the gear in the middle, it moves also the waterfall part, thus opening the entrance to the caves bellow. I like that the TLG camouflaged this sliding mechanism as a dam, but I'd prefer to have the yellow handle in brown or at least green. It wouldn't stick out so much. Also visible from the point of view is the crystal rock hidden in the cave behind the waterfall. A few steps on, little chairs are added to the top of the rocks to form the platform for Olivia's observation point. At this point, more greenery is included, and the rocks look much better already. The new plant type extends from the top of the rocks to the bottom right. It's attached with clips, and its flexibility allows for different positions. Considering there's an extra plant vine in the set, it could well enough be used in the building of the set. There's no such thing as too much plants, right? The little table at Olivia's observation top is built very simply. It's a combination of lime and reddish brown parts which gives it a more natural look. Colour-wise it fits nicely in the little hut at the top of the rocks. The most interesting part here is the stickered 2x2 tan round tile. My first though was that it's a pizza, but I'm not sure who would order a tropical pizza with kiwi fruits, so I'm guessing it's a fruit pie. As for the yellow spots and pink sauce, I have no idea what could it be. Maybe some sliced bananas and berries. The table is then placed at the platform at the top of the rocks, under the shadow of the palm tree roof. From this front view, it's not so obvious, but the table is not completely covered by the roof. I'm guessing it doesn't rain in the jungle or Olivia is not watching out for little tigers when it does rain. The building of the set is finished here. The size of the build surprised me nicely, as I didn't expect it to be this big. After all, there's only 179 parts in the set. This number would be higher, though, if bricks and slopes would be used instead of the large panels. To increase the parts number, more plants could be included. Bamboo leaves would fill the gaps bellow the tan plate really nicely. The finished product After 42 building steps, the set is finished. The finished cliff looks great from three angles, that is the front and both sides. From the left, the rock panel is nicely decorated with the butterfly sticker. It makes it more interesting, but I'd prefer to see more plants instead of stickers. Also, the yellow handle is well hidden from this side, and the transparent waterfall panel creates a nice effect. As it is not as clear to see through as from the front view, it looks more realistic to me. From the right side, the cliff is partially opened to allow easy access. The stickered flowers add more detail here as well, but as I said before, I'd prefer real flowers. My first thought would be to add a couple of those bionicle spines hanging from the top, and it would make the set even cooler. Also, more plants could be used to camouflage the rocks and the steps to the top of the cliff. A view from the back reveals a cave behind the waterfall and the hidden crystal rock. The cave is a nice feature in this set. At first it may look that it's just an empty space beneath the cliff, but it's much more. The hidden crystal is there waiting to be found, and in addition, the (stickered) flowers are a proof of life in the cave, so there's obviously lots to explore. The access to the cave from the back is relatively easy also for the adult fingers. Another interesting feature is that the access to the cave is revealed by stopping the water flow. The dam function stops the water, and as the waterfall dries out, Olivia can set to explore the cave beneath the cliff. I really like that on one side you can have a tea party at the hut, chat with your girlfriends, and on the other, you can have an adventurous afternoon by exploring the cave beneath the cliff. Olivia climbed down from her retreat, and is debatting whether to call for help or go in the water with the life preserver to save the baby tiger. The tiger is floating on a drift wood in the middle of the lagune under the waterfall. The inverted tiles on the bottom side of the brown plate really allow for smooth surfing. When the baby tiger is safely out from the water, Olivia can return back to her hut on the rocks, and enjoy the kiwi pie. As seen on the box art, the chameleon can join her at the table, but I'm not sure if he can use the cups. Maybe the baby tiger can use them. Anyway, it's nice to have an extra cup included, so Olivia doesn't fell all alone in the jungle. Additional play features were explained in the text above, here I just want to emphasize them again. Apart from the surfing tiger, Olivia climbing up and down the rocks, the dam can stop the water and reveals the entrance to the underground world with hidden treasures, so Olivia can explore the cave. Considering the size and the price of the set, there really is a lot to offer. The Final Verdict Design: 9/10 The overall design is great, but there is still room for improvement. Considering the target population of 6-12 year olds, the build is simple and well done. I'm only missing more plants here. Considering that trees in official sets often have just a couple of leaves, I know I shouldn't complain here. After all, there's an extra plant included. There some rare and interesting parts included in the set, adding more value. I was surprised with the colour scheme, as there's hardly any pink. While being a small set, with not a large number of parts included, it offers a lot. Parts: 10/10 The parts in the set are a nice selection of various bits and pieces in interesting and very usefull colours. There are some new and rare parts included, and that makes the set also nice as a parts pack. The interesting parts are the new lime plant vines (there's 2! ), the panels for the rocks and the trans-light blue parts for the waterfall. The parts selection is very useful for various MOCs, and for me that was the reason to get an extra copy of the set. Build: 8/10 It's a simple and straight forward build approriate for beginners, but also with some elements for the more advanced builders. I was excited to see the dam mechanism. It's a lovely play feature. I missed some extra plants here, but that can be easily added, as probably everyone has some extra greenery. Considered it's targeted at girls, there's a lot of building, and not many mini builds, as in some other Friends sets. It also has a potential to modify it and make it larger. Playability: 10/10 Playability is the most important feature of this set. There's enough action for everyone, boys and girls, and adults. There are moveable features, such as the dam and the surfing tiger, the hut to enjoy a meal, a cave to explore and baby tiger to take care of. Minifigs: 8/10 Olivia wears a Jungle uniform. Her top is a new design, while the skirt isn't. This is probably one of the few minidols without hair accessories, and she looks good that way. Well, I wouldn't mind some tropical flower pinned in her hair. Price: 9/10 It's a small set, but it offers enough interesting bricks for the price. The price per part is a bit high in this price range, as there's sligthly less parts included due to some of the panels. I mentioned there are some rare and new parts included, and these justify the price per part. I was nicely surprised with the selection of very useful bricks, and I have to admit I got two copies of the set for both the parts and playability, and considering the price, it was a great deal. Overall: 55/60 (90%) The overall score implies, this is a set worth having. It's an interesting design, appropriate for the beginners, it has a great selection of parts to attract AFOL, and it offers a lot of playability. Considering its price, this is a set that should attract different demographic groups of LEGO users, and still meet their various needs. So, did the TLG get the right story? I think the baby tiger was after an adrenaline-pumping ride at the waterfalls, and Olivia missinterpreted his intentions. But that's just my story, you can make your own....
-
LEGO Ideas - Birds (21301) Review by Adeel Zubair, on Flickr "They will fly off the shelves!" First Impression: When I saw this set for the first time I was very impressed with this set just like any LEGO Ideas set. This is a must have set for any birds enthusiast. These are impressive recreations of three birds seen in different parts of the world. This will be an iconic and popular LEGO set amongst adults. This is one of the LEGO Idea's set that is not based on an IP (Intellectual Property) or a replica, others being the recent Exo-Suit (21109) and Research Institute (21110.) I just want to say a huge thanks to Thomas Poulsom for making this set a reality. Unique Parts: This set contains 3 unique printed 'Flat Tile 2x4' pieces in Black each with the specific bird's name in Latin: Erithacus Rubecula, Cyanocitta Cristata and Colibri Thalassinus. There are recolours of certain pieces which are now exclusive to this set at the time of this review: Plate 2X4X18° (Dark Green), Corner Plate 45 Deg. 3X3 (Dark Green), Tip Of The Tail Ø6,47 (Earth Green), Neck - Tail Link, Ø7.84-Ø6,47 (Earth Green), Plate 1x3 (Medium Blue), Plate 1X2 W. 1 Knob (Medium Blue), Plate 2x3 (Medium Blue), Left Plate 2X4 W/Angle (Medium Blue) and Right Plate 2X4 W/Angle (Medium Blue.) There are also a few rare pieces in this set: Plate 6x16 (Dark Green), Right Plate 3X8 W/Angle (Earth Blue), Left Plate 3X8 W/Angle Earth Blue), Roof Tile 4X2/18° W/Cor. (Earth Green), Brick W/Bow 1/3 (Medium Blue), Plate 1X2 W/Shaft Ø3.2 (Reddish Brown) and Plate 1X2 W. Shaft 12M (Transparent) Something I would like to point out that some ‘Medium Blue’ pieces seem to have two different shades in this set. I don't know why but it may be a quality control issue which does happen sometimes. I found it to be extra useful for different texture as the bird is a natural form. However some people may not like this simply because they may look out of place if the pieces are used for your own creations. Minifigures and Playability: Ha! This set contains no minifigures. These are detailed models of birds for display only. Therefore I don't see young children purchasing this set for any reason besides someone who likes birds or the swoosh factor of the birds. No, the wings don't move but yes each Bird can be easily removed from their display stand. The models are really great display pieces and are just a wonderful piece to adore the details on display. Build Experience: This set contains 5 five numbered bags. 2x Bag 1's for the Robin, 2x Bag 2's for the Blue Jay and 1x Bag 3 for the Hummingbird and flower. It surprisingly contains three instruction booklets (one for each bird.) As always with the LEGO Ideas sets, they are high-quality books containing the building instructions, information on the LEGO Ideas platform and background information about the set and its original creator. It took me an average of 25 minutes per bird to assemble together. This set was designed by the very talented Steen Sig Andersen who has been with The LEGO Group for a very long time and it really shows. He has provided each bird with its own unique SNOT (Studs Not On Top) techniques and very thoughtful engineering which makes the models really strong and durable. Each Bird has its own stand very similar to the architecture stands but this time we have the green grass with a small pedestal for the birds to fit on. In front of the pedestal we have the printed 'Flat Tile 2x4' with the name of the specific bird which keeps them partly hidden and at the edge of the base we have a ‘San Yellow’ finish to possibly represent wood. The set was very enjoyable to put together and I learned a few new techniques along the way which was quite surprising since I'm a pretty experienced builder. Value for Money: This retails for £39.99 in the UK and contains 580 pieces. It's hard to judge this set because it contains three different builds. Each bird with stand works out £13.33 each so that's fairly respectable plus with the high quality box and instructions booklets is definitely worth £39.99 compared with other models LEGO has released in the past. It's a set that will sky rocket in the aftermarket, you would rather purchase this whenever you get the chance since it has a limited production run like any other LEGO Ideas set. This set is only available at LEGO Stores and Shop.LEGO.com Display Attributes: Since this set is built with three separate models I will discuss each model in depth. The Erithacus Rubecula also known as the Robin has been exquisitely rendered with the whole profile and shape capturing the exact shape of a Robin. Unlike the other models it's not smoothed out to try to hide the studs. Instead they have expressed and proudly shown the studs through 80% of the model. It's really great they have exposed the studs to capture what LEGO really is and how its simple brick can be constructed into a beautiful natural form, which isn't seen often. As I examine the photograph I can see that the Robin is orange, light brown, tan, grey and white. I understand that having several colours on a model of this scale could easily take away from the model, but I was surprised they didn't use orange instead of the red but to be honest I saw the original in person and it didn't look right with the brown. I like how the belly of the Robin is built like a Lowell Sphere. One advantage with this compared with other birds is that the Robin can stand on its two very small feet without extra support, again heads up to Steen for some really great engineering techniques used. This model has to be the highlight of the set. The stand is also well designed, you can turn the Technic axle 360° to suit the owners needs of display and it can also be easily be separated. I don't like that the Technic axle wiggles, I feel they are under a lot of pressure underneath the weight of the model. I have two complaints which I have with most LEGO sets: when having SNOT techniques used in a LEGO set is requires you to assemble an opposite colour to the brick/s it will attached on to. In this case the white and brown is showing though a small gap above the assembly of the red belly of the Robin. It's a natural form so I won't complain too much but I have seen it many times in other sets. Yes LEGO have to use as many simple and primary colours in the internal structure of any model to make it easier for the builder to find the pieces when constructing a set. Additionally the black ‘Plate 1X2 W. Vertical Grip’ that have used to attach the Robin's wings which could've been brown but I guess in this case it can represent shadow and depth. Another example is the Technic axle going through the underside of the Robin could have been transparent, now it seems as if it's part of the Robin. Which doesn’t look right? I like that the scale is pretty close to the real bird and it also make these models feel like your personal pets. The Blue Jay (Cyanocitta Cristata) is once again rendered well but this build also has minor problems. Main reason is in some angles you can see right through the bird but to be honest when it's on the stand you can barely notice. Comparing this model to the photograph provided in the instruction booklet. You can clearly see that all black pieces should have been ‘Earth Blue' besides the beak. I feel cheated and I would have preferred them to be 'Earth Blue' I don't understand why LEGO had to be lazy and choose black instead. That's one big problem I have with this assembly. The final bird is the Hummingbird (Colibri Thalassinus) which sits on a ‘Plate 6x16’ for the additional flower assembly. The flower is an interesting but simple. It's nice to see another large natural form in this set beside a couple of birds. Referencing back to the photograph I can see that a Hummingbird also has yellow and blue but would look out of place with the presented scale like the Robin. The brown 'Plate' would have been nice in transparent but I may be mistaken, but it could be its feet? The two sloped 'Earth Green' bricks that were used to hide most of the back of the plates is a great addition however it's only conned by one Technic pin which means doesn't stay still. Fan Model Vs. Final Product: All three models are very well recreated and are pretty similar to the original fan creation. The only differences are the internal structure and the way the models are presented. I do prefer the way the final product displays the birds because they look or presentable. Steen has done a wonderful job of staying true to Tom’s original design and has done them justice as a worldwide product. Final Analysis/ Conclusion: Overall this set it is a must have set for adults. It has its flaws like any other set: the grey Technic axle used between the Robin and tree branch, black pieces used instead of ‘Earth Blue’ for the Blue Jay and the loose ‘Earth Green’ pieces of the Hummingbird. Anyway the models are impressive recreations and would make a great gift for any adult or birds enthusiast. Quick Summary: Parts: 5 - Good quantity of common and semi rare colours from a parts perspective. Playability: 3 - Each bird can be easily removed from their display stand and be swooshed around if you so desire. Building Experience: 4.5 - A few interesting SNOT techniques are used, although some parts of the build are a bit repetitive but still enjoyable. Value for Money: 5 - At first the price may seem high however the models of the birds are very attractive. With a price tag of £39.99 you cannot go wrong. Overall: 5 - It has one or two problems that come from the deep vaults of LEGO but besides that I can only judge the build on its own merits. The models are impressive recreations and would make a great gift for any adult or birds enthusiast. Useful Links: https://ideas.lego.com/projects/16897 https://ideas.lego.c.../1-blog/post/22 http://shop.lego.com/en-GB/Birds-21301
-
I acquired this set on Thanksgiving weekend and had the review photos ready to go as I built it, but I haven't gotten around to it 'til now. It's a decent large battlepack, though a tad overpriced (as with everything in the Star Wars range anymore; licenseflation, I call it) Here's the box, from both the front and the back: As is usual with contemporary Star Wars sets, the front shows a high-energy battle with motion blurs while the action on the back is a bit less energetic. The back also demonstrates the set's gimmick and provides views of the BARC speeder from different angles. The top (not shown) has the customary minifigure images; I like to cut out and save these. Here's what that box contains: An instruction manual, a small sticker sheet with decals for the bike and the STAP, and three bags of parts. Front cover of manual, and the inside of the manual. Amusingly, even today the manuals still tend to show pieces as being Old Gray and Old Dark Gray despite the switch to the new bluish grays. And here's all those parts dumped out, ready for building. You could go bag by bag, but where's the fun in that? Besides, if you want to follow the instruction manual exactly you actually pretty much have to do this! As ever, it starts with building the minifigs (except for one), and they're in two separate bags already. Then the first part of the build proper it gives the instructions for? The STAP, the pieces for which are in the other bag. With that out of the way, it's on to the build. The minifigures, including the one it doesn't tell you to build right away. One 91st Recon Corps trooper (It's not Neyo, he doesn't have Neyo's sash), two Battle Droids (one holding a rifle, one with the original Battle Droid arm on either side to pilot the STAP), and two Super Battle Droids. Note the platforms under the SBDs and the regular BD with the rifle. Those will be important later. The STAP begins to take shape. It too is also on one of those platforms, and is also flying lower than previous STAPs since it's on a transparent flagpole atop a transparent cylinder, rather than a transparent cannon piece. Interestingly, the flagpole is the classic rounded-top version, rather than the new one with the flat top. The STAP is almost completed. It's the same basic STAP design that had its beginnings in the "Droids Battle Pack" set and was refined and given proper CIS livery by the Clone Wars AT-TE set. And boom, one complete STAP with Battle Droid operator. The droids' lookout post is under construction. Note the 2x2 tile, it will also be important later. A bit more formed now. Just like "Clone Battle Pack" from 2007, this set makes use of a wheel arch as a top guardrail for the lookout. Not too much more formed, though the first of the vegetation growing around the place has been added - this is supposed to be in the brush of Saleucami after all. Not as densely forested as Felucia or Kashyyk, but plants do abound. And getting started on the other side of it... Not much to comment on here, although you do get a good look at the hinge plates used to make it not be just a straight line. And voila, the droids' lookout post is complete. Two places of concealment in the brush, flanking an armored lookout's nest. The classic foliage piece that looks like a miniature christmas tree is once again brought into service here, and very nicely so too. Last to be built is the BARC speeder, the star of this set. As with most vehicle builds of the non-nautical persuasion (and even then, some of those do this), it starts with a plate or two or three. As a bone thrown to alt build potential, two 1x6 plates are used where a 2x6 plate would have also sufficed. The body of the bike takes shape. Here, the center is formed from one of the new missile bricks (that goes on your notepad too). A wheelmount piece for the handlebar assemblies to clip to can be seen, something that's standard nowadays for BARCs. The body is basically complete. There is a battle droid head next to tally marks, indicating somebody's been keeping score. Yes, this is a sticker. No, I'm not gonna complain about it being one. And ta-da. BARC speeder ready for action. It looks nice. The BARC design has been well-refined by this point, and it looks very nice. I've seen some people complain "We dun need another BARC" but you have to keep in mind that not everybody was able to get their hands on the previous sets to include one (like me), and the fact that a good chunk of the target market wasn't even born or old enough at the time of those sets' release. So here it is, all together: Battle on Saleucami. One Battle Droid on a STAP, one on the ground with a rifle, and two SBDs. All four of them on 2x2 bases that let them stand without just falling over, but leave them easy enough to knock over. A lookout point with tiled spots to stand them, so that they are braced but not anchored. A clone trooper on a BARC speeder with a spring-loaded missile-launching brick and four missiles for it. Can you say "Shooting Gallery"? It's a lovely idea for a set, good fun to play with and good for building up your armies. It's perhaps a tad overpriced, as I stated at the beginning, but I still recommend picking it up before it disappears from store shelves.
-
This is the one you've been waiting for, and now it's here! The one and only WhiteFang, master of the Collectable Minifigs, brings you his in depth review of one of the most anticipated sets in the series, the very first offering from Disney! Go check it out now!
-
Hello, Star Wars 'The Empire Strikes Back' is such a great movie. So, it is fun building this new Hoth set. If you already own some parts of this set (4 in 1...) this might be different. But it is a fun build, so far. My review will be online, soon. And this is the unboxing - with the instruction manual, the bags - an overview. Best wishes Andres
-
Introduction As a fan of Star Wars, the original trilogy, there are some scenes that are absolutely iconic. The final duel, on board of the Death Star two, is one of them. Luke facing both Darth Vader and the Emperor, and finally awakening the Anakin Skywalker still inside the black armor. I can still remember the emotions I felt when I first watched this scene years ago. Will this set make me feel the same things? We'll see at the end of the review! Set information Set Name: Death Star Final Duel Set Number: 75093 Number of Pieces: 724 Theme: Star Wars Year Release: 2015 Prices: £69.99 / $79.99 / €99.99 #75093 on Brickset #75093 on Rebrickable Packaging The box is pretty big and shares the Star Wars Rebels layout with all the early sets of 2015. The front shows the whole set in "play mode", completely opened and with Luke, Darth Vader and the Emperor fighting. The new Darth Vader helmet is highlighted by specific artwork in the lower left corner. The rear of the box shows all the play features of the set and has some very nice artwork. A side of the box shows the minifigures included. Lord Vader himself is the 1:1 part. Content of the box The box is quite full with the instructions booklet, 6 numbered bags and a sticker sheet. The stickers are only for two 1x2x2/3 slopes in black and the inner side of the four 4x4x5 cylinder quarter. I usually put stickers on parts when doing a review, but those stickers are so nice, that I didn't apply them on the cylinder parts. Instructions booklet The instruction booklet shows the same artwork as the front of the box. It is quite big, almost an A4 size (21cm x 29,7cm), with harder paper for the cover. The first page could make a nice poster! The instructions are easy to follow, while not on the same level as a Minecraft set. The very light blue background makes them clear and easy to read. The last double page shows sets from the wave and all the minifigures you can collect. Gotta catch 'em all! Minifigures The minifigures are the jewels of this set. We got two imperial guards, a new Luke, a new Emperor Palpatine and a new Darth Vader with his two parts new helmet. Except for Luke, everyone wears a cape in this set, meaning we got two red/dark red and two black capes. While both Luke and Palpatine got alternate faces, the back of Darth Vader's head is printed with scars. Luke is also the only minifigure in this set to get back printing, but he is also the only one not wearing a cape! A closer look at Darth Vader. I think he is really well done, with the new helmet and his awesomely printed face. He looks maybe a bit too kind, and I don't know why, but I think his head should be in light bluish grey and not white. Interesting parts The set is filled with nice bricks that give texture to the walls and bases, like the #2877 1x2 modified brick with grille. The set contains two #16577 1x8x2 raised arch, which is a new part from 2014, and not common in light bluish grey. But what may attract us to this set is the fantastic 6x6 inverted dish with handle, printed with Death Star window pattern. And we have 3 of them! And let's not forget the fantastic minifigures included that we reviewed just above. Build The first bag contains all the capes and both Luke and Vader minifigures. At the end of the first bag, we have the center part of the set, on which we'll build the emperor's throne. Note that the front of the build can extend, as seen in the pictures illustrating bag 2. There is also a small lever mechanism that I will explain later in the Play feature section of this review. The second bag's contents... .. And what we build with it. Again a play feature here: look at the lever on the side of the stairs. With the bag 3, we'll build the left side of the set The left side of the build features the collapsing bridge. The 4th bag will bring us the right side of the set... ... which will be used to make the reactor shaft. Bag 5 will complete the throne room. And with bag 6 we'll build the entrance door and frame while the second imperial guard shows up. The complete build in all its glory. Spare parts are always nice! Especially with the lower half of Vader's helmet that could be used to make a Dagobah Dark Side cave's Luke. Play features First, let's recognize that the set looks very good. I had it displayed in my living room for weeks. And my nephew kept playing with it each time he visited! Working doors are always nice, even if the mechanism could be enhanced. Vader can make Luke trip... Or Luke can do a force jump, you choose! The collapsing bridge will hurt Luke badly... ... as will the collapsing stairs! The Emperor can make a lightsaber pop-up from behind its throne. Careful when you catch it, it's lighted up! The reactor shaft can be used as trash disposal... ... or to enact emotional plot twist! Conclusion Design: 10/10 - The design is almost flawless, well deserving a 10. Parts: 9/10 - The parts selection is really nice. The windows are truly awesome! Build: 8/10 - The fold out structure and all the play features make the build very interesting and easy to store. Playability: 10/10 - We had so much fun playing with this set, there is so much to do! Minifigs: 10/10 - I couldn't want more minifigs with this set, and all of them are great. Price: 8/10 - Star Wars sets aren't cheap, especially in Europe... But at least, this set is worth the (high) price. Overall: 55/60 (92%) - This is a great set. It manages to be both great to look at and full of playability! The different areas of the set really capture the mood of the movie, and the very detailled minifigures add to the accuracy of the set. It has a lot of play features that kids love... Well if you let your kids play with it! If you are a Lego Star Wars collector, this set will have its place next to Jabba's Palace!
-
Hello, the Legoland Train (40166) reminds me of the 70s, I guess, because of the colours. This is my review: It is availabe in every Legoland. Best wishes Andres
-
REVIEW - 21305 - MAZE INTRODUCTION Admittedly, I definitely wasn't one of the first backers of the Labyrinth Marble Maze. Not that I didn't like it, but I only visit the LEGO Ideas website every once in a while. When I saw this project I supported it immediately though. Because I have been waiting for this set my entire life? Not really. But it's definitely very original and it is somewhat linked the LEGO games product line, which I do appreciate. When TLG asked if we would be interested in doing a review, I didn't hesitate to volunteer. I liked the opportunity to find out more about this set, especially how the tip-and-tilt mechanism works. I'm guessing we will find some Technic elements, but who knows! PICTURES Pictures can be clicked to view hi-res versions. DISCLAIMER This set has been provided by the CEE Team of TLG. It's not my goal to promote this set. It's my goal to give you an honest opinion about it. Therefor, the opinion in this review is my own and is in no way linked to TLG. SET INFORMATION Number: 21305 Title: Maze Theme: Miscellaneous, LEGO Ideas Released: 2016 Part Count: 769 Box Weight: 1542 gr Box Dimensions: 38 cm x 26 cm x 9 cm Set Price (MSRP): € 69,99 (est.) Price per Part: € 0,091 (est.) Links: Brickset, Bricklink THE BOX The box looks different than a regular LEGO set box. For starters, the entire box is covered with a maze pattern, which obviously represents the set. Furthermore, it's a box with a flip-open cover, so it can be easily used to store LEGO parts or other stuff. The front of the box shows the image of the default Maze, with a container to store the balls. It also tells us that a booklet with inspiration for extra mazes is included, which made me curious. The right bottom shows the LEGO Ideas logo with the number #13, which indicates this is the thirteenth set published via LEGO Ideas (CUUSOO). The back of the box shows it's a 2-in-1 set, which boils down to the fact that there's an extra maze included. The base will probably remain the same. The back also refers to the inspirational booklet. CONTENTS OF THE BOX Nice thing about this kind of box is that you can open it up gently to see what's inside. The instruction booklet is stored beneath the baseplate, which protects it perfectly from damaging. The bags and the four black plates are stored on top of the baseplate. Makes you wish that more sets are be packed like this. Thumbs up for this box The box contains: 1 x Instruction booklet 1 x Base plate - 32 x 32 4 x Black plates - 16 x 8 8 x Unnumbered Bags BOOKLET A single booklet with instructions and inspiration, so there's no separate inspirational booklet. PLATES A 32 x 32 baseplate and four black 16 x 8 plates. BAGS Ten unnumbered bags, which is more than I expected. HIGHLIGHTED PARTS If you are into building modular buildings, this set is a great source for parts. It contains loads of tan bricks and tan and black tiles. You might not expect it, but this sets also contains some interesting parts. 32 x 32 BASEPLATE The Baseplate is actually pretty rare. It's only found in the Parisian Restaurant in Light Bluish Grey. 6 x 6 TILES These tiles aren't new, but they are by no means common. From 2009 to 2012 they appeared in eight sets. Edit: Actually it's this tile included in the set, which is less rare. SOCCER BALLS The Orange Soccer Ball appears in only four other sets and is quite popular in the GBC scene. YELLOW TECHNIC AXLES Since 2016 TLG has changed their "axle strategy". Axles aren't mostly grey and black anymore, but yellow and red. Red for even length axles and yellow for uneven length axles. This set contains two of these new axles, 4 x 9L and 2 x 3L. PLATE WITH TOWBALL This 1 x 2 Plate with Towball has been released this year (2016). It also appears in some Mixel sets and a Nexo Knight set. TECHNIC AXLE CONNECTOR This orange Technic Axle Connector makes his debut this year (2016). It will probably appear in one of the 2H Technic sets as well, because it could have been used in any color in this set. Don't want to spoil the fun, but I can only think of one set.... PART LIST This set contains 769 parts, which can be found in the part list at the end of the booklet. Looking at the image makes clear that this set contains more colored parts than you'd think at first sight. THE MAZE AND THE DESIGNER The first two pages of the booklet are dedicated to the Maze and the Designer. THE MAZE LEGO Maze reinvents the classic ball and labyrinth game, adding a twist of creative LEGO building to the fun. Built entirely from LEGO elements, the LEGO Maze consists of a base frame and a simple tip-and-tilt mechanism made up of LEGO beams and axles. You turn the wheels to move the maze up and down or from side to side, guiding the ball away from the traps. Challenge your family and friends and see who navigates past the obstacles fastest. Once you've mastered the two maze designs included with the set, you will find lots of inspiration to start creating your own mazes using the bricks included or any of your own LEGO elements. You decide how simple or challenging the maze should be. Add extra traps or more walls, or use different colored elements. The interchangeable maze system means you can easily swap maze plates without rebuilding the entire game. The set also includes a removable container to store the balls and a travel lock that keeps everything in place when you are carrying or storing the game. Build up your gaming skills and enjoy hours of challenging and creative fun with this latest creation from LEGO Ideas. Here's a picture of the classic wooden toy. THE DESIGNER Jason Alleman LEGO fan and designer of the LEGO Maze "Growing up I was always fascinated with how things worked. I have never actually owned one of those original wooden mazes, but I would always be drawn to them whenever visiting someone who had one." "After building a few smell mazes it didn't take before I was building larger mazes to run a LEGO soccer ball through. I originally tried to recreate the wooden version of the labyrinth maze as faithfully as possible, but it quickly became apparent that this wasn't practical." "I decided to decrease the size of the maze and eliminate the holes. By having the ball fall into the depressions, the maze could be built using fewer larger plates." "One of the limitations of the original wooden toy is that it is always the same. There is no way to make it more or less difficult, or modify the maze to have a different play experience. As I was designing this model I really wanted to embrace the customization that having it built out of LEGO pieces would allow." "Not only can people modify the difficulty of the mazes to gradually increase their skill, but they can create mazes that follow specific patters, themed mazes, mazes with multiple pathways to the finish. The possibilities seem almost limitless." THE BUILD Enough with the background information and other facts, let's start building the maze! Of course, the inclusion of the baseplate is a huge spoiler of where we begin. This picture is taken right before you start to build some of the elements for the tip-and-tilt mechanism. As you can see the interior of the base doesn't solely contain black parts. Building the base feels like starting the VW Van, UCS R2D2 or some the other Star Wars UCS sets. What they have in common is that they have a monotone or duotone exterior, but the inner section is comprised of a color-vommit of parts. At first I found this strange, but I started to like it. It facilitates the building process and it prevents from getting only grey (or another color) parts. We continue the build by adding some Technic axles and liftarms, which will be connected to the upper section later on. The big black gear on the side will be used to control one of two tilting movements of the upper secion. Finishing the base is all about adding black bricks. After the base frame the first section of the tip-and-tilt mechanism is constructed. This consists of simple square frame, almost entirely made up of tan bricks and tiles. Two black pivot points connect the frame to the base. Here you can see the first section connected to the base. After attaching the second gear, the first section of the upper section can be tilted. The video below shows the inner workings of the Maze. We proceed by building the inner upper section of the tip-and-tilt mechanism. This section has a single stud border with tiles on the inside. These tiles provide a smooth surface to lay-in the actual maze. Since the maze doesn't connect to any studs it's easy to replace with a different design. Here you can see the inner section attached to the outer section. This basically concludes the tip-and-tilt mechanism and finishes the base. Here you can see the entire base in action. Now it's time to build one of the two mazes! This is a matter of building a custom base plate, which is made up of the four black 16 x 8 plates and a single black 8 x 8 plate. After building the base plate it's tan tile galore. Grey bricks are used as walls. I personally would have liked the grey bricks to be covered with grey tiles, to give it a smooth finish, but it's no biggie. The green section indicatates the start and the red section the end. One needs to move the ball from the green to the red section. The maze inlay is conviently placed in the inner upper section, which completes the build! Some people refered to the model as looking rather dull. I definitely don't agree. I think the black base with tan tip-and-tilt mechanism looks great. There's enough contrast between the base and the mechanism. The wooden game is entirely made up of wood, which would result in a completely tan model. I think this is a great compromise. FEATURES AND FUNCTIONS This being the maze game, one can't expect it to have loads of features and functions. You can turn the two gears to operate the tip-and-tilt mechanism. Besides that, there's a lock (the black box) to keep the mechanism in place when traveling. Furthermore there's a storage container which holds four balls. That's about it, and that's exactly what I expected from this set. The video below shows a demonstration of the game. Looking at the video you can see one downside of this maze layout. When the ball moves fast it doesn't "fall into the black holes". It simply moves on. I consider this inappropriate game play. I did make it to the finish once, but the ball jumped a few holes in the process. Another small issue is that the ball has mold marks, which makes it slightly irregular in shape, resulting in sudden unexpected movement. This isn't a big issue though. What I do think is an issue, is that the tip-and-tilt mechanism has slightly more tip and tilt in a single way. This means that tipping one way has more effect than tipping the other way. Same goes for tilting. Sometimes you need to change direction really fast and having less movement can be limiting. Does this diminish the fun?! Not really. A little frustration is what makes this game fun. I still found myself challenged to get the ball to the finish. I showed it to my dad who immediately was inclined to play a few rounds. Putting this game on the coffee table will draw everyones attention, I can assure you that much. ALTERNATIVE MODEL AND INSPIRATION After building the first model, there's lots of parts left. These are used for building the alternative maze. You use the included brick separator to remove the tan tiles and grey bricks, until you only have the black base plate. On that base plate you start building the other maze, which you can see in the picture below. The alternative maze attached to the base. The alternate maze in action. Obviously there's no way to tell how many attempts I needed, but I can tell you this maze is a lot easier. It only took me three times to complete the maze. I must admit that I am not entirely sure what the start and what the end is, so I might have taken the wrong path. At the end of the booklet there are two pages with inspiration for three other mazes. Instructions for these mazes are not included, but they should be easy to build, by looking at the pictures. The front of the box states that it includes a booklet with inspiration for extra mazes. While it does include three extra mazes, I found this to be a bit of a dissapointment. Five mazes in total isn't bad at all, but the statement on the box made me expect more. All in all I do like the alternate maze. It has a bit of a Mini Golf feel to it, which I find rather cool. SUMMARY This set is what it is...a Maze game, so we need to judge this set accordingly. It doesn't have nice little details like the modular buildings, it doesn't have cool Minifigures like some of the Star Wars sets and it doesn't have loads of functionality like most of the Technic sets. We need to compare apples with apples and not with pears. I think the designer did a great job in recreating a classic wooden game into a LEGO set. Ironically the LEGO brand has a history in wooden toys, which adds some value to this concept. The set looks great. I especially like the combination of the black base with the tan tip-and-tilt mechanism. The first maze is a very simple, yet difficult, maze, while the second has more appeal, but is a lot easier. I think TLG (or the designer) made the right choice. The tip-and-tilt mechanism feels a bit flawed, because it extends to one side more than the other. This limits gameplay in a certain way. Same goes for the included balls, which have mold marks and are not completely round. However, both these flaws are minor issues. Overall the game is lots of fun and it will generate a lot of interest. This set contains a lot of tiles, which can be useful if you are into modular buildings. If you are looking for those orange axle connectors, this set comes to the rescue. And it will get you started if you are thinking of starting a GBC career All jokes aside, this set might not be interesting enough for everyone, but I think it's a very original set and I do like it a lot. Thumbs up for TLG and Jason Alleman (and of course for the 10.000+ backers who agreed with me) SCORE Okay, so how do I grade this set? 7 DESIGN Simple, yet true to original. 7 BUILDING EXPERIENCE Straightforward build. 7 FEATURES Changeable layout is a plus. 7 PLAYABILITY Just as much fun as the real game, with some minor flaws. 7 PARTS Basic set of parts, lots of tiles and it includes a 32 x 32 baseplate. 7 VALUE FOR MONEY Worth the money, if you are into this type of set. 7 Maze-merizing EXTRAS There's a nice article on Brickjournal about remotely controlling the maze with your Mindstorms EV3 units. Thanks you for reading this review. All pictures can be found in my album.
-
Hello, and, welcome to the Aperture Science Computer-Aided Enrichment Center Eurobricks LEGO Media and Gaming Forum. You will be reading a review of 71203 Level Pack: Portal 2. I am authorised to inform you that there will be cake at the end. The Cake is a Lie! First we'll take a look at the LEGO Shop blurb. Front of the trapezoid box/carton/swing pack we have our figure and the two re-build-able vehicles. As with the other packs, it is an iconic pair. One sentry turrent and a weighted companion cube. Though, I would have loved a core of some kind. The side on view is an action shot of Chell. The opposite side has warning information on the "tags"; avoid getting them wet, magnets etc. These were murder to photograph, the angle of the box made it next to impossible for a good shot! The back of the box shows off the three things your "vehicles" can become alongside the warning information and age ratings. Plus the now very familiar Dimensions graphic. Inside the box, two bags of parts and the most pointless instruction manual (MPIM) It tells you how to build Chell and then directs you to the game. The extra pages are adverts and ticksheets of what to collect, much like all the others. Of course, this is the aim of LEGO Dimensions so I can't fault it too much. Just be warned that you'll need to look online if you want to have any of the level or character packs simply for the builds. Onwards then, to the builds themselves. Here we have what is probably the biggest attraction for gamers and AFOLs alike; Chell herself in official LEGO Minifigure form. Aperture vest, long fall boots, portal gun and all. She's about as talkative as the real deal too! One whole new figure, a printed tag and the lovely portal gun. The gun is a two parter, a rubber weapon with the siren popped in. The rubber makes it a little awkward to get into a figure hand and to pose it once it is in there. Though it is a lovely crisply moulded part, well designed and printed too. Yes, it is a render, but it shows off the part better than my camera can! Chell is fun to play as. Bringing along the Portal Gun that can be used, of course, to create portals. In the regular game environment there are white surfaces not dissimilar to the Aperture Test Chamber walls. They are dotted around the levels or can be built from revealed LEGO parts when you smash things. As expected, they help you access areas of the game to find gold bricks and mini-kits. Here is the official video. Companion Cube The Companion cube in its basic form. The cube itself is made up of printed tiles, five of them, no sixth, so you'll have to pick one more up for a more detailed version of the cube. It would have been great to have something more like the actual cube or some of the fan efforts out there, but of course the designers had to make it into two other things too. Hence all the extra goings-on underneath. Not the worst offender of the vehicles in Dimesions though. Aren't the printed tiles great! Laser Deflector Cube The "Laser Deflector" mode Cube uses all the parts from the regular cube and looks a little nifty. It can't help but look a little odd, but so did the first basic mode. As can be inferred from the name, it deflects lasers. Useful to solve certain puzzles. The Gold Heart Emitter This is the weirdest of the builds, but there is little one can do with a cube isn't there? Again, it does what it says on the can. The Turret Sentry Turret The regular turret is rather spiffy. Looking pretty much like the video game source but rendered in our favourite blocky medium. The turret provides lasers, which in LEGO games are used to damage gold obstacles in levels. Also useful when there are a lot of foes to battle. Turret Striker The turret provides a lot more to work with. So this variation looks much better than the companion cube remixes. More hefty and speedier than the Sentry Turret. Also, more "dakka" to play with in the game is always fun. Flying Turret Carrier This version of the turret is wider than the others, extra width for menacing placement of weapon's systems. It flies, this is helpful in games of course, allowing non-flying characters to fly. The Game It was a joy to play Portal in LEGO game form. Just too much fun for nerdy me! All the expected jokes and original voice casting. There's even a song! I don't want to spoil much more really. Just be assured: If you are a gaming fan, a Portal fan and a LEGO fan this is worth it. Conclusion So, if a visit to a LEGO version of the Aperture Science Computer Aided Enrichment Lab is exactly your cup of tea, this is excellent. If you have a Portal fan in your life, the LEGO figures and models are great novelty items in their out-of-box form (you can find instructions online, most helpfully). The game and the toy justify the price point, though it might be a little pricey if you just want the LEGO. However that is to be expected, you can't exactly compare this to regular LEGO sets. Also merchandise for games (like figures and vehicles) do have a similar price when cost of three items are added together. Thanks to TLG for giving me the opportunity to play with and review their exciting new product. Set Supplied by The LEGO Group.