Search the Community
Showing results for tags 'off-road'.
-
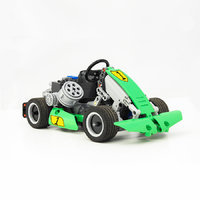 Three years after my previous model, the Hoonipigasus, here is finally a new MOC that I can present! But what’s that super long title? In other words, it’s a truck made by Matt! A truck designed to rescue vehicles stuck or damaged in off-road environments. Introduction This is a commissioned MOC by Benjamin Lorteau. He wanted this truck to be 100% manual, using the wheels from the Audi RS Q e-tron #42160, and featuring several steering modes thanks to two knobs, one controlling the front axle and the other the rear axle. I was free to do pretty much whatever I wanted as long as the initial constraints were generally respected. Here's a little paragraph from Benjamin: When the idea was proposed to me, I immediately saw strong potential. I thought it was possible to build something very interesting, the opposite of what is increasingly found in the Technic range, with lots of mechanically boring cars. The project would be based on an innovative mechanism allowing multiple steering modes, working in a similar way to the Claas Xerion #42054, while still being compatible with suspended axles. The model also had to stand out with a very good building experience. I will come back to this specific point later. Design I tried to reproduce the lines of the real truck as faithfully as possible. The visual appearance is split into two parts: the cab at the front and the exposed chassis at the rear. At the front, the cab stands out thanks to its yellow color, while the rest is entirely black. The cab was not easy to build, since the real model features many surfaces lying in different planes (doors and rear cab pillars, top of the hood and sides for example), as well as curves that are very difficult to reproduce at this scale, such as the roof. A panel with a curvature over one stud gave a result that was too thin, while two studs resulted in something too thick. I chose to simplify certain lines to ensure a smooth appearance, while staying as close as possible to the original design. The shape of the hood was made possible thanks to the new angle connectors #7. They allow for a simple, clean build and a faithful result. The rear section came together more naturally. It was “just” a matter of building the chassis cleanly, adding the rear winch, building the arm, and adding the toolboxes and the roll bar. This required a significant amount of optimization. After all, it was necessary to fit: The rear suspension The steering mode selection mechanism The rear chassis winch The arm The toolboxes All of this in a very limited space. Suspension What would an off-road recovery truck be without a good suspension? I reproduced the original suspension as faithfully as possible. It consists of suspended axles held by links, forming two opposing trapezoids at different heights. The suspension is responsive and allows for nice axle articulation, achieved solely by the weight of the vehicle - there’s no need to press down on the cab to compress the shock absorbers. Opening parts The following elements can be opened: Doors Hood (left and right sides) Toolboxes The toolboxes are built using studful parts and are attached to the chassis with pins and an axle. The doors do not have stops in the open position, so they can be opened until they touch the front wheels. I chose not to add any in order to keep the build simple and part-efficient, and I felt it matched well with the rugged style of the vehicle. All-wheel drive and fake engine Just like the real truck, my MOC features all-wheel drive, without a central differential, driving a fake V8 engine. The engine doesn’t spin very fast, partly by design choice. Indeed, the motion is transmitted through the differentials with a 22t/14t gear pair, then from the central axle the motion goes up to the engine via a 12t/20t idler/12t gear train, and finally two 8t gears. I could have added gearing, but it would have made the build less clean and more artificial. As with the door opening, I preferred simplicity. Winches and arm There are no fewer than… five winches on this model! Two of them are located at the front and rear of the chassis, to get out of difficult situations or tow a vehicle. These are mounted on a friction pin and are controlled by pulling the rope and using a gear. The choice of a friction pin was made to save space and to offer a different holding technology compared to the other winches. The other three are used for the arm. In all cases, they feature a ratchet allowing the rope to be held without any slipping. One of them controls the raising and lowering of the arm via the same pulley system as the real truck. The arm’s range of motion is slightly under 90°, with the upper limit being vertical, which can prevent the arm from falling back down. The last two control the towing cables. Their construction is light but sufficiently robust. 3-mode steering Alright, enough with the small classic functions, now we’re getting to the core of the model. What it was built around. As I mentioned at the beginning, I wanted steering behavior similar to that of the Claas Xerion #42054. But I couldn’t simply reuse the mechanism from this set, since my MOC features suspended axles, which requires steering to be controlled by a rotating axle rather than linkages. With linkages, the suspension would have influenced the steering. To counter that problem, it would have been necessary to add a translation/rotation conversion mechanism, which would have been a real mess. (Actually, using linkages wouldn’t be impossible with the right geometry, but it would add complexity and likely reduce reliability.) I based my design on a very simple principle that has existed for centuries: bevel gear transmissions. You’ve probably noticed that when the crown gear of a differential is placed on the left or right, the bevel gear connected to it will not rotate in the same direction for a given wheel rotation. That’s why, on chassis with multiple driven axles, the differentials don’t all have the same orientation. That’s what I needed: a mechanism with a bevel gear transmission, capable of reversing the direction of engagement - but using knobs to avoid losing wheel alignment. So I came up with this: Steering is controlled by the vertical axle. This axle is directly connected to the front wheels. The different steering modes are achieved by swapping, or not, or disconnecting, the rear axle steering shaft relative to the front axle - just like the Claas Xerion. When the grey knob on the carriage is up, it engages with the upper knob of the vertical axle. The front and rear steering axles rotate in the same direction: this is crab steering When the grey knob is down, it engages with the lower knob of the vertical axle. The rear steering axle rotates in the opposite direction to the front axle: this is 4-wheel steering When the grey knob is centered, it is disengaged: the rear axle is disconnected. However, this introduces an extra difficulty compared to the Claas Xerion: the linkage system naturally locks the rear axle on the Xerion, which is not the case with my system. So I added an automatic locking mechanism. When the carriage is in the central position, locks block the carriage knob. When the carriage is moved, the locks spread apart thanks to rollers pushed by slopes located on the carriage. The selection lever rotates almost effortlessly, but it can sometimes be a bit hard to grab since it is close to the toolbox. Just like on the Claas Xerion, the wheels need to be straight for the change to occur - within a certain tolerance. Since for each axle the steering shafts rotate slightly less than 90° in each direction (thanks to stops), you can’t, for example, switch steering modes when the truck has its wheels turned to the right in crab mode and end up in front-wheel steering while the rear axle is locked to the right. Well, it is possible - but you really have to want it and perfectly align everything while forcing against the stops. Front-wheel steering: Crab steering: 4-wheel steering: The selection lever rotates a cam fitted with a roller. This roller raises or lowers the sliding carriage of the moving knob. Position holding is ensured by the rubber band located at the front, which presses the rollers rollers against the slopes of the carriage. The carriage/slopes/elastic/rollers assembly naturally tends to return the carriage to the central position. For the upper and lower positions, a toggle point prevents the carriage from returning to center, enabled by a green connector located near the rear suspension - the travel is not ±90° but slightly more. Using a long CV joint makes it possible to compensate for the change in distance between the carriage knob and the rear axle steering shaft when the carriage moves, in addition to suspension travel. And that’s it - you know everything now! Build and instructions I did a significant amount of optimization work to achieve a build that is both elegant and enjoyable. I wanted to create a model that would stand out from most MOCs, which often feature poorly optimized construction and an unpleasant building experience. The construction is done through small assemblies that are attached to the main structure, as LEGO usually does. I reworked each sub-assembly until the build felt "obvious" and intelligently designed. (Well, I hope that’s the impression you get! ) The instructions came naturally thanks to the work done during the build process. I wanted them to be more “challenging” than current LEGO instructions, while avoiding all the pitfalls encountered with alternative brands. Concretely, I made sure that all parts in a step are clearly visible so none are missed, avoided (except in rare cases) mixing callouts and parts added directly in the same step, optimized the build order to avoid rotation steps, or prevented issues where a previous sub-assembly blocks progress, for example. Everything else came naturally during the build, and I didn’t have to do anything at the instruction stage regarding build contrast (use of colors), assemblies that don’t fit properly, etc. The goal was to make the build more stimulating by avoiding chains of single-part steps, without the difficulty coming from poor instructions. Basically, it’s a rally with a good co-driver, not an orienteering race with a bad map. It’s not perfect though - there are, for example, a few assemblies where I prioritized aesthetics over strength, such as the studful parts around the front and rear winches. But it’s the best I could do for now. Result: a MOC with only 1211 parts, featuring: 5 winches 3-mode steering Suspension All-wheel drive with fake engine Opening parts For reference, 1:10 scale sets usually range from 1500 to 1700 parts. Building instructions: Rebrickable Stickers: send a request to Forwartsticker Parts: (coming soon, on MOCBoxing) Video All photos can be found here: https://www.flickr.com/photos/162173007@N06/albums/72177720331182416/with/55013628563 That’s it for this truck. I hope you like it!
 -
 I gathered here all my W.I.P.s that I plan to do. Also, from now on, I will put in this topic MOCs too instead of making different topics for each. ”Retro styled buggy” - 1x upgeared buggy motor that wont work probably (because of the upgearing and its 740 grams / 26.10 ounces), 1x servo, independent suspension on all wheels and detachable body (with huge wing, that most likely will make the model tip on the back). It takes some ”shapes” from the Tamiya Avante Mk.1. ”Test X” - a rear wheel-drive model which was meant for speed with the PF XL motors - nonsense, I know. That is why I pretty much renounced at it when I finished the first version. It has independent suspension on al wheels, 2x upgeared XL motors, 1x servo and has a modified Flat baja II front frame. ”APACHAIHAPACHAI 15 stud chassis mod” - this, but with 2x buggy motors. Also, great work @apachaihapachai ! ”Technic Tamiya Neo Fighter buggy” - based on a Tamiya RC buggy, but unlike the RC buggy, it has a 4x4 drive-line. Fitted 2x buggy motors and 1x servo, removable body-work, positive caster-angle and full independent suspension. Als, the weight is just under 900g (pretty decent, considering it is a 4x4 and that has a pretty body plus some useless pieces to simulate the electric motor of the real thing). One of the hardest parts that still have to be done is the battery hub frames, which don`t fit in the pretty small body. ”Technic Tamiya BBX BB-01 buggy” - encountering huge problems with the rear suspension arms on the Technic BBX, I kind of canceled it. But the idea was too great to let it just be unfinished. So I returned at the 2nd model file I made, which had 2 motors and an updated rear swing-arms, but visually it was a mess and I think that didn`t work as well. In any case, I am working on a 4th redesign; the renders are from the 3rd one. ”Flat baja-truck MAXX” - with chassis based on the looks and ideas of the HPI Jumpshot SC RC baja, it has 4x4 drive from 2x buggy motors and 1x servo. As main features, it has a (pretty big) positive caster-angle, independent suspension on all arms, consolidated steering rack, space for lights in the front and in the back, plenty of space for the battery hubs, detachable body and, the cherry on the cake, the distance between the suspension arms is 0 studs, enhancing the suspension behavior and travel. The front and rear are heavily modified frames from the ”Something 4x4”, a kind of a study created for testing the same idea for spacing the suspension arms while integrating a 4x4 driveline. P.S.: At its a little over 1 kg / 35.27 ounces, this will sure need another pair of shocks. I will see how I will put them. Also, I want to do a version with RC hobby-grade electronics. And here is a closer look at the rear frame with 0 studs between the suspension arms. This is a modified frame from the ”Something 4x4” from the bottom of the post. ”Ruslan baja-truck” - based on the Eagle V2 trophy-truck - thanks to @Daniel-99 for helping me with recreating some parts of his build. It has 2x buggy motors, 1x servo-motor, (big) positive caster-angle, easily removable sides, space for about 5x light systems (1/2x back and 3x front )and 4x 9.5L hard shocks for the 4-links suspension at the rear and independent at the front. I am planning to make a version with RC hobby-grade parts in it. Here are the original topics: ”Flat baja-truck II” - same features as the first one, but this time 100% of the design is mine and also it has less parts while it has a smoother look (for me). i am still working on the instructions, so until the final steps, I only have one render with it :/ I have another bunch of W.I.P.s, but most of them I don`t consider to finish at all. You can find all of them in the ”General archive” on my Bricksafe. Most notable ones are the (I wont add descriptions because you can find the Studio files on Bricksafe): ”Red Yeti chassis” ”Superstar” ”Something 4x4” ”Bathtub dragster”
 -
 Good day everybody! Today I am proud to present you my new MOC - an all-wheel driven pickup. Specs: 4x4 solid axle suspension 2 m-motors for drive 1 m-motor for steering openable doors ,trunk and bonnet lightbar on top standart PF battery box 1x PF receiver detailed interior: adjustable side mirrors reinforced structure with a cross inside protection net Enought talking, let's watch this! Video: I hope you liked this and you will post your feedback! Between, N1 means Number One which refers to be my first successfull design of a steered and 4x4 driven off-road vehicle
 -
Tundra buggy – an off-road vehicle for extreme arctic adventures - 4x4 - XL, Servo, IR, LiPo - Leaf spring suspension - Opening doors - Removable body. The chassis is modified version of my Trial Pickup Truck one.
-
 Presenting another trial truck - 4x4 - PF: XL, Servo, IR, LiPo - Leaf spring front suspension - Double soft shock rear suspension - Panhar rods for both axles - Opening hood - Removable body. Prepared it for the Trial contest in Moscow, but couldn't come there, then participated in the Truck Trial competition in St. Petersburg. You can watch the performance here: Time: 13:41 and 54:33.
 -
-kpia.thumb.png.a265cddff9575859eea3a4d2aad663c2.png) Power functions: 1x Servo motor 1x L motor
Power functions: 1x Servo motor 1x L motor -
 I' ve decided to make an alternative model for 42054 CLAAS XERION 5000 TRAC VC set. I' ve wanted to design something different from all those excellent c models already made, so I made a truck capable of off-road conditions, with crane and many other functions. The result: Functions: rear axle drive with 4 piston engine steering live axle suspension side outriggers cabin tilting rear PTO (power take off) crane arm rotation crane arm 1st stage elevation crane arm 2nd stage elevation grabber closing/opening Please watch the video to see this machine in action and for more details. This model is powered by one m motor with rotation direction selection. It powers main selector, crane selector. and PTO. Main selector switches between worm gear powered functions and arm rotation. When worm gear functions are selected, there is another switch to choose between outriggers and cabin tilting. The crane selector switches between 1st and 2nd stage elevation. I had to use some interesting (I think) solutions because of parts selection in 42054 set: Piston engine There are no piston engine parts in the set, so i made them from some connectors. You can see it working in the video. Suspension There are no shock absorbers or wishbones too. So I' ve made a suspension based on twisting axles: Every wishbone is suspended independly. 3 of those connected to axle make a well-working long travel soft off-road suspension: Grabber There was a grabber in original set, but when building the grabber I've already used the worm gear for more important functions, so I' ve designed a different locking mechanism: Turning the green axle makes the red grabber frame move up and down and becouse of engaging the blue knob gear with h-frame opening and closing blue grabber. Instructions Instructions are already available here on rebrickable! I hope you liked this model.
 -
 Hi everybody. last month I started a new project, while my 42043-C Unimog U4000 is on standby. I kinda like the Mercedes Benz team. so this one will be another Zetros. while my 42043-C Zetros was a C-model, this Zetros 3643 AS 6x6, will be way bigger, and not a C-model. Below is the blueprint I'm actually building from. been during a lot of research, blueprints and calculated a proper scale many times..... so by basing the scale on the wheels I figured out that a 1:12.5 scale would fit very well. I got some RC wheels 108mm, which kinda looks like the Zetros tires, but the Claas Tractor tires will fit the model very well too. Now let me show some pictures of my actual model so far. This one was my first atempt to build a proper fitting chassis for the Zetros But after a month with rebuilds and testing, I got to scrap that design, as the gearbox wasn't strong enough to power 3-4 kg of lego. also was the chassis a bit to flexible. so during january I ended up with this design: And by now I have finished most of the chassis, on moved on to the cab. As told it is the CrewCab model I'm building, mostly because it is the one I like most, and think it fits the size of the truck very well. By finishing the Chassis, it also means that bumbers and headlights are done. I'm not quite sure about the headlights yet, but it will work for now. The picture above, is the current prgress. More will follow. more pictures at: https://flic.kr/s/aHskRFHEQB
 -
Good day! About a year ago I made an APC . It was a simplistic, underpowered MOC. Today I present you my second attempt at building APC. It was slightly inspired by BOV m11 Functions: -4x4 drive with buggy motor with 1:4.4 gear ratio -steering with m-motor -turret rotation with m-motor -gun elevation with m-motor -powered by a BuWizz -pendular suspension on rear axle The off-road perfomance of the geared down buggy motor was surprisingly good , both at low and high speeds. The turret can rotate 360º freely with the motor geared down 1:2.3. The gun uses a mini LA for the elevation @ 1:1 gear ratio The charging port and the switch on the BuWizz are accesible throught the hatch on the left side of the vehicle. I hope my studded bodywork isn't too horrible , the video will be up later today.
-
 Hi! These two off-roaders were made special for Moscow Technic fest (November 2016). Hedgehog: Chick: Thanks for watching!
 -
 Hi everybody! Today I present to you my first experience of construction Trial Truck! During this year I was looking for your ideal 4x4 chassis. And in the end I came to this building. In the final, which turned this freak on 4 wheels medium size range (80-82 mm). The main idea of this project was the task of the displacement of the center of gravity down and forward is not at the expense of detail, as well as the compulsory use of the portal gears on both axes for high permeability and stability of large CG. The power installation in the form of two twin L motors located in the rear axle, where through the reduction gear torque is distributed to the axle gears back and forth, and then the rotation of spreads on all wheels through a gantry gearboxes. This arrangement limits the transverse rear axle moves up one degree of freedom. Yes, the rear wheels are posted on the obstacles, but discomfort on the track it does not deliver. Servo motor for steering is mounted on the front axle, which also lowers the CG and the sprung mass model. Power - LiPo, management - Sbrick. Number of pieces - 875 pieces Weight - 950 grams More photos you can find on my flickr and blog
 -
[MOD] 42037 ultimate
agrof posted a topic in LEGO Technic, Mindstorms, Model Team and Scale Modeling
Hi All, I ran into a sale (50% off), and couldn't resist to buy a copy of 42037. It was actually much more fun to build than I thought, pretty sturdy construction. Still, L4 engine? I had to change some bits of it... enjoy! https://rebrickable.com/mocs/agrof/42037-ultimate-mod -
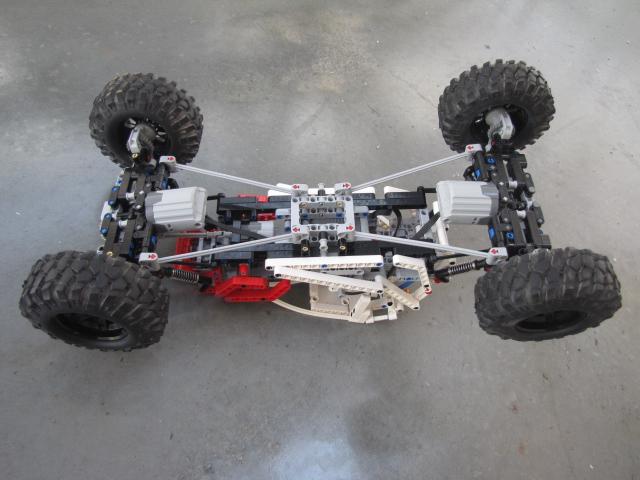
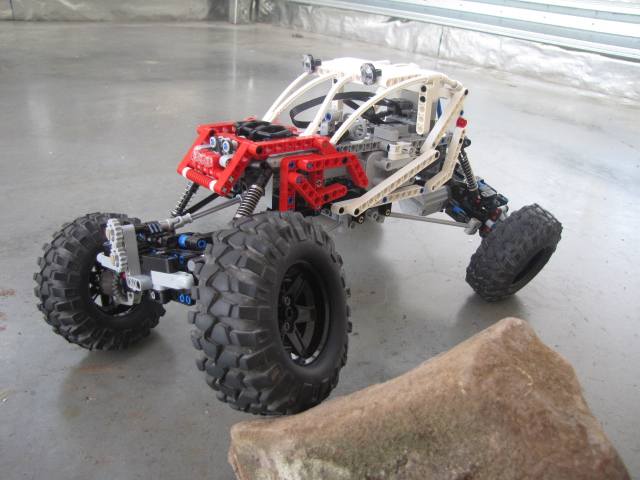
 G'day from Australia everyone! This is my first topic created on Eurobricks and my first serious MOC since the end of my "dark age". I'm seriously super glad to be here and keen to share my Technic creations with you all from now onward. With this in mind, if there's any way I can improve how/what I post, by all means let me know so I can keep everyone (including staff) content. I am committed to giving this site the full respect it deserves. :) As a few of you have suggested, it's a good idea when coming out of your dark age to develop designing/building skill by drawing on other people's MOCs for inspiration and guidance for different building techniques... Partially inspired by SevenStuds' recreation of Tim Cameron's rock bouncer "Showtime", I present my own 4x4 Rock Bouncer. Features.. Drive: 2 PF XL motors (1 per axle). Final ratio is 3:1. Steering: 1 PF Servo motor with rack and pinion Suspension/axles: Full-time locked solid live axles with portal hubs (geared 3:1), suspended by 9.5L shock absorber (soft) (2 per axle) and stabilized by a double triangulated four-link setup. Tires: Third party scale RC tires similar to the "Rock Crusher" by RC4WD. Battery: 1 x PF AA battery box Receiver: 1 x PF V2 I initially began designing some kind of rock crawler which was to include PF XL motors, third party tires of some description and (after quite a while researching suspension design) double triangulated four-link suspension. This kind of suspension is ideal as it provides maximum articulation and strength of the axle while eliminating the requirement for a Panhard Bar or Watts Linkage because the triangular positioning of the upper and lower control arms oppose each other, eliminating sway and allowing all desirable movement. By far the most difficult part of designing was the requirement for a steering shaft which moved harmoniously with the suspension cycle of the front axle. Because the upper control arms are shorter than the lower ones, the angle of the axle relative to the chassis changes through it's cycle and this means that when positioning the steering shaft, it must be such that the radius of it's motion doesn't change (due to angle change) as TLG doesn't offer any part which works purposely as a slip joint to negotiate the effect of plunge. After many, many, many... many attempts, a sweet spot was discovered which offered a negligible discrepancy. (This was a happy moment). It's biggest performance drawback would have to be that when the angle of climb and drive torque applied is too great, the rear lower control arms buckle and the rear axle begins to walk under the chassis. Trust me, it's cringe-worthy. With 15L beams instead of 16L links and consequently different suspension geometry, however, this could be resolved. The turning circle also suffers due to the wheel base. Overall, I am reasonably happy with the final product as it is capable of most of the things I intended it to be and in my opinion, the body could look worse. ;) I unfortunately don't have video footage, but I do have photos (see below). Enjoy! All comments welcome. :D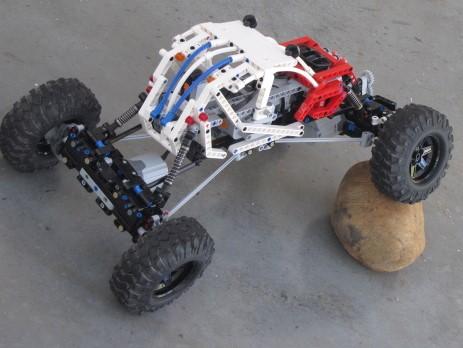
-
How about that little cross between mud and go on the rocks? Crawler 4x4 always ready for it! Still would! Its wheels are shod with tires RC Rock Crusher X/T 1.9, coupled with portal axles and two motors running by SBrick and LiPo battery box - we have an off-roader with excellent maneuverability, suspension geometry and a low center of gravity due to the unsprung axles. Crawler 4x4 built under the rules of the forthcoming Off-road trial competition in Moscow, at the same time. I tried to build the chassis in such a way as to achieve maximum throughput and maximum flexibility - namely, so this chassis can set the wheels of virtually any size from 62 to 108 mm. The body of the model removable. This allows the chassis to this every body, even though the truck, even an SUV. Get more photos on my blog of flickr
-
Hello all! This time I'm making the recently showed here on EB russian off-roader, SHERP Right now I'm trying to keep the weight as low as possible to make it actually float.LDD file: http://bricksafe.com...sherp/SHERP.lxf Complete model LDD: http://bricksafe.com...herp/SHERP1.lxf Videos at the end of this post Pics of real one: Finished MOC: Enjoy! My version(still WIP chassis in LDD soon will build it) Big clearance:
-
 After more or less coming to terms with the failure of my first MOC, I started looking around for another model I could try my hand at and eventually came across Zblj's off-road crane. I thought it was pretty cool but I still wanted to build another tow truck, so I scoured the web for something that might be a cross between Zblj's off-road crane and a wrecker. Luck was not on my side, however, so I decided to just wing it and not worry about how unrealistic my model might be. Since I love building by trial and error but am not too keen on piecing together massive models only to have to tear them down because of some silly design flaw, I took a sort-of-modular approach. So far I've got a very rudimental rear axle, some outriggers and a distribution gearbox. This is the rear axle (the pics suck big time as usual). I'm not too fond of those 2x1 rubber bricks, so I took advantage of the space and used soft shock absorbers instead. The setup is basically a heavy-duty version of the Actros 42043's. Down-gearing is 3-to-1. Nothing special about the outriggers: And this is the heart of the truck-to-be: This module has 5 L motors. Four are hard-coupled to provide propulsion to the vehicle; the fifth will drive the various functions through the gearbox, which is just a basic distribution system with each segment driving a function either way (42042 style). The functions should be as follows: Right side, top to bottom: - tow arm - tow fork - tow winch - front winch Left side, top to bottom: - cabin tilt - middle and rear outriggers - rear spade outriggers (I don't think that's their real name - anyway, the same kind of outriggers on the 42038 truck) - compressor (one-way switch, of course) I went with L motors rather than XL ones since the former are easier to incorporate into a build and are less likely to tear apart the U- and CV-joints. The model will probably be around 100 studs long and 23 or 25 studs wide, so I expect it to weigh around 5 kg, which the four L motors should be able to handle comfortably. To prevent excessive friction and power loss, the crane (whenever I get round to it) will have its own motor and battery box. Hopefully I'll get the truck done by the end of the year and also be able to take some decent pictures at long last.
 -
 As a tribute to this truck this project shows some of the unlimited possibilities. It is a model of a KrAZ 255B 6x6 off-road truck which is used for extreme applications. Even though this specific truck was never produced as a civilian truck however after its retirement it has been used as such. Within a couple of minutes it can be changed into one of the four different editions which include: - Semi-truck with fifth wheel - Ballast tractor with ballast box - Trial Truck edition - Log Truck with stinger steered trailer So it is up to you what kind of job it does: just having fun as it being a Trial Truck, or will you give it a semi-trailer? Or will it be hauling logs? The truck features: solid axle suspension on all axles of which the rear axles use a tandem bogie suspension, PF powered driving on all axles 6x6 drive, reduced speed to increase power/torque, Servo powered steering, fully functional fifth wheel, modeled V8 engine, detailed cabin interior and two light units. Actually you could build this yourself. Building instructions and inventory/parts list are available. Early in the building process you will see what it is that you are building. You will be very excited from the moment you start the build of "Truck T14" KrAZ 255B 6x6 till you finish it with about 290 different parts totaling 1800 pieces. Scale: 1:17,5 Length: 477 mm (+ trailer 926 mm) Weight: 1,92kg (+ trailer 2,41kg) Parts: 1840 (+ trailer 2270) This KrAZ 255B 6x6 model is powered by a YaAZ-238A V8 4-stroke Diesel Engine which is visible with the hood opened. This power source has 8 cylinders in a V setup with a displacement of 14,87 liters. The initial YaMZ-238 delivered 215 hp with a torque of 785 at 1500 rpm. Since 1966 the YaAZ-238A engine was installed and delivered 240 hp with a torque of 883 at 1500 rpm. This detailed V8 engine is nice to build and to give it those realistic looks a total number of 80 parts is used. It is detailed with for example air filter, fan, fan belt, pulleys, hoses, by-pass oil filter and the exhaust system. Both L Motors, which are used to power the truck's drivetrain, are positioned laterally on each side of the chassis. The rotation of both L Motors is reduced using a single gear reduction one for each. The power produced by these motors individually is merged by the length differential. To increase off-road capabilities it has limited slip applied. One out going shaft is powering the front axle, but not without being geared down once more. The second out going shaft of the length differential is powering both rear axles. Both rear axles have there own gear reduction which is equal to that of the front axle. Again limited slip is applied, but to the rear axles only. The front axle has Rubber Belts installed instead of shock absorber. It's double rear axle setup is fitted with a tandem bogie suspension. The use of this setup allows easy axle and wheel travel. Both front and rear axles are fitted with "Technic Steering Wheel Hub with 2 Pin Holes". These hubs have proved to be a real improvement, less friction and the wheels do not bend under the weight of the model as it would without. Semi-truck with fifth wheel For a basic configuration a fifth wheel is mounted. Because of this a semi-trailer can be hooked up. Since this is a common application it makes the truck extremely versatile and depending on the used trailer it still suites any kind of terrain. At the rear end of the chassis has wedges installed to allow easy attaching of any semi-trailer. By adding a winch the versatility can even be increased. The battery box is simply sitting behind the cabin and the spare tire is mounted to the truck's roll bar. Ballast tractor with ballast box As used to haul extremely large and heavy loads this truck can be fitted with a ballast box. What it basically does is adding weight to the rear axles to improve traction. While fifth wheel mounted trucks have there semi-trailer to add weight to the rear axles it is now replaced with a ballast box. The truck's battery box acts as the actual weight. A spare tire is mounted that fits the truck as well as four spare tires that would fit for example a drawbar lowboy trailer. Trial Truck edition To be used as just an off-road truck to fool around with a trail truck body can be installed. To distribute the weight of the truck equally over all axles the battery box placed on top of the rear axles. Even though spare tires are not common for trail trucks two are installed to improve the looks of this truck. It is always impressive to see a truck with these large wheels having some spares. Mounted to the roll bar and easy to access when needed. Log Truck with stinger steered trailer Using this truck to transport logs requires to additions. The first one is a bolster mounted to the truck's chassis. It is sitting directly on top of both rear axles which enable good weight distribution. Second is the stinger steered trailer. Basically this trailer is a large tube with a tow ball at one end and a partial chassis with a bolster and two sets of wheels attached to it. The two sets of wheels are attached to solid axles which uses the same hubs as the truck does. Essentially the axle setup is equal to that of the truck without the drivetrain. Again it uses a tandem bogie suspension setup which allows easy axle and wheel travel. To hook it up to the truck it has a tow ball which connect to the truck's tow ball socket. The trailer's bolster is exactly the same of that of the truck and both are foldable. Finally the partial chassis with the axles and bolster attached is slidable. Allowing the full log combination to haul different lengths of logs.
 -
Hello all! I want to show my modification of Toyota FJ40 (designed by RM8). We needed a tow truck for Moscow competition and I had only one weekend to create this model. The result is promising but it needs some improvements because the rear cardan shaft is very unreliable. The model is controlled with SBrick. To be continued :) So let's watch the movie: Thanks for watching!
-
Hi All, I would like to present my latest experiment, an extreme off-roader mini Samurai - yes, another one . The goal of this project was to see, what is the tiniest chassis I can build, with suspension, steering, and 4x4 drivetrain. I succeed to shrink down to 10 studs width, and for that I built the chassis and the body. The position of the IR receiver might be "illegal", I couldn't place it in LDD, but in reality it works without any problem. Well, the result is quite fine, but the front axle is not stable enough, too much slack left in it, and the gears can slip under hevier load. I tried to reinforce with rubber band, which brought some improvement, but not as much, as I was hoped for. Maybe one day I will build a completely new one, although as it is, pulling a 42043 is no problem for this tiny monster. The rest of it pretty stable, so all in all I am happy with it. Features: 1 XL motor, 1 Servo motor, MiniZip cable, 9V battery, weighs round 460 gramms. HERE You can download the LXF file. I hope You enjoy!
-
After seeing lots of different takes on the Land Rover (of various eras) I was inspired to design a minifig-scale version of the Series 2 for my nascent 1950s British village. LDD instructions are available here: https://bricksafe.com/pages/Zetroc
-
Hi to all fans of Lego! Today I want to share with you my new work - Rock Rod Rock Rod - it's the crawler, on the construction of which I was inspired by the fierce custom projects from HAUK Designs. Especially, where, no matter how on the crawler to run a fresh RC DC chequered flag STT PRO rubber wheels and BuWizz. At the output was a relatively light on the portal bridges crawler. At the heart of the model is also the philosophy of placing motors on bridges, to reduce the center of gravity and minimize weight and inertia of the body. Technical characteristics of the model: Weight (together with a technic-figure) - 817 g. Number of parts - 617 pcs. Steering - Servo motor Movement - two L motors Power / Control - BuWizz Even the "sofa" trial allows us to understand that additions such as non-standard tires and BuWizz significantly expand the scope of use and possibilities of radio controlled Lego models. It remains to wait until the snow comes down, to ride Rock Rod on the rocks. But you can do this before me, by building the Rock Rod yourself by free video instruction. I plan to test the model in the spring on a severe off-road. I will be very glad to hear from you any advice or wish for the completion of both the technical component of the model and its appearance. Ahead is still half a year :)
-
 This is Lego's 42056 Porsche 911 GT3 RS set with some unique rallycross-inspired features I added making it the perfect sports car to drive in the snow. Features Suspension system raised to make the car about two studs higher Wheels and tires from the 42037 Formula Off-Roader Mudflaps LED light bar Front off-road lights Rear bash bars Optional snowplow that attaches to the front The lights are fake and don't turn on, and all of the other lime-colored pieces are from the 42037 set as well. I had a lot of fun making this. I just had to switch of the area of the springs to change the height for the rear without any pieces needed, but for the front, I had to remove the entire Porsche's body to make the lift there using a variety of pieces. Overall, I'm proud that a got the result I wanted, which was making the Porsche 911 GT3 RS higher (so it wouldn't bottom out) and equipping it with off-road features so I could have fun with this set in the winter. It does need to drive in snow only about an inch high so I could move it without getting stuck (and so the plow can move the snow too). I recommend to anyone who has the Porsche set to try these mods out for themselves this winter! Here's some more pictures of the car and a desktop wallpaper that I created wishing everyone at EuroBricks Happy Holidays!
 -
I'm back with one last issue in my GX EV3 build. I just got done finishing the doors, side panels, rear trunk door, hood, and some part of the roof. But the vehicle was so heavy that when I drove it around, it kept on doing the same thing. The diffs were clicking and the car had very much difficulty moving. Here is a picture of the bottom of the vehicle. Most of the clicking seems to be coming from the rear diff when I move the wheels by hand. I can either do two things. 1. Reinforce the rear diff somehow. 2. Improve it's off-road performance and stop the clicking somewhat by replacing the diffs with knob gears. But this will come at the cost of independent moving between the wheels. What should I do? Please give me the best response you can so the clicking will stop and I could finally take this AWD machine through some rough terrain like a real SUV. I really appreciate any advice.
-
Off-Road Expedition Car "NIVA"
-
"Bronco" buildind instructions