

mihao
-
Posts
143 -
Joined
-
Last visited
3 Followers

About mihao

Recent Profile Visitors

-
[MOC] 1:8 Porsche 911
mihao replied to mihao's topic in LEGO Technic, Mindstorms, Model Team and Scale Modeling
Hi Sokolov, I was in the middle of porting the app to support arbitrary MOC instructions instead of only one MOC, and I had to move away from this work due to other priorities. Once I am back on this, I will first let you know any progress. Many thanks for being interested in this project. -
[MOC] 1:8 Porsche 911
mihao replied to mihao's topic in LEGO Technic, Mindstorms, Model Team and Scale Modeling
FYI, I published the instructions on RB at LEGO MOC-260112 1:8 Porsche 911 Carrera by Lego__Bee | Rebrickable - Build with LEGO. To build the MOC with genuine LEGO parts, I made it in two-color theme and various areas have to be redesigned. -
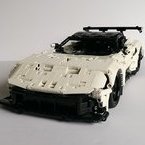
[MOC] 1:8 Koenigsegg Agera RS
mihao replied to mihao's topic in LEGO Technic, Mindstorms, Model Team and Scale Modeling
yes -
[MOC] 1:8 Porsche 911
mihao replied to mihao's topic in LEGO Technic, Mindstorms, Model Team and Scale Modeling
I reworked on these comments in terms of the headlight and the front fenders. Now the front hood is 1 unit wider on both sides and accordingly made the fender narrower. The headlights aligned with the inner fender piece now and I also add a 2x2 black tile behind the headlight so the red liftarm won't be seen through. Please let me know what you think. Thanks! -
[MOC] 1:8 Porsche 911
mihao replied to mihao's topic in LEGO Technic, Mindstorms, Model Team and Scale Modeling
By "linkage", I mean the fake engine connected with rear wheel by axle/gears, also connected with the motor. Here are the pictures. Two motors on each side drive a 28 tooth, and these two 28-tooth will drive a 12 tooth in the middle which directly goes into the differential. The other side of the differential will go to the dummy engine. I can't think of any better way to connect them to preserve the efficiency. About the PU light, I compare it with PF light, can't tell the difference visually. I guess it is just some slight diameter difference at the bottom of the bulb which change the grid when pushing into a pin hole. I believe that the PU light I got from bricklink is a genuine one, because I can see "2015 LEGO" on the middle block. It may be defective, but I can't tell because I don't have another. Someone owning PU light can please confirm. Anyway, if it is just a defective, I'd to use a piece of tape to fix it. Good idea! Adding a third motor is possible but not easy. The only place I can see is between two seats, and adding a motor there will have to elevate the center console. I also need to figure out the new gear ratio so all 3 motors can input the same torque. Another reason I don't want to give up the headlight is that it gives a soul to this build. :) My understanding of your complaint is the gap around the headlight towards the fender parts. Maybe I should try to use the 4X4 dish or find a way to make the two fender parts closer to each other. For the self-painted parts, it won't be a problem when publishing instructions on RB, because it now requires the part list matches with the picture, so it can't be red for sure. It can only be an orange/bright light orange mixed one due to the color availability. (Black is not an option this time, because the new tall fender part.) Yes, I need to see how aggressive a half stud move will be against the overall proportion but completely agree with you that the headlight part is challenging considering the front wheel turning clearance, aesthetics, and the naughty LED lights. -
[MOC] 1:8 Porsche 911
mihao replied to mihao's topic in LEGO Technic, Mindstorms, Model Team and Scale Modeling
Yes, many people like manual module more than RC ones. Because I want to put in a 1:8 figure, the remaining space in the cockpit doesn't allow to make complex shifting and gearbox. Thanks. If you mean the red lift arm behind the headlight, I've thought about that. This lift arm serves as important structure to keep the body together, and it has to be red otherwise there will be a black line on the body. Thought about adding some black pieces to cover it up, but that needs to move the headlight forward which will be way off from the original. A remedy will be some sticker on the lift arm to cover it up. What do you think? Thank you. Thank for the LEGO scale modeler where I can measure the build with a blueprint precisely. To make it all red is not easy, I have to use many self-painted parts such as the turning small panel and the new taller fender part from P1. But I am glad I can finally put them together here. :) Thanks. The LED is still a bit lose though I found a way to keep them in place. LEGO should really improve it. -
[MOC] 1:8 Porsche 911
mihao replied to mihao's topic in LEGO Technic, Mindstorms, Model Team and Scale Modeling
for manual: opening hood opening spring loaded doors independent suspension on all wheels flat-6 engine, linkage to rear wheels. steering wheel linked to front wheels, and HOG detachable body from chassis tunable spoiler (wing) 1:8 action figure ready cockpit. :) motorized functions include: 2xPU L motors for propulsion 1xPU L motor for steering 1xPU LED for headlights. (Need an 25cm extension) 4-channel PU hub. The good part of it is to connect with BrickController2 app and use a console controller to play. -
Hi, I’m excited to share my latest MOC, a new build I’ve been working on recently—a replica of the newest Porsche 911. This project was both a design and engineering challenge, as I wanted to make it not only visually accurate but also highly playable and functional. Unlike a static display model, this MOC is designed to interact with, explore, and motorize, which required balancing realism, functionality, and structural efficiency. In addition to the standard features you’d expect - independent suspension, fully working steering with HOG control, an opening front hood, and spring-loaded doors, I focused on two key goals that I think make this model unique: A removable body: The entire body shell can be easily detached from the chassis, just like the real car, making maintenance, motorization upgrades, or interior access simple and straightforward. A full-size cockpit: The interior is scaled large enough to comfortably fit a 1:8 action figure, allowing for more immersive play and display possibilities. To achieve the spacious cockpit and maintain a manageable weight, I made a deliberate trade-off: this model does not include a gearbox or shifting mechanism. Removing these components freed up the interior space and helped reduce the weight, which is critical for motorization. The model is fully ready to be powered with one PU 4-channel hub, three PU L-motors, and a set of PU LED lights. While it won’t achieve high speeds due to its current mass, the motors provide enough torque for smooth, realistic movement, and I’m still exploring ways to trim weight and improve efficiency. Speaking of the PU system, I did encounter an interesting design challenge with the new LED lights. Unlike the old Power Functions bulbs, which could be securely pressed into a Technic pin hole and stay in place, the new PU lights are slightly thinner and no longer lock in by friction. This means I had to think carefully about brackets or support structures to prevent them from sliding out. It’s a small detail, but it highlights how subtle changes in LEGO parts can impact design decisions - especially when working in tight spaces like the headlight area. Overall, this MOC was a fun exploration of both aesthetics and playability. I’m excited to continue refining it, experimenting with weight reduction, and exploring creative ways to integrate the PU system without compromising the design. Here are some pictures of the build. Your comments and feedback are very welcome! Update on 11/28: Fixed the headlights based on comments:
-
[MOC] 1:8 Koenigsegg Agera RS
mihao replied to mihao's topic in LEGO Technic, Mindstorms, Model Team and Scale Modeling
Hi Sokolov, thank you for testing it thoroughly, I will address the instructions issues soon. The two finger panning is a good suggestion for more viewing freedom. The second suggestion is an interesting one, I have also thought about that clicking a part in the view can lead to the step where that part is added in the first place. But it does require each part in the view is clickable, but right now, some part exists in a sub module, and it means that user can only click into the sub model first then to the individual part. I think it is tolerable. For Google store release, I haven't collected enough testers there, and there is some new issue reported from Google store which I have to fix. It seems a lot more restricted requirements to publish in Google store than Apple store. I am using Unity, so it should be straight forward to generate Windows store app, but using Windows is not part of my original intention, given that windows PC is not as agile as mobile device. Anyway, will let you know when I need some testing there. Thanks in advance! -
[MOC] 1:8 Koenigsegg Agera RS
mihao replied to mihao's topic in LEGO Technic, Mindstorms, Model Team and Scale Modeling
Yes, flexible parts can be used for that, but I don't think they'll as neat as the current way. For the Android app, seems that OBB has some issue with certain regions so right now I am trying to change them into Addressable asset bundle being loaded from CDN. I will send you a message when it is ready to test. Thanks. -
[MOC] 1:8 Koenigsegg Agera RS
mihao replied to mihao's topic in LEGO Technic, Mindstorms, Model Team and Scale Modeling
A bit small, but possible to use with additional structure. Also need to revise the related areas like the windshield side bars. -
[MOC] 1:8 Koenigsegg Agera RS
mihao replied to mihao's topic in LEGO Technic, Mindstorms, Model Team and Scale Modeling
Yes, I thought about that, but that part is a bit too big here. -
[MOC] 1:8 Koenigsegg Agera RS
mihao replied to mihao's topic in LEGO Technic, Mindstorms, Model Team and Scale Modeling
Yes, when I decided to use these Znap parts, I realized that they have already been discontinued, but given that they are relatively cheap on bricklink, so I chose to still use them. I just can't find any good replacement with other parts. This car is convertible, which becomes a signature feature of it, so I don't want to miss it in the design. When the roof is detached, it is basically a half circle left there. I have thought about using soft axle or similar, but none of them can achieve the clean result like the current one. -
[MOC] 1:8 Koenigsegg Agera RS
mihao replied to mihao's topic in LEGO Technic, Mindstorms, Model Team and Scale Modeling
I’m trying to bring the instruction App to Google Play (Android). But Google requires that my app is tested by at least 12 people before I can make it public, so I need some help from you here. If you’d like to support me: 1. Share your Google (Gmail) email address with me via IM. 2. I’ll send you an invite link. 3. You just install the app through the Google Play internal testing link. Thanks so much for your support. -
[MOC] 1:8 Koenigsegg Agera RS
mihao replied to mihao's topic in LEGO Technic, Mindstorms, Model Team and Scale Modeling
Yes, I am thinking about that too.