
ludov
-
Posts
686 -
Joined
-
Last visited
Content Type
Profiles
Forums
Gallery
Everything posted by ludov
-
 I think the only way to prevent last-minute entries is to have the contest in two rounds. So vote at half-way and then the best N WIPs can continue to the next round (for some suitable value of N). This enforces a WIP, but might make it "too official" and cumbersome. I do like the idea of "classes". On some contest topics, like the crane contest, the "pro" builders leave very little chance for us mortals to win Maybe a simple rule like "if you have won a previous contest, you're in the pro league, otherwise you're in the regular league". Promotion to pro if you win in the regular league. (And demotion...? ). Anyway, I really enjoy the contests. I don't always have time to participate, but I always try to follow!
 -
Some serious safety issues you guys implemented I'm very impressed by the variety of the submissions. 5: 10 10: 6 6: 4 12: 3 1: 2 2: 1 Good luck!
-
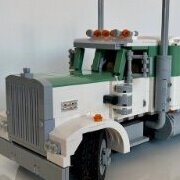
Very nice! I really like the combination and especially that you took a lot of care to have matching scales. Each of the three components is a great MOC by itself. Great job (It reminds me a bit of a very improved version of one of my all-time favorites, 8872 ) Just out of curiosity, what's the difference between US and non-US style trailers?
-
Technic Hall of Fame Discussion
ludov replied to Jim's topic in LEGO Technic, Mindstorms, Model Team and Scale Modeling
+1! -
That’s awesome! Incredible Can you explain how the mechanism works?
-
Yes, it is 5x4 (5 wide, 4 high). I agree that f it were a scale model it should be about 4 studs wide, but I prefer playable over scale in this case. Good idea! I didn't think of the regular 3x11 panel, as I don't have them in yellow. But you could indeed make it 3x4 with those: Obviously, 4x4 would be trivial, just add a layer of beams in the middle. Maybe I need to reconsider my design
-
Still working on it I made the boom: This tool me a lot longer than I expected. I really wanted the boom to be 4x4 or 5x5 in cross section. I tried many solutions based on the "old" 2M worm gear on a gear rack (often used, e.g. by @Erik Leppen here (design by Anko) and recently by @jwarner in his small 5-axle crane. But I didn't like how the axle joiners rub on the gear rack. Also, LDD wouldn't allow the construction, so I searched on. I found two solutions that I was reasonably happy with: The front one uses an idler 8z gear (kind of hidden) and has the gear racks sort of on the side of the boom. The back one uses the new 1M worm gear, which fits nicely into the space at the end of the 3x11 curved panel. I like that solution the best for its symmetry so I developed it further. Here's a close up of the final implementation I also spent a huge amount of time figuring out the geometry of the actuator. Being an engineer and all, I dusted of the cosine rule and try to optimise the placement for horizontal boom when the actuator is retracted and maximum elevation angle when extended. The final solution shown above has 79 degree elevation, and I'm happy with that I will finish it some day. Hope you like the progress!
-
[WIP] MAN TGS 10x8 Effer 2655
ludov replied to Beck's topic in LEGO Technic, Mindstorms, Model Team and Scale Modeling
@Beck The 8z fits on the 5x7 frame; not sure why LDD doesn't allow it (this is a 8M gear rack on a 1x8 plate): But the restricted steering lock is a valid issue. Maybe linkage-based solution would be better, but I guess you made your design decision, so let's see how it works out @I_Igor Is that RC? I only build manual models, so I don't have experience loads that can take stuff apart. But the 8z on the frame seems a fairly tight fit. If you turn the supporting beam 90 degrees, it seems even a tighter fit (on account of the beams not being square), but it doesn't jam: -
[WIP] MAN TGS 10x8 Effer 2655
ludov replied to Beck's topic in LEGO Technic, Mindstorms, Model Team and Scale Modeling
I thought the solution with the 8z gear would work. It’s the same distance as you’d have with bricks. I’ll check later, out of curiousness. -
[WIP] MAN TGS 10x8 Effer 2655
ludov replied to Beck's topic in LEGO Technic, Mindstorms, Model Team and Scale Modeling
Can you use the steering rack from 8479 Barcode Truck? See step 14 of the instructions. Then the gear rack only needs one stud, and you get Ackermann steering geometry for free. Nice to see the real build getting started. Looks good -
I also recall that you announced this somewhere... maybe the Scale Modelling forum? I'm definitely going to follow this - after seeing that old footage I'm thoroughly fascinated! These machines is remind me a bit of the Catch and Release by Akiyuki
-
Non looped chain use.
ludov replied to knotian's topic in LEGO Technic, Mindstorms, Model Team and Scale Modeling
A 3L or longer plate also fits on a link. And 8862 uses two links to squeeze two connectors (which you can replace with something else of course, like beams); see page 10 of the instructions: -
[WIP] Telescopic Excavator
ludov replied to nerdsforprez's topic in LEGO Technic, Mindstorms, Model Team and Scale Modeling
I don't know if "cable chain guide" is the correct scientific terminology, but I'm referring to these things: They look a bit like chains and cables go through them. They are used in linear motion stages to avoid exactly the problems you're having with your tubing. My idea was to use a bunch of 2M beams to emulate the chain. You'd have to fill up the entire length of the tubing (at least the part that will be moving) with 2M beams. Of course, it won't work as neat as in the picture here because the 2M beams wouldn't be interconnected, but maybe good enough. Does this make sense? -
[WIP] Telescopic Excavator
ludov replied to nerdsforprez's topic in LEGO Technic, Mindstorms, Model Team and Scale Modeling
On a bigger scale you can maybe make a cable guide chain from 2M beams to guide the tubing? On this scale, I think would look too bulky. -
Ideas Book 8888 Excavator
ludov replied to louisk's topic in LEGO Technic, Mindstorms, Model Team and Scale Modeling
That is surprisingly functional! Good old technic... -
I don't recall that the SC1 tanks had those tracks folding out, but I guess that's artist's freedom Loved that game, good job!
-
[WIP] Caterpillar CT660 remake
ludov replied to Technivor's topic in LEGO Technic, Mindstorms, Model Team and Scale Modeling
You mean how to lock the steering of the 2nd axle when it is raised? I was walking by a parked tractor truck the other day, which had its 2nd axle raised and the wheels in almost full steering lock. I noticed that the raised axle was also turned! It was quite obvious when you were nearby, but from a distance you don't really see it because it turns into the mudguards. I think real trucks don't lock/unlock an steering on raised axles, so maybe don't bother about it (Maybe someone more knowledgeable can attest, but the complications of lock/unlocking steering on such big vehicles seems enough of an argument for not to do it...) -
My mechanical clocks
ludov replied to Davidz90's topic in LEGO Technic, Mindstorms, Model Team and Scale Modeling
Orreries are awesome! Very impressive how you figured out all the gear ratios. And there's some clever constructions in there, like the old clutch gear with the plate-with-hole locking into it to have the Moon revolve around the Earth. I need to order me some more 40z gears, see if I can duplicate it! Do you have maybe also some still photo's? P.S.: if you line up those u-joints, the motion of the Moon will be quite a bit smoother. -
Opinions on LEGO Technic Theme
ludov replied to Jim's topic in LEGO Technic, Mindstorms, Model Team and Scale Modeling
I'm with @Jeroen Ottens on this one. For me the increasing size is also off putting. I don't have a lot of space to store assembled models, and also my parts collection has limited space, so the more functions per part, the better in my opinion. In the studfull era, about a 1000 parts was enough to build a function-packed, awesome flagship model. Look at 8868: 954 parts, giving a big truck with working V6 engine, compressor, pneumatic crane with 4 functions, and some decorative parts even (air filters, exhaust stacks, air horns). 8880: 1051 parts. 8480: 1040 parts. Now look at the studless era. I'd argue that 42043 is 8868's studless successor: big truck with L6 engine, compressor, pneumatic crane with 4 functions... 2502 parts. To be fair, the Mercedes has suspension on all axles, outriggers and a tipper bed. Also the overall appearance is much more refined that 8868. And, of course, studless building does require a bit more parts in general, so 2500 parts seems a reasonable amount of parts to get to a function packed model. 42009 (2297 parts) and 42078 (2372 parts) prove my point. So why the increase to 4000+ parts? Are we really getting more functions per part? Are the models really that much more refined? I'm saying no. I think the ~2500 parts is a sweet spot for a studless flagship model and I don't see why we should go to 4000 and up. Just my €0.02 -
[MOC] Caterpillar D11T Dozer
ludov replied to sheo's topic in LEGO Technic, Mindstorms, Model Team and Scale Modeling
Wow. Beautiful and functional. I love it -
Little mobile crane
ludov replied to Appie's topic in LEGO Technic, Mindstorms, Model Team and Scale Modeling
Very cool! It’s a small version of what I’m building, and it’s a reminder for me to finish I’m amazed how you managed to get all those functions in such a small space. Where did you hide the pump this time? Do you still have the rest of the “series”? I recall the shovel at least. Maybe a photo together? -
Grum's Shed
ludov replied to grum64's topic in LEGO Technic, Mindstorms, Model Team and Scale Modeling
I'll be following this with interest! I never had this set, or built it, so I'm curious to see what all the excitement is about Interesting to see how the LA brackets are used here. I guess didn't exist yet... -
Very cool! I didn't expect that a pneumatic solution would work so smoothly, considering the lag and asynchronous behaviour that often occurs in pneumatic circuits. Great work
-
Opinions on LEGO Technic Theme
ludov replied to Jim's topic in LEGO Technic, Mindstorms, Model Team and Scale Modeling
In my opinion, the Technic theme used to be better for only on reason: it was LEGO, in the sense that it used the same kind of bricks and plates that the other themes used. There was a fairly smooth transition from System to Town to Model Team to Technic. Nowadays Technic really feels like a completely disjoint theme and I find it hard to integrate with “regular” LEGO due to the odd versus even spacing. Don’t get me wrong though: I love the new pieces and how much more advanced mechanisms can be built with them. But the downside is that the theme is becoming more specialized and with that it also becomes more difficult to build something with the same set of parts, which I think is reflected in the perceived lack of creativity in the b-models. (I say “perceived”, because I think they’re only seen like that compared to the super advanced a-models.) I notice it in my building too: even with 10000 parts from the studless era I still have to order stuff because I’m short on some connector or something. Also, because the theme is disjointed, there’s no comparison possible with other themes, e.g. regarding playability. Just my €0.02, if it makes sense. -
That engine looks really good. Very effective usage of parts