Search the Community
Showing results for tags 'creator'.
Found 210 results
-

Let's Play LEGOs, Episode 1: Let's Build a Treehouse
JohnFromKS posted a topic in Brick Flicks & Comics
Hi. I am a new AFOL and very new to brickfilms. Here is my first real effort. It was filmed and edited entirely on my iPad. I learned a lot while doing it, so I'm hoping future efforts are even smoother. I really enjoy watching build videos, so this takes that basic concept but adds a bit of storyline behind it. I chose set #31010, the Creator Treehouse, for my first one because it is still pretty new and doesn't yet have a lot of reviews or build videos. Future efforts will mix new and older sets. Thanks for watching! -
Hello Everyone! After seeing the wonderful review of the new creator set 31009 by Rufus, I decided to make my own row of them. I also added furniture and tiled the floors. I decided to keep them on 16 x 16 baseplates so I could move them around my city easier. I hope you enjoyed looking at them as much as I did making them. C&C Welcome
-
For several years now, CREATOR has carried the flag for LEGO housing; CITY dwellers are presumably meant to sleep in their caravans or fire engines unless they are lucky enough to have a Modular Building for a domicile, or only sleep in buildings that have snow on them. I suspect this is a deliberate move by The LEGO Group; the CREATOR 3-in-1 mantra provides versatility in design, and might perhaps provoke multiple purchases to enable a bit of variety in one's Town layout, or at least an affordable source of house parts. The last bona fide CITY residence was 8403 City House in 2010; this year's CREATOR range will boast no less than three minifigure-scaled dwellings, if you include the rather offbeat 31010 Treehouse; let's take a look at the first to be released, the modestly-named Small Cottage. Review: 31009 Small Cottage Set Information Name: Small Cottage Number: 31009 Theme: CREATOR Release: 2013 Parts: 271 Figures: 1 Price: GB £19.99 | US $24.99 | EUR 24.99 - 27.99 | AU $39.99 | CA $29.99 | DKK 299.95 Links ... Shop@Home ... Brickset ... Bricklink ... Peeron (not yet listed) The Box Click for a larger full-frontal image The CREATOR logo shamelessly obscures part of the model on this square box; the set itself is captured from its best angle. The usual blue CREATOR background is enhanced by faint bushes and trees, framing the cottage and setting the 'countryside' scene indicated by the official set description; it wouldn't otherwise be obvious. Two insets in the CREATOR yellow don't even try to frame the two alternative models. The box 'feels' like good value; it is larger than similarly-priced sets from many other themes, and weightier, though the latter may be due to the instruction manuals. More bushes flank the alternatives, which are showcased with their features on the box rear: Click for a larger image The box artist has done well to show all three distinctly without overlap; the space has been used very well. You'll notice that Thumbs are required to open this box. I used a knife; but, to be fair, this still required thumbs. Despite the inclusion of a minifigure, it's a three-part lantern that decides the scale on the box top: The troublesome gradient behind the inventory persists: why do they put the light-coloured parts in the light corner, and the dark ones in the dark corner? Of the other sides, the left-hand is the most interesting: The two lesser models feature here, with a multi-lingual explanation of '3 in 1' if it weren't already clear. Unusually, the 'Small Parts' warning features on the right-hand side rather than the bottom. Out of the box fall four polybags, three instruction manuals ... and a 16x16 full-thickness plate in Bright Green. It's shown here because I forgot to include it in the Parts section. The Instructions Three smart manuals each have shiny, quality covers; no indication is given as to build difficulty or order, either on the covers or inside. The only information inside the front cover is the new 'sort your bricks!' cartoon. I've assumed that the model order is the primary build, the Small Cottage on the cover; then the Windmill; then the other house, which is called a 'Skater's House' in the official blurb which also uses this order. There's no other indication that this is the 'correct' order; in fact the box art might suggest the smaller models should be reversed; but for clarity and consistency I will refer to the models and their respective manuals as 1, 2, and 3 in this order. The other two manuals are similar: Click the thumbs for larger images More monochrome bushes feature on the covers; different in each case reflecting the change in perspective. The steps are clear and simple. Piece call-outs ask for an average of three to four parts per step: I only encountered one point where the placement of a brick wasn't clear, which will be indicated later; it was of no consequence in any case. Advertisements for other CREATOR sets feature prominently; book one promotes the excellent 7346 Seaside House and 31004 Eagle on their own pages, akong with a composite of several sets on the back cover; I was a little surprised at the choice of 31008 Thunder Wings for the full-page treatment at the back of book three, considering it has what I would consider a rather different market than the houses might attract. Manual one also contains the inventory; see page 1 and page 2. The Parts Hope you weren't expecting Technic. Actually, there are two Technic plates, but otherwise the inclusion is mostly basic bricks and plates. There is great selection of dark blue roof slopes: not quite as good as 5891 Apple Tree House (which, incredibly, is still available, in the UK at least) but still most welcome. Door and window parts are always useful. The bright green 6x6 plate hasn't been seen since early noughties Belville. The smaller part collection is dominated by basic red bricks. We used most of ours building a Toadstool, so I'm not complaining. I got very excited by the inverted bracket when I reviewed the new UCS X-Wing, not knowing I had one in this set which I've owned, unopened, for at least two months. Otherwise, the tiles will always be useful, and I appreciate the inclusion of earth blue cheese slopes. The Minifigure CREATOR houses have included figures since Log Cabin in 2011; they are rarely anything to write home about, and this one is no exception: I'd sooner have had a classic smiley, but I expect TLG have done their market research and presumably kids want more expression. Rather surprisingly, the face isn't that common: appearing only in a couple of basic brick sets, a seasonal CREATOR, and the Winter Village Cottage, along with a few promotional minifigure collections. The entire figure, replete with skateboard, is found the Watford UK store opening set. I'm going to call him Chet. He has an American Preppy look. Not sure if Chet is an appropriate name for a skateboarding, sausage-sucking, drink-spilling preppy, but Chet it is. Model 1 - Small Cottage The primary build is quite a beauty! A surprising amount of detail has been crammed into this cute little cottage. The colour scheme is pretty, with stripes of white and light bluish-grey adding texture and the appearance of height to the red walls; the dark blue roof is smart and features an attractive gable. The yellow door provides a further splash of colour, and is set off nicely by the dark blue cheesy awning. A SNOT-mounted lantern, tiled step and flowerpot - the last typically formed from colourful 1x1 rounds in CREATOR style - add a welcoming aura to the entrance. Note the dark tan plate with rail forming a neat sill under the gable window. I'd like to have seen the roof apex 'finished' with double-slopes - like on the venerable Apple Tree House - but the studded top does help to round it off in a more 'cottagey' style, I suppose. Another window sill sits under the double-height window on the right-hand side; this wall is otherwise featureless ... ... except for the plate-hinges which suggest an opening section for access to the inside. Click the picture for a straight view. The opposite face is far more interesting. Big full-length French windows are the main source of light into the modest internal space, and one slides open - in one of the rare instances of the 1x8 plates with wide rail being used for their intended purpose. We'll see the barbecue in more detail later, but this is a good moment to point out the chimney. Dark bluish-grey and tan are used to add texture to the stone, and slopes gradually angle the flue; the stack sits just off the centre of the roof, but the slopes imply that the chimney is continuous. It's rather pretty; sure, it doesn't use headlight bricks and tiles to add depth like we see on the Winter Village sets, but for a little CREATOR set, I think it's been done quite tastefully. The back of the chimney is squared off nicely, and forms the boundary to the opening rear wall: The dark grey plate with vertical pole forms a little handle, which allows the whole - and otherwise plain - wall to open. You can also see that there's another gable window - replete with sill - on this side. The wall swings back, allowing Chet to sit in his swivelly chair ... ... and preventing adult hands from having to squeeze through the narrow space afforded by the sliding window. In the opening corner is a little table - rather optimistically called 'drawers' in the promotional text - with a lamp of unusual design. It's basic, but at least there's furniture! Though I hope the chair is comfortable, as Chet doesn't appear to have a bed. If the opening wall isn't enough, the whole roof comes off easily: This is great for play access to the interior, even if there isn't that much to do in there. I'd quite like to have seen a bunk bed, or something. Sadly, there is too little space in the roof structure to add any features up there; this is partly because larger bricks have been used than is strictly necessary, in order to allow for the alternative builds. Maybe Chet sleeps in the garden; certainly the little pond obviates the need for a bathroom. The pond is incredibly simple, but still rather effective; the slopes and green plates are somewhat successful in providing an illusion that the pond surface is lower than that of the lawn. I do like the fence. Barbecues seem to be an essential feature of CREATOR houses: Seaside House, Hillside House, Log Cabin, Beach House, and Lighthouse Island have all featured outdoor cookery in various guises. The tradition continues: Chet enjoys his sausage with a cup of something. I'd have appreciated a little clip to attach sausage or 'fork'; you can clip the fork to the plate with bar under the grille, but then there's nowhere to put the sausage. I guess Chet can just hold it while he goes 'boarding. Cottage Verdict: This is a remarkably pretty little cottage, designed to look very smart despite a limited part selection. The opening door, window, and wall section; swivel chair, barbecue and skateboard provide minor play features, but it is in the creation of a beautiful house and garden scene from very simple parts and techniques that this model excels. Model 2 - Diminutive Windmill Hats off to the designer's imagination for including a windmill among the alternatives, even if the execution is a little too simplistic. To be fair, this isn't its best angle; the mismatched colours of the opening side look a little jarring here. I do like the design of the chimney flue, though. Not so on the opposite side with the door; the double white stripe continues above the door here. I'm not so keen on the use of red 1x1 round plates in the central stripe, but at least they are used symmetrically; I'd rather see normal 1x1 plates even is it would result in square flowers in the other builds! The big windows aren't used in this build; instead, four small windows let in some light. A 1x2 brick with frictionless pin - not used in the other builds - allows the windmill to spin ... ... which it manages to do for less than the eight second exposure of this shot. It might have helped a little if I'd built it correctly - the white tiles and red plates should have rotational symmetry. Of course, an effecive windmill would have sails that capture the wind; these barely extend beyond the face of the mill. I do like the minor landscaping detail which, coupled with regularly spaced tiles, makes an attractive path up to the door ... ... beyond which we see a hint of some inside detail. From the front, note again the dark bluish-grey brick which looks a little out of place, and the rather-too-short sails: The back is more interesting than you might imagine: here, the dark tan rail-plates make a little ladder - spaced a brick apart using a technique which might be instructive to less experienced builders - even if it doesn't really lead anywhere. Again a red round plate looks a little incongruous, but not nearly so as the trans-orange one at the bottom of the ladder. Again, the back opens, revealing the inside detail and a eyebrow-raising blue floor: If you don't like the floor, there's a bright green plate you can use instead; maybe blue is better. The white cones are, I presume, bags of flour, although you'd be forgiven for thinking they are milk bottles. It isn't clear from the instructions how exactly to place the SNOT 2x2 round brick onto the wall; I've chosen to use its centre anti-stud as it is a better connection, even though it's now off-centre to the other 2x2 round brick. Like the primary build, the windmill's roof is detachable: The roof section is a very uncomplicated stack of bricks. I'd have thought the black plate with bar at the top of the opening wall section would have been better facing out, at the top of the ladder. Windmill Verdict: A novel idea, though a little disappointing in the flesh. This is by far the weakest of the builds, though its spinning sails might appeal to younger builders. Model 3 - Modest House The final build is another cottage, but this one is long and thin, and there's a good reason for this: it folds! TLG calls this a 'skater's house' - that well-known phenomenon. We'll see why it's call that in due course (and not just because of the skateboard. ) With the house folded out like this, the chimney forms an attractive buttress adding to the 'cottagey' feel. In this and the first view, you can see that the large windows form the end walls; they are topped by the 1x4 arches, which I guess form an architectural feature, but it isn't entirely successful. I'm not sure why the arches were included in the set; apart from introducing a little variety to the red bricks, they don't really add anything to the designs at any point. From the front, you can see how again the wall-mounted lantern welcomes you, and this time there is a little garden tap, though it's a little close to the ground. I'm not sure why the doorknob is a dark blue cheese slope; there are plenty of black 1x1 rounds to do the job a little better, but maybe this is due to show that other parts can be used for this in your MOCs in the unlikely event you've run out of rounds plates. Now for the money shot: Closing the house brings the two large windows together; they look great, but this emphasises the oddity of the arches. I wonder if the blue 'pond' plate might have been better placed in front of the further window. The plain wall formed by closing the model again suffers from an incongruous round plate in its construction. The light bley bottom layer is nicely continuous; the chimney bley intrudes a little far into the wall, but I can live with this: it looks suitably rustic. Chet retains his swivel chair to warm his feet by the lounge fire, but he still doesn't have a bed. This time he does have somewhere to keep his fork (if that's what it is there), but it's all for nothing, because he doesn't have anything to cook. Not a sausage. And that's because his sausage has been employed elsewhere: Nice part usage!! the sausage forms the stem of an angled desk lamp. Super! Shame it's a red light. What do you get up to in the evenings, Skater Boi? Anyhoo, in daylight, he likes to practice his skateboarding tricks, and the house has a means to help him: The plate with rail is a ledge for him to do that thing that I've seen skateboarders do on MTV. Apparently, according to TLG, this is called 'grinding'. Who knew? Skater's House Verdict: There's something refreshing about this little house, which achieves far more than just the folding mechanism would imply. It's cute, it's quaint; it's ... somehow familiar, reminding me quite strongly of some old classics: Here we have the Skater House next to veteran sets 6370 Weekend Home, from 1985, and 376 Town House, from as early as 1978. They're really not too different. Stick a moulded tree and some flowers onto 31009, and you've got a Classic Town set in all but name. Conclusion You know, I really like this cute little set. It's simple, unpretentious; it looks great, with a pretty colour scheme, and there's a bundle of useful house parts for creating your own little town buildings, from homes for your myriad CITY workers to trackside structures for Train fans (I can see an opportunity for a signal box, though you might not want a blue roof). There may not be much in the way of technicality in the build, and play functions are little lacking; the skateboard probably appeals to the kids in this respect, but I'd rather have had a bicycle. As a standalone, it might not compete so well with the slightly cheaper 'action' CREATOR sets; however, it fills a niche that's been lacking now for years: an affordable home that will fit into any Town layout. Design & Build 8 A pretty though simple set, it lacks a little in the build compared to other CREATOR sets, but it's great to look at. Not so much the windmill, perhaps. I'm impressed with the effect of the simple landscaping to create garden features and gradients, and the smart use of colours in the two house builds. Parts 9 Dark blue roof pieces, including corner slopes; large and small windows; and a variety of basic bricks and plates in useful colours make this a great parts pack. I'd consider buying mutliples of this to make a big house. Figures 6 Chet isn't the most exciting dude to be included in a LEGO set. He has a rare-ish face, but I doubt you'd be buying this set for the figure alone! Playability 7 There are a number of good play features; I suspect this set might appeal more to girls than boys, unless they are all entranced by Friends; the somewhat anathematic skateboard might have been included to swing this appeal the other way. Couple the set with some CITY and the playability multiples. Value 10 Part for penny, the CREATOR range is always good value; at £20 for 271 useful pieces, this is a bargain. Couple it with two attractive houses, and ooooh so much potential, and it's a no-brainer. Overall 80% My Score 9/10 Classic Town lives on, in a modern CREATOR-fied form. Thanks for reading! I hope you enjoyed the review. Please take the time to comment! Rufus My flickr Set Other CREATOR House Reviews 4954 Town House by Siegfried 4956 House by alex54 4996 Beach House by def 6754 Family Home by Matn 5891 Apple Tree House by def 5766 Log Cabin by The Brickster 5770 Lighthouse Islandby Pandora 5771 Hillside House by Rufus 7346 Seaside House by Pandora I you like my reviews, and would like to learn how it's done, please consider joining the Reviewers Academy:
-

(MOC) 6912 Super Soarer Alternate Model - Super Spacer
Toa_Of_Justice posted a topic in Special LEGO Themes
This is my own alternate model for 6912 Super Soarer. However, I added a few extra pieces up front to make the laser cannons. Click any image to enlarge it. The thrusters can pivot, thanks to the TECHNIC elements included in 6912. An unintentional design feature is that the thrusters can also fold away into a "parking" mode! I designed this model in LEGO Digital Designer. LXF File - Instructions (.xps format) - Brickshelf Gallery Special note: This is the first MOC I built with a friend. I designed the model entirely by myself, but my friend and I followed the instructions together to build it. Here are the pieces I used in addition to those included in 6912: - Trans-Dark Blue 4589 Cone 1 x 1 without Top Groove (2x) - Black 3957 Antenna 1 x 4 (2x) - Yellow 4081b Plate, Modified 1 x 1 with Clip Light - Thick Ring (2x) -Toa Of Justice -
LEGO's 2013 CREATOR range has brought quite a variety of new models; there may not be much in the way of innovation, but I'm sure the LEGO Group knows what sells. For many, the highlight of the new sets will be this latest foray into the realm small-to-medium size cars, last visited with 2010's 5867 Super Speedster. In many respects, 31006 is a follow-on to this model, as we shall see, and we'll get to compare the two later. Review: 31006 Highway Speedster Set Information Name: Highway Speedster Number: 31006 Theme: Creator Release: January 2013 Parts: 286 Minifigures: N/A Price: GB £14.99 | US $24.99 | EUR 19.99 | AU $29.99 | CA $29.99 | DKK 179.95 A note on the pricing: In the UK, Europe, and Australia, this set occupies the same price point as 31008 Thunder Wings, which has some 50 fewer parts; whereas in the US and Canada, the Highway Speedster is considerably pricier. 31008's pricing is as follows: GB £14.99 | US $17.99 | EUR 19.99 | AU $29.99 | CA $24.99 | DKK 179.95. I can only assume that TLG have done their market research, and consider this set to be a sure-fire hit that will sell despite the higher pricing - interesting because it's rather a European-looking car, in my opinion. Links ... Shop@Home ... Brickset ... Bricklink ... Peeron The Box Click for a larger full-frontal image The familiar blue-and-yellow CREATOR colour scheme is, on this box, enlivened by a coastal roadway-graphic context for the car. I appear to have - quite unintentionally! - mimicked this for the title picture. It's more than you tend to get on most CREATOR boxes, and I think flatters the car somewhat. It is interesting that the alternative model insets - given unexpected prominence on the box of Thunder Wings - are relegated to their usual position here. Over the back, the three models parade themselves on the same 'speckled' floor found in the lower half of 31008's box rear. Click for a larger image Here, the car's opening features are opened for your delectation. I like the way the bley studs on the side of the nearmost model have their LEGO logos aligned - something I tend to take care to do when building official sets - although it is quite possible that these images are digital renders, which are often used on box art, I believe. I have often criticised the CREATOR set inventories - found as usual atop the box - for having a background gradient that can make some of the parts difficult to see; I'm pleased to report that this problem appears to have been fixed. Click for a larger image It'll be interesting to see if this lighter background extends across the entire range. The wheel construction here provides the customary '1:1' reference; it gives you some idea of the depth of the box, which is considerably deeper than that of 31008 ... ... though both share the same frontal dimensions. I doubt the 50 extra pieces require the increased interior space; it may be designed to mitigate the price hike for North American customers. This paradox continues inside the box: only three polybags reside within, compared to 31008's four; one however contains a small foetus. Each model gets its own manual. In common with the rest of the standard CREATOR range, no stickers are included; I wonder if this habit is to change with the introduction of the CREATOR Expert range and its decals. The Instructions The primary model's booklet has a shiny, high-quality cover. Having a smaller height than the box, the car is forced to encroach onto the yellow surround, as if breaking out of the page. The other two manuals have covers of a similar quality to the inside pages. A plain blue surround makes the instruction steps clear. With about 4-5 pieces per step, the build nevertheless progresses at a reasonable pace. As you can see from this picture, the rear and of the model is almost complete before the front is more than a skeleton: There are a few small sub-builds, but it's largely brick-on-brick, with very few colour-differentiation issues. Two double-page spreads advertise the rest of the new range, and some CITY vehicles. It's nice to see that the new Small Cottage gets a mention here! Behind this lies the inventory; found complete with part IDs here and here. There's nothing in the second manual besides instructions; the third's rear cover advertises the LEGO Club, with its disturbingly-faced mascot: The Parts A few pieces of blue and red break up the black, white, and grey monotony of the larger parts bag and its smaller offspring. It's nice to see a number of trans-black parts. Trans round tiles and a number of white cheese wedges could prove useful; the large number of light bluish-grey 1x1 studs would be handy if you're a fan of Derfel Cadarn's medieval walls. The other two bags contain quite a collection of white bows, tiles, slopes, plates and wedges, all are welcome in my collection. I'm really pleased to see large numbers of 1x2 plates in various colours. The yellow plates might be a little surprising; we'll see why they are necessary in due course. The only new(ish) part is the 1x2 brick with studs on one side, which I highlighted in my Octan Tanker review. Model 1 - Highway Speedster The primary model is a curvy, 10-stud wide supercar with large, purposeful front air vents, wing mirrors, large 'low-profile' tyres, and a rear-mounted engine. Size-wise it is similar to 2010's 5867, and as we shall see, the two compliment each other rather well. The low roof, and wedge-shaped profile building to a higher rear end, gives the car a suitably sporty look. The use of this piece improves the look of the tyres, which otherwise would look rather chunkier than you'd expect for such a car. They do a reasonable job off imitating alloys; the pearl light grey colour looks a little flat and it would have be nice to see them in metallic silver. Better still would be new wheel parts with low-profile tyres, but that would undoubtably push the cost up, if it is even possible at this scale. I like the red and black recesses in the sides, which otherwise would be rather flat and blocky. The low front is dominated by the twin air intakes, lined quite effectively with wedges, cheeses and bows to create a stylish look. The trans-red 1x1 rounds are a little surprising, but their resultant look complements the other, rather subtle, red parts in the intakes, without being too 'in your face.' The back is simple but smart, and looks somehow familiar. Using 1x1 round plates to imitate exhausts is perhaps a little simplistic, but it does show the younger builders how to create complex effects with simple parts, I suppose. Bows and slopes have been used in this model to recreate sexy supercar curves to quite good effect, seen best in this rear oblique view: You'll note the transparent cover to the engine compartment: a realistic feature of many modern supercars. It opens, too, as we'll see shortly. The little red tiled spoiler is rather understated; it also serves as a handle to open the engine cover. A new feature in this latest supercar is the transparent roof, formed from a 1x4x3 window panel and a 1x4x1 wall element attached SNOT to a 1x4 brick. It isn't hinged, but lifts off quite easily to access to the interior. I think the smooth look is an improvement over the previous studded plate of 5867. There's no rear window, however: the driver would have to rely on his wing mirrors! No steering in this car! I doubt a steering mechanism could be added at this scale without losing much of the exterior aesthetic; I wasn't expecting any, so I'm not disappointed. Note that, unlike most previous CREATOR cars at smaller scales, the wheels are connected directly via a 'live' axle. A minor side-effect of this construction technique is that manoeuvring the car in small spaces (ie., doing a three-point turn) is rather more difficult than with independently-spinning wheels. There's a large cavity under the passenger compartment, the floor of which is mounted above the large blue chassis rails. I'd expect a 'real' car to have quite a low floor; this is something of a design floor flaw which will cause us a bit of a headache shortly. Now we'll take a little tour of the car's features. The front headlights make use of a minifigure neck bracket to attach indicator lights; it's a fairly common technique that I've used before, and can be very useful. I do wonder whether the parts should have been white, though. The top-right frame shows the little recess under a 2x2 white tile that contains a trans-red round tile at a half-stud offset. I'm not sure what it's for, but it gives the car a Knight Rider vibe. Now there's an idea... I've already pointed out the very attractive round rear lights, but let's look at them again. Opening the engine cover reveals that, unfortunately, the engine is a little disappointing, especially compared to the hinge-brick V8 from 5867. In what is, I believe, a first for CREATOR cars, the Highway Speedster features gull-wing scissor doors (thank you, SirBlake, for the correction). The bley stud acts as a handle to allow the door to be lifted more easily ... ... even if the resulting 'open' door looks a little lame. Lifting off the roof allows easy access to the interior, itself quite smartly laid out: The chairs are a little perfunctory. The dash can easily be modified for right hand drive. It's also worth pointing out the two black symmetrical wedge plates under the windscreen, which form an attractive rhomboid shape here. Here's the downside to the high floor of the passenger compartment: You can't sit minifigures inside, without removing the roof. Actually, you can, but it involves a bit of modding including removal of the steering wheel, and lying the fig down almost flat. To be fair, you're probably not going to be trying to squeeze this car through the streets of LEGO City! I actually prefer the look without the roof. I was pretty keen on 5867 Super Speedster when I reviewed it back in 2010. 31006 is its natural successor; I've hastily rebuilt the earlier set so that we can see how well they sit together: 31006 shows up some of 5867's flaws. Its front fender is rather too deep; 31006's wheel trims make the chunky tires of 5867 look rather odd. 5867's curves, quite advanced at the time, look a little blocky, particularly on the wings; 31006's fluid contours are a vast improvement. On the downside, 31006's rather simplistic engine is a disappointment, and I've already pointed out the poorer turning circle; neither does the front trunk/boot cover open. I also miss the oblique-mounted doors of 5867 which greatly-enhanced its shape. However, the two sit quite nicely side by side, and this view reveals why I think the two sets complement each other. I remember pointing out that 5867's rear resembled a Lambourghini; the lovely round rear lights of 31006 are definitely saying 'Ferrari' to me. See here for a higher view. Model 2 - Highway Recovery The inclusion of a Recovery Truck as the second model in the set marks a pleasing contrast to the sporty primary model, and shows how a little lateral thinking can produce a very different creation from the same set of parts whilst sticking to the vehicular theme. Owners of 5867, however, won't be surprised - the second model in that set was also a truck, and even used the same SNOT technique for the windscreen. I would hazard a guess that the same designer is responsible for both sets (Morten, I believe). The use of tiles and slopes to provide a smooth upper surface for most of the truck is quite effective. You can also now see why the yellow plates are included in the set - they create a striped pattern along the sides, as you might see on an emergency recovery vehicle; it's a nice touch, if not exactly stunning. Trans-orange cheeses complete this image as emergency lights on the roof. The combined effect is perhaps seen better in this low view: Also apparent is the neat arrangement of inverted slopes along the underside, culminating at the front in a curved bumper. The arrangement of lights, radiator grill, and the centred 'badge' is a little messy, but it's probably the best that could be done with the available parts. The brick-built crane/hook assembly combines a number of contrasting colours, and isn't exactly beautiful, but it is functional: The main upright doesn't move very much; the arm extends a little way, and the hook barely moves at all, being restricted by a small plate/cheese wedge spur. This is necessary to enable to hook actually to hook anything - otherwise it would just swivel uselessly. The protruding blue 3L friction pins spoil the look slightly; it couldn't have greatly altered the price of the set to include a couple of 2L pins, but then again I'm sure just about everybody has a few spares lying around, if the protruding pins bother you. An interesting shortcut is used to attach the crane arm to the body: It is simply skewered on the rear axle. Neat! Note that this model also has 'live' axles (indeed, all three models do). Here's the crane in 'action' - Cameron's antique racing car has broken down, again. The minifig bracket that creates the hook works quite well, provided there is a plate or brick underside that it can hook onto. You have to place the towed vehicle onto the hook by hand, and it might struggle to tow anything with a low ground clearance. The truck's interior is neat and spacious, and can seat a System minifigure with ease: However, the cab roof is quite securely attached, and it can be tricky to remove. This view also highlights what I think is one of the major flaws of this build - it's just a little too low to the ground; you would expect the wheels to be mounted a plate or two lower, perhaps. Model 3 - Highway Racing I wasn't desperately keen on this third model - a classic racing car - when I first saw its pictures, but having built it and spent some time looking at it in the flesh, as it were, I've come to like it quite a lot. Like the 'concept car' model in 31008 Thunder Wings, an ugly lump of bricks transforms during the latter stages of the build into a smooth and sleek racer. I particularly like the use of wedges to define the bulge around the cockpit; the array of lights at the front looks a little odd, but it might be the best that could be achieved with the parts. The sides are finished with a SNOT panel with a row of bley studs representing, I suppose, exhausts. See, I've aligned the LEGO logos too. It's profile is somehwat dull, but I like the bowed front and the little wings over the rear wheels. The wheel-hub inserts do well here to give the appearance of spoked wheels, though they are a little too wide for realism. The back end is also neatly bowed, and here you can see the beautifully-tiled cockpit interior: It is interesting that the steering wheel is mounted slightly to to the right - I would expect the car to be a single seater. There's a jumper plate included in the set, which I don't think is used elsewhere in the model, so this could be easily corrected. The car's size is a little too large for a System minifigure, but it looks to be the ideal scale for to fit a Fabulander. It's possible, but only with a minor modification: I've removed the seat backs here so that Gibson Goat can challenge Cameron Crocodile to a race! This is perhaps what led Cameron to break down. Click the links below for some alternative views: Conclusion LEGO CREATOR's latest advance into the territory of small-to-medium sized Supercars provides us with a sleek, sporty, powerful-looking roadster that builds on the successes of its predecessor. There is some superb usage of bows and slopes to define the curvy contours of the car; the simple addition of wheel inserts vastly improves the realism of the look. If you own 5867, you will be delighted to note that the two cars are the same scale, and will look pretty sitting side-by-side on the shelf, especially given the 'allusion' to real supercar brands provided by their rear ends. The two included alternative vehicles are good models in their own right, with sufficient variety to make them interesting and fun builds, and as always significantly increase the value of these CREATOR sets. Yes, there are a few minor flaws, but overall I think the designer has done a fantastic job here. Design 9 The aesthetic of the supercar is enhanced greatly over that of its predecessor, with a wonderful use of curves to depict the svelte lines of a luxury roadster. The two alternatives are imaginative in their variety, and attractive to behold; they can be inspiring in their use of the available parts to create a very different vehicle from the original. I'm not so keen on the rather simplistic engine of the main build, and if I were to change one thing, I would lower the floor of the interior. Build 7 The build process is fun if a little pedestrian; unlike 31008 Thunder Wings I didn't experience any 'wow' moments here, although there are a few neat little tricks used here and there. The highlight is seeing how the gorgeous curves take shape. Parts 7 Aside from the new 1x2 SNOT bricks, which are already becoming quite common, there are no rare or interesting parts; however, the overall part variety and colour palette looks to be more useful than many of the set's contemporaries. Playability 8 A few fun features enhance the experience, but primarily this is a set for pushing around the carpet or sitting pretty on the shelf, at both of which it excels. Value 10 I've scored here for the UK price point: at £14.99, this set is a steal. Less so, perhaps, in North America, where it seems to have been hit be a 'desirability' premium, or something. Or perhaps TLG has taken pity on the recession-ravaged UK, where clearly people can no longer afford luxury cars, even as toys! Overall 82 % My Score 9/10 A great set, at excellent (albeit location-dependent) value. Thanks for reading! I hope you enjoyed the review. I'm sure people will have a lot to say, particularly about the price issue. Fire away! Rufus Resources My 5867 Super Speedster Review My 31008 Thunder Wings Review LEGO CREATOR home page My flickr Set Endpiece Who needs steering, anyway?
-
THUNDER WINGS!! Hhuurrr! It's macho. <flex biceps> MEN WILL LIKE THIS. Thunder wings!! Propeller Power ... Sonic Boom ... Street Rebel ... Fierce/Ferocious Creatures ... Roaring Roadster ... The LEGO Co. has often resorted to hyperbole to increase the masculine appeal of these smaller CREATOR sets to their target audience, but THUNDER WINGS!! takes this decidedly to 11. As we shall see, there is a certain logic behind the use of this monicker for this particular 3 in 1 collection. As you will probably have noticed if you've read any of my previous CREATOR reviews, I'm a big fan of planes, and certainly from the looks of the box this latest airborne offering promises an attractively-styled fast jet with what looks at first glance to be quite realistic styling for a relatively low price point. To see how it lives up to first impressions, and to check out the alternative models of this set, read on ... Review: 31008 Thunder Wings Set Information Name: Thunder Wings Number: 31008 Theme: Creator Release: January 2013 Parts: 235 Minifigs: N/A Price: GB £14.99 | US $17.99 | EUR 19.99 | AU $29.99 | CA $24.99 | DKK 179.95 Links ... Shop@Home ... Brickset ... Bricklink ... Peeron The Box Click for a larger frontal image Like the CITY range, I don't think the CREATOR box art has changed since around 2004, although the yellow surround has perhaps receded a little compared to its predecessors. In this 3 in 1 set, the secondary models have been given a surprisingly high billing; usually one would expect small insets at the bottom (compare 6912, 5767, and 5892). The result of this is a somewhat crowded cover; the '3 in 1' logo obscures part of the main model. The back, however, follows the tradition of displaying the secondary builds more prominently, with a rearward view of the plane: Click for a larger picture The rather eclectic mix of models has given the box artist an intersting dilemma in choosing the background design, overcome quite effectively with the use of a blue marbled 'floor' blending into the blue sky at an arbitrary horizon. The floor effect seems to lack perspective, however. Good to see I'm not the only fan of Lens Flare. The customary CREATOR set inventory is once again featured on the box top: Click for a larger picture This allows you to make a shop floor decision on whether to buy the set depending on its contents, and allows the less thrifty to fork out £15 for the one part they need because they can't wait for Bricklink. I never do that, of course. Opening the thumb tabs reveals the following contents: Three manuals and four polybags make this quite a weighty set: 454 grammes (or exactly 1 lb for Americans and metrically-challenged Brits). The Instructions Each build gets its own instruction manual featuring a shot of the model and little else. They're all the same size with slightly varying thicknesses; models 1 (plane) and 2 (robot) have nice shiny covers, but model 3's (car's) booklet cover is lesser quality (the same as the inside pages). Opening the first manual, we find that the 'don't pour the pieces onto the back lawn' instructions have been replaced by a rather endearing cartoon: I really like this! Particularly the minifigure's puzzlement-bordering-on-abject-fear in frame 2 resolving in to supreme joy by frame 3 when he has managed to sort the parts (which, given the scale, are presumably Nanoblocks). Pandora has pointed out that a similar cartoon appears in the latest Friends sets, adjusted appropriately for theme. A plain blue background with yellow CREATOR surround minimises distraction from the instructions: themselves quite simple, with about 2-5 parts per step and piece call-outs for all three models. The build flows smoothly, and is nicely paced; the only slight issue I found was differentiating flat orange 1x1 round plates from their trans-orange equivalents. Towards the rear of the first manual, there's a double-page spread of the many other new CREATOR models this year. 31007 Power Mech gets a whole page to itself opposite this one; that is perhaps because it will appeal to those who bought this set because of the robot secondary model. I will hopefully do a review of the white sports car soon , but the one I'd really love to get my hands on is that rather splendid eagle. Following this is a double-page spread of the inventory, replete with part IDs; see Page 1 here and Page 2 here. Instructions in the other two manuals go right to the back page. Click the thumbnails below for larger images: The Parts The four polybags can be arbitrarily divided into two large and two small. Click for a larger picture A few splashes of orange brighten up the blue-dominated large part selection. There's not a huge amount of interest here; the Bionicle joints will most likely end up in the Useless Parts container unless you're into making Mechas. The four black hinge-plates (bottom right) could be useful, particularly if you're trying to make a round tower in the style of Derfel Cardarn, though you'll need a lot more than four! Wedge-plates and tiles are the highlights of the smaller-part line-up: Click for a larger picture A slightly unusual inclusion for a CREATOR set is the four pearl-dark grey mechanical arms; we'll see their interesting use in one of the models presently. Note the juxtaposition of flat and trans-orange 1x1 round plates, the source of the only (albeit minor) colour-confusion in the build. Model 1 - Thunder Wings!! Thunder Wings!!'s primary model is a twin-engined, twin-tailed, swept-wing jet that is clearly based on a fighter design but, like previous jets in the CREATOR line, given a more 'display team' livery. As you can see, the wing sweep is created not just by the use of wedge plates, but also by mounting the wings onto the body at an angle. This, it turns out, is a major feature of the set, and we'll look more closely at it later. The nose of the plane is quite neatly styled with bows forming blue and white stripes along the side, and creating a nice contour behind the black nose-cones. Like the 5892 Sonic Boom, the engine air intakes comprise SNOT- (Studs Not On Top) mounted wheel arches; the smaller scale of this plane makes them appear relatively larger, but I don't think they are overly large for the model. Behind the air intakes, the lovely smooth stripes are lost, and the colour-scheme starts to get a little fussy; with white, blue, dark and light bluish-grey, black and orange all vying for attention, the wings aren't as clean and streamlined as the sweep would like you to believe. The blue 1x2 plates outboard of the orange tiles aren't strictly necessary, and their removal would go some little way towards tidying them up. This high shot from the rear is quite flattering. I nearly used this for the title picture. You can see here the slight gap between the blue wedge plates behind the wings - which are attached perpendicular to the fuselage - and the bley grille tiles on the wing surfaces; this could be corrected with some clippy-piece trickery to allow an offset and also create working ailerons in the process. The designer has obviously opted for simplicity. Also apparent is the use of levers at the wing-tips to give the impression the wing-tips are parallel to the fuselage, with some success. Noticeably absent on this jet are the green and red port and starboard navigation lights I've come to expect. The 'colourful' wings are all-too obvious when viewed from the front: The trans-clear stand isn't included in the set! The plane has a pleasingly low, sleek forward profile, though from this angle the air intakes do look a little on the large side when compared to the cockpit. Two wide wheel hubs form the engine exhausts at the rear; between them and the tail fins are two of the mechincal arms, the purpose of which here is unclear. The (suggested) upward slant of the horizontal stabilisers is achieved with the help of these 1x2 clip plates, at the expense of making the stabilisers rather thicker than they should be, but it helps to make the rear profile rather more interesting. A nod to realism this isn't: upward-sloping horizontal stabilisers on fighter jets are, to my knowledge, unusual; usually they are flat but some are downsloping (Harrier, Phantom for example) - but this is not possible here. The side profile reveals a number of faults on this plane. Behind the air intakes, the lower white stripe that started so promisingly behind the nose degenerates into a blocky mess. The fuselage itself is a little too deep, and ends with an ugly bley step in front of the exhausts. The tail fins taper quite well, but aren't a patch on the beautifully-styled tail of Sonic Boom; they are about as good as the scale will allow, although I'm not keen on the orange and black stripes. In case you were wondering... no, there is no undercarriage on this plane. It's really rather disappointing, especially since the designer managed to squeeze retractable landing gear into the much smaller 6912 Super Soarer. Instead, large bley and black plates make for a featureless underside: It's a shame that the same colour wasn't used for these plates. Some effort has been made to give contours to the sides of the fuselage, forming a 'waist' level with the trailing edge of the wings. Ideally, I would expect the engine bulge to be maximal under the wings, and to taper gradually toward the exhausts (see for example the underside of the Tornado), but I can live with this. Less forgiveable is the sudden step behind the engine intakes. I don't normally show build pictures of CREATOR sets, but it's worth drawing attention to a couple of points. Firstly, note the rather unusual use of some parts to enable three complete builds with a minimum total part count. Here a Bionicle ball and socket parts are used simply as filler - the joint doesn't move. Behind this are two 2x2 bricks with pin, facing each other. The pins don't do anything and are barely visible on the finished plane. These parts are each vital in one of the alternative builds. Secondly, let's have a closer look at how the swept wings are achieved: The angle is produced by 2x2 hinge plates and 2x4 wedge plates. The point of pivot is between the rear stud of the white 2x4 wedge and the adjacent stud from the white 2x4 plate on the fuselage, enabling a snug fit and a sturdy attachment. This is quite an advanced technique for a smaller CREATOR set; it gives you a glimpse of how Ralph_S achieves his incredible results. I've certainly learned something from building this - moreso than from any other LEGO set I've built in recent memory! It's the highlight of the model, if not the entire set. Click the tumbnails below for some alternative views of the plane. Sadly, the Super Soarer has been parted out, but here's Thunder Wings in company of the flagship jet of the CREATOR range, and my own F-18 Hornet [/shameless plug]. It's not so obvious from the photo, but Thunder Wings is considerably smaller than the F-18, so we probably shouldn't expect too much in the way of features; however, I really would like to have seen landing gear even if it were only detachable rather than retractable. Model 2 - Thunder ... Thighs? The second model of the set is some kind of Mecha, identified as a 'robust robot' on Shop@Home. Now, I have no interest in mechas (they're not called 'meh-cha' for nothing ) so I was expecting to pass over this particular build with alacrity. The robot has a chunky body, nicely rounded and striped at the front but somewhat flat at the back, with freely mobile arms connected via ball joints and legs which, connected via clicky joints, are somewhat less mobile. He looks like an Eric to me. Perhaps Eric's most prominent feature is his two large shoulder-appendages of uncertain purpose. They look suspiciously like wings, even if it's not clear how they could possibly act like wings, and suddenly the choice of the name 'Thunder Wings' for the set starts to make a little sense, even if it remains a little arbitrary. Eric can't turn his head unfortunately - it's attached directly to the chunky upper body, between two stylishly-curved shoulders. I like the use of the wheel-arch pieces to line the shoulder joints here. The right-hand panel shows what would be quite interesting offset SNOT work, were it not for the fact that these studs decidedly are on top - it's the main body that is SNOT here. The 'wings' behind are attached via one stud sandwiched between two plates, which allows a little movement, from their maximum spread here to vertical. It's a perfectly valid technique, but it might make some people uncomfortable. Being essentially a brick-built Action Figure, Eric is of course poseable. [i once admonished a Reviewers Academy student for saying 'poseable'. My spellcheck doesn't like it, but it's used no less than twice on this set's page on Shop@Home, so it must be ok!! I stand corrected. ] Here he is attempting to walk. His ankles flex only laterally, and he has no knees, making this a difficult task; he looks more like he is speedskating. This is about the only 'walking' pose you can get him to balance in. Note that the clicky-hinges at the hip joints have different coloured sections; as these parts exist only in one 'right-hand' orientation, they appear to be different colours when viewed head-on. This is apparent also in the Power Mech set. Eric's arms are very mobile. Here he has clearly found something crotch-ticklingly funny - or else whatever he's doing to his crotch has made him rather ashamed. You decide! You'll note that Eric has only two fingers on each hand - his 'thumbs' are two 1x2 clippy-plates which don't move, making gripping things a little tricky. All that walking and laughing has made him tired, so it's time to sit down: He looks like he's looking at something interesting in the distance, and perhaps massaging his big tired feet. Ahhhhh! He's so tired, now he needs a little lie down: Or perhaps he's doing the backstroke. Note the 'wings' here are in their 'vertical' position. It's a shame that he can't point his feet down and his head up, or you could make him do a great 'Superman' flying pose. The lack of opposable thumbs hasn't prevented Eric from taking his rage out on two nearby sigfigs: He can grip System-Rufus reasonably well, but he could only pick Rufus Rabbit up by the toe between his fingers. Ow. I actually had quite a bit of fun with this build. Its poseability means that there is far more play potential in the robot than in either of the other two builds, and it's quite an attractive model. For some reason I'm reminded of 80's cult animation . The plane, on the other hand, makes me think of .Model 3 - Thunder ... Wheels Model 3 is described on Shop@Home as a 'futuristic concept car' but to me it looks more like a cross between a hot rod and a dragster. The 'wings' here are - I presume - the white rearward-pivoting spoilers; they could also refer to the wedge-slopes over the rear wheels, I suppose. Either way it's a little lame, but it does serve to provide something of a common theme between three very different models. The car tilts dramatically downward towards the front, again in keeping with a hot rod or dragster: The ground clearance at the front it minimal: as you can see in this picture, there is less than a plate-height between the body and the ground, which might cause some difficulties when zooming it along the floor. Like in the plane, the stripes along the side are quite staggered. There's another unusual use of a wheel-arch piece at the front; not entirely successful this time, although this is as much to do with the unsightly orange slopes behind as it is the arch itself; moreover I'm not keen on the blue headlights. As these trans-light blue rounds are only included in the set for Eric's eyes, it's a shame they couldn't be trans-clear. The back of the car is neat, if a little plain; a simple SNOT panel creates some interesting and attractive angles with the blue inverted slopes beneath, and two inverted Technic plates give the appearance of exhausts, though I'm not sure they are necessary ... ... as the engine appears to have upward-pointing open exhaust manifolds created with the pearl-dark bley mechanical arms: I like the use of 1x2 clippy plates to look like pipes between engine and exhausts. In the right-hand frame, two staggered SNOT pieces provide a very secure support for the side panels. The car has a very small area for a driver's seat, denoted by the orange 'cushion'. It seats a minifigure, but only just: A grille tile takes the place of a steering wheel however, so Rufus has to steer by leaning from side to side, or something. Rufus Rabbit has to stand! The car is quite fun to build, and is chunkier than its external appearance might suggest; the bodywork is for the most part nicely styled, and it makes quite a pleasing third model. A slight redesign of the front end and the side panels (losing the topmost blue wedge plates and mounting the SNOT panes a plate higher) could have made for a very attractive car. Conclusion Being a fan of planes, I bought, built, and reviewed this set first out of the whole (extensive) 2013 CREATOR range. The official LEGO pictures and the box art promised an attractive, sleek small-to-medium size jet, and recent set releases have shown that LEGO can produce decent and fairly realistic fighter jets even if their military heritage is heavily disguised. And I find I do like this set, but for very different reasons from what I expected beforehand. The jet itself, when you scratch beneath the surface, is a little disappointing. The styling which looks good on the upper surface is rather tatty and mismatched underneath the wings, and the two-toned plates on the bare underside highlight the lack of undercarriage, which detracts from both play and display. It is, however, eminently shwooshable, and despite my misgivings about the colour scheme of the wings, it is an attractive jet. The best feature by far, though, is the superb demonstration of angled juxtaposition of plate surfaces (there must be a catchier phrase to describe this!). Then come the secondary builds. Had I bought this set just for the plane, and hadn't intended to review it, it's likely I never would have built them, and I'd have lost out. Both are fun in their own ways, and I can see the target consumer getting hours of fun from this little set. I even kinda miss Eric now he's been destroyed. Kudos must be afforded to the designer for providing three very different models from a limited palette of parts in one set. The price is the relatively large number of leftovers from model 1, but it's impressive nonetheless. Design 8 Viewed from the top, the plane is a sleek and attractive fighter-styled jet, and really benefits from the swept-wing configuration. It is let down by the messy construction beneath the wings, and mismatched colours here and there. However, it's still lovely to look at from the most important angles; moreover, the inclusion of two pretty good - and varied - secondary builds serves to bolster the score significantly. Build 9 A mostly brick-on-brick construction of uninteresting parts somehow builds to a surprisingly attractive result in each case; it's enjoyable although a little pedestrian. Major bonus points are awarded here for the swept wing technique. Parts 6 A rather mediocre parts selection lets the set down here - you've probably got most of these parts already, and it's unlikely you'd buy the set for the inventory alone. Playability 7 The plane is eminently swooshable, but the lack of landing gear or any other added feature do restrict the possibilities of bith play and display considerably. The car can be zoomed along a table, but on a carpet or other bumpy surface it'll snag. Eric the Robot saves the day here - he's fun to pose and cute to boot. Value 7 CREATOR sets are always good value on a parts per pound basis; this one perhaps doesn't hold up so well compared to the myriad similarly-priced sets in the current range, but it'll keep you amused for a time, and keep kids quiet for far longer. Overall 74% My Score 7/10 There isn't really that much to recommend this set to your average AFOL, unless they are a die-hard plane fan. I do, however, think this would make a great set for kids. Provided, of course, that they are sufficiently MACHO. Thanks for reading! I hope you enjoyed the review. Please let me know what you think! Rufus Resources My other CREATOR jet reviews: 5892 Sonic Boom Jet 6912 Super Soarer Special Themes CREATOR Review Index My flickr set
-
London Toy Fair 2013 Check this out!!! http://www.brickset.com/news/article/?ID=5557
-
At last, after 3 trial missed, I've qualified to CUUSOO with my mini-series! Plz support me! >> Link >> http://lego.cuusoo.com/ideas/view/34022 As you know, I try hard~! >_< good luck to you all guys! I wish this project could pass 10k supporters! (you can see more photos on my blog. http://legodaystar.blogspot.kr )
-
CREATOR 2013 News 31000 Mini Speeder Pieces: 65 Price: USD 6.99 Brickset 31001 Mini Skyflyer Pieces: 62 Price: USD 6.99 Brickset 31002 Super Racer Pieces: 121 Price: USD 14.99 Brickset 31003 Red Rotors Pieces: 145 Price: USD 14.99 Brickset 31004 Fierce Flyer Pieces: 166 Price: USD 14.99 Brickset 31005 Construction Hauler Pieces: 256 Price: USD 17.99 Brickset 31006 Highway Speedster Pieces: 286 Price: USD 24.99 Brickset 31007 Power Mech Pieces: 223 Price: USD 19.99 Brickset 31008 Thunder Wings Pieces: 235 Price: USD 19.99 Brickset 31009 Red House Pieces: 271 Price: USD 24.99 Brickset 31010 Tree house Picture courtesy 'Fedro Photo's' on flickr. Thanks to Just2Good Pieces: 356 Price: $29.99 Available: August 31011 Flying Adventures Picture courtesy Brickset. Pieces: 618 Price: USD 59.99 Release: August 31012 Family House Picture courtesy Brickset. Thanks to sgeureka. Pieces: Price: 10250 Chinese Year of the Snake Pieces: Price: Original Post: I looked in the retailers catalogue and I could tell something Moderators, feel free to change or remove this post if it is not acceptable. 2 little sets 31002 Race car, with mostly yellow pieces 31003 Helicopter with mostly red pieces 31004 Eagle, with mostly brown pieces 31005 Sattelschlepper?, German word I not can translate 31006 Sportcar, mostly white pieces 31007 Robot, mostly green pieces 31008 Powerjet, mostly bleu pieces 31009 Red little house with dark blue roof pieces, male minifig and another barbecue
-
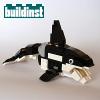
I was amazed as much by grohl’s creations from mini Creator set 4916 as I bought this set too and began building. It was great challenge to build something what wasn’t already built by grohl. Soon I found few favourite animals of mine which were not built yet and here they are: Rabbit with carrot was the first – I love rabbits! Frog on water lily was the second. The third animal was another cute pet – dachshund. The fourth animal was camel (dromedary). The fifth creation was couple of animals – cat and mouse (almost like Tom & Jerry :) Soon beaver came as the sixth creation. After modifying beaver I’ve got squirrel which has already been the seventh creation. I’d like to show you last animal for this time - mountain goat. It's my number 8. If you like my little animals you can find building instructions for all of them at my website buildinst and few more pictures in my brickshelf gallery