Search the Community
Showing results for tags 'MOD'.
-
Hello everyone, I am about to start building a mod of the Pet Shop. I plan on turning each building into 24 studs wide instead of the normal 16 and hopefully have enough spare bricks to also add an additional floor to each building too. The big question that I had for the community today is if anyone knows if you can fit the normal bay window on each side and the door in between them, this is not an issue on upper floors but you obviously need a front door to get inside. If anyone has attempted this or happens to know how many studs wide the bay windows are that would let me figure it out. Each window can have 10 studs in width since a door will only take up 4. Once I get this all put together I will share the pics with everyone. I also plan to make the Pet Shop sign actually say Pet Shop since it will now have the space. I've looked all over and can't find any examples of a 24 wide townhouse or pet shop. If I don't have enough bricks from the sets for an additional floor I will most likely brick link whats necessary since my Cafe Corner and Green Grocer both have an additional story. Thank you to anyone that can answer the 10 stud allowance for the bay windows.
-
Hi all, this is my first MOC of the Lord of the Rings theme. It needed a lot of work and I'm quite proud of it. I built it starting from the original set and taking inspiration from different mocs that i found on web. Hope you like it!
-
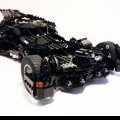
Here's a quick mod I came up with. I felt the front end of the Batmobile from 76045 was unfinished, so I rebuilt most of the front section to include wheel covers, spinning turret, and smoother front end.
-
Hello all. I recently picked up a Microfighter ARC-170. it is a great little build, but I am wanting to get rid of the hole in the middle of the ship, and loose the chibi look, while still keeping the microfighter size and simplicity. Any tips on modding it?
-
And... done. Finally finished the hospital and that is all I will upgrade for now, next step is the interiors and modding the green grocer to be playable from the back... which I will leave myself some time for. So for those that came late here is a link to the police station: http://www.eurobricks.com/forum/index.php?showtopic=122523 And fire station http://www.eurobricks.com/forum/index.php?showtopic=122627 So one more time... here was the problem: Which is the odd one out? :) So here was the plan: And here the results another: And one more: And now from the back... here I have to say I did nothing with the interior yet, almost totally out of usable bricks at this stage... something for my next project... also you will note I stuffed up my colour order of the floor tiles... such is life, something for next time. So now that I am done, what do they all look like together? And another: And one from a lower perspective: And there you go... that will be it for a while as I do some other things but it was a lot of fun and I think the results are respectable. Got to love lego. Biz
-
When I am taking a break I sometimes mod my models. This little post is what happened the last time I needed to take a break. I was building my latest moc and was about halfway done. In the morning had gotten a big shipment of the dgb plates I needed to move on and I was content with the progress I had made that day. The sun was shining and birds were singing. Well, it was early March and there were very few birds to be found anywhere - but I imagine I could hear them sing. Suddenly the imaginary birds went silent. Something on the model was not lining up as expected. I took a second look. Nope. It was not correct. I had messed up. Badly. I knew what I had to do. I needed to take most of the model apart and a long with it the last couple of days of work. I felt the frustration surging through my veins (if this story ever turns into a movie, I would like to be played the Rock. I imagine he has the acting skills to play a frustrated Lego builder). I stood up (a bit too fast so I got dizzy and had to sit down again). I was sitting down. Pondering. I really did not feel for taking the model apart. If only there were something I could do to help me push off the inevitable – just for a bit. I stood up (this time slowly). I looked around my Lego filled room. The models were getting dusty. I took my brush and went to work, cleaning the models. The radar dish on the falcon always falls off when dusting, but not today. Maybe it was a sign? I continued. I knocked over the Y-wing. It had not been a sign… Then I got to the Star Destroyer. The command tower had a thick layer of dust. I took the model down so I could give it a good cleaning. I got to the back. Saw the engines covered in cobwebs (well not cobwebs exactly, but it sounds more dramatic than ‘more dust’, so bear with me). I glanced at my old engine mod. Hmm, it could be better. I had had fun making it, but I hadn’t been concerned with the finer details. Well, now I had the time… The mod was pretty straightforward. It is just about putting bricks on top of bricks. Nothing was taken a part - that would diminish the purpose of relaxing :) I wanted to get the sloping engine housings as correct as possible along with all the piping. The remnants of the old mod can be seen behind the engines. How the detailing exactly look back there I am not 100% certain, but this gives a nice affect of depth. Yes, I have used a lot of lbg levers. I was lucky I had a small stash because they are pricey! This time the tables have turned! With the assitance of an Escort Frigate, the Corellian Corvette is hunting down the behemoth Imperial Star Destroyer – yes they are all both exactly to scale :) ISD 1600m. Frigate 300m. Corvette 150m. The Corvette is a modified version of the mini model Lego released a few years ago. The Frigate is what happened when I accidentally shot my Nebulon B with a shrink ray! After this, I could go back and take my moc apart.
-
I love the UCS Slave 1, it has been my favourite OT ship since I owned the Kenner 3.75" version back in the early 80s. Unfortunately, my wallet doesn't love the price and with the amount of other Star Wars sets being released, it's not on the horizon. I'm not sure if the UCS is genuine minifigure scale or not (I'm sure someone's done the measurements), but I decided I actually wanted something that might fit more easily into a diorama, so I decided on a MOD of 8097. I was lucky enough to pick up a set without minifigures for less than £50 on eBay, and only needed one Bricks & Pieces and one Bricklink order to get what I needed (mostly bricks from the UCS). Without further ado, I give you the Not-really-Ultimate, Not-really-Collectors Series Slave 1! The main job was re-shaping the dark red bottom 'skirt' which was far too blocky in the original. This made the top/rounded end 2 studs wider, so a bit of fiddling was needed. I lost the flick fire mechanism, but kept the compartment play features as I felt the fit with the aesthetic and purpose of the craft. A bit of greebling on the fin arms made a world of difference. The 4x6 dark red tile with studs on 3 edges (I'm sure it has a name) actually lies a lot flatter and smoother than it looks here. The outline is not perfect, but I'm pretty happy at this scale. The nose guns are pretty much a copied/scaled down version of the UCS. Flight mode, with Boba Fett at the controls. The underside is pretty much as-was. The removal of the flick-fire rack means the interior is actually pretty empty. I've covered the opening with a small 4x6 hatch for now that may become some sort of removable holding cell. One final shot with Boba Fett scouting for his latest prey. No arm printing? Well, that's for UCS only! All comments and suggestions for improvements gratefully received and acted upon!
-
I've been wanting to do this project for a while now and I am pleased to finally share the finished product with you all! The majority of the build changes were inspired by the following threads: http://www.eurobrick...howtopic=123246 http://www.eurobrick...showtopic=46040 The original MOD is what I'm most proud of. Anytime I did research on Boba Fett's ship I was always reminded that the ship model is a Firespray-31-class patrol and attack craft. When I hear the word "Firespray" I can't help but imagine that this ship is equipped to rain proton torpedoes, lasers, concussion missiles, etc. on it's opponents. That being said, flick fire missiles were not going to cut it. I planned out the firing mechanism in LDD and only had to make a few changes when I built in in real bricks to make it fire properly. Check out the video and let me know what you think! Full Flickr Album: https://www.flickr.c...th/29076720293/
-
 After quite a long time of gathering parts, although I had about 80% of them required, building and rebuilding, and finally getting time to photograph the result, I present my interpretation of Mr. Tekneex's C-Model of the 8110, a Jeep - the original topic is here - http://www.eurobrick...&hl= 8110 jeep SInce I didn't have an 8110 to start with, I decided to use parts on hand, which then led down the slippery slope of changing colors, adding doors and a roof, adding a spare tire, different lights, etc... I also spent some time looking at similar vehicles on the road (about 11.6% of a passenger vehicles where I live are Jeeps, and about 20 % of those are some variation of this style). Lights, doors, roof-top light bar, spare tire, outside mirrors, and other added/modified features are all inspired from these observations. Features: - XL motor for drive - Servo for steering - RC for the XL and servo motor - M motor for front winch, raising/lowering hood - hand operated two-speed gear shift, mounted between seats - working doors - working engine - working steering wheel - four wheel drive with center differential and independent suspension Don't ask for a video, the final model was soooo heavy the poor XL motor could barely budge this thing to move much faster than a snail. Rather than rebuild with two motors for propulsion, I promptly disassembled the model for the next MOC. Without further ado, some images:
 -
Hi guys, this is actually my first conversion of a City set-to-modular. I hope you like it! Here is the front side: http://www.brickshel...y.cgi?i=6325898 (I'm sorry if it doesn't appear embedded, this is my first time). Here is the back: http://www.brickshel...y.cgi?i=6325897 Here is the left: http://www.brickshel...y.cgi?i=6325903 And here is the right: http://www.brickshel...y.cgi?i=6325904 Here is the first (or ground) floor: http://www.brickshel...y.cgi?i=6325901 And here is the second (or first) floor: http://www.brickshel...y.cgi?i=6325899 Here is a little extra I decided to build after I finished the pizzeria. It's an alleyway!: http://www.brickshel...y.cgi?i=6325902 Thanks for seeing the photos. I really hope you guys like it. Well, now off to finishing modularizing the 60026 pizzeria and bike shop!
-
Poe's X-Wing by Ryan McBryde, on Flickr Poe's X-Wing2 by Ryan McBryde, on Flickr Poe's X-Wing3 by Ryan McBryde, on Flickr Poe's X-Wing4 by Ryan McBryde, on Flickr Poe's X-Wing - Top, Closed by Ryan McBryde, on Flickr Poe's X-Wing - Head-on, Open by Ryan McBryde, on Flickr I got rushed a bit at the end getting this ready for BrickUniverse Dallas and I've got a lot of improvements in mind. But, I'd love to hear what y'all think and your thoughts on how I can make this better. Mainly, I'm struggling with the weight and sturdiness of the wings. I'm also not happy with the front section's slope or the gaps in the front of the engine. Regardless, I hope y'all like it and kudos to thehornedrat for beating me to the punch
-
Edit: Please note that this thread includes a mixture of posts from the 2015 Pictures & Rumours which have been merged with appoah4's thread..... Thanks a lot for taking the time to respond. A lighter grey,in the palette as a compromise would indeed have been great, but you make do with what you have. Not that I'm second guessing your decisions, but I'd still like to point out that white doesn't look that bad on a transport ship like The Ghost, which isn't really that far removed from the Falcon as far as presentation goes.. I realize that it has a lot of bright colors to contrast with a bright white, but the white is also toned down with clever use of grey plating like it was done on ghost.. I guess I should just assemble the thing in white in LDD sometime and take a screengrab and see for myself :) EDIT: This is what it looks like at the end of Bag 6: Also, if I may ask one more question, was there ever an idea of giving The Ghost interior space a la Falcon? I promise, no more questions after this.
-
 Hello everybody, I didn't notice yet any MOD page of the Volvo EW160 excavator. I find this a really good set and as I'm an excavator lover, I couldn't resist to add a few modifications. I have already done 2- 3 and I have others in my mind. Here are the first ones I took away the cab elevating mechanism. I find the excavator better proportioned this way. It looks a lot more like the real machine and IMHO also a lot nicer. The cab was in the original model too much forward and got in the way of good playability. I still have to get rid of the grey beam behind the cab. I also put a swivel and turning mechanism on the grab, which also looks better and approaches the looks of the real machine. The mods I'm planning is to arrange the hoses on the boom and add rigid hoses.
 -
 I finally managed to make a HD-video of the new modified XL BrickBank in my Lego Modular Square. I hope you like it!! For this Modular Square i used a total of 19 modular sets. The first three modulars are in their original size. All other 8 modulars are XL versions, each made of two sets. The footprint of the whole square, including its buidlings counts almost 62,000 studs. The measurements of the square are 336 x 184 studs, equal to 2.62 x 1.44 meters (=3,8 square meters), or 8,6 x 6,0 feet (= 51,6 square feet).HD
 -
Hi guys, I haven't posted here in awhile, but I thought I would share my MOC/heavily modded of Lego's 7915 Imperial V-Wing starfighter. This has been my project that I've worked on and off since I got this set back in 2011. Originally, I planned to assemble it just to see the inner workings of the ship before modifying the ship to fit the entire astromech droid. I loved the ship (especially the cockpit piece ) so much that I continued to modify it and it has become my pet project. I have since redesigned the ship from bow to stern and added more features while removing the old wing system. The wing design shares inspirations from the X-Wing to Starcraft's Banshee while still keeping the old wing flaps as part of the design. I apologize in advance for the poor pictures and model stand. Any comments or suggestions are welcome. Hope you enjoy! Full gallery of high resolution images: http://imgur.com/a/uHXSe Lore: "The Alpha-5 Nova-class Starfighter was a joint venture by Kuat Systems and the Incom Corporation to win the Galactic Empire's bid for its next frontline starfighter. Built off the chassis of Kuat Systems's V-Wing starfighter, the Nova was created as an air-superiority starfighter at the tail end of the Clone Wars to escort ARC-170 starfighters on campaigns. The biggest draw of the starfighter was its experimental hyperdrive engine, becoming one of the smallest single pilot starfighters to be equipped for hyperspace travel without the need of an external booster ring. The starfighter is armed with 4 cannons, one on each secondary wing, 2 proton torpedo launchers located towards the bow, and rear flares for evading homing missiles. However, the Nova was plagued by its high manufacturing cost not to mention difficulty to be stored in the Empire's new line of Star Destroyers. In the end, Sienar Systems won the Empire's bid to produce much cheaper and expendable TIE/LN starfighter. The few Nova prototypes became popular with Imperial spies and agents as a versatile and well equipped starfighter. The failed Nova design would later inspire Incom's T-65 X-Wing starfighter." The flimsy design of Lego's 7915 V-Wing was significantly beefed up in my design. I gave the ship more heft to it and now that awesome cockpit piece fits more appropriately to a much sleeker looking ship. A view of the rear of the ship. Also notice how the landing gear are folded up. They fit snugly under the engine flaps but I couldn't really think of a better place to put them since they still do stick out. Again sorry for the poor quality pictures. In landing mode, the 4 wing flaps fold down to cover both of the Nova's hyperdrive engines. I imagine from my experience with Star Wars that hyperdrive engines are very easy to damage and especially ones that are placed externally. Here's a closeup view of one of the hyperdrive engines. I originally wanted to modify the wings after Starcraft's Banshee but I lacked the appropriate pieces to make rotors. Instead I used these silver Bionicle claw pieces and they certainly do a great alternative. To the right is a better angle of the flare poppers. A view of the cockpit. There is a targeting display and a switch to make the cramped cockpit more detailed. Another feature I added which I feel Lego never does enough of is provide housing for minifigure accessories included in their sets. Here I have included room for a blaster pistol and a pair of binoculars. Lastly, my lovely Twi'lek pilot and her astromech droid. Thanks for looking!
-
Inspired by some of the other excellent threads on this forum, I decided to have a go at lengthening my First Order Transporter: I've added an extra 16 studs, twelve of them in the troop compartment: it can now take a total of twenty stormtroopers. I have rebuilt a lot of the details: I have also shortened the cockpit and moved it back. It is accurate in profile and still fits a minifig. Finally, I've lengthened the engines and added some greeblies to the space between them. Sourcing another 16 stormies was fun but expensive: Battle of Takodana + 2 batle packs + 2 Bricklink orders. Special thanks to our very own Lobot for his rapid and friendly Bricklink service. Many thanks also to Vodnik, deskp, Veynom & Solscud007 for their inspiration. If anyone wants to build this mod, I've created a Lego Digital Designer file: (LXF) This file is slightly different to my "real bricks" version, due to Lego Digital Designer being a crotchety old block. Bonus fun - Spot the differences! To build the version in the LXF, you will need a 75103 First Order Transporter and about 470 extra parts: (XLS). Having an extra 75103 on hand (£40 on ebay with no minifigs) cuts that down to 300 parts: (XLS).
-
Hello, if you're aboard a MSC Cruises ship, don't forget to pick this new set up: LEGO MSC Cruises Meraviglia (40227) The building instruction is online, yet - costumer service. And this is my review video - kind of MOD, because I have changed a few things and the stickers are missing. A nice build. Best wishes Andres
-
Hello All, And here is the second upgrade to my town set, the fire station. Police station can be found here: http://www.eurobricks.com/forum/index.php?showtopic=122523 So, once again the problem: (town sets don't really match the look of the new modular buildings) The plan! And the results: again from front From the back (this one I spent a bit more time on the interior as the fire station is the favorite of my son. And finally a zoom in on the living quarters: So there you go, one more left. Anyone else undertaking similar upgrades to their town sets?
-
When I saw the preliminary pictures of the new TIE Advanced vs A Wing, I was very excited for the new TIE, and not so happy that the A wing made the price substantially higher. I might still cave in and but the set when it comes out, but for now, here's mine. You can find more pictures on my Flickr page. Leave a comment on what can be changed or improved.
-
Once again, I just couldn't be more pleased with this year's Speed Champion sets. As some of you will recall, I've been widening the standard Speed Champion cars to be 8 studs wide. I just prefer the aesthetic, and now my drivers aren't centered in what is supposed to be a 2 or 4 seat car. 2016 cars http://www.eurobrick...opic=122188&hl= 2015 cars http://www.eurobrick...36#entry2154620 The Model A was a special case because while it surely wasn't the scale that would necessitate 8-stud width, I didn't think it needed to be 6 studs either, so I went with 5, which keeps it a small old hot rod size, but is still more to scale than the tiny 4-stud configuration that comes with the set. In addition to the change in width, I've done a lot of detail work, from the engine to the back of the car. I didn't change much on the Raptor but did add to the garage pit area. This was so much fun I immediately began building more hot rods in this style and scale. Edit: Here's a link to the other hot rods. http://www.eurobricks.com/forum/index.php?showtopic=134719 Enjoy! For comparison, here is the stock version:
-
Five years ago when the Super Star Destroyer 10221 came out, I couldn't dream of buying it. In Canada, with taxes and possibly shipping combined you were looking at around $600.00 for it - which I'd already dropped on the Death Star playset and that was, I felt, the maximum I would ever spend on Lego. I simply decided that the SSD wasn't happening in this lifetime and that was that. But after MOCing the rest of the major OT locatons/ships, five years later this one slot remained empty into an otherwise comprehensive collection. I had to have that Executor, I thought. Checked out some listings on eBay, Kijiji and of course Bricklink. The markup would have made me spit coffee at my screen - if I drank coffee. The prices were lowest at $1400.00 CDN. There was one complete and assembled going for $1100. Unreal - but understandable. It's a limited edition high demand item. A compromise was made and I started to Bricklink Pellaeon's brilliantly designed Midi Scale Super Star Destroyer found here. It would cost me about $70 to get the parts I needed for it on Bricklink. It is a beauty of a design and TLG would be smart to adopt this kind of scale for such a distinguished and iconic OT Star Wars ship. But it nagged at me - in the back of my head - if I did build this, would I be satisfied with the scale? Despite already ordering parts for the midi scale, I started to sink deep into the abyss of Bricklink and multiple blogs, posts and threads on the subject of Bricklinking large sets. I was hooked on the idea of this huge set I couldn't afford. But I also discovered some very important information - the UCS Super Star Destroyer contains no super special, highly priced parts that only appear in that set, 10221. Encouraged by this, I found a great price on replacement stickers and that was that - I was invested and there was no turning back. The goal was to get this half price. If I got the price down to $300.00 ($200-250 USD?) I could do it. It wouldn't break the bank so to speak and the full size SSD could be realised. It would just take several long nights alone working out which pieces to buy, who from, and what sets I had that I could cannibalize for parts... ...especially wedges. There are over 100 wedges of the 3x12 type in this model. It ended up being mostly a scramble to see if I could get the right number of the right color and how cheap. Here's where it got weird: the light grey wedge pieces are very common in both Star Wars and non Star Wars kits. They are, for that reason, highly in demand because people want them to build all manner of MOCs. This was reflective in the prices. So what I ended up doing was only using those more valued light grey wedges for the top and the absolute bottom layer of the base. The rest of the build I would use dark grey 3x12 wedges, of which they were much more available and cheap. So if you are willing to cut costs down with a bit of color changes, I'm sure the choice saved me close to $100.00. The build of this thing was very exciting. There are 4 main stages, the base, the spine, the "cityscape" on top (with the bridge) and the perimeter neckline that gives the SSD its distinctive shape. Building these stages, I was serious about getting the base and spine as accurately built as possible, lending some flexibility to the top bits which are arguably more cosmetic. Lots of rainbow colors came out to help put the base together. Sadly this resulted in a lot more work near the end, as I had to rip apart the whole thing to replace some of the rainbow bits that were visible from the lateral strips that hug the sides of this giant beast. Most of the rainbow bits were contained but I was surprised how deep into the ship you can see once you've got a lot of light coming in to the display. The spine was tricky - I had used a bunch of smaller beams in my haste and once the Bricklink shipment with all the long technic beams came, I was compelled to replace some but not all of them. The stability was and still is decent. I'm proud to say that it ended up being rather swooshable (with a firm grip of course!) Once I got to the cityscape part of it, I started taking a few minor liberties. There were a couple of areas where I got lost, in particular with the intricacies around the recessed bridge scene. In the end, I took a leap of faith based on assembly videos and was invaluable. Even though it didn't show every step (the instructions were good for that) it was super helpful to see everything in real three dimensions. I spent a lot of time reviewing and pausing Brickbuilder's helpful video to check the build. I'm sure it wasn't made to assist in a build but it certainly did.One area that I went completely "off book" was the triangle-shaped bit that brings together the front taper of the ship with the back end - I hadn't ordered enough 4x4 wedge plates and I was getting impatient. I just rammed together some bits to make it work and so far it seems perfectly sturdy and I have no plans to revisit it. The discrepancy might stick out to owners of the official kit, but no worries for me. Finally I had one last Bricklink package arrive with dozens more 2x12 plates and 2x4 plates to help fit together the two large strips that make up the outer edges of the top. Since I'm still not 100% finished with it (it's done but I plan to work more on it when time allows) so for that reason I haven't anchored down the two strips using those 12 door hinge plates on the undersides. So those parts are a little loose - with too much shake the end plug can pop out and send the two strips flying off. So I reinforced them a bit more to survive ejecting to the floor. That's why there are a few extra wedges attached to the underside of these strips. It may look a little wonky but the reinforcement it provides is well worth it. As for the figures, Bossk is a major holdout. I will buy him eventually. For now, I'm satisfied with the stand-in involving the Chima croc head. It's certainly worth mentioning that I didn't bother with the stands (or the plaque) but I plan to build them someday. My shelf actually allows it to be displayed without the stands. The only issue is it cannot be displayed flat on a table - it needs to dangle off part of the table to avoid ramming the engines into it and have an engine array collapsing on the floor in a million pieces. That only happened once, so far. There are a few bits on the underside that use the wrong dark grey. Those will be swapped out eventually. I'm surprised there wasn't more. We've got some stand-ins for 4-Lom and Zuckuss, too! Thanks for reading this. I am super thrilled with it. It was a satisfying build that I managed to pull off within budget and about three months of spare time. What a satisfying and mighty sight. Although I regret not getting it an retail, having one slightly imperfect at half price is a great thing. Questions, comments, etc welcome. Oh yes, of course, the obligatory "no disintegrations" scene!! "You are free to use any methods necessary, but I want them alive..."
-
This is a tutorial detailing how to modify a LEGO 9V train motor so that it may be powered independently of the track. This effort is part of a larger project inspired by Thorsten Benter’s article in Railbricks Issue 7 titled “PF and 9V Trains: The Best of Both Worlds”. Step 1) Open the 9V motor. This has been covered elsewhere, so it should suffice to say you carefully remove the 12 tabs holding the bottom cover on with an xacto blade or something similar. There is enough friction to hold the bottom cover in place later even without the tabs. Step 2) Remove all internal parts. Ignore the fact that I took this photo after completing step 3. Step 3) Use a rotary tool with a cutoff disk to bisect the metal strips in the top of the motor enclosure. These strips are exposed in the top studs, and we will later use them to pull power from the track and apply power to the motor. Very important: Be sure to apply NO PRESSURE when using the rotary tool. Instead, just lightly touch the spinning cutoff disk against the metal strip, and let the tool do the work. It will take some time, so be patient and careful. If you apply pressure, the metal strips will heat up and deform the plastic. If the plastic deforms, it will be impossible to interface with LEGO bricks and PCB adapters (like the one in the upper-right corner of the picture). Keep it light and easy. You will thank yourself later when you haven’t ruined your motor’s plastic housing. Step 4) Desolder the metal pieces from the electric motor. I don’t have a picture of this exact step because I used the electric motor from a Power Functions train motor. If replacing the 9V motor with a Power Functions motor, open up the PF train motor using a T6 bit, remove the electric motor, and desolder it from the wires. Step 5) Solder a short length of wire to each tab on the electric motor (do this outside the housing to avoid accidently melting it). I used 32 gauge DCC decoder wire, but you can use whatever you have that will fit inside the motor. Reassemble the motor with exception of the wheels and the bottom cover. Step 6) Attach the wires to the outermost halves of the metal strips; the innermost halves are connected to the wheels through the wipers. I used a silver epoxy for this. I chose silver epoxy for two reasons: 1) I didn’t want to risk melting the studs by soldering the wires to the metal strips, and 2) silver epoxy has a lower resistance than graphite epoxy. Step 7) Reinstall the wheels and make sure everything is running smoothly. This would also be a good time to lubricate the gears if you want to. Make sure you don’t get any lubricant on the electrical parts! Press the bottom cover onto what remains of the tabs, and you’re done! If you ever want to run the motor directly from track power, simply use a PCB adapter with a loopback connector or connect a LEGO wire (9V or light gray end of PF). This is what a PCB adapter looks like when installed on the motor. (I’ve updated the design since taking the previous photo.) And here is a connector leading up to the electronics (currently just a Power Functions battery box, soon to include a Bluetooth receiver) in my Horizon Express. The connector plugs into the PCB adapter. The PCB adapter is attached to the electrical studs on the motor. And the motor is pinned to the bottom plate of the locomotive. Now I can charge the battery in my train without taking it off the track, run it indefinitely on a mixed metal and plastic layout, and have non-line-of-sight control when I add the Bluetooth receiver. It really is the best of both worlds!
-
I was always very fond of this oddball Rebel Alliance starfighter... A very bold but also sleek and streamlined design. The system scaled version, I bought last year, was nice but didn't quench my thirst... I knew, there was an UCS out there, but I read very bad reviews and a lot of rants about it... and the cockpit area wasn't really "good" to say the least... I got an offer for a sealed set at 250 Euro shipped, which seemed decent, but I already had my mind set on doing some small and some major changes to the set, so the premium to get an original was imho wasted money! Bricklinking!!! I kind of like Bricklink and even if its tiresome at times you can always get great stuff from a lot of nice people sharing the hobby or the business... my last project was the UCS Deathstar Hangar... So I decided on getting the parts I needed which took about 3 months and I started looking for applicable mods, but there are only a handful... finally I found a great cockpit mod at fbtb that I wanted to integrate, and I made A LOT of smaller changes as I went along lengthening building time to about 2 full days. After all I got all the parts plus spares, original instructions, canopy and stickers for around 175 Euro... I really like the result, and think its a great rendition of this classic trilogy ship. See for yourself: What did I do? - the cockpit was completely reworked to get the look and the size about right... I put in Ten-Nunb to have a pilot working there, even if he's not in scale... - backside of the cockpit was worked on, some of the gaps were closed, the tan-colored parts were swapped for DBG - the neck was streamlined and plated and I added greeblies - the round parts in front of the engine, that are known to leave nasty gaps were closed with small technic pins and a clever plating design... - the topsides of the wings were plated (one sloped tile is still missing, because one of my BL-orders was short one piece...) I left the undersides without plating to keep the perfect shilouette of the wings intact... plating would make the too chubby, imho. - I tweaked a lot of fine details with small greebling parts, making it more interesting to look at - Used some old gray and old dark gray parts to give it that used-universe look - I switched all colorful parts that would be visible in the finished model to gray, which makes it much more realisic... (I kept some of the peeking parts in tan in, because I think it fits nice to have some discoloration here and there...)
-
I've lit up the engine of my UCS Millennium Falcon: It's done using a cheap €2 set of 20 LEDs from a Euro store. I had to replace the 2x3 grey plates the trans-blue tile attach to with transparent parts (and as 2x3 clear plates cost a fortune, I built them out of 1x1s and 1x2s). After that, there was a bit of work to remove some parts that blocked the lights, and some internal parts to hold the wires in place. The battery box sits neatly under the top gun emplacement, where it's easily accessible to turn on/off or change batteries. For a fairly easy mod, I think the really adds something to the Falcon. James
-
Evening All, While we are waiting for the 2016 50th anniversary Creator Train that will be a three-in-one that can be assembled as a Mallard, Challenger or Crocodile. (I may have made that up) I thought it would be interesting to ask what mods are out there for the current Red Cargo Train? I'll start off with my simple MOD to add lights and lower the roof profile. I think this makes a huge difference to the roofline without losing the character of the locomotive. It makes a smooth line from front to rear and gets rid of that unsightly grey stripe. 60098 mod by Canvas Rails, on Flickr At the other end of the spectrum, Lok24 has a MOC that looks a bit like a 60098 on the outside but includes remote uncoupling! Murdoch17, you were doing some great LDD work with this back in May; did you end up building any of your mods in brick when the set came out? MODders, what have you got?