Search the Community
Showing results for tags 'phantom'.
Found 16 results
-
 Saving the Queen, Theed 32 BBY During the early stages of the Invasion of Naboo, "Queen Amidala" and the rest of her entourage are heading for Camp 4 as Jar Jar Binks, Qui-gon Jinn, and Obi-wan Kenobi leap down to rescue her from Trade Federation custody. Saving the Queen, Theed 32 BBY by Nicholas Goodman, on Flickr Saving the Queen, Theed 32 BBY by Nicholas Goodman, on Flickr Saving the Queen, Theed 32 BBY by Nicholas Goodman, on Flickr Saving the Queen, Theed 32 BBY by Nicholas Goodman, on Flickr
 -
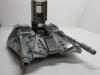
Hi all, here's a quick modification I did to the new 75357 Ghost & Phantom set. I really love this new set, it's a very well proportioned build and fairly faithful to the ship we all love, but as with most big ships it's lacking detail. As usual with Lego the underside was ignored and sadly the Phantom 2 was kindof badly proportioned and odd looking, so I had a go at improving things. As always Instructions for the modified Phantom are on Rebrickable and the 566 extra pieces will only cost about £45, plus another £15 to build the first Phantom. And here's some photos. The original structure is still in there, the mods involve removing exterior parts which only takes around 15 minutes, then almost everything I've added is surface detail or rebuilt sections. Several of the sections are completely new, like the docking rings and roof, and some like the main top panels just need some tiles and wedge plates to be added or rearranged. The underside of the ship has a lot of parts added, partly disguising the Technic Brick structure but mostly adding some simple slopes as well as the signature lower-body shape. I'm really pleased that I was able to eliminate some of the gaps around the roof area, as well as reposition the docking rings to be centered rather than high up. I think the angled stand also helps The Ghost look it's absolute best when on display. Anyway, thanks for looking and I hope you enjoy the mods!
-
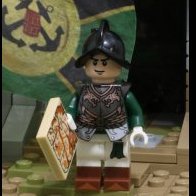
"Chess Ko Sebulba." Anakin Skywalker, 32 BBY "Chess Ko Sebulba." Anakin Skywalker, 32 BBY by Nicholas Goodman, on Flickr "Chess Ko Sebulba." Anakin Skywalker Mos Espa, 32 BBY by Nicholas Goodman, on Flickr "Chess Ko Sebulba." Anakin Skywalker Mos Espa, 32 BBY by Nicholas Goodman, on Flickr "Chess Ko Sebulba." Anakin Skywalker Mos Espa, 32 BBY by Nicholas Goodman, on Flickr
-
 See replies in this thread for any NEW models Models in this thread - SHADOW CASTER PHANTOM II PELTA-CLASS FRIGATE IMPERIAL GOZANTI-CLASS CRUISER QUASAR-CLASS CARRIER IMPERIAL TROOP TRANSPORT GHOST & PHANTOM INTERDICTOR CRUISER TIE DEFENDER MINING GUILD TIE FIGHER ARC CANNON AT-DP PROTOTYPE (NEW) LAAT/le PATROL GUNSHIP (NEW) SHADOW CASTER Hello again everyone This week I present the Shadow Caster a Lancer-class pursuit craft - the ship of Bounty Hunter Ketsu Onyo from the excellent (well last 3 series anyway) Star Wars Rebels animated series. I was ill a while back and my attention span at the time was only an hour or so so watching a few Rebels episodes at a time fit nicely. It made me realise that there were a lot of vehicles from the animated series, not just Rebels, that I have not built or could update form my old collection so this is the first of many from this genre so keep an eye open. This is not a very tricky build, The difficult part was getting the colour scheme right whilst not making the model too thick. The new maccaroni tile pieces and 6x3 semi circle plates certainly helped with that once I realised that they existed. I tend to find out about new parts now when my son gets a new set! I think i have the overall shape and dimensions just about right. I am surpised an official minifig scale set of this was not made. As this was not the case I have also had to build a Ketsu Onyo minifig from official parts for the display. This is not my speciality so if anyone can think of better minifigure parts let me know. Anyway, enough waffle, here is the model. Let me know what you think. Jon
 -
 Not ten months after I gave up the idea of doing a System scale Naboo queen's cruiser with space for minifigs, hachiroku24 knocks it out of the park with his excellent build, Nubian Royal Starship MOC. This video is his build: Using spare parts and wrecking my old build, I pounded my version of this MOC out last Saturday, squeezing some light grey bits from other builds. Even though I've only used about maybe 60-70% of the original build, the result is stunning. A long awaited piece for the Phantom Menace display. I am sorry that I forgot to remove the distracting blue decals from the Mandalorian speeder parts while taking these pics - will take more pictures soon of this build as I try and swap out parts to improve it over time. I was able to get the base pretty close (except the nose) and the top, but took many liberties, especially with the underside and interiors. As for the middle, the original build uses two plates for reinforcement but since I am desperately low on light grey wedges I tried to make it work with only one plate thickness. Really happy with the 4 small interiors - throne room (Queen Amidala from Gungan sub can only lie down with the lid closed), cockpit for Ric Oliee, Droid bay with a little hyperdrive build in the middle and the loading ramp. I sacrificed a bit of slope here to accommodate my interior. Still need to install some landing struts for the underside. Love hachiroku24's use of the flat 3x3 macaroni piece on top and bottom of the cockpit. It really pops from all angles and this build is swooshable as hell! Looks so great next to the N1 cruiser. This is an inspired build, and I'd like to send a special shout out to hachiroku24 for sharing this and other fine builds on his channels.
 -
 I am still looking to tweak a few spots (the panel at the rear window is included in this), but mostly it is finished: 20190827_134133 by Appie NL, on Flickr 20190827_134604 by Appie NL, on Flickr 20190827_135244 by Appie NL, on Flickr 20190827_134945 by Appie NL, on Flickr I don't think I mentioned this before, but the "gas" and "break" pedal function as the forward/neutral/reverse for the gearbox. If I did the math right, then the reverse gear ratio is slightly above the ratio of the 2nd, perhaps not very realistic since afaik they are usually around the ratio of the 1st, I couldn't figure out a better ratio in the space I had left for this. 20190827_134741 by Appie NL, on Flickr 20190827_135042 by Appie NL, on Flickr The white levers with silver knobs control the windows and the black one on the dash controls the airconditioning. The lever below the steering wheel is for the lights. My aim was to have the positions for these controls as close to what they would be in a real car. Despite the roof being open, the front window levers are a little hard to reach for my big hands (especially with my left as you will see in the video below). 20190827_153707 by Appie NL, on Flickr 20190827_135520 by Appie NL, on Flickr My attempt to recreate the "star filled heaven" roof lining of the real Phantom. These are "glitter bricks". They only come in weird colours like dark pink until a set of Harry Potter brought these light blues. I considered adding PF lights to this for extra effect, but it didn't have the desired result in terms of lightning and I didn't want to use 3rd party stuff on this build. 20190827_134306 by Appie NL, on Flickr 20190827_134407 by Appie NL, on Flickr 20190827_135313 by Appie NL, on Flickr Behind the back of the trunk is the gearshifter from Attika and some wires. 20190827_140703 by Appie NL, on Flickr Perhaps looks a little bright in this picture, but there's only 2 PF leds per headlight on these. 20190827_140547 by Appie NL, on Flickr And the taillights, 1 PF led each. 20190827_140944 by Appie NL, on Flickr @Attika Here's your desired belly shot I don't have the new wire holders yet from Control+ sets and not sure of these can even hold 2-3 wires in 1, so I made something myself to hold/tunnel/guide the wires. At first I wanted to completely cover up the floor and "hide" the Technic like I mostly did on the rest of the car, but decided to keep it open. And some might notice that I updated the front suspension. When I nearly finished the build it needed an upgrade to 3 hard springs, same number as the rear, since the front suspension was pretty much dead in the old configuration. And a little video to showcase the windows and airconditioning Original opening post below this point: With all the great sportcars on this forum, I felt I had to try a different approach to the "1:8 Lego supercar". Choosing this car also gave me a good excuse to add different kind of functions usually not in these kind of cars. First of all I want to say thanks to a few people on this forum for information, techniques or mechanisms they provided: @Didumos69 and @jb70 for their work on the Chiron gearbox. This model uses their efficiently build Chiron gearbox, I only tweaked it slightly further to make it shorter. Also thanks Didumos and @Erik Leppen for their information on suspension, made it easier to look for how to fix stuff. @Attika for his compact servo based gearbox stepper which I used in this model. @Jeroen Ottens for all sorts of neat techniques and tricks in his DB11. The front mounting of the suspension is very similar to his to get the engine very low like in his DB11. I am sure I forgot a few people, my apologies. So here's the current progress: WIP3Frontside by Appie NL, on Flickr WIP3RearSide by Appie NL, on Flickr WIP3Side by Appie NL, on Flickr The current features are: - 8 speed gearbox - V12 fake engine - Suspension - Electric windows - "Airco" - Lights I think, despite the outer shell being about 70% system bricks and 30% technic, the base of the car is all Technic and that it should belong in this forum and not the scale forum. This is how the car looked in the early stages: WIPRollsPhantomFront2 by Appie NL, on Flickr But if Jim or Milan thinks it should still be in the other forum, I am sure he will move it. The reason for the mostly system outer shell is because I had a hard time making all the little curves with Technic (panels) and I felt those little curves made the difference to try and capture this car. Especially at the front, after that I tried to minimize Technic panel use because it would be a breach of style at that point. Overall I am happy how it turned out so far, some parts I don't like. The windscreen being the biggest offender with how square and flat it looks, but the A-pillars being part of the structural integrity of the model made it hard to come up with something else. Stuff left to do: - Dashboard and midconsole - Front seats - Roof - Mirrors - The bottom 2 studs of the model (under the doors, bottom of front grill and the second layer of the floor to hide wires and provide more rigidity to the model)
 -
 UPDATE! (DECEMBER 2022) Version 2 has gone live (Sorry for the delay), new function video can be seen on Brickvault YT channel (Click HERE) List of changes: - Upgraded landing gear - no more tilting to the backside with Phantom II docked - Reinforced main engines - additional support to prevent the main engines from disconnecting from the fusselage - Corrected color scheme to better match one in the Rebels TV show - Reduced greebles and added slight discoluration to match better with the one in the Rebels TV show - Changed docking port design - Reinforced front mandibles using new SNOT bricks from Super Mario series - Changed engine thruster color from Transparent Light Blue to Transparent Neon Orange (Transparent Yellow color is reserved for frontal lights) - Added limiters to pilot canopy piece, to ensure that it won't close too far. (Closing the canopy fully ensured incorrect placement of the frontal roof piece) - Reworked common room layout now includes corner sofa and a smaller kitchen area - Reworked Phantom I* - Reworked Phantom II** * Not minifigure compatible ** Both Phantom older versions are still usable Everyone who has purchased the original instructions should receive the new ones for free. -------------------------------------------------------------------------------------------------------------------------------------------------------------------------------------------------------------------------------------------------------------------------------------------------------------------------------------------------------- After 3 years of work and 2 different iterrations I can proudly present one of my favorite SW ships - GHOST Part count - Approx. 4100 (excluding phantom) Length - 62 studs (50 cm) Width - 50 studs (40 cm) Height - 26 studs (20,5 cm) It's not a minifig scale model, but rather a playscale one - it is designed to fit the minifigures, but when corresponding to proper scale model the inner rooms are smaller and I had some artistic freedom making them to my likings and configuration. GHOST suffers from being heavy to the rear end, to prevent the model from tipping the chasis/landing gear is slightly angled forward and therfore model can stand on it's own without any additional support at the back. GHOST features modular removable sections - Phantom docking bay, top floor with the gunner position and roof sections in the front and the back. All of the removed sections reveal an interrior space that can be used by minifigures. And yes, this model is made IRL as well. It was one of those rare times that I made model with real bricks first and only then it made in digital form. Compared to the UCS Star destroyer 75252, GHOST looks rather small, but to be honest a lot of MOC's look rather small next to that thing! More photos/renders of interrior and Phantom will be added soon. Also, the instructions are being worked on right now. Update (17.08.20) Renders for the Phantom and how it fits with the ship. Also. description and top view of the accessible interrior. Main floor Top Floor Rooms as following: 1. Front gunner seat, accessible by lowering ladder 2. Pilot position, accessible from the communication room 3. Communication room and droid repair station 4. Main hallway, connects main ramp, living quarters, communication room, both airlocks* and the backside of the ship 5. Living quarters - has 3 beds, table and some basic furniture to accomodate basic minifgure needs 6. Cargo elevator. Can be used to access the lower cargo hold** 7. Right airlock 8. Left airlock and doorway to common room 9. Access to upper level, main gunner seat and Phantom docking bay 10. Armory and gunsmith 11. Dejarik and dining table 12. Kitchen area 13. Bathroom 14. Engine room, houses 2 hyperdive units and signal jammer 15. Main gunner position*** 16. Access hatch for the docking bay 17. Phantom Docking bay *Airlocks cannot be opened due to the structure of the build, they are keeping all the side connections together and play major role to make GHOST swooshable. ** Lower cargo hold access is limited, therfore it's hard tu use it for "playing" porpuses. It's possible to put some cargo and boxes while still building this MOC. Cargo will be seen through the large 8x8 grill pieces. *** Main gun on the top of the ship is fixed and can be reattached at 90 degree increments. I tried to make it freely rotateble but at this scale I didn't want to sacrifce looks for this small function. Hope to finish instructions till the end of the August for anyone who is interested in buying my playscale GHOST. UPDATE (11.09.2020) Instructions available at Daves Customs shop! Check it here - Daves Customs Shop UPDATE (23.01.2021) From now on the instructions are available on Brickvault.toys - VIDEO review here!
 -
 Lego Technic Rolls-Royce Phantom by Isaac Yaw Instructions: https://rebrickable.com/mocs/MOC-67767/Isaacyaw/rolls-royce-phantom-110-by-isaac-yaw/#details Full video: functions: -Fully independent suspension system-Adjustable height suspension-V12 engine with gearbox-6-speed manual transmission-working steering wheel and 'hand of God' steering system-full black and yellow theme interior-fully openable doors, hood, and trunk replicated from the original model-hidden 'umbrella' in the door dimensions: length- 57.5 cmwidth- 20.5 cmheight- 15.5 cm
 -
A long, long time ago I started working on a micro scale Millennium Falcon. To begin with all I wanted to do was add detail to the Microfighter but I kept tinkering and before I knew it I had a growing collection of micro Star Wars freighters and fighters, and here they are! Instructions for all these little builds are on my Rebrickable page. Since this all started with that Falcon Microfighter the cockpit piece (a light blueish-grey 2x2 truncated cone) became my yardstick for scale. Luckily trans-black 1x1 slope pieces work as fighter cockpits at the same scale so all the ships are, and will continue to be, as close to scale with each other as I can manage, at least based on these pieces and whatever reference images I can gather from Google. My Blockade Runner (April 2021) is the last ship on my micro Star Wars to-do list, although it’s hardly micro! The size and weight were a new challenge for me, I’ve never had to worry about a moc falling apart under its own weight before, but I enjoyed the challenge and managed to make it pretty easy to pick strong. I’ve put together instructions for the Tantive IV as well as the Liberator from Star Wars Rebels, which I couldn’t resist building for myself. Rather than doing new posts for each new ship I’ll edit the very long post below. All the instructions are on my Rebrickable page and there are photos and Studio renders some photos of the ships in this post, plus a few more on Flickr and Instagram. Thanks for looking!
-
 I'm selling: 76053 Lego Batman Gotham City Cycle Chase - SOLD 70901 The Lego Batman Movie: Mr. Freeze Ice Attack - SOLD 30522 Batman in the Phantom Zone All are brand new in their factory sealed boxes/polybag. All are from a smoke-free, pet-free, mould-free, odour-free home. You can buy them separately or combined. Free UK P&P. 76053 and 70901 are £16 each (including UK P&P). 30522 is £5 (including UK P&P). And some parted out Nexo Knights vehicles and minifigures. They've never been touched. Interested in any of the above? Please PM me.
 -
 This is a minifig-scale model of "The Phantom", the shuttle from the TV series "Star Wars Rebels". It's about a foot long and has a full interior, with working hatches at the rear and on the underside. I re-used the cockpit and nose from goatman461's excellent design, along with elements of the sides, roof and underside hatch: and I'm grateful for his kind permission to post this model. As usual, I've documented the build as an LXF file for my own reference, and I am linking the LXF file here in case anyone else feels like building this model. The LXF is nearly-but-not-quite correct. I can't place the roof (the angled pillars at the back prevent it from attaching) and the tyre with tread at the front of the engine should be an old smooth tyre (part no. 132) - something which does not appear to exist in LDD. Update: Many, many thanks to @monkypaws for making the instrctions available for free on rebrickable - link here. This page contains both a step-by-step set of instructions and a parts list. The details section contains a list of rare parts to check before attempting a build. Before someone asks: yes, I am pondering building the Ghost in scale with this shuttle. I estimate it would be quite large - 138 studs long, 1.1 metres, or the length of a stay in a local psychiatric hospital. Here are a couple of pictures. More can be found on the flickr album: Here are some photos of the Interior. First a shot from the front of the cockpit, showing Hera and Kanan, with the rest of the crew in the background (minus Chopper, who is in his droid socket on top of the ship). The belly hatch works, i.e. it opens and closes: There are eight seats in the back (realistically, seating for six, given the width of Lego figures): Once again, more photos can be found on the flickr album There is always room for improvement: If you have any suggestions, comments or criticisms, please feel free to leave them below. Edited 16th May: added interior photos.
 -
I am currently working on a Ghost MOC from Star Wars Rebels. I'm basing the design of DarthTwoShedsJackson's Ghost. I really dislike the original Lego set because its too small and has no interior. I'm making it UCS scaled and it would really help if anyone could give me some advice.
-
I am currently working on a Ghost MOC from Star Wars Rebels. I'm basing the design of DarthTwoShedsJackson's Ghost. I really dislike the original Lego set because its too small and has no interior. I'm making it UCS scaled and it would really help if anyone could give me some advice.
-
Instead of making a load of topics, I will just post a collection of my best LEGO Star Wars MOCs and scenes. Death Watch Base: Jedi Starfighters: Palpatine's Office: The Machine (CABGO III Entry): Enjoy!
-
In ideas for you to support - https://ideas.lego.com/projects/94771 Thanks! You like it? cheers!