1963maniac
-
Posts
909 -
Joined
-
Last visited
Content Type
Profiles
Forums
Gallery
Everything posted by 1963maniac
-

MLCad: Part count in BOM are wrong
1963maniac replied to 1963maniac's topic in Digital LEGO: Tools, Techniques, and Projects
Thank you!! It's kind of a big file, 43kb, 248 parts, ghosting all parts for a total of 3x. How do I post it here? -
I finally got the parts list correct in MLCAD and saved it. I opened the saved file in LPUB, created the "BOM" first and the part counts are different (wrong). I am using LPUB 4.0.0.11 & MLCAD 3.4. I'm having a tough time. When I make the MPD of course it's wrong too. I'm using 3 files to make the MPD. The file with buffer exchanges and arrows and ghosting is where the problem lies. The two other files involved in the MPD do not have any special editing features at all. I have worked at this first attempt for a long time. I cannot figure out why the part counts change from one software to the other. I'm so close to being done but just can' finish it. Any help would be greatly appreciated.
-
MPD Multi Part Document
1963maniac replied to 1963maniac's topic in Digital LEGO: Tools, Techniques, and Projects
THANKS! THANKS! THANKS, Classicsmiley!! SUCCESS! I just have to finish with LPUB. -
Could someone please tell me step by step how this is done. I opened one part of my model then imported another and was able to build what I wanted. But, in LPUB and LDVIEW only the building steps for the original part were there. When I do Mutlipart, then new, and repeat, nothing shows up in the edit panes. I'm 99% done with this first attempt at making building instructions.
-
Part rotation in MLCad
1963maniac replied to 1963maniac's topic in Digital LEGO: Tools, Techniques, and Projects
Yup, I'm up to needing to learn Multi part now. I have not been able to understand how to use it. It's looking really good I'm 95% done with my instructions. So close but stuck again. I can't figure out how to get both parts to appear in MLCad together. I need to rotate one part in order to connect it into the main model. This forum has been so helpful. -
[Software] LPub3D 1.0.0
1963maniac replied to bootknuckle's topic in Digital LEGO: Tools, Techniques, and Projects
When installing this software I get this box to be filled in for "define library path" for the LDraw directory. What do you type into it ? I'm stuck!! -
I'm trying to make building instructions for my 24 leg strandbeest. I like to share it. I'm new at this. Just wanted to know how to add text (if possible) to my instructions. Any help would be greatly appreciated.
-
Part rotation in MLCad
1963maniac replied to 1963maniac's topic in Digital LEGO: Tools, Techniques, and Projects
Thanks, Seems like I have to learn some things one baby step at a time.This 24 leg strandbeest is turning out to be a beast of a MOC to learn on. Wondering if it will ever get done. -
Part rotation in MLCad
1963maniac replied to 1963maniac's topic in Digital LEGO: Tools, Techniques, and Projects
How do you change the rotation increment to 1 or 5 degrees? To answer your qestion my incorrect rotation amount is probably between 10 and 15 degrees. It's always the same. Thanks for your reply. -
Part rotation in MLCad
1963maniac replied to 1963maniac's topic in Digital LEGO: Tools, Techniques, and Projects
How do you change the grid settings? -
I need to rotate a part 1, 2, 3 or 7 degrees. I've printed all the tutorials and looked through this forum. Nothing has helped. I have newly downloaded and installed MLCad, running windows 7. I can set a rotation point. When I do edit, rotate, keyboard entry and changing the Z value, nothing changes. I keep getting the same wrong amount of rotation. I also tried changing the grid settings, but nothing can be changed there either. I also tried rotation step angle but the values will not change. I don't know what I'm doing wrong.
-
LDD 5, what features do YOU want?
1963maniac replied to BasOne's topic in Digital LEGO: Tools, Techniques, and Projects
I would like to see more parts added, such as Znap. I would also like to see better building instructions, especially for Technic creations. -
Muscle car
1963maniac replied to Zerobricks's topic in LEGO Technic, Mindstorms, Model Team and Scale Modeling
This is cool. You packed a lot into a small model. I have your brickshelf file in my MOC builders folder. I see you might be willing to help with my Ldd file. I have a strandbeest walker that is partly done. I have the legs assembled and the frame assembled. I get frustrated when trying to build it altogether. There seems to be too much space between parts to snap it together. I have been wanting to post it on "Rebrickable" but just can't get the building instructions right. You can find it here as "strandbeest 24 leg walker". Would you be willing to try to help with my project? -
Adjustable Spirograph
1963maniac replied to Blakbird's topic in LEGO Technic, Mindstorms, Model Team and Scale Modeling
Doe anyone still have a copy of the LDD file. I made a MOD and would like to use in to record how I made my MOD. ML CAD software is a little bit tough for me. I'm finally getting a little handy with LDD. -
This is the best LEGO Technic Corvette ever!!! I will be building this one. Thanks for posting on Rebrickable.
-
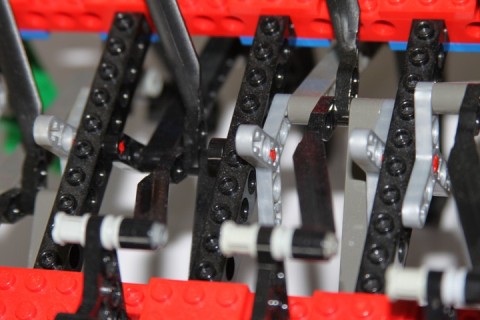
I used 16 rotor 3 blade (thin) and 8 1x3 liftarms (thin) for the crankshaft. On one side of the strandbeest the 6 positions are clockwise and the other side is counterclockwise.

-
I actually used more znap than what is in the current version. I had cut some znap parts apart in order to create a 5L x5L elbow. But purists would say that's kind of cheating. So, I replaced them with mutiplied parts for the elbows.
-
Digital Znap in Ldraw
1963maniac replied to 1963maniac's topic in Digital LEGO: Tools, Techniques, and Projects
I did a redesign on the motor holders. So I don't need Znap part #32225 modeled for LDraw. The strandbeest works better than ever now. I just posted it. -
Guys & Gals, Here's a Theo Jansen inspired strandbeest (walker) with 24 legs. It's crankshaft has six points (not 4) like most builders use. It walks pretty well. I'm working on the building instructions which is taking quite a while. I have some learning to do on LDD and LDraw and etc. But here is a still photo and a youtube video.

-
Where can I get a first version building instruction for nathanael's GT car. When I click on the "brickshelf" MPD file all I get is text, no graphics. From what I read about N Kuipers, I need to build his designs if I want to learn.
-
Digital Znap in Ldraw
1963maniac replied to 1963maniac's topic in Digital LEGO: Tools, Techniques, and Projects
Thanks, legolijntje. I found another problem, part #32225 "Znap grid motor holder" does'nt seem to be available in LDraw. What to do? -
Digital Znap in Ldraw
1963maniac replied to 1963maniac's topic in Digital LEGO: Tools, Techniques, and Projects
DO you just copy and paste between the different programs? I'm knew to all of this, but I really want to post to rebrickable. I need to learn this digital software. I have a 24 leg strandbeest to post. I understand why some builders use a picture sequence. -
I need to make building instructions for a technic MOC post to "Rebrickable'. But, I don't know which software to use. I used some "Znap" parts which makes things a bit tricky. Any suggestions would be appreciated.
-
Adjustable Spirograph
1963maniac replied to Blakbird's topic in LEGO Technic, Mindstorms, Model Team and Scale Modeling
Guys & Dolls, I rebuilt my mod of pg52's spirograph version 4. It works much better now. It goes a long time before it starts to retrace the graph. It can also be irregular as you can see here. I also took away the two extra M motors and made it all run off the one large motor. I put some weight on the arms to help the pen draw better. I'm recharging my batteries so I can try some more drawings. -
Adjustable Spirograph
1963maniac replied to Blakbird's topic in LEGO Technic, Mindstorms, Model Team and Scale Modeling
Yup, just a 2L axlepin holds the 40t gear on top of the turntable. A long axle coming through the turntable drives it. I need to think of a better way to attatch the 40t gear to the turntable. That is the problem.