Search the Community
Showing results for tags 'ghostbusters'.
-
Today the 18+ Ghostbusters Ecto-1 has been LEAKED! The @LegoBuildOffs Facebook page has a picture of the 10274's Those are new pieces above the headlights, yes?
-
 My latest MOC is finally complete, the Ecto-1 from the original 1984 Ghostbusters movie. This is a theme I haven't done anything before from and I was actually a bit surprised myself also that I got an inspiration to do this one. I always liked the Ectomobile and probably played around with the idea on some level but I never had any concrete plans. I think the build was mostly triggered by a random idea to try out a front end design using the fairly new 1x1 slope pieces for the hood corners. Once I had a decent version of the front end laid out, I decided to continue with the rest and see what happens. As usual there were many versions on the way and everything was changed many times over to arrive at the final design. The build takes some inspiration from the Lego Ideas 21108 set, obviously there are some similarities in part usage and the size in particular, but other than that I have made it fully from ground up. I had to use quite a few different techniques here and there to achieve the shapes I was looking for, and the car is actually made out of a few differently built sections. The base is a brick-built with the side skirts facing out, the front section has bricks facing more or less every possible way; up, down, front and sides, and the side and back panels are plate-built, sitting on top of the base. But with some useful new pieces (like the 3386 1x1x2/3 modified brick with a stud on top and side) it was possible to "bolt" everything together quite sturdily. Some more pictures: As usual in my cars, no opening doors or windows but the roof is fairly easy to take out to reveal the interior. I added the main interior details and there is room for 4 minifigures, sitting in the same arrangement as the original (2 in front and 2 in the back but on right side facing each other). The Ecto-1 is fairly large vehicle to begin with, and with all the associated details the part count is also almost double to a "standard" Speed Champions style car at around 600, but that's how it is for the official sets as well. It was a fairly big project overall, but I'm quite happy about how it came out so I made the instructions for this one as well. More information can be found on Rebrickable: https://rebrickable.com/mocs/MOC-168757/firefabric/1959-cadillac-ecto-1/
 -
 full life scale PKE-meter (psychokinetic energy meter) from Ghostbusters Building Instructions on rebrickable: https://rebrickable.com/mocs/MOC-97668 My version of the psychokinetic energy meter as it apeared in Ghostbusters I (1984), Ghostbusters II (1989) and Ghostbusters Afterlife (aka Legacy, 2020/2021) Yup it's that strange detector, that Phoebe finds. from ghostbusters wiki Next to the Proton Packs and the Ghost Traps this is probably the most iconic of Ray's and Egon's devices from Ghostbusters (I don't count Ecto and the Condamnent Unit). I have been making a lot of MOCs lately including some motorized 76204 Batman Tumbler. And as a kid I was such a Ghostbusters nerd that I just have to MOC some of their equipment. I started with the PKE because it's the smallest. Maybe I will do the ghost trap next (maybe even the new RTV). Feature The wings (antennas or whatever they may be) can be flipped out by pulling a small lever at the back. I was done with the handheld scanner and proudly presented it to my wife. Her very first question: "Is there some mechanic to flip out the antennas?" so I had to figure out a way, which was quite complicated because this build is so weired already with studs going in every direction, and the inside looking like knitted rather than plugged. Anyway I found a stable solution. You have to build very carefully and make sure, no bricks are twisted but then it works. I dont yet have all the parts but I did build a test prototype (look at the left half and ignore the colours) to make sure it works while developing the instructions in bricklink studio. LED-light-ready: I developed this, keeping in mind the option to add those tiny LED lights. So I left some spaces behind the clear bricks, for you to be able to add LEDS, and there is a 15% dicount for gameofbricks.eu as usual. AND have a look at my Invisible 10274 Ecto-1 Motorization (Ghostbusters 3 Legacy / Afterlife)
 -
 Here’s my alt-build for 42099. It’s the new deployable remote trap vehicle from the upcoming Ghostbusters 3 movie. It’s the big version of the one included in the Ecto 1 Creator set. I’m also working on the MOD so the ghost trap door will have the correct hazard stripes and open at the center. Feedback welcome. Build instructions and custom programming will be available on Rebrickable when ready.
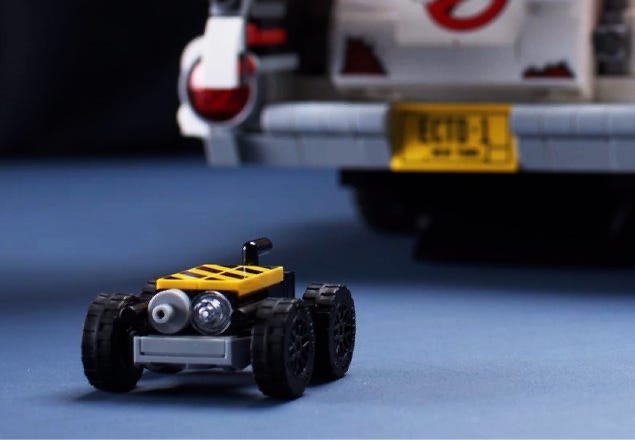
-
I got the Ecto for christmas and I felt the urge to squeeze in some remote controlled Motors. The new Powered Up have just the thing (although they are badly documented) One month after christmas I had it up and running. Tell me what you think. • quasi invisible • minimal invasive - all gadgets work • Battery replacement with no dissambling • light and sound kit still fits in • Lego POWERED UP Bluetooth Remote Control • no discontinued Power Functions • complete Instructions on rebrickable I made my first video about that: For this motorization I used LEGO's Powered Up Large Technic Motor for steering. That thing is just made to be used for the steering. It can act like a servo, because it has an internal position sensor. It is slim and dark bluish gray so it replaces that kardan drive below the front seat perfectly. Aditionally I didn't want to take it appart every time I change the batteries, so you can reacht it from the bottom.
-
HI guys I want to share this video with you. Hope you like the intro I've made :) I recommend, raise the volume of the audio !! Today we present a new product of the company Light My Bricks which offers complete solutions through the production of lighting kits specially designed for many LEGO sets on the market. This kit is made for the Led lighting of the Ghostbusters LEGO Ecto-1 set. The packaging is really well done, and in the front there is the big logo of the company Light My Bricks and later a set of information about it. The name of the LEGO set for which the kit is studied is shown below, on one of the two apertures of the package. Within the package we find the soft sponge that protects the electronic components inside. Let's see them together: 9 fixed white leds 9 white flashing leds 2 expansion cards with 12 ports 1 battery holder (requires two CR2032 batteries) the information booklet LEGO extra pieces Specifically, the extra LEGO pieces inside the kit are: 6 Lego 1 × 1 plates with clip (gray) 4 Lego 1 × 6 plates (white) 4 Lego 1 × 2 plates (gray) 4 Lego 1 × 2 plates (transparent blue) 1 Lego 1 × 1 round plate (transparent blue) As always, the LEDs and expansion cards are individually contained inside the antistatic sachets. Anti-static envelopes are used to protect electronic components from electrostatic discharge. The kit instructions can be found on the manufacturer's website and can be viewed online or downloaded in PDF format. In the booklet inside the box there are only a number of generic tips. The model is full of illuminating elements thanks to the presence of many headlights on the roof of the vehicle and expansion boards, and all electronic components are inserted inside the vehicle. As instructors, to install this led kit we will have to disassemble several pieces, including the roof and all the windows, in order to access the bricks of our interest. The installation of the led in the front lights and blue light on the left side of the car are easy. Just remove both front wheel arches and headlights and then put in the non-flashing LEDs. Same identical operation for blue spotlight. All present cables come into the interior of the passenger compartment and are fixed with gray slopes. For the two red headlamps, just remove the rear glass and the two red cones. Flashing LEDs are inserted here. For a clean job, we recommend rolling the cables around the expansion card. Refit the front glass and side windows to later install the lights on the roof of the machine. This part is quite complex. The components are so many. There are 11 LEDs in total. Finally, we connect the two expansion cards between them and light up the lights. First, however, we have to put the batteries in the dedicated compartment. The finished model is very similar to the original set and all electrical wiring is hidden inside the car. The mix of fixed and flashing lights in this kit make the ecto 1 very cinematic. In conclusion I can say that this kit I particularly liked. The Led are so small that they can be easily inserted into 1x1 rounds. This is not the first kit I try, in the past I tried the kit for the Big Bang Thoery set (my favorite among those I've tried) and that for the UCS Tumbler. You can see the videos by clicking Big Bang Theory and UCS Tumbler. If you are interested in these kits, I suggest you contact Light My Bricks guys on their Facebook page. If you live in Europe, I know they have some resellers. For Christmas I hope to be able to illuminate my little diorama. I will upload video updates on the channel.
-
From days of long ago, from the uncharted regions of the nerdy-verse, comes a legend, the legend of Nerdtron: Defender of the 80's! A mighty robot loved by good, feared by evil! This totally tubular titan is comprised of some of the most iconic pop culture vehicles of the 80's, such as the Ecto-1, Delorean time machine, A-Team Van, and the Teenage Mutant Ninja Turtles Party Wagon, and Nerdly forms the head. Sporting a glorious mullet, shoulder pads, and a walkman, our heroic 80's icons are ready to take on the Shredder, Biff, ghosts, or any other evil foe that threatens our nostalgia! This is my entry for the Nerdvember contest on Bricknerd. It was inspired by an illustration that I came across in an image search. If this isn't the nerdiest, most 80's thing you've ever seen, I don't know what is! Nerdtron: Defender of the 80's by Okay Yaramanoglu, on Flickr Here he is, ready to spring into action! Nerdtron action pose by Okay Yaramanoglu, on Flickr Behold the glory of the back of Nerdly's mullet! Nerdtron back by Okay Yaramanoglu, on Flickr When he's not fighting crime, Nerdtron likes to relax and listen to some rad 80's tunes on his walkman. Even giant robots need a break sometimes. Nerdtron resting by Okay Yaramanoglu, on Flickr Here are Nerdly and the vehicles when they haven't formed Nerdtron. Some assembly required. Nerdtron disassembled by Okay Yaramanoglu, on Flickr I had a lot of fun designing 6-wide versions of these iconic vehicles, so let's take a closer look at them. First up we have the DeLorean time machine from Back to the Future. Nerdtron DeLorean front by Okay Yaramanoglu, on Flickr Nerdtron Delorean back by Okay Yaramanoglu, on Flickr When there's something strange in your neighborhood, who ya gonna call? The 6-wide Ghostbusters Ecto-1 of course! This one was the most detailed and most challenging one to build at this scale. Nerdtron Ecto-1 front by Okay Yaramanoglu, on Flickr Nerdtron Ecto-1 back by Okay Yaramanoglu, on Flickr Cowabunga! Here come the Teenage Mutant Ninja Turtles in their Party Wagon! Nerdtron TMNT Party Wagon front by Okay Yaramanoglu, on Flickr The two Technic holes in the back are where the legs slot into. Nerdtron TMNT Party Wagon back by Okay Yaramanoglu, on Flickr I love it when a MOC comes together. Such as this A-Team van. Nerdtron A-Team Van front by Okay Yaramanoglu, on Flickr Nerdtron A-Team Van back by Okay Yaramanoglu, on Flickr I apologize for the poor quality of the pictures as I had to take them last minute. I hope you like it nonetheless.
-
.thumb.png.244f1755db107e82468c438ba32e962d.png) IT'S THAT TIME OF YEAR AGAIN AND WITH HALLOWEEN AROUND THE CORNER I WANTED TO HONOR THESE MONSTER MEMORIALS: 15TH: This year marks the 15th year since the Studios monster subtheme (called Scary Thriller and even Scary Monsters) made its debut, introducing Universal-style monsters. Although TLC had licenses on Universal Studios properties such as Jurassic Park and Steven Spielberg's name, one is led to believe that they did not have the Universal Studios Monsters license or, at least, were granted permission to make sets resembling this license. There were four sets and even at times these sets mixed monsters from other movies (like the 2017 edition of The Mummy with Tom Cruise). The main monsters represented were a Vampire, Werewolf, Frankenstein, and The Mummy, although these characters were more or less designed to be costumed actors on film sets. The sets, in many ways, closely resembled the Universal Studios monster films. Other monster mashups included a modified version of Dr Jeckyll/Mr Hyde as the Scientist in the Frankenstein set, the ghost costume and a female actress in the same set (I am guessing an homage to Phantom of the Opera) and The Hunchback in the Vampire set. Although not directly stated by his name, Van Helsing makes an appearance too in the Vampire set. 5th: This year marks the 5th year since the Monster Fighters line was released. Centered around the fictional steampunk culture, here, a gang of monster hunters must stop Lord Vampyre from eclipsing the sun forever. Many of the sets were different from actual sets in the movies but at times, especially with the Vampyre's castle, they had some similarities. Given the design of the vehicles one must wonder if the time period wasn't meant to be depression-era, especially since many monster movies were released around this time. The sets, in some ways like the Werewolf set, reused previous ideas from the original line. However, some sets did indeed create new editions of older sets and introduce new monster properties from which they were derived. I suggest the following: * Lord Vampyre's Castle - Dracula * Frankenstein - Frankenstein * The Mummy - A chariot, * Werewolf - The Wolf Man * Sea Creature - Creature from the Black Lagoon * Vampire Hearse / Coffin Car - Munsters Coach & Dragula. The driver had been called Renfield, Dracula's assistant, in the preliminary box displays, as well as Dracula being used for Dracula's Castle. * Vampire's Bride - A spin-off of Bride of Frankenstein mixed with Elvira * Haunted House - Munsters (the creator of the set was wearing a Munsters shirt during the reveal for this set) and some Addams Family influence since there was a Frankenstein's monster butler * The Zombies - White Zombie (it was supposed to feature the VoodDoo doctor) and of course was, after all, a zombie wedding in a graveyard * Ghost Train - I am guessing a very loose idea from the 1941 film by the same name * Spooky Boy & Spooky Girl - Although they came later, it's worth noting Spooky Boy is more like Pugsly Addams while Spooky Girl, which you would think is Wednesday Addams, reminded me more of Lydia from Beetlejuice due to her schoolgirl outfit * Tiger Woman - close to the 1944 film by the same name * Mr Good/Evil - A spinoff from Dr Jeckyll/Mr. Hyde * Grandfather clock - Any number of horror films, though Disney's Haunted Mansion ride stands out for me * The Fly/Scientist - obvious * Venus Flytraps (Scooby doo) - Little Shop of Horrors * Graveyard / Witch scenes - Wizard of Oz, Walking Dead * Most zombies are likely influenced by Walking Dead and the rise of the zombie movie craze around that time * One can't help to think if Mad Monster Party and Groovie Ghoulies helped to influence any of these sets and CMFs * Frankenrocker - I know the Beetlejuice show done this at Universal Studios Orlando but I can only find the frankenstein monster from Munsters playing the guitar Almost all of these comparisons to all the Monster properties mentioned are based on my observation since the only time we knew of TLC acknowledging their relation to existing monster movies was at an event where recording was prohibited during an advance presentation of the line.
IT'S THAT TIME OF YEAR AGAIN AND WITH HALLOWEEN AROUND THE CORNER I WANTED TO HONOR THESE MONSTER MEMORIALS: 15TH: This year marks the 15th year since the Studios monster subtheme (called Scary Thriller and even Scary Monsters) made its debut, introducing Universal-style monsters. Although TLC had licenses on Universal Studios properties such as Jurassic Park and Steven Spielberg's name, one is led to believe that they did not have the Universal Studios Monsters license or, at least, were granted permission to make sets resembling this license. There were four sets and even at times these sets mixed monsters from other movies (like the 2017 edition of The Mummy with Tom Cruise). The main monsters represented were a Vampire, Werewolf, Frankenstein, and The Mummy, although these characters were more or less designed to be costumed actors on film sets. The sets, in many ways, closely resembled the Universal Studios monster films. Other monster mashups included a modified version of Dr Jeckyll/Mr Hyde as the Scientist in the Frankenstein set, the ghost costume and a female actress in the same set (I am guessing an homage to Phantom of the Opera) and The Hunchback in the Vampire set. Although not directly stated by his name, Van Helsing makes an appearance too in the Vampire set. 5th: This year marks the 5th year since the Monster Fighters line was released. Centered around the fictional steampunk culture, here, a gang of monster hunters must stop Lord Vampyre from eclipsing the sun forever. Many of the sets were different from actual sets in the movies but at times, especially with the Vampyre's castle, they had some similarities. Given the design of the vehicles one must wonder if the time period wasn't meant to be depression-era, especially since many monster movies were released around this time. The sets, in some ways like the Werewolf set, reused previous ideas from the original line. However, some sets did indeed create new editions of older sets and introduce new monster properties from which they were derived. I suggest the following: * Lord Vampyre's Castle - Dracula * Frankenstein - Frankenstein * The Mummy - A chariot, * Werewolf - The Wolf Man * Sea Creature - Creature from the Black Lagoon * Vampire Hearse / Coffin Car - Munsters Coach & Dragula. The driver had been called Renfield, Dracula's assistant, in the preliminary box displays, as well as Dracula being used for Dracula's Castle. * Vampire's Bride - A spin-off of Bride of Frankenstein mixed with Elvira * Haunted House - Munsters (the creator of the set was wearing a Munsters shirt during the reveal for this set) and some Addams Family influence since there was a Frankenstein's monster butler * The Zombies - White Zombie (it was supposed to feature the VoodDoo doctor) and of course was, after all, a zombie wedding in a graveyard * Ghost Train - I am guessing a very loose idea from the 1941 film by the same name * Spooky Boy & Spooky Girl - Although they came later, it's worth noting Spooky Boy is more like Pugsly Addams while Spooky Girl, which you would think is Wednesday Addams, reminded me more of Lydia from Beetlejuice due to her schoolgirl outfit * Tiger Woman - close to the 1944 film by the same name * Mr Good/Evil - A spinoff from Dr Jeckyll/Mr. Hyde * Grandfather clock - Any number of horror films, though Disney's Haunted Mansion ride stands out for me * The Fly/Scientist - obvious * Venus Flytraps (Scooby doo) - Little Shop of Horrors * Graveyard / Witch scenes - Wizard of Oz, Walking Dead * Most zombies are likely influenced by Walking Dead and the rise of the zombie movie craze around that time * One can't help to think if Mad Monster Party and Groovie Ghoulies helped to influence any of these sets and CMFs * Frankenrocker - I know the Beetlejuice show done this at Universal Studios Orlando but I can only find the frankenstein monster from Munsters playing the guitar Almost all of these comparisons to all the Monster properties mentioned are based on my observation since the only time we knew of TLC acknowledging their relation to existing monster movies was at an event where recording was prohibited during an advance presentation of the line. -
Presenting my 10230 - Mini Modulars interpretation of 75827 - Firehouse Headquarters from Ghostbusters (1984) Mini 75827 - Firehouse Headquarters by Adeel Zubair, on Flickr Mini 75827 - Firehouse Headquarters by Adeel Zubair, on Flickr ________________________________________________ Follow Me On... Facebook - www.facebook.com/Adeel-Zubair-208739829518301/ Flickr - www.flickr.com/photos/adeelzubair/ Instagram - www.instagram.com/adeel_zubair Deviantart - www.adeelaubair.deviantart.com Twitter - www.twitter.com/webhead_studios Youtube - www.youtube.com/user/webheadstudios LinkedIn - www.linkedin.com/in/adeel-zubair-b969b111b Behance - www.behance.net/adeelzubair Feedback and criticism is much appreciated. Adeel
-
I really wanted a fire station in my town. I sacrificed my townhouse as it was no use in my setup, and i tried to build a fire station in the same style. the fire truck i already owned. and to fill the small garage i wanted to build a SUV firetruck. but then i had the idea to downscale my ecto-1 and that just fitted! so now it is also Ghost Busters HQ let me wat you think
-
I've previously posted some of these but have now taken decent picture and added stickers. I think a new thread is deserved. They were all part of my Tie Rack for Brickvention 2017: So here we go. Mining Guild - added custom stickers Dalek Tie Rebels Wolf - added custom stickers Scooby Doo / Mystewry Machine Ectie 1 Classic Space Batman Steampunk ... More picks on Flickr https://www.flickr.com/photos/78271818@N00/
-
This is my version of the ecto-1a. I bought a second ecto-1 from lego ideas, I changed the roof and put sticker on it. The result is very nice. Now I have the ecto's from the three movies. I really like the result. Please tell me what you think of it. Do you like it or not?
-
I had several pieces chromed. I think it give it a much needed "pop". I also added a few other mods that I have seen from other MOCs. https://www.flickr.c...57650287592231/
-
Hi, First and foremost, i'm French. I do my best to avoid grammatical and spelling error but some (a lot in fact) may subsist. I'm sorry for that by advance. Second, it's my first post here! Hopefully not the last. So here is my mod based on the set 21108 Ghostbusters Ecto-1 car. It's a fully custom made light mod. Key feature of this is: - NO modification of ANY Lego bricks. - NO kragle or drilling or any other funky stuff. - Everything must fit inside. - Hide the mod as much as it can be. - All should work as expected (the strobes strobe, the rotating beacon rotate, etc). The mod is made of 28 LEDs, all controlled by an Arduino board. All wire are INSIDE the car. // All images are clickable for a bigger version. Here is the exterior shots, everything is exactly like every set: The roof portion is still detachable without any hanging wire, it's also clean underneath. Nothing cheap to hide a messy mod: Everything is controlled by an Arduino Pro Mini (Not really a choice, it was the smallest Arduino board I had in home) that is hidden under a 4x2 plates: Same apply for the battery, that was what I had at the time of building. A smaller lipo can be fit so it's not a choice. Run time is... Well I don't know. It fit in the trunk of the car and it's the ideal size to be held by the window mounting point after a small change in the design. Neat! The roof is attached by a very thin wire and connectedto it via a small 45° home made adapter: To start the Arduino, there's a hidden Reed sensor which is (for who don't know) triggered by a magnet. I put a neodyme magnet in a small Lego round piece and when it's in place underneath, the controller is powered on. Yup, the Ecto-1 keyfob is a Lego piece with a magnet in it. Then the magic begin: Pictures don't do justice for the lighting sequence so here is a small video: For those of you where Youtube cry for a copyright infringement (soundtrack to match the car....), here is one that work (it was an earlier version without the embedded electronique like on these photos: If you have question, i'll be glad to answer them. Troll included.
-
Sergio's LEGO Ghostbusters headquarters has not made it past the LEGO Ideas review stage. I suspect the size of the project might have had something to do with it. Sergio's LEGO Ghostbusters headquarters with interior included is made up out of 5704 bricks. To date there have only been two official LEGO sets which consisted of more than 5000 bricks. With that in mind I have designed a smaller LEGO Ghostbusters headquarters in the same scale as the LEGO modular buildings. The backside of the building has been left open for playability and display. For even better access the stairs can be removed. The interior has been recreated as faithfully as possible from the Ghostbusters movies. The wall panel with the bell and the office area were quite a challenge. They are build half sunk into the double walls. The blank square behind Venkman's desk is supposed to be a framed black and white photograph from the original Ghostbusters movie. I still need to make a legofied version of this and add it in. I've included, among other things, a camera and monitor setup showing a terror dog, a "last of the petty cash" meal, a dancing toaster, and jars of slime. At some point I would like to do a side-by-side comparison of screenshots from the movies and the LEGO versions. The pinball machine is supposed to have a Star Gazer backplate. I still need to make a legofied version of this and add it in. Janine Melnitz and Louis Tully minifigures. Making a smaller Ghostbusters headquarters does require a smaller Ecto-1. Brent's Ecto-1 unfortunately won't fit inside the building, at least not without removing a large part of the ground floor interior. But perhaps LEGO could include the smaller version of Ecto-1, similar to how LEGO included a smaller version of Metalbeard in Metalbeard's Sea Cow set. The number of bricks used comes to 3008 bricks with the smaller Ecto-1 not included, and 3264 bricks with the smaller Ecto-1 included. Which would mean the LEGO Ghostbusters headquarters would cost somewhere around €190 with the smaller Ecto-1 not included, and somewhere around €210 with the smaller Ecto-1 included. I've submitted this building on the LEGO Ideas site. It currently has about 4000 supporters, so it can still use some support. Help make this become a real LEGO set and support! LEGO Ghostbusters Headquarters project: https://ideas.lego.com/projects/89254 My flick page, for higher resolution images: https://www.flickr.c...os/8411573@N05/
-
Does anyone have any information on the latest LEGO Ideas group that is in review? There are a number of sets that I would love to see go into production. It should be any day that a decision is made. I thought I read somewhere that LEGO would announce their decision in January. My vote... 1) Ghostbuster Firehouse 2) Xavier Mansion 3) Wayne Manor
-
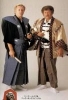
GhostBusters, Dana Barretts Apartment This is my Lego Ideas model of Dana Barrett's apartment from the eighties classic movie Ghostbusters I Have made the model as near to movie accurate as I could get, I spent a lot of time viewing the film footage and cross referencing from screen grabs, The apartment features several times throughout the movie and the set dressing changes on each occasion, so I have combined all occasions into the model. The features of the set are as follows three mini figures Dana Barrett, Pete Vekman,Terror Dog Terror Dog arms to attach to the arm chair Additional 1X1 Triangle pieces to create the carpet ripple effect Additional pieces to create the apparition in the fridge All the furnishings of the apartment, Piano, Tables, Books (etc) This is one of my favorite scenes in the film I believe this Lego Idea would really compliment the ghost busters Lego sets that are already available.
-
I am not a sticker fan. Not a violent or vocal campaigner or complainer, it's just my building preference. The Ghostbusters Firehouse Headquarters was a no-brainer. I definitely had to have one. Still want one. But, the fact that the main signage out front is a sticker made me put a pin in the idea. For now. I'm curious...has any one found a way to mod the main sign out front using the printed logo bricks from 21108-1 Ghostbusters Ecto-1? I know they are slightly different elements...but has anyone found a good looking way to do this? I desperately want that Firehouse, but I can't do stickers. Without the sign at all, the set just isn't worth it to me. Any suggestions or a friendly point in the right direction would be very much appreciated. Play well!
-
Hey guys, I just finished up my GBHQ portal for the game Lego Dimensions. It comfortably fits all the Ghostbusters content released thus far, and fits nicely on the Toy Pad. The .lxf for the firehouse and the in-game Ecto-1 model can be found here: http://adf.ly/1cEIAs The .lxf is only missing the exclusive 12x24 Dimensions baseplate (as it is not in LDD) but it should be fairly obvious where it goes. These are available on B&P for roughly $4. Comments welcome, and please share pictures if you build it!
-

[MOD] Ghostbusters Ecto1 (improved looks/details/in-exterior)
B Rick posted a topic in LEGO Licensed
I recently purchased 21108 and I think it's one of the all time better sets from Lego. I really enjoyed building it, and I can tell you the endresult is awesome. Like you didn't know already huh. Still ater a while some things started to bug me, and I thought I could improve on some details and overall look. The frontend is unmistakenly 59 Cadillac, but somehow it didn't look right... Wheelwell had a wrong angle; the frontwheels were set too far back; the 'eyebrows' above the headlights stick too far out; the hood is too flat compared to the fenders; too much room between frontwheel and lights because of wrong use of snot-technique, etc... I think I have improved the original model. After I modified the exterior I came across this post by flailix, and his work inspired me to do a proper interior and engine bay. I had just one problem: My car is one stud shorter than the original. So that meant I got even less room to place all 4 minifigs... But I managed to do so... ^ seating ALL 4 minifigs! ^ detailed V8 engine bay ^ notice not one but two exposed studs behind the frontwheel. Somehow it doesn't feel like Lego has forgotten something anymore It now looks like the car has a doorline. ^ I replaced the inverted slope which just had the wrong angle and made the bodywork between frontlights and wheel too large with a cheeseslope. By using other snot-parts I managed to shrink it a bit further and clean up the bumperside by separating it from the headlights. ^ Major modification was shortening the cab by a stud. It forced me to create open windows which I love. The windshield is set back to create more bodywork between frontwheel and windshield. The roofrack needed to be set back a stud creating less room at the back of the roof. Just like the real thing. The blue hoses are now compact together compared to the original set. I used an extra slope next to the hoses to let the body have a better flow. ^ now that the ladder is set back one stud I could attach it by clicking it into a red 1x1 clip I placed in the fin. On this side also more slope pieces above the rear wheel for better flow ^ I used a plate to give the bumper more mass. ^ the round studs don't bother me as much as they do on the original. It's much more a 'one piece' frontfender. It even suggested me to use round studs in the hoodcorners. It really helps rounding off the hoodcorners. The hood got raised because I thought it sat too low between the fenders. ^ now this was the most difficult task: Creating enough room for a decent interior that can seat all 4 minifigs. I'ts not able to hold all 4 backpacks but it does have room for a trap ^ sure it's kinda cosy but hey, it fits! -
If ghosts need busting on Mars, this is how it might be done In LDD, I modified the original Cuusoo/Ideas version of the Mars Rover to have a Ghostbusters feel, attempting to add as many of the greebles present in 21108 while still retaining the Rover feel and function. Added a proton pack to the front and then the Rover's instrument boom becomes the nozzle, with silver flex hose connecting the two. The wheel hubs on both original sets are the same size, so easy to use 21008's wheels, and silver wheel covers, with 21005's tires. Also attempted to capture the 21008's Caddy tailfins onto the Rover body. A little photoshopping on these images to add the sticker images to the model. Too much? Sacrilegious? Are you ROFL? I want to see what people think of this before I go get the parts, as I won't part out my Ghostbusters set just yet, but will mod the Rover accordingly,
-
The new Ecto-1 Ghostbusters car is pretty awesome so I wanted to make a video of it. You'll recognise Frankie the mechanic from the 60056 Tow Truck set.
-
While I absolutely LOVE the exterior of the new Ghostbusters set, the interior was much in need of an overhaul! While it technically "seated" all four figs it did so rather comically. Here then, are my mods. It seats all four in the proper placement without affecting the exterior or seriously degrading the integrity of the structure. See other images here. As I have received requests for it, here is the LDD file: Ecto1-Mods.lxf

-
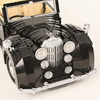
During the development of the Ecto-1 for LEGO Ideas (former Cuusoo) I couldn't keep myself from creating the original 1959 black Cadillac that got turned into one of the most iconic movie vehicles of the silver screen. This is a very easy MOD that any fan of the movies can make, only having to basically swap the color of the exterior elements and clean up the top of the car. Feel free to navigate on my Flickr for more shots: https://www.flickr.c...in/photostream/
-
I've added new foto's of my Ghostbusters headquarters addition! (11-3-2014) I've made some alterations to the hearse. Mostly on the tailfin area. The red from the fins isn't touching the rearlights anymore. Also the equipment on the roof is slightly different. It sort of 'belongs' ther now as opposed to be just an 'add-on' like before. I've also made it structurally better. (see post #2)