Search the Community
Showing results for tags 'Car'.
-
 From the Classic Vampire Movie, "The Lost Boys" I've seen this movie at least 50 times and only tonight, I caught this 1 second clip... Of course the fact that I finally watched it in widescreen probably was the reason...
 -
 All, After 5 weeks of work and some sneak peeks on my WIP forum item, I finished my Lego Technic MOC of a Cadillac Eldorado Biarritz 1959 Convertible. The goal for this model was to squeuze as much as original details in this model as I could, and stay as close to the original design, incuding all the detailing of the chrome parts like the grill and striping on bonnet and sides. It resulted in a heavy usage of half-beams to get these details in. The model is RC controlled, with functioning steering wheel, running V8 engine, opening door with locks, opening bonnet and trunk, independent suspension on both axis and LED lights on both front and backside. It weighs about 2.4 kg and the dimensions are 68x25x16 studs (55 cm long) Update 23-05-2015 Instructions are now available on Rebrickable: http://www.rebrickab...o-biarritz-1959 For more pictures take a look at my Bricksafe page: I hope you like it. I do plan to make instructions for the model, but that will take some time. I will post it here if I have completed them and they are posted on Rebrickable. Be sure to also check out my other Lego Technic instructions on Rebrickable Martijn
 -
 I haven't posted any of my own content recently due to lack of time and ideas, but about a month ago my last attempt at a high speed vehicle was sitting on my desk, partially disassembled, when I got a spark in my mind and I knew exactly what to do. Previously I made multiple failed attempts at making a complex independent suspension work, but I couldn't get a practical result without modifying parts, which I wanted to avoid. So this time around I went for a solid axle with 4 link suspension. I spent a long time building and rebuilding the car until I got a balance of power, weight, and strength that I was happy with. Apart from a couple pieces I forgot to add here and there, this is the final build: I could have gone for lower weight, but the reinforcements were necessary to bring the chassis flex to a minimum, letting the suspension do its job. The car barely bottoms out under full compression, but I doubt this will happen out on the road. The higher clearance and lack of u-joints should reduce the risk of damaging parts. The rear wheels are driven by two buggy motors each, acting as an electronic differential. Since the motors are DC motors, this system will never be perfect, but it's as good as it gets. The only modified lego pieces on this build are the pneumatic cylinders (now act as dampened shocks) and the wheelhubs (made by nicjasno at LPEpower ) The front suspension is independent multilink, my own blend of various ideas I got from nicjasno's Standard servo steering. I lubricated the large ball joints on the upper 'wishbones' to reduce friction. Nice and smooth underside, which also adds to the structural rigidity (note the numerous pins) Another look at the multilink setup in action I've already tested this model on the road, and it performs very well, but I won't be making a video until I receive an order of 4 brand new custom wheel hubs, as the current set have experienced some serious wear and tear over the past year thanks to my punishing tests If you are new or aren't familiar with my previous projects, this chassis is powered by a near 12 volt battery and a 3rd party RC system that I made work with Lego motors. Multiple people have asked why I don't build bodywork for any of these large scale vehicles, and to be honest, I really enjoy building the chassis, while bodywork is...meh. I could get better with practice, but I simply don't want to spend time perfecting a body, and the extra weight would reduce the play factor, unless I become a wizard with flex axles . I think this model is the ultimate balance of speed, moderate realism, and weight, (within my building style) so I don't see myself making anything new soon with my other hobbies and work taking up most of my time. Special thanks to nicjasno for the tips on the front suspension, and for making the LPEpower parts/show. Feel free to leave any comments/criticisms/ideas for a new project. Enjoy!
 -
Hi, This is my LMP1 car, that I made for the current TechLUG Technic contest. The full review (and much, much more pictures) is here: http://bj51creations...c-lmp1-car.html. Please leave a comment. Hope you enjoy.
-
Welcome to Gallardo's Garage, here I will be posting up each of my newest city Car MOCs including past cars I've already shared here. the newest car will be added to the end of this first post. Featured New Car: The Dodge Viper ACR (2009) The American Club Racing (ACR) model's upgrades included street-legal racing tires (Michelin Pilot Sport Cups which Michelin describes as "Ultra-High Performance Sport tires"),two-piece brake rotors, adjustable suspension, and significant aerodynamic revision. No engine modifications were made, so power and torque remain at 600 hp (450 kW) and 560 lb·ft (760 N·m) as in the standard SRT-10. The ACR is street-legal! Weight was also decreased by 40 lb (18 kg) by using the "Hardcore Package", without AC, radio, speakers, amplifier, trunk carpet, hood pad or tire-inflator. Its aerodynamic upgrades produce up to 1000 pounds of downforce at 150 mph (240 km/h), or roughly 10 times the downforce the standard Viper SRT-10 can produce at the same speed. The interior was upgraded only by the addition of a beacon-tripped lap timer (Hardcore Edition Only). The Lego version is quite similar, with its aggressive stance, large brakes, and complete aerodynamic package. this Viper is ready to Terrorize the streets of a quite Lego city near you! (well maybe only near me for now). so here it is, The 2009 Dodge Viper ACR, 6w+, 18 studs long! Side view here it is easy to see the large disc brakes. Big thank you to ER0L for showing the tire trick this was adapted from! the signature A-symetrical racing stripes are very easy to see from this angle, running across the entire car length! this last one is for the MOCpages contest, just to prove that yes a Figure can fit in the car completely! (if i remove the stripe on the roof i can give him a helm too) Current cars: KTM X-BOW: (Original thread: X-BOW) Ford GT40 MKI: (Original Thread:GT40) Renault Alpine A442: (Original Post:A442) Pagani Huayra: (Original Post:Huayra) Maserati MC12: (Original Post:MC12) Renault Espace F1: (Original Post:Espace F1) Dodge Viper ACR: (Original Post:Viper ACR) Comments and Critiques are welcomed for all cars!
-
I made Mention in my last MOC thread about building a car from "yesteryear" well after looking over many great cars from the 60s and 70s i settled on the Iconic Ford GT40, in particular the 1966 MKI. *History Lesson* As Many racing fans know the Ford GT40 holds quite an amazing chapter in Le Mans history. starting in 1966 the GT40 had come out of its development years and was primed to dominate the endurance racing scene. the MKII would win 24 hours of Daytona along with 2nd and 3rd. Sebring was another 1, 2, 3 finish for the Ford cars with the X-1 Roadster taking the over all. at Le Mans of 1966 the GT40 was running 1, and 2 late in the race and in an attempt to keep both Drivers happy with the result Ford tried to arrange a tie. Driver Ken Miles was however not satisfied with a tie, and in protest to Ford slowed his car in the final straight still taking second but removing what could have been an amazing side by side finish. 1967 was equally as successful with the MKVI taking Le Mans. in 1968 a rule change was applied that limited engine size and eliminated the MKII, MKIII and MKIV, leaving the older MKI cars still eligible. this change in rules left the MKI in great position for the season and lead to a Championship for Makes victory for Ford. the following year would be the end of the GT40s reign being almost 6 years older than its competitors. in a very close battle with Porsche's 908 the Ford GT would win but by mere seconds unlike previous years. the most remarkable detail of the 68, and 69 victories is that it was achieved by the exact same car - the legendary GT40P/1075. this to date is the only Car to win the 24hours of Le Mans twice. *end of history lesson* I've spent quite a lot of time on this one, more than my previous cars combined. with the history of the car, and my long standing appreciation of the car i had to get it right. My model is 16studs long and only 3 bricks 2 plates tall. so, without further ado here is my LEGO 1966 Ford GT40 MKI (road car). *Update: revised headlights to better match those found on the actual car* Ford GT40 headlights 2.0 as always, I hope you enjoyed my build, there are more pictures of the car in my Flickr, for those that want to see more. Comments and critiques welcomed!
-
 REVIEW - 42039 - 24 HOURS RACE CAR INTRODUCTION When the preliminary images of the "Le Mans Racer" surfaced somewhere last year (2014) it got a lot of praise. This changed dramatically when the final images of the 24 Hours Race Car showed up. The front side of the car, especially the head lights, and the curvature of the side of car had changed a lot. The car obviously still resembled the prototype, but the new design raised a lot of eyebrows. The new design was considered a step back instead of forward. Eventhough I still liked the design, I must admit I liked the earlier design better too. With the emphasis on past tense liked. I am not sure anymore and this review will show you why. Like the Arctic Truck this set has a B-model which is well worth checking out. That's why this review includes both the A-model and B-model. For people who are on the fence, the B-model might actually convince them to buy the set after all. Let's see what this set is all about! Note: All images can be clicked for hi-res versions. SET INFORMATION Number: 42039 Title: 24 Hours Race Car Theme: Technic Released: 2015 Part Count: 1219 Box Weight: 2110 gr Box Dimensions: 47,8 cm x 37,3 cm x 8,7 cm Model Dimensions: 40 cm x 18 cm Set Price (MSRP): €99.99 / $? / £99.99 Price per Part: €0.082 / $? / £0.082 Links: Brickset, Bricklink THE BOX The box measures 47,8 cm x 37,3 cm x 8,7 cm and weighs well over 2kg (2110 gr to be precise). The width of the box is the same as the box of the Arctic Truck. This box also feels like it's filled to the brim. THE FRONT The front shows a picture of the main model in action, with radial blurred wheels to emphasize the motion of the car. The lower right section shows the dimensions of the model. Upon completion, it will measure a length of 40cm and a width of 18 cm. THE BACK Like the front, the back side has exactly the same setup as the box of the Arctic Truck. The top shows the functions of the model, while the lower left side shows the B-model and the lower right side shows the motorization options. The picture of the B-model looks so cool, it could be a model of it's own. At this point I was very eager to build both models and compare them. THE SIDE One of the sides usually shows a part in 1:1 scale. This time it's one of the wheels indicating the size of the model. CONTENT OF THE BOX The box contains: 1 Book(let) 1 Sticker Sheet 13 Bags 4 Tires INSTRUCTION BOOKLET Since I own two copies of the set, I also received two instruction booklets. What's catching my eye is that my second copy is supplied in different packaging than the first one. It's for the first time (that I am aware of) that the instruction booklet and stickers come in a sealed bag, without cardboard back. Hopefully this will be a new standard for all sets with sticker sheets. Instead of multiple booklets, this set contains a single square bound book. In earlier reviews I have epxressed my preference for a single book. I don't see any advantage in having 2, 3 or even up to 6 booklets. STICKER SHEET Like the actual model, the sticker sheet looks very vibrant. The bright green, white and black color combination has found it's way to the stickers as well. Either you love 'em or hate 'em. Since I started writing reviews I have been applying stickers and I am happy I started doing it. Stickers do give the model it's finishing touch. BAGS WITH PARTS Thirteen bags with a total of 1219 parts (give or take a few) are supplied in the densily packed box. The rims and flex are sealed in a bag as well. Sometimes looking at the bags makes you wonder what the logic is, behind the distribution of the various parts across the different bags. Well this time it really got me confused. Take a look at two of the bags below. There's a bag containing all the 3L Blue Pins. Then there's a bag with various parts....and a single 3L Blue Pin. I figured this might be an error, but both of the sets have the same anomaly. TIRES The tires have been supplied unbagged, as usual. HIGHLIGHTED PARTS This chapter describes new and interesting parts. This set actually contains a lot of them. This set also contains an abundance of panels. If you aren't into panels, this isn't the set for you. CHANGEOVER CATCH This year (2015) the new changeover catch parts were released. It's a combination of three parts. The advantage of the new parts is that the red gear is the same on both sides, which avoids mounting it the wrong way around. It also avoids the changeover catch slipping out of the driving ring, like it used to do. You can apply lots of pressure, but the catch doesn't slip out. PINS Some of last year's new pins are also included in this set. 12 x Pin with Pin Hole and 21 x 3L Pin with 1L Axle. Securing Technic Beams can be quite simple with the new Pin with Pin Holes. The new 3L Pin with 1L Axle gives you more possibilities when connecting Beams and other parts. Below are two example situations where the new pins have been used. Granted, the examples below can be accomplished by using other techniques. However, some predicaments from the past can be easily solved by using these new parts. Like me, you will most likely appreciate the ease of use. ENGINE AND SUSPENSION Also included are two Steering Portal Hubs and Steering Portal Hubs with Ball Joint Arms and four Steering Portal Axles for driving and steering the vehicle. These parts are commonly used nowadays. The picture below also shows some other parts, like gear rack, steering arms and suspension. FRAMES This set comes with a single 5x7 Frame and three 5x11 Frames. PANELS This set contains a whopping 47 panels in three different colors. I personally like panels a lot and I do appreciate the variety we have at our disposal lately. This set even contains a new 13x3x2 Curved "Mudguard" Panel. NEW 13x3x2 CURVED PANEL This is the first set to contain the new 13x3x2 Curved Panel. Looking at the pictures doesn't do these panels justice. In real life they are actually quite big. I figured they would be smaller, but they are even longer than the 11 x 5 frame, with a length of 13 (including the attachment points). Hopefully this part will be available in other colors as well, preferably white, for adding variety to your EV3 robot. 19L WHITE FLEX-AXLES The White 19L Flex Axles have only been released in a single set, the 8461 Williams F1 Racer in 2002. Current prices on Bricklink are as high as 15 Euros! Needless to say we are very happy with the return of these White Axles. Now we can build Jeroen Ottens' awesome Alfa Romeo 4C Spider for a decent price as well. I am really happy that useful rare parts are being used more often by TLG designers PART LIST Here's the complete list for all 1219 parts. As you can see in the Highlighted parts section, this set contains a lot of interesting and useful parts. If you don't own sets like the 8070 - Supercar, this might be the set to pick up if you want to start building your own supercar. THE BUILD Enough with all the set and part information, let's build the model. REAR SUSPENSION The build starts with the rear suspension and drivetrain. As you can see in the picture below, the length of the Axle between the Steering CV Joint is 4L, where it usally is 3L. This is an indication that the finished model will be a bit bigger than usual (8070 for example). The finished suspension is one of the cleanest suspension setups I have seen in an official model. It's pretty basic, but it works like a charm. This setup is defintely worth using in your MOC. Here's a video: After attaching the suspension to the frame you rotate the module and secure it. At this stage the rear section of the chassis with suspension is almost finished. V8 MID-ENGINE Extending the chassis forward results in the picture below, where the front spoiler is already visible. What's also visible is the V8 engine placed right in front of the rear axle, resulting in a Mid-engine setup, perfectly suited for sports and race cars. Two exhaust pipes have been fitted on either side of the engine, together with two hoses attaching them to the engine. The instructions are easy to follow, although you sometimes you need to bend the beams a bit. Minor improvements are possible here and there, but nothing shocking. FRONT SUSPENSION The front suspension is a bit more complicated than the rear suspension, which makes sense considering the fact it contains the steering rack. The shock absorbers are placed in a different angle than the rear ones, resulting in a somewhat stiffer front suspension. All in all the front suspension is well designed and the steering rack can be easily powered with a Servo Motor. The picture belows shows the front suspension attached to the chassis. If you follow the official instructions to motorize the model, the area in front of the suspension is used to mount the battery box. When you are modding this model to make it Full RC this area can be used to mount the servo motor. GEARBOX Like the gearbox in the 8070, it's not used to switch gears powering the drivetrain. It's used to switch between two functions, opening the doors and the hood/bonnet. The gearbox is located at the left of the vehicle, near the cockpit. The mechanism to open the doors is located on the left side, while opening the hood/bonnet is taking place at the right side. To accomplish this, some axles traverse under the cockpit to the other side of the vehicle. Following the axles to other side of the vehicle and adding some gears, results in the situation below. The video below shows the gearbox in action. DOOR OPENING MECHANISM The mechanism to open the door is comprised of some Knob Wheels, Links without Stoppers and Pins with Towballs. Take a look at the doors opening and closing. THE FRONT Using the new mudguards and various other panels you finish the front of the car. The front is probably the most controversial part of the car. This is caused by the preliminary pictures shown before the release of this car. In the early pictures the front of the car had smooth curves and beautiful lines, while the final car lost these smooth lines and got a more blocky look in return. I must admit that at a first glance, the new design lost some of it's appeal. However, this model grew on me pretty rapidly. The headlight design can be found, in more or less the same way, on several real Le Mans type race cars. THE REAR The rear of the car looks great, with the stickers continuing from the mudguards to the panels underneath the spoiler. The two exhausts sticking out give some details to the back. I absolutely disagree with all the negativity surrounding this car. Maybe it's one of those models which needs to grow on you. FINISHED MODEL Here it is, the finished model. I know some of you don't like the looks of the car, but I think it looks great. The color scheme is outstanding. The new (for Technic) bright green parts, combined with white and black make this car look very vibrant and colorful. I am not a big fan of the green used in the 42008 - Service Truck, but I do like this bright green a lot. It fits perfectly well with the Mindstorms EV3 set. The curves on the side of the car are not as smooth as some of us hoped, but I still think the car looks more than acceptable from the side. The stickers add some nice details to the car, giving it that characteristic race car look. The model looks great in pictures, but it does even look better in real life. I love this picture of the front of the car. However, I do wonder if a dedicated 24 hour Le Mans Racer has the seat and steering positioned off-center?! Using the good ol' Google Machine I come to the conclusion that they do have centered seating and steering, at least the majority of them. There's ample space in the cabin, which makes me wonder why TLG decided to place the seat off-centered. The rear view looks cool too, with some of the suspension showing and the two exhaust pipes clearly visible. The bottom view is very useful to determine the size of the car in studs. It measures approx 59 x 27 studs. The chassis looks organized and well designed. The engine has been placed close to the ground, which is perfect for the weight distribution. A low center of gravity improves the handling of the car. I really enjoyed building this baby. The build is very clean and organized, although there are some steps where you need to bend the beams a bit to get things into place. Seeing the model come to life and seeing it grow to pretty impressive proportions is very satisfying. For me it was fun, but I reckon kids will go nuts over this set and the build. SIZE COMPARISON What became obvious during the build, but what's emphasized when you have finished the model, is that it's quite big! The size of the car is pretty impressive. The pictures below show the car next to the 42030 - Volvo L350F. The side view emphasizes the size of the car. It's even longer than the Volvo, if you dismiss the bucket. PARTS LEFT Some parts left. Nothing out of the ordinary. FEATURES AND FUNCTIONS Unlike the B-model, this model doesn't implement any unexpected features. The functions it does implement are exactly what you would expect from any car. Steering (HoG) Working fake engine Suspension Opening doors (gullwing style) Opening bonnet/hood Opening trunk Gearbox for switching between functions Unfortunately the steering wheel hasn't been linked to the HoG (Hand of God) steering mechanism. Placing the seat in the center would have provided an easy way to link the steering wheel to the steering mechanism. it's a shame we hardly see actual steering anymore. Opening the hood actually opens up the entire rear section of the car, providing you with easy access to the motor compartment. The mechanism to open the hood works properly, which results in smooth opening and closing of it. The same goes for the gullwing style doors. Both functions are operated manually and you need to switch with the lever to the left of the cockpit. These two functions are also the ones which can be motorized by placing an M-motor near the cockpit and a battery box in the trunk. All things considered I think this car offers lots of playability. The model is solidly built and the functions are easy to operate. I'd say it's pretty safe to let your kids play with it. B-MODEL Unlike the A-model, the B-model for this set received (almost) universal acclaim, and I can see why. Often the B-model is a pale shadow of it's part donor. In this case the model looks so good, it could be a model of it's own. It even incorporates a neat feature, which actually deserves to be in the A-model. There's a lot a variation in the quality of digital building instructions TLG is providing, but these ones are of very high quality. The picture below shows most of the chassis with suspension, fake engine and gearbox in place. FINISHED MODEL Some concessions have been made, but overall the car looks fantastic. The black of the roof has been extrapolated from the hood, which definitely works for me. The rear section of the car feels a bit empty, but the panels do cover up most of it, so it's hardly noticeable. The V8 stickers will be upside down if you use the parts from the A-model. Since I could apply new stickers, I have placed them using the proper orientation. The bottom of the car shows the chassis. It's obviously a bit smaller than the A-model's chassis. FEATURES AND FUNCTIONS Taking the functions into account, this model isn't playing second fiddle to the A-model. Besides the obvious functions like steering, opening doors and hood, this car features folding fog lights, which deserve a better podium than a B-model. Steering (Hog) Working fake engine Suspension Opening doors (manually) Opening hood/bonnet (manually) Opening trunk (operated by gear) Folding fog lights (operated by gear) Gearbox (used to switch functions) FOG LIGHTS One of the most interesting features of the B-model are the folding Fog Lights. It almost feels a bit weird that a feature like this is implemented in the B-model, instead of the A-model. Below are 4 steps showing how the mechanism works. I have also included a video. The mechanism is somewhat reminiscent of fork mechanism used in the 8109 - Flatbed Truck, which has been described in Efferman's Review. Take a look at the video to the fog lights in action. PARTS LEFT A fair number of parts left, which isn't uncommon for a B-model. SUMMARY To summarize how I feel about this set, you need to take a look at the picture below. The combined image reflects the quality of this set....or better yet....sets! You actually get two great models, for the price of one. You don't like the A-model? No problem, you can have lots of fun with the B-model. I can't stop playing with the fog lights, it's mesmarizing. The color scheme on both models is outstanding. I simply can't emphasize enough how well this color scheme pleases the eye. The regular green is dull and boring, but this bright green really pops out, especially when combined with black and white, and possibly some red details. Black, white and a little red?! Sounds familiar? Yes, bright green can easily be combined with your EV3 robots. So while you are combining the bright green with your robot, why not use the great new curved "mudguard" panels. These new panels are introduced in this set and they look great. They open up a lot of possibilities in the design department. The build of the A-model is outstanding. It is fairly simple, but since it's so clean, I really enjoyed it a lot. I think the build should be entertaining, which doesn't mean it needs to be a real challenge. And let's be honest; when is a build really challenging?! The rear suspension is a good example of why I liked the build. It's very simple, yet very effective. Works like a charm. The same goes for the other functions in both models. And the star of the entire show can be found in the B-model. How's that for a surprise?! Being aware of the fact that I like this model a lot better than most of you seem to do, I really encourage you to give this model a chance. The sheer size is impressive, the color scheme is awesome and you get a bonus model, which is actually worth building. SCORE Okay, so how do I grade this set? 8 DESIGN Open to debate, but I like it a lot. 8 BUILDING EXPERIENCE Fun and clean build. 9 FEATURES Superb function in B-model steels the show. 9 PLAYABILITY Both models offer lots of playability 8 PARTS Lots of new parts and cool existing parts. 10 VALUE FOR MONEY Two models for the price of one. 8,7 TWICE THE FUN I hope you enjoyed this review! More pictures can be found on my Flickr page.
 -
OK, continuing the current trend of building cars intended to give some competition to the up coming Speed Champion cars I've been hard at work on a 6-wide KTM X-Bow. this little speed machine was built to take on the most technical raceways and put out Ferrari level times for a fraction of the cost. Our resident Octane driver liked the car so much he has been begging me for one. so with out further ado here is my latest MOC. EDIT: LDD file added to mocpages entry: LDD KTM X-BOW The X-Bow uses a turbocharged four-cylinder 2.0 litre Audi engine which produces 237 hp, in a car weighing only 790kg! This beast can run 0-60mph in a short 3.9 seconds. the slot in the orange body panels is meant to resemble a Crossbow which to takes its name from. and here is our happy new owner! i bet he can't wait to start enjoying this little roadster! Comparison pic with the Endurance racer, which shares a wheel base and height, but overall length is shorter on the KTM (3 whole studs shorter) as always Comments and Critiques are welcomed, hope you liked it!
-
Hey guys, I have found out you can use the minifgure style head piece inside of wheels to add some extra detail to some vehicles. Sorry in advance for slightly blurry images I wasn't using the best camera and I have unsteady hands. Style 1: IMG_20150207_124635620 by Railco1, on Flickr Style 2: IMG_20150207_125438985 by Railco1, on Flickr Hope you like these i think they are kind of cool, you do not need to include a 1x1 round plate but I did for a little color in the rim. -RailCo NOTE: You cannot do these with the new style wheels that clip in you can use them on the new ones that use an axle as shown. [How you can use it for trains!]: http://www.eurobricks.com/forum/index.php?showtopic=105603
-
 Everyone, It's taken me a while to get this up here, but this is my first ever MOC. I wanted to build a car, but I wanted to build something unique. Then when I was flicking through a car book I was inspired. Something Australian (like me) , and unique (like me). A ute. Even more relevantly, they will be stopping manufacture in a couple of years time. My MOC is based on approximately the VE Commodore, which when it is not made of plastic, is still made of plastic and steel and looks like this: It is RC, and uses two XL motors for drive and a servo for steering. No gearbox. That's a bit scary. There's also a fake V8 motor, driven by the two XL's. It also has an opening boot lid using a linear actuator. And the moment you have been waiting for, the pictures. I think my picture taking is improving. It is built mostly from 8070, 42000 and 42029, since I'm still building my parts collection. Lets hear it for cheap red panels. I'm very keen for everyone's feedback. 2014-12-27 18.01.21 by veryrusty82, on Flickr 2014-12-27 18.07.07 by veryrusty82, on Flickr 2014-12-27 18.04.08 by veryrusty82, on Flickr 2014-12-27 18.06.01 by veryrusty82, on Flickr 2014-12-27 18.03.35 by veryrusty82, on Flickr 2014-12-27 18.02.16 by veryrusty82, on Flickr There are a couple of more photos in my flickr album. No video, it's beyond my current skill.
 -
Hello! I've made a funny video based on the 60128 set: Police Pursuit. The Lego Police Chase Enjoy!!
-
 Hi folks, I present to you the smallest technic truck ever.. Any comments on the build and advice to upgrade this moc are welcome... I tought a "little joke" most be possible... :grin: :grin:
 -
 Hi Everyone, For some months I have been working on a realistic looking "not so super" car. Actually it is my real life car, I tried putting both much functionality and also good in aesthetics. Here is a photo of real life image of Ford Focus I "focused", (photo is not my car, my is 5door hatchback in dark gray) Nope, it is not orange, LEGO lacks many things in orange but as Blakbird says white is new red, so I made it in white. Still there are many pieces lacking in white so I had to use many black pieces from my inventory. Now it looks like a panda unfortunately. I hope you enjoy it. Features: * Common Expectations from a (Super) Car: Independent Suspension, 5+R gearbox, working steering wheel, HOG steering, fake engine * Handbrake / 2WD / All WD switch, fake engine is tied to front wheels * Openable doors, back trunk, front hood + sunroof * Realistic accessories: side mirror, back mirror, glovebox (?), console "middle of seats arm putting thing / small box" (what is this called in english?), fake air conditioners and its control panel, fake stereo system * Around 2stud suspension travel * Custom front axle with some geometry I honestly dont know its names, I know it has Ackermann steering and kingpin incline:) idea is from here, check post #8 and #13 * NO RC Link to all screenshots: Ford Focus Second Gen Glovebox thing, sorry it is black and hardly visible there Handbrake's special switch to activate 2WD/AWD and also handbrake (by locking the middle differential to force on with different direction turning, technically prevents wheels turning = handbrake ) That "thing" I have been mentioning about the middle seat box. Console and you can also see the handbrake's link going back. Idea is almost same with the new gokart set. Dead simple sunroof, opens by manual lifting, no technic stuff. Front axle, idea from this thread: http://www.eurobrick...showtopic=74356 check post #8 and #13 Finally the bottom of car and interior with a different angle to show "fake" stereo and air conditioner controls I hope you like it, Things I dont like: * It is white, I really wanted to make it orange, perhaps after Porsche set is out I will have a chance to convert it to orange. * Front is ugly, if you have a different idea about the front hood and lights, I appreciate. * I could not put the fog lights on front, I want to put them for completeness, again problem of the front * Interior is messy to make the sunroof and also the angular back, it is not really visible unless you look for them (no photo of it hehe). interior is like the arm of 42042 :) * To make the angular view, I used some angles which Lego does not like, no stress is made but as you see not all beams look connected directly. Hint: 15L white beam over the rear wheel is actually completing a 15x1 triangle * to LEGO: Why you not make #4 connector and #6538c on white common !!! Cheers
 -
Jake Raines is out in the desert seeking a rumoured lost Sphinx. He has a tough car to track through the near non-existent roads and shifting sands. So, I bought a mostly complete Rise of the Sphinx on eBay and haven't got around to sorting the parts yet. I whipped together this car from what was in the bag of parts. I like the challenge of limits to parts. I think this came out all right. It's also my first build in ages, most of my collection is awaiting the completion of my LEGO space... On closer inspection, it looks like I need to give these parts a good dust!
-
Using creator set 3012: Blue Racer, I created four of my own alternate models. It was a lot of fun! x24Hrs is made to look like a number of the road hugging racing car styles. Sport* is made to look like a sporty two-seater to take out for a drive on a nice day or a track day. . Boost was just for a little fun. Make something that looks like it can go fast. Photos are a bit poor, but as they were essentially table-scrap builds I just snapped pics with my phone before taking them apart and trying again. I must have built about 12 different things and these three were my favourite successful builds. A "fail" was something I did not like the final look of, couldn't get to "work" with what I was aiming for in building, or something just too fragile to stay together. So there we go.
-
 Hello everyone! I want to present you my MOC - the "Huntsman" drift car. Characteristics: Length - 28 cm Height - 9,7 cm Width - 14,7 cm 1 Servo-motor for steering, 2 L-motors for driving, 1 Small battery box. Thank you for attention!
 -
After the 'recent' Mini Cooper, Transporter T1 and Ferrari F40, what should be the next model in the expert Creator line? Some suggestions: - Aston Martin DB5 - Jaguar E-Type - Ferrari 250 GTO - Jaguar Mk2 - Mercedes 600 'Grosser' - Citroën DS
-
Location: E03, Ertauq Tags: Land Vehicle, Vehicle, Job: Driver Start Log: I got to try out a MANTIS vehicle prototype this week, and what a car it is! Rugged, fast, powerful, and able to handle some moderately rough terrain. It also packs some hidden weaponry: And unlike Octan vehicles, it's easy to pilot. Thanks for looking
-
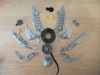
 I need suggestion with my car. I have images below of what I have so far. A few questions. What springs should I use. Hard or soft? What wheels or tires? And I need ideas on how to complete it. So far my axle has working steering and a driveshaft connected. I don't know what to do next as I am a new technic builder. If any more information or pictures are needed please tell me :) Images: http://imgur.com/a/QbhXw
 -
 The Koenigsegg One:1 was introduced in 2014. Seven examples, including one prototype, were built during 2014 and 2015. This was one of the most exclusive production car programs ever envisaged in the car industry. The hp-to-kg curb weight ratio is an astonishing 1:1. This has been called the “dream” equation, previously thought impossible when it comes to fully road legal and usable sports cars. The One:1 is the first homologated production car in the world with one Megawatt of power, thereby making it the world´s first series produced Megacar. More on the One:1 at http://koenigsegg.com/one1/ This car grabbed my attention about a year ago so I decided to try to build it. The design parameters that I want to achieve include the following: Replicate the rear triplex suspension set up of the Koenigsegg One:1 as closely as possible Replicate the front suspension set up Syncro dihedral door hinges which are typically Koenigsegg Paddle shift gearbox - a new challenge for me. A good approximation of the real car with the bodywork. Tough enough to withstand my young three year old playing with it. Intuitive enough for my kids to explore the functions. After a long build process and lots of experimentation I am really happy with the end result. The paddle shift gear box ended up being 3 speed plus reverse mainly due to space restrictions and also complexity. Perhaps a future project will be to expand this concept to include additional gears. The paddle shifts at the steering wheel are aesthetic in that they are linked to the actual manual shifters which are camouflaged on top of the dashboard, but it is not really possible to exert enough force on the dash paddles to change gear. This is presented in the images below and in the CAD image. Over time I will digitise this and add a bit of video to show the functions, but first, here are some pictures. [TBC]
 -
Here's my latest creation, and yes it's another sports car. Yay! I wanted to have another go at building a small RC Sports Car, but this time loosely based around a 2009 corvette. This car is wide and low so I was expecting it to be a challenge. I also wanted to use some of the ideas from my other models, such as the L motor setup in the Mini Truck. Features - 2x L motors at 1:3 - 1x Servo - functional doors, boot & hood - battery access under dashboard - working front lights - 36Lx17Wx10H (chassis, in studs) - 804g Like the mini truck, the two L motors make this car move! The extra width seems to give it some extra traction as well. Design wise it isn't perfect, but I did the best with what I had available. Hope you like it. EDIT: Video is up!
-
 So, a long time ago, I decided, on a whim, to make a small, fast car. Inspired by Mahjqa's Ice9 racer, I built something similar, but with 5 years of parts advances, namely the L and servo motor. Ice18 by Saberwing007, on Flickr it is similarly compact, but I was not able to make a nice shell for it, and lost interest in the project. As a matter of fact, this just goes to show that I don't really like fast things. Controlling them indoors, in a tiny apartment, on carpet, is a pain in the rear. Not helping is the fact that using stock PF outside is impossible, and then you have control delay, which all in all makes the experience no fun, at least for me. Maybe if I had an Sbrick... Anyway, let's go into some technical details. My version uses an L motor for propulsion, and due to the new diff, has a slightly lower gear ratio,3.57:1 vs 5:1 on Ice9. However, the rpm at the wheels is actually faster, due to the speed of the L motor, 971 vs 730 on Ice9. You do need quite a run up to use that speed, however. Because of the servo and L motor having more mounts, I was able to use them, as well as the battery pack, as stressed members. The chassis is quite floppy without the battery box, in fact. But hey, it adds lightness. Ice18 by Saberwing007, on Flickr Versus the above view, there is not really a whole lot to see that's different on the bottom view, but most people want it. Ice18 by Saberwing007, on Flickr The gears are braced on all sides, there is no way for them to skip. There is no way for axles to walk out, for that matter. Ice18 by Saberwing007, on Flickr Steering lock is good, there are no restrictions, or chassis rubbing. And, of course, my inspiration. Ice Nine views by mahjqa, on Flickr I might be able to build small, but I sure can't do stylish designs, or photography, like Mahjqa can. I also have an .LXF file, it has a canopy, which is optional. It will also be posted to Rebrickable, and I will add that link when it is moderated. LXF:http://www.brickshel...Ideas/ice18.lxf Rebrickable:http://rebrickable.com/mocs/Saberwing/ice18 Thanks for viewing. P.S. There is not going to be a video, there isn't really anything to show, and I need the servo for a project that's a contest entry.
 -
I am proud to present you my very first LEGO car that I have built and I am quite pleased with the outcome and had a lot of fun building this fancy cabriolet. If you want to see more pictures, including the details in the cockpit, they can be found on my ImperiumDerSteine album. Fancy Custom Sportscar by Jonas Obermaier, on Flickr Feedback is really appreciated, since I am a begginer in building LEGO cars! Jonas
-
The Rat Runner is a pacey little car that can be loaded onto any number of larger vehicles for easy transport across longer distances. After all, in the criminal activity trade a man needs to move from place to faraway place very often. I suppose it is because the sets I owned with Sam Sinister always had a small car, I put him as a small car kind of guy. Another of my Adventurer revisits, this one is a mixture of the number of little cars Sam Sinister drove. Sam Sinister was always a sharp dresser, so the "violinist" suit and top hat were the choice for this figure.I gave him a chunkier gun as I always imagined him of an almost Joker like figure with some very odd weapons.
-
This is my first topic so sorry if it is not perfect. Sorry for the pics but I don't know how to post them directly. Back in March (I think) I made this red red super car. I made the chassis first but it was not extremely strong, but I ignored that and built the body on top of it. I started with the front hood first and I managed to make it detachable, then I made the rest of the body but making it detachable was too big of a hassle. The front was not inspired by anything in particular but the angle reminds me of a Lamborghini Countach, and the rear was inspired by a Gallardo. Of course in Lego tradition it was mainly red. It has HOG steering and a working model V8 mounted at the front of the car. It has full double wishbone independent suspension and RWD. The front: https://drive.google...iew?usp=sharing Front, side view: https://drive.google...iew?usp=sharing Side view: https://drive.google...iew?usp=sharing Front without cover: https://drive.google...iew?usp=sharing Inside: https://drive.google...iew?usp=sharing This car has been destroyed, so no video. Thanks, Epic Technic