
afol1969
-
Posts
397 -
Joined
-
Last visited
Content Type
Profiles
Forums
Gallery
Everything posted by afol1969
-
 I've now finished the Truck Container. I've made an PDF file too. I've made my best to make high quality instructions, but I was forced to increase the landscape page scale to get the complete container on page, because I've used lots of callouts to use the minimum on pages. The instructions I've made to show how I proceed, it's not needed to use it for the final instructions, but maybe it helps to get suggestions from it, so feel free to change it. I've put the MLCAD file and the instructions in my dropbox: https://www.dropbox....k Container.mpd https://www.dropbox....k Container.pdf Best Greetings Alex
 -
Hi Tech-Nick, Nice C-model. And high-quality instructions! you've made quick progress Can you send me the MLCAD-code? I want to know how you have placed the arrows, because I still have trouble to learn the skills for buffer exchanges and ghosts.... Greetings Alex
-
Just for information: I'd made all the corrections noticed by Tech-Nick, and myself too I found an mal-placed submodel in the instructions. Now all must be ok, I'll upload a 2nd Version in next days, with appended instructions for the joystick-controller Thanks for the note. I'll place an arrow in the instructions. Greetings Alex Edit: I've uploaded the new files, see the links in my first post.
-
Here my last progress: As you see, the picture ist depassing the page border even in landscape mode, so for myself I search for another page scale. I make also the first experiences with arrows and buffer exchanges. But it needs too much time to place the arrows correctly, normally I use a picture program to make signs and arrows in my own instructions, but in this case I'll try to make all in MLCAD code, that it can be modified by others. @Blakbird: It would be great that I can have your pre-made files for my instructions . Do you have the same for PF motors too? Greetings Alex
-
The truck has big dimensions, that maybe it must change the page layout to get the complete model on the pdf file. Has anyone tested which page size to take in LPUB? As the container modeling makes good progress (I've already made the main side doors), so I'in further time I want to use LPUB for the submodel and callout placement, so at first I must know the nesessary page dimensions, that we 'll use. But I post my personal LPUB preferences, so you can see, what to change: 0 !LPUB PAGE NUMBER FONT GLOBAL "Arial,36,-1,5,75,0,0,0,0,0" 0 !LPUB PAGE DISPLAY_PAGE_NUMBER GLOBAL TRUE 0 !LPUB PAGE SIZE GLOBAL 11.5000 8.0000 0 !LPUB PAGE NUMBER MARGINS GLOBAL 0.1000 0.1000 0 !LPUB PAGE NUMBER PLACEMENT BOTTOM_LEFT PAGE INSIDE 0 !LPUB PAGE TOGGLE_PAGE_NUMBER_PLACEMENT GLOBAL TRUE 0 !LPUB BOM ANNOTATE FONT GLOBAL "Arial,16,-1,5,75,0,0,0,0,0" 0 !LPUB BOM INSTANCE_COUNT FONT GLOBAL "Arial,16,-1,5,75,0,0,0,0,0" 0 !LPUB BOM MODEL_SCALE GLOBAL 0.5000 0 !LPUB CALLOUT SEPARATOR GLOBAL 0.03125 Black 0.1 0.1 0 !LPUB CALLOUT MARGINS GLOBAL 0.1000 0.1000 0 !LPUB CALLOUT INSTANCE_COUNT FONT GLOBAL "Arial,16,-1,5,75,0,0,0,0,0" 0 !LPUB CALLOUT BORDER GLOBAL SQUARE Black 0.02 MARGINS 0.1 0.1 0 !LPUB CALLOUT PLI PER_STEP GLOBAL FALSE 0 !LPUB CALLOUT INSTANCE_COUNT MARGINS GLOBAL 0.2000 0.2000 0 !LPUB CALLOUT STEP_NUMBER FONT GLOBAL "Arial,16,-1,5,75,0,0,0,0,0" 0 !LPUB PLI BORDER GLOBAL ROUND Black 0.02 20 MARGINS 0.1 0.1 0 !LPUB PLI ANNOTATE FONT GLOBAL "Arial Black,16,-1,5,87,0,0,0,0,0" 0 !LPUB PLI ANNOTATE FONT_COLOR GLOBAL "#0000ff" 0 !LPUB PLI CONSTRAIN GLOBAL COLS 2 0 !LPUB PLI INSTANCE_COUNT FONT GLOBAL "Arial,16,-1,5,75,0,0,0,0,0" 0 !LPUB ASSEM MODEL_SCALE GLOBAL 0.7500 0 !LPUB ASSEM MARGINS GLOBAL 0.3000 0.5000 0 !LPUB RESOLUTION GLOBAL 150 DPI 0 !LPUB STEP_NUMBER FONT GLOBAL "Arial,24,-1,5,75,0,0,0,0,0" 0 !LPUB CALLOUT PLACEMENT LOCAL RIGHT CENTER ASSEM INSIDE 1.36896 -0.0164967 0 !LPUB ASSEM PLACEMENT LOCAL CENTER PAGE INSIDE -0.12196 0.134615 0 !LPUB PLI MODEL_SCALE GLOBAL 0.6000 0 !LPUB PLI PART MARGINS GLOBAL 0.1000 0.1000 0 !LPUB MULTI_STEP ASSEM MARGINS GLOBAL 0.3000 0.5000 0 !LPUB MULTI_STEP STEP_NUMBER FONT GLOBAL "Arial,24,-1,5,75,0,0,0,0,0" 0 !LPUB MULTI_STEP MARGINS GLOBAL 0.1000 0.1000 0 ROTATION CENTER 0 0 0 1 "Custom" 0 ROTATION CONFIG 0 0 0 STEP 0 !LPUB INSERT PAGE 0 !LPUB INSERT BOM 0 !LPUB BOM CONSTRAIN LOCAL HEIGHT 6.12 0 !LPUB BOM ANNOTATE FONT_COLOR GLOBAL "#0000ff" Greetings Alex
-
As I've recently tried to step an LDD file imported into MLCAD, I have made the experience that stepping existing parts take even more time, so I've stopped an began by zero. And it was more quicker and a better result. So I'll continue the work tomorrow. In general I finish projects to the final step, I don't like wasted time. I think that I'll be finished in the next 2-3 weeks. Greetings Alex
-
Ok then! Until now, I've all stepped and made submodels and substeps to give possibility to make a lot of callouts. That gives the minimum of instruction pages. It's still a lot of work to do, but as I see that Blakbird has made the complete model, so I don't now....at the moment I've stopped the work. @Legolintje & Alsdair, should I continue with the container? Greetings Alex
-
First try:
-
Hi Tech-Nick, I use the same joystick control, so thanks for the LDD file, it's easier for to transfer in MLCAD, I'll make the instructions in further time. Greetings Alex
-
Hi Tech-Nick, Can you give me more details about your BB modifications (photos etc.)? So I can add these modification steps to the instructions. It may be a great alternative for them who have only the standard BB. Greetings Alex
-
Hi, Tech-Nick, I thank you very much for these informations I've revieved the instructions, indeed I have to take some corrections. It's normal to make errors by such a complex work, it was my biggest project until now. I hope I 'll find soon the time to upload an Ver.2 Update, because at the moment I'm working on the Container Instructions for the Wing Body Truck. Greetings Alex
-
Same here! It was announced that before starting an instruction work for a Truck part, first discuss it in this thread that Legolintje can coordinate the planning. Or didn't you have red the thread until now? Greetings Alex
-
Hi Tech-Nick, Great work, your modification! A good solution for using a standard BB box, so it's not necessary to buy the expensive charging BB. Greetings Alex
-
42009 Extended Boom
afol1969 replied to afol1969's topic in LEGO Technic, Mindstorms, Model Team and Scale Modeling
Congratulations! If it works well. I'll try it. And if it's a better solution than the classic method, I'll modify this step or at least propose the two ways of cable connection in the instructions. And I'm happy that you have now a well-working boom, because I already thought maybe I've made an error in the instructions... Greetings Alex -
Container Update 13th dec.
-
42009 Extended Boom
afol1969 replied to afol1969's topic in LEGO Technic, Mindstorms, Model Team and Scale Modeling
Yes, I know him, I'd mail contact with him to ask his instructions, which I converted in a pdf file. He has left the forum for some reaons which are not clear. I've built the boom with the LDD file, and it worked well. Then I dismateled it to recreate the instructions in LDRAW, and I rebuilt ist. In both cases I'd no problems with friction/retraction. Maybe some beams are fixed not very correctly that can cause some bending that results in friction. Look at all pins/axles if they are pushed in correctly. I've used the original cable from the set 8421, it's rather thick, but it causes no problems. In worst case, you have to dismantel the boom and rebuild it. Greetings Alex -
Here the link: https://www.dropbox....9qgg/engine.mpd Container beginning: And I've downloaded all photos, put them in the right order an have created a pdf file: https://www.dropbox.... Body Truck.pdf Greetings Alex
-
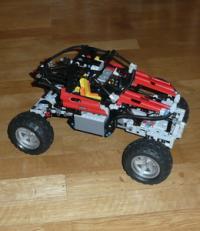
I just finished the fake engine:
-
I've just checked my stock of panels: I've 12 in light grey, 8 in black and 27! in green colour. So I can make the container floor with green panels, (16 panels needed), it isn't visible until you open the container. So I've to buy 28 grey panels. Yes! Alasdair and legolintje have more experience with LDR, so it's better they take the job for the more complex chassis model, but the container is more simpler and easier, and I can do the instructions. I've more free time in next two weeks, so I've no problems to do the job. At least I've the necessary parts for a test build. My favorite BL stores: http://www.bricklink.com/store.asp?p=44bricks http://www.bricklink.com/store.asp?p=tomte http://www.bricklink.com/store.asp?p=legostock Greetings Alex
-
Yes, that will be a good idea, I've already done same on the Unimog: http://www.brickshelf.com/gallery/afol1969/MySets/frame.jpg I've tons of axles, so it will be a good solution to save panels. Greetings Alex
-
42009 Extended Boom
afol1969 replied to afol1969's topic in LEGO Technic, Mindstorms, Model Team and Scale Modeling
That's right. If I make instructions, sometimes I do make some little modifications on my own - but not too much. Which kind of cable you used, and which thikness? The cable loop is correct, so I cannot see at first moment where's the problem. I've built the boom, and dismanteled it for the instructions, and rebuilt ist.In both cases I didn't have problems with the boom functions and cable loop.... Greetings Alex -
Sorry, of course I mean LDR, not LDD, sorry..... Just for note: 1.500 from over 4.000 parts are pins - that will say that I've not enough pins (especially the blue long pins), so I've to put black pins together. And 58 panels.... But I think that I've at least enough parts to build the chassis, ok, I've not all parts in right colors, but for a test build it must go, I've all the necessary electronic parts (if I dismatle the Ultimate 42009....) That I can do: Make the Submodels for the fake engine and the placements for BB/Receivers. There I'll see If I can make the notes for the connections. Greetings Alex
-
Wow! You have very good experiences in LDD, if you can make the first instruction steps in short time, so I think, you make the instructions, and I test the steps with some building trials and parts control via the pictures. We really appreciate your offer to make the instructions. I'll send you a PN later. Greetings Alex
-
42009 Extended Boom
afol1969 replied to afol1969's topic in LEGO Technic, Mindstorms, Model Team and Scale Modeling
Hi Justin, I'll try to help you to solve the problems - 1.) It seems that you have used a cable wich ist too short. But I'm not sure...Try to take a longer cable, and cut it in a final step when fixed at all sections. - 2.) Maybe it's caused to a wrong cable placement - 3.) Block the string in section 1 like shown on the picture, pass through the 1/2 pin and block with the red axle 2 Wich instructions you used? the ldd file or the pdf file? Explanation for the cable placement: Use a cable of minimum length 50cm - Attach the cable at the end of the section 3. - Pass the cable through the pulley - Insert section 3 in the section 2. - The cable must pass through the center (holes) of 1x5x11 panels - Fold the arms fully - Once the cable placed, secure with pin ½ and block to the end of the main section with a axle 2. Greetings Alex -
Indeed! Over 4000 parts...But I've already thougt to make instructions by Ldraw too, and publish a proper PDF file. Can we cooperate? As I find that the Truck is a fantastic and amazing MOC, I plan to build it too....an I think I've to do another buyings on BL...:-X Greetings Alex