Search the Community
Showing results for tags 'helicopter'.
-
 I've finally decided to properly share my Kamov Ka-50 helicopter MOC. At this point, I have a prototype ready, all the proportion work is done, I still have a few external details to figure out (and some redesigning), and also a few internal mechanisms to properly fit in. This is a very dear project of mine. Also the most ambitious one, so far. Challenging both in terms of functions/mechanisms but also in terms of looks. This is probably my favorite attack helicopter, and I've been wanting to give it a proper translation into LEGO for at least 10 years. I've started researching stuff about it, but the first sketches I've done for this project happened back in 2020. Back then, Studio didn't have the option to import blueprints, so I was using colored beams for measuring (you'll see those in some of the renders) I've decided to try my best to complete this project mainly because I think it could be one of the coolest MOCs the community has to offer, I love designing LEGO Technic stuff, and I've also loved this helicopter ever since I was a kid. It will have 2 motorized functions (co-axial rotor, and landing gear) and 2 manual functions (machine gun controlled by a single joystick on the left side, and the tail rudder controlled by the cockpit stick - I still have to find the room for linking those two) Initially, I wanted to use 2 x Powered Up L motors, positioned exactly where the real engines are, but that was gonna be a really tight fit. The idea was having one motor for each function, so the landing gear would easily be controlled up/down just from the battery box switch, without any reverse switch gearing. But right now I'm thinking I should just use one single motor, permanently linked to the rotor (so switching on the battery would turn on the rotor) and then a different switch for lowering / raising the landing gear. I'm still debating this idea. I'm open to any suggestions you might have. I'm not very experienced with motors and how much weight they can pull, so I imagine I'll need quite a bit of testing here. I also think a lot of gearing down is needed. Also, 2 clutches, one for the rotor and one for the landing gear, so if for some reason, the landing gear is stopped in mid transition, the rotor is still going. But if the rotor is stopped, the whole thing stops. - But today I wanna show you the most interesting motorized function, which is the main landing gear (just the rear wheels for today). I'll be honest, designing this one took at least a year of testing and I imagine it feels as good as solving something like the ghost mode from the Sadair's Spear. It's a very cool and visually impactful function. Tested over and over again, 0 failures, there's proper clearance everywhere, there's a satisfying flow and alignment to how the panels are arranged, and it feels amazing seeing this thing work in real life. I didn't have access to any schematics properly showing the internals of the landing gear, so I had to guess where the hinge is positioned and what the angle is, to have the wheels folded at an angle like that, while having them sit straight when fully lowered. The landing gear mechanism is pretty straight forward, just a worm gear activating a liftarm linked to the wheel arm support. The arm itself has an angled hinge on top, designed using basic triangle geometry. The hinge then connects to an angled frame, using the same geometry (so, basically, the same angle). This basically negates the angle when the arm is fully lowered, and sits straight, so the wheels are staying straight as well. When retracted, though, the wheels sit at an angle, just like the real thing. The most challenging part was linking / syncing the bay doors to the wheels. Initially, I thought of a system that was pushing the door out using an axle, then the door closed using a rubber band that pulled it back in position once the axle retracted. It used a barrel that looked like this (below) And below you can see it mounted (in retracted/closed position) The beauty of it is that the rotation of that barrel opens the doors (at a 180 degree turn) and then closes them (at an almost full 360) but it also works in reverse, when you're raising the landing gear, performing the exact same motion for the door. It wasn't quite perfect, because the axle would rotate a bit at the beginning of the motion, so instead of pushing the door directly with a linear motion, it would somehow rotate towards it from the side. Sometimes it would fail to open it in time and the wheel would come down and hit the door. But then I realized I could use a 6L link instead of an axle. The problem was I needed a perpendicular link. Luckily, LEGO decided to release that exact link, with the 42182 NASA Apollo Lunar Roving Vehicle, which was a perfect fit and solved my problem. And I didn't need a rubber band for closing the door anymore. The two mechanisms, each using a worm gear, are then linked together and synced using gears. And here's an old photo from 2019, pretty much how it all started, even before I discovered Studio. You can also see an early attempt at the machine gun. On my next post, I will show the machine gun mechanism in detail, which is the second most interesting function. Stay tuned! I hope you're enjoying the presentation so far!
 -
Hi fellow builders My third MOC here on Eurobricks is a minifig scaled model of the brand new SAR helicopter in Norway. The Leonardo AW 101 is a magnificent machine! I start off with some important information. I built this MOC based on a model i found on Lego Ideas. The creator SimonSchepp published six pictures of his grey army version of this helicopter, and I used these with the intention of making a similar model. The result is a helicopter that looks similar, but is probably built very differently. With only six pictures available It was really difficult to figure out how to build this thing. But I think it turnes out nice, and I learned a lot along the way. Hope you like it. Minifigs deserve only the best, and the AW 101 is state of the art. You can hoist the patients in to the helicopter. The crew has lots of medical equipment available for treating patients. The helicopter flies fast and safe in all kinds of weather conditions. Fully decorated cabin, similar to the layout in the real helicopter. Size does matter, and this thing is big. Fully decorated cockpit, with collective and cyclic. I know there should to room for 2 pilots. But to maintain playability, I could only fit in one seat. The godfather of helicopters, Igor Sikorsky, deserves som credit. Any comment or questions is much appreciated. Thank you for your time. Keep building :-)
-
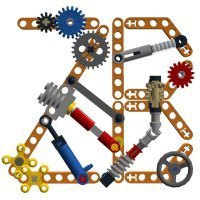 For my 8000th post, I'm presenting my model ideac for the TC30. I got the idea for the models by watching Bajd and Dakar racers, especially from the perspective of the helicopter. The same helicopter that records the races could also be used to provide support and rescue. One of the models will be a trophy truck with the following functions: Independent suspension in the front Live axle in the rear RWD with a fake V8 engine Steering actuated by a spare tyre in the rear Full interior with 2 seats and a steering wheel Opening doors and hood Monster livery Here's the current digital progress. I'm using the new large, thin tires and suspension parts to keep the model as compact as possible. The rear suspension uses a ball joint to attach to the rest of the bodywork. The angled spare wheels provides the HOG input. I am really proud of the following drive and steering solutions. The driveline basically goes directly from the axle to the fake V8, while the steering system uses linkages to transfer the steering input from the spare tyre to the steering rack. I think this is a more compact, and a cleaner solution than using gears. This being a trophy truck it needs some proper suspension system. Currently the suspension system is compressed a lot, so the physical should have a much higher gorund clearance. The front suspension is sharing a single shock absorber which is placed longitudally between the wheels. The rear suspension is an interesting hybrid of a ball joint and a trailing arm suspension. The suspension arms not only center the rear axle, but also act as levers for the suspension system, supported by hard shocks in the rear: That's the plan for the trophy truck, I will build and weigh it soon. it should just be under 300 grams according to the Studio. The second model will be some kind of a Rescue/camera/support helicopter which supports the race by providing video coverage and a means to a rescue if needed. The idea is to implement the following functions and features: Spinning rotors using a gear or a hidden rack trigger mechanism Collective control for the main rotor Winch with a ratchet mechanism Foldable landing gear Add lots of cameras, sensors, antennas, etc. Colorful livery, using neon yellow, red, white, black, etc. Modern styling with lots of curved surfaces Current progress so far is the basic concept of the collective control uisng a small turntable. Basically the central axle can move up and down and thereby change the angle of the rotors: So far that's all, I will update the topic as I go along.
 -
This model is inspired from 6691 set which was produced between 1981 - 1983. It was one of my favorites sets in childhood. There are many differences but I intended to keep the Classic Town spirit. I've added a working door on the right side, windows on sides, I've used nowadays elements like curved slope bricks for actual design and I also made the model a little smaller. LEGO Ambulance Helicopter 6 by Severus A, on Flickr LEGO Ambulance Helicopter 5 by Severus A, on Flickr LEGO Ambulance Helicopter 4 by Severus A, on Flickr LEGO Ambulance Helicopter 2 by Severus A, on Flickr LEGO Ambulance Helicopter 1 by Severus A, on Flickr
-
 So I got a new LEGO room / ManCave for my son and I. Its large, about 20'x30', with open cathedral ceiling with exposed beams, ideal for hanging 9393 helicopter, 8480 space shuttle, 42025 cargo plane, etc.. I am looking for some solutions to do so - some requirements are - sturdy, can't risk any model falling; easily removable, by standing on a step stool should be able to reach the model and uncouple it from the hanger system for occasional swooshing and PF operation, and the hanging solution should be somewhat invisible. I am thinking about using this part , in trans-clear, as part of the support structure under the models, and then using colorless nylon rope to loop over the exposed beams. Perhaps s-hooks or carabiner-hooks can be used to attach the beams to the rope. Wondering if anyone else has done something similar and their solution. I am not planning to operate the PF while the models are suspended, however, but could one day...
 -
Hi all, as you might know I’m a car builder mainly, however, I’m interested in practically everything in the Lego City world, boats, trains (and monorail, of course!) included. One of the subjects I’m very fond of is Lego aviation. Of course, we won’t see those heavy brick-built aircraft fly high in the sky. But even grounded planes are quite interesting, especially passenger and cargo planes, just because of their size which allows lots of special functions you won’t be able to include in smaller vehicles. Plus an airport is in fact a place where lots of different vehicles can be watched: crash tenders, pushbacks, pallet and belt loaders, jet air starters, refuelers, extra-wide buses etc. etc. Since there are quite a few MOCs now concerning aviation I will put them together in this thread. This can also be regarded as a contribution to the idea of a more technical Lego city where any space available is used to include functions or light to get more interesting Lego City layouts. #1 Faun 8x8 Crash Tender (ARFF/FLF) 8w ARFF, equipped with 3 flashing lights (9 Volt Light & Sound) plus battery box. Fits 2 minifig firefighters. The Faun has its own thread: http://www.eurobrick...showtopic=96949 #2 Canadair Waterbomber CL-215 Wingspan 80 studs, weight 1050 g, equipped with 3 PF M motors (2 for the engines, 1 for the flaps), battery box and IR receiver. The rudder is coupled with the nose wheel. Fits 2 minifig pilots. Since 2014 the Canadair has undergone some changes, e. g. it has smaller propellers nowadays. Also the Canadair has its own thread: http://www.eurobrick...showtopic=95522 #3 Turbofan A possible design of a spinning turbofan with PF M motor I've developed some years ago: Sorry, I only have this blurry video of it. This design hasn't been used on an aircraft model yet, maybe I'll build something around it in the future. #4 Pushback/Tow Tractor/Aircraft Tug “Goliath” Not the most beautiful vehicle I've ever built, but it does its job: moving relatively large aircraft on a Lego airport which is rather rare to be seen, I guess. Equipment: PF M motor, IR receiver, battery box + Light & Sound flashing lights. Plus it has a storage compartment to keep the tug bolts. The pushback has a front wheel drive (with worm gear) and is able to push or pull Lego aircraft up to 1,5 kg (tested), maybe more, on a straight path - I wasn't able to build in a proper steering. More pics: Fixing the engine: Video: Thanks for looking, more to come (there's another aircraft in the pipeline). [Edit, 26 June 2016] #5: Sea King Coast Guard Helicopter PF motorized The chopper has its own thread: http://www.eurobrick...26#entry2596441
-
 I build this helicopter and the truck as my weekly build for the Andromeda´s Gates Game:
 -
I would like to present my newest LEGO Ideas project. It will be followed by one more set in a few days (I hope). Both are tributes to the famous Swedish pop music group ABBA. The present set is based on the cover of the group's fourth studio album Arrival, released in 1976 and containing super hits like Dancing Queen and Money, Money, Money. The proposed set contains a helicopter of model Bell 47 as well as four mini figures, one for each of the members of the group. Here is a link to the project: https://ideas.lego.com/projects/0a5fff0d-68b3-45d9-9606-838cf79aa262 And here are some pictures:
-
 When I saw first pictures of set 42074 (racing yacht) I knew I have to take it and rebuild it into something else. So let me introduce you my latest alternative model - freight helicopter. It spins both rotors when you are turning gear on its bottom. Since set contains just 2 bevel gears I had to build another couple of them from bricks and connectors - I have already used this assembly for my dragster built out of set 42036. ...and little excursion into its innards:
 -
 I've finally finished my little project of creating a tuned-up version of the 42057 set an here it is complete with building instructions for your pleasure: https://myleniumsbrickcorner.wordpress.com/2018/06/10/final-surprise-42057-moc-finished/ Let me know if you have questions! Enjoy! Mylenium
 -
 It's been a busy month here in thirdwiggville. This time a little Helicopter MOC based on the Sikorsky S62 helicopter with additional turbines, and a Fenestron tail. Full gallery on Flickr. Features: main rotor connected tail rotor landing gear winch sliding doors folding main rotor Much more at thirdwigg.com.
 -
-
 Good day! I have seen many helicopter MOCs that inclined the main rotor to go in that direction. But real helicopters don't work like that. The cyclic control changes the pitch of the propeller blades unevenly what inclines the helicopter in the desired direction Here is a good page that explains in detail the controls of a helicopter The LDD is at 0% Functions: cyclic control - inclines and flies the helicopter in the desired direction anti-torque pedals - the "steering" collective control - the altitude control Enought speaking here are the pics, expect the video soon I wanted to make all the mechanisms visible , so no bodywork Bricksafe
 -
I'm wolf_grrr here. You can find me on lots of various places. Look for me me
-
A helicopter I made in LDD. It's not a recreation of any particular real world model. This is basically my first thread in this forums showing off my MOC, so please be gentle. ;) Pictures created using Bluerender with SunFlow Mod.
-
I have not been happy with the performance of my 9396 for a long time, so I am in the process of rebuilding it. The issue is that both the manual and motor-driven operation of the blades are sluggish and involves seemingly high torque, perhaps due to the large number of gears in the drive train, resulting in very slow turning blades. After completing about 82 steps in the rebuild, I got to a place in the build in which I can turn the blades with the hand knob, and again there seemed to be a lot of binding and "stiction" of the gears, which I traced to the gear directly driving the turntable being the primary trouble maker, highlighted as lime-colored in the LDD image. Loosening the build at this location, by forcing the two DSG11L beams slightly apart, resolves the issue, but is not a permanent solution as these will be tightly locked in place once the build is done. Does anyone else have similar issues, or suggestions to fix?
-
 Hello everybody, If something is not clear, please ask, english is not my language Here is my last moc: a Sky Crane Helicopter: General: Length: 80 Width: 29 Height: 27 Rotor diameter: about 75 Container: Length 30, width: 11, height 12 Number of parts: 894 all inclusive (manual or with PFS) Design: At first glance, we recognize a type of helicopter Sky Crane: leggy, long and thin, prominent turbines and especially a huge rotor: On the body of the vehicle, the choice of two-tone flatters the eye, an orange border highlights the line and even gives a sporty look to the model! For the cabin, the orange panels allow good highlight the rounded nose of the aircraft, made with white liftarms mounted on flex: At the rear of the panels of the cab give the rectilinear shape of the cabin. The cab roof takes up the two-tone orange piping and large white panels, it's almost like a sports car hood! Turbines, well highlighted, black is easily detached from the rest of the vehicle. The use of wheels, gears of different diameters can refine the turbine. The mechanisms at the front of the copter, also in black, are used to give relief. Cab, massive contrast with the rest of the long, thin copter. Similarly, the landing gear looks very frail. We find the orange border on the legs of the landing gear. The tail assembly is thin and slender. The rear rotor drive shaft visible outside the tail is another characteristic feature of the Sky Crane present on the model. The tail rotor blades 4 and above the horizontal drift gives volume. Finally, the main rotor is given strong presence to the vehicle. The diameter of standard blades (like about 65: 31 + 2 * fixation) is not enough for the model. The diameter has been increased, it now reaches 75 like! Suffice to say that the helicopter must! In addition, the use of various connectors can give yellow color and simulate mechanisms on the rotor. Such a rotor is problematic to expose the model along a wall for example, but by removing only 4 liftarms 5L thin can be easily removed easily wins 2 blades 25 cm deep, without harming the general appearance of the model. The container matches the rest of the helicopter, white and orange: In manual mode, the handle is visible on the left front of the unit. Right side of the cab, a door allows access to the control of the battery case. The PFS elements are also fully integrated in the cabin. Mechanisms: The model is very simple mechanically. There are two main mechanisms: rotor rotation and winch. It may be added, as a secondary mechanism: suspension, directional front wheel and the container locking system. For two main mechanisms, there is a BV with two selectors. The first selector, left, used to operate the winch in one direction or the other. (bottom of photo) The second selector, right, has one function: activate or not the rotation of the rotors. (top in photo) If it is in manual mode, the crank drives a 12T SB makes a bevel with a 12T DB to raise an axis through the cabin. If you are in PFS mode, the motor is mounted vertically, so there is no the first bevel gear. The rest is the same. A second bevel gear 12T SB / 12T DB can direct the axis backwards. It is this axis which carries the first selector. Pushing forward the selector switches in the driving ring of the red wild 16T which in turn causes the 16T of the output shaft. By pushing forward, it triggers a mad 16T will operate a 20T DB, offset in height. The rotational axis will cause a second 20T DB will rotate the DB 12T of the output shaft. There are thus two ways to drive the output shaft or with a gear linkage, or with both. So for a given direction of rotation to the input, rotation is reversed by pushing the lever forward, the rotation is not reversed by pushing the lever backward. This is option is especially useful when the model uses the PFS. From the output shaft, is driven a couple VSF / 8T. Finally, it is on the axis of the 8T what fixed the cable drum. The cable is routed into the body of the helicopter to leave behind the main rotor. This position is determined by the size of the container and the position of the fixing to bring the right container in the middle. This prevents the container tilts when it airlifted. On the input shaft of the first BV, there is a cascade of gears: 16T / 16T / 16T Mad. If you push back the second selector, driving ring just mate with the 16T Folle. The movement is then transmitted to the axis. We walk directly to the main rotor. It shifts the movement towards the center and upwards with 3 16T (16T / 16T Folle to center / 16T to mount). With a bevel gear 12T SB / DB 20T, the rotation axis is vertical and it drives the main rotor. For the rear rotor, starting afresh from 20T, we have a bevel gear 20T DB / 12T SB and heads to the back. Two gimbals to track the shape of the tail of the helicopter. Arriving at the end of the tail, a trio of gears to switch the curvature (SB 12T / 20T SB crazy / 12T) and a corner last reference (SB 12T / 12T DB) can guide in the right direction the axis of rotation of the tail rotor. The suspensions have the function of absorbing (more or less) the soil unevenness. The directional front wheel lets you play with the model on the ground and rotate smoothly. Fixing the container is very simple. At the front, blocking is provided by 3L pins with axes attached below the helicopter. On the container, the "Axle and Pin Connector Perpendicular Split" connectors come dragging in the pins. At the rear, a small spring mechanism ensures proper maintenance of the load. A controller drives a shaft and a 8T / 8T couple to get off a post. On the lower axis, brackets (3 * 3L) rotate. When the lever is released, the spring mechanism reduces the brackets to the front and upwards. In this movement, the brackets crochet the container through a conveniently placed axis. The well attached container, one can make any kind of maneuvers the helicopter. To release the container, simply manipulate the joystick again and picks one container. A small diagram LDD: Green: movement entry Red: winch with double meaning BV In blue: the BV rotors with all the main rotor and tail rotor tracking Orange: the system for attaching the container Manual To PFS: This helicopter can also integrate the PFS. Here, everything happens in the cabin. It begins by removing the crank and its axis. Then detaching the cabin of the helicopter body. To do this, simply detach the body of the roof (two pins), remove the white liftarms bent, remove the panels on the back and liftarms L orange on top. Finally, one can draw the cab forward. The liftarms is removed by L (3 * 5L) and lifarm 7L which bind to the rear of the cab. Can then be inserted in the battery case, the engine takes place next. Finally, we can put it all together. Disassembly: The cab with the engine and the battery unit: And Video: Thank you for having read everything !!
 -
Hello community, after the refurbishments of the swap body trucks I could finish another project. It was one of these projects, you start very ambitious and stop immediately due to the lack of parts and/or solutions for building problems and such. The helicopter should have a modern and compact appearance, a color scheme that fits to my other rescue vehicle and some functional details. Now after being more a construction site than a MOC on my desk for months I gave it a second chance. And here it is... Hope y'all like it. C & C welcome as usual. Thanks for watching!
-
 After the Lego Atlantis line went out, I had been thinking about how if the divers were indeed a salvage team, it would be logical for them to have a form of sky unit. And after experimenting with some helicopter designs, I decided to create my own Atlantis sky unit. The helicopter is more or less based of a military attack chopper, mixed with a medium transporter. The model can fit two minifigs, A pilot up front, and another operator behind. The pilot uses a custom control panel made of a droid body and some clips. The operator just uses some Lego levers. Unfortunately, there's a small gap at the front, because of the way the two walls are positioned sideways. The model would have looked better without this, but I didn't want to screw up any of the chopper's streamlined shaping just to fix one small little gap. The helicopter, being on a dive team, has removable tools, and an ROV (Remote Operated Vehicle) in back. Here, everything is detached. The Helicopter got its name unintentionally when I noticed its similarities to a dolphin in profile. And being an Atlantis helicopter, that didn't seem out of place, so I named it the Dolphin Chopper. Quick Facts: The Atlantis Dolphin Chopper, has specially designed pontoons to land on water. I may possibly add a winch attachment later on that can hoist up the ROV. I will add a follow up to this post if I do. You probably have noticed the huge bulging windows on either side. they may look silly but, this is simply a way of being realistic. Many large transport choppers have these windows so pilots may look out and down at the ground. Examples of helicopters like these would be this Chinook: https://www.gov.uk/g...ook-helicopters
 -
Creator is among my favourite themes, with its no-nonsense, anonymised, 3-in-1, 'pure LEGO' approach, and in this theme, the aircraft are always my first purchases. I recently bodged together a nice light-up display area for models and the first theme to go in was a selection of Creator's aircraft: CIMG0062b by bananaworld, on Flickr The Dilemma: They've been on display for a while now and I'm itching to build up another theme from the stash, BUT I don't want to take them apart! Which ones should I save to display elsewhere? Just the stunning larger ones, or are any of the smaller sets just too brilliant to part-out?
-
Hi all, I've wanted to build a chopper with working rotors in minifig scale for a long time - however, since I knew it would be tricky, I hesitated for quite a while. Now that it’s done (building time about 5 weeks) I can say I had a lot of fun - at least most of the time ;-) The two major issues were the angled tail (especially making the tail rotor spin more or less smoothly) and the position of the battery box. It took a while to understand that it’s too large to be hidden completely within the fuselage and that it must be accessible via the sliding door to turn it on and off. Another major feature might be the tilted rotor axle. Regarding the main rotor I used some ideas of other builders (see credits), however, the fixation of the blades might be a new aspect. I tried to use the TLG Coast Guard color scheme first, but for whatever reason it didn’t work for me plus the white and red color scheme of the U.S. Coast Guard is quite intriguing. It can be very well combined with the blue lettering of TLG Coast Guard stickers. Specs: Power Functions gear: XL motor (main rotor), M motor (tail rotor), battery box, IR receiver Weight: 690 g (batteries included) Length (fuselage): 39 cm Rotor diameter: 44 cm Scale: 1/43 The model fits a crew of 3 minifigs: 2 pilots and 1 winch operator. It’s prepared to be operated via a pushback (e. g. the “Goliath” motorized tug, see http://www.eurobrick...howtopic=134369). Credits: Forex (the radome is a mere copy, couldn’t think of anything better): www.1000steine.de/de/gemeinschaft/forum/?entry=1&id=476 Mad Physicist: https://www.flickr.c...ist/2409098303/ 100% Lego. More pics: Video: You may find some more detailed pics of the chopper on Flickr if you're interested. Thanks for looking!
-
Good day! Today I would like to present my mod of the 42020 twin rotor helicopter. I changed the color scheme and added pneumatics for opening the cargo bay. Little update: Hidden the pump inside the model.Photos in the end of the post. Some photos: the original and my MOD The mechanism Pump update: More photos on Bricksafe: http://bricksafe.com...LXF/mod---42020 The Mod on my website:http://www.hoklywood.wix.com/home Instructions: http://bricksafe.com...0/42020 mod.lxf Video :
-
Friends, It took a little too long, much like the ATS, but the MD600N if finally done. Much more at thirdwigg.com, and the Flickr album can be found here. As I child I would see the MD600N and MD520N flying up and around my house. It was time to honor the love for the aircraft. The MOC has the following features: Opening Doors Working dual Joysticks Working dual Foot Pedals Working collective lever Swashplate Collective control (much thanks to Efferman for many components of the design) Swashplate Cyclic control NOTAR rotation Six bladed rotor PF L drive with LiPo Battery Working Landing skids (I mention this only because getting it to support the MOC and not tip over was quite a task) Seating for eight I hope you all enjoy.
-
 Hi everyone, This is my next project. Its a replica of the brand new Agusta-Westland - AW196 Air ambulance. This model is a lightweight transport helicopter designed to be able to achieve missions in about every possible environment. This is also one LEGO project, and I have tried to take lessons from my previous helicopter MOCs. At this point I have achieved the most difficult part of the MOC. The complete control center of the rotor's head is done and perfectly functional. But before, have a look at the global model in it's WIP state: The global shape is coming out of the bricks actually :) On this picture you can see one joystick standing lateraly in behind the pilot seats: And you have the same on the other side of the aircraft. Other point of view: So, what's the goal? I already build previously helicopters with onboard command, even realistic commands. It was pleasant but not always really practical. So this time I decided to make use of a pair of joysticks, one on every lateral side. The left joystick controls the cyclic movement of the rotor. When pushing it to the front/back the swashplate incline to the front and back (forwards and backwards translation of the aircraft). Pushing the joystick up and down makes the swashplate incline left or right (lateral movement of the aircraft) The right joystick controls: the collective mouvement of the rotor when pushing it up and down The pitch of the tail rotor (command is operational, tail rotor still to build) Actually, the main rotor is perfectly functional with large amplitude movement of the blade. This amplitude was a real goal of this MOC, because I found lots of beautiful build on the net, but not really one with real large movements of the blades. Other view of the rotor head, i'll explain you all of this later ;) On the other function point of view, the BB already is placed in front of the rotor in order to assure a good wheight repartition on the 3 points landing gear. I will place now a gear box with to reversible commands on it : one for the landing gear in/out command and one other for the winch, that actually does not exist. There will also be one main clutch gearbox for the rotors, in order to be able to use of the other function without rotor rotation. So, that's it for now guys, this is the first take of it. Building time: about 20 hours actually. Any comment or idea will be appreciate.
 -
 So when I read about TC13, I first had something huge in mind... But actually I think the pullback series are cute because of what they are: small, simple and quite fast. So I decided to keep in the spirit of official pullbacks, and keep it small. However, I did not go for the obvious racer or offroader car, I want to do something not done before (at least not by TLG). So I went for a helicopter. The type was not a difficult decision: after watching barmans incredible avatar helicopter numerous times, I wanted to do one myself. So how to make a pullback work without any wheels... Here is the proof of concept result of tinkering an evening with two pullback motors and some rotors: And a video of it in action. I'm actually quite happy with the way it works, although it does not use the full extend of the windup mechanism. So I'll stay with this concept and try to refine the looks in the coming period.




.thumb.JPG.9c0e760daa3b93fff783c83e550e94bd.JPG)