
Lok24
-
Posts
1,241 -
Joined
-
Last visited
Content Type
Profiles
Forums
Gallery
Everything posted by Lok24
-
 There are some points: you have to use beta.pybricks.com instead of code.pybricks.com, version should be 3.1 then, only this supports the remote one remote can only communicate with one hub no communication between hubs
 -
This is a nice built! with "Control+" (which is the app only) you mean two technic Hubs with 4 ports each? Yes, they can be progarmmed with the powered Up App since a long time, my latest program (with an old version) was controlling the CAT, before the offeclial release... But: Now your programm ist running in the Hub! Then it would be running in your smart device which takes time so send and receive. Or you use pybricks, which make programs resident in the Hubs, you could then use two LEGO remote controls
-
Raspberry Pi LEGO HAT
Lok24 replied to Ankoku's topic in LEGO Technic, Mindstorms, Model Team and Scale Modeling
Correct! That's the idea! But as I wrote: you have three lines to start a motor on Port A from buildhat import Motor ### THIS ist part of the HAT-Bundel motor_a = Motor('A') #define the Motor on Port A motor_a.run_for_seconds(5) # do somthing That's simple. But if you could stack the HW you needed somthing like motor_a = Motor('HAT1','A') #define the Motor on HAT 1 Port A or the sofware had to add more Ports like E,F,G,H ..... See what I mean? -
Raspberry Pi LEGO HAT
Lok24 replied to Ankoku's topic in LEGO Technic, Mindstorms, Model Team and Scale Modeling
Hi @JaBaCaDaBra Sure, I used my C64 to drive my model railway via PWM, directly generate by an interrupt assembler program, so 60Hz. And saved the programs via a self made interface on my magnetic tape recorder with reels. Nice Picture, thanks. Got a Weller, too. since -hm- 40 years? But if you wand to do programming and soldering: why do you use the HAT? That's my point. -
Raspberry Pi LEGO HAT
Lok24 replied to Ankoku's topic in LEGO Technic, Mindstorms, Model Team and Scale Modeling
You can't stack them directly, bacuse there are no pins on top. You could perhaps use any adpater like @JaBaCaDaBra showed. But that doesn't solve the problem, that you cannot address the HAT via the software coming with the HAT. The Idea of the HAT is a ready to use solution. -
Raspberry Pi LEGO HAT
Lok24 replied to Ankoku's topic in LEGO Technic, Mindstorms, Model Team and Scale Modeling
Yes, let us know how i works. The GPIOS you find in the documents GPIO Use Status GPIO0/1 ID prom GPIO4 Reset GPIO14 Tx GPIO15 Rx GPIO16 RTS unused GPIO17 CTS unused with the remark: The following pins are used by the Build HAT itself and you should not connect anything to them. And the syntax for a motor is from buildhat import Motor motor_a = Motor('A') motor_a.run_for_seconds(5) So there is - at first sight - no idea how to adress something like "HAT2" Perhaps helpful: a good documentation of syntax can be found here: https://github.com/raspberrypi/documentation/blob/develop/documentation/asciidoc/accessories/build-hat/introduction.adoc -
Raspberry Pi LEGO HAT
Lok24 replied to Ankoku's topic in LEGO Technic, Mindstorms, Model Team and Scale Modeling
You shold have a look at the used GPIOS and how the software handels them. I did not find any idea in the SW how to adress. -
Raspberry Pi LEGO HAT
Lok24 replied to Ankoku's topic in LEGO Technic, Mindstorms, Model Team and Scale Modeling
Very simple: #include <WiFi.h> WiFiServer server(80); WiFiClient client; void startServer() { WiFi.softAP(ssid, password); server.begin(); } -
Raspberry Pi LEGO HAT
Lok24 replied to Ankoku's topic in LEGO Technic, Mindstorms, Model Team and Scale Modeling
This is easily possible today and well described in the documentation of the LEGO HAT. And then you can add your breadboard and resitors or whatever you want. Today. There are pictures, that's where I know from And of course it uses GPIOs, the simplest way. They are documented. I thougth your original question was about the "auto detection" of the ports (!= GPIOs, they are fixed), and all my responses concernd to that question. And I still think: yes, you can check if a motor is attached, and yes, you can get a dict of the ports. Some nice kind of missunderstanding? -
Raspberry Pi LEGO HAT
Lok24 replied to Ankoku's topic in LEGO Technic, Mindstorms, Model Team and Scale Modeling
I really don't know want you want to explain or know or say? The question was about "auto detection", and this has nothing to do with any "wires, GPIOs, hardware" It's just a matter of software and LEGO-Komponents and protocol. And I described how to handle. It's the same for any ESP, Arduino, Pi, pybricks and so on. They all use WLP 3.0 And we are talking about the HAT, and when attached there are no "wires, GPIOs, hardware" anymore, just 4 plugs and Software. Yes, which is possible on the ESP too, I use that to configure the M5Stack Atom for specific parameters (i.E: carousel, how long should it run at which speed, pendular train, how log wait and so on) (the program it is fixed in teh ESP, but reads parameter-files, which are written when via web parameters are changed) I showed that here for a wile. The central advantage: developement is much faster, cause you develope and run on the same devivce.. -
Raspberry Pi LEGO HAT
Lok24 replied to Ankoku's topic in LEGO Technic, Mindstorms, Model Team and Scale Modeling
I'm not sure about detection, but is this really important? You have to code , as usual, "myMotor = Motor('A')" and connect the motor to A, in the program you use "myMotor" And it's not a dump H-Bridge, cause you can read the motor data in the program, like other sensor data. And somewhere the ID's whre mentioned, if you can read them you can figure out what is connected. But documentation says: Gets list of devices connected to the hat class buildhat.Hat¶ Allows enumeration of devices which are connected to the hat get()¶ Gets devices which are connected or disconnected Returns Dictionary of devices Return type dict -
Raspberry Pi LEGO HAT
Lok24 replied to Ankoku's topic in LEGO Technic, Mindstorms, Model Team and Scale Modeling
The concept is just to mount the HAT onto the RaspPi. It is not possible to mount further HATs in that way. But you could multiplex the UART, which means soldering, additional HW and so on. And I suppose the SW-Libraries would not support this? -
This possible with motors that can be set to rpm, like the Powered up technic motors. And there it is very easy to adapt different gear or type of motor. But much better is it to use a second loco
-
Octrainber 2021 | Vollert Robot DER 100 "Leonhard Weiss"
Lok24 replied to HoMa's topic in LEGO Train Tech
I showed this already here, based on an idea of Thomas Selander. The problem is that you need a lot of space between loco and waggon, depending on the axles (with steel up to 6-8 studs) -
Octrainber 2021 | Vollert Robot DER 100 "Leonhard Weiss"
Lok24 replied to HoMa's topic in LEGO Train Tech
Hi, really nice project! I'll stay tuned..... -
[MOC] OcTRAINber 2021: Coke Quenching Locomotive in 1/33
Lok24 replied to Sven J's topic in LEGO Train Tech
Nice! -
Control your trains without smart device - with Pybricks
Lok24 replied to Lok24's topic in LEGO Train Tech
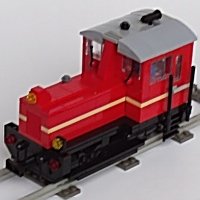
Hi all, just made some videos to show how smooth trains drive ( 1min) Speed is set to +5/-5 (in a range of 1-100) , 1 waggon is about 1kG, there is app. 60gr of ballast on the loco. Motor is just started and stopped via LEGO remote, no manual regulation at all up to sec. 50 in the video, then button is just pushed and hold, acceleration is automatically. Here's a switch (45 sec) Smooth! -
Hi, these are curved slopes, here they are https://www.bricklink.com/catalogList.asp?catType=P&catString=438 LEGO DesignID is 15068 or 11477, name is "PLATE W. BOW 1X2X2/3" or "PLATE W. BOW 1X1X2/3"
-
@Toastie, sorry, no But my contact was via https://gitter.im/legoinochat/community?source=orgpage
-
Pybricks Q&A
Lok24 replied to Pybricks's topic in LEGO Technic, Mindstorms, Model Team and Scale Modeling
Hi @Pybricks, is there any news about setting the name of a hub? Reading this https://github.com/pybricks/support/issues/52 says it is possible (in january ) but still on list for 3.1 , or did I missunderstand? -
Hi, what if you use two commands, one for each motor ? The documentation contains many examples https://docs.pybricks.com/en/stable/
-
Only with the train Motor, you the can increase speed in 10 Steps. (with PF: 7 Steps) Otherwise you shold use - Powered Up App - Brickcontroller 2 - BUWIZZ App - Pybricks - Microcontroller
-
Control your trains without smart device - with Pybricks
Lok24 replied to Lok24's topic in LEGO Train Tech
Hi, Every remote has a name. You can set this in different ways before(!) starting the program. With the Pybricks class remote (name=...) the remote connects to any remote with that name, if you have two with identical names any of them would do If you ommit name any would do. And if you choose the MAC-Address as name..... When developing this feature this paramer was called "address". Now it's the name. -
Control your trains without smart device - with Pybricks
Lok24 replied to Lok24's topic in LEGO Train Tech
Hi all, version 2.4 is available - Connect to a certain remote - show mode (slow or fast) by LED color New with Version 2.4 remoteName = "remote3" # connect this remote only "" connects to any remote LED_A = Color.GREEN * 0.3 # Remote Profil_A, color * brightness LED_B = Color.RED * 0.5 # Remote Profil_B, color * brightness -
Pybricks Q&A
Lok24 replied to Pybricks's topic in LEGO Technic, Mindstorms, Model Team and Scale Modeling
Hi all, remote name and light are now available on https://beta.pybricks.com Works fine, thanks a lot to the Pybricks team