
vascolp
-
Posts
338 -
Joined
-
Last visited
Content Type
Profiles
Forums
Gallery
Everything posted by vascolp
-
 Yes, that's why I said you needed a gap behind. You see, I tested it IRL and those problems appear immediately… I am not in a Studio mood ... Your idea of using a is very good because it inserts the needed gap and avoids horizontal rotation. As I said before: it is not completely smooth, there is some resistance when you start to steer… I think because the axles do bend a little when you start to steer. But in fact, this is a good feature because it keeps the wheels straight. You need to force it a little to start steering. I think both solutions are good, @gyenesvi must be smoother while steering, "mine" might be a bit more stable. It is also a bit difficult to build because of those completely loose ... I bet LEGO would not approve it! I can build both solutions and compare them but only next weekend as I don't have all the parts with me right now.
 -
I got some 1x2 bricks from a MOC around, so here it is another version. I have no barrel with me but two pulleys do the job. I also don´t have a 2x8 technic plate so ... imagine there is an axle through the non technic grey one! It should work!
-
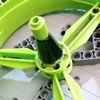
It does not get jammed. But it is also not completely smooth, there is some resistance when you start to steer… I think because the axles do bend a little when you start to steer. But in fact, this is a good feature because it keeps the wheels straight. You need to force it a little to start steering. I think there must be something on top of the vertical axles, otherwise wheels will go up. And relying in the pulley (or the other part, the Weapon Barrel) to keep things in place does not seem strong enough. That’s why I embraced with vertical 3L thin liftarms and used horizontal 4L thin liftarms connected by the 5L axles in my video (black and yellow). Yet steering command is not good enough, it is a bit too high. I wish we had a 3L liftarm with an axle connector in the middle, because it would fit very well in the middle of those 5L grey axles…
-
stevendejong , I think the half stud gap is not so good in your render because it allows the whole thing to slide horizontally... Gyenesvi solution is interesting because one can have an axle from one side to the other and also the pivot axles can be replaced by a pin (with friction, that's all there is...) which keeps things together vertically wise. Furthermore, it might allow to make it less high. But it requires half stud gaps horizontally to alow the rotation... so the whole thing will woblbe along the axles too... It also can rotate along the horizonal axle since it is only one axle...
-
By all means, post wherever you want! I have a rebrickable entry too...
-
I tried, you can use these instead of these and then one of these fits inside. The problem is how to rotate this 3L beam with an axle...
-
No stress problems., The axles will bend sligthly but it seems aceptable to me. For the steering you can use one of this ,so a bit thinner... For a bus the height should not be that much of a problem, I suppose... If it was a car,... that would be different.
-
Don't quit 4-wide yet!
-
Gears instead of tires and blue pins instead of tan ones but you'll get it. These parts are there to keep things in place. Probably better with some of these: More images here: https://bricksafe.com/pages/vascolp/varios/stering-for-6l-car
-
Cool idea. I am also afraid it might not be strong enough. But if you use two sliding axles instead of one, and this part, it will hold. You will probably have to use two of this to attach the sliding axles. Than you have to brace it very well... Good luck!
-
I love it! This is the way!
-
[MOC] Cartense 77
vascolp replied to vascolp's topic in LEGO Technic, Mindstorms, Model Team and Scale Modeling
, thank you! -
[MOC] Cartense 77
vascolp replied to vascolp's topic in LEGO Technic, Mindstorms, Model Team and Scale Modeling
Thanks you! -
Hi everybody! Back in TC21 Technic Transforming Vehicle Contest I had this idea. Soon I realize it would not be possible for me to do it in the contest timeframe. So here it is at last. It’s an RC LEGO 42077 that transforms itself. So, let’s start with the video… Here is a photo. More photos here. So, the car opens itself and the fake engine becomes a tensegrity sculpture. And, when it is closed, the fake engine works connected to the differential. Initially I had the idea of building a car from scratch…. But then I saw the 42077 empty shell in the shelf crying for being filled up with motors and gears . It was quite a challenge, one that I really liked to do. Here are some notes: The chassis was changed to include a driving, a steering, and a transform motor, all Powered Up L-motors, The front adda small was change to allow better steering. The front was changed to include the hood opening mechanism. The hood had to be flexible, so that it could closed. Flexibility is achieved with shock absorbers. The rear suspension had to be lowered to give space for the mechanism. The rear was completely modified to become an opening element… while maintaining the original 42077 looks. The fake engine is hanged by two strings that come from the roof. These strings have a tension fine tuning mechanism next to the car rear window. When the roof opens, the fake engine is pulled up. There are two other strings that go through the chassis and connect to the lower part of the fake engine. These strings will pull the fake engine against the chassis when the roof is closed, allowing the engine to connect to the differential. When the roof opens, these strings allow the engine to be lifted and kept in equilibrium. The strings are connected to a reel located near the right door, that slides connected to one of the linear actuators that control the roof movement. I took some time to find this solution, but it seems to work quite well, the trick is the synchronization with the LA. Control is done using a LEGO Remote Handset and Remote Bla Bla. The mechanism seems to be reliable; you can open and close it several times and it remains properly tuned. You can even drive with the roof open, and close it while moving, as long as in a flat surface and not too fast… Hope you like it!
-
Pybricks Q&A
vascolp replied to Pybricks's topic in LEGO Technic, Mindstorms, Model Team and Scale Modeling
You can do all that and much more... red buttons are Button.LEFT and Button.RIGHT. Check documentation, it is complete and has a lot of simple examples. -
Pybricks Q&A
vascolp replied to Pybricks's topic in LEGO Technic, Mindstorms, Model Team and Scale Modeling
Unfortunately can´t be done in current version. I use the red buttons as shift if I want to command 4 ports or the red buttons as another command if I want to command just 3 things. It includes a lot of other code but you can check an example of this in Remote Bla Bla. -
Very very cool!
-
Hi, If you have a lego remote controller you could try Remote Bla Bla. It includes several modes to control 90 degree steps gearboxes.
-
This looks really cool! Check this one on jaysbrickblog:
-
Pybricks Q&A
vascolp replied to Pybricks's topic in LEGO Technic, Mindstorms, Model Team and Scale Modeling
My 2 cents... in line 30 it should have wait=True... In the main loop you are always calling track_target when no buttons are pressed which means calling it every 10ms.... I think you should detect when you unpress the button and only then call a run_target or track_target to go to zero position. If you use run_target you can define the THEN mode which can be used to stay actively in the 0 position using HOLD. So you call it just once, when the button goes from pressed to unpressed. Hope it helps! -
[HELP] Generic Building Help Topic
vascolp replied to Jim's topic in LEGO Technic, Mindstorms, Model Team and Scale Modeling
You can replace this with this to make it look better, but with less studs. -
[HELP] Generic Building Help Topic
vascolp replied to Jim's topic in LEGO Technic, Mindstorms, Model Team and Scale Modeling
Try this. Very rigid, very strong. Maybe not so nice seen from the outside... -
1: 10 5: 6 6: 4 2: 3 8: 2 3: 1 Very nice contest unfortunately had no time for a decent participation. Congratulation to all participants!
-
[sMOC] Remote Bla Bla
vascolp replied to vascolp's topic in LEGO Technic, Mindstorms, Model Team and Scale Modeling
Hi, thanks for trying it! I suppose you can write the string to the hub using the Powered Up app, I never tried. You can certainly do it using the Pybricks Code App, there is an example of small program to read and/or write the remote string in the documentation (section 9.5). But notice that, when you run a program in current versions of Pybricks Code the program gets saved in the hub and the previous program stored in the hub is deleted. This means that, if you try it in a hub with Remote Bla Bla, you have to flash Remote Bla Bla again.... (I should mention this in the documentation... but I just noticed it while writing this). After writing the configuration you want in the Remote, when you turn on the City Hub, you must have the appropriate motors previously connected to the hub. If the motors are not connected it might fail. The configuration strings aren’t really easy to understand by a human, that’s why the idea is to define them with the help of a Technic Hub. Anyway, here is an example. You should connect one motor to each port of the City Hub. Can be sensorless motors like the WeDo 2.0 Medium Motor or Technic Motors. Right button is a BLASimpleMotor and left button is a BLAStepsMotor. The string is: RbAC..gABS.... Notice also the startup sequence: On a completely disconnected hub, clicking the hub button should blink in blue (meaning you can now connect to the Pybricks Code app) A second click will start Remote Bla Bla and the light should blink in white. You must connect the remote while the light is blinking in white. Turn on the remote by pressing the green button on it. If the configuration string matches the connected motors, the lights on the remote and the hub should be steady green. Play. Hope it helps! -
Police Carrier Spaceship This is Police Carrier Spaceship, a ship to carry dangerous prisoners. It is a C model of LEGO 42077 Rally Car. The features are: Retractable Feet Feet Shock Absorbers Carrier area with jail Thrusters Up/Down Thrusters Left/Right The ship includes a small cage in the back to hold the prisoner. Discussion entry: