
Graydingo
-
Posts
207 -
Joined
-
Last visited
Content Type
Profiles
Forums
Gallery
Everything posted by Graydingo
-
 Right. So you have to login to the social.sbrick.com site, and then create a profile on their web app. When you login into your phone app, you can download the custom profile.
 -
Just made my own custom profile. It's easy and quick! Thanks Sbrick people!
-
The old school studful technic beams are super rigid. I was thinking of using those at one point to make my chassis more stiff.
-
Looking cool!
-
Technic pieces all the way. Start a basic body and then once you get the shape, you can add little improvements as you go.
-
[WIP] 63 Chevrolet Impala
Graydingo replied to Graydingo's topic in LEGO Technic, Mindstorms, Model Team and Scale Modeling
Ah well I hope you realize it's a WIP. The battery box will be completely hidden under the rear deck lid, tail lights and bumper...eventually. One of my early modifications was moving it one stud lower so now it is flush with the bottom of the frame. Lately I've been working on the roof. I had to take a break for a week or so to sort of let it resonate. It's an all new roof though: It's lighter, stronger and more narrow like the real car. it's also slightly taller so it feels more like the real car. That blower is from Lucio Switch's 4x4. It's just setting on there for kicks atm. Thought it looked cool! -
Lego Technic Time-lapsis
Graydingo replied to 2x4Studios's topic in LEGO Technic, Mindstorms, Model Team and Scale Modeling
Great video! Love to see the motorized lego dolly too. -
Little American Truck
Graydingo replied to Appie's topic in LEGO Technic, Mindstorms, Model Team and Scale Modeling
do want! instructions pls! -
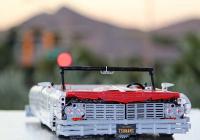
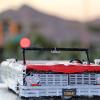
Q would be impressed. My favorite Bond car growing up! You should build the helli that he blows up too
-
[WIP] 63 Chevrolet Impala
Graydingo replied to Graydingo's topic in LEGO Technic, Mindstorms, Model Team and Scale Modeling
In short, yes. The front isn't an issue. The rear is plagued by the heavy battery box. I'd like to get the rechargeable battery. I've heard it's much lighter. The extra weight of the body ended up making the clutch spin on the rear setup. it's a dompromise, but I just replaced it with the regular 24t gear. I didn't want to put the battery box on the end but it works for several reasons. 1. easy access, 2 with the lowering setup i have, the battery box would have taken up a good portion of the inside the passenger area. The batteries would to have to sit in front of the xl motors (see underside pic above). That would mean no front seats, or surely compromised seats. It works quite well (now with weight). I'll try to get another video up of the driving and the lowering / raising action. My driving is pathetic since I'm using the joystick on Jergens app to control acceleration and turning. -
[WIP] 63 Chevrolet Impala
Graydingo replied to Graydingo's topic in LEGO Technic, Mindstorms, Model Team and Scale Modeling
Hello! I hope everyone is excited about the upcoming weekend. Here's to lots of Lego time for everyone. Thought you might enjoy some fun photos and a few small updates on the project. The first was a simple upgrade to the front suspension. Added an extra gray shock to account for weight. I had to move a few things around to get them in there. Now there are 2 for each wheel. Underneath: Next up was getting a roofline going. It's a good start. Helps tie the car in for sure. I'll probably keep it as is for a while and maybe come back to it after the car is complete. I'll maybe get some time in over the weekend to start the front grill. Have a great weekend! -
Crane Truck with Loading box
Graydingo replied to sm1995's topic in LEGO Technic, Mindstorms, Model Team and Scale Modeling
Great looking cab and overall truck. -
Yes. Don't abandon this project. That chassis is beautiful. Seems it might need a model team style body
-
Plus 1 on maximum overdrive
-
sand ra
Graydingo replied to P robo's topic in LEGO Technic, Mindstorms, Model Team and Scale Modeling
. Two XL, one on each back wheel. -
Small clutch
Graydingo replied to Samolot's topic in LEGO Technic, Mindstorms, Model Team and Scale Modeling
I used a similar device in my impala prototypes and I got the idea from Sariel's book, in which he refers to it as a linear clutch. You can also replace one side with a friction pin if you need less clutch. So there are a variety of strengths achievable with this setup. -
Awesome! Why stop there? make the whole body!
-
[WIP] Ultimate 42009
Graydingo replied to grum64's topic in LEGO Technic, Mindstorms, Model Team and Scale Modeling
It's starting to really take shape! -
Don't you start. Just one lego...that's all it takes. Pretty soon you are buying bins to sort them. 24 hour racer
-
[WIP] [MOC] The Thing
Graydingo replied to Pat-Ard's topic in LEGO Technic, Mindstorms, Model Team and Scale Modeling
Cool "the thing" you nailed the body. -
[WIP] 63 Chevrolet Impala
Graydingo replied to Graydingo's topic in LEGO Technic, Mindstorms, Model Team and Scale Modeling
Hello again. A small update. I wasted a lot of time building a pretty terrible dash. Going to 86 it soon and probably go straight technic. Not sure why I thought a brick dash would work. Maybe a much more subtle one. Got my black rims. They look better in real life, but not sold on the difference. They almost look like steel wheels, vs the old gray which pop a bit more. Once I get the body all done I can swap them out again and really decide which rim to go with. A hub cap might help too. I built the other side body work which went fast. The door again was bugging me a bit. So I streamlined the end of it. Visually, it wasn't a huge difference, but the old design rubbed against the fender because it stuck out more. I also changed up the rear quarter-panel and streamlined the mounting area. I was running out of the smaller fairing panel, so I had to move to a mid sized fairing on the bottom of the quarter panel so I could free up two of the smaller fairing panels for the other side body work. I had some really nice running boards that looked very slick, but when I opened the door, a small section of the inside rubbed causing the door to momentarily high center on it. (this bar would go one stud in and under the door, not where they sit in the picture: Which means these pin joiners are slightly bigger than a beam... Gotta learn that the hard way. -
Car Lift
Graydingo replied to Sheepo's topic in LEGO Technic, Mindstorms, Model Team and Scale Modeling
Sheepo this is so cool! Didn't someone make a floor jack? Would love to see a Technic Garage. -
Awesome!! I put stops on the raising / lowering mechanism to control the end high and low point- that may solve the cv joint from popping out. Gotta put a body on!
-
[WIP] 63 Chevrolet Impala
Graydingo replied to Graydingo's topic in LEGO Technic, Mindstorms, Model Team and Scale Modeling
High praise sir! And one day I want to build that monster in your profile picture. It's truly amazing. I want to say that it's interesting to build other people's MOC's. Does anyone else feel like you kind of get a sense of what the person is like by building their mocs? You can tell a lot about a person by how they build. Maybe I'm crazy. Also you pick up a lot of new techniques. Well I've got the seats in. The real Impala has a bench in the back, but obviously my S-brick is in the way. Pretty happy with how it turned out: Top front view: I'm waiting on some 3x11 white panels. so that's why only one side is built out. Also found some cheap black rims sans tires. Black or gray rims? (no photo) A video of the interior (sorry for the taylor swift ) I reworked the door latch. It was a little grabby. It seems to work better and the latched door is flush with the body now. -
{WIP} Mystery Project
Graydingo replied to Electricsteam's topic in LEGO Technic, Mindstorms, Model Team and Scale Modeling
Ha. That's fun to watch. Can't wait to see the final.