SlyOwl
-
Content Count
2322 -
Joined
-
Last visited
2 Followers


About SlyOwl

-
Rank
Watch out for Infuriated Isaac's metatarsal!
- Birthday 12/30/1992
Recent Profile Visitors
4424 profile views


-
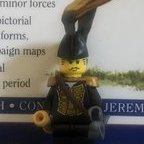
Review: The Lego Build-It Book Book Information Name: The Lego Build-It Book: Amazing Vehicles Author: Nathanael Kuipers, Mattia Zamboni Publisher: No Starch Press Release: July 2013 Pages: 136 ISBN: 9781593275037 Price: US $19.95 | US $15.95 (E-Book) Links: Amazon ~ No Starch Press ~ 5867 - Super Speedster The Book To put it bluntly, the book is a glorified alternate-model instruction book. But it's good at what it does. It gives instructions for 10 different models, all created using the same parts, which are listed at the beginning. These all come from the Creator set 5867 - a red car - so, inevitably, all the models are red wheeled vehicles! It goes to show the versatility of the bricks and the designers' imaginations. One author, Nathanael, is a former Lego Technic designer - and the other, Mattia, is a graphic designer - and have collaborated extremely well to produce this excellent-looking book. The graphics are genuinely flawless. I'm not sure what program the instruction images were created in; some of the parts don't seem entirely right on closer inspection (missing friction ridges etc - nothing major at all!). I really struggled to work out whether the pictures were renders or photos; though I'm leaning towards excellent renders. The book is as high quality as I've come to expect from No-Starch-Press. The cover is matt, soft-backed - and is showing a few signs of wear and tear after having it in my rucksack for a week's holiday... just like the BrickGun book - don't know what it is with me and doing that! The book is very clear throughout, mainly white text on a blue background with "blueprints" of the model watermarked on. There's a brief introduction to the book, followed by a set of helpful building tips. A bit is about the basics of being creative with parts - the whole range of things you could use a 1x1 round brick for, for example. It then goes on to introduce SNOT techniques, why certain pieces have been designed like they have; and there is another section on "advanced" building techniques in the middle of the book - reinforcement, some more SNOT, hinges and so on. There's nothing ground-breaking here for an AFOL, but it is a very good basis if you're new to higher level building. There is also a parts list for 5867 - I found I had 90% of the parts straight away (being Creator, it's mainly bricks, plates and slopes) - and could improvise the rest. It's largely red, with black filler and grey/white trim. The rest of the book is simply ten sets of instructions for the models: Off-Roader Go-Kart Muscle Car Stroller Multi-Purpose Truck Historic Racer Classic Car Wheel-Loader Street Rod Rescue Truck Each is introduced with a cover page showing a variety of angles/details, a wireframe/blueprint view, and a brief info box containing dimensions, features, design notes etc. There is also a rating box (similar to in a computer game) for Complexity, Functions and Pieces, 1-3; it looks nice, but I didn't pay any attention to it when picking which models to build! The Instructions These are very clear, and similar to official Lego instructions (as you'd expect). The graphics are slightly more jazzy - it has a nice header and shadows on the parts-call-out boxes. I had some issues distinguishing between tan and white, though - particularly as some of the same parts are used in both colours. There is no individual parts list for each model; so I picked out all the parts at the front and went from there. The Build I built the Multi-Purpose Truck first, and then the Classic Car. They came together much as you'd expect from a Lego set - though as the techniques were considerably more advanced (the whole underside of the Classic Car is built upside down!), you need to concentrate a bit more. One thing I didn't like - which is a result of using a limited parts selection - was that it felt parts were being used to fill gaps - or weren't the best solution. I fully understand why they chose to use just the parts from one set, but it made me a bit frustrated when building, as you couldn't always work out what you were building at that moment/what it was going to attach to. It also made the models quite physically weak, I felt - parts are cantilevered no end, bits fall off - there's no heft to the models. But given some more bricks, I'm sure they'd be fine. Judge for yourself; but I think the models do look really good. And I am very impressed with the broad range of vehicles at different scales (some are roughly minifig scale, others much larger, others slightly smaller) - the designers did a good job. Whatsmore, there's a sequel coming out - 10 more models, using the same parts! Multi-Purpose Truck Where better to start than a meaty truck; what sold me to start with was the "logo" on the front grill. The back tips up; it's a fairly sturdy joint. This pic probably expresses my thoughts on the book best: there's some nice detail going on in the cab and under the tipper, but it feels a bit unrefined and slap-dash. Classic Car The stripe down the middle is built sideways, with the top and bottom sandwiching it neatly - so the bottom is built upside down! It's quite squidgy if you press down on it, and I've found the wheels tend to rub rather. But it looks very good. Doors open, neat continuation of the stripe through them. Note the cleverly-built-but-a-bit-too-tight arches. The seat backs sit on Technic pins, so tend to flop around a bit! Final Thoughts... This is a book I would have enjoyed as a kid - sure, I'd have been frustrated with not having the right parts, but the way it gradually teaches the techniques is great. I think if you own the set 5867, it would be great to have - something to take on holiday, say. Unfortunately, 5867 is no longer produced (and, it seems, not hugely available online either) - so it'll be a case of make-do. Idea for the future? Get official endorsement and sell similar books alongside the set. Not sure this would ever happen! The book, presentation and instructions are all top notch - kudos to No Starch Press. Barney
-
Looks like DLuders pipped me to this, but hey-ho. Review: The BrickGun Book Book Information Name: The BrickGun Book: Build the World's Most Realistic LEGO Handguns Author: Jeff Boen Publisher: No Starch Press Release: May 2013 Pages: 232 ISBN: 9781593274900 Price: US $29.95 | US $23.95 (E-Book) Links: Amazon ~ No Starch Press ~ Brickgun.com BrickGun The author Jeff Boen's first Lego pistol went viral when he posted it on LUGNET in 1999 - and since then has created his own website, selling CAD instructions (and even kits) for various Lego guns. He claims they are "the world's most realistic Lego handguns" - and they invariably feature functional triggers, hammers and so forth. BrickGun has now published its first book, in collaboration with No Starch Press, well known for their geek-books, including an ever expanding range of Lego titles. The BrickGun Book contains instructions for five of Jeff's most popular models. Given the controversial nature of the book's content, it's worth the caveat I'm reviewing this from a builder's perspective, not a gun aficionado's. I'm not entirely comfortable building realistic guns - but at the same time, my mates thought they were cool (and very... playable) when they saw them. I was expecting the guns to actually fire (bricks or rubber bands) when I first saw the book - so was a bit disappointed that they don't, but actually rather liked it in the end. The Book The book is as high quality as I've come to expect from No-Starch-Press. The cover is matt, soft-backed - and is showing a few signs of wear and tear after having it in my rucksack for a week's holiday... The book is very clear throughout, black text on white/grey pages, with the majority of images created in LDRaw. It begins with a warning about the dangers of functional weapons (the only one here which actually fires is the MAC-11 rubber-band gun) and not to take them out in public without attaching an orange tip to the muzzle. Which is very sensible. There's a brief introduction to the book, followed by a set of helpful building tips. Some are insultingly simple ("ensure that pieces are completely and firmly attached"), others more useful ("use a pencil tip to attach rubber bands"). There's also tips on how to read the instructions - which may be useful for people not familiar with Lego. Finally, there's some useful websites recommended (Bricklink, MOCpages, LUGNET, LDraw) - and a history of Jeff's development of the five BrickGuns in the book, along with some design considerations. The rest of the book is simply five sets of instructions for the different guns: BG22 with magazine (22-series pistol) 92FS (Beretta pistol) Desert Eagle 1911 (M1911 pistol) MAC-11 rubber-band (machine pistol) (at least that's what I can work them out to be - Jeff seems to have his own naming system, BG presumably standing for BrickGun) The Instructions These follow the same format for each gun. Written parts list - quantity, part #, colour, description - I imagine this is for buying parts if necessary Pictorial parts list - very clear, I used this for picking out the parts needed Set of instructions, typically lasting 80 steps or so, using 200-300 parts. They follow a logical format, nearly identical to official Lego instructions, with similar arrows, parts-boxes, call-outs, sub-assemblies etc. A demonstration of the functions of the gun. I found this quite confusing, as I didn't know what each part was supposed to represent - some text here would have really helped. The Build I built the Desert Eagle and MAC-11. The MAC-11 is significantly different from the rest in terms of design and function, but the other four seem relatively similar. The build typically follows a handle-mechanism-barrel-details pattern, with various large sub-assemblies coming together around 2/3 of the way through the build. The techniques used are generally straightforward - there is some SNOT, offset building and Technic in there, but nothing at all complicated. Each gun mainly consists of bricks and plates, with a handful of Technic parts and a fair few slopes/tiles/decorative parts, almost entirely in black and grey. I found I had 95% of the parts in the right colours, but was able to easily sub in a few parts when I didn't have the right ones. The parts feel very 90's (especially the Technic parts) - they're all well established parts. Both finger and click hinges are used, though I subbed out the latter as I didn't have them. Desert Eagle I built this first, as it was the only gun I'd actually heard of: " And the fact that you've got "Replica" written on the side of your guns. And the fact that I've got "Desert Eagle .50" written on the side of mine, should precipitate your balls into shrinking, along with your presence. Now f*** off!" As above, it's mainly bricks and plates. I swapped in some light grey for black so I had the right parts. Apparently these guns come in all sorts of colours, so I felt free to chop and change. First, we build the handle, nothing fancy here. The mechanism comes together easily, and is sturdy from the off. Et voila. Took about 30 minutes to build once I had the parts in front of me. It looks fairly good, fits in the hand well. The grey stripe down the side is my own addition. Compared to an actual Desert Eagle, it doesn't entirely live up to its claim of being "the world's most realistic handgun" - I'm sure I could do better given a bit of time - though the techniques and parts would get more complicated... This part slides back, and the Technic beam flips up to lock it in place. I imagine this is some kind of magazine... The hammer at the back can be pulled back, which will be released by pulling the trigger. It makes an unsatisfactory click - perhaps I needed stronger rubber bands? The safety catch at the top prevents the trigger being pulled. Final thoughts on this build? It was fairly fun, looks passable and the parts move realistically, I'm sure. It's a bit on the fragile side - the macaroni brick section and back of the hammer tend to fall off - as does the handle under moderate shaking. So not for playing with in a bellicose manner. MAC-11 Rubber Band Gun I chose to build this as it was very different from the other guns in the book. I also have made semi-automatic rubber band guns in the past, and was interested to see how this would compare. The build is again fairly straightforward, though it feels more like a 90's Technic model than a gun at times. There's some neat stuff going on in the handle using brackets, to allow the magazine to slot in. I think it would probably look better all in black - again, I had to swap some grey bits in. It doesn't feel as cleanly finished as the other builds - mainly as the top is built upside-down! The magazine is held in by friction - it slides in and out very satisfyingly. The bullets are a nice little detail. It takes up to five rubber bands easily - though I tried it with eight and it just about managed. They don't shoot all that far or with that much power compared to others I have built - but then again, they are not stretched over a very long distance over the barrel. It works with a simple escapement mechanism - though one would probably need to add another band or two to the trigger restoring part, as it tends to stick in place when loading. The mechanism seems strong, and was pleasantly surprising to see it all slot together so neatly: I didn't have particularly high hopes. View mid-load. It can be a bit fiddly to get the rubber bands onto the rotating bar at the back. Final thoughts? I enjoyed building this, it works fairly well - the magazine in particular is great. I was impressed. Final Thoughts... This isn't a book I would have bought: I'm not into guns, I like to build my own thing - and it's not all that cheap. That said, if you're looking to build realistic Lego handguns, this is a good starting point - they'd be easy to modify to look better (tile the tops...). I think it would make a good present for the right friend - or as a handy way of filling up an hour or two on a rainy day. The book, presentation and instructions are all top notch - kudos to No Starch Press. Barney
-
It's been a while since I built castle... two years to the day!
-
Official Eurobricks Straightshooters List
SlyOwl replied to Siegfried's topic in Buy, Sell, Trade and Finds
+2 for Whitefang (one extremely belated!) - thanks mate! -
I'm afraid I don't have a great picture of it, but I had a go at a longboat here - It's pretty similar, with the two top SNOT layers with curved bricks in them, with some sort of base on it (mine had a curvier bottom).
-
There's two nice tutorials on making sails here - 1 ~ 2. Simply, find some suitable material - I've used old tshirt stuff in the past, but anything that's tightly woven and the right thickness should work. Paint it with a mix of 5 parts water to 1 part PVA glue and let it dry (this stops it fraying, stiffens it, makes it easier to cut and draw on). I use a hole punch to punch out the holes to attach the sails to the masts - and trim the holes with nail scissors. Shoving a soldering iron through the cloth also works. As for the printed stripes, I think the easiest way is to either find some appropriate cloth (which could be quite hard) - or paint/colour them on yourself. It'd be easier to do this before you cut the sails out. It's possible to run pva-d cloth through a printer and get good results - though it does tend to clog everything up and go wrong an awful lot! Hope this was helpful.
-
Thanks guys! The photography was a happy accident - a mix of it raining outside and being lazy and just blurring and smudging the wrinkles in the sheet behind it out - but it turned out quite overcast and stormy. I made the waves fit the ships I built the ship hulls first, then roughed out the sea in grey, just roughly building around the outside of the hulls. I then filled in all the gaps with white plates - it doesn't fit exactly, but near enough. Thanks for the blog! It is, thanks! And thanks for all the ship inspiration there. It's coming to STEAM, definitely. Pirates at STEAM 2014?! If you've still got ships built up, we could extend this one for this year. Not too long - a few hours (although as it was repetitive I was watching tv). It's a mix of bley and grey. Probably not, I'm afraid! It does look much better in person - it's just very hard to photograph between the sails and masts and stuff! - Maybe when I'm not in a rush I'll add some better pics.
-
Simply, a pirate ship attacking an English merchant... Flickr ~ Brickshelf Cheers
-
Maybe try battle droid arms between the layers of flex tubing?
-
Cheers guys, glad you like it There's a great big hole in the bottom of the rock (it would have been too complicated/unnecessary to fill it up with all the different angles), with a technic shaft coming out of it, which is attached to the mainframe. I just clamped this in a vice when I was building it - and also taking photos! I might need to build a stand if I'm going to display it more permanently... I wasn't too sure about that section - it seemed to deviate too much from the rectangular streetplan on the rock!
-
(is this the right forum? I feel a bit out of touch! - I reckon it feels more historical than sci-fi-y!) The Last Evacuee There's some sort of vague backstory about a city that broke up into chunks and started floating around, but I couldn't really make anything fit! I was trying to make Steampunk a bit more realistic (as in, a more probable alternate reality), hence the more subtle steampunkishness on the stagecoach and relatively normal house. The pics are a bit big, so here's the galleries: Flickr Brickshelf Cheers
-
Thanks guys I'll be around a little this week - there's a MOC in the pipeline. Josh... I have no idea who that person is!
-
Four pages? I did about 30!