Sign in to follow this  
Myers Lego Technic

[WIP] Green Raid Buggy - The Long Road to Perfection

Recommended Posts

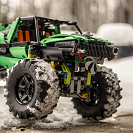
Hello everyone, I have started a build on a Green Raid Buggy.

Current features include-

-RWD (direct, no gearing) with two L-Motors 

-Steering with Servo 

-Front double wishbone suspensions 

-Rear Uni-trailing axle suspension with ball joint connection and s  

-Beginnings of bodywork

Brick Safe: http://bricksafe.com/pages/Myers_Lego_Technic/lego-technic-green-raid-buggy-wip- 

As always, advice, thoughts, and comments are much appreciated. 

-Myers Lego Technic

Pic of the rear lights 

800x533.jpg 

 800x533.jpg 

800x533.jpg

Pic of the rear lights 

800x533.jpg

Edited by Myers Lego Technic
More pictures in later posts

Share this post


Link to post
Share on other sites

Thanks for sharing your WIP with us! A few more pictures would be nice. Best way to do that is to upload your images to Bricksafe.com or Flickr and then simply paste the links into your post as text. The images will be automatically inserted.

Share this post


Link to post
Share on other sites
2 hours ago, Myers Lego Technic said:

P.S. - Info on uploading images would also be nice. most of my uploads failed for non-size realted issues, and I was informed to contact admin. 

Best way to present your photos on EB is to upload them on external image hosting site, like Flickr, Bricksafe, Brickshelf etc and then just link them here. That way you can have big photos (preferable 800x600).

Here is the tutorial for Flickr.

Share this post


Link to post
Share on other sites

Well as a matter of fact, 18 MP is really pointless on any standard size screen anyway :) But if you link your images from flickr according to the guide, people can click on them and head over to flickr where they can zoom and enjoy the resolution. Still, from my experience as a viewer, it's much better when the pic is in something between Full HD and UHD max, so the zoom on flickr isn't to extensive.

Share this post


Link to post
Share on other sites

@Myers Lego Technic

You have linked pictures that are 5000x3000 in size. That is way too big according to forum rules. I removed them. In my post above I wrote that preferable size is 800x600. So please try to post pics according to this.

Share this post


Link to post
Share on other sites
10 hours ago, Didumos69 said:

Thanks for sharing your WIP with us! A few more pictures would be nice. Best way to do that is to upload your images to Bricksafe.com or Flickr and then simply paste the links into your post as text. The images will be automatically inserted.

2 hours ago, Offroadcreat1ons said:

I agree that more pictures would be nice, but so far It looks good. I like the use of panels and the bit of orange at the back.

I have included more photos, of an appropriate size. I will start experimenting with backgrounds as these were just quick shots. 

Share this post


Link to post
Share on other sites

The bodywork looks good. IMO, you need to add a brushguard of some sort to the front. Also,on the rear view pic, it looks like you are bending the shocks inwards, so they will not perform as well as they should. But its an excellent start. :thumbup:

Share this post


Link to post
Share on other sites
1 hour ago, Leonardo da Bricki said:

The bodywork looks good. IMO, you need to add a brushguard of some sort to the front. Also,on the rear view pic, it looks like you are bending the shocks inwards, so they will not perform as well as they should. But its an excellent start. :thumbup:

Thanks you for the comments! the shocks on the back are angled inward but with completely legal techniques, that don't put stress on the spring. The inward angle helps when only one tires is pushed upward, and only one of the shocks is depressed. Without that angle the independent suspension would be useless. 

-Myers

Some interior WIP pics should be up in a few minutes. 

Interior Pics

(the central compartment with the red handle opens, and has it own lighting, with Lego LEDs.)  

800x533.jpg

800x533.jpg

Edited by Myers Lego Technic

Share this post


Link to post
Share on other sites

That interior looks really nice, are you doing seats? Also, the back reminds me of a Volkswagen beach buggy, but without the engine. It all looks good so far! :classic:


Share this post


Link to post
Share on other sites
3 hours ago, Myers Lego Technic said:

Thanks you for the comments! the shocks on the back are angled inward but with completely legal techniques, that don't put stress on the spring. The inward angle helps when only one tires is pushed upward, and only one of the shocks is depressed. Without that angle the independent suspension would be useless. 

True, but I meant that, because the shocks are two connected pieces, the shocks themselves are bent slightly in the middle due to the angle they are mounted at and the ensuing weight upon them. It most likely will have no effect because your model is small, but it has negatively effected one of my large-scale crawlers.

Share this post


Link to post
Share on other sites

Here are some more photos of my WIP. 

As you can see I raised the chassis, and lowered the axles, to make room for the tires from the CLASS. 

There is also interior lighting from the roof above the seats, and glove box lighting for the opening glove box. 

800x533.jpg

800x533.jpg

800x533.jpg

800x533.jpg


I am quite pleased with these pictures. :wink:

Bricksafe: http://bricksafe.com/pages/Myers_Lego_Technic/lego-technic-green-raid-buggy-wip-

Edited by Myers Lego Technic

Share this post


Link to post
Share on other sites

For those of you who use proper backdrops and lighting for your photos, what advice can you give me based on my photos here?

(I am new into using backdrops and lighting, and am also having trouble with keeping the entire model in focus.) 

Edited by Myers Lego Technic

Share this post


Link to post
Share on other sites

Your backdrop seems to good. I'd say you need more light. If that is somehow not possible there is an alternative if you have a tripod. In this case you could use higher exposure and setting photo capture delay by few seconds. The idea here is to get as much light as possible, but you need to make sure camera doesn't move.

Share this post


Link to post
Share on other sites

Update! 

-Added much more bodywork

-Redid much of the rear suspension 

-Improved existing bodywork in stability and aesthetic properties 

-Raised the chassis and lowered the axles to make room for the CLAAS TIRES! 

-Beginnings of the front end (Light mounts, jeep style grill, HIGHLY detailed fake fake engine) 

(An outdoor pic) 

800x533.jpg 

(My favorite pic of the Buggy so far) 

As always, advice, comments, and constructive criticism are much appreciated! 

 Brick safe:  http://bricksafe.com/pages/Myers_Lego_Technic/lego-technic-green-raid-buggy-wip-

Edited by Myers Lego Technic

Share this post


Link to post
Share on other sites

Looks good, The suspension setup looks pretty robust, one thing I would change is the front springs are mounted on a 4L axle with no half bush, I would put one there to stop binding.

I'm not a fan (no pun intended) of the radiator fan in the front, it looks a little to big.

Share this post


Link to post
Share on other sites

Sounds good @JJ2! I will implement your ideas before the next update.

3 hours ago, JJ2 said:

Looks good, The suspension setup looks pretty robust, one thing I would change is the front springs are mounted on a 4L axle with no half bush, I would put one there to stop binding.

I'm not a fan (no pun intended) of the radiator fan in the front, it looks a little to big.

Quick Pic... 

800x533.jpg 

Edited by Myers Lego Technic

Share this post


Link to post
Share on other sites

Create an account or sign in to comment

You need to be a member in order to leave a comment

Create an account

Sign up for a new account in our community. It's easy!

Register a new account

Sign in

Already have an account? Sign in here.

Sign In Now
Sign in to follow this  

  • Recently Browsing   0 members

    No registered users viewing this page.