Search the Community
Showing results for tags 'x-wing'.
-
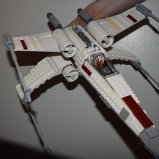
Here is my take on the iconic X-wing. Lots of builders have been bringing out some incredible models, and I decided to hop on the X-wing train and see if I can bring something interesting to the table. The objective of the project: To build the perfect minifig scale X-wing and make it look like a mini UCS X-wing, not because I'm a genius, but because I'll be using the best design ideas inspired by the best X-wing builders out there. The design guidelines: Accuracy in overall shape, scale and proportions. Convincingly accurate color scheme. Abundance of details. Sturdiness. Working S-foil mechanism. Modularity and easy assembly. Using the new windscreen. Detailed cockpit. Convenient R2 slot. Storage compartment. LEGO Star Wars - T-65 X-Wing 0 4K by Khaled Yousef, on Flickr LEGO Star Wars - T-65 X-Wing 1 4K by Khaled Yousef, on Flickr LEGO Star Wars - T-65 X-Wing 3 4K by Khaled Yousef, on Flickr LEGO Star Wars - T-65 X-Wing 4 4K by Khaled Yousef, on Flickr LEGO Star Wars - T-65 X-Wing 5 4K by Khaled Yousef, on Flickr LEGO Star Wars - T-65 X-Wing 6 4K by Khaled Yousef, on Flickr LEGO Star Wars - T-65 X-Wing 7 4K by Khaled Yousef, on Flickr The build: The ILM model used in the CGI work is dirty white, while the life size model leans towards grey, so you pick the one you prefer; there is no definitive answer to that question. I chose white because the X-wing is a lot lighter than the Falcon, and the Falcon is definitely grey, so there is no other choice in LEGO except white. I tried however to darken the overall tone a bit by using grey and tan parts whenever possible to give it the battle scarred look. I used red and dark red for marking to give it a dirty look while at the same time be able to use the original Red Five striped 1*4 tile on the wings. An all dark red markings would just make it look dark not dirty; dirty is more accurate. I found that L-DI-EGO's and Inthert’s idea to use the 12*3, 4*2 & 3*3 wedge-plated to illustrate the nose to be the perfect solution. I just wish LEGO would make a 6*2 wedge plate so I could use it instead of the 4*2. I also think Inthert is the best builder to incorporate this idea to achieve the perfect overall shape. I had to use the new windscreen because it's just gorgeous. The only problem with it is that it ends in 4 studs and doesn't taper inwards; it should taper inwards to 3 studs to fit seamlessly into the wedge plates of the nose. This caused a slight unavoidable gap between the wedge plates and the top of the nose. I’m working to fix this issue. The build of the body is sturdy enough, and the wings are removable for easy maintenance of the s-foil mechanism and for easy storage. Psiaki was the first to inspire me to think outside of the box when it comes to designing the X-wing body; he was the first to use SNOT techniques, modularity and angled plates to make a more accurate overall shape for his X-wing than the official set. The nose tip is a new design, I hope I managed to make it look as smooth as it should. I used LEGO's S-foil mechanism with rubber bands, it's the best and most professional one to use, it opens easily with a twist of the top 2*2 round plate and snaps right back perfectly. I improved on LEGO's design by concealing the rubber bands so it won't look stupid. I consider this model to be a work-in-progress, so any ideas to improve on this design would be much appreciated. I intend to improve the S-foil mechanism by connecting the opposite wings to achieve more balance while keeping the core rubber band system, which is tough considering the tight space I have. I also want to add retractable landing gear inside the engines and the nose without compromising the shape or the integrity of the structure. I hope I've succeeded in building a better and more accurate X-wing, worthy enough of the 40th anniversary celebration this year, bringing together the best ideas of the best builders out there with professional techniques from the official sets and some personal ideas of mine to make it look like the perfect minifig-scale X-wing. I wanted to take more time to improve on this model, but I don't want to cause delay to my next MOC, which is going to be my best work ever, so I think I'll move on immediately to my next MOC, which will be "on the way at the speed of light".
-
 I have had an enjoyable 40 year life journey trying to build the perfect Lego X-Wing. My first childhood model in 1978 used primitive 3149ac01 hinge plates. Since then I have continually evolved my X-wing (including a notable 2001 MOC on Brickshelf, now badly outdated), drawing inspiration from many on the internet - which rapidly drove the advancement of Lego X-Wing modeling accuracy. Today I am pleased to present the current version of my X-Wing: There are many great X-Wing models posted on the internet, and each advance makes it harder to add something original that hasn't been done before. I have blended ideas drawn from many others (acknowledgement and attribution at the end of this post), as well as added a few of my own to create a unique build that, as a whole, I feel is materially different than others posted before. I humbly offer the following individual aspects of my model as being unique enough to represent an advancement in building techniques. 1 - tapered, accurate canopy with lines flowing smoothly into the other fuselage lines and direction 2 - smooth, fuselage side paneling from nose to rear. Straight lines and angles, minimal protrusions 3 - smooth nose cone with constructed sensor window. 4 - redesigned S-Foil. Structurally sturdy, but also containing smooth interior, exposed engine cutout (two studs deep), 3/4 plate deep exposed 4x4 paneling with smooth surface, triple "fin" at back, and two plate thick pin holes for the saucepan laser base. Also note the SNOT technique inspired by Jerac's build, with added smooth transition to the fuselage panel 5 - Nose cone has the smoothest side diagonal along the red stripe that I have seen built so far, with no gap transition 6 - Proton Torpedo launcher has fuselage pathway exit angle exactly parallel to the forward line axis of the ship. 7 - Landing Gear is retractable, and sturdy enough to push the model across a flat surface without any hint of collapse. (Note the tradeoff of a slightly off center gear position on the rear gear) 8 - Working cargo compartment - this is where Luke's base camp equipment seen on Dagobah was stored. 9 - Canopy opens at proper hinge point at 90% of the total length, unlike Lego one piece canopy which opens at the far end. 10 - Transition between canopy and back fuselage is clean, smoothly angled with rest of rear fuselage, and avoids the near ubiquitous 2x2 corner slope and its jarring angles 11 - New laser base. Minifig saucepan used as a round, smooth base (although a bit small in diameter), attached to wing through 1x3 inverted tiles, and 1x2 rounded plate with open studs. Gap covered by minifig utility belts and a rubber band. 12 - High relief greebling on top inspired by actual X-Wing models, hiding the technic S-Foil opening/closing mechanism - the 1x2 liftarm piece near the middle. Swing this piece counterclockwise 1/8th a turn to close the S-Foils, clockwise to open. 13 - Six sided rear with angled greebles and key features of prominence replicated I've drawn inspiration and technique from many posters here and elsewhere on the internet. My thanks and credit to you for advancing the state of the art X-Wing in my mind (I apologize if I failed to acknowledge builders who have shown concepts prior to the ones I listed - these were the ones I personally saw first that inspired me): @dmaclego and @atlas inspired the front upper fuselage. My upper front fuselage is virtually a straight up copy of those excellent builds. The laser tip and flashback suppressor is a 100% copy of what I first saw on a @dmaclego model @Jerachad a unique gearbox for the S-Wing opening. I redesigned it on similar principles using half the parts, reducing some of the wobble, and increasing attach points/sturdiness to wrap the rear fuselage around it. @Jeracmodel also showed me the rigidity of the SNOT scissor action on the S-Foils. I modified this even further to create enough rigidity to hold a 2 stud deep engine cutout that starts just one plate deep from the front wing edge, and ends just 4 plates from the back edge. (Note: The inner wing engine parts and front cowling were constructed to add to the structural integrity of the one plate front edge). @Inthert built the first model I saw with a good custom X-Wing canopy @L-DI-EGO had the first posted pictures I could find using the minifig saucepan as laser base, however the inverted 1x3 tile was not available then, so that model could not put the laser at the end of the S-Foil. @L-DI-EGO also inspired the "3 fins" on the S-Foil near the engine, I used a different mounting technique to achieve greater smoothness with my deflector panels. Thank you for your time reading my first post. I am happy to answer any questions, and welcome your comments and feedback. I hope you enjoy my contribution!
 -
I haven’t seen any depictions of the T-65 X-Wing in 1:1455 scale so I thought I’d throw my solution out there. https://rebrickable.com/mocs/MOC-182540/MTgreg/t-65-x-wing-starfighter-in-nano-scale/#details Suggestions/alternative solutions welcome.

-
Hi all. I haven't added much to my 1:250 fleet of Star Wars fighters, gunships, freighters and one corvette (plus a couple of mini scenes) this year but I have been working on my photography. I've really enjoyed seeing the groups of ships grow and comparing the sizes of the finished products, Slave 1 and the Rogue Shadow turned out surprisingly big, but the biggest surprise was how huge a Blockade Runner is! In case anyone's interested, instructions for all of them are on Rebrickable... https://rebrickable.com/users/ron_mcphatty/mocs/ And here's another with almost all the ships arranged together, which took far, far longer than I thought it would!
-
After a year's break from Star Wars, I decided to improve one thing in my collection. I already had one MOC/MOD for X-Wing, strongly based on the 75218 set, but for some time there were a few things that bothered me about it. It turned out that the rubber bands had lost their properties and the mechanism was malfunctioning. Plus I wanted something much better and here it is my new Luke Skywalker's X-Wing Fighter The build took about 3 weeks, I had most of the parts so I only needed one order on Bricklink. There are 985 pieces here, quite a lot. The mechanism works on the same principle as in the 75301 set My X-Wing has retractable landing gears and a new type of display stand. Instructions is available on Rebrickable! more about this MOC on my YouTube channel - Edge of Bricks
-
I've been working on some modifications to the 2023 UCS X-Wing in Studio. My main aims were to increase the slope angle of the top surface of the nose and to build a stand to display the X-Wing on landing gear, I also swapped the nose tip parts for light blueish grey and got rid of those horrible white flippers on the laser tips. The landing gear feet and doors are built into a a thin flat base which the X-Wing rests on top of, aligned by the rear gear and supported by a column of bricks that poke up into the ship's display stand hole. The X-Wing set doesn't need to be modified to sit on the stand so hopefully it'll be useful to anyone like me who wants to display the under a coffee table. It can also be moved, the UCS plaque positioned on either side (or not at all) and the X-Wing can be lifted away very easily. Free instructions are on Rebrickable I also built a detailed little R2 to display with the X-Wing. Like many others I wanted to reuse the old 30611 polybag head part behind the X-Wing's cockpit, it's slightly too big to be the right scale but personally I prefer it to the too-small minifigure. Big thanks to Jan Woźnica, who goes by john_carter and is the behind the Tale of The Space Age Lego Ideas set, he kindly let me alter and use his very clever R2-D2 design. He brilliantly positioned 1x1 Round Plate with Bar pieces at 45 degrees between two 4x4 Round Plates, taking advantage in the gaps between studs and anti-stud notches underneath round plates, allowing an open stud piece to securely connect to the end bar poking out of the 4x4 circle. You can find his excellent original here and I created a seperate set of instructions for R2 (also on the X-Wing mod Rebrickable page). I'm really pleased with how the mods turned out, it's great (for my marriage) to be able to display such a big set under a coffee table rather than taking up huge amount of space with the s-foils opened. I really like seeing the ship with the wings closed with the added bonus of the weight of the top pair making them appear fully close. I hope the stand proves useful to some of you, thanks for looking!
-
Hi all. I started this little project as soon as I saw pictures of the Dagobah Jedi Training set, already into the swing of sub 30cm builds I thought the little piece of wing protruding from the swamp would be an ideal starting point for an X-Wing. This modification is a combination of a small stand (in the boardered diorama style) with my Midi X-Wing, plus some swampy decoration. The swamp-stand can connect to the Dagobah set by removing one of the silver grill tiles and using the protruding studs for the connection, or the stand can also sit seperately. The Dagobah set's bit of wing can be hidden behind Yoda's hut and the hinge area conveniently disguised with a single piece of foliage. I've put together instructions and parts list for the mod and X-Wing (which can be built as a mod of 75301), they're all in a zip file here. Thanks for looking!
-
When I was a kid wasting time browsing Brickshelf, I always liked X-wings most. I had a mental list of custom X-wings I liked best and I wanted an X-wing just like them. But I wasn't willing to break up my sets to make a custom X-wing like the amazing ones on Brickshelf, so I never got one. As an adult wasting time browsing Flickr, I always like X-wings most. I have a mental list of custom X-wings I like best and I want an X-wing just like them. But I'm not willing to break up my sets to make a custom X-wing like the amazing ones on Flickr, so I'm never going to get one. Oh, what the heck. It's been 20 years now that I've wanted a super awesome custom X-wing so I should just go ahead and get one. I'm an adult now. I don't need to ask anybody's permission, I should just do it. Show that I can get something done in my life, even if it's as unimportant in the grand scheme of things as a silly little Lego build. But there are so many good ones! How can I pick just one! Obviously I should make my own custom design that takes all the best parts of the best models and corrects the worst parts. But that would take a LOT of hard work and trial and error ... a friend of mine built his very own custom X-wing design in 2018 and it consumed him for months. So, like a fool, I spent money instead of time (though time is money) and just, um, built them all. (Though I'd note that there are at least a dozen more great X-wings on the internet that I'd also like to build .... ) Full Flickr album here: https://www.flickr.com/photos/149520828@N02/albums/72177720298365006. I apologize for the bad photography, I don't have a light box or a nice place to take pictures outside. My very own little T-65 X-wing, based on a childhood makeshift (1998ish, 2021) This one is an idealization of the makeshift X-wing I built as a little kid without a lot of parts, either before or shortly after the first set came out. I remember using the 4x9 wedge plate in red to form the nose, and using that shape of windscreen in trans-light blue with that top hatch, and that I used 2x6 plates for the wings. This takes the concept of that old childhood build and makes it like an actual retail set. It's about the same size as the 4+ X-wing sets, though not quite as simple. My very own design for a T-65 X-wing retail set circa 1983 This one is all mine! It bears no debt whatsoever to any other X-wing ever made. It's my impression of what an X-wing set would have looked like if it had been released in 1983 to tie in with Return of the Jedi, instead of in 1999 to tie in with The Phantom Menace. Some molds come from as late as 1987, but it seems fair to me to imagine those molds being made in 1983 for this set, since the 1999 set used an awful lot of new molds. The canopy uses sticker strips cut from unused sticker sheets. I really like the brick-built R2-D2. The contemporary finger hinges are too weak to hold the wings up or down on their own, so pneumatic tees are connected to modified plates and sandwiched between 4x1 hinge plate assemblies. They swing in and prop the wings apart when they're open, and rails near the top and bottom of the aft fuselage prevent the wings from opening too far. A 2x2 plate at the base of each lower wing provides enough clutch power to keep the wings together and level when they're closed, but not so much that the wings are hard to open. Like any 1983 set, this uses the Classic Space landing legs, and the contemporary Classic Space canopy works really well for the X-wing - so well that Dan Nelson used it independently in 1997 and Mike Psiaki used it again in 2011. This is much smaller than most custom X-wings, but it's still a very substantial size for swooshing and play, and it feels like a good size relative to the minifig. It's got a spacious cockpit and it's easy to get the pilot and droid in and out. It's also very close to the size of contemporary Lego spaceships in 1983, 1985, and 1987, so it's not too large to imagine as a 1983 set. So yeah - there are many custom X-wings out there, and this is my humble contribution to the field! Dan Nelson T-65, 1997 This is actually 98% My Own Creation, but I'm crediting Dan Nelson because it's heavily inspired by Dan Nelson's childhood makeshift X-wing circa 1997. This is my imagination for what an X-wing set would look like circa 1997 if it had been released to tie in with the Special Edition movies rather than with The Phantom Menace. I've swapped out some old molds that are now very expensive on Bricklink for their modern counterparts - which mostly means swapping finger hinges for modern 3.18mm clip hinges. I really like the brick-built R2-D2. There's room for storage accessed from a hatch on the rear fuselage step, like in Dan Nelson's version - a rare feature in custom X-wings. The canopy framing is white strips cut from unused sticker sheets. Mark Chan T-65, 2001 Back in the old days of Brickshelf, when the world was young, this was an X-wing I really admired. I still think it's pretty neat, nice and sturdy and detailed, but its proportions are a bit off. As with all the other X-wings, I've swapped some old molds for new ones in this build. Mark Chan posted an all-new fully modern X-wing to Flickr in 2018, but I actually don't particularly like that one, so I made no effort to copy it. Niko T-65, 2003 This one is a very lightweight and simple X-wing, mainly notable for not having upside-down lower wings. The proportions are bad and it can't fit a complete droid, but it's lightweight and sturdy, so it's good for swooshing. It's notable that Mark Chan, Niko, and Bruce Lowell all posted their X-wings with simple nose taper before Lego released the set 4502 with simple nose taper, just as fan-built X-wings used 4w cylinders for the engines long before Lego finally used them in set 75218 in 2018. Bruce Lowell T-65, 2003 Back when Brickshelf was the leading place on the internet to post your Lego creations, before Bricklink was as useful and well known as it is today, Bruce Lowell's X-wing was the best! It was copied as widely in its day as Mike Psiaki, Tom Loftus (Inthert), or Jerac's X-wings have been, in no small part because like them, Bruce Lowell posted step-by-step instructions for how to build it. For instance, David Low's excellent "Minifig Collector Scale" X-wing from 2006 is, upon close inspection, a lightly modified Bruce Lowell, so I chose not to build that one. This one is bigger than Mark Chan and Niko's X-wings, but not quite as big as Brian Tobin's, and smaller than any modern X-wing. The build is very sturdy and has excellent proportions and detail. The hexagonal profile and detailed greebling of the aft fuselage was unsurpassed for eight years, until Mike Psiaki posted his famous X-wing in 2011. As with other old X-wings in this collection, I've swapped some old molds for new ones. The problem with this X-wing is the wing opening geometry - opposite wings don't line up very well, so it's not a very convincing X. Brian Tobin T-65v3, 2004 Brian Tobin continuously upgraded his childhood makeshift X-wing from 1983 until 2001, but never managed to get the wings to actually open! His is the most prominent old "big" X-wing I can find pictures for on the internet. The last Brian Tobin X-wing was this one, which was heavily inspired by set 4502. As with other X-wings in this album, I've swapped out some old molds for new ones. I've also included a very large cargo space behind the seat for Luke's Dagobah camping gear, which is a rare feature for custom X-wings. The problem with this model is that the wing geometry is altered from the 4502 set such that it no longer works! The wing jacks get caught on the engine cylinder pieces and are unable to open the wings. You have to open the wings manually and rotate the wing jacks between them. Also, the rubber bands aren't strong enough to hold the wings open and closed with this geometry, so the wings flop about a lot. I copied the geometry faithfully though, so I guess Brian Tobin's build must have had the same problem. Despite its flaws, Brian Tobin's X-wing was one of the best on the internet between 2004 and 2011. This is the largest of the pre-2016 X-wings, but still smaller than any modern X-wing. Mike Psiaki T-65v3, 2011 When this X-wing appeared in 2011, it made an earthquake in the AFOL community. It wasn't the first X-wing with true center-pivot wings, but it was the first one to have true center-pivot wings and complex nose taper, and its use of the old Classic Space canopy was ingenious. Thanks to Mike Psiaki's generous posting of full instructions on Brickshelf, this was the most widely copied X-wing from 2011 to 2016. Various adaptations used the windscreen from set 7140 or the windscreen from set 75102, or turned it into a T-70. It's a little smaller than modern X-wings of the latest generation. The canopy uses strips of white sticker material cut from unused sticker sheets. Unfortunately, the nose is a little fragile. The geometry isn't exact, so it takes a little persuasion to stay there. I don't think anybody is building Psiaki X-wings anymore: the key parts for the build, the hinge plates that form the side of the nose, cost me $6 each on Bricklink. Ouch! Jerac T-65v1, 2018 Jerac's original T-65 has set the standard for the last four years, with good reason. Although it's fragile during construction, it knits together very well and is surprisingly sturdy afterwards - except for the lower aft fuselage step and the 4w engine cylinders. Unfortunately, the lower aft fuselage step is so fragile that it's hard to grip the model near the center of gravity, and the 4w engine cylinders have such a fragile connection that you can't open the wings to their full range of motion without having one or more engine cylinders pop off. (I can't anyway.). The greebling on top of the aft fuselage leaves something to be desired too. It's so shallow that I don't find it very convincing. The retractable landing gear works well, but the hinges are inadequately supported and prone to detaching unless treated very gingerly, and it's a bit tricky to reattach them. Koen Zwanenburg T-65, 2019 Koen Zwanenburg posted the Studio file for this on Eurobricks for a few days, but he removed it after Brick Vault complained that he was affecting their sales of the instructions for Jerac's 2018 version. In fact, the build is completely different. The brick built Red 5 stripes on the wings are excellent. The 4w engine cylinder mounts are much improved, so the wings can be opened to their full extent, which is wider than on the Jerac model, without losing anything. The aft fuselage profile is a much nicer hexagon. The lower aft fuselage and aft fuselage step are much stronger than on the Jerac model, but at the cost of losing the nice SNOT tiled underside. The landing gear doors are simpler and theoretically stronger, but I still end up having to take them off any time I want to get the landing gear out, so it doesn't actually end up much better than the Jerac model in that respect. The nose construction is much simplified, with no attempt at achieving the subtle bank of the sides; instead, they're straight vertical. The nose cone isn't attached to the nose side panels with Mixel joints as in the Jerac model, but is mounted on a rigid pole extended from the cockpit. This theoretically should make the structure simpler and stronger, but in practice it makes it much harder to assemble and much more fragile when assembled, because the parts remain under high stress rather than having flexible joints that accomodate the stress. The big cylindrical bases of the wing guns are modified from Marshal Banana's modified Jerac X-wing. Chris Ehnot T-65v3, 2020 After Tom Loftus's (Inthert's) revolutionary T-65v2 in 2016, Chris Ehnot was the first to post a fully modern X-wing with the windscreen from 75102, paneled/tiled nose sides, and 4w engine cylinders. He revised his build over three years - this is copied from his version 3, posted in 2020. Like Koen Zwanenburg's model, this one has wings that open wider than Jerac's without popping off the engine cylinders. Though it looks similar externally, the build is completely different than in Jerac v1, Jerac v2, or Koen Zwanenburg. It's distinguished by several subtleties of shape compared to those. Baby bows are used on the bottom of the fuselage to suggest the subtle angles on the bottom, where the filming model is in fact not flat. The wedges beside the engine cylinders are more smoothly integrated into the wing and have a subtle edge above the plane of the wing as on the filming model. Behind the engines, there are the little jigsaw-tabs that are almost always omitted on custom X-wings. The upper aft fuselage has a nice depth of greebling, and has the small, limited 45-degree sloped edge that characterizes the original ANH filming models, but which is lacking from the full-size model used in the ESB Dagobah crash scene and from the Special Edition CGI models. Because Chris Ehnot's model has no rear landing gear, it can have four complete engine cylinders for a better look underneath. The modeling that connects and smooths the junction of the aft fuselage and nose is very detailed and subtle. Unfortunately, this is also the most fragile X-wing model in the collection, such that it can hardly be touched in order to take photographs. Jerac T-65v2, 2022 Jerac's T-65v2 is the best X-wing of the lot. It's amazingly sturdy, unlike all the other fully modern X-wings with the post-2015 canopy part and 4w engine cylinders, and easy to build too. The nose knits together very well, and the line of panels on the side is completely level and unstepped, unlike on the Jerac T-65v1, the Koen Zwanenburg, and the Chris Ehnot models. The worm gear box is amazing. It holds the wings steady as a rock when open and when closed. The back engine extensions are held on very steady. The Ninjago sais and candles work very well to simulate the flashback suppressors at the tips of the laser cannons and the varying diameter of the gun barrels. It's easier to get the pilot in and out than on the previous model, and the droid. The bottom of the forward fuselage is covered better than on the old model. Most importantly, the aft fuselage step, which was previously very fragile, is now much simplified and completely solid, and the 4w engine cylinders, which previously popped off tremendously easy, no longer do, even though the wings open wider with the new mechanism than they did with the old version. The greebling on the top of the aft fuselage is also much improved, and there's even greebling on the sides of the fuselage between the wing jacks! Also, there's added greebling inside the wings on the engine "shadows", and representation of the "greeble panels" at two stations along the wingspan. The rear landing gear is now fully supported, so the hinges won't pop off if you press down on them too hard. While some subtleties of shape are lost on the lower aft fuselage compared to the previous version, the tailcone has the proper subtle 7-sided shape for the first time. The visible gaps on the sides of the nose cone leave something to be desired though. Jerac T-70, 2022 This is nearly unmodified from the Brick Vault instructions, with just a couple small color swaps on the nose. It's a surprisingly easy build and very sturdy. The nose knits together extremely well. The worm gear mechanism for the wings is amazing. They hold their position steady as a rock either open or closed. The visible gaps on the sides of the nose cone leave something to be desired though. All of them together! I don't have enough room to take a really well-staged fleet shot, so this will have to do. By the door: Chris Ehnot 2016-2020. On stands: Jerac T-65v2 2022, Jerac T-70 2022. Left column, front to back: my 1983 set concept, Dan Nelson 1997, Niko 2003, Brian Tobin 2004, Jerac T-65v1 2018. Right column, front to back: my little X-wing 2021, Mark Chan 2001, Bruce Lowell 2003, Mike Psiaki 2011, Koen Zwanenburg 2019.
-
Disclaimer: credit where credit is due; this is a modification of the amazing X-wing moc (V2) by @Jerac (see here.) I had to make some modifications to make the theme work, but it's mostly his design. Don't know if that will disqualify me, but at the very least, treat it as a reskin. I was in the middle of designing it in Studio at the time that the contest was announced, but have since built it. In-universe (SW) history: Blackburn Squadron is group of former pirates from the outer rim who chose to align with the Rebellion when the Empire started taking control of systems in their territory. Much like the great Saw Gerrera's Partisans, Blackburn's methods are often deemed too violent for much of the Alliance's leadership. Their results, however, are rarely questions. Candidates for the squadron are heavily trained and tested before they can be considered for membership. Upon selection to the unit, every pilot must travel to the fourth planet of the unit's home system to hunt and kill two Jakerni, giant indigenous primates that rival Gundark in size, strength and ferocity. Their skulls and leg bones are then fused to the wings of the pilot's new X-wing. Real world history: The scheme is based on the Jolly Rogers series of U.S. Navy squadrons, beginning with VF-17 in WWII and passing most recently to VFA-103 in 1995. Initially, bearing just a small black "Jolly Roger" (skull-and-crossbone) flag on an otherwise normal paint job, they began to adopt the more-recognizable scheme currently utilized with VF-84. While there have been different variations, the common components are the black tail fins with large white skull-and-crossbones and gold tips, black around the cockpit that continues to the nose and "Vagabond" stripes (gold w/ black chevrons or black with gold chevrons, barrowed from VF-84's previous name.) Some have gray noses, some black and some F-4's had white ones. Build history: I adopted mostly the current version of the paint scheme, but thought the white nose was distinctive (like a skull itself), so I used it. Originally, the wings were done with stickers, but I wasn't satisfied with the results (it would have helped to have a 6 x 4 tile without studs), so I decided to "brick build" them instead. This was tricky due to the pins that stick out of the bottom. With such thin wings, I decided that they had to be fused to the top. Ended up using these to turn technic bricks for the pins to mount in. The long bones are attached with black clips, one raised by a 1x1 plate to clear the other. I haven't settled on the Vagabond stripes yet, as I had a few ideas (for example, as seen here.) Even had some sticker chevrons, but didn't use them after I went brick build on the S&CB. For the gold color, I went back-and-forth between Yellow or Bright Light Orange. Most of the actual designs are closer to yellow, but due to lighting, often look like BLO. I went with the one closer to the Trans-Yellow windscreen, which I knew I had to incorporate as soon as I saw it. Using yellow did, however, require redesigning the rear portion of the laser cannons, since ingots do not come in Yellow (but do in BLO.) Finally, the red corresponds to the inlet caution labels on many of them. At first, I used dark red, but decided to try red instead, thinking it look more like vibrant blood coloring.
-
Built to commemorate the release of Star Wars: VISIONS and delayed in order to get as pristine a render from @ExeSandbox as I could. Follow my Insta!
-
Built to commemorate the release of Star Wars: VISIONS and delayed in order to get as pristine a render from @ExeSandbox as I could. insta link if yall want it.
-
Hi!I'm back with a new Star Wars project! POE DAMERON'S T-70 X-Wing Fighter This time something from the sequels! It's been almost 10 years since the premiere of The Force Awakens! Do you feel old? Just before the premiere of the film I bought the 75102 set and that's how my adventure began, first modifications and then my first own projects.My 75102 has been lying in the closet for many years, until now! This is one of my favorite Star Wars designs, I really like the combination of black and orange. I decided to return to the topic and create my own T-70 MOC The basis for the front was the design by Quarries Workshop, who did a great job on this element, check out his other designs! In the later stages of construction I will develop this structure for my own needs. The biggest challenge was building the wings, because the T-70 has a completely different design than the classic T-65. 971 parts! If you have the 75102 set you can use 188 parts. Instructions is available here:https://rebrickable.com/mocs/MOC-199921/EDGE OF BRICKS/poe-damerons-t-70-xwing-fighter/#details All details on video:
-
Here is my Let's Build for the upcoming (08/2018) #75218 X-Wing Starfighter. Enjoy!
-
 These are original trilogy themed scenes for my Kinetic Balancing desk toy with Interchangeable scenes. Here is a video of it in action and photos/more info below : LEGO Kinetic Balancing Desk Toy by Sandlot Creations, on Flickr Lego balancing Desk Toy - Star Wars themed scenes by Sandlot Creations, on Flickr Lego balancing Desk Toy - Star Wars themed scenes by Sandlot Creations, on Flickr If you would like to make the Balancing Desk Toy concept into an official Lego product please consider voting for it on Lego Ideas here: https://ideas.lego.com/projects/235a536e-c6cc-4b0e-889f-1daf1403da88 Every vote counts! You can also see the other scenes I've created for this on the Lego Ideas Page! Also, Let me know any scenes you would like to see created for this project! Thanks for watching!
 -
This is a MOC of the T-70 X-Wing from the Resistance, in both Poe Dameron's Black Leader (black and orange) and the generic fighter version (blue and grey). This MOC has been inspired not only on one but by several others creations i've found on the internet. Though i've combined several elements from these builds, most of the design is mine. Anyone willing to build this MOC or to know more about it please contact me through the comments. The main pages about this MOC are on the following links: https://bricksafe.com/pages/marcanadell4/t-70-x-wing I might post other low-resolution images in the replies. The Stud.io rendered images are can be seen and downloaded on the links that I've given in the description.

-
Hey Eurobricks, First time poster but I wanted to share the my custom T-65 X-wing I have been working on for the past while. Flickr album: https://flic.kr/s/aHskC2ymYh LDD File: https://drive.google.com/open?id=1H2r8EemynUHE9wV_Q0ILHjciZeTAJIOq Part Count: 1056 Length: 34.5 cm, 13.6 inches, 43 studs. Width: 39 cm, 15.4 inches, 49 studs Height: 13 cm, 5.2 inches, 16 studs Bit of Background: I have loved the X-wing since I first saw the movies, and it was the first MOC I ever completed as a kid. Now as an AFOL I was recently able to block out some time for building a MOC and I wanted to update my first X-wing from many years ago. LEGO's versions have been solid, but the more I examined them the more I wanted to design my own that more closely matched the shape of the OT movie props. I was inspired by the amazing MOC X-wings I have seen created by many folks, including Gray Mouser, Inthert, Psiaki, cehnot, and dmaclego. My Objectives: Model building focused on three key components. Overall I wanted to make an X-wing that was relatively accurate to the source props but also very sturdy and still possessed important play features. 1) My first goal was to provide structural stability to allow for maximum swooshibillity. I will be the first to admit my MOC doesn't capture some aspects of the shape perfectly like others have done, but I wanted to focus on using a Technic solution to build a hull and wings that were very strong. I designed a custom skeleton using Technic beams and bricks across across the entire ship so the model can actually take a short fall without exploding entirely. :) 2) My second goals was to capture the proper shape with the heptagonal fuselage, proper angles and correct length and width proportions. Using the original model and screen grabs from the films as a base, I also drew inspiration from the great models of Gray Mouser, Inthert, Psiaki, cehnot, and dmaclego. I used hinge plates and Technic large ball bearings to achieve the slanted heptagonal shape and these were attached the rigid skeleton to maintain structure/swooshibility. It also means I can hold the model by the nose :) Here is a stress test swooshing videos. Two more are on the Flickr album. 3) Building working 'play' features such as retractable landing gear, removable R2 unit and opening s-foils. Since this was going to be for swooshing and not just display I wanted to incorporate the action features that were present in the official LEGO sets. The first was fitting an entire R2 unit behind the cockpit, legs and all. Fortunately, the skeleton allowed for a large space bind the cockpit and I used hinged panels around the R2 unit so the entire droid (legs and all) can be removed and inserted easily. I also made retractable landing gear a part of the rear engines and the front fuselage. Again the landing gear don't look quite as pretty as a display set, but I prefer the play-ability aspect myself. :) The s-foils can also be opened with a knob on the rear or a switch on the top of the craft. There is also an option to use a knob on the top of the fuselage, but I think the top knob would stick out too much. Just for fun here are the past two iterations of my MOC, from many moons ago I would love to hear thoughts about what others think of the model and I would be happy to answer questions or provide my LDD file, too! Thanks!
-
I started building this last summer, but never was able to take pictures of it. When I finally did, I revealed it on AFOLs of Facebook to much fanfare, but I thought I would share it here as well. First picture is an angle shot. It is a modified 9493. I extended the nose, modified cockpit and engines. But I used that set as a starting point, then changed things as it came along. Neo Classic Space X-Wing by TheLegoDr, on Flickr This is a rear shot of the engines. Neo Classic Space X-Wing by TheLegoDr, on Flickr Cockpit area. Added some extra decals so Benny knows his surroundings better. Neo Classic Space X-Wing by TheLegoDr, on Flickr With s-foils in attack position. Front view. Neo Classic Space X-Wing by TheLegoDr, on Flickr Side view. I think this is one of my favorite angles. Neo Classic Space X-Wing by TheLegoDr, on Flickr Rear view. Neo Classic Space X-Wing by TheLegoDr, on Flickr I know I've seen many classic space inspired X-Wings, but I liked doing it myself as well. It was a big hit at the few local LEGO shows I've taken it to. I have since built a 48x48 landing pad similar to the 928 landing pad, but no pictures taken yet. I have also built a classic space Y-Wing and currently working on another station/landing area for an A-Wing. Anyway, let me know what you think. Plus, any critiques. I'm new to classic space inspired builds. I don't have a lot of these colors, so it is all new purchases for me, so I don't always have the greebling needed. I have given thought to going back and smoothing out the wings better and exposing less studs.
-
Hi Everyone, My first post here. I have been working on a lego star wars mini ship set for awhile now and thought i'd share it with everyone here. The ships are primarily built to play with my 2 boys (4 and 1.5) so they have to be extra durable. I do my best to get sizing as close to same scale for all the ships as I can. I have a few more ships as well you can check on my Flickr page. There are many more photos of each of the individual ships but wanted to post a fun little render I was playing around with here. I also have instructions on some of the ships and am working on a build-guide for the falcon. Flickr Gallery: https://www.flickr.com/photos/159419138@N03/with/39595199135/

-
Here I want to present you my newest MOC a X-Wing Fighter in Midi-scale. More photos on Flickr album Download the buildings instructions: - for LDD : HERE - for Stud.io : HERE Version 2 form my X-Wing with the monochrome version. My diorama.
-
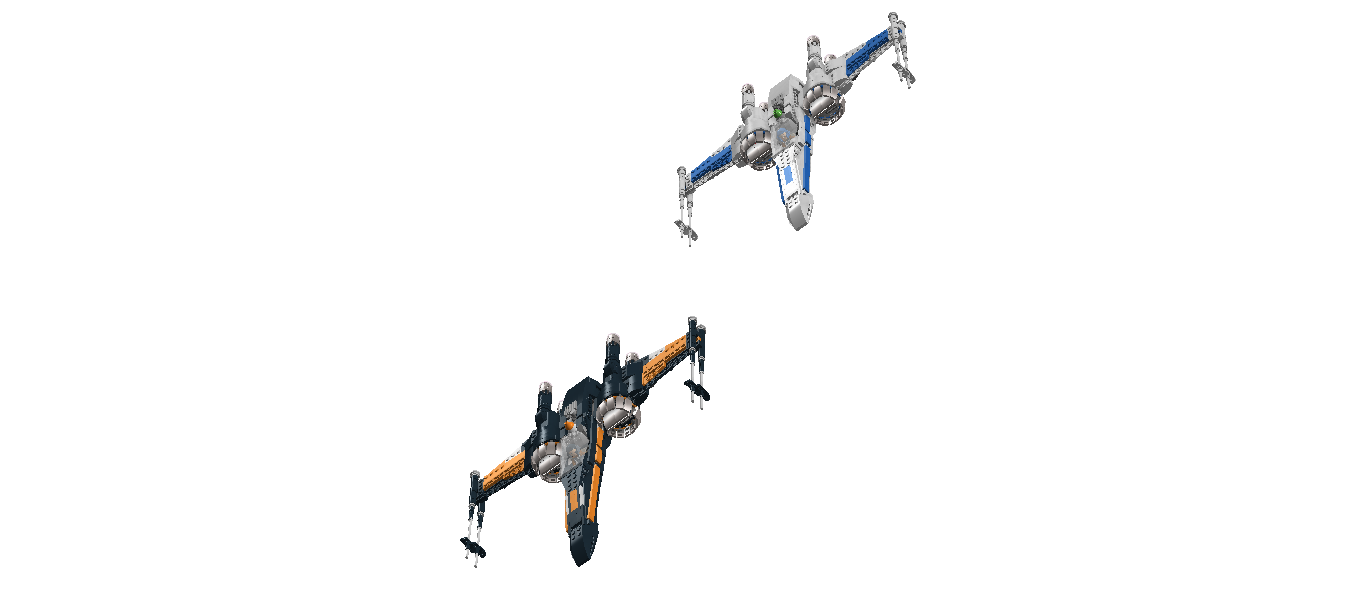
An alternate version of the X-Wing. It's been in my head a while. Finally had time to get it out. Done in New Republic colors, with a Resistance/Rebel alternate coloration. Enjoy!
-
Hey there, After seeing TLJ I made a quick MOD to Poe's X-Wing to include the booster he has on his ship. Poe's X-Wing Booster by Dosenbrot!, auf Flickr Poe's X-Wing Booster 2 by Dosenbrot!, auf Flickr Poe's X-Wing Booster Assembly by Dosenbrot!, auf Flickr
-
 Hi everyone, About a year ago I was inspired by @obijon’s amazing and very extensive collection of micro builds to start working on my own micro versions of my favourite Star Wars ships. I think I have enough of them now to get all cocky (what’s that Han?) and start sharing instructions on Rebrickable so here’s the first wave, the Rebel Starfighters. Update: I’ve thrown together some Resistance variants too! The X-Wing, A-Wing and B-Wing are fairly solid little builds, at this scale one-stud connections are inevitable but luckily these are still kind of swooshable, as long as you’re careful! The A-Wing is my favourite, I went through so many real and Stud.io prototypes trying to get the shape, fins and connections right that I’m so pleased I finally ended up with a strong and recognisable build. The Y-Wing is the most fragile of the group, it’s almost all one-stud connections, particularly to the centre of the hull, so unfortunately it’s only suitable for display. I’m aiming to build several of each fighter as part of a micro Rebel hangar display and with that in mind I tried to stay away from rare/expensive parts. Having said that I couldn’t resist using the skate helmets on the Y-Wing and my liberal use of those little curved slopes with notches pushes the cost up a bit too. Oh well, you can’t build a rebellion on peanuts! Back in the spring my first attempt at making instructions in Stud.io was actually this U-Wing. I managed to build the rear of the ship so that the wings fold out but there are so many weak connections that it means the wings are very fragile. I also have to admit that I cheated when connecting the engines, to keep those wheel pieces in place I wrapped a layer of tape around the internal 3L bars and pushed the wheels on. I’m still on the hunt for a better (and legal) solution and I’m open to suggestions! Update: I’ve just finished a few Resistance variants of the Starfighters, almost in time for The Rise of Skywalker. The B-Wing involved a lot of guesswork as it’s only very briefly seen in the film and trailers, but it was the same with the old B-Wing and Return of The Jedi so I suppose it’s a Star Wars tradition that’s been upheld. Overall I’m really pleased with how all these little ships have turned out and especially how they look together as a group. I’ll share more micro starfighter instructions (the next is the Millennium Falcon) when I can and if we get a good look at the new B-Wing in TRoS I’ll be able to finish the Resistance version of the starfighter group too. All my MOC and MOD instructions so far are here, I’m always grateful for any comments and criticisms. Thanks for looking and down with the space nazis!
 -
Here’s my attempt at modifying Poe Dameron’s X-Wing from The Rise of Skywalker! I think Lego did a great job with this latest X-Wing, I really like the refined wing mechanism and orange/white patterns and I love the new engines, but when viewed from above or the side that boxy nose is no good and the barely offset wings obviously need sorting out. I also put together some instructions, more on them later... https://rebrickable.com/mocs/MOC-35800/ron_mcphatty/mod-poe-damerons-x-wing-t-70-set-75273-mod/#info Rather than adding the same removable lid from my last X-Wing mod I instead built a hinged hatch, it’s a much simpler mod to build in and to use too. I took that landing axle out when first building the set but if you like that play feature then the wing mechanism still works with it left in. The main modifications are the rebuilt wings, I stripped them back to the engine structure and attempted to make them close in a 100% movie-accurate way. That didn’t pan out so well, the connection of the lower wing to the body was always too weak, so I settled for them overlapping by one plate to balance strength, limit the number of extra pieces and also to keep those blue accents in. I also tried modding the sides of nose, adding a line of tiles on modified bricks to bring the width out a bit. I added some extra plates on top too, hopefully giving the impression of the gentle slope towards the nose. I built in some very simple landing gear and details to the end of the lasers, and that’s it! Overall I used more pieces than I’d’ve liked, about 80, but they’re all common parts and the cost is fairly low at about £5. I’m really enjoying using Stud.io, even the instructions feature. Clear mod instructions are much harder than from-scratch instructions, this time I’ve tried to incorporate references to steps in the original instructions for clarity and completeness. I’m hoping the familiar chunks will help you easily see where my mods start and finish so that stripping back the original set is an easy job. https://rebrickable.com/mocs/MOC-35800/ron_mcphatty/mod-poe-damerons-x-wing-t-70-set-75273-mod/#info I’m always happy to get criticism and suggestions and very grateful if you point out any mistakes in the instructions! I plan to do instructions for my old 75218 X-Wing mod next and then, taking inspiration from @LEGODrongo01’s recent 75213 recolour, apply these mods and new engines to Poe’s old black X-Wing! My old set might need a good dust first, I can hardly believe that came out five years ago now. I hope you guys like the mods, and just for fun here’s Poe and a micro X-Wing :D
-
My Version of a 1:40 minifigure scale T-65 X-Wing. It took a while to bring all the Angles together that make the front Body looks like it should. Unfortunatly i didn't made a better picture of the slim Front Edge of the Wing made of round Slopes. I took the Standard Turbine and turned it 90°. Guess i'm gonna show some more Pictures of the Wing Design in Time...
-
I spent some time designing midi versions of the rebel fighters (OT). As is usual for me, I didn't start from scratch, and ripped off borrowed ideas from other people: x-wing: based on Pasq67's MOC y-wing: based on Tim Goddard's MOC b-wing and a-wing: based on SPARKART!'s MOCs I had already posted renders for the x-wing and the y-wing, but I finally could build them with real bricks. And now they are accompanied by the b-wing and a-wing. I'm glad to have them out of my system (and on my shelves); I wasted far too much time on these.