Search the Community
Showing results for tags 'ldraw'.
-
 Finally, after a long hiatus there's a new official LDraw parts update. Here's the full 'press release':
 -
 Hi, Does anybody know if the parts from the technic 42083 bugatti chiron are in the ldraw parts libary yet (as official or unnofficial parts). I wanna make a gearbox and need the parts to do so. Replicating them in LDD is too confusing. I have the 42083 set x2. one is half built, so no dismantaling it, and the other is getting returned to lego. there are none of the new parts for sale locally on bricklink yet. regards, SNIPE.
 -
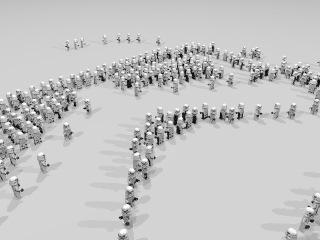
 A recreation of popular design using 688 stormtrooper minifigures. It uses a mosiac function and a Lego crowd generation system that I created in python - hope you like it.



-
As an FYI for any users of LPub3D, an update (version 2.2.1) was recently released. This release seems to have addressed issues I had been experiencing with getting LPub3D to successfully render images using "faded" parts in versions 2.1 and 2.2. It appears to have also remedied an issue related to using POV-Ray to render images and POV-Ray is now successfully working for me to render images. My installation is a Windows 7, 32 bit machine, so you may not have been experiencing the same issues. The most recent version of LPub3D is available for download at https://sourceforge.net/projects/lpub3d/ Regards, David
-
I finally completed my most complicated LDCad animation to date It is a fully animated 8860 LEGO technic 'super car' set. You can watch it here (2:15 long). https://youtu.be/Ea1iHCSPbqo (Some how youtube messed with the quality though, the original x264 mkv is much sharper) It is an OpenGL export, I was originally planning to do a POV-Ray rendering (I've got the POV file) but it would take over 200 hours to render as it would need very high radiosity settings to prevent background flickering. This would result in 3750 frames of this quality: Fullsize img: http://www.melkert.net/img/mel/8860.png If anyone know of a way to reduce that flickering without having to crank the radiosity settings to 11 please let me know.
-
Dear All, it has been a very long time since my last “productive” post on EB – I have been lurking ever since from time to time - but no contributions from my side. It is time to share some of the stuff that has slowly accumulated over the recent years. These are some locomotive and rolling stock ideas/MODs/MOCs. Below is a short summary of what and why; the instructions were meant to go on the RailBricks repository but that seems to be no longer an option. Instead, I am using my cloud space at work; a click on the link below the images should get you to a corresponding folder with the MLCad/LDraw file(s) and the LPub instruction PDF(s). Note that there are 300DPI as well as low-res versions of the PDF files; the latter are much more bandwidth friendly. Also note that there may be numerous errors/faults – I am using these files as references and aid for my rather limited building capabilities. Generally, I am building in a rather weird way, I guess. Most of the parts I am using, particularly for rolling stock, are spare parts from LEGO sets I got as present or simply purchased for other parts. Rarely the sets I am buying survive as a whole. It may also be an excuse to regularly visit the local TrU or LEGO stores nearby … for some reason it is still very exciting to me to browse through their shelves – that is also the reason for not ordering sets or parts online that often. There are exceptions of course. BrickLink is more of a last (and beautiful) resort. I have simply more fun figuring out ways of using individual pieces that initially appeared to be useless even for a longer time. Also, I hardly use scaled schematics for building – it is just my personal look and feel that should be “right”. So all my models may well appear as inaccurate or unrealistic in some way or the other – but they are just that: LEGO MOCs and MODs … and I am sure, that many building ideas have already been shown – either here on EB, in the various BrickShelf galleries, or somewhere else. I have not checked thoroughly though – just let me know and I’ll add the references. There are currently no photographs of the real trains. I am planning on taking these along with some impressions of my expanded “home office layout” – hopefully sooner than in a couple of years from now. This a rather long post, I am sorry. But I simply did not want to open several threads on rather minor things. Locomotives/Trains 1) GP38 “BNSF” (#10133) MOD LDraw file(s) and PDF instruction(s) I personally believe that the BNSF GP38 is one of the most inspiring train models TLC ever made. It appears as if many builders have modded, extended, and (re)designed their models based – at least partly – on the layout of this engine. I have also merged some of the beautiful design elements from the SD40-2 “Maersk” train (set #10219; these are the cab lights, front section, truck elements with new discrete brick/plate pilot design) along with a new frame comprised of discrete plates, re-bricked the fuel tanks, and added front PF lights. The concept of powering the locomotive is either pure “9V” or “PF”. A PF version requires a controller of some sort; either custom approaches (e.g., Arduino) or plain vanilla PF controllers/batteries located in separate cars etc. When running on its own with onboard battery and controller, the color scheme suffers severely on the 4-wide body section of the locomotive, which could be covered by custom stickers of course. The modified SD40-2 “Maersk” train introduced further below may also serve for “controlling” purpose. On my layout an SD40-2/GP38 pair is hauling rather heavy loads: The SD40-2 as PF controller with onboard battery and two motors and the GP38 with just one additional motor hooked up to the SD40-2. The V2 version of the PF receiver is handling 3 motors rather flawlessly when fed with the rechargeable LEGO LiPo battery. The required building steps are included in the SD40-2 instruction section, see below. 2) SD40-2 “Maersk” (#10219) MOD LDraw file(s) and PDF instruction(s) The major SD40-2 changes are the discrete plate frame (this way it became possible to add the neat white stripes the original locomotive features), changes to the trucks (they are one stud shorter and have a discrete brick/plate pilot), changes to the main body behind the cab, which is now only 4 studs wide, and to the fuel tanks. The engine is PF controlled, runs on the LEGO LiPo rechargeable battery, which is in turn charged through power-pickup from the 9V rails using a modified 9V train motor, cf. this EuroBricks topic, PF V2 receiver, and second PF train motor, along with PF head lights. The additional second PF receiver output wired to the rear section may be optionally used to operate a third motor; the GP38 shown above is an example. The color scheme of the 4 studs wide section behind the cab is suffering from the dark/light grey sections of the PF elements; however, I pretty much like the “used look” that results from that though. I never really like the original LEGO design of the body, where the receiver etc. is covered by large plates – to me, it appeared simply too wide for an overall 6 studs wide model. Note: There is an additional PDF which shows the required modifications to pair the SD40-2 with the GP38 shown above 3) Cargo Train (#4512) MOD 1 (engine), 2 (battery car), 3 (box car), 4 (box car type2), whole set LDraw file(s) and PDF instruction(s) The “major” changes to this very classic 9V train are the addition of a PF “battery car” in the same color scheme of the original locomotive and box car, and some undercarriage changes to the latter. There is also a second version of the box car. I really do like the old-dark grey/green color scheme of this train. Fortunately, my father has given me his Sopwith Camel (set #3451) as “brick supply”; this way also the second box car version became reality in the grey/green color scheme. The front section of the locomotive is raised by one plate and the front handrail changed. 4) High Speed Passenger Train (#7897) MOD 1 (engine), 2 (coach A), 3 (coach B), whole set LDraw file(s) and PDF instruction(s) Ages ago the “real,-“ department store close by not necessarily well known for their LEGO set inventory had the RC high speed “ICE” like train set on sale … I got two for very little money. Well, the one-piece front cab of this train (part #55768) has been discussed “controversially” – carefully phrased – but nevertheless, as far as I am concerned, with some modding a more or less decent passenger train resulted from merging the two sets. Everything has become a little “longer”, particularly the coaches. Also, the coaches have discrete plate frames and their trucks are rather heavily modified – based on the design of James Mathis’ Santa Fe cars (sets #10022/#10025). The four additional white 6x8x4 cylinders with flattened upper half (part #45411) required for a train consisting of two engines and three coaches came from two City tank truck sets (set #60016) – I could not get hold of the white cylinders with flattened lower half (part #45410) so the third car has a modified lower section. [Note: Unfortunately the “RC train base” (part #55455c01) is not available as official LDraw part – and I guess it never will be. I simply assembled that part from bricks and plates for the instruction and treated it as part in LPub … no idea how to do it differently. Also the “ugly” front nose is not even an unofficial LDraw part, I found the LDraw.dat file at digital-bricks. Rolling Stock 1) 4 Axle Tank Car MOC LDraw file and PDF instruction The tank design is close to that of the #10016 tank car set; there are some additions to the top section. The frame is made rather conveniently mainly from Technic pieces. 2) 2 Axle Tank Car MOC LDraw file and PDF instruction This is a plain vanilla 2-axle tank car – I guess there were many similar designs posted in this forum. 3) TankTainer Car MOC LDraw file and PDF instruction This one is a result purchasing the #3368 Space Center set – I was looking for the #64448 support/fence part (or whatever it is called) in red for a bridge structure – and these were left overs – as were the (sloped) tank half shells … looks a little weird but this way the car is more or less 6 wide and the tanktainer is easily removable. The frame is again mostly comprised of Technic pieces 4) Flatbed Car MOC LDraw file and PDF instruction The flatbed car is entirely made-up … it started with the four #91176 support parts from the 2011 Red Cargo Train #3677 set – did not know what to do with them … the cargo is – hmmm – cylinders? Had too many of the round 2x2 bricks and round bright green 1x1 plates … 5) Spine Car (with girders) MOC LDraw file and PDF instruction I guess the 5 “Toy Story 3” sets I purchased one after another for €20 each at TrU. No idea why that was, they had them for more than a year somewhat hidden in the “bulk-brick” section and each time I was there I could not resist … lots of bley plates for another bridge and for a rather big train station … but also tons of the 2x2x10 girders … 6) Gondola Car MOC LDraw file and PDF instruction As already mentioned, for the high speed passenger car MOD shown above I needed extra white 6x8x4 cylinders. At that time, the original ICE-type high speed train set was gone for long; the City tank truck set #60016 featured two of these cylinders each though; white with flattened upper half and green with flattened lower half. The white ones were perfect for the passenger cars, the greens were “left overs”. Which brought me to the gondola car – again entirely made up and again with a Technic element frame. 7) Tipper Car MOC LDraw file and PDF instruction This car is the result of eight yellow tipper end sloped pieces (part #3436) from the #4565 Freight & Crane Railway set (which was my first train set after my Dark Ages). For long, I did not know what to do with those. Then I saw tipper cars on BrickShelf, looked them up on the internet and this is the result. I guess they are rather “European” if not “German” … small and compact. The yellow color is not appropriate at all, but that’s how it is. This is it for the moment. Thanks for reading! Regards, Thorsten
-
Hi guys for all this time when I think of making a moc I never build digitally. Now I think that building digitally first before trying to build it in real life is a good method to start mocs. I have built in LDD once but that was 2 or 3 years ago. Now i want to know what Lego digital building program is the best. I want something to begin with. My choices are LDD or Stud.io or Ldraw . Ldraw seems to be a bit advanced but i don't know that if it is that advance. I might go with Stud.io but I'm slightly not sure if it has technic parts but I am most sure it has While LDD doesn't have some parts ex:- Pneumatics. Tell me your opinion. P.S. Sorry for the bad English
-
 Hi all, has anyone ever compiled a matching table between LDD decorations and LDraw patterned bricks (or stickers)? (Something like 95551 = 3005pf0.dat) There’re about 2000 decorations in LDD and it’s highly disrespectful to redo the gruesome work someone has already done
 -
 Hi folks, has anyone investigated what font was used for the old Technic logo: http://logos.wikia.com/wiki/Lego_Technic Unfortunately sites such as https://www.whatfontis.com/ didn't come up with a suitable result. Knowing the font type would help enormously converting the logo into a LDraw pattern. Thanks, Willy LDraw Content Manager
-

The Geometric Shape Generator
Jarema posted a topic in Digital LEGO: Tools, Techniques, and Projects
This is command-line tool for geometric shape manipulation and exporting as LDraw model. Typing this in command-line: LDShapeGenerator.exe --shape rectangular --geometry 1x2x5 --output C:\Windows\Temp\geometry-shape.ldr You got file with content like this: 0 Rectangular 0 Name: Rectangular 0 Author: LDShapeGenerator 1 27 20.0 24.0 20.0 1.0 0.0 0.0 0.0 1.0 0.0 0.0 0.0 1.0 3003.dat 1 27 20.0 24.0 60.0 1.0 0.0 0.0 0.0 1.0 0.0 0.0 0.0 1.0 3003.dat 1 27 20.0 48.0 20.0 1.0 0.0 0.0 0.0 1.0 0.0 0.0 0.0 1.0 3003.dat 1 27 20.0 48.0 60.0 1.0 0.0 0.0 0.0 1.0 0.0 0.0 0.0 1.0 3003.dat 1 27 20.0 72.0 20.0 1.0 0.0 0.0 0.0 1.0 0.0 0.0 0.0 1.0 3003.dat 1 27 20.0 72.0 60.0 1.0 0.0 0.0 0.0 1.0 0.0 0.0 0.0 1.0 3003.dat 1 27 20.0 96.0 20.0 1.0 0.0 0.0 0.0 1.0 0.0 0.0 0.0 1.0 3003.dat 1 27 20.0 96.0 60.0 1.0 0.0 0.0 0.0 1.0 0.0 0.0 0.0 1.0 3003.dat 1 27 20.0 120.0 20.0 1.0 0.0 0.0 0.0 1.0 0.0 0.0 0.0 1.0 3003.dat 1 27 20.0 120.0 60.0 1.0 0.0 0.0 0.0 1.0 0.0 0.0 0.0 1.0 3003.dat This tool using only basic regular bricks. Thanks, to this is 100% compatible with LEGO Digital Designer, BrickLink Stud.io and other digital tools that understand LDraw format. Repository: https://github.com/Jeremy1980/LDShapeGenerator/ Support Center -- go here if you have know more: https://github.com/Jeremy1980/LDShapeGenerator/wiki/ This is example of Cylinder; Trapezoid and three version of Rectangular prism -- 1x2x5 /look at the code above/ , 2x2x2 /knowed as cube/ , 2x5x1 /longest horizontal rectangle/: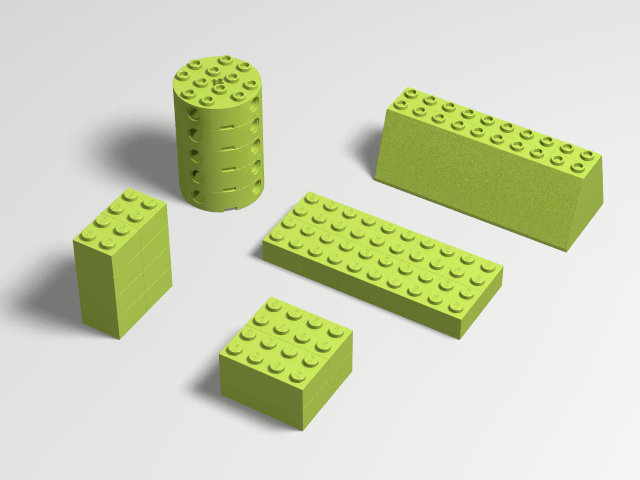
-
This is a fictional space-themed LEGO shopping mall complex named "The Spaceship" due to the shape of main building resembling a spaceship. If that naming idea had come sooner I would probably have designed something that actually looked more like a spaceship, but the idea only came to me more than halfway through the project when I saw what shape the building was taking so I just used the idea to name and style numerous parts of the model. The model uses approx. 175000 parts and 258 custom sticker designs and measures 3810mm x 3493mm x 519mm (13.3m² footprint). It features 30 shops, 218 car parking spaces, 500 minifigs, bank, post office, library, cinema, amusements, restaurant, foodcourt, admin/security office, service access, maintenance areas, escalators, functional elevators, toilets, ice rink, gymnasium, boating pond, custom brick-built road layout, and real LEGO lighting in most of the main building and ice rink. The design attempts to be as functional as possible by providing convenient car access, separate rear public transport access, and separate rear service vehicle access to all shops on the first two levels, as well as multiple entrances and fire exits. It also attempts to be wheelchair/buggy friendly as much as possible using a mixture of stairs, escalators, ramps and a glass elevator. The main glass roof can be removed in two halves, as can the roofs of the gym, the wing shops, and the rear section, the latter of which reveals the battery packs for the LEGO lighting. There's also manual cable winders on both the customer and service elevators. I managed to get the water tank in too but had to forego the boiler room - despite the size of the build I found myself running out of space. The massive size of the model caused numerous problems, especially due to buggy software and PC limitations, so I had to reduce the intended length of the mall and forego a few other features too, but it's still by far the biggest model I've built. It probably should have taken around 6 to 9 months to complete, but due to personal and technical issues it ended up taking more than 2 years. This virtual LDraw model was built using MLCad software and rendered with LDView (sadly it's too big to render with POV-Ray), with additional construction, graphic and animation support via the use of PHP, LDraw Sticker Generator, LDraw txt2dat, LDraw LSynth, ImageMagick, Paint Shop Pro, GIF Movie Gear, IrfanView, PNGOUT, AviSynth, VirtualDub, and ffmpeg. Even had to use Excel to write macros to compute the precise angles needed for the curved window walls on the wings, which were too difficult to compute on paper. And no, I don't intend building it for real! Links: Flickr (lots more images) YouTube (looks better at 720 resolution) The video contains still images and many flyby sequences which give a better impression of the model by restoring some of the 3D visual cues lost due to the non-raytraced renders containing no shadows. Excuse the length of the video and number of images. It's a REALLY BIG model, and 25 images just wasn't going to do it... This is my first post here, and may well be my last! - during the uploads of the more than 200 images the PC terminally died and the remainder of the uploads and this post had to be done from a Raspberry Pi.
-
Shackleton's Endurance in Minifig Scale In August 1914, Sir Ernest Henry Shackleton started an incredible expedition to the Antarctic.This voyage is also known as the Imperial Trans-Antarctic Expedition. Endurance was the name of the ship in which Sir Ernest Shackleton sailed for the Antarctic. On board were 28 men and 69 dogs. Shackleton planned to cross the Antarctic on foot. But shortly before its arrival in the Antarctic the Endurance became locked in ice and was finally crushed. Thus the legendary survival of Shackleton and his crew began. Length 166 studs (131 cm) / Width 50 studs (39 cm) / Height 103 studs (81 cm) Built with LDCad 1.6 alpha 4 / Rendered with POV-Ray Shackleton's Endurance by Papacharly by Papacharly
-
Greetings,LPub3D 2.0.14 is released. LPub3D is an Open Source WYSIWYG editing application for creating LEGO style digital building instructions. It uses the LDraw parts library, the most comprehensive library of digital Open Source LEGO parts available and reads the LDraw LDR and MPD model file formats. LPub3D is available for free under the GNU Public License v3 and works on the Windows Operating Systems. Portions of LPub3D are based on LPUB© 2007-2009 Kevin Clague, LeoCAD© 2015 Leonardo Zide.and additional third party components. LPub3D can run under POSIX-compliant operating systems, such as Linux, Mac OSX, & BSD using WINE HQ. You can download from sourceforge.net or check for updates in your existing installation. LPub3D 2.0.14.838.2 Features and enhancements ------------ Fix: File reload after external source change breaks page drop-down combo dialogue(r837) * When a file is reloaded after being changed by an external source, the drop-down menu for selecting a page doesn't work until after navigating using another method. Fix: Image orientation does not conform when page orientation changed to Landscape (r836) * Image generation was not inheriting the proper page size values. Fix: Extra characters "%3" in margin meta and page size meta does not display the page size identifier(r835) * Oops, allocated the page size identifier variable to the wrong meta - should have been allocated to page size meta instead of units meta (units meta is used for setting the margin). Consequently, the page size meta is missing the size identifier (A4, Letter, etc...) because the place-holder to pass the variable is not there. This must have happened during the patch process from the maintenance branch because it did not present during my tests. Both issues are now corrected. Cheers,
-
Hi all I'd like to present a viewer for LDR/MPD files on Apple devices. The idea is to open files which are already present on device in Dropbox, Google Drive, email and so on. App allows to view model from different angles, zoom, rotate or "disassemble" it to view internals. Line to iTunes https://itunes.apple.com/us/app/studless/id1039486304?ls=1&mt=8 Opinions and/or complains are welcomed
-
While building #5540 Formula 1 Racer model, I had some trouble finding the exact position of the two gray plate of the motor. I've positionated them at the 54° angle on the 3938 1x2 hinge top, and then I found that the one on the right (viewing from the bottom of the model) appears to be "well" positionated with value X 200 Y 48.625 and Z 40.625. The plate on the left (ever viewing the model from the bottom) instead has the position values of Y 11.375 and Z 40.75. You can argue the pieces are not parallel, but in the editor they appear right. Where I'm wrong? Thanks for the answers, PN
-
 I am trying to import my LDD model to Bricksmith which uses LDraw database, but tire (tyre) 61254.dat is missing. I checked the LDraw database and I cannot find a correct file with the tread and all. Can someone point me to it? Much appreciated. Here is the Bricklink reference: http://www.bricklink.com/v2/catalog/catalogitem.page?id=84621#T=C Here is what I found: http://www.ldraw.org/cgi-bin/ptdetail.cgi?f=parts/61254.dat Apparently it needs the tread file 61254s01.dat somehow used along with it, which is linked from within the 61254.dat link, but I do not know how to use them in combination. I copied them both to my Bricksmith/LDraw parts directory, but it's not coming out right. I'd appreciate some help, hopefully a fully compiled 61254.dat file or a solution to my problem. Thanks in advance. Miro
 -
Greetings, LPub3D 2.0.13 is released. You can download from sourceforge.net or check for updates in your existing installation. Interesting fixes are the ability to switch part occurrence (times used) in the PLI between per step and per submodel on called out and submodel pages; the ability to insert one-to-many non-faded models (e.g. with alternate attachments/views etc...) when fade step is on; and new meta for pages size including the standard identifier - e.g. A4, Letter, Legal etc... and print/export performance improvements. LPub3D 2.0.13.834.2 Features and enhancements ------------ Fix: Logging options added to Preferences (r832) * Select logged attributes and logging levels. Fix: Prompt search directory settings reset (r831) * Prompt to inform that the search directories have been reset after the search directory reset button is clicked. Restarting LPub3D is not required. Also changed menu items "Reset 3D Viewer Model Cache" to "Change Temp File Cache" and "Reset Image and Model Caches" to "Reset All Caches". Fix: Inconsistency between part counts in submodels and part counts in call-outs where multiple instances are involved (r829) * For submodels, the PLI part counts reflect only one instance of the submodel, even if multiple instances are used in the same step. The instance count is correct, and the BOM has the correct total number of parts. With this update, sub-model pages displaying instance count now have a context menu option to display parts per step/page or not (total parts consumed by the number of instances indicated. Previously, for callouts, you have the options (see context menu) to display parts list per callout (one instance) or not. When you select no parts list per callout, the PLI will show all the parts consumed by the total number of instances in the callout. If you choose parts list per callout, the PLI is moved to the callout and only the parts for a single occurrence of the callout is shown. The idea here is if you have 5 occurrences of the called out assembly, you'll need 5x the parts total, but only 1x parts are shown to indicate what you need to build an instance of the called out assembly. On sub-model pages displaying the instance count, there is only one behaviour for PLI counts (the most intuitive) which is to display the parts list per step. This is intuitive because the primary role of the PLI is to show what you'll need to build an occurrence of the step shown - it is not the intention to mimic the BoM. Nevertheless, I added a context menu item to not display parts list per step and instead display total parts consumed by the number of occurrences of the submodel in the parent submodel/step. Fix: Page size and orientation processing update (r826/833) * Further industrialization of the print/export module. This update streamlines the process and realizes some performance gains. There are some key changes. Notably, page orientation and page size are now mutually exclusive. This means when switching from Portrait to Landscape, accompanying the orientation meta with a transposed page size meta no longer required or managed. Here is an illustration: Previous behaviour when editing a page size change required the following meta commands: 0 STEP 0 LPUB PAGE ORIENTATION LOCAL LANDSCAPE 0 LPUB PAGE SIZE LOCAL 11.0000 8.5000 Note that the page width and height have been transposed. Going forward, transposition of the page width and height when switching from Portrait to Landscape is automatically managed by LPub3D. NOTE: This update is NOT backward compatable. An accompanying transposed page size meta to indicate the switch from portrait to landscape as shown above will be treated as a new page size meta for that page. Consequently, using this meta to 'switch' orientation will actually result in NOT switching the orientation as LPub3D will automatically switch again the switched page size meta. If the user is only interested in changing the orientation, the proper meta command going forward will be: 0 STEP 0 LPUB PAGE ORIENTATION LOCAL LANDSCAPE To help with accurately displaying the page size identifier in the setup and context menus, the standard page identifier is now appended to the page size meta command. For example: 0 LPUB PAGE SIZE 8.5000 14.0000 Legal 0 LPUB PAGE SIZE LOCAL 8.5000 11.0000 Letter 0 LPUB PAGE SIZE LOCAL 5.8000 8.3000 A5 0 LPUB PAGE SIZE LOCAL 5.8678 8.3456 Custom Along with the width and height values, if the page size is non-standard, the identifier "Custom" will be automatically used. Additionally if an identifier is not present, the identifier "Custom" will automatically used. The page identifier is displayed in the Page Setup dialogue and Size/Orientation change context menu dialogue. Also, the LPub3D print/export function no longer needs to parse the model file to capture, in advance, page sizes. This capture is performed during the existing page parse and load functions and is exposed to the print routines during printing/exporting. This change was necessary to better enable mixed-size page export/printing where it is necessary to 'look ahead' to get the next page's size and orientation parameters in order to configure the printer engine before processing the page. Fix: Expand INSERT MODEL meta command behaviour (r825) * When using part fading LPUb3D will now process multiple INSERT MODEL commands rendering the CSI content at each command. For example, if the instruction document includes different model attachments, the editor can now include a non-faded image of the entire model with each attachment. Here is an example of he proper command sequence when used in conjunction with BUFEXCHG: 0 BUFEXCHG B STORE 0 //... default model content... 0 STEP 0 BUFEXCHG B RETRIEVE 0 BUFEXCHG A STORE 1 0 445 -46 -10 1 0 0 0 1 0 0 0 1 attachment1.ldr 0 STEP 0 LPUB INSERT MODEL 0 LPUB INSERT PAGE 0 STEP 0 BUFEXCHG A RETRIEVE 1 0 0 0 0 1 0 0 0 1 0 0 0 1 attachment2.ldr 0 //STEP These last 3 lines are optional when editing the model file. 0 //LPUB INSERT MODEL If they don't exist and fade step is ON, they will be automatically created by LPub3D 0 //LPUB INSERT PAGE Fix: The PNG output of a model with various page orientations is not correct (r824) * Cleared page buffer before rendering each page. Also corrected a typo causing page range to sometimes not work for image exports. Cheers,
-
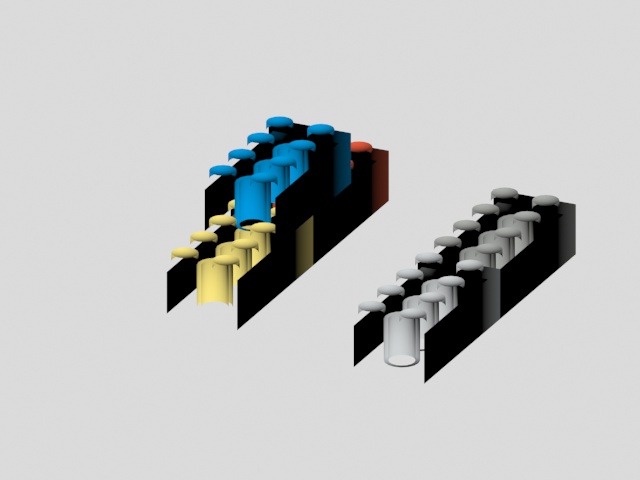
Hello, I was trying to import my LDD file to 3DS max, but everytime when I render the object I get this. Can someone help me to get this right? Greetings, Tom
-
Hi there. What programs do you use for LEGO 3d designing? LDD or Ldraw? Let me know :D
-
HOW IT IS WORK: Manage your LEGO set collection, and build an inventory of the parts in those sets. This is remastered version of application with this same name that was brought to as by Jim Valavanis on SourceForge. Is focus on work without internet. Protect user privacy as much as possible. Connection with outside is used when images, price guides must be downloaded. Information about sets | parts can be imported from *.xml file /BrickLink order/ or from *.csv file /BrickLink or Rebrickable set data/. DISCLAIMER: Use at your own risk, i decline any responsibility for anything that may happen to you using the program. DOWNLOAD: Runnable version /Windows platform/ The LDraw images used as parts images GitHub repository 2018-02-18: Add LDraw support Update db_urls.txt Upgrade GUI Improved missing image file download Fix some bugs
-
 Some questions: Is there an Blender importer that can read LDraw models? Does the importer make use of grouped instances? How is the performance when modeling in Blender? Is the framerate when editing comparable to LDCad? Would it be possible to create a library of parts as grouped instances? Thanks!
 -
 It looks like the LDraw official parts library doesn't contain any of the Mixels-type parts that contain a towball socket (e.g. 14418, 14419, 14704) even though unofficial parts have been in there for close to 4 years now. Has anyone done any MOCs in LDraw using these unofficial parts? Any problems? I ask because the one time I tried installing unofficial parts I somehow messed up my parts library so badly that I had to reinstall LDraw entirely, so I am wary. Also, looking at the review comments for the unofficial parts, it looks like the part editors reeeally hate these sockets for some reason. Anyone know why that might be? These parts are dead useful.
 -
Year by Year I take many lesson, when developing LICreator. But I go to this software in the end. It is written in Java. So will be platform in-depended, what is in Java technology nature. But I testing and build LDraw Instruction Visualizer only on Microsoft Windows Seven with 64 bit architecture. What this tool can do: %APPDATA% for Windows platform or User Home Directory for others as Storage Can hide | un-hide selected parts Display part description Rotate on selected axis Exports steps as single images and many more ... A use JLDraw as starting point of my journey. It is Simple LDraw models viewer, written and abandoned by Mario Pascucci in 2014 year. I try get new life to this software, and make them better... that software, I currently stop working on... for many reason. At the current level of development, this program can calmly serve as instruction player. Everyone, stay tuned for updates. EDIT 1: This software strongly depend on LDraw file format standard. If model do not have STEP command. You can see, only one step on the list. EDIT 2: LEFT BUTTON for selecting single part RIGHT BUTTON for context menu SHIFT + LEFT BUTTON for select more parts CONTROL + LEFT BUTTON for toggle section ALT + LEFT | RIGHT BUTTON for rotate all parts in currently displayed step MOUSE WHEEL for zoom out | zoom in EDIT 3: Move application source to GitHub repository LDraw-Instruction-Visualizer
-
 Hi everyone, may be you can help me: I am looking for the new LEGO Boost parts for LDD or LDraw. I would like to start with some projects and it looks like, there is no update available. Any ideas what i can do? Thanks, Michael
 -
I am pleased to share with all of you a brand new Ldraw-based digital designer for iPad that I have spent many hours over the past few years on! Masonry is a 3D brick creation app with access to Ldraw's 5000 part library and it supports freeform editing and step creation. I've got a video of it in action, and you can see more details at my website: https://masonryapp.com Thanks!