
agrof
-
Posts
1,941 -
Joined
-
Last visited
Content Type
Profiles
Forums
Gallery
Everything posted by agrof
-
Non-Existent Parts
agrof replied to DrJB's topic in LEGO Technic, Mindstorms, Model Team and Scale Modeling
So, if we go really down to the basics in this way, there is 2 very basic geometry, on which the Technic system relies: a free rotating connection along a surface (pin and pinhole) an interlocking connection along a surface (axle and axle hole) The grandiosity of the whole system is this core simplicity. If there would be more options, the combinability of the different parts would be radically decreased (example: you can not push a ball joint into an axle hole), and also the permeability between the LEGO building systems couldn't be so efficient like today. I think now I understood the topic theme better , and from this perspective I don't miss anything. -
Looks good, but what about this kind of bucket attachment? - These little guys have the strongest pin connections out there, so probably the best choice to connect something to a chain link. I would give a try for sure. Looks like a big project, keep us updated!
-
Non-Existent Parts
agrof replied to DrJB's topic in LEGO Technic, Mindstorms, Model Team and Scale Modeling
Correct, the older ones have thicker wall, just like the 3L pins. @DrJB Luckily the latest version of LDD allows it: Totally agree with this, and that's why I don't miss any part - but I am open for new ones, if they are not overspecified for one purpose only and open new possibilities. Perfect example for this: And the opposite: (at least I have never seen any other technical application, just cosmetical maybe) -
Non-Existent Parts
agrof replied to DrJB's topic in LEGO Technic, Mindstorms, Model Team and Scale Modeling
There is some more basic connection possibilities, a perfect example the flick missile , the bar end can be connected to the black pin's hole (or even with axle holes), just like seen in 42043: And we can use the studs as connectors with the rim of the pinholes - like the rear lights here: Also we have the ball joints connection with many parts: , and more. I don't miss any further version, even combined with system / bionicle bricks, I think we have versatile possibilities. -
General Part Discussion
agrof replied to Polo-Freak's topic in LEGO Technic, Mindstorms, Model Team and Scale Modeling
We are talking about the same. I just brought the 3L pin with bush only as an example for usage. The second part of text is still about the normal 3L pin (my bad, I see it can be misreaded), here is an example what I mean, I did like this with my Bison bot: To be able to connect the driven axles module (left) + the secondary axles module (right) + the transmitter wheel assembly (marked with lime green), the 3L pins are used instead of usually these parts : . Advantage is, that the 3L pins offer direct mounting points to the cover panels. Also on the right of the picture, you can not see the collar of the outer 3L pins, because they are purposely placed inwards, so at body panels removal (for replacing the BB) they can not slide out - less parts to reassemble. -
General Part Discussion
agrof replied to Polo-Freak's topic in LEGO Technic, Mindstorms, Model Team and Scale Modeling
Absolutely, many times the 3L pins can be used like this part, to connect modules together: It offers a pin already for instant connection without a 1L gap, like that one above. I also use them purposely for detachable stuffs, the main modul contains it with the collar inside, so it can not be pulled out when you remove the f.e.: detachable battery box cover. -
Looks good, but I advice You to redesign the front axles. The way the wheels are connected now, are not stable enough and make a lot of stress on the wheel hubs. Maybe using these wheels would make stronger connections (but still the stress due to the offset is there): Or even better to use the pulley wheels (3 pieces), also connected with a 4L axle with the wheel together, something like this:
-
Effe's MOC Corner
agrof replied to efferman's topic in LEGO Technic, Mindstorms, Model Team and Scale Modeling
Looks really good Effe, which model do You build? What about using flex axles for windshield instead of connectors? Just for sake of smoothness. -
Lego Zombificator
agrof replied to Sariel's topic in LEGO Technic, Mindstorms, Model Team and Scale Modeling
Thanks for the gag! Noone else has ever had any good ideas, but You can have... one. -
Favorite Technic Part
agrof replied to Aventador2004's topic in LEGO Technic, Mindstorms, Model Team and Scale Modeling
Sorry, but your comments are recently confusing. What do you mean here by that? Is it a question, or is it a statement? Missing "?" or "." or "!" at the end of your sentences. -
[TC11] Powerspin
agrof replied to Rennuh's topic in LEGO Technic, Mindstorms, Model Team and Scale Modeling
RC motor and THE metal hooks??!! I report psychotic symptoms here. Honestly, this is probably the only option I didn't calculated with. A bit late to the transmission discussion, but I would use some kind of it to protect the precious RC motor when the spinner stalls. Maybe such rubber tracks would have been useful: or the small ones: -
Just like the bots with retractable weapon (in standby mode) - which is allowed according to the rules. In this point of view I can only consider a spinner as a kind of retractable weapon, all is needed: it must be started remotely. I do think the original rules are good, the diagonal measurement of the blades and thus the restriction is a misunderstanding. In case it isn't, I am open for detailed arguments.
-
I understand the quoted statement, but there is still a geometrical - logical conflict. I tried to visualise below: in standby mode both robots fit, in active mode none of them. We have two statements now: It must fit in 45x45x45 L. None of any measurement may be longer than 45 L. In first case the spinner bots should be OK with diagonal blades, in second case we all have to start to measure our models, if there is a diagonal measurement (also in X-Z and Y-Z and even in X-Y-Z direction) wich doesn't fit. This doesn't sounds realistic. My bot is one of the smallest with 37x26 in Lengt x Width, which is in diagonal 45,22 L, if I count the height also to it (9 L), than I get a 46,1 L line. So should I rebuild?
-
Agree with Rennuh, I also don't see the point of limit spinner's length back to 45, as long it fits into the 45x45 footprint in standby mode. The rules allow to extend weapons after the green light, I don't see how a diagonal blade is different in this case, than a pneumatic arm for example.
-
[TC11] Nibbler
agrof replied to Seasider's topic in LEGO Technic, Mindstorms, Model Team and Scale Modeling
You just messed up the links. Click on the pictures with right click, select copy picture address (or link), and insert it here with ctrl-v. Or just select direct link on the right, than ctrl-v here. Should work, here is one: -
[TC11] Son of Aminnich
agrof replied to aminnich's topic in LEGO Technic, Mindstorms, Model Team and Scale Modeling
Son Of Aminnich? -
[TC11] Son of Aminnich
agrof replied to aminnich's topic in LEGO Technic, Mindstorms, Model Team and Scale Modeling
It looks really scary, better than expected. What are the dimensions now with the weapon on? One terminus technicus correction: the sheet is used not plywood, but OSB. I use plenty of those in my profession, and considering the durability, strength (and price), it really matters which we are talking about. -
Technic 2017 Set Discussion
agrof replied to CM4Sci's topic in LEGO Technic, Mindstorms, Model Team and Scale Modeling
I was curious, so I built it in LDD. It really feels that there was a strong constraint to use the available parts of the 3 sets only, still it is an interesting build. As a gesture and hommage set from LEGO it is up to the (my) expectations, and good inspiration for smaller supercar builds. LDD file available here, only one part is missing : EDIT: and a quick MOD (LDD file here) with size comparison to 42048. -
[TC11] Wave of Wrath
agrof replied to msk6003's topic in LEGO Technic, Mindstorms, Model Team and Scale Modeling
Looks really well, good job on it! Waiting for the video, my only note is to make it horizontally instead, not like the pictures. -
Technic 2017 Set Discussion
agrof replied to CM4Sci's topic in LEGO Technic, Mindstorms, Model Team and Scale Modeling
Great news, althogh it is already nice as a stand-alone model, I already see AFOLS being busy on making suspension on the front too, maybe 4WD as well... This hatchback bodywork from @Petter would work also well with this chassis, looks like the same scale: -
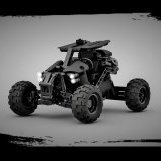
Love it, nice details everywhere, and the use of the lights is brilliant idea here.
-
[TC11] Powerspin
agrof replied to Rennuh's topic in LEGO Technic, Mindstorms, Model Team and Scale Modeling
Welcome here! It is a strong start, I will follow this with great interest. I know, it is a sketch model yet, but brace the portal axles well. If You achieve to integrate the battery(ies) - actually I see no big issues with only 1 BB -, than I see good chances for your bot. -
[TC11] IRON-SLAMMER-ALPHA
agrof replied to roppie11's topic in LEGO Technic, Mindstorms, Model Team and Scale Modeling
This is what I meant, correct, good luck! -
[TC11] Bison
agrof replied to agrof's topic in LEGO Technic, Mindstorms, Model Team and Scale Modeling
Even I struggle to remove them. The transmitter wheels are more easy to detach, but they are placed inner, and also the big wheels protect them quite well. Thanks! -
I didn't meant the hook and rope, I got the point of it. I meant the top and bottom "surface" of the bot, inbetween the beams and panels. For the color: that was my guess too, of course it doesn't degradate the value of it, reasonable argument.