

astyanax
-
Posts
1,191 -
Joined
-
Last visited
Content Type
Profiles
Forums
Gallery
Everything posted by astyanax
-
General Part Discussion
astyanax replied to Polo-Freak's topic in LEGO Technic, Mindstorms, Model Team and Scale Modeling
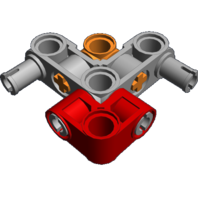
New part 80477 was briefly mentioned in this thread, but didn't get much discussion, I believe. Still unsure if this part facilitates any great new constructions... Hmmmm -
General Part Discussion
astyanax replied to Polo-Freak's topic in LEGO Technic, Mindstorms, Model Team and Scale Modeling
The existence of this contest makes me kinda sad. Clearly it has been conceived from a System brick perspective. Apparently the System catalogue is already so complete that it makes sense to start thinking about 'creative' new molds. But in Technic we need no such contest while basic gaps exist. For example, we're sorely missing but with axle hole. No creativity needed to think of that.... -
General Part Discussion
astyanax replied to Polo-Freak's topic in LEGO Technic, Mindstorms, Model Team and Scale Modeling
Yeah the cam seems underrated... What also seems very useful is just a 3L beam with 3 axle holes, like what CaDA is producing... -
General Part Discussion
astyanax replied to Polo-Freak's topic in LEGO Technic, Mindstorms, Model Team and Scale Modeling
I read reports saying the triangular parts are prone to crack, so they are best used doubled. This would make the belt wheel redundant. There seems enough room for this, given the portal hub. -
I will admit that, in a real life mockup that I just made, the collision asserted by LDraw seems much less severe. Still, I recommend using non-friction pins for this construction.
-
Can you explain your reasons for putting the #14 panel in front of the front wheel?
-
Nope, "Image not found". Maybe it's my end, but I tried from 2 different devices and browsers. But I remember seeing your pic a couple days ago, from this browser.
-
Unfortunately the picture link is dead... Anyway I think @LegoHoops's original idea can still be made to work, 'legally'. By mounting things on non-friction pins, like so: Note that is not connected to directly, but via -> -> , allowing some small rotation.
-
LDraw has doubts about your assertion... Nonetheless those are some very good-looking mods!
-
Sorry for clumsy phrasing. I mean, with your / TLG's solution, the 5L beam will stick outside the curve of the panel; with my solution, the 5L beam stays wholly inside the curve of the panel. Try it
-
The other day I was flicking through @dickylaban's flickr and found this super cute rally car. It's basically set 42109 with new bodywork. I resolved to build it for myself, but with one more change away from set 42109: to make it go faster with a buggy motor! (Also I had to build it in Red because I don't have any Dark Azure.) Now that both the bodywork and drivetrain of 42109 have been replaced, nothing of the original set seems to remain except the scale... Hopefully for the better haha! Virtual model and a few more photos can be found here. Thanks to @dickylaban for inspiration and approval.
-
Right, but the angle will be different: the 5L beam won't be 'flush' within the curve of the panel.
-
On the one hand, we could feel 'liberated' from TLG's self-imposed notion of illegal build techniques, but the Apollo IE is pushing it quite a bit! Parts are colliding all over the place, as is evident even from a cursory look at the render on the box. Although many such collisions are relative minor, my Math PhD heart bleeds when I see such blatant disregard for basic geometry: What hurts even more is that there's an utterly simple and totally 'legal' alternative for this connection: remove the lower blue pin, connect the two 5L beams in the same place with a regular 2L pin, then push a 3L bar through the 2L pin and into the panel. I get it that QC is hard (even TLG still makes frequent missteps), but I wonder if CaDA even reviews these 'external' models? I mean, this connection is so obviously bad and easily fixed....
-
General Part Discussion
astyanax replied to Polo-Freak's topic in LEGO Technic, Mindstorms, Model Team and Scale Modeling
Are those 3L liftarms in Tan above the cam pieces? I've been meaning to add some to any order on BrickLink since a while, but no luck yet, they seem pretty rare. -
Thanks everyone for voicing your enthusiasm!! When I pull the model apart again -- probably before end of summer -- I'll post here a little "reconstruction guide" for prosperity, describing the elastic band diameters and quantities used to get it to work. (I think my supermarket-bought pack only contained bands in 2 sizes anyway...)
-
I don't doubt it fits. I was just pointing out it bends the plastic. If you have no problem with that, then all good. However, it doesn't seem like a fair idea to include this particular mod into the 'official' 'pimped' model...
-
I'm in continual awe at what the people in this community can come up with, seemingly by themselves. From that perspective, I judge MOCers less strictly than TLG. Nevertheless, I do feel a little jolt of disappointment when a MOC I paid for doesn't function as smoothly as hoped. But I see this as part of the risk I knowingly took when sending my money to a lone designer without QC department.
-
Technic General Discussion
astyanax replied to Jim's topic in LEGO Technic, Mindstorms, Model Team and Scale Modeling
Old Technic and modern Technic feel like different systems to me too. My last set as a teen was 8868 Airtech Claw Rig. Then after 25 years of 'dark ages', I purchased 42055 Bucket Wheel Excavator on an impulse (it was 50% off at our local supermarket), which surprised my wife and myself in equal measure. What shocked me even more was that I didn't recognize any of the parts... it was a completely new system to me! I think I had 'fever dreams' for like a month, as my brain tried to process all the new combinations and possibilities afforded by the new parts... -
Legal/illegal is a concept imposed by TLG on themselves. You're free to bend your own Lego as you wish, but if it breaks, you get to keep the pieces. In official sets, we sometimes see illegal connections made tolerable by mounting on non-friction pins, for example. My personal go-to part for 'fixing' illegal connections is the rubber axle connector.
-
Tried it in LDraw and there's a significant collision. The proposed black #21/22 panel intersects with the big red triangular panel by ~0.5M. So this fit relies on bending plastic. File: https://bricksafe.com/files/astyanax/42143/hood_mod_v0.ldr
-
And here's the proof it works...
-
Given my supermarket-bought elastic bands, the solution for the front legs turns out to be to revert to what was apparently an earlier version of the Droideka, used for the photos in the building instructions. According to the instructions, there should be ball-pins under the red circles, holding the elastic bands for the front legs. But by connecting them as in the photo, i.e. under the green circles, the elastic bands will be slightly weaker, as desired in my case. Now the mechanism works as reliable as can be expected, and after practicing my throw, my Droideka unfolds perfectly every time! ===== So I can now answer the question "Can set 8002 be built from modern parts and function using cheap elastic bands from the local supermarket?" with a definitive "Yes"!
-
@Gray Gear If you look at step 25.1 depicted in the first post, you see the rubber band going from a ball-pin toward a gray bush. Try this: in addition to the rubber bands already in place, take a tight rubber band (or double-fold a larger one), and connect the ball-pin directly with the bush. Do this twice or more on each side, until the rear leg succeeds in lifting up the model.
-
We got someone with first-hand experience, awesome! Probably nowadays something so fickle won't be approved for release. (But then again, some other recent Technic sets also got their fair share of issues...) I don't think of it as frustrating... I set out to learn how the mechanism works, including the usage of elastic bands. Anyhow I'll share my findings when I get something resembling reliability. The rear leg has a large range of motion; would be hard to find a good placement for a shock absorber, without colliding with other mechanisms... Indeed! Let me share some progress. The build is complete in terms of plastic. What remains is further tuning of the elastic bands. Above you can see the 22L ziplines are a perfect replacement of the flex cables. Of course the ziplines can't go through the 'eyes' of the changeover catches, but the look & fit are great IMO. I added a (yellow) elastic band on the rear leg, which helps to pull the 'lever' with against the rear leg. If this lever does not end up fully against the rear leg, the model will sag. My main issue was with the 4x elastic bands added in step 25 (see first post). I doubled the amount. Now the rear leg does unfold fully. The next issue that surfaced is that the front legs unfold too much. As I understand, the front legs are the first to unfold, but then the weight of the model must push down on those front legs, making them move back slightly in the folding direction. This will then trigger the release of the rear leg. In my case, the elastic bands unfolding the front legs are slightly too strong, causing the rear legs' release not to be triggered. But if I use looser elastic bands on the front legs, they're prone to fall off during the unfolding action. So I'm still searching for the right compromise here...
-
Set 8002 is from deep in my dark ages (released in 2000), and ever since returning to the hobby, I've wanted to build it -- and understand it's mechanism! Instead of hunting down the original set with possibly degraded elastic bands, I'm attempting to build it from my inventory with simple elastic bands of similar size from my local supermarket. Since I don't have the parts in the old Brown and Dark Gray colors, I went for the following color conversion: Brown -> Red Dark Gray -> Black Red -> Tan (this color is used only to mark point where to grip the model) Furthermore the following alternatives appear to work well: The flex cables can be replaced by common 22L ziplines The soft hoses in the arms can be replaced by soft rubber pneumatic hoses ====== Now, I got one problem. Using common elastic bands, all mechanisms work fine, except the rear leg. The problem is with the elastic bands highlighted in bright blue in the rendering above. According to the instructions, a generous amount of elastic bands need to be placed here like so: It is then these elastic bands -- and nothing else -- that should then be capable of lifting up the entire model, while the rear leg folds down, like so: But the issue is, in my case, these elastic bands are not capable of lifting up the model to fully unfold the rear leg. And I have a hard time understanding how they could ever even do so. In the given position, I don't see how they could exert enough force anyway. Yes I'm trying this on a very smooth surface. So my question is: Does anyone have experience with this awesome model, and previously encountered & solved the issue of the rear leg failing to make the model stand up?