
Saberwing40k
-
Posts
1,936 -
Joined
-
Last visited
Content Type
Profiles
Forums
Gallery
Everything posted by Saberwing40k
-
Maybe, maybe not. It's not entirely unprecedented that we could get new parts in a train set. Though, if that were true, and it were only stuff that applied to trains, that would be lame. Although, it could be that the source of this information either does not exist, or is full of it.
-
Today, I decided to bang out something quick, and simple, to take my mind of of a couple of other projects I've stalled out on. It is a replica of the Overland Train, which was built by LeTourneau for the U.S. Army in the 1960's. The vehicle was 570 feet long, and could carry 150 tons of cargo over most any terrain. Sadly, the Army thought that newly developed, at the time, heavy lift helicopters made the concept outdated. And, in 1969, the vehicle was scrapped. However, the cab/tractor section still remains, as a display at Yuma Proving Grounds in Arizona. Wikipedia article on this vehicle and other similar machines: en.wikipedia.org/wiki/Overland_train My model is actually not a straightforward replica, and is far more primitive than the real vehicle. Overland Train Concept by Saberwing007, on Flickr The only way to actually get a good view of the entire vehicle was to arrange it in a circle, as the real machine was arranged at least once. One thing my version does not have is steering on the trailers, which makes maneuvering a massive pain. The tractor is also tremendously slow, which makes driving it an even bigger pain. In addition, one of the gears in the drivetrain rubbed against some supports, making weird noises. In all, it was more to see what it would look like than to be an actual workable vehicle. Trailer Details by Saberwing007, on Flickr As explained earlier, the trailers are very primitive, and identical, with only the colors and the wheels being different. Tractor by Saberwing007, on Flickr The tractor, with some minifgs for scale. Going by this, I could in theory make it in minifig scale. All in all, it was meant to be a quick project, and it shows. Ah well, I hope this is of interest to someone... Parting shot: Wall of Wheels by Saberwing007, on Flickr
-
I think the fact that many mechs lack knees is a bit ridiculous. If it's a poseability issue, then why do we have Bionicle figures with knees? I think the lack of knees is a combo of cost cutting, and "They're kids, they're not going to care anyway." I mean, for a kid, they'd most likely prefer a mech that has four arms over one with knees. I'm the opposite way, however, which is why I prefer building my own mechs, key exception being the Exo-Suit, which is one of my favorites. And I never had problems posing any mech with knees.
-
General Part Discussion
Saberwing40k replied to Polo-Freak's topic in LEGO Technic, Mindstorms, Model Team and Scale Modeling
You really think so? I ordered some at a later date, and they are the same color as the ones in my stock, out of the box 42009. Could they really have been made in one large batch? -
General Part Discussion
Saberwing40k replied to Polo-Freak's topic in LEGO Technic, Mindstorms, Model Team and Scale Modeling
Has anyone noticed that the 8z gears without friction, as used in 42009, are a slightly different color than other red parts? I've put one of those gears on a red axle, and they are pretty clearly different colors. Does anyone have a possible explanation for this? -
That gearbox is probably far too weak for four L motors, it would be destroyed. I think with that model he could barely fit two L motors, without a gearbox.
-
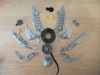
This is pretty cool, but do the masks go over those connectors IRL? Also, where/how did you come up with the name? Just looking at this, you'd almost think that this was a set, maybe something that was an accessory for the Mask Maker.
-
Actually, I'm not sure it's even possible to make a crane that is pneumatic that will not leak air over time. As a matter of fact, real hydraulic cranes and other equipment can not really keep their boom raised for long periods of time with the hydraulic system shut off. I've seen several vehicles, like Bobcat loaders, and even some large wheel loaders at an exhibition that had a locking bar, essentially a length of metal C channel that went over the extended rod of the cylinder, keeping it extended. I'd recommend that you do the same thing, as even if you glued the pneumatic hoses to the t pieces, valves, and cylinders, the valves and the cylinders would still leak a little bit of air. As a matter of fact, this has been talked about before, and you were even the one who posted it. http://www.eurobrick...ak#entry1433621 The solutions that Efferman and Blakbird posted should work for you.
-
Your thoughts on "cutting lego" ?
Saberwing40k replied to Breakdown's topic in General LEGO Discussion
Oh, so that's what you wanted to do. The set you were talking about, 6394, is a completely different set than the one you were modifying. Personally, if it were me trying to add a stripe like that, I'd have used a sticker, but your modified pieces look right, like something Lego themselves would make, and function perfectly. -
Several? Might this mean a bright green supercar sometime in the future?
-
As far as what has been seen so far, L motors for both seem to be confirmed.
-
Probably not. I was thinking that this would be something like At The Mountains of Madness. Besides, if this alien were frozen in ice for who knows how many thousand years, how would they know the lyrics to that song? It's not that much of an earworm, right?
-
A while back someone said $230 USD, and going by 42009, that sounds about right.
-
You're correct in thinking that it is not right, as it is not. Check the connections at the top of the linear actuators, they should be in the axle hole, and not the pin hole, on the linear actuator end. Also, check the teardrop shape liftarms on the underside of the boom. Near the larger end there are 3 holes, the connection to the boom should be not in the first hole on the large end, but the second one. Book 6, steps 52-55 show the offending parts.
-
Your thoughts on "cutting lego" ?
Saberwing40k replied to Breakdown's topic in General LEGO Discussion
So, you want to use one of these: on little tiny Lego pieces? You'd definitely destroy the pieces, and maybe lose a finger. I'm not quite sure what you are trying to do, as I have looked at the set in question, and I do not see a good place to add garage doors of any kind. In any event, Lego does make parts designed specifically for making garage doors, and those are available cheaply, either directly from Lego themselves, Bricklink, or Ebay. Regardless of that, on the idea of modifying pieces being a sin, there are many stances on it. The Lego Group's official stance is, naturally, "NEJ!". But, you don't work for them, so you don't have to worry about that. As a fan, the only thing you have to worry about is being able to enter contests, as most Lego contest, fan run or official, have a rule against modifying parts. Ultimately, it's up to you, but most fans are against it. Part of that is that the Lego system has rules, and one of them is that you may only use parts from within the system, with the key exceptions being stickers, and sometimes third party stuff like BrickArms guns; among Technic builders, strings and rubber bands are allowed as well. Personally, I'd only modify a piece to obtain something new, not made by Lego, and that I could use elsewhere. Even then, I'd be more likely to fabricate said piece, maybe through a 3-D printing service like Shapeways. However, I have a small bin of broken parts and some not Lego bricks (Kreo and Megablocks), and if I needed to make a custom piece, I'd take one of those, and use that. I have used some Kreo parts in a custom action figure, and you do not need a power tool to work with them. That would be inadvisable. What I used is the smallest hacksaw I could find, with the thinnest blade I could find, and a set of jeweler's files. But, overall, for what you are looking for, just get the pieces Lego already makes to do this. -
I would think the features would be drive, steer, remotely locking fifth wheel, and maybe a two speed gearbox. It looks good for a first MOC, and I can't wait to see more pictures.
-
Recently, I came across an idea, originally by Leo Dorst, on a method to make a crossover track with standard Lego pieces. Seeing as original crossover tracks are rather expensive on Bricklink, and there is no real equivalent in terms of current Power Functions track parts, such a thing might be useful. His original sketches: From these pictures, it was fairly easy to recreate in LDD, then translate into real bricks. But, there was a problem. As it is, this design does not align with the geometry of the existing Lego track. But, the solution was fairly simple, which was to extend the cross 4 studs in every direction, as seen in my rendition. Now, the cross has exactly the same dimensions as the original, and can be used exactly the same way. All that was left to do was test it. I created a figure 8 shape using the pieces I had, and made a simple train run with Power Functions. It worked, although there are some traction problems when the engine is being started in the crossing. But, it is not a big problem, and it could be remedied by putting rubber bands on the PF train wheels for extra traction. .LXF file:http://www.brickshelf.com/gallery/saberwing2/Ideas/LeoDorst/rail_crossing.lxf I hope you all find this useful, especially those of you who don't want to use the other method, which involves cutting up parts.
-
Technic General Discussion
Saberwing40k replied to Jim's topic in LEGO Technic, Mindstorms, Model Team and Scale Modeling
i think that you could still get a signal, as long as you leave that gap to the side. There are a bunch of tutorials on all kinds of stuff to do with posting images, in this topic:http://www.eurobricks.com/forum/index.php?showtopic=97921 -
Technic General Discussion
Saberwing40k replied to Jim's topic in LEGO Technic, Mindstorms, Model Team and Scale Modeling
Could you post a screenshot of what you are trying to build?, as that would help us help you a lot. -
Cylinder file STL
Saberwing40k replied to legomania94's topic in Digital LEGO: Tools, Techniques, and Projects
Jaaptechnic has some pictures on his Flickr gallery of extended pneumatic cylinders that he made from scratch. It would appear that he took the seals and stuff from a standard Lego cylinder, and attached a new inner and outer shaft. Pneumatic cylinder 22 studs long by JaapTechnic, on FlickrPneumatic cylinder V3.0 by JaapTechnic, on Flickr And, as a bonus, he is using them for the exact purpose you are, as the lifting rams on a Volvo dumper. Volvo A25D WIP by JaapTechnic, on Flickr -
Oh boy, I have some nice ones. I've noticed that virtually every part with a single stud tube connection, with a few inexplicable exceptions, be put between any four studs, like in real life. However, almost all of those parts can be put between two studs, even though that connection is not possible in real life. Examples: Inexplicably, the 40m string with studs will not go between studs, even though, as seen in the pictures above, the 30m variant will. This is by no means a survey of all possible bricks with this kind of connection, but it is a little bit jarring.
-
I've got a better idea than sand. Either one could use decorative stones from Ikea or Michaels, or steel ball bearings. i have a large number of the latter from various Magnetix building sets. I'm sure you could get some in bulk online. I'd also suggest some small free weights, but those are much harder to incorporate.
-
Alright, that's good. But, I think we should take this to either the Buy/Sell/Trade forum, or private messages, so as to not derail this thread any further.
-
This isn't quite the right thread for that, but I'd be interested. Did you clean it off, and do the motors still work?
-
Let's not forget all the great RCX era Mindstorms builders. I don't know how many of them still have sites, but I found many books on them at my local library.