
Mr Jos
-
Posts
515 -
Joined
-
Last visited
Content Type
Profiles
Forums
Gallery
Everything posted by Mr Jos
-
 Title I have to say was found from wikipedia, as I couldn't find a name for it. It seems wikipedia put all fairground attractions that move in more then 1 direction in the group "Spin 'n Puke", and as I didn't find a fitting one I sticked with the groupname. First and most important part was that it would work with only 42128 parts, EV3 came only into play once it worked, as that's what I like to do, making things work remotely. My B model even didn't use EV3, no fancy name. As far as I know it's the first (published) forklift using (multistage) pneumatics and no gear rack/only string on reel for pulling up. Could I have made way better/nicer models with same functions? Hell yes if I din't limit myselve to this set's parts. At this moment doing right that, I threw everything from 42128 into a ziplock bag keeping it separate from my usual LBG bricks, and started making a bigger version of this fairground ride but LBG/black/yellow only, that will have full size carts spinning instead of just the minifigs in this C-model. I was limited with the low amount of panels in the set keeping me from making it big enough to have carts where the figs could sit in. The real life possibilities for this (In this video where I start it) ride #6, #5, #4 and #1. All hydraulic lifting platform rides with more movements on the platform unlike a centrifuge that only rotates the platform rapidly. Edit: Tried to rename the topic title to generic. But it seems you can't change topic names (or I can't find where). Thanks @Gray Gear
 -
5 hours of 3D Modelling in correct order steps later, Thought more people would be interested in combining multiple movements through a turntable, that is moveable itselve, whilst maintaining it as a very small footprint, but guess I was wrong. This wasn't a MOC to make a fairground, but just to prove the TECHNIC possibilities of combined pneumatics, turntables, gearing etc in narrow spaces. That's why I won't put time into making instructions for this one, but I can use the 3D model to recreate this if I ever want to display it anywhere, or at a STEM learning point. Guess I'll only post here another MOC if I make a Supercar or Truck (Which I will never do, I only make things no one else would think of, or think would be possible). /End of monologue.
-
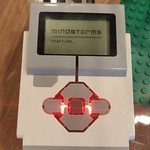
Found some time for a video Motorized control with EV3, programmed with Pybricks MicroPython, PS4 controller used with Bluetooth. Big thanks @Pybricks for making all my projects possible, easy to control motor speeds as you can see in the video, slow ramping up/down for the platform motors etc.
-
Manual control mode; Automatic control mode; I tried to make it simple, put all 3 motors on in 1 time with 1 point locking it in place with a 3L pin with bush. The compressor is in parallel with the manual pump, that still works. I made a small program with Pybricks MicroPython controlling it with the PS4 controller, and it works, but the motor for the valve is not strong enough for precise control. I will try to add some gearing to it and see what happens. Compressor frame made completely with items from the 42128. Only things added 4x 5,5L pump, 5x T piece, manometer to see the pressure doesn't go to high. ~1 bar is needed for lifting the platform.
-
After my B-Model where I couldn't use the turntable available in the 42128 [Heavy-Duty Tow Truck], I wanted to make something usefull with as many as possible functions going on around that piece. I came up with a tilting platform fairground attraction. Functions (only 42128 pieces): - Manual tiltable platform with pneumatic pump and 2x 1x11 cylinders. - Manual control for spinning the platform at base with knob. - Manual control for spinning an element on the 4 arms (I added 4 minifigs for seeing better the movement of these platforms) at base with knob. - Full walking platform closed for walking when cylinders in lowest position for boarding. The 2 spinning functions are not linked together, they can be controlled individually. Platform going up: Functions (with extra pieces): Compressor not made yet, I will try to make it with minimal extra pieces, I'll try only 2/4 pumps and few T-pieces. If possible all liftarms from 42128 set. - Compressor driven by controlable motor for speed/height of the platform moving up/down. - Controlable motor for controlling the valve (no need for extra pieces, only motor) - Controlable motor for spinning the whole platform. - Controlable motor for spinning the 4 arms mini platforms. All items I think that will be needed to do this is in this picture on the left side. I will try to use the PS4 controller for controlling all movements. The name of this MOC is fitting for the minifigs, that can end up spinning very fast in all directions. Depending if there's a need I will make a video of this. It's here
-
[MOC] Forklift 42128 B-Model
Mr Jos replied to Mr Jos's topic in LEGO Technic, Mindstorms, Model Team and Scale Modeling
For that mast a 1x30 pneumatic cylinder I mentioned before would be awesome to go with the 2x15 liftarms in series. I'm nearly finished with my C-Model, it's just a small fairground attraction, but I made it just to try some special technics with the turntable from the set combined with the 1x11 cylinders. Mechanically finished, it works, no idea if I will make instructions, depends on feedback, don't want to waste time on it to much. Tomorrow I want to add one of my EV3's with 2 motors to make it work like in a real fair just for fun. -
[MOC] Forklift 42128 B-Model
Mr Jos replied to Mr Jos's topic in LEGO Technic, Mindstorms, Model Team and Scale Modeling
Well that's the difference with 8416, it uses gear racks as I mentioned before, you can make them as long as you want. In that set it's 2stages, one looong gear rack second with the string. With pneumatics you're limited to 6L extension for the cilinder. Maybe I'll give it a try later to make a bigger one, but as you said beam guides are good for 1-2stages max, then it gets really big. And the bigger/heavyer, the more chance it will grind to a stop by the pivoting weight. I had this problem in my High Bay Crane MOC. It has a really long (can scale up easily) beam guide allowing it to go up in 1stage. The forks for taking pallets is 2stage, and really big/heavy because it uses brick-stacking as guides + chains. It is pulled up with a string, down is gravity doing its job. But without a good beam-stack it will just stop midway, string still loosening, and bam crash. Here it should be possible to see these stages (if the video starts where I want it should @90sec) -
[MOC] Forklift 42128 B-Model
Mr Jos replied to Mr Jos's topic in LEGO Technic, Mindstorms, Model Team and Scale Modeling
Thanks, the mast can be taken out easily modified, just the 4 hinge points need to stay the same. The only problem is the pneumatic connections, in real forklifts pneumatic lines are small compared to the mast. In lego they are huge, and cant make short 90° bends. This makes that you can't brace the mast easily as these lines move everywhere in front of. Second problem to this set making it hard to get a bigger then 18stud height difference for the forks; There are no long axles to make guides. Plenty of 9 long, but only 2x 10L axle, where one is used in the motor already.. No 11L/12L. Take into account that you need to brace a 9L axle at both ends and you only have 7L left, then your guidepoint removes 1more and there you have my 6L movement (3x). That is also what the long cylinders move 6L. So unless you go to a 4 stage mast you won't be able to get higher. For reference, here are some of the forklifts I have driven this year, this one with a 3stage mast. You can clearly see that the real cylinders extend waaaay more compared to their size(thickness). Lego cylinders should be 1x30 instead of 1x11. The model I made is better to be compared with this big boy. I still want to make one like this next one, but the extension is here increased by the chain looping over the cylinder, and this set doesn't have any (I have 1200 in stock, but can't call it a B model then). But I do plan to make a bigger forklift, but then freestyle with all my elements. -
42128 B Model - Dump Truck
Mr Jos replied to Ngoc Nguyen's topic in LEGO Technic, Mindstorms, Model Team and Scale Modeling
Yeah the pump is really huge, a small 1x6 pump is way easyer to find place for then this 3x3x11 chunk, it's the reason I left out a seat for the driver. Certainly in small builds it's hard to get these items in, but in big builds the pneumatic 'action' length is pretty small if you compare it to gear racks, which can go on forever. Most things I can think of using hydraulic cylinders in real, would have a way to short movement with these Lego cylinders. -
42128 B Model - Dump Truck
Mr Jos replied to Ngoc Nguyen's topic in LEGO Technic, Mindstorms, Model Team and Scale Modeling
Second! Hope this topic gets more comments.. (Already ∞ more now) As I know how hard it is to make a B model (limited parts). To your model selve now, good size, and aesthetics, just to bad you didn't find place for the pneumatics, they are to me what Lego made so interesting when I was a kid. If I were you I'ld still try to get the 1x11 cylinders in somewhere, they don't need so much space, the 2x11 however I can understand. They are very bulky. If I fail at my C Model, I'll break it down and give your instructions a try. -
[MOC] Forklift 42128 B-Model
Mr Jos replied to Mr Jos's topic in LEGO Technic, Mindstorms, Model Team and Scale Modeling
First HD rendering is in, it's sooo hard to get hoses connected 100% in the middle with Studio.. -
As soon as I saw the new set coming out, 42128 Heavy-Duty Tow Truck, I knew I wanted it. For his pneumatic cylinders and valves it was something I already wanted a long time, but they were to expensive (1x11 @50€/piece). My initial plan was to make something with my EV3 bricks, and program movements with the cylinders as in MOC Perforating Press. But I thought, I'll give an alternate build a try. I came up with this forklift with many functions. As cylinders have a fixed size, it was impossible to make the front end (mast with forks) bigger, so had to keep the forklift itselve in scale with it small. The start, after breaking down the A model, thankfully had some bins left over as I normally only build with LBG/Yellow/Black. I tried to make a triple stage mast to get more height, as 2 sets of cylinders only extend 2x6 studs, now it goes 18 studs high without tilting. Meanwhile making the cabin with all functions+leftover pneumatic hose inside whilst keeping the floor low wasn't easy. The instructions (Rebrickable) also were not easy as Stud.io is not a good tool for routing the pneumatic lines, and string doesn't even exist. The smaller ones I did manage to make. Here a few examples of how I kept the complete PDF at 101pages. Might make some renderings later with Stud.io but my computer is getting old (~10years) and it goes sloooow. I hope you like my first B Model for a Technic set. No idea if I will ever make some again, depends on feedback I will get. If you like it, leave a message, if you don't like it, certainly leave a message as well so I know what can be improved, or what not to do.
-
Thanks to your parts I've been able to finish my 3D Model, couldn't make all pneumatic lines in Studio, small ones I did manage to add, and bend nicely, but the long ones, they go through the body and pin holes, impossible to do with Studio. Guess that's why you also didn't add the long ones in the 42128 model. And a little teaser as what will be coming soon in a new topic if I've finished this instruction book. (I haven't started yet with step 1 etc, just frontpage, but I'm not a very good graphic designer..) I think many more people will be able to make MOC's/MODs with this set, hope Lego has made enough 1x11 cylinders to keep new sets coming.
-
Oh man awesome! That's why I love this community! On we go with the MOC moddeling + instructions! Will later try to see Youtube how to do the pneumatic pipes like you did, they are very difficult in my model as I can not cut them and some are waaay to long.
-
First set in ages I bought, as I always loved pneumatics. At first the colors didn't say much to me on the photo's, but in real life they look very good, and right color for the MOC I wanted to make with the cylinders. Ordered set on 31st July, Shipped monday 2nd, received 3rd. Build by evening of 3rd, fully broken down and parts sorted by 4th morning, MOC finished today, and I like it. But now running into problems with Studio. The Pump does not exist there yet (even thought it was in a 2016 set already?!) and the 11L perpendicular beams aren't made yet, but those I managed to make myselve with Studio Part Designer. If anyone with part designer skills reads this, try to make it for all future MOC's by everyone? :D I really liked the original set internals, very good use of the items, and had a big smile a few times, as I should remember that. I'ld rate the set 9.5/10 If they would give a few extra hoses it would be 10/10, then I could cut those up. EDIT: And another missing element, the pneumatic valve. This will be a hard design to make..
-
Well done making it in Studio, certainly for a first model. Insane that is has 4000+ parts and still being as strong! At this moment not much time to look more at it, as I'm busy modeling my own next MoC in Studio as well, but as you said, it has its limitations, and don't know if I will succeed this time (pneumatics!~). You have chosen a very nice color design, wondering what your next project will be.
-
Nice design, and great video design. I liked the starting part where it rotates around, I could pause the video everywhere to see what you've done! About the 8T gears, I think they can handle pretty much. Certainly the power from 1 motor. In my designs with heavy torque I used 8z gears and they did not deform yet, but I have a lot of twisted axles already. (Yesterday have thrown away 8more). Nice way to start here
-
EV3 Technic Pin Sorter
Mr Jos replied to Mr Jos's topic in LEGO Technic, Mindstorms, Model Team and Scale Modeling
Thanks for the post, Yes I did have many problems with it. I started making this MOC before I started my T-Bot Gantry. I had to put it aside, put my thought on something else and made the T-Bot. After that one worked I started again with the Pin Sorter. I completely deleted, in my opinion, a very nice pin feeder. It was a double stepper without a scissorlift underneath making it very low profile. But whatever I tried, stacked liftarms, panels, bricks, plates as material for the steps, the pins destroyed everything I made within 2minutes. The little edge get caught on the smallest edge between 2 Lego bricks and tear it apart. So I designed this drum feeder and as it worked reliable I could mass test pins, and didn't have to manual put them on the belt anymore. The programming difficulty was to find the difference between Tan and LBG, Black and DBG and find correct lengths for these difficult colorsas they have near same color code with a certain background. Adding the 2nd color sensor made it possible to see all different pins, but still not a 1 minute job. Many hours of testing went into this MOC. All 3 components have been designed to work as standalone indeed aswell. You can just remove the swingarm, and put a bin underneath and you have a pin counter, make it stop at.. [This just gave me an idea right now for a MOC to try later = Make an item counter, filling bags with certain amount of that 'thing', and then fill a new bag], ok so make it stop at a certain amount. Drum feeder could be used for axles, liftarms, etc. -
The last belt is always on a constant high speed (I think 1000°/sec), it never changes. The scanning belt before however I do stop in this case. You can see this very good in the beginning of the video when filming from the top on the scanning belt. When a pin is on the belt, the program knows where it will be dropped (Lets call it point 'A'). The next pin is scanned by the 2 sensors, at this moment the dropoff place is known 'B' for this 2nd pin. The program calculates the time the swingarm will need to move this amount of degrees. And it knows approx. when the 1st pin will fall off the belt+little marging. It will let out pin #2 on the last belt, and start moving it 'at the last moment'. This is done with the previous time calculated the arm will need. If all goes perfect the arm is in position right before the pin drops, next pin should be on the same belt going already if nearby, and waiting longer if a large swing is needed. It was very fun to program this, but not easy. Right now breaking down all my MOC's to make an inventory of my parts. I already ordered a few times extra pieces I thought I ran out of but had a bag full hidden somewhere... Will take a few days I think. For the electronics, you need patience and some luck. Yesterday I was 30seconds to late for someone giving away a complete EV3 Home Edition+few kg of Technic+studded. It was just few minutes posted on FB. But I did manage to get all my complete EV3 Edu sets there for under 200€ each, which is ok for me.
-
Jeep Willys
Mr Jos replied to Sariel's topic in LEGO Technic, Mindstorms, Model Team and Scale Modeling
For me it would, as I did not take a look in the SM sub for a few months, I would never have seen this great model untill after the merge, where it would be on like page 20 or something already by that time? SM to me says just looking good on the outside, but inside does not mather. Sariel's Jeep drives, steers with Technic remote devices and Technic motors and Technic hubs, having all that hidden inside doesn't make it less Technic for me. I am for 'moving' Lego. I would never ever have seen this great model if it was directly placed here, glad he did not. And back to the model itselve, your instructions maker is superb. If only I could do that/learn that, it would be awesome. Makes the experience of building your models great. -
Leaving Eurobricks
Mr Jos replied to Sariel's topic in LEGO Technic, Mindstorms, Model Team and Scale Modeling
Gonna miss the hamsters on here, but will see them on YT. I understand your frustration of your long work in a MOC being moved to an inactive part that will be moved here soon anyway. Can't we have a grey zone until then and just leave the 'maybe' SMF MOC's here as they will be put here soon anyway? Still hope things might calm down and you stay here, always been reading your topics, even though I don't post much. Keep calm and keep bricking. -
As my program is completed, instructions have been made, and a drawing for making the sidewalls finally works (100% in MS Word does not mean 100%, I needed 107% to measure my screen), I present here a swinging sorter; The sorting belt uses a constant speed control with 2 color sensors with a different background to find the color and length of a passing pin. It then gets dropped in a swinging arm that brings the pin to the correct bin (if known), else it will put it in the center bin, so you can put them back in the feeder for a 2nd try. If the pins are to close to eachother, and the distance for these 2 bins needed to far, it will hold the pin and stop the feeding until it can continue. It tries to keep going as much as possible, 2 different pins in bins close to eachother are allowed to be together on the swingarm. The feeding is done with a drum feeder. The sidewalls are best lined with 160g/m² paper to prevent the hooks of the pins catching on the edges of panels/liftarms (They will do!) That's why I changed from my step-feeder to this one as these little pins rip plates from eachother. Programmed with Pybricks, MicroPython. Instructions + program available at https://rebrickable.com/mocs/MOC-83411/Mr_Jos/technic-pin-sorting-machine-for-all-pins/#details
-
Jeep Willys
Mr Jos replied to Sariel's topic in LEGO Technic, Mindstorms, Model Team and Scale Modeling
Great model and great instructions! For what age of hamsters is this suposed to be, and do they need to wear seatbelts? -
I have made all my machines as a real life build first. I use Studio for everything, no other programs needed (only for my software but that's not needed for most normal technic builds). I take it if possible in sub-assemblies and make that part in Studio. What I do is already start 'drawing' in the order I think it should be build step by step (this makes the process for making instructions later SOOOO easy). No problem if you're not sure, you can change and add steps later anyway, but remember, DO NOT start making instructions untill the 3D is finished, sometimes the program likes to mess up the instructions if you change something to much in the 3D build. Just changing a pin to another step because you added it to soon, in floating air is no problem though. If you finish a sub-assembly, just select every piece of it, and make it in Studio into a 'subassembly' like here in my example, every arm has 1item in the main 3D steps. You can then hide it completely to make the next sub, or hide partially to connect the next part to some of the beams, and later hide it. How big are your builds? Because I notice Studio gets greedy of the RAM and does not like my 5000+ pieces builds to show everything. 2000 pieces works perfect.
-
I prefer to make it IRL first, and try untill satisfied. Then make the Studio file. Certainly for moving parts it's better to have it in your hand and test it.