

astyanax
-
Posts
1,191 -
Joined
-
Last visited
Content Type
Profiles
Forums
Gallery
Everything posted by astyanax
-
General Part Discussion
astyanax replied to Polo-Freak's topic in LEGO Technic, Mindstorms, Model Team and Scale Modeling
Hasn't always been this way. I have 100s of black 2L pins from the early '90s mixed with recent black pins. You can't push a bar into an old pin..... Whenever I intend to use bars, I need to select my black pins carefully. -
It's like this already in the original. Maybe to avoid mixing red and black 2L axles in the same bag? (I don't understand why that would be important, but that seems to be what's happening...) Feel free to swap them around where you see fit.
-
General Part Discussion
astyanax replied to Polo-Freak's topic in LEGO Technic, Mindstorms, Model Team and Scale Modeling
I find this change the most infuriating. Pushing a bar through the pin is truly my #1 usage of this part -- it holds the bar very securely, which I've found very useful in many scenarios. Fortunately, the new version received a new part number (61408), which is treated separately on BrickLink. -
I'm running out of steam with the mods... I was trying some alternatives for the black "fins" at the rear, but no winners. Expand the spoiler for some of my attempts.
-
General Part Discussion
astyanax replied to Polo-Freak's topic in LEGO Technic, Mindstorms, Model Team and Scale Modeling
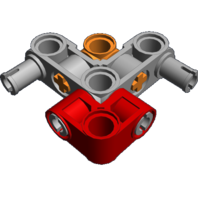
The 2x11 pneumatic cylinder got a new number, 26656. (Was 19478.) I wonder what changed? -
General Part Discussion
astyanax replied to Polo-Freak's topic in LEGO Technic, Mindstorms, Model Team and Scale Modeling
Cool! Just noticed that Rebrickable has the inventory: https://rebrickable.com/sets/45400-1/bricq-motion-prime/?inventory=1#parts -
This was my best shot, as suggested by @Gray Gear: It has the added benefit that the tooth can no longer rotate.
-
Ya don't need stickers if y'have a ton of lime-colored tiles & slopes... It looks better IRL than on the photo I think -- the latter worsens the color consistency issues even further. And IRL the tiles don't look bulky either; they're flush with the wheel arch and sitting below the 19L flex axle. Still, I realize that for many people this may be too much System in their Technic -- a matter of taste & tolerance. I'm not decided yet on it myself, but anyway it was a fun experiment! Thanks! I'm planning to share the virtual model via Rebrickable sometime soon.
-
Great idea! The only downside I see, compared to the "flex-liftarm method", is that the encircled parts remain black/uncovered. Your solution offers opportunities too, though. Here's an idea for modeling the small air intake at the top of the hood: For reference:
-
Nice! Haven't seen anyone use in a while...
-
Hmmm, I don't see an obvious way using Technic parts... maybe try using some Bionicle wing to re-model the black vertical fins? Maybe it would look better if the black vertical fins were 1M less tall?
-
Great idea! Should've thought of that myself... I even have the pieces needed. Is this what you had in mind? Here you can also see how the additional 14L flex axle looks naked. (Actually I don't have enough to cover both sides... You'd need 24.) To make the tops bend inward, it might suffice to use that new panel , which I don't have (yet).
-
Finally the parts arrived to finish the exhausts, so here's my photo. Also, I found a way to get rid of that the silly plaque: the printed 4x6 tile fits perfectly as license plate, as in the show car quoted above. Best idea I've ever had. As for the front: My model now looks suitably angry: I've also been experimenting with filling that gap between the hood and the 19L flex axle. Spanning a 14L flex axle in between them does a good job. Tunneling both through a series of finishes the job. I like it. But I understand this technique is not universally appreciated on this forum, so I don't expect to be applauded here.
-
Technic Model Comparison
astyanax replied to Ngoc Nguyen's topic in LEGO Technic, Mindstorms, Model Team and Scale Modeling
Thanks again for your photos @Ngoc Nguyen, this is a very valuable thread. -
I also had this solution, surrounding each headlight with 2 tapered flags. It fits well. But I like it slightly less as it's less "technic"...
-
Another day, another idea. Is this an improvement? The idea is a result of my silly insistence to have a glow-in-the-dark 1x1 round tile as headlight, which looks awkward if the headlight is not inset as in the real car. My solution is to replace the black #1/2 panels under the hood by #13/14 panels, set at an angle, such that they partially curve over the headlights. If the #13/14 panels look a bit bulky, that's because of the gap between the curved tapered panels on the hood and the 19L flex axle, I think... But I really like how the #13/14 panels perfectly continue the curve of the black 3x13 panels over the front wheels. Compare original / mod: For reference: I'll try it on my model when I get home next week, and share some photos (unless y'all agree it's an awful idea.....).
-
That doesn't seem entirely accurate. I don't have a Facebook account and I can browse CaDA's Facebook page but I can't access the instruction files. (Not that I need them, but still )
-
Okay I'd suggest to @amorti to put links in the first post then.
-
Brand loyalty is not the only factor. For me, the CaDA Ferrari did not contain any new parts, so I could just build it straight from inventory -- even pimp it at will. Then again, probably few people have so many red panels and other parts at hand, so I realize I'm in a small minority (many of whom might be frequenting this forum though).
-
Sorry for being the least sensitive person in the room... But is there something against linking to CaDA's files or website directly, possibly even from the first post? It's about accessing TLG-compatible instructions now, not about buying non-TLG bricks.
-
General Part Discussion
astyanax replied to Polo-Freak's topic in LEGO Technic, Mindstorms, Model Team and Scale Modeling
You're right. The parts list of 42125 says 2x in red. Nice. -
Great stuff! Regarding parts in new colors, I think you missed the 1L liftarm in red (18654)...
-
Well, what do you think looks wrong or bad? Knowing that might already give you an idea of how it should be improved...
-
Welcome in the light! So you'll be looking more for "subtractive" improvements. One obvious and simple mod is to make the engine top easily detachable by skipping step 332. If you have 8 more blue axle pins , use those in steps 847 & 852 instead of the black 4L axles -- this will make the engine cover feel more rigid and premium. For other mods described in this thread, I suggest you start getting familiar with BrickLink as well as Bricks & Pieces (I prefer the latter for newly introduced parts as well as for small orders due to low shipping costs).
-
Driving a planetary hub directly from a buggy motor's inner (fastest) output will give you something "real fast". I've tried it myself, and it was great fun. Although this was of course a simple mockup, not a 3200-part model. But I just wanted to confirm that planetary hubs can indeed be driven fast.