
roppie11
-
Posts
226 -
Joined
-
Last visited
Content Type
Profiles
Forums
Gallery
Everything posted by roppie11
-
 thanks you so much for doing that. I'm definitly waiting for the building instructions.
 -
Cutting Machine
roppie11 replied to uefchen's topic in LEGO Technic, Mindstorms, Model Team and Scale Modeling
what a pity it failed. If it worked it would be a pretty cool machine! -
General Part Discussion
roppie11 replied to Polo-Freak's topic in LEGO Technic, Mindstorms, Model Team and Scale Modeling
there is a whole topic about "non released parts" on general discussions section. 1972 1974(who left eurobricks sadly) and some other dudes show a lot of test parts and other parts that were made, but never released. and here is the topic: http://www.eurobricks.com/forum/index.php?/forums/topic/94037-legoland-non-production-parts/&page=1 -
Technic 42058 Review
roppie11 replied to Richard Dower's topic in LEGO Technic, Mindstorms, Model Team and Scale Modeling
i agree that he didn't do the 'ramp part' very well. other than that, great review. Shows the model very good from all angles and gives a honest impression of how the set is. thank you! -
[TC10] Pneumatic Press
roppie11 replied to roppie11's topic in LEGO Technic, Mindstorms, Model Team and Scale Modeling
thank you really much for that, but keep in mind that you have to vote for multiple participants. -
7. Pneumatic press A press is not a very difficult object. It can crush things or get things done by applying enormous pressure (varying from 10-5000 tonnes! but 5000 is extremely much) some presses have a blast shield so the operator does not get hurt by pieces flying away. My press - can Apply up to 5 kg pressure (2 big arocs cilinders) - Open and close the blast shield( 1 small cilinder) - A manual positioning system in x- and y-direction. (for/backwards and sideways.) - Pump is operated manually. the beginning The pressing cilnders (originally one, but upgraded to two. put together Make it look better This is how the pump works. I also show it in the video in the video you will be able to see everything a lot better. Discussion Topic In the discussion topic is a lxf-file but it is not updated. Good luck with voting. I also like a lot of the entries. Good luck everyone!!!
-
its a pity that its not possible to do with only lego parts but this plane is closest to only lego that i have ever seen!
-
Caterpiller tracks (HELP)
roppie11 replied to doug72's topic in LEGO Technic, Mindstorms, Model Team and Scale Modeling
thanks for asking doug. I have the same struggles but the ideas here are pretty good. Thanks people! -
It depends, if you use one of sariel's gearboxes, in which he put quite some work, he deserves to be mentioned. but if you take just a little idea from someone who spend 5 mins of their time, i don't consider it rude when you don't mention them. But as didumoso said, the builder should not take credit for something if he didn't come up with it. Even if it is just a tiny idea.
-
[TC10] Pneumatic Press
roppie11 replied to roppie11's topic in LEGO Technic, Mindstorms, Model Team and Scale Modeling
hello people, I just finished the video about the press and it is up on youtube i am now updating the lxf file so that is coming also. and it is reallly cool, if you put a link (From youtube) it automatically changes to the embedded video which is really cool edit: and then i mean while typing the post and not after posting it -
whoa what a changes! i don't like everything but i guess thats just a case of getting used to it. thank you admins for all the work you have done! and by the way,j is the upgrade finished already?
-
Axle Collection Thread
roppie11 replied to efferman's topic in LEGO Technic, Mindstorms, Model Team and Scale Modeling
tell me more, does it have to be driven, or steered? or both? Do you want suspension? or there other things maybe? -
[TC10] AT-AT
roppie11 replied to Jeroen Ottens's topic in LEGO Technic, Mindstorms, Model Team and Scale Modeling
i think 6 legs provides much better stability than 4 legs, but of course it makes everything much more complicated and it will be even bigger. -
ahw, i missed you last time, now i see why. Goodbye and all luck for your little family!
-
[TC10] F18 Carrier
roppie11 replied to Alex Ilea's topic in LEGO Technic, Mindstorms, Model Team and Scale Modeling
That is looking pretty good, I love the neat solution with the pump(shock absorber). -
[TC10] Scraper Caterpillar
roppie11 replied to juGSI16V's topic in LEGO Technic, Mindstorms, Model Team and Scale Modeling
that is a very cool creation. Also very unusual (and thats a compliment ) The looks are good too! -
[TC10] Pneumatic Press
roppie11 replied to roppie11's topic in LEGO Technic, Mindstorms, Model Team and Scale Modeling
I don't assume the travel as a problem. I have 4,5studs free between pressing table and press tool. If it is much bigger it would just look unrealistic. 4LA's have indeed a lot of power but i don't want to break my lego. It would be really awesome to see what you can make. -
[TC10] Pneumatic Press
roppie11 replied to roppie11's topic in LEGO Technic, Mindstorms, Model Team and Scale Modeling
this is my last holiday day so i spend my time upgrading my moc I added a second cilinder. more power is needed For that the whole top had to be taken apart. I then replaced the pressing table with beams and i'm doing the panels right now. I Also made a 'pressing tool' and i set the cilinders a bit higher. In v1.0 there was hardly any space under the cilinder and a pressing tool was not really possible. I will see what i can press and i will include it in the entry video. I'm not gonna use clay or anything else that makes my press very dirty. i first teared it down a bit then make the holder for the cillinder and add it to the first one.(copied it from the 1st one) I attached it at the height that the cilinders just touched when maximum extended. This way, a pressing tool is no problem, space enough add panels, make a press tool top view the side panel still folds open, but now the other way. it was easier to make it this way and at the top there are no parts sticking out just a quick picture so this is the update i will write a short story in the first post edit: and why did the title change? first it was [TC10]Pneumatic Press - Discussion topic now the last bit is missing -
How durable is Technic LEGO?
roppie11 replied to Bering's topic in LEGO Technic, Mindstorms, Model Team and Scale Modeling
I second that, and cracked parts is actually bad for TLG because if you go to customer service you will get send new ones for free. I think quality has decreased because of lower production costs or maybe the quality of the ABS plastic has decreased and TLG can't do anything about it. But i don't know anything about that -
[TC10] Pneumatic Press
roppie11 replied to roppie11's topic in LEGO Technic, Mindstorms, Model Team and Scale Modeling
ok, thanks I have to make one for the entry but i don't know when i will do that. thank you yeah, you are right. IT is actually a little boring. I will stick to my handpump however, because otherwise i will have add a lot more and it's not really needed. It is a good idea actually to use 2 cylinders. Maybe i'll do that, and uhh the paper didn't explode under my press unfortunatly. The panels are the weakest points indeed, so if i add another cylinder i will make a sturdier pressing table. I also made a pressing tool but now there is hardly any space to put something under it so i will probably also make it a bit higher. I will post it when i have done upgrades -
Introduction Hello, I present to you, my new, first fully-finished MOC and entry to TC10: The 'pneumatic press'! About I wanted to participate in the contest, and it should not be a problem for me since i have 42043 with all it's pneumatics. I didn't want however to create another vehicle. I really like the Hydraulic press channel so i decided to make a hydraulic press, well a pneumatic press to be precise. So here it is. I am creating the discussion topic after the build but that is perfectly fine because i have progress pictures which i will show you. If you have suggestions for mods etc. you are free to suggest. There are for sure a few flaws which can be made better. so it has a few functions - You can move the platform to position your part (2 yellow knob gears). You can move it for-/backwards and sideways. - The yellow blast shield can be opened with a small pneumatic cilinder. - There is a big cilinder for pressing. All controls can be found at the front. For safety there is a blast shield, just like in real presses. Building progress I realised that i had to make progress pictures when i was here: I had then made the positioning and i added a pneumatic pump. I made the platform such that it can handle a lot of weight, well it remains ABS plastic but i made sure to build it such that it doesnt fall apart when there's weight on the platform. As said, you can move the white platform sideways and for/backwards. This is done with gear racks. one knob gear is moving with the platform (in one direction). I can make something so that it doesnt move but that would make my MOC even uglier and i don't think it is a real problem. My plan was first to put the pump in the top, so that the tubes dont have to go up the pump. Later, i realised that you need a control panel and that the switches have to be at the bottom. So i added the pneumatic pump at the bottom. I didn't like an exposed pump so i used a beam and a lever mechanism which you will see in a video further down, OR in the final entry video. My first function is the blast shield. It works pretty nice and the blast shield doesnt look that bad. What i don't like is that the supports stick out. The blast shield cant clap up 90 degrees, but i don't think that is needed and it would make it a lot more complicated. then i built the cilinder for pressing. It only has one attachment point so i had to make a frame such that it can't swing. the 4l axles, next to the pins, will later be replaced with 7l axles but you will see later on. This will be attached to the frame This cilinder also has to be connected to the switches and when all the tubing is done, the underside looks like this you can actually see that i had too little space for all the tubes so i gave him 4 feet (the LBG rims). then i need to do panels to work it off. You can see that i used some frames and beams to make the top part stiffer. between the black panels, come the grey panels which can fold out On top of that goes a cover which wont be attached with pins. This is so you can easliy see through and repair/change something. Now it is done, finished. here is one more picture The way the black panels are attached is really ugly. Then i built in in LDD, this way i can see exactly how it is made and where it is the weakest. file can be found at the bottom. While building i changed the model a bit. I replaced 2l pins with 3l pins. Red pins with axle connectors for regular pins, and added extra pins for more firmness. i also changed the way the black pannels are attached and i added a some beams. On the cover i added 2 red 5l beams so you can pick it up more easily. the final version is the one, made in LDD. Of course there are no pneumatics but it is pretty clear where they have to come. It is very good visible on the pictures. I couldnt find a few parts in LDD so i used something else. Updates/Changes Let me know what you think. What are good and what are bad things about it. Feel free to suggest changes because a MOC is never perfect. I haven't done measurements like part count weight, volume etc. but if you want to i can do that. does anybody know when i can enter my moc in the entry topic? Upgrade 1: post #13 I am not gonne upgrade the lxf file, maybe later. Here is the lxf file: pneumapress.lxf
-
what a superb review :thumbup: ! the renders are really useful. i couldn't figure out how the output conveyor lock worked but it turned out to be pretty simply. If i can afford it i will definitly get this set!
-
well, you can edit the entry post as much as you like. You cant edit the topic title though (of your discussion topic) which is sad. and if you really want to quit, just change your entry post to somethink like: Not participating anymore well, TLG does the same in set 42043, so i assume it is allowed but as always jim's answer is decisive
-
Technic 2017 Set Discussion
roppie11 replied to CM4Sci's topic in LEGO Technic, Mindstorms, Model Team and Scale Modeling
well, i believe you but i have literally no idea how to pronounce russian text. btw, lets not get this (too much) off-topic (yeah im starting with it) -
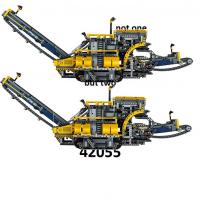
42055 - Bucket Wheel Excavator
roppie11 replied to Jim's topic in LEGO Technic, Mindstorms, Model Team and Scale Modeling
Hello Folks, guess what i stumbled upon yesterday: (you wont get it right btw ) no i will just tell you Not totally 42055-b but it has a lot to do with it and for some reason i find these kind of video's wildly interesting so i considered it worth sharing here and you can learn a lot from this video