

Tommy Styrvoky
-
Posts
1,132 -
Joined
-
Last visited
Content Type
Profiles
Forums
Gallery
Everything posted by Tommy Styrvoky
-
[MOC] [WIP] The Command of the AT-AT
Tommy Styrvoky replied to LiLmeFromDaFuture's topic in LEGO Star Wars
Not as much as you would think, as all of the gears are rotating in the same direction( except for the centermost one). The planetary drive gives the gears more contact than a standard 3:1 reduction with a 8z and 24z gears. This allows one to apply lots of force into it. It's used for heavier motorized models, and you can mount custom tires onto the turntables. -
[MOC] [WIP] The Command of the AT-AT
Tommy Styrvoky replied to LiLmeFromDaFuture's topic in LEGO Star Wars
Well I have plans to make an AT-TE motorized, later this year, the only issue is figuring out operation of the middle joint with the middle 2 largest legs, so they can povot and turn. -
[MOC] [WIP] The Command of the AT-AT
Tommy Styrvoky replied to LiLmeFromDaFuture's topic in LEGO Star Wars
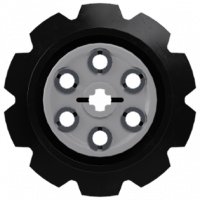
Here's a thought for the affixing of the turntables in place, there could be a similar setup with planetary drives in the center of the turn table, then you could attach that planetary drive in the 24z opening of the turntable and adjust it inside the model with a couple worm gears that could surround a gear, if they were driven opposite directions you could control the motion of the gears from a single shaft. If the axle was solidly connected with a 24z gear in the center, I think it would put too much stress on the axle and easily twist it, also If you wanted to adjust the leg you would have to split the turntable every time it was changed. here's a image of a vehicle with planetary drives in the drive axles. if you need more teeth for purchase there can be an extra 2 gears added to the sides of the main 8z gear. -
Criticism isn't bad, I understand I made some flaws with this model, but for what it contains, I think the function of the shooting mechanism mitigates the flaws. I'm very limited with the Lego system to what one can do with a shooting mechanism at that size, if it was smaller it would perform worse. Basically the turret was built to house the shooting mechanism. I personally wanted to better the previous mechanism I had built in my ISU-152, rather than copy someone else's design. If one wanted a smaller turret, it would require a smaller mechanism, thus Sariel's mechanism would work better for this application, but it would be less powerful, as the bolt travel of his mechanism is only 2 studs, my mechanism travels around 6-7 studs of bolt travel. I'm surprised how well the mechanism preforms for it's size. This mechanism is why I decided to build this vehicle.Criticism provides a different view than of my own, I have been improving my models over the past few years, as I have been more strict about what is "close enough" for structure and shape/function. Though the posting of the blueprint overlay provides me with the future inspiration to use blueprints to test my models for accuracy and proper shape. I'm amazed that I was even able to complete this model in such a short time span, that even though there are some errors, that it could be a lot worse. I would probably say this model is more accurate than 75% of the motorized Abrams Tanks on youtube or the web, considering its scale. Though I do appreciate the criticism It means I can still do better with future models. I hope that there isn't any personal issues, I'm just happy to receive feedback about my models and inspire others to do it better.
-
Ok you're somewhat correct, but to start off first that is a M1 Abrams you overlaid. There are some differences between the M1A2 and the M1A1 and M1. First it's missing the turret bustle , second it has a 105mm gun (it's longer) as opposed to the 120mm gun the M1A2 has, also it's missing CIP panels, and the CITV next to the commanders hatch. This photo shows the differences, between the M1A2 and M1A1 and M1 Abrams The blueprints I used were of a M1A1, but I changed my mind to making a M1A2, as it is newer. I questioned making a M1A3 Abrams, but not enough reference material was available. I also used a model of a M1A1 Abrams for some references. Blueprints for Abrams by Tommy Styrvoky, on Flickr Blueprints for Abrams by Tommy Styrvoky, on Flickr Blueprints for Abrams by Tommy Styrvoky, on Flickr A reference for the sizing of the side skirt panels. blueprint for abrams by Tommy Styrvoky, on Flickr Here's the reasoning of why how large the turret is, I also acknowledge that the barrel is too short, but it starts to bend too much. The hull is nearly perfect, but the turret is the most flawed in the model. Lego M1A2 Abrams Main Battle tank (RC) by Tommy Styrvoky, on Flickr Here's another look at the top of the turret showing how little space there is for me to work with. There's a battery box in the front left corner, IR receiver in the right, and the trunnion is covered up by some plates. There were some protruding bits of the turret's shooting mechanism that were covered up as best as possible, this caused a couple components to be shifted around to avoid having to make the turret a extra plate taller. Lego M1A2 Abrams Main Battle tank (RC) by Tommy Styrvoky, on Flickr Im not exactly sure, but it's the weight of 4 XL motors, 2L motors, 2 AA battery boxes, LIPO battery box, and maybe a couple pounds of bricks. I don't have a digital scale at my house, and the mechanical one my parents have is probably very inaccurate in terms of tolerance. My guess would be something around the weight of your Leopard 2, as it's roughly the same size.
-
Driving through snow is fun, but I had a few issues with ground clearance, and bottomed out the hull a couple times.
-
I don't have the funds to make something all in tan or the time with break, it was a big enough issue that I wasn't sure if the XL motors and IR receiver would arrive in time... I know enough of the minifig scale tank builders complain about how rare some pieces are in tan. I will let Sariel figure that out when he builds an Abrams in tan.
-
Well this was built in a week and a half, I finished most of the hull in 3 days, then was on vacation for 5 days, returned and completed the hull in 2 days, the turret was built in the remaining 3 days, leaving the last 2 days of my break to film it. Though it was very busy weeks... no time for video games, and a couple nights that I stayed up to 2 AM... but it was worth it and was a fun process. Luckily I was able to get the shooting mechanism to work the first time and not have to spend another day working on that. The hull was rather easy to build, the only difficulty was laying out the internals. The turret was more difficult, as the shooting mechanism took up a majority of the space used for it, and the elevation mechanism. The shape of the turret was not too difficult, but It's a little bit taller than it should be because of the shooting mechanism.I had thought about this model a little bit prior to finals, as I was debating on building a IS-7 or Abrams, I decided to go with the Abrams, as it was spacious, and I lacked a couple parts for the road wheels of the IS-7. Someday I will build one, as I figured out a solution for the rounded turret by using flex axles and technic bricks.
-
I wasn't too fond of that either, but if I covered them up it would have been too thick.
-
Lego M1A2 Abrams Main Battle Tank (RC) by Tommy Styrvoky, on Flickr Well this model is a major change compared to my older MOCs. This Is my first Modern Main Battle tank that I have built. There are several reasons why I decided to build a MBT. Most modern vehicles have a much larger space between the tracks/ have smaller tracks. This allows me to mount XL motors closer together, so I used this extra space to mount 4 coupled XL motors. ( 2 coupled with 1:1 ratio to each of the tracks) With the remaining space in the hull, there is 2 AA battery boxes mounted in front and behind the turret ring. There are 2 sets of PF led lights mounted in the front hull and the tail lights. 3 IR receivers are mounted above the XL motors in the rear of the hull. There is a single L motor mounted in the hull to traverse the turret. The turntable features a coupling that allows me to remove the turret from the hull for getting loose pieces that fell in there maintenance. The suspension is torsion bars on 12 of the 14 road wheels, as on the last road wheel there was clearance issues for torsion bars, and the rear of the vehicle had a majority of the weight bearing on it, nearly collapsing the suspension, and causing the rear of the vehicle to sit lower. The front most torsion bar fixing point is as tight to the side of the hull wall, as there is lots of weight there too. The turret of the MBT is rather large, but slightly taller than it should be, as the turret houses the massive Technic driving ring firing mechanism inside of it. This model was based off of the mechanism of my ISU-152, and uses the newer Technic driving ring to eliminate the issues with the clutch gear disengaging because of too much strain of the rack under load of rubber bands. This new mechanism seems to be much more robust and durable, I was able to apply enough force on the bolt to stall the L motor, so I decided to use only a single rubber band, rather than 2 that would stall the L motor. I was able to create a Ldraw model of this and used that to animate it in Blender, this better shows the internals and their operation. This was a fun process, as I had to determine the rotations per frame for each gear. The shooting mechanism features a M motor to elevate the gun slightly, as there isn't much room for the gun to move in the turret. I think this model is one of my most impressive so far, it's not incredibly complex, but it's powerful and impressive. This year there will be a lot of different vehicles built, such as some halftracks, a 6x6 armored car, and maybe a AT-TE from Star Wars. Enjoy, Tommy Styrvoky Lego M1A2 Abrams Main Battle Tank (RC) by Tommy Styrvoky, on Flickr Lego M1A2 Abrams Main Battle Tank (RC) by Tommy Styrvoky, on Flickr Lego M1A2 Abrams Main Battle Tank (RC) by Tommy Styrvoky, on Flickr Lego M1A2 Abrams Main Battle Tank (RC) by Tommy Styrvoky, on Flickr Lego M1A2 Abrams Main Battle Tank (RC) by Tommy Styrvoky, on Flickr Render 1 by Tommy Styrvoky, on Flickr Cutaway by Tommy Styrvoky, on Flickr Lego M1A2 Abrams Main Battle Tank (RC) by Tommy Styrvoky, on Flickr Lego M1A2 Abrams Main Battle Tank (RC) by Tommy Styrvoky, on Flickr Lego M1A2 Abrams Main Battle Tank (RC) by Tommy Styrvoky, on Flickr Lego M1A2 Abrams Main Battle Tank (RC) by Tommy Styrvoky, on Flickr Lego M1A2 Abrams Main Battle Tank (RC) by Tommy Styrvoky, on Flickr Lego M1A2 Abrams Main Battle Tank (RC) by Tommy Styrvoky, on Flickr Lego M1A2 Abrams Main Battle Tank (RC) by Tommy Styrvoky, on Flickr Lego M1A2 Abrams Main Battle Tank (RC) by Tommy Styrvoky, on Flickr Lego M1A2 Abrams Main Battle Tank (RC) by Tommy Styrvoky, on Flickr Lego M1A2 Abrams Main Battle Tank (RC) by Tommy Styrvoky, on Flickr turret back by Tommy Styrvoky, on Flickr turret facing by Tommy Styrvoky, on Flickr back of turret by Tommy Styrvoky, on Flickr Teaser by Tommy Styrvoky, on Flickr Teaser by Tommy Styrvoky, on Flickr
-
The tilt sensor looks interesting, as it's smaller and cheaper than the EV3 brick and sensor, hopefully It could interface with a PF servo. Also the M motor looks interesting, I looked at legoeducation earlier today when they posted on facebook about it. It would be cool to get a tilt sensor to act like a gyroscope and mimic the change in tilt to a position on a PF servo motor. This would be useful for replicating a gun stabilizer, as I tried to replicate one with using the potentiometer on the Lipo battery to move with a counterweight. I hope it could function like that, then I would purchase it.
-
It would be cool to get the Mecabricks importer to work with Ldraw files, that would be really useful.
-
Thanks, I'm still a novice to working with blender, I will try it out sometime.
-
Lego M1 Light bulldozer by Tommy Styrvoky, on Flickr I present my last model of the year, it's nothing too special. During the past few months at college, I have been working on a redesigned static model of my M1 light tractor, or the M1 Light Bulldozer. This vehicle is a re-designated Caterpillar D4 used by the US Navy's Seabees. This model is my first to have full PDF instructions made in Lpub. This was a intensive process, first I built the model, then seperate it into steps. Unfortunately I don't know how to work with sub models in Bricksmith... or if that is even a feature, so maybe in my next model I make instructions for I will use a different windows program that has sub models. The main focus when building this model was to have a highly detailed static vehicle. If I were to motorize this, it would affect the form of the bulldozer. I prioritized the detail of the engine and running gear for the tracks, as most of the model is flat and doesn't have much detail to break up the surface of it. Surprisingly it was somewhat difficult to find lots of reference material on this vehicle, the US military had lots of different bulldozers in use during WWII and post war. I had to rely mostly on the civilian Caterpillar D4 U7 or CAT D4 2T. Instructions Photos of the real vehicle Lego M1 Light bulldozer by Tommy Styrvoky, on Flickr
-
Well I mounted these in a moc, they seem to work fine... But the main issue is with the axles that drove it, I reinforced everything heavily, but It still twisted a 8 stud long axle and bent a 1 stud long portion at the end of a 4 axle with stop... this part was meshed with a axle joiner... well back to using directly coupled XL motors to the drive sprockets.
-
I have never had that happen to my knob gears, though I haven't examined them that closely for a while. I have on of my 40z gears get a slight distortion to the entire gear flexing in the middle, thought it still functions fine.
-
It will be interesting what happens when I put 4 coupled XL motors through one of these...
-
XL differential MK II by Tommy Styrvoky, on Flickr A newer more compact design for a XL differential, my previous version was rather large, I simplified the design of it and replaced the perpendicular meshed gears with a linear setup, this makes the differential smaller in width by 2 studs. I am uncertain if the 16z gears will skip under high torque, but they could be replaced with knob gears if that happens. here's the first version differential xl V3 by Tommy Styrvoky, on Flickr
-
yeah, there are tons of tutorials and tools available for use that are really helpful. You could probably follow the steps in the video, through most of the video I have the keys displayed in the lower left corner of the screen.
-
This may not be the best forum to post this into, but I think it is the most applicable, as most Technic builders utilize Ldraw to replicate their models for instructions. About half a year ago I began experimenting with importing Lego models into Blender, there are several ways to do it, but after some research and trial and error, I found one of the better and user friendly means of importing the models and creating renders. Some people use rendering softwares for importing LDD models into and rendering, but I have attempted that but have had little success with LDD renders. After seeing a few of Blakbird's renders , I wondered if I could recreate life like images or a cutaway of a model to show internal functions. I had some prior experience with Blender a couple years ago, with some failed attempts at modeling a few different tank models. In the past few months I have been using Blender more often with college, as I use it to present 3D models of projects for a design class (Bender isn't taught in the class). I have used this program to create animations for my latest moc and my youtube channel's icon. This video will cover the basic steps of first installing the Blender LDR importer, then the basics of modifying/correcting materials, basics of rendering, and finally some simple animation. Tools/files used in the video Blender https://www.blender.org/ LDR Import-export plugin for blender (version 1.2) https://github.com/l...rter-v1.2.0.zip GIMP photo editing software https://www.gimp.org/ Differential model http://www.rebrickab...xl-differential enjoy, I hope the tutorial is easy to follow, I tried to best explain the concepts without making the video too long.
-
The original vehicle is very impressive, great job replicating the long travel suspension. It would be cool to see one of these with a bunch of L motors or RC motors to replicate the original speed and power of the beast. Also great job with the video.
-
Here's my plan for the drivetrain (2-4XL motors)=>4 speed gearbox with new driving rings=>Subtractor with 2 differentials=>final drives
-
I have had that issue with older gray single bevel gears, but I think the newer ones are more durable, and I worry about the differential casing failing.
-
I am wondering what sort of strain the newer/older differentials can take in terms of strain. I Think it is more likely that the 12z single bevel gears will fail prior to the differentials. I have plans for a Moc that could use up to 4 XL motors providing power through a single differential. I wonder if anyone else in the community has ever had a differential break under a very high torque load? If so I have a custom differential I can use in this application. here's the custom differential design http://www.rebrickable.com/mocs/TommyStyrvoky/xl-differential
-
I tryed to fill the gaps between the late war German tanks, he recently built a Tiger II, and he had built a Tiger I a few years ago, so I chose the Panther as it was designed and operated around the same time as the other 2 vehicles.