Search the Community
Showing results for tags 'Friends'.
-
 I'm looking to trade or sell these parts: As you can see in the picture, most of the Harry Potter heads are somewhat banged up or have faded printing. The scooby doo and friends figs are in superb condition though. The price for the whole lot is $45 plus shipping which in the US would only be a few more dollars. I'm interested in castle building parts and figs especially, though not limited to that by any means. So if you have something you'd like to trade, just let me know. PM me, if you're interested in some or all of the above.
 -
Hey all, I was wondering if anyone had any info on the costs of some older Lego Friends sets, or more specifically, why there costs seem to have gone down in price? My daughter is getting a bit older, and she isnt interested as much in her Friends sets, any longer. My initial thought was to "break" them down, and incorporate them into my huge Lego collection. You can never have enough pieces, right. That being said, the colors of most of the sets pieces, and of course the mini-dolls, really wouldn't "fit" into my collection. Even if I parted them out, and sorted them, most of the pieces would be "wasted" in my collection, just sitting in bins. This brought me to my next idea, which was to consider selling them. I am not a big fan of evil-bay, but to unload them quick and easily, it seems to be the best fit for me. My daughter started collecting the Friends sets from the very beginning, and she kept them complete, and in pristine condition. The ONLY things missing, in most cases, will be just some of the boxes, only. She has literally every set, up to about a year ago. This includes the original, retired sets, like Olivias house, and treehouse, the dog show, Butterfly beauty salon, Stephanies car, the Summer camp riding school, horse trailer, and many, many more. About a year, or two ago, I had briefly went on Ebay and saw that most of the original sets, whether opened or. of course MIB, were very high in price. Needless to say, I couldn't believe how much some of those original sets were commanding. The Butterfly beauty shop was especially high in price, the City café, the 3188 Heartlake animal Vet, and many others were really up there in price. This was for MIB, and 100% complete sets in great condition. I even re-call that some of the smaller sets, like Olivias treehouse, and the Heartlake dog show, were pricey too. Now I get that these sets MIB, actually still do, in some cases get a slightly higher price, but back about 2 years ago, the prices were much higher, and even loose, complete sets, were much higher. I looked at the prices now, and was kinda shocked at how cheap they are going for these days. I do not buy and sell Lego sets, or collect in any way to make money, but it is nice to know that most of MY sets, have gone up in value. I keep MY sets 100% complete, and in great condition too. I just assumed that the Friends sets would have been the same, especially since when I checked them awhile back, they WERE up there in price. Now these Friends sets, seemed to have taken a "beating", for some reason. I am really wondering, why these sets are so cheap now. Does anyone know why? Or have any ideas why, or info on the Friends set prices going down? An idea I thought of, was maybe some newer versions, of the older sets, were released, like the Vet, or the newer light purple house, or newer cars, or a new Salon, and that made the older versions of them, not as sought after. However, that's usually NOT the case. Even if a new version of an older set is re-done, it still doesn't drop the value of the older sets. Look at Batman, for example. What I really think it is, though, is the mini-figures/mini-dolls, that are in Friends sets. Idk, but perhaps many of the mini-dolls that were in the older retired sets, are the same ones in the newer sets? This would make it easy to "create" complete sets from parts, AND mini-dolls on hand, and the "exclusivity" that many mini-figures have to a set, simply does not exist in Friends sets. Is that true, though, idk. I know there are definitely some exclusive pieces, and of course, stickers that are exclusive to each Friends sets. Maybe that's not enough, or there isn't enough of that, and then not really having exclusive mini-figures, contributes in the prices for sets staying lower. I just don't get it, and don't get why they WERE more expensive a year or two back. Its almost like the "market" was flooded with sets, or something like that. Does anybody have any thought on this? Its more of a curiosity thing for me, at this point. Is there something I missed about these sets, that for some reason, dropped them in price? Anybody have any info on this? Thanks in advance to any info, its appreciated.
-
It's not often you get mini-doll rants by a mini-doll fan but I wrote one on Brickipedia: http://en.brickimedia.org/wiki/User_blog:Soupperson1/A_mini-doll_rant_by_a_mini-doll_fan I'd really like to hear your thoughts about how mini-dolls are spread out amongst sets either here or there. It be great to hear other people's opinions! (I assume this is the right place to put it as mini-dolls are now in different themes)
-
I tried to make something that I could see being released as a Friends "DTC" for rebrick's "Best Friends" contest. More pics: http://en.brickimedia.org/wiki/Fan:Heartlake_Clubhouse
-
Greetings! Soon it is 1st December, which means jolly advent calendar adventures from me AGAIN! This year I tried something that has never been done before: A FRIENDS themed calendar! Unfortunately LDD still doesn’t include Friends minidoll parts except from the haircuts (come on LEGO, it is about time!), so I had to go with the regular minifigs. To make them more friends-ish, I tried to summon the classic torsos and faces the girls have, for which I had a huge help from Dorayaki, who already made those stickers and was kind to share the designs with me. Thanks again! So except something very cozy and festive in two days!
-
Hi Customizers! I rarely do custom figures, but Miku was one that I had on my mind for quite a while that I needed to do. It was actually my first attempt at sculpting a custom hair piece, and of course, it was an incredibly tough one to make. Here is the completed figure: LEGO Custom Miku Hatsune! by Chris Rozek, on Flickr LEGO Custom Miku Hatsune! by Chris Rozek, on Flickr LEGO Custom Miku Hatsune! by Chris Rozek, on Flickr LEGO Custom Miku Hatsune! by Chris Rozek, on Flickr LEGO Custom Miku Hatsune! by Chris Rozek, on Flickr LEGO Miku Hatsune Before and After by Chris Rozek, on Flickr Comments welcome! Thanks for looking!
-
Once a year there is a nice and private feast in Nocturnus. You only can join by a personal invitation. And with that you got a bow, which you have to wear during the feast. The best about that fest is as usual the food, but have a look by yourself: Smiling pig ;-)
-
Hi All, Just finished this little Easter Gift for my "Friends" crazy daughter. She has got most of the stable associated stuff, and I saw a small fence that came with one. This got me thinking.... I love boardgames and have dabbled a bit with designing before, so I figured I'd have a stab at a centerpiece for all her Friends buildings, and here it is. It's a bit sad that Lego have finished up with games as this to me presented a massive opportunity. The way it is built allows for many different courses to be designed, and extra fences to be purchased/built. It plays in about 10 to 15 minutes and although simple to learn can be quite deep to play. It has all the elements of Show-Jumping (inc time faults for those that dawdle around!) and has little downtime for players - we have multiple horses on the track, at safe distances. Each fence also has easily removed top tiles that "fall off" if the fence is hit! Anyway, on to the pictures. The overall layout - all 9 fences, the player plates and the 3 dice. The "Parallel Bars". The first part of the double combination, and a tricky area to clear. The "Waterjump" with the "Toy House" behind it, you can also just see "Aintree" in this picture, (I named all the fences - sad isn't it!) Fence 7 "Manhattan" - designed on paper by my little girl makes up the second half of the deadly double... View from above - you can see how the track has been designed to turn and allow for different track designs to be built. The last fence is the "Big Red Brick Wall" - a little homage to my childhood watching Olympia. Fence 8 Egypt - I have tried to give all the fences a Lego theme too. On the other side is a rather nice "Atlantis" fence that for some reason I failed to photograph. Anyway, that's about it. I am going to throw this on on Cuusoo just for the fun of it - so please if you feel that you might like Lego to consider this idea, vote for it! Cuusoo link: http://lego.cuusoo.c...deas/view/62682 All the best to all the fine members of this forum.
-
So, I have decied to make a new topic on customizing Minidolls. Beacuse there (I think) isn't a topic on based on custom Minidolls. Does anyone customize them? If so use this fourm to post them. -Toby
-
I'm not entirely sure if this belongs here or in the Town section, but here goes: I knew from the moment that I first saw the carriage set, I just HAD to make something cool with those fancy golden wheels. What came to my mind after a few days of thinking on it was a Rolls-Royce/Dusenberg-styled Royal Roadster: A modern Princess needs a car, and one that can get her where she's going in STYLE! Those Brickforge printed shields sure came in handy, didn't they? ;) (Note: I couldn't find the license plate tile I could have SWORE I had, so I decided to use one of the money tiles, since it looks kinda like some of the classic car license plates I've seen in different places) Interior view showing the instrument panel. I couldn't fit in a floor shifter, so I'm just going to say that the gearshift lever is on the steering column, like most old-school cars. ;) Another interior shot, taken from the front to show the plush, pink interior. :D Pic of Laura, my Friends sig fig & Cinderella standing beside the car. I think the color scheme worked out pretty well, especially considering how poorly things were going early on in the build process... Finally, the first annual Friends Road Rally. Our contestants this year are Laura & Cinderella in her Royal Roadster, Jane & Stephanie in Stephanie's Cool Convertible and finally, Olivia in her glorified ATV, er, I mean Dune Buggy. :D Hope you guys like the build.
-
As our annual exhibition, Bricking Baravia, gets closer (April 26th/27th in Dachau) it's time to finish some MOCs :-) Heartlake City will be a joint display and among my contributions is a 4 baseplate long strech of a boulevard/esplanade along the beach featuring a brick-built road to accommodate a wider side-walk which is decorated in truly HLC style ;-). Here's one part of it! Hope you like it!
-
 Hello everyone, I'd like to introduce my original Minifigures series. While I use the title "Universe", which is based on "LEGO Universe"-- the massively multiplayer online game developed by NetDevil, I also included some other LEGO's original characters who's never been phsycal minifigures due to many different reasons. The parts are designed in 3D modeling softwares, then use 3D printings with ABS. There is still much room for improvement (decals, paintings..... etc), so most of the figures still look pretty sorrowful. Even worse, my camera had problems so I could only shoot with cellphone in super low quality t . If you guys don't mind hurting eyes, please follow this post below. 0) The righteous Natalia Kowalski from City Undercover Natalia, once the most popular reporter in LEGO City, now drives an ambulance to save anyone who has supported her. Previously in the witness protection program, she keeps a low profile to hide from the man she helped put behind bars—Rex Fury, and later begins a complex relationship with her police boyfriend Chase McCain. I gave her number 0 because she was a trial prototype of my decal practices, and she comes without any new mold. I wonder why TLG didn't actually include her in any medical-related set since she's really easy to deal with. 1) The imaginative Doctor Overbuild from Universe As leader of Assembly, Doctor Overbuild is a very intelligent genius as well as rather eccentric, much like the famed physicist Albert Einstein. His passion is building and pushing the uses of Imagination. He spends months at a time locked in his building laboratory, creating the visions in his head. Okay, when I began the project I just found Mr. Kaminoan, a talented MOC designer also made a different version. I only managed to get the paintings without transparency. Dr. Overbuild's design is the most complicated unconventiona; one among the four, IMO he's the one really represening the Universse style among the four leaders. 2) The charming Peg Mooring from The Adventures of Clutch Powers Peg Mooring is a marine biologist who worked for the LEGO Organization. She is calm, relaxed, kind-hearted, but sometimes can be bossy. She is also very intelligent and knows a lot of things to specific detail. Her only issue could be that those immediately coming missions leave her very little time to take care of her beauty. And here is a note, I didn't do Clutch Powers himself because Mr Kaminoan also made him. Peg probably one of my favorite non-physical LEGO female characters. 3) The wicked Madam Frost from Belville Madam Frost, the coldest witch of all, is best known for using ice-type magic and being in charge of the seasons in the land of Cold North. Even hough she tries to have her own remote lifestyle in Frost Forest, she never has a good time with her close neighbor --- the Cold North Royalty. She seems to be an annoying person, but deep in her heart, she wishes to have someone talk with her and share a hot cocoa sometimes. There are actually several different (but similar) witches throughout the Belville history, but Madam Frost is the only noted one in Cold North storyline. It shows that villainess is not very common in LEGO world, especially in girls-oriented themes nowadays. 4) The enraged Rex Fury from City Undercover Escaped from his incarceration in Albatross Island Prison thousand times, Rex Fury is the most ruthless criminal in LEGO City. He's been with different masterminds behind the current crime spree, but unfornately it never works when Chase McCain intervenes. Time for some LEGO City villain variations! We've had enough with those roublemakers from LEGO City physical sets who mostly wear black-white stripes. Rex represents a good image how a nature street muscle ruffian could look like. 5) The heroic Duke Exeter from Universe Duke Exeter is charismatic and brave, serving as an inspiration to everyone around him. He refuses to compromise his principles, and so far he has always been prepared to take on challenges and find a way to achieve victory with honor. Always trusting that the right will win, Duke Exeter also gives everyone second chances. Among the four leaders, Duke Exeter was often the spotlight in most Universe advertisings, and IMO he looks more heroic than most of the physical LEGO characters. 6) The arrogant Lacy from Friends It's not easy to keep the record as the champion of Heartlake City Horse Riding Competition every year. Becasue of this, Lacy, the talented girl never show respects and compassion to her rivals. Surprising to the others, she is actually a person willing to offer helps when she sees people having trouble. Despite having a role in the animtion, Lacy didn't actually get to any of the official sets along with many other generic female figures, as well as Tanya from later storyline. We actually don't really often see this kind of LEGO characters, so it would be nice to have her in order to create more storytellings. Additionally, despite her hairpiece appeas to be generic in the cartoon show, it's weirdly not a physical mold. 7) The decisive Sky Lane from Universe Sky Lane is a Venture League Explorer and former captain of the late Venture Explorer starship. After her starship was invaded by Maelstrom, she could only give up it and escape to Avant Gardens. Her wish is to start a Bowling Night and performs her best moves against her sisters. Well, I made her simply because she was one of the very early characters in the gameplay. I always wonder what the "Bowling Night" could be :p. 8) The sweettooth Frank Honey from City Undercover Frank is as green as they get on the LEGO City police force. He's been given the chance to show his idol Chase around the precinct on his first day, and couldn't be more excited about it. But in most times, his commander Ellie and donuts would make him even more excited. Frank played a successful jackpudding role in the whole Undercover storyline, especially compared to the depressing prequel when Chase didn't get along with his chief. He is definitely a welcome addition to the LEGO City Police scenarios. 9) The valiant Barresh Barbarian from Heroica Raised in the harsh northern mountains of Barresh, the barbarian is as strong and fierce as he is wild. While traveling the world he found out that his home had become overrun by monsters. Now he has vowed to free his people and has started to recruit other heroes to his cause. While Collectible Minifigures already had a Barbarian, I chose to do a version based on the microfig Barresh Barbarian from LEGO's Heroica, one of the discontinued Lego Games theme. He's look is more close to his original design shown in the 3D animation, this includes an actual fur decoration part on his arm. PS, I personally call him "Barret" in my headcanon. :p 10) The fierce Vanda Darkflame from Universe A ninja warrior, Vanda Darkflame's background is shrouded in mystery. Some sources suggest that she was an archaeologist, while others claim that she was a ninja princess. She was once the protégé of Baron Typhonus. One day, the Baron left her in charge of his work while he and Doctor Overbuild searched for Planet Crux. After the fateful event that shattered Planet Crux and created the Maelstrom, Vanda was recruited to form the Nexus Force and later becomes one of the four leaders. I always think some of the Paradox members like Vanda could be reintroduced to the Ninjago series since they're pretty compatible, much to the dismay that Ninjago was once part of the Universe too. 11) The commanding Ellie Phillips from City Undercover Ellie's a real tomboy and a darn fine cop. Her wicked sense of humour comes bundled with a maturity that others her age simply don't have – which could explain how she rose to the rank of Lieutenant so quickly. She's got one ear to the police channels, and keeps Chase informed of anything big that's going down. Compared with Natalia, Ellie seems to be the heroine that players are actually more familiar with, via the communicator. She is also a fairly great addition to physical LEGO Police Stations where police ladies aren't that inspiring :p. 12) The venturous Hael Storm from Universe Hael Storm, the Venture League Faction leader, is a notorious space pirate who plundered many worlds and is wanted on most of them. He is daring and cheerful in times of danger, adventurous and curious when exploring, and fearless and and wisecracking even in the darkest moments. His specialty is the sea and he is a seasoned explorer of all the oceans in the Universe. Hael Storm is my favorite leader among the fours. In his bio he should be originated from a Space theme, but his look is nothing different from an ordinary pirate captain. 13) The sunny Marvin from Friends A country boy living as a young farmer alongside with his father, he's much more capable than most of those Heartlake City teens in his age. He's not sensitive when being with any opposite gender, thus, his feeling for a girl from the neighbor farm is not noticed. Despite being featured in another Friends episode, Marvin also had nothing to do with the physical Sunshine Ranch set. I think he could beat down all other physical male Friends characters, but, perhaps an ordinary country boy doesn't cater to most FOLs' tastes? 14) The refreshing Velocity Lane from Universe Velocity Lane, the sister of Sky Lane and one of The Bowling Lanes, is a professional racer that guide and train rookies who just join Nexus to go on the racetrack. Just like Sky Lane, I chose her due to her likeable appearance. She feels like a good candidate for any LEGO racer-related theme. 15) The dedicated Daniella Capricorn from Hero Factory As the most popular reporter in Makuhero City, Daniella devotes herself to get every single detail from the powerful heroes. She can be truly dedicated by reporting during battles while nearly getting struck. However, she seems to have a very different side of personality when her Camera-Bot is off. Some other technic figure FOLs had tried to capture the physical shape of Daniella, and I try to capture her in a minidoll form instead. The last subtheme of Hero Factory, "Invasion from Below" featured a series of minidroid, unfortunately Daniella wasn't considered to be part of the line. The main defect is that minidolls height is not longer than HF minidroids, since Daniella should be taller than the heroes in the show. 16) The high-strung Bernie Von Beam from The Adventures of Clutch Powers Bernie is an engineer who worked for the LEGO Organization. He is rather nervous at times, and appears to be quite high-strung, although a bit shy. Bernie repetitively tries to gain Peg's attention by supporting whatever she says, although sometimes she fails to notice, embarrassing himself. Bernie is the other jackpudding character in the CP story, and yet another my favorite LEGO guy. 17) The graceful Princess Vanilla from Belville Born in the Royalty Family of Cold North, Princess Vanilla is pretty close to the cold nature. She is born to be a talented ice-skater, and she befriends with lots of arctic animals including Snowy the polar bear. She frequently invites Madam Frost to her parties, but inadvertently provokes her as result. Last but not the least, here is Princess Vanilla, the leading character of the Cold North storyline from 2001 to 2003 and rarely one of the recurring protagonist in the whole Belville theme. Conclusion: There are several reasons why I plan this series. One of them especially be The LEGO Movie. As discussed much in TLM canon thread, the main idea of TLM is to represent real experience of playing physical LEGO toys. Yes, that means any of the nonphysical themes or characters in the LEGO franchise has nothing to do with TLC's marketing trend. Though it makes sense, it's also a denial to all FOLs who have also been supporting the nonphysical LEGO world. But still, why can't the other side of LEGO world be AWESOME too? LEGO actually draws an invisible line to differentiate the two different realms. Other than TLM which was already tied with toy productions and marketings, recently, the success of several LEGO TV cartoon series do bring up some examples that cartoon exclusive characters can reintroduced to phyical sets, such as Dareth from Ninjago series. However, it seems like certain themes or discontinued mediaworks would not be able to have the same treat. The other main reason is the game: TLC is currently running their next MMO game --- Lego Minifigures Online, which is developed by Funcom and also directly based on the Minifigure series replacing the original . And after TLM, LEGO also keeps cooperating with WB and declares their very first interactive video game series--- LEGO Dimensions, which tells about heroes from different kinds of LEGO themes gather together and fight the evil. But somehow, even though both games share similarities with LEGO Universe, in the aspects of game systems or theme crossover ideas, none of both actually inherit the Universe characters or the storyline to give an official end to Universe. It's kinda like LEGO is wasting every single chance that can compensate for the loss of original LU fans. Again, both games have special associations with phyical minifigures, but sadly, at this point LEGO seems not to do anything more for LU. It would have been a good idea--- even if the game deceased, we could still have something left for us. After all, LEGO is "bricks", not "clicks". Several notes to the themes mentioned above: Clutch Powers: Although Clutch Powers was a crossover canon that involves several different LEGO themes, The LEGO Movie canon didn't actually refer to the "LEGO Organization" from this series. The reason may be some plot needs (new quirky characters instead of mature agents), but as mentionted above, it could also be due to the fact that Clutch Powers isn't considered as a "physical" canon. Recently we just got Ultra Agents, a new continuation to the agent themes, where the main hero Jack Fury looks pretty much like Clutch . Since LEGO Organization also happens to be an agent organization, I somewhat believe that Clutch Powers could have been part of the Agent subtheme and storylines if LEGO designers add some adjustments. City Undercover: While being the very first WiiU game, it was meant to promote the LEGO City line, but its influence on the whole City lineup is pretty insignifcant and not even to talk about Dimensions. I believe that providing some Undercover characters or materials along with the generic ones would enrich our conservative LEGO CITY Police line. Friends: As mentioned in Ninjago's example, despite Friends keeps extending their storyline and Heartlake City details as much as other story-based themes do, the original characters/settings from the 3D cartoon and webisodes aren't reintroduced to the physical line so far. LEGO should push it harder if they expect Friends to keep going to appeal their targeted market. Belville: Uhrrrrr ..... you hus know that CMF series introduced "Fairytale Princess" and "Witch" in the recent series while I was still making the figures . Belville has been a pretty underrated theme in LEGO's history, both due to their failure to appeal the market and their non-mainstream figure scale. However, I think Belville could be part of the regular Castle line to make up for the lack of princess side story (not the damsel-in-distress, though) if LEGO can seriously treat this theme. Promotional poster Hope that everyone endured the whole boring post. Comments and criticisms are strongly welcomed. Although I'm not sure if I'd go further to make more, I'd like to know which other non-physical characters (with non-physical molds) or themes weren't mentioned but also deserve to be noticed by LEGO official?
 -
What will happen when Friends meet Star Wars? Introducing the X-Wing fighter of the Orange Squadron, flown by commander Olivia herself. Armed with cake torpedoe lunchers and four bloming cannons, this craft sports advanced shield generator based on MP3 player with J.Bieber hits&bits and shoe store discount coupon dispenser to loose any pursuit it may encounter. The R2-Squirrel droid can track up to 10 nuts and can easily hyper you to the nearest shopping mall. Enjoy the rest of the photos here
-
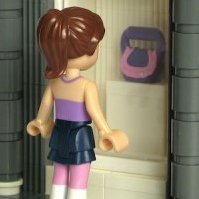
It's autumn, when the leaves turn various shades of red, yellow and brown, and when it's time to harvest fresh fruits and store them for the cold winter months. Olivia is offering some fresh fruits and homemade jams at her stand, but she could use an extra hand picking up those tasty red apples. Why don't you join her? Basic info of the set Set no.: 41026 Name: Sunshine Harvest Theme: Friends Year: 2014 Pieces: 233 Minifigs: 1 (and a dog) Age group: 6 - 12 Price: £ 17.99 / US$ 19.99 / EUR 19.99 Price per part: 7.721p / 8.579c / 8.579c Links: Brickset, Bricklink, LEGO S@H The box The front of the box is (as always) in bright Friendly colours, with the main five characters on the top right corner as opposed to the main set's character, in this case Olivia, in the bottom right corner. The sides of the box are curved, again as is typical for the larger sets from the Friends series. The landscaping on the box art is a lovely way to present various mini builds and adds some depth to this relatively small set. The back of the box reveals other aspect of the set. Contrary to the front box art where the set is presented as a whole, the back of the box gives much more information to the potential buyer just by a quick look. Again, Olivia is shown on the top right corner as the main character of the set. The five smaller pictures show off different parts of the set - the mini builds and accessories found in the set. This is a great way to promote all the interesting bricks found in the set (but more on that later). The side of the box (again) shows Olivia as a measure of scale. In my opinion, it might be more interesting to show off some of the interesting new and rare pieces, such as the new grass stem or the red apples, instead of a minidoll. Afterall, the set's name is Sunshine Harvest, and some of the crops would look nice on the side. The other side of the box has the same, but smaller, picture of the set, as on the front of the box and in my case shows signs of some wear and tear from a few months storage. The booklet The front art design is repeated on the front page of the booklet instruction. Luckily, the box is big enough and the booklet doesn't have to be folded in half, thus avoiding possible creases. Nevertheless, my booklet was only slightly damaged, as it's visible on the top right corner, with the last page sticking out a bit. Inside the booklet, I was surprised to see a page with all Friends characters from the first wave of 2014's new sets. I've seen this design only in some LOTR sets, and here I was tempted to put tick marks in the corresponding boxes to show off my 2014 collection of Friends. I do find this a bit commercially oriented towards the target population of little girls, collecting all the minidols from the series. ''Look mommy/daddy, I only need Mia and Liza from the Sunshine Ranch to complete my collection!'' A random page from the instructions shows one of the intermediate steps of one of the many mini builds. I specifically chose this page as it shows off nicely a new type of plate, the 3x3 cross in dark orange. The parts needed for each step are shown in light blue boxes on a lavender background. Having in mind the set is targeted towards 6-12 year olds, individual steps are very easy to follow. The pieces The set contains two numbered bags of similar size, and quite colourfull. Logically, I opened the bag no. 1 first. In comparison to some other Friends' sets, the parts come in many bright colours. In addition, there are some interesting parts included, such as the red apples, cherries, printed strawberry tiles, and the ice cream cone. Parts I specifically like, although they are very common are the flower stems, yellow flowers, bright green and dark pink flowers. Bag no. 2 holds some goodies as well. The most interesting are the greenery bricks, the more common leaves in green and dark green, flower stems, bright green and dark pink flowers. In addition, a redish brown arch 1x3x3 and a new mold of grass stem are included. The highlight parts of this set are shown separatelly. Most of them are greenery parts, such as the leaves, flowers, and plant stems. In addition, the red apples made a comeback after 10 (long) years. As they were included in five of this years sets, their price on Bricklink dropped, however it's still much higher than bright green apples. In addition, five apples in the set makes this set the best one to get for the apples alone (as was almost the case with me). Luckily, the set has other interesting parts, such as the 3x3 cross, which is handy when building trees, printed strawberry tiles, pearl gold tiles, red cherries and the icecream cone. Most of them are smaller parts, but they can be very handy when creating small details around your MOCs. In addition, the extra parts are interesting as well. There are some extra plants, cherries and pearl gold tile. The minifigs Olivia is the main and only character in this set. Unfortunately, her outfit is pretty generic. The dark blue skirt can be found in 7 sets, while the lovely top with light pink flower design was seen in 4 sets. In my opinion, clothing is the limiting factor of the minidols, and I welcome all the new clothing designs found in the newest sets. I played with colours in Photoshop, and this is what I came up with. Different shades of purple and blue would still look Friendly, and they would differ enough from the white top. However, I still like the top design, yet I'd be happier with a different print or top colour. Surprisingly, none of the almost standard hair accessories can be found in this set. Contrary, Olivia got her own pitchforks to work around her apple tree orchard. Another detail I like is the asymmetrical back opening of the top, which is actually hidden by Olivia's hair. Not counting as a minifig, but as her best friend, is a white nameless dog with brown spots. The dog appeared in 4 sets, one of them being UK promotional set. According to Bricklink, the dog's name is Charlie, but the name connect to only this promotional set. Charlie looks cute enough for Heartlake, and can be easily included in any City layout. The build The set is meant for a fairly young population (6-12 years), and the simple mini builds can be expected in this age range. Within the set, several individual mini builds can be assembled and then combined together to picture a lovely scene found on the box of the set. The first mini build is also the simplest. It's just a bucket stand with some flowers. I'm not a fan of the stand, as it looks too colourfull, but it's a nice idea to put the pink basket to use. On the other hand, I was excited to find the ice crem cone used as a holder for the flowers. It's still a rare brick type, and it's nice to see it used also for something other than as ice cream cone. I wish there would be an extra one included. As for the flowers, the I like both the yellow classic ones and the newer dark pink ones, but not on the same stem. The next mini build is Charlie's hut. I'm guessing Charlie is a girl, considering the pink roof and flowers around her hut. The hut is made pretty simple, and it's actually just the front part of what might be thought of as a dog's hut. This is convenient for the little hands that mostly play with these builds. I'm a bit annoyed with the pink-red combination of the hut's roof. The red plate could easily be changed to white or bright pink, and the colour combination would look much nicer, in my opinion. Despite the pink-red colour combination, Charlie looks happy inside her hut. Well, it might be for the extra bone at her feet. My favourite mini build in this set is Olivia's market stand. It's also larger than the first mini builds, and it's even more colourful. However, various colours used in this build are much more pleasant to the eye. To start, the roof colour is the same pink-red combination, and it would look much better without the red. Even an awning could be added, and the overhang might hide the red a bit. Side view of the stand shows nicely a wide selection of goods on offer. The most interesting here are fresh red apples and strawberries. Although strawberries and apples don't grow in the same season, including them on the stand was well thought of. On the other side of the stand, there are some homemade jams, as is also indicated by the printed sign on the roof of the stand, and probably a home made fruit cake. Front view of the stand with Olivia behind the counter really emphasizes her various goods on offer. I mean, who wouldn't want to stop and try some of the strawberries or homemade jams? My favourite detail on the stand are the jams. Using trans-coloured bricks with simple pearl gold tiles as lids look really realistic. Also the different colours are indicative of different flavours. My guess, from the left to right, is two glassed of apple jam, orange jam, and 2 glasses of strawberry jam. If you were wondering, where Olivia grows her vegetables and fruits, she has a small garden close to her stand. She grows extra large carrots and some flowers. The design of the garden is again simple, but it looks really nice surrounded by a low white fence and a door. It also offers some playability as the crops need to be picked up, or substituted with other greenery. The highlight of the garden is the new grass stem. The fifth mini build is a tree. It's a somewhat typical Lego tree with branches expanded to three sides. Here, a new plate type is utilized, and this new 3x3 cross comes very usefull stabilizing the branches. Also, the dark orange colour is suitable for the tree design, I only wish it will appear in other brownish colours as well. The finished tree design looks great from the front as opposed to the back side. My only complaint here is that more green leaves could be included, ast the treee looks rather bare with only 3 leaves. On the other hand, another intriguing detail is that apples and flowers grow at the same time. The trees I'm familiar with, have flowers in the spring, and fruits in the autumn. Nevertheless, these characteristics are easily improved by adding more leaves from your own collection, adding extra fruits and removing flowers in the autumn, or removing fruits and adding more flowers in the spring time. As mentioned above, the tree looks very bare from the back side. Here, the lack of extra leaves and branches is much more visible than from the front side. I know it's not much work adding more leaves, but I wish the designers would do that. The sixths mini build is a tractor. What stands out are the colours, the dominant medium azure and accents in bright pink and lavender. Another unusual detail are the flowers used for the exhaust. If you consider the set as a useful parts pack, then the dark pink flowers are a nice detail. However, from the technical view, I found this detail unusual. At the back of the tractor, there's a hook to attach the trailer. The trailer is predominantly in medium azure and some lavender. It has enough space to transport various goods from the garden to the stand. The stud in the middle of the trailer can be used to attach havier loads. Olivia fits nicely on the tractor. The only flaw is that she can't reach to the steering wheel, but that's a problem with the minidoll design. This is even more obvious from a side view. An alternative connection of the steering wheel on SNOT bricks to achieve a 90° change of orientation could solve the problem, but I'm not sure how would that affect the overall appearance of the tractor. The finished product At last, here's how all seven mini builds look together. Considering varying size of these mini builds, the end product looks quite large. It also allows for flexibility of individual mini builds, as they can be moved around and everyone can adjust the positioning of the mini builds according to their own whishes. The set also offers a lot of playability. It is targeted towards girls mostly, and offers a lot of imaginative play. I actually prefer this kind of role playing in contrast to various missiles found in some City sets. In addition, as mentioned above, there are quite a few interesting bricks and pieces included that give the set an extra value. The Final Verdict Design: 9/10 The overall design is great, but there is still room for improvement. Considering the target population of 6-12 year olds, the set with seven mini builds is appropriate for this rather wide age range. In addition, there are some interesting parts included in the set, adding more value. Colour wise, the set is rather colourful, yet it's not too girly coloured. The highlights in pink, lavender and medium azure don't look out of place as they're combined with more neutral colours. I also like the idea of position the set more in the rural area with orchards then in the town. Hopefully, more sets in this theme (farming) will follow. Parts: 10/10 The parts in the set are a nice selection of various bits and pieces, that you can use to play with in different MOCs. The parts standing out as more rare or new are the above mentioned red apples, new grass stems, and printed strawberry tiles. Build: 8/10 It's a simple and straight forward build with no special or advanced techniques. I like it for what it is, it's simple enough for inexperienced builders, but offers a chance to improve and/or reuse individual builds also in a more advanced settings. Playability: 10/10 Playability is an important feature of this set. It's probably more targeted towwards girls, but even boys (or adults) with imagination can enjoy building and playing with the set. The playability of the set is based on various situations that can happen either around the garden (picking the apples or greeneries), transporting them to the stand or selling various fruits and home made products at the stand. Minifigs: 7/10 Mia has a rather standard clothing design, and I'd prefer to see at least a different colour combination of her top and skirt. Price: 10/10 It's a small set, but it offers enough (interesting) bricks for the price. None of the parts are particularly outstanding, but there are many interesting parts as mentioned in the parts section. I was pleasantly surprised with the selection of bricks, and I have to admit I got the set for parts mostly, and considering the price, it was a nice deal. Overall: 55/60 (90%) As the overall score implies, this is a set worth having. Although the builds are simple, the value of the set is its design - combination of interesting parts forming various smaller builds that can be combined in various ways and offer lots of playability. Also, the price of the set is in favour of buying it, even if it's just for some parts. I'd definitely recommend buying this to anyone. Despite the long line, customers in Heartlake are leaving the stand with smile on their faces.
-
Hi everyone I am very excited to share this creation with you. I just completed a big sort and mix of all my Friends pieces, so I could build my own stuff, and this is my first one. I used to keep the sets a little separate (I grouped them by categories and binned them 2 or 3 together) but I was getting frustrated that I would sometimes need pieces from other boxes. and my stepson was getting them all mixed up when he played. So I did the big sort this week and merged everything. And this is my first creation I made using ALL the pieces! I think it is a much higher level than my previous stuff, and when I think back to last year, when I first started Lego, I am embarrassed at what I posted. I think this is much more sophisticated and I really tried to make it nice. I used some techniques like the flower boxes which I learned from building sets, but the only part of this build which came from instructions was the pizza oven---I had just picked up the Stephanie's Pizzeria set and loved the pizza oven, but I was disappointed we didn't get a full restaurant with it so that inspired this build. This is my first attempt at a modular building, and I am currently working on a dorm room, a pet shop and an electronics store to go with the cafeteria. I hope you like this build! I welcome any constructive feedback for ways I can improve my stuff. Overview: Modular #1! by ficbot, on Flickr Right side detail: Modular #1! by ficbot, on Flickr Left side detail: Modular #1! by ficbot, on Flickr Exterior: Modular #1! by ficbot, on Flickr Window shot: Modular #1! by ficbot, on Flickr
-
I bought a couple of the Friend’s Jungle sets a few months ago and knew right away I wanted to modify them so they look less like a picnic area and more of an actual jungle. I decided to go for a jungle mountain slope scene: Here are the original sets: Both of the main sets have a ‘hidden door’ mechanism that reveals a pathway. I modded the sets so that as you pull on the loose boulder on top it open up both the cave wall and the waterfall synchronously. Both passageways reveal gemstones. My collection of spare bricks is limited so that back of the set still looks fairly bare, but once I get enough grey bricks I’ll try to make it more interesting. I replaced the Friend minidoll with the cmf Cave Girl who now has a home, enjoys swinging from tree to tree and hanging out in her cave. So, can you spot all the jungle animals?
-
Summer is almost here, and the ice-cream shop at the old Heartlake Lighthouse has opened for a new season. Join Stephanie and Kate and enjoy your favourite ice-cream flavour. Basic info of the set Set no.: 41094 Name: Heartlake Lighthouse Theme: Friends Year: 2015 Pieces: 473 Minifigs: 2 (plus a seal) Age group: 6 - 12 Price: £ 39.99 / US$ 39.99 / EUR 39.99 Price per part: 8.455 p / 8.455 c / 8.455 c Links: Bricklink, Brickset, LEGO S@H The box The front of the box is a standard Friends design, with curved sides of the box. The top right corner has a cartoon picture of the five main Friends characters, while at the bottom right there's a picture of the two Friends, Stephanie and Kate, included in this set. The box art is lovely, and I like the balloon in the background. In the bottom left corner, there's a small picture of the back of the lighthouse, which I find a bit redundant. It's too small to see the details, and as most of them are shown on the back, this picture could be omitted from the box art. The back of the box is nicely showing all the wonderful details, and is actually very appealing. Almost half of the box is covered with small windows showing different details and play features of the set. Although these little windows reveal much of the details of the set, and take away the element of surprise, I find them really useful in presenting the set. My favourite feature window on the back of the box is the one showing set's accessories. I admit I was simply captivated by all the ice-cream flavours available in the ice-cream shop. In addition, there's a new hair pin in the shape of a flower, and a coin of 5 FMU (Friends Monetary Unit). The sides of the box are following the standard box design. There are typical hearts, paws, butterflies, stars, flowers and musical notes on a lavender background. On one side, there's also a smaller picture of the set. The top of the box has a picture of Stephanie as a measure of size. This is a nice feature, but I would expect something more catching here, as there are plenty of other interesting parts in the set. The booklet The front art design of the two instruction booklets copies the box art. If you have a sharp eye, you can notice the bottom left corner of the booklet is torn. That's how I got it. Also, the booklet was twisted a bit, and stayed like this even after a couple of days under a box full of parts. Inside the instruction booklet, there are no surprises. The background is lavender, and the odd pages have a small heart watermark, which is a typical feature in Friends' instruction booklets. Individual building steps are simple, and if needed, placement of some parts is emphasizes with arrows. The back of the instruction booklet surprised me with an image of the new series, the Elves. I bought and opened the set in late January, so the Elves were still an upcoming series. In a way, they are connected to Friends series (the Elves use the same minidoll design) so this shouldn't be a surprise. The parts Inside the box, there are two instruction booklets, a sticker sheet, and a 8x16 medium azure plate. Parts not being inside the polybags is becoming a fashion, and I'd really like to know why is that. At least in this case, the plate is not that big, and could easily be packed inside a bags. Also, with its sharp edges it might contribute to damaging the instruction booklets. The parts are organized in four numbered bags. Considering the part count (473) numbered bags are expected. Each of the numbered bag had inside one smaller bag with the small parts. The sticker sheet was only slightly bend in my case, and I was happy not to see it damaged. In general, I don't like stickers as much as I like printed parts, but with the Friends series, there are some neat design. However, this is the first set where I actually applied only some of the stickers. If you read through the review, you'll see what I mean. Inside bag no. 1 the majority of the larger parts are in white and tan. Medium azure plates stand out a bit, but only due to the bright colour. When organizing the parts for the picture, I was surprised to see that Kate's torso was not packed inside a smaller bag as Olivia's torso and both of their legs were. Other special and interesting parts in the first bag are the bright pink boat, ice-cream cone, reddish brown plates with swirl top and a bright pink flower with pointed petals as hair accessory. Inside bag no. 2 the most parts are in white and medium blue, but there's also a fair amount of bright pink. An interesting part here is the bright pink 2x2 macaroni brick, and it appears in this set only. In addition to bright pink, medium lavender is another Friendly colour in this bag. I also like the flower plates in green, red and dark pink. Another rare part are the white doors, as they are available in four sets only. Bag no. 3 contains roof slopes in dark blue, and more of bright pink bricks for the lighthouse tower. I was excited to see inverted corner slopes in dark blue and the 2x3 and 1x2 slopes in dark blue. These are not very common, but they'd allow more dynamic roof tops in every city. In addition to flower plates in green, red and dark pink, a bright light orange flower plates are included as well. Bag no. 4 has more specific parts than the first three. Also, the most interesting parts can be found here. There's a lot of white parts included, but the most interesting parts are in other colours. An exciting recolour is the quarter round fence in magenta, which appeared in 3 other sets. Starting from left to right, there's a lot of the flower plates, and they come also in lavender, which is a new colour for this part in 2015. There are also some ice-cream parts included, such as a trans-neon green popsicle, ice-cream scoops in bright light orange and lime, and round plates with swirled top in bright pink and white. The most interesting parts in this set are shown on the picture above. Most of them are recolours of the existing parts, while some are completely new and unique to the set. Some of them I mentioned before, but just to emphasize my favourites. It's really nice to have a boat hull in yet another colour. If you're after bright pink bricks, this set is worth having for the variety of them. But then there's also the ice-cream cone and scoops, (not so) new plant, lavender flower plate and a printed coin plate. In my opinion, this set has a great value in these small and special parts. There's a lot of extra parts in this set and they are a nice selection. Mostly, they are the usual combination of small and easily lost parts, but there's are also some really nice extras. I really like the amount of extra flower plates, 5 FMU coin plate, and the round plates with swirled top. The minifigs Stephanie (left) and Kate (right) are the main characters in this set. Stephanie is one of the 5 original Friends, while Kate is not. I was a bit surprised to find out that Kate is not unique to this set, but she appeared in two other sets, namely 41000 Water Scooter Fun and 41037 Stephanie's Beach House. Kate is enjoying a scoop of chocolate ice-cream, while Stephanie seems to be more interested in taking photography. Stephanie is sporting a medium lavender wrap around skirt unique to this set and green top with stripes. She also wears modern trans-purple sunglasses, available in only 3 sets. Kate is wearing a bright light orange layered skirt, which is common in this theme in other colours as well, and a bikini top which she wore also in 41008 Heartlake City Pool and 41034 Summer Caravan. It's really nice to have more variety in Friends' clothing and the wrap around skirt in lavender will fit nicely with other tops. There's no printing on the back, but it would be nice to see the striped pattern on Stephanie's top. Both of them also have hair accessories. Stephanie has sunglasses, which are different from the ones that appeared in previous Friends sets. Also, they look more realistic being a trans-colour. Kate has a flower hairpin, which is a new design. I wouldn't mind using this part as a real flower. The obstacle for this is the small pin, which doesn't fit the holes in plant leaves, but it fits the flowers and can be then attached to the bottom side of the leaves. The build The building of the set starts with a minibuild setting for the seal. It's a small rocky island in the middle of the water. It's a very simple build, but it's effective for the purpose. I'd prefer a grey jumper plate on the top or if it has to be green, dark green would be great as well to present a wet algae on the top of the rocks. Reddish brown seal is rare, but not unique to this set, and has appeared first in the Friends Animal series 6. It looks really cute seating on top of the rocks. I'm guessing Stephanie is observing him/her through her binoculars. There's no printing except the eyes, which are not so realistic, but they do give the seal a cute look. The next minibuild is the boat. It's hardly considered a build on its own, as only few parts are added as equipment. There are wooden benches for sitting, and a special tile so hold the minidolls in place while enjoying the boat ride. I really like the brown bars as an extension of the paddles, as they allow minidolls to hold the paddles and actually row. What I don't like about the boat is the flags colour. I'm not sure red and pink go together, and almost every other colour would fit better. Stephanie likes taking a boat out to the lake (or sea) to observe the seals. The boat is big enough to accommodate also her equipment, the camera and the binoculars. And if she wants company, she can move her equipment to the front of the boat to free seating for one of her friends. The building then continues with the base for the lighthouse. My favourite part here are the brown pillars, on which the pier is latter build on. These are hidden in the next steps, and I wanted to show that the designers also had in mind these hidden details. The finished base for the island has three different areas. There's a small patch of grass on which the lighthouse tower will be built on, and a large wooden area for the adjacent building and the pier. The medium azure plates are nice for the water, as they create a more tropical atmosphere. The building of the lighthouse starts with the base of the tower where a small toilet is. White dome bottom is used for the toilet, which is simple design, but works fine. A weird detail is the dark pink flower on top of the toilet tank, but I'm guessing it's there as decoration, and not a part of the toilet tank. The details of the toilet are hidden as soon as the walls are built up. It's here where the white door is used, and I have to say that this is the most appropriate door colour and design for toilets. When I first put a toilet in one of my MOCs, I had a huge dilemma which door to use. It's really great TLG started making this door also in non-transparent colours. Initially, I was sceptic about bright pink walls of the lighthouse, but the colour fits nicely. The door should have a sign to indicate the toilet behind them, but I decided against using the sticker. I plan to use those door in MOCs, and I'm not sure they'll be used as toilets only, so I'm also glad the door is not printed to have a choice to used them as something else as well. Next the base of the adjacent house is build. It's a combination of white and medium blue. I like this choice of colours, as they complement bright pink nicely. A cute design are also the floor lamps, two are positioned at the base of the walls, and latter more are added to the patio area. I was surprised to see that the building continues with the front wall, as it felt a bit unstable. Another colour is introduced as the canopy, and it blends in with the colour scheme really nicely. The front door to the ice-cream shop is ''decorated'' with an ''open'' sticker sign. Left wall is latter build, and the window on the side has the same canopy. The odd parts here are the yellow window panes. The really look out of place. I wish white panes or a glass would be used instead. Additional pillars that give more stability to the walls are built, and they partly cover the cute floor lamps. Later on, the building of the lighthouse continues with the second floor. This floor act more as a storage space than actual floor, as it's a place where Kate stores various bottles. I'm guessing these are soap and air-fresheners used in the toilet bellow. The house part is finished at this point, and the colour scheme pops to life here. The combination of blues and pinks is really pleasant to the eye. The plate above the roof window has a sticker on, so that everyone can see from a far that this is where the ice-cream shop is. Only thing out of place, at least in my opinion, are the yellow window panes. More details are added also to the back of the building. There's a loft area above the shop with a makeshift bed and a wonderful view through the window. In the lighthouse tower a map is added to the top floor together with very simple ladder. The map is the same as in the 41097 Heartlake Hot Ait Baloon. I consider myself an experienced builder, yet here I made a colossal mistake when building the cooler case for the ice-cream in the shop. I used the larger trans-clear panels. I discovered this mistake when I was looking for those large panels in latter steps. Obviously, the instructions to open one bag at a time make sense even if you're a bit older. This is how the lighthouse and its adjacent building looks in the winter. The patio is empty, and more details can be seen that way. The new magenta curved fence is used at the top of the lighthouse, and the radar dish in magenta is used as a roof. Overall, despite the pink and magenta not being traditional lighthouse colours, the colour scheme is really pleasant, and even the yellow window panes don't looks so disturbing. In the last few steps, more details are added to the patio in front of the house. There's a small table where Kate is enjoying her chocolate ice-cream, and as it seems she has another portion of strawberry ice-cream waiting for her. In the back, there's an advertising board showing the ice-cream selection. While this is a lovely detail, it's a bit hidden in the back. Also, the before mentioned floor lamps are added to the patio, and I can almost imagine the atmosphere in the evenings. On the right side to the door, there's a large model of an ice-cream cone with 4 scoops of vanilla, pistachio, chocolate and strawberry ice-cream. It's a nice decorative element, and uses technic cross axle to position the scoops at different angles. Also, some greenery is added to the walls of the lighthouse tower. The finished product After 103 building steps the Heartlake Lighthouse is finally finished. Considering the small patio, it looks full. In addition to Stephanie arriving to the lighthouse in her boat, and the little seal sunbathing at the rocks nearby, there's not much more room for any other visitor. For some reason, while building the set I had an impression that the lighthouse is accessible only by boat, and that it is not build on the shore of the lake or sea. I'm guessing the tile map helped with this perception. There's not much details left to reveal on the back side. The coolers in the shop are filled with the various ice-creams. A lamp is added to the loft area. It's a simple design, and has a handle to carry the light around. All in all, there's easy access to the back of the building, and the various areas allow lots of play action. There's a cashier in the shop close to the window, so you can sell/buy the ice-creams outside the shop... ...or you can go inside to have a better look at all the tasty ice-cream flavours. If you had too much to drink, you can use the toilet in the lighthouse tower. The space is tight, but at least the toilet seat is down. That's actually the only place for the minidolls to stand in the lighthouse tower. The other two floors are too low, and too small to fit a minidoll in, and it would be much better if only one floor was made instead of two. Kate has access to the loft above the ice-cream shop, where she can have a quick nap on the bed, or just sit and watch the view through the window. Stephanie enjoys the view from the top platform, observing the seal, and taking photographs. I tried to position her with a camera taking a selfie, but apparently with no wrist movement, that's not possible. A view from the right side shows the plants growing at the bottom of the lighthouse tower. I like the leaves climbing on the walls, and there could be more of the new grass stems at the bottom, not so much to fill the space, but more to increase their availability. A view from the left side reveals the details on the patio. The advertisement board stands out more from this side, and it has a rotating base, so you can position it whichever way you like. At the table, there's seating for two, so Kate can invite over some of her friends. The Final Verdict Design: 10/10 The overall design is great and I cannot think of any flaws or improvements. Considering the target population of 6-12 year olds, the build is simple and well done. Also, it takes a while to actually build this large set, and the process is very enjoyable. Some of the parts included in the set are available in few sets only, and they add more value to the set. Overall, the colour scheme is lovely and amount of details is great. Parts: 10/10 The parts in the set are a nice selection of various bits and pieces in interesting colours. The not so common parts makes this set also a nice purchase as a parts pack. I like the variety of parts in bright pink, the magenta fence, and the ice-cream scoops. When I was deciding on buying the set, the parts list was an extra reason to get the set. Also, you get a lot of extra small parts, and there's a bunch of flower plates in 5 different colours. Build: 8/10 The building of the set is relatively simple and straight forward, and is appropriate even for the less experienced builders. The advanced level of the set can mostly be considered due to a large number of parts, as it takes more time to assembly it. The finished product is stable and allows lots of play action, however when building it, it didn't feel this way all the time. The walls of the tower are built by stacking bricks without offsetting them. Due to the curved walls of the tower, there's no other way to do this, yet I'd still prefer the sets to teach the kids how to build stable walls by offsetting. Playability: 10/10 As it's standard for the Friends sets, aimed mostly at young girls, playability is the most important feature of this set. However, there's enough action for everyone, and the set doesn't feel as it's only for girls. There are not many moving features, the playability is based more on the imagination of the player. You can row the boat around the lighthouse and search for seals though. Also, the ladder at the back can be moved to allow access to the loft above the shop. The value of the set is in playing out different scenarios. You can play shop, or watch the view from the tower, or tell scary stories in the loft at night, or simply enjoy the ice-creams. Minifigs: 9/10 Stephanie wears a lavender skirt, available only in this set, and both Stephanie and Kate have accessories that are not so common. The flower pin Kate is wearing can also be used as a real flower, although it can be connected to leaves only in combination with classic flowers. Also, their torsos are available in few different sets only. However, there's always need for different tops and bottom of minidolls. Price: 9/10 It's a large set, so the price is not that surprising. The price per part is great actually, but if the size of the parts is considered, it's not so great anymore as there's a lot of very small parts. However, keeping in mind there's some rare parts included in this set, the selection of parts is actually great for this prize. I'm not considering getting an extra copy, but the set as a whole is a great parts pack for builders oriented in creating houses and landscape. Overall: 56/60 (93.3%) As the overall score implies, this is a set worth having. The design is interesting and pleasing to the eye and offers a lot of playability. Building it is appropriate for both beginners as well as more experienced builders. The parts selection is nice, and has rare parts attractive to AFOLs. Considering the price, it's not the cheapest, but it offers a lot of interesting colours and rare parts. The parts have a potential to be used in different themes, and the set is a great buy also for the parts alone. It's not the distance, it's the goal that motivates you.
-
''Help a baby tiger in trouble at the LEGO® Friends Jungle Falls Rescue with Olivia mini-doll figure, cliff hut, dam function and caves.'' But... ...did the TLG get the right story? If you're interested, scroll down (and read the review) to find out. Basic info of the set Set no.: 41033 Name: Jungle Falls Rescue Theme: Friends Subtheme: Jungle Year: 2014 Pieces: 183 Minifigs: 1 (plus a tiger and a chameleon) Age group: 6 - 12 Price: £ 17.99 / US$ 19.99 / EUR 19.99 Price per part: 9.831p / 10.923 c / 10.923 c Links: Brickset, Bricklink, LEGO S@H The box The front of the box is (as always) in bright Friendly colours, with the main five characters on the top right corner as opposed to the main set's character, in this case Olivia, in the bottom right corner. The sides of the box are typically curved, as seen in larger sets from the Friends series. The landscaping on the box art is tropical and acts as a nice background for the set. Interestingly, there are many features that set the box(es) in the Jungle subtheme appart from the classic ''Town'' Friends. The five characters are dressed in tops seen in the Jungle subtheme, the box art is framed with bamboo and tropical flowers. I also noticed that the set as shown on the front of the box differs slightly from the set as seen in the instruction booklet. Can you spot the differences? The back of the box reveals other aspects of the set, most importantly the playability of the set. The Friends theme is aimed at female population, young and less young girls like me, and playability is an important factor. Individual play set-ups are framed with a bamboo pattern. There's a mechanism that allows sliding the waterfall panel to the side, Olivia saving the baby tiger, exploring the cave in the rocks and giving him a treat. In addition, Olivia can enjoy a meal with her chameleon. Same as seen at the front of the box, the most obvious box art are the bamboo and tropical flowers, clearly distinguishing the Jungle subtheme. The same jungle box art is seen on the sides of the box and it looks really nice. Of course, the mandatory hearts, butterflies and dog paws are seen in subtle print. The top of the box has a bamboo framed picture of Olivia as a measure of scale. The tropical flower pattern nicely rounds up the top of the box. I'm only missing the butterflies here. The booklet The front art design is repeated on the front page of the booklet instruction. It's slightly bend on the left side as a result of bags of bricks being pushed against it. Luckily, the instructions were not damaged. I know it's just a small set, but having more protection for the instruction booklets would be nice. On the inside, the booklet is as neat as ever. The background is in lavender, again a typical Friends colour. Building steps are simple, with not many bricks to add in each step. What I liked specifically, in some steps, such as step 18, there are red arrows emphasizing the right placement of some bricks, where it's a bit hard to see. This is a nice addition, not so much for the experienced builders, but for the beginners. The odd pages differ from the even pages in that they have a small heart and butterfly design in bottom right corner. Again, this kind of watermarks is typical for Friends. Although, it's not a necessary one, it became a traditional, and the page would look a bit empty without it. A positive surprise in the instruction booklet was the promotional page for the Jungle subtheme sets. Apart from the pictures of all 4 sets, there's a lovely presentation on how to combine those sets into one larger setup. Although it's more of a MOD, I see this feature as a promotion for MOCing. It also shows nicely how the TLG planned the individual sets to allow for combining them together. The pieces Inside the box, there are two numbered bags of similar size, a 16x16 plate in medium azure, a sticker sheet and two lime plant vines with leaves. Medium azure plate of this size is available in only 4 sets of the Friends and Disney Princess themes. Since the standard base plates in blue are not available any more, this medium azure plate can be considered as its substitute to create water. The lime plant vines are the highlight of this set - they're a new mold and one of them is an extra part! They're flexible, and can be placed in different positions. Sticker sheet is included, but again it could easily be avoided. While it does make some of the rocks slightly more interesting with the printed flowers, the set would be just as nice without it. I have two copies of this set, and chose to use the stickers only in this one for the presentation purpose. In general, I like the flower designs, but I'd rather see more plants and flowers included. The build starts with the bag no. 1. The parts found in this bag form the base of the rocks and the waterfall. Here, the torso and legs for Olivia are found, but I forgot to include them on these photos (they're discussed in more detail later on). The parts to point out include the dark bluish grey rock panels and the trans-light blue waterfall panel. The latter is actually quite rare, it's included in 3 sets only. These are my first parts of the kind, and although I'd prefer smaller parts for the rocks, in the end, these do their job just fine. Most parts are in light and dark bluish grey, and from the colours seen on the picture I'd never guess this is a Friends set (where's the pink?). Inside the bag no. 1, there's a smaller bag with the smaller parts. These parts are more colourful, and surprisingly there's only 3 parts in pink - again, is this a set aimed at girls? Yes, it is! My favourite parts here are the trans-light blue ones, they complement the waterfall nicely, and I only wish that more of them were included in the set. The 1x1 bricks were re-introduced in 2014 after a 12-year gap. The other interesting parts are the 1x1 round bricks in dark orange, appearing in 5 sets, but only 2 of these sets are currently available at the stores. Bag no. 2 contains slightly more colourful parts, but again, there's not as much pink as I'd expect from my experience with the Friends series, which is not necessarily a bad thing. The dark pink plate is the only part in a girly colour. The interesting parts here are the lime palm trees which were introduced in many sets in the last two years, two inverted tan tiles and the chameleon in bright green with medium lavender pattern. Inside the bag no. 2, there's another polybag with smaller parts. There were only a few. The most interesting (and anticipated in my collection) were the 1x1 round bricks in dark orange (there's a total of 6 in the set). Other parts are not that excited, apart from the round tiles - they are the new types with a bottom stud holder. The best parts in this set are the the panels for the rocks and waterfall. I might be too excited over those, but these are the first ones in my collection, and I'm looking forward using them in future MOCs. Also, the trans-light blue bricks and tiles are interesting and useful parts to build various water features. In addition, there are the newer molds, the 1x1x3 brick, the round tile with bottom stud holder and one with a hole in the middle. The dark orange 1x1 round bricks are welcomed too, as they allow for more variations of bark colour when making trees, and the highlight for me is the new plant vine. Did I mention you get two and one of them is an extra? Chameleon with the lavender pattern is also a new (recoloured) LEGO species. The extra parts are the usual small bricks that could get easily lost. As mentioned before, there's an extra plant vine. I won't complain about that one. I was positively surprised to see one, but I wonder why it was included as an extra part. Is it possible it breaks more easily when under stress? Never the less, it's a great part to have as extra! The minifig Olivia is the main and only character in this set. Her outfit is a uniform of the Red Cross Friends Jungle team. The dark pink printed scarf is a lovely addition to add more feminine touch to the uniform. Her hair has holes for hair assessories, but there are none included in the set. If I could choose, I'd go for some type of large pinkish tropical flower as seen on the box art. Well, I guess Olivia knows better than to pick wild jungle flowers just to put them in her hair. I didn't include the parts of Oliva in the parts section, so here they are. We all know the Friends anatomy, so there's nothing new here. Everyone would look so thin with an empty stomach, right? In addition to Olivia, two animals are included in this set. The baby tiger is the first one presented in the set. It's the same type as in the Friends Animals series 4, Tiger's Beautiful Temple. It has a nice back printing. I only wish the dark brown pattern would be printed also on the sides of the torso. It has cute written all over him/her. Beware if you have a soft spot for blue eyed kitties! The tiger has the main role in this set, as Olivia seems to be rescueing him/her from the waters in the waterfall lagune. The tiger is placed on this simple raft, that could be easily thought of as a drift wood. What I like about it, is that the underside of the 2x4 plate has inverted tiles attached to it. This way, the raft moves more rapidly over the studded water surface. The other animal in this set is the chameleon. It's a new LEGO species that was introduced in the 2014. One of them is Pascal, the chameleon from the Rapunzel's Creativity Tower. Chameleon in this set differs from Pascal in two ways, both obvious. He/she doesn't have a name, and he/she has a more realistic chameleon-like pattern. It comes in bright green with a medium lavender pattern. Since I own two copies of this set, I thought to compare the lavender pattern, and it's actually different. For me, this is really great, as it's easier to distinguish between them in case you name them. The build The set is targeted at girls from 6-12 years old, and it's basically an intermediate build. There are some more complex aspects of the set, where you need to be careful when placing parts in the correct positions. Contrary to some other Friends sets, where smaller subsets are included, the Jungle Falls Rescue is a one build set. The building process is divided into two parts as already indicated by the two numbered bags. It's starts with forming a base for the rocky landscape or the cliff, as TLG described it. The tiles seen here are where the waterfall slides into the cave, and the black jumper tile is where the crystal stone can be found. What I found interesting at this step, is that the stickers were applied to parts which are not visible from the front. This is why I think the sticker sheet could be easily omitted from the set. However, in a way it feels nice to have some details included also at the back side. At the end of the day, each builder gets to decide for him/herself whether to apply the stickers. As for me, I applied them in one set only. Few steps on, part of the mechanism for sliding the waterfall is built using Technic gears. Also, the first rock panel part is included and it's decorated with a stickered butterfly. My least favourite parts, the 1 x something x 5 bricks are included here, and although I'd prefer smaller bricks, I have to admit these parts are efficient when trying to gain some height. So far, all the building was on the baseplate. The next step is building the highly anticipated waterfall. While having a completely brick built waterfall would be amazing, I'm liking this panel-built version just as much, although it's more simple and less realistic. The trans-light blue colour of the panel with a rocky pattern works great as a water feature. Different views of this minibuild show part of the sliding mechanism. Another panel is included here, and I can not blame the TLG for using a panel instead of bricks. This is a part that's not visible in the completely build set. The LBG gear rack connects to the gear and allows movement. The waterfall is then placed on the tiles, and its only connection to the rest of the structure is by gears. The only thing I'd change here is the base of the waterfall. Instead of white plates, I'd go for blue or even trans-blue plates, and then use white, trans-clear and trans-blue 1x1 round plates for the splashing water at the bottom of the waterfall. . A view from the back shows how the gear rack connects to the gear. It looks simple, but I have to admit, I wouldn't think of such mechanism. Well, I'm one of those AFOLs who think Technic bricks are too complicated to use correctly. Here you can see that a medium azure tile was used as the top of the waterfall and it looks much better than the white plates at the bottom. My favourite choice here would be a trans-light blue tile, but you can't have it all. The right part of the sliding waterfall is nicely hidden by a LURP with addition of some slopes and dark orange bricks. Considering the size of the build, this large element fits just fine. To me, it even seems as if the set planning was based on this part, and then build around it. The only thing missing here is some more greenery. More details were added to the water. The LBG tiles look great as stones, and the trans-light blue tile at the bottom of the waterfall creates an effect of splashing water. I would add more of them, though. When opening bag no. 2, another interesting minibuild pops up. It's the handle for the sliding mechanism and is camouflaged as a dam. It has a gear rack on the later hidden side, and dark orange and reddish brown bricks and plates on the visible side. The handle is very colourful, and I really wonder why TLG uses these colourful parts in hidden places. In the end, only the parts above the 1x8 reddish brown plate are visible, so the use of yellow and blue bricks is not a big problem. With the above handle in place, the waterfall can already slide to the right. Here's a view from the back side, showing an ''open'' waterfall. At this point the mechanism doesn't run very smoothly, but this gets better after addition of extra bricks, that help keep the handle in place. Ok, I admit I had to try sliding the waterfall as soon as the handle was added, and I had much fun doing that. It's a great feature, and adds so much to the playability of the set. A view of the sliding mechanism from the top. The yellow handle is used to slide the gear rack to the waterfall slide, and by moving the gear in the middle, it moves also the waterfall part, thus opening the entrance to the caves bellow. I like that the TLG camouflaged this sliding mechanism as a dam, but I'd prefer to have the yellow handle in brown or at least green. It wouldn't stick out so much. Also visible from the point of view is the crystal rock hidden in the cave behind the waterfall. A few steps on, little chairs are added to the top of the rocks to form the platform for Olivia's observation point. At this point, more greenery is included, and the rocks look much better already. The new plant type extends from the top of the rocks to the bottom right. It's attached with clips, and its flexibility allows for different positions. Considering there's an extra plant vine in the set, it could well enough be used in the building of the set. There's no such thing as too much plants, right? The little table at Olivia's observation top is built very simply. It's a combination of lime and reddish brown parts which gives it a more natural look. Colour-wise it fits nicely in the little hut at the top of the rocks. The most interesting part here is the stickered 2x2 tan round tile. My first though was that it's a pizza, but I'm not sure who would order a tropical pizza with kiwi fruits, so I'm guessing it's a fruit pie. As for the yellow spots and pink sauce, I have no idea what could it be. Maybe some sliced bananas and berries. The table is then placed at the platform at the top of the rocks, under the shadow of the palm tree roof. From this front view, it's not so obvious, but the table is not completely covered by the roof. I'm guessing it doesn't rain in the jungle or Olivia is not watching out for little tigers when it does rain. The building of the set is finished here. The size of the build surprised me nicely, as I didn't expect it to be this big. After all, there's only 179 parts in the set. This number would be higher, though, if bricks and slopes would be used instead of the large panels. To increase the parts number, more plants could be included. Bamboo leaves would fill the gaps bellow the tan plate really nicely. The finished product After 42 building steps, the set is finished. The finished cliff looks great from three angles, that is the front and both sides. From the left, the rock panel is nicely decorated with the butterfly sticker. It makes it more interesting, but I'd prefer to see more plants instead of stickers. Also, the yellow handle is well hidden from this side, and the transparent waterfall panel creates a nice effect. As it is not as clear to see through as from the front view, it looks more realistic to me. From the right side, the cliff is partially opened to allow easy access. The stickered flowers add more detail here as well, but as I said before, I'd prefer real flowers. My first thought would be to add a couple of those bionicle spines hanging from the top, and it would make the set even cooler. Also, more plants could be used to camouflage the rocks and the steps to the top of the cliff. A view from the back reveals a cave behind the waterfall and the hidden crystal rock. The cave is a nice feature in this set. At first it may look that it's just an empty space beneath the cliff, but it's much more. The hidden crystal is there waiting to be found, and in addition, the (stickered) flowers are a proof of life in the cave, so there's obviously lots to explore. The access to the cave from the back is relatively easy also for the adult fingers. Another interesting feature is that the access to the cave is revealed by stopping the water flow. The dam function stops the water, and as the waterfall dries out, Olivia can set to explore the cave beneath the cliff. I really like that on one side you can have a tea party at the hut, chat with your girlfriends, and on the other, you can have an adventurous afternoon by exploring the cave beneath the cliff. Olivia climbed down from her retreat, and is debatting whether to call for help or go in the water with the life preserver to save the baby tiger. The tiger is floating on a drift wood in the middle of the lagune under the waterfall. The inverted tiles on the bottom side of the brown plate really allow for smooth surfing. When the baby tiger is safely out from the water, Olivia can return back to her hut on the rocks, and enjoy the kiwi pie. As seen on the box art, the chameleon can join her at the table, but I'm not sure if he can use the cups. Maybe the baby tiger can use them. Anyway, it's nice to have an extra cup included, so Olivia doesn't fell all alone in the jungle. Additional play features were explained in the text above, here I just want to emphasize them again. Apart from the surfing tiger, Olivia climbing up and down the rocks, the dam can stop the water and reveals the entrance to the underground world with hidden treasures, so Olivia can explore the cave. Considering the size and the price of the set, there really is a lot to offer. The Final Verdict Design: 9/10 The overall design is great, but there is still room for improvement. Considering the target population of 6-12 year olds, the build is simple and well done. I'm only missing more plants here. Considering that trees in official sets often have just a couple of leaves, I know I shouldn't complain here. After all, there's an extra plant included. There some rare and interesting parts included in the set, adding more value. I was surprised with the colour scheme, as there's hardly any pink. While being a small set, with not a large number of parts included, it offers a lot. Parts: 10/10 The parts in the set are a nice selection of various bits and pieces in interesting and very usefull colours. There are some new and rare parts included, and that makes the set also nice as a parts pack. The interesting parts are the new lime plant vines (there's 2! ), the panels for the rocks and the trans-light blue parts for the waterfall. The parts selection is very useful for various MOCs, and for me that was the reason to get an extra copy of the set. Build: 8/10 It's a simple and straight forward build approriate for beginners, but also with some elements for the more advanced builders. I was excited to see the dam mechanism. It's a lovely play feature. I missed some extra plants here, but that can be easily added, as probably everyone has some extra greenery. Considered it's targeted at girls, there's a lot of building, and not many mini builds, as in some other Friends sets. It also has a potential to modify it and make it larger. Playability: 10/10 Playability is the most important feature of this set. There's enough action for everyone, boys and girls, and adults. There are moveable features, such as the dam and the surfing tiger, the hut to enjoy a meal, a cave to explore and baby tiger to take care of. Minifigs: 8/10 Olivia wears a Jungle uniform. Her top is a new design, while the skirt isn't. This is probably one of the few minidols without hair accessories, and she looks good that way. Well, I wouldn't mind some tropical flower pinned in her hair. Price: 9/10 It's a small set, but it offers enough interesting bricks for the price. The price per part is a bit high in this price range, as there's sligthly less parts included due to some of the panels. I mentioned there are some rare and new parts included, and these justify the price per part. I was nicely surprised with the selection of very useful bricks, and I have to admit I got two copies of the set for both the parts and playability, and considering the price, it was a great deal. Overall: 55/60 (90%) The overall score implies, this is a set worth having. It's an interesting design, appropriate for the beginners, it has a great selection of parts to attract AFOL, and it offers a lot of playability. Considering its price, this is a set that should attract different demographic groups of LEGO users, and still meet their various needs. So, did the TLG get the right story? I think the baby tiger was after an adrenaline-pumping ride at the waterfalls, and Olivia missinterpreted his intentions. But that's just my story, you can make your own....
-
The idea was very simple, to make some real juice with Lego 41035 Friends Heartlake Juice Bar birthday present for my granddaughter Laura (will be three on this Valentine day ), so I added some more Lego parts, including 12V pneumatic pump machine, and two (non-Lego) bottles as storage canisters for apple juice and apricot ice tee. Hope this will be great fun at her birthday party. Bottles can be easily refilled from the back if children will be thirsty. Some Juice Bar photos (with hi-resolution links, where appropriate): (http://www.bricksafe...ar/DSC06244.JPG) (http://www.bricksafe...ar/DSC06249.JPG) (http://www.bricksafe...ar/DSC06273.JPG) And also a short video:
-
Just thought I'd share the street of 16x16 Friends shop modulars I made for the Yorkshire Brick Show 2015 back in May. I'm not the first person to do this sort of thing (see here, here, and here for better examples) but it seemed to be appreciated by the public at the show More pics and description on Flickr. C&C welcome!
-
Month ago Jan Beyer challenged me to build alternative model out of Lego Friends set and this is my first attempt. I've used Heartlike lighthouse (set 41094) as donor of bricks. Carousel features 4 seats that spin around. It is also supplemented by ticket stand.
-
Today I have built an aquarium for my LEGO Friends. There are... a souvenir shop, benches, a terrarium with a turtle and aquarium (inside there are two Flounder fish and a turtle). Flounder XD Thanks for watching
-
Since there are so many animals in LEGO Friends, it seems obvious to build a Friends zoo. I got the idea at LEGO Fan Weekend in Skærbæk in Denmark last year where my first Friends MOC “Rainbow Holiday Center” was located next to another Friends MOC, which was a zoo, but just built in a different way than I would do it. Together with my 19-year-old son Lasse I started building the layout between Christmas and New Year. The layout was completed and exhibited for the first time at a Danish LEGO exhibition in the beginning of May. We also expect that it will be exhibited at LEGO Friends days in LEGOLAND Billund 6-7 June. More photos: https://www.flickr.c...157652462197078 Video:
-
Hi! Here's my entry to this year's Expand the Winter Village Contest, the Kissing Booth. Hope you like it! Manning the booth is hard work, so the girls are taking turns, and keeping warm by the fire between shifts. More images on flickr. Thanks for looking. C&C welcome!
-
This is Part 3 of my project. After rebuilding the LEGO official products of 10196 and 4597, I start to build a true MOC. It is a CUUSOO project and it awaits your support: http://lego.cuusoo.c...deas/view/48013 The girls of LEGO Friends need more excitement and here they go to the Gyro Drop (or Falling Machine). It is a 10-seater gyro drop powered by a motor and remote control (optional). Yet it does not merely operate with electricity – it operates with the magic of magnet!!! Safety to the girls is always the utmost concern!!! The carriage may fall at an alarming speed but the girls won’t feel any shock when they come to the lowest point. The carriage cannot reach the floor – the magnets underneath helps to float the carriage!!! At the same time (when they come to the lowest point), the girls won’t feel any vibration as the magnets sideway help to stable the carriage. The girls' feet are exposed to feel the breeze when they feel the excitement. The carriage only has minimal contact with the stand, so that it can fall very smoothly. Movie clip of this Gyro Drop -- Former works: (I) Friends' Grand Carousel 10196: http://www.eurobrick...showtopic=87068 (II) Friends' Ferris Wheel 4957: http://www.eurobrick...showtopic=87882