

steph77
-
Posts
925 -
Joined
-
Last visited
Content Type
Profiles
Forums
Gallery
Everything posted by steph77
-
42056 - Porsche Speculation
steph77 replied to Jim's topic in LEGO Technic, Mindstorms, Model Team and Scale Modeling
have you noticed that, on the last pictures when doors hood and trunk are openend: the central lever is engaged and on other pictures it is in neutral position while all these openable elements are closed?. Makes me think this lever control a bidirectial gearbox connected to openable doors hood and trunk....So sad.... -
42056 - Porsche Speculation
steph77 replied to Jim's topic in LEGO Technic, Mindstorms, Model Team and Scale Modeling
The gearbox will be a 4 speed type and will work exactely like this one: And the selector at steering Wheel will be this kind of mech -
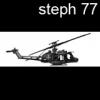
Hi eurobrickers! This is my last helicopter project. It is based on: -an Optimal use of Lego blades has a correct scale compared to the their size(i think on TLG heli, they seem to be too short), -The Realization of swhashplate at 100% based of current official pieces. In terms of function, we have: -The Joystick which controls the cyclic pitch of the main rotor, no collective -rotation Of the two rotors, -A Winch. The set of functions is manual. The rotation of the rotor can be upgraded by adding a base comprising a battery box and a medium PFS motor . The swashplate is carried out by means of two superposd floating plates. They are each built around a technic ball. Photos: The joystik is located on top of the cokpit and is easy accessible enjoy...
-
I am quiet dissapointed about the Porsche. I think LTG take a big risq releasing one of the most iconic car. And i do no speak of real thing but i am speaking about crowkilers his 997. Releasing this set is assuming it's comparaison with one of the best lego Moc ever created. Any afol now this car. And asking about 250€ for something that does exist ...? EDIT: i mean it is NOT possible doing better than krowkiller's job on that car....
-
Searching 'ultramotive' i found this car build by: Varley Group, Ultramotive and Tritium. it's name: Varley EVR450. A full electric supercar. Could it be this one?
-
[HELP] 9396 - Rotor Friction
steph77 replied to JGW3000's topic in LEGO Technic, Mindstorms, Model Team and Scale Modeling
Hi, I got lots of problem with mine too. I spoted this issue: The friction problem comes with the pitch system of the blades. The mecanics at the bottom of the mast generate a friction by torsion on the vertical axle. This is due to the friction of the grey pin connected to the lever that transfer the horizontal movement of the command to vertical movement for the blade's pitch control. Maybe you can check it on your model :) -
Tracked Loader
steph77 replied to steph77's topic in LEGO Technic, Mindstorms, Model Team and Scale Modeling
Thanks Jim! A usually use imageschack as pictures storage. I actually have paid for next year use and so i'll be able to resize proprely my pictures. Sorry for that. I'm glad you like all my design on this Moc In terms of mechanics I will take pictures by removing parts to see proprely inside There is nothing complicated in this model perspective mech. By cons, my main focus point was to have a maximum range of motion. And I struggled a lot on it. In fact, the realisation of a Z-kinematics that offers a perfect linearity in the movement of the bucket was not easy. There was always a point or the 'lack' was enormous due to the excessive proximity of the link with the pivot point of the bucket. Furthermore, the positioning of the main LAs was also difficult to find. Once found these fixed points, mechanical flowed naturally. It took me a few tries to determine the most effective setup in PFS and finally a total redesign that incorporates everything. In short, although what it could seem to be, the work on this model was very consistent .... Thanks for all comments -
You said a porsche 911 GT3 RS made out lego briks? Allready done :) http://blackflag.jalopnik.com/half-of-this-porsche-is-made-of-lego-bricks-1711088533
-
Hi everybody... This is a time that I'm out of Moc posted on the forum. It is time to compensate for this;) I present here the latest Moc of the generation of remote controlled. We wondered, after mounting the bull from TLC what we could do with this fabulous bucket. Our choice (not very complicated at the same time) is therefore focused on a tracked loader. The primary goal was to improving the maneuverability of the loader. In fact I've never been a fan to the servomotor and the brutality of its use Here is our loader Image From the technical point of view, -for propulsion, we have two large motors connected via 12T / 20T and 12 / 40T. -For lifting a XL motor is connected via a 3 gears of 24T ratio: 1: 1 To tilt the bucket, a medium motor is enough, in direct contact with the cylinder mech with 1:1 ratio. Regarding other functions, it was a fake engine connected exactly like on the set 42028. The default is that when you turn on the spot with a caterpillar in one direction and the other in the opposite direction then the engine does not rotate. From the perspective of my little son, this is not very important. Well. At last, the additional functions are reduced to a deployable ladder, retractable cabin protection and a swich for igniting the BB which is positioned in the heart of the chassis. (just remove nevertheless 4 pin to get it out and replace the batteries). I put you the video, everything is there. Enjoy!
-
Jeroen hello, thank you for your nice comment (as always with you as well). For the tail rotor it is actually a little high but it gives the scale model and a burly stature. It is a compromise between design and realism.
-
Hi everybody here is my entry for the 29th Techlug contest. We had to buil a skycrane type helicopter with manual functions that can be upgraded with powerfunction M motor only. Searching on the web for actual use of this old heli, i found the fire fighting version and decided to reproduce one of them here comes the beast: so can be defined mu goals for that moc: - Must be playable - the two functions had to be independent in two words simplicity and efficienty. I choosed to place two reversible gearboxes, one for each function you will see it working in the vid above About the design, i observed that the main conception line of the real skycrane was probably 'less is more' So, I do that also with my lego... for the details, we have two powerfull engines on the front. when rotors spins, the engines also rotate. The drive shaft is exposed as the real model, there is no universal joint, just gears and no vibrations . I opted for a default four-bladed rotor. Not too keen to order two blades that will not serve me anymore. For the tail rotor, it is a compromise. I wanted the finest possible articulation and 40T gear .... is not that which is finer or discreet. So I settled for a mere three-branch connector on which the blades can be attached simply and aesthetically. On the container. I opted, according to my model of inspiration for a simple and playable stuff. Basically, there are the characteristic line of the skycrane tanks, triangle, manual door that opens by a link. The device is held by friction pines. The container is further equipped with a suction tube that allows a flight reload in a lake or river. A simple interlocking device allows the stall once ascended to the structure of the bird. For refulling, kerosene this time, the chopper is equipped with a refueling boom in flight. Pictures now: General overview of the bird with its container Front face with refueling boom opening element for battery box insertion. The M motor can be installed without any complementary pieces lateral view without watertank Stature which imposes I elongate blades to have a coherent rotor diameter compared to the size of the container, from which also the reduction of the transmission shaft Container detail with its simple locking system (red pins are inserted in the chassis) opening system of the watertank. other general view lateral view Cockpit detail with the battery box inside the modules cockpit without BB: design is not affected Elements opening for insertion of BB. The glass door is the actual model (lift operator) more details: General view of s propellant module, with the two turbines connected to the rotation of the rotor: Bottom view or seen in lateral winch mechanism and the center one of the two supply gearboxes The module of one rotor with its anchor points, it is completely independent of the gearbox module top and bottom view of the gearbox splitted: and in LDD renders version: Finally: the video: https://www.youtube....h?v=2GZQWy6kicI hope you'll enjoy that model
-
i know how hard could be this exercice! Good job to have achieved all these functions in one relatively compact package
-
Hotweels supercar 2015
steph77 replied to steph77's topic in LEGO Technic, Mindstorms, Model Team and Scale Modeling
Thanks for your comments Here are, at least, some picture of the beast The design as been upgrade, fixing some issues in the bodywork (holes) I added a rear spoiler the whellhouses have been improved On this 3/4 view you can see the door's command witj a better ergonomy The spoiler is a bit big (i know , but just a little...) My son love it! Radical design on the rear with rasor cut of the back diffuser Agressive design on the front. The view from above highlights the car's hourglass figure and the curve of the wheel arches, note the aero opening at the chest that allows échapement the air flow directly to the mobile broadcaster The 'most wanted view', which does not teach you much, flat bottom outlet of the diffuser and airflow to the rear discs. The axis of the gearbox go directly through the pannels (axis 16L). The panels of the flat bottom stiffens the assembly in the horizontal plane, assuring perfect stability of the axes of the gearbox. Details of internal reinforcements triangulated and firmly attached to the frame idem, note the use of a ball pin to lock the structure , Detail on the half beam opening control of the discrete and well integrated door's mechanics Hood opening... Here it is. Any comments or ideas are welcome @+ -
Hi everyone Here is a simple supercar i designed for my son. He asked me : -A red big race car -A car that roll perfectly without friction -A car looking like this ('this' was a microcar Hotwheels) Ok.done. Here is the result: not my best Moc but one of my son's favourite. It features: -full independent suspension -4 speeds gearbox, no reverse -scisor doors -opening Hood and trunk -adjustable seat -HOG
-
[MOC] Bell 47 Helicopter
steph77 replied to paave's topic in LEGO Technic, Mindstorms, Model Team and Scale Modeling
hi, i saw your copter and tell myself : whaouw! this guy made a relica of the exact movement of the rotor with separates linkages for collective and cyclic movements...great job for that. What makes me sad is that the Hiller bell mecanics is not complete. The real rotor is fully free of its movements in the real life, yours is a rigid model design (agusta, Westland, etc...) and not a fully articulated. Another thing is that the stabilisation system i not effective yet. Making your rotor free (fully articulated) and a well designed sabilisation bare will higly improve the stability of rotation and also make more effective your commands and linkages. Whatever you made a very good job actually ! It is a real pleasure to see copters on this forum. Yeah! -
Compact designs
steph77 replied to aminnich's topic in LEGO Technic, Mindstorms, Model Team and Scale Modeling
Ok, lets go.... Is this what you mean by 'compact design'? -
D3K's MOCs
steph77 replied to D3K's topic in LEGO Technic, Mindstorms, Model Team and Scale Modeling
Yep, It makes me think to a Moc i've seen recently One thing to be attentive to is the fact all gerabox needs to work really smoothly when using a single motor. And you'll need to pass quikly to real pieces to valid that... The frame structure is really important in such Mocs. You'll need a perfectly independant frame and as rigid as possible. From my experience, one motor can drive until 6 gearboxes, more becomes really difficult due to friction... i'll follow this thread... -
Tow truck 8X2
steph77 replied to steph77's topic in LEGO Technic, Mindstorms, Model Team and Scale Modeling
I made the ldd file after building the real Moc so you can be sure 99% is ok with it. I do not promise that it didn't miss one pin somewhere, but this file is globaly reliable and normaly it must be possible to rebuild the model with it. -
Tow truck 8X2
steph77 replied to steph77's topic in LEGO Technic, Mindstorms, Model Team and Scale Modeling
OK, understood But this is another work... ...that i am not able to do actually. Sorry guys, that's all that i can do for now... -
Tow truck 8X2
steph77 replied to steph77's topic in LEGO Technic, Mindstorms, Model Team and Scale Modeling
Sorry i didn' understand your problem. Can you explain what's wrong with it, i can open it fom the link below.. -
Tow truck 8X2
steph77 replied to steph77's topic in LEGO Technic, Mindstorms, Model Team and Scale Modeling
here is the link where you can find the Lxf file for it.Hope it will help you. http://bricksafe.com/search?search=towtruck -
Tow truck 8X2
steph77 replied to steph77's topic in LEGO Technic, Mindstorms, Model Team and Scale Modeling
Hi here is the updated video with the updated design Enjoy -
Hi, I realised a similar Moc some years ago: I hope this can help you. I only use one PFS m motor and this Moc wasn't IR controled
-
Tow truck 8X2
steph77 replied to steph77's topic in LEGO Technic, Mindstorms, Model Team and Scale Modeling
So here, I spent a lot of time to consider installing larger wheels, but unfortunately this means rebuilt the Moc Then I went on the Mercedes website, and I could see that on the new Actros, the overall height of the truck is four stacked wheels. So I resumed my Moc and found that the wheels are far from being out of range, they are almost good, for against certain visual elements were not in their place, for example the upper space above the wheels, etc. . So I set out to change everything on the face and deleted elements above the cabin which has the effect of reducing its perceived height. I modified the design of the headlights making sure of compatibility with the lifting of the cabin whose simple kinematics is reinforced by the fact that it goes to the millimeter. Ditto for the wheel arches where I could increase the turning radius while maintaining clearances millimiters to the wheels. I think the result is satisfactory. Visually it's much better. At the back I replaced the 5X11panels by 3x11 panels that look better for the same reasons. Then I tried to perfect camber. Unfortunately I short white beam 13L to perfectly finish the sides. Finally, I took the idea of Pierrolego16. I turned the wheels (it is true that the star wheel for a truck ...). and, in the rim , a simple bush does well the job. Place to the photos: Overview or we can see the wheelhouses detached wheels and balanced design, The balance between the passages of BC and rear wheels is better too, modification of the rear arm, the main mat, and various retouching, Better integration of LEDs Cab kinematics and design compatible headlights Integrating LEDs This is a good patch design that balances things to me; what do you think? -
Tow truck 8X2
steph77 replied to steph77's topic in LEGO Technic, Mindstorms, Model Team and Scale Modeling
Thanks. The LDD file is finished :1323 pièces preview: unfortunatly the file have 185ko so cannot be placed directly here :(