
Balrog
-
Posts
988 -
Joined
-
Last visited
Content Type
Profiles
Forums
Gallery
Everything posted by Balrog
-
 Wow. This is really a masterpiece :)
 -
Your parts wishlist
Balrog replied to skppo's topic in LEGO Technic, Mindstorms, Model Team and Scale Modeling
You mean like a 1L liftarm? -
Impossible LEGO
Balrog replied to Boxerlego's topic in LEGO Technic, Mindstorms, Model Team and Scale Modeling
Only if it is a tile from the 70s without the groove. -
Impossible LEGO
Balrog replied to Boxerlego's topic in LEGO Technic, Mindstorms, Model Team and Scale Modeling
I can't stop laughing. You made my day. -
If you report a lot item via this link, it cannot be reported again.
-
Effe's MOC Corner
Balrog replied to efferman's topic in LEGO Technic, Mindstorms, Model Team and Scale Modeling
Using the new hubs this way is pure genious. Now I am really anxious to see the complete chassis. -
That was me who told you. I also told Barry by sending him a message through the Forum. He already contacted the seller and told him to stop. This is really mean to make profit illegally from other people's stuff. That is why I notified you guys immediately.
-
Effe's MOC Corner
Balrog replied to efferman's topic in LEGO Technic, Mindstorms, Model Team and Scale Modeling
Efferman: This will be a great new project. I like the idea for your second steered axle. Though (perhaps it's just me) I think this will not work that way. How should the axles turn in the same direction? Or am I missing something here? Edit: Oh forget it. The big gears are idlers, right? So the steered axle isn't driven. The axle through frame and u-joints are for stability, right? Edit 2: Or is one idle and the other is not? And you have simply a fixed axle (no diff)? This really puzzles me right now. -
tatra 8x8 vs 6x6
Balrog replied to pint14's topic in LEGO Technic, Mindstorms, Model Team and Scale Modeling
More complex = more impressive. I'd vote for 8x8. -
technic connectors
Balrog replied to SNIPE's topic in LEGO Technic, Mindstorms, Model Team and Scale Modeling
How about this? Or does it need to be fixed horizontally? -
Sounds like the perfect birthday present from me to me :D
-
Wow... those are huge. Too bad I don't have the fitting tires.
-
This is all very interesting. I think I might order me some bigger offroad tires to use instead of the Unimog tires for a MOC that I am planning. But I wonder if anyone looked for street tires for the 44772 wheel as well? This might be interesting, too. Since I have only the street tires from 8070 supercar, I am somewhat limited in the scale. I know there are original Lego tires that are a size bigger, but I wanted to know, if there are already known good 3rd party tires. Thanks. Edit: I would guess, that any 1.9" (48mm) x 1.4"-1.45" (35-37mm) tires should fit on the 44772 rims. Is that correct?
-
This is most impressive. I am really jealous about those building skills.
-
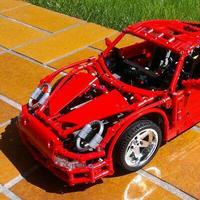
My very own Supercar - WiP
Balrog replied to Balrog's topic in LEGO Technic, Mindstorms, Model Team and Scale Modeling
Update #3 This will be my final update for this project. I have considered it as failed, because I coulnd't think of a good way to go on. And I still have to learn. Though, I really liked building the car so far. It was a huge challenge. Basically, the pics I show now should be considered two updates. As you can see, I made some changes to the hood. This was basically experimental. I also made some changes to the seats, raising the dashboard by 2 studs, so it comes out more to "scale". As you can see in this pic, I reworked the front. I realized, that it would be stupid to have the cooling for the engine in the front, when the engine itself is in the back. I think it looks quite interesing here, but I wasn't too satisfied with the position of the headlights and the how the long panels are here. I also changed the doors for regular ones. Though the are not finished here, but I discarded my idea for a fancy door mechanism. All in all, this was a great experience so far. I had interesting ideas and a lot of fun (and probably brain-damage) when integrating the functions and building this far. Though I realized, that for now I will not be able to complete this. I already dismantled the whole thing yesterday in the evening. My fingers still hurt What I will do next, is to build Paul Boratko's Supercar Deluxe 2. Not completely as he has it (due to the lack of parts), but more or less my own version. I have already ordered some parts from bricklink to supplement my collection and bring me close to be able to build this nice car. I hope you all liked the model so far. If there are still some opinions on this, I'd definately like to here about them. Thanks for your time and all the commenters and criticism. -
8110 Unimog building time?
Balrog replied to bekesizoltan's topic in LEGO Technic, Mindstorms, Model Team and Scale Modeling
@colinrichardson that will be most interesting. Please let us know. Btw. it took me something around 8 hours. Not a lot sorting was done. I mostly kept the bags separated though. The time was spread over 3 days in the evening after work. And taking my time gave me the advantage of not having to re-build because of a wrong placed diff. -
Oh that is very cute. I will build the nano one, as I am obviously not lacking parts for that one :D
-
Or maybe if some people would learn to read, they would realize the big "Coming Soon" above the Porsche Pic on Paul's Website. Sorry if some people are offended by this.
-
It looks to me like a MAN truck. By the way, well done dokludi. Again!
-
Use ProxTube addon for Firefox. I did so and could see the video then. @dokludi Very well done. Let all the others say what they want, but I think, this is gonna be a fantastic set. Only thing that strikes me a bit after seeing this video is, that it seems that the Mini-LAs in the outriggers seem to bend a little bit when extending/retracting. Can you confirm this?
-
My 42000 Pics :)
Balrog replied to Bzroom's topic in LEGO Technic, Mindstorms, Model Team and Scale Modeling
Well, this makes me just want to see it more :D -
My 42000 Pics :)
Balrog replied to Bzroom's topic in LEGO Technic, Mindstorms, Model Team and Scale Modeling
I currently think it would be less interesting to see the pics about 42000 than to see what has been censored in the lab pics. -
Batmobile Supercar
Balrog replied to Porty's topic in LEGO Technic, Mindstorms, Model Team and Scale Modeling
Well, obviously you started in the wrong direction. Build the chassis first, then the body. -
Red Coupé V12
Balrog replied to Lipko's topic in LEGO Technic, Mindstorms, Model Team and Scale Modeling
Hey Lipko, you already know, that I like this car a lot. But I want to thank you, that you featured the .lxf on Rebrickable. I also checked the parts list, since I wanted to know how far my collection would be sufficient to build this piece. And I found the wheels to be missing. Just a little hint And cheers for being featured on the Lego Car Blog.