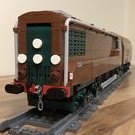
Paperinik77pk Posted October 21, 2021 (edited) 9 hours ago, Hod Carrier said: Thank you, my friend. Yeah, it is a bit parts-heavy. It would be less if I didn't have to build it up over the rail, and I can already see one way in which the height could be reduced by 1 plate which might reduce the parts count a bit, but it does come ready ballasted and with a nice grass verge too. I think you're right about it fitting a 16mm gauge model. Might be a bit tricky getting power to the wheels, but it should sit there quite happily. Just for research purposes - It works!!! 2 studs = 16mm = H0 gauge. So being your track (ok, it is inverted for the Trevithick) 4 studs wide (32mm) I'd say your platform can work also as an O gauge track, just moving the brackets outwards. Sir, you just created the conversion kit from L-gauge to two of the most common real rail-modeling gauges! Now H0, 0, SM32 and SE32 scales are open for business! Edited October 21, 2021 by Paperinik77pk Share this post Link to post Share on other sites
Sven J Posted October 22, 2021 (edited) 15 hours ago, Paperinik77pk said: wonder if a real H0 model (16mm gauge) could run on it too - but with wheel flanges on the inner side (it should !) Hi Davide, just saw your photo on Flickr and commented there already, but just to be sure, I'll write here, too... H0 gauge track, according to NEM (European model railroading norm), is 16.5 mm wide. Given that wheel sets must have a bit of lateral track play (and thus the flanges of H0 models are slightly less than 16.5 mm apart), it may well be possible to put a H0 model on 2-stud wide Lego track, but it may be difficult to actually get it running safely, as it might sit very tight between the rails. Vice versa, a Lego model that has 2 studs distance between the outer (!) edges of the flanges on H0 track would theoretically work. In reality, it wouldn't, for the high Lego flanges would rattle across the sleepers... (That's why my 1:33 models don't run on gauge 1 track, but rather on G-scale track. Same width, but higher rails...) Sven Edited October 22, 2021 by Tenderlok Share this post Link to post Share on other sites
Paperinik77pk Posted October 22, 2021 Correct Sven! I'll start a specific discussion not to use this one - It's an interesting topic and the track made by Hod Carrier was just...inspirational Share this post Link to post Share on other sites
Hod Carrier Posted October 22, 2021 19 hours ago, zephyr1934 said: That's brilliant! Thank you, sir. That's most kind. 13 hours ago, Paperinik77pk said: Sir, you just created the conversion kit from L-gauge to two of the most common real rail-modeling gauges! Now H0, 0, SM32 and SE32 scales are open for business! I never thought I'd ever be credited with having invented anything. Thank you. But I think @Tenderlok is correct. The crossover between LEGO and rail modeling is going to be small as each system's wheels and rails are designed to work with each other and not be interchangeable. There's also the small matter of why anyone who is rail modeling would want to put their models onto a fairly crudely built plastic track that cannot transmit any power. I'm very happy to have created something to have given you so much inspiration, though. I shall be interested to see which way you go with this and what you come up with. Share this post Link to post Share on other sites
Sven J Posted October 22, 2021 17 minutes ago, Hod Carrier said: fairly crudely built plastic track Don't say that. Your brick-built 2w track is very neat! Wouldn't it be perfectly suited for the 4w trains some guys (including Davide) are designing? I think they are unpowered anyway, and your track makes a perfect display piece. Share this post Link to post Share on other sites
Hod Carrier Posted October 22, 2021 10 minutes ago, Tenderlok said: Wouldn't it be perfectly suited for the 4w trains some guys (including Davide) are designing? I think they are unpowered anyway, and your track makes a perfect display piece. Yes, possibly. But for 4-wide display track would this be a bit more suitable...? Share this post Link to post Share on other sites
Paperinik77pk Posted October 22, 2021 14 minutes ago, Tenderlok said: Don't say that. Your brick-built 2w track is very neat! Wouldn't it be perfectly suited for the 4w trains some guys (including Davide) are designing? I think they are unpowered anyway, and your track makes a perfect display piece. I was just writing it! @Hod Carrier you just created a special track for your Octrainber MOC, that works also on curves (and it's not banal at all, working with standard parts!). This awakened again my idea to inspect better other gauges and scales. Yes, it's true, no real modeler or model maker will use a Lego parts-built H0-like track. It's only Lego on Lego, but this could open a lot of opportunities (even for static models only). I'm curious to see the Trevithick working on that fantastic track of yours! Share this post Link to post Share on other sites
Sven J Posted October 22, 2021 3 hours ago, Hod Carrier said: But for 4-wide display track would this be a bit more suitable...? Well, it looks great. Nevertheless, it's much too wide compared to the train itself... I know, this is also true for Lego's own 37mm track. But that's no excuse. Joking aside: I think a narrower track would make these little models look even better. Share this post Link to post Share on other sites
Hod Carrier Posted October 23, 2021 (edited) 20 hours ago, Tenderlok said: Joking aside: I think a narrower track would make these little models look even better. Oh yes, I do agree. But I think it might also make things a lot harder from the design and building perspective. Narrower track is one thing, but it also means narrower wheelsets. 23 hours ago, Paperinik77pk said: I'm curious to see the Trevithick working on that fantastic track of yours! I think it might be a bit ambitious to get a motor into this loco. It's part of the project that I've parked for the moment. A couple of nights ago I was busily laying plate in order to create a little display track. (As an historical aside - In the UK, people who worked on constructing or maintaining the track were often known colloquially as "platelayers" which dates back to this early stage in the railway's evolution.) Edited October 23, 2021 by Hod Carrier Share this post Link to post Share on other sites
Paperinik77pk Posted October 23, 2021 It looks great! Share this post Link to post Share on other sites
Hod Carrier Posted October 24, 2021 Having gotten myself a little distracted designing plateways (I suspect I may have been the victim of some gamesmanship at the hands of other entrants) I've managed to get myself back on track with some locomotive building. Construction has started on the Trevithick Coalbrookdale Locomotive. Believe it or not, this little lump of bricks is the majority of the loco showing just how tiny it is. The only details added at this stage are the firebox door at the bottom right, but you can see the attachment points for the chimney, piston motion, axles and gears as well as the improvised coupling to the tender. There is a void inside the loco which at present is only being used to accommodate the anchor point for the centre gear. Depending on it's precise size and shape, this would be where a Studly Tiny Trains motor might sit. The reverse side, but now with piston motion, guide bars and chimney. It's starting to look a lot more like a steam engine. I think you could finally call this a locomotive. Wheels, gears, motion, flywheel and connecting rods all now attached. It looks like it might be the rear, but maybe it's the front. I'm never quite sure. It's not Trevithick himself, but this splendid fellow in his terrific top hat gives a little idea of the scale. I'm very pleased with the way that the loco has come together. It's been a fairly straightforward build so far with only a few small niggles to correct and a minimum of parts to be changed. Obviously the Technic axle connector with bar holders (PN:24122) has had to be slightly altered with a needle file so that it will slide on the bar, but other than that everything so far has been unaltered. And slide it does, because the motion works, which is something that I'll be hoping to show. That said, there is a source of friction that took a little bit of tracking down. Having checked all the gears and axles, it turns out that treads on the flangeless wheels are actually rubbing against each other. I have just one more Bricklink order to come in and then I should have everything I need to finish this build, and then I can finally turn my attention to my other entries. Share this post Link to post Share on other sites
zephyr1934 Posted October 24, 2021 13 hours ago, Hod Carrier said: It looks like it might be the rear, but maybe it's the front. I'm never quite sure. Because of the stack location I've always assumed that was the rear, but you're right, it is ambiguous. I'm learning a lot from your project. If that is the front, it adds a whole new dimension, I can see the headline, "engine driver runs himself over as he tries to feed the fire." 13 hours ago, Hod Carrier said: It's not Trevithick himself, but this splendid fellow in his terrific top hat gives a little idea of the scale. An amazing little MOC, it is like those cool chairs made out of three parts and a wand sprew that are so spot on and leave you wondering, "how'd s/he ever come up with that?" Share this post Link to post Share on other sites
Paperinik77pk Posted October 24, 2021 59 minutes ago, zephyr1934 said: Because of the stack location I've always assumed that was the rear, but you're right, it is ambiguous. I'm learning a lot from your project. If that is the front, it adds a whole new dimension, I can see the headline, "engine driver runs himself over as he tries to feed the fire." An amazing little MOC, it is like those cool chairs made out of three parts and a wand sprew that are so spot on and leave you wondering, "how'd s/he ever come up with that?" I fully agree. Indeed it's a work of synthesis and style. Simple? It can seem so. Not so much parts, but each one has a specific function, plus it must work well with the other parts and keep up the overall look. I missed the comment on display track - I firmly believe the "inner" track is a complementary part to this fantastic MOC, since it is historically correct and functionally needed by the locomotive. It makes the whole creation "complete". Ciao! Davide Share this post Link to post Share on other sites
Hod Carrier Posted October 26, 2021 On 10/24/2021 at 3:31 PM, zephyr1934 said: Because of the stack location I've always assumed that was the rear, but you're right, it is ambiguous. I'm learning a lot from your project. If that is the front, it adds a whole new dimension, I can see the headline, "engine driver runs himself over as he tries to feed the fire." I suspect that, like many locomotives, there wasn't really any "front" or "back". But in this case, being the very first locomotive design, it's clear that the whole layout of the locomotive and how it might be operated hadn't received an awful lot of thought. For example, putting the firebox door directly below the motion would have ruled out firing it on the move (but then Trevithick probably never expected the loco to travel far enough to have considered it necessary). On 10/24/2021 at 3:31 PM, zephyr1934 said: An amazing little MOC, it is like those cool chairs made out of three parts and a wand sprew that are so spot on and leave you wondering, "how'd s/he ever come up with that?" On 10/24/2021 at 5:26 PM, Paperinik77pk said: I fully agree. Indeed it's a work of synthesis and style. Simple? It can seem so. Not so much parts, but each one has a specific function, plus it must work well with the other parts and keep up the overall look. As ever, you are too kind with your praise. The construction is fairly conventional studs-up with a few Technic elements. Anyway, back to the build. My final parts delivery has arrived and I have been able to complete work on the Trevithick Coalbrookdale Locomotive. I had slightly altered the design of the tender, making it a stud longer so as to add a couple of extra details, which meant that I didn't quite have everything I needed. However, it is all now done. The simplicity of the appearance does somewhat hide the complexity of the construction. With intrusions into the structure for things like the axle pins and the coupling to the loco, and only 3 plates in height to work with to make sure that it would still fit underneath the piston motion, meant that designing it to still be stable was quite tricky. It holds together well enough though, so I'm happy with the outcome. Now united with the locomotive, it looks like it was meant to be. I did promise to show how the motion works, and I am as good as my word. The final composition with locomotive and tender together on a short section of plateway (@Paperinik77pk your wish is my command). I am very pleased with the way this build has turned out and how well the end result looks. As mentioned above, it's not a particularly complex build as it is mostly studs-up in the conventional manner, but it still manages to give a good finish. I have enjoyed this build very much and have enjoyed receiving a lot of positive feedback and suggestions during the build which has helped me to improve the design that I originally presented. And now with this build finished I really should turn my attention to my other projects. Share this post Link to post Share on other sites
Feuer Zug Posted October 27, 2021 Your locomotive looks wonderful. I like the video with the motion. Simple, fits the time, but functional. The track piece to make a full scale diorama completes it. Share this post Link to post Share on other sites
Hod Carrier Posted October 27, 2021 4 hours ago, Feuer Zug said: Your locomotive looks wonderful. I like the video with the motion. Simple, fits the time, but functional. The track piece to make a full scale diorama completes it. Thank you, sir. That's very nice of you to say. I'm back again with news of my other entries, as construction of the Hythe Pier Railway electric locomotive has begun at last!! There is just enough room inside the cab to put a bit of detailing. The driver basically sits on a little seat on top of the electric motor. There is the brake wheel and the cover for the gearbox and chain drive down from motor to the axles. The cab is built up with brackets, plates and tiles in a studs-down orientation. Some LEGO was harmed in this area. Mating the studs-down cab to the studs-up chassis using probably a very well-known technique, but a new one to me. All together now. Although originally battery powered, the completed loco now has shoegear for electrical pick-up from the third rail. These little locos really do look like a tin out-house. Over the century or so that they have been in use, these locos have had a lot of modifications. They would originally have been symmetrical with a single windscreen on both sides like this. Now this is very much the rear of the loco with the front windscreen replaced with something larger. Whenever the pier railway is in operation it seems that the loco always carries a life preserver behind the cab in case of emergency. Whether this is for the benefit of the driver or for other visitors to the pier is not immediately clear. With the open side of the cab it is possible to glimpse the internal cab features. The Hythe Pier baggage trolley has been realised in brick. This tiny wagon really is as simple as it looks, weighing in with just 40 parts in total and not a huge amount of space for detailing. There really wasn't a lot of chance to report on this build as a work-in-progress because it was finished almost as soon as it was started. There has been one change in the design. I had originally planned to use Technic towballs and pin joiners for couplers, but I was unhappy with the size of the coupling gap. So I have reverted to using Technic liftarms instead which has meant a bit of a redesign was necessary. I am unsure whether or not to enter this for the contest, as I'm unsure if it meets the requirements. The category is "Industrial Wagons", and I don't feel convinced that a baggage trolley on a pier railway really is industrial enough. It's also not very interesting or complex. Thoughts...? Share this post Link to post Share on other sites
XG BC Posted October 27, 2021 looks really nice! the cab design is very clev Share this post Link to post Share on other sites
Paperinik77pk Posted October 28, 2021 This is really complex , and the little cabin is full of tiny details! It's a very interesting and original prototype too. Ciao! Davide Share this post Link to post Share on other sites
Feuer Zug Posted October 28, 2021 I like the cab interior. Looks cramped, but the essentials are there. The overall build works too. Small, yet functional for the purpose. The life preserver ring is a nice touch too. Share this post Link to post Share on other sites
zephyr1934 Posted October 28, 2021 On 10/26/2021 at 3:02 PM, Hod Carrier said: I did promise to show how the motion works, and I am as good as my word. It looks amazing! (the hand of g** has pushed me to it) 20 hours ago, Hod Carrier said: These little locos really do look like a tin out-house. That is an amazing little build. And you are so wrong, "few parts" does not equal simple. Your few part models are very complex. It is easy to hide hacks in large models, but there is nowhere to hide in these almost micro models. Share this post Link to post Share on other sites
Hod Carrier Posted October 28, 2021 (edited) 21 hours ago, XG BC said: looks really nice! the cab design is very clev 9 hours ago, Paperinik77pk said: This is really complex , and the little cabin is full of tiny details! It's a very interesting and original prototype too. Thanks guys. Yes, the cab was definitely the trickiest part to get right. I was surprised at just how few parts are available in Green, which I thought would be a common colour. As a result, the studs orientation changes from studs-up to studs-down back to studs-up again which, because of how small the build is, meant that I had to employ one or two rather ugly "hacks". But I did want to include at least some of the cab details. Luckily it was a simple layout with few controls. 4 hours ago, Feuer Zug said: I like the cab interior. Looks cramped, but the essentials are there. The overall build works too. Small, yet functional for the purpose. The life preserver ring is a nice touch too. Thank you. The cab is a squeeze even for a correctly proportioned and fully articulated human, so there's no chance of getting a minifig in there. Click for image. Along with the cab interior, the life preserver was a must-have, especially as the lack of green clips severely limited the options for any other greebling on the outside. 2 hours ago, zephyr1934 said: That is an amazing little build. And you are so wrong, "few parts" does not equal simple. Your few part models are very complex. It is easy to hide hacks in large models, but there is nowhere to hide in these almost micro models. That's very kind of you to say. Of the two locomotives I've built for this contest, I actually feel more fond of this tiny electric engine than I do of the Trevithick. My concern is actually over the baggage trolley which, although it looks fine as part of the pier train, really isn't competition standard. 2 hours ago, zephyr1934 said: It looks amazing! (the hand of g** has pushed me to it) Ha ha!! (Hand of God not to scale ) Edited October 28, 2021 by Hod Carrier Share this post Link to post Share on other sites
Hod Carrier Posted October 31, 2021 (edited) I've not been entirely happy with the Hythe Pier Railway baggage trolley as my entry for the Industrial Wagon category. Although it's definitely a wagon I'm not entirely convinced that it's sufficiently industrial nor that it's competition standard. So I've gone back to the drawing board, back to my original inspiration and designed a this covered tipper used in large numbers on the Guinness Brewery railway system to carry malt and other dry ingredients for the brewing process. Malt Train outside No.2 Brewery - Guinness history (1939) by Andy Brill, on Flickr This is very much v1.0 as I'm not completely happy with the shape of the lid or the end supports. It's also hard to get any real idea about colour, as very few colour photos exist of these little wagons and those that do seem to disagree. Even the black and white images suggest that there was a wide variety of shades in use, so I think I'll just freelance it and just go for what I think looks best. Edited October 31, 2021 by Hod Carrier Share this post Link to post Share on other sites
XG BC Posted October 31, 2021 nice idea and great with coming up with a different model for octraintober! Share this post Link to post Share on other sites
Hod Carrier Posted October 31, 2021 (edited) I've had a nice quiet day today which has allowed me to work up another late entry, this time for the Maintenance of Way (MOW) category. The contest this year is to celebrate the unsung heroes of the railways, and there really isn't a hero more unsung than this one. It's presence is frequently overlooked but it's role is vital. No other piece of MOW equipment is more important and no other carries out a task more heroic. I am referring, of course, to the Honey Bucket. Having already built an electric loco that looks like an out-house on wheels it seems only fitting that I should also build an actual out-house on wheels. There are a few rail companies in the world that seem to use these rail-mounted conveniences, but it appears that Union Pacific use more than most. In fact, they seem to operate quite a large fleet of them. My design is based around theirs. I've also been having a tinker with the Guinness Tipper Wagon. I've tried a different shape of lid, but I actually like this one less than the original version. Although it's curved across the entire width the profile is still not correct. So I've gone back to the original shape but made it a plate wider so that it overhangs the sides by a little more. This version also has amended end supports and grab rails which look a lot better than the former version. I'm thinking this might be the design that gets built. Edited October 31, 2021 by Hod Carrier Share this post Link to post Share on other sites
Ts__ Posted October 31, 2021 The toilet provided a laugh ;-) Really interesting and never seen vehicles here... Thomas Share this post Link to post Share on other sites