

Chilly
-
Posts
153 -
Joined
-
Last visited
Content Type
Profiles
Forums
Gallery
Everything posted by Chilly
-

Generic Contest Discussion
Chilly replied to Jim's topic in LEGO Technic, Mindstorms, Model Team and Scale Modeling
Contest idea - something (but not a vehicle, unless it's primary purpose is not driving) that uses one motor to perform actions, and second to change which action is performed. Think like the fork lift truck in 8082 - http://technicopedia.com/8082.html -
I'm sure I built the B model many years ago, but either I'm getting old, or I didn't finish it then. I can't get it together now. I'm stuck on page 227 where it rotates the last placed assembly. I don't have any photos of complete model, or notes in the instructions, so does anyone have this model and have any notes or hints as to how that bit rotates. It's all threaded on axles, that go through axle holes on the bent lift-arms. (It doesn't help that it's all black!)
-
8466 Diffs orientation
Chilly replied to Chilly's topic in LEGO Technic, Mindstorms, Model Team and Scale Modeling
Thanks all for your thoughts. The problem seems to be the gears added on page 59 are not staying where they should be, but are bouncing away from the diff. I can't see that I've missed a step, but who knows without taking it completely apart. I've solved it by adding a cross axle through the technic bricks, with a Technic Axle and Pin Connector Perpendicular 3L with Pin Hole 32068 joining the original axle in place. http://www.readypedalgo.co.uk/Lego Images/8466 - Page 59.png -
[MOD] 8466 Offroader
Chilly replied to Kumbbl's topic in LEGO Technic, Mindstorms, Model Team and Scale Modeling
For anyone looking for the link above, it's now here: https://www.designer-han.nl/lego/Modifications.html -
Just built 8466 (2nd/3rd time) and the engine/wheels are not happy together. Has anyone got one built, and could take a photo from underneath? I'm particularly interested to know if the diffs at each end are the same way round or opposite. Mnay thanks
-
B-models
Chilly replied to Roc_Xel's topic in LEGO Technic, Mindstorms, Model Team and Scale Modeling
8485 Control Centre has 3 models, (and 8094 has four, but only 549 parts) 8466 4x4 Off Roader -
Yes, I think you're correct. The HOG is a bit low and awkward to operate. I have all the extra pieces lined up on the table, so will have a go and see what it does. I've got the original book, just wondered what this mod was. Going to have a go.
-
Several years back, I bought a used 8880 Super Car, which didn't come with instructions. Before I built it, I found a paper copy. In the meantime I downloaded the instructions from Peeron/PICSL and had them printed and bound. I've built the car a number of times, but never used the downloaded instructions. I am now building the car again, and this time using the downloaded instructions (spiral binding is great, the book stays flat and you can fold it back on itself). I have now got to a page with handwriting on it, that I cannot read - my german? is not very good. Can anyone make sense of the below pictures, or can translate? 8880 Handwriting 1 8880 Handwriting 2
-
[TC28] Bobbin Winder
Chilly replied to Chilly's topic in LEGO Technic, Mindstorms, Model Team and Scale Modeling
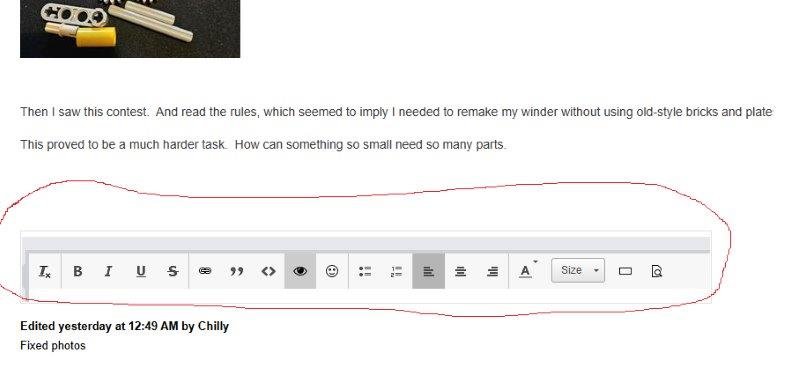
Thanks. I used the parts I already had. I'm happy with the first, studded model, so have given up trying to improve it. -
I am in awe of all MOCers Are there any admins that can remove this circled picture? I've tried many times, it just won't go away.
-
[TC28] Bobbin Winder
Chilly replied to Chilly's topic in LEGO Technic, Mindstorms, Model Team and Scale Modeling
Version 2 using new style Technic using more L beams and no baseplate. This one does work, no different to the original old-style Technic. Two and a half times as many parts as the old technic model Technic Pin Connector Hub Perpendicular 3L with 4 Pins to create holes for axles As an exercise I was quite surprised how many more parts were required to make this tiny model using new-style Technic compared with old-style. The old-style build was much more intuitive. Placing connector pins so each layer didn't interfere with the one above or below needed careful thought. I take my hat off to all those out there who design bigger models. You are amazing. -
[TC28] Bobbin Winder
Chilly replied to Chilly's topic in LEGO Technic, Mindstorms, Model Team and Scale Modeling
I've had two attempts at building the same winder, but only using new Technic, so no studs at all. First attempt was not rigid enough, I think the green baseplate is just too flexible. Tried putting the long beams around it to stop if flexing, but it wasn’t enough. The gears chattered more than often than they worked. Partially dismantled, showing base layer parts Technic Pin Connector Plate used as feet 3/4 pin used so can place on baseboard L beams used to try to stop bobbin being pushed away from gears Gears still not meshing nicely Abandonded -
For Xmas I bought myself the instructions and the extra parts that I didn't already own, to build Nico's Manual Braiding Machine. It's great, works just as it should. Except. I got bored hand-winding the thread onto the bobbins, if it was too loose or too tight or wriggly, the machine couldn't make good braids. I needed to make a winder. First attempt was with bricks and plates, I didn't even think I needed gears. Then realised that gears meant more wound yarn for less winding time. The bobbin itself was being pushed away from the gears, so a little wall stopped that. I then realised it took up far more space than necessary, so swapped out some bigger bricks for smaller, and a smaller baseplate. Great, it worked, but I was winding in one direction and the bobbin wasn't winding the direction I expected it to. Added another gear and that problem was sorted. I was happy, my first bit of free-style LEGO since I was a child. Nico’s Manual Braiding Machine Nico’s original bobbin My alternative, side by side with Nico’s. Hoping to use the extra beam to create tension on the thread. And a longer axle, so could add a gear for winding Can’t attach the bobbin to bricks as connectors prevent contact. Need to add a 1 x 3 plate. One gear, but gears not meshing as bobbin pushed away. One gear, with wall to resist bobbin. And smaller bricks Second gear added, so handle winds in more intuitive direction. This works perfectly. Then I saw this contest. And read the rules, which seemed to imply I needed to remake my winder without using old-style bricks and plates. This proved to be a much harder task. How can something so small need so many parts.

-
Just finished building this set. I had three attempts to get the earth/moon attached to the main module, and each time a gear fell out as I was fiddling! Third time worked fine. Until I discovered the earth is not tilting in the correct direction. Looks like I need to disengage the gears from the turntable, rotate the centre part and re-engage the gears. But. I can't find a way to do this without removing the earth/moon module and starting again. Does anyone have a solution to this? (Sorry if it's already been discussed, but I didn't find anything by searching.)
-
OK thanks, but I like a challenge, so I'll have a go at using beams and connectors. That will be more in keeping with the machine.
-
Well, two days ago, I'd never designed anything in Lego. Then I bought plans and the missing parts to make one of Nico's designs - the manual braiding machine. It's great, but winding the bobbins by hand was a right pain in the butt. So I designed a bobbin winder. It's old school Technic, using bricks, plates and gears. So I guess I'll have to re-design it to use beams instead. It'll probably be the smallest entry ever.
-
How do you tell what lenggth of axle to use? I am building Grohl's Trike alternate build of 8271 and have saved the file as a pdf. I also have the lxf file open in Studio.io, but can't find out which length axle to use in any particular step. Trial and error is too tedious. There must be a way........ Thanks
-
Wow, those instructions look brilliant. You've kept the old tradition of putting more than one part on a page And you've shared them for free. That's incredible. Thank you.
-
Done and voted, pheww, taken me all week.
-
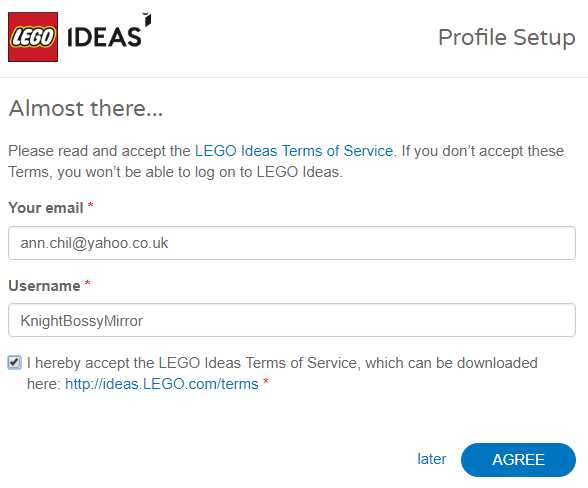
I've been missing from the forum for a while, just found this and want to vote for it. Has anyone else had problems logging in to Lego Ideas. I've re-set my password, and when I try to login it just ask me to create a profile Then it says: And then it goes round and round these two screens. Help please

-
Thanks guys for all the suggestions. I'll probably work my way through them over the next few years. I've bought 42059 as a starter, see how he gets on. His mum did tell me which sets he's into, but I didn't catch (remember) what she said. Might have been Ninja or Something like that. Anyway, we'll see. No problem with no pics, Yevhen, I coped. (I have 8880, 8435, 8466, 9398, 8455, 8462, 8110, 8094, 8485 so should be able to help if needed.)
-
Hi all Looking for opinions on which set, old, very old or current to buy for an 11 year old boy who has learning difficulties and is autistic? He loves cars, his dad has a blue Mitsubishi pickup, which he loves. He has Lego, and builds from instructions, but never had Technic. Yet. Love to hear your suggestions, thank you.
-
[VIDEO REVIEW] 10258: London bus
Chilly replied to Sariel's topic in LEGO Technic, Mindstorms, Model Team and Scale Modeling
Great review, thanks Sariel. Can't believe they've got the back looking quite realistic, and the front is rubbish. I must be getting out of touch as I think £110 is way overpriced. Might be a good pence per piece price (7p), but still too expensive. -
You'll be lucky to find a shop with any Technic, let alone a choice. Best for you to choose the first one and then see how you go from there. Next step could be to look at the books by Yoshihito Isogawa https://www.nostarch.com/technic_set.htm, available individually, and a box of second-hand technic bits.
-
Is there a way for you to add a number to each post in a thread? Another forum I use looks very similar to this in format, but each post has a number. It is very useful in a thread of many pages to refer back to a particular post, for example "see my explanation in post #45 in this thread". Particularly useful when you are on page 27! Thanks