

astyanax
-
Posts
1,191 -
Joined
-
Last visited
Content Type
Profiles
Forums
Gallery
Everything posted by astyanax
-
General Part Discussion
astyanax replied to Polo-Freak's topic in LEGO Technic, Mindstorms, Model Team and Scale Modeling
Ah, finally. But I bought the Sian in 2020 and it already came with the new pins like 65487. And it had color inconsistency issues like everybody else. -
With the cost of living here in Switzerland, it was never realistic to expect MOC sales would cover the time spent on making instructions. Unless maybe I had the talent, experience, and following of Nico71 or LoxLego, but alas that's not me. But even for them it must've been a long long road to reach break-even (assuming that they did -- I have no clue).
-
Depend how much one wants to earn, your expectations. I expect Lego to remain a hobby, i.e., something which costs money (but brings rewards in other ways). My only expectation is that yearly sales can recoup the cost of the Designer Plan. If after a year this expectation is not met, I may downgrade the plan. Without RB I would've sold zero anyway.
-
I upgraded to Designer Plan 2 weeks ago. I have 1 premium MOC published this spring, a large B model. According to the "MOC analytics" feature, the promoted views average 3 per day (min 1, max 8), on top of 25 non-promoted views. No new sales since upgrading. But a bit early to draw firm conclusions, of course :)
-
General Part Discussion
astyanax replied to Polo-Freak's topic in LEGO Technic, Mindstorms, Model Team and Scale Modeling
Theoretically you're right. But I often find that the stud does not stick well into the pinhole. Especially with connectors like and the stud falls out very very easily... -
General Part Discussion
astyanax replied to Polo-Freak's topic in LEGO Technic, Mindstorms, Model Team and Scale Modeling
Today I learned that this new pin (65826) from the VW T2 Camper (10279) is called the "bridge pin" by TLG. And that it indeed has an anti-stud. Could be very useful... Just hoping it won't stay color-locked in Bright Green! Source -
I'm sure they had some very tough discussions at BuWizz HQ about the trade-off between form factor and backwards compatibility... Whichever they let prevail, someone will then argue it should obviously have been the other!
-
Just wondering how you think the new BuWizz motor doesn't fit the bill here? https://buwizz.com/shop/buwizz-motor/
-
[TC20] 8448 ReStreet Sensation
astyanax replied to weavil's topic in LEGO Technic, Mindstorms, Model Team and Scale Modeling
Still very recognizable! Nice use of at the doors. Just those #13/14 panels above the headlights look off... The passenger-side one seems to be mounted further to the front than the driver-side one. Anyhow, both should be mounted further back -- and maybe they should be less wide or mounted further toward the center as well. Also the top of the windshield should be narrower I think. I do like the tail lights, looks cartoonishly angry, but in a good way haha! -
Yes they represent the blinkers of course. Just do an image search for "Ferrari Dino" -- highly recommended because it's a beautiful car to see! PS: I notice now in the photos that those blinkers are a different shade of orange... I just looked into my drawers and found 4 of , of which one is more 'neon' than the others. It seems TLG's color inconsistency problems manifest even in Trans-Neon Orange...
-
Free building instructions for the red version are now hosted on Rebrickable: https://rebrickable.com/mocs/MOC-84257/astyanax/ferrari-dino-246/ Thanks @JamesJT and @Thorsten50 for supporting the effort!
-
Cheers! I look forward to see the results in the other thread
-
Even if so, don't ever get provoked, it's not worth it! This is a Lego forum, let's just focus on the fun!
-
@barbanera What I can see is a ton of cosmetic changes, mostly using System pieces to close gaps and increase accuracy. You're approaching Model Team levels here haha! I quite like how you modeled the bottom of the doors. I can see the differences because I spent a lot of time tinkering with the model last autumn. But for others who are interested it might be good if you can highlight some of your favorite mods that you applied...
-
Not 100% sure but this topic might be allowed in this forum: https://www.eurobricks.com/forum/index.php?/forums/forum/7-community/
-
General Part Discussion
astyanax replied to Polo-Freak's topic in LEGO Technic, Mindstorms, Model Team and Scale Modeling
Price on B&P got reset to zero today, hopefully that means they'll become available soon(ish). -
General Part Discussion
astyanax replied to Polo-Freak's topic in LEGO Technic, Mindstorms, Model Team and Scale Modeling
I just checked out the instructions of set 75296 which is currently the only set to contain (two of) . But there is absolutely no reason they couldn't just have used . So the new pin's introduction remains to be justified... -
General Part Discussion
astyanax replied to Polo-Freak's topic in LEGO Technic, Mindstorms, Model Team and Scale Modeling
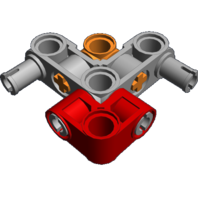
Hey this looks different.... https://rebrickable.com/parts/69819/technic-axle-and-pin-connector-perpendicular-double-split-reinforced/ -
It's just unnecessary, I think. The 'pimped' version with 2 shocks per wheel does not suffer from sagging (at least not when I built it).
-
General Part Discussion
astyanax replied to Polo-Freak's topic in LEGO Technic, Mindstorms, Model Team and Scale Modeling
I think of you type the element ID in the Rebrickable search box, it brings you to the corresponding part. -
General Part Discussion
astyanax replied to Polo-Freak's topic in LEGO Technic, Mindstorms, Model Team and Scale Modeling
Perhaps TLG doesn't want to change the usability of the part? For example, the 8-tooth gear fits next to but not next to . On the other hand, TLG doesn't seen to mind breaking usability, seeing as they are currently replacing lots of parts with bar-accepting pins to molds with squared pins... -
Over the last year I've shifted to building in LDCad first, to make a full virtual mockup, testing only small tricky subassemblies as table scraps. Then I order parts (if needed) and build the physical model. Finally I update the virtual model with the improvements I came up with while building. But this really only works if you're very proficient with the software. With LDCad I know all the shortcut keys and so I'm very fast. I find it very convenient to quickly try alternative solutions in virtual reality, because you don't have to take apart the whole subassembly just to swap a buried pin or connector. I never managed to get a good workflow in stud.io.
-
[MOC] Azure V8 Racer
astyanax replied to apachaihapachai's topic in LEGO Technic, Mindstorms, Model Team and Scale Modeling
Awesome stuff, thanks for sharing!! -
General Part Discussion
astyanax replied to Polo-Freak's topic in LEGO Technic, Mindstorms, Model Team and Scale Modeling
. -
General Part Discussion
astyanax replied to Polo-Freak's topic in LEGO Technic, Mindstorms, Model Team and Scale Modeling
Set 71389 (Mario theme) will bring the 15L beam in Dark Azure for the first time.