
-Mini.jpg.22fd9f6228faf03e40c193dcf09aa9d0.jpg)
Andy Glascott
-
Content Count
342 -
Joined
-
Last visited
Posts posted by Andy Glascott
-
-
I’m pretty sure a 1 wide plate will stick to the underside of the track along the length of the track, maybe try that? I can’t remember what the underside looks like but do remember the metal connectors are underneath so it might not be possible to run a couple of 1x8 plates the length of it…
I’ll have a look at mine later and see if there’s anything else I can think of.
Update Yes, I was able to put a 1x12 plate under the crossing, across the gap where the metal connections are, attached to the underside of the rail.
-
It is possible to run two trains with one transformer but when running both at the same time they will be slower than running one at a time. If you want to run two trains your best option is to have 2 distinct loops, such as the layouts Tassier posted, otherwise you will have to make sure you can stop one easily before it catches up to or crashes into the other (no two trains run at exactly the same speed!).
Two loops connected by points/switches will always have power in the 12v system, though another option would be to have two loops that aren’t physically connected and run wire from the transformer to each loop.
-
Lego track doesn’t easily work with corners that aren’t 4 sections of curved track, so the irregular corners top right are what are causing the misalignment. 3 curves followed by 1 straight and then 3 more curves turning the other way do align with the regular geometry.
-
I’m not familiar enough with the components to name them accurately but it’s easy enough to make a switch that will isolate a section of track for you in a siding.
First, place a piece of tape between two sections of track where they connect, just on one side of the track, then repeat this further down, say 2 track sections or 32 studs, again on the same side of the track. This creates a section without power.
Second, connect one end of a wire to the track on one side of one of the pieces of tape, for arguments sake, about 12 inches/30 cm long and connect the other end of it to the track on the other side of the tape. This bypasses the tape and provides power to the “dead” section. Now fit a simple on/off switch in the middle of the length of wire. When it is on, power reaches the dead section of track, when it is off, it doesn’t. Use a longer length of wire to have the switch closer to your control panel. The old 12v track system uses exactly this set up.
If you use this in a ladder situation you only need one piece of tape as there is no power reaching the track from the end of the siding.
-
I brought my collection of 9v and 12v trains over from Europe to the US and have run multiple controllers off a voltage converter with no problems.
-
Thanks @Murdoch17. I’ve found that working on a section at a time has really helped me focus on getting things like that right, it went through a few changes when I first built it and then again after a couple of shows.
-
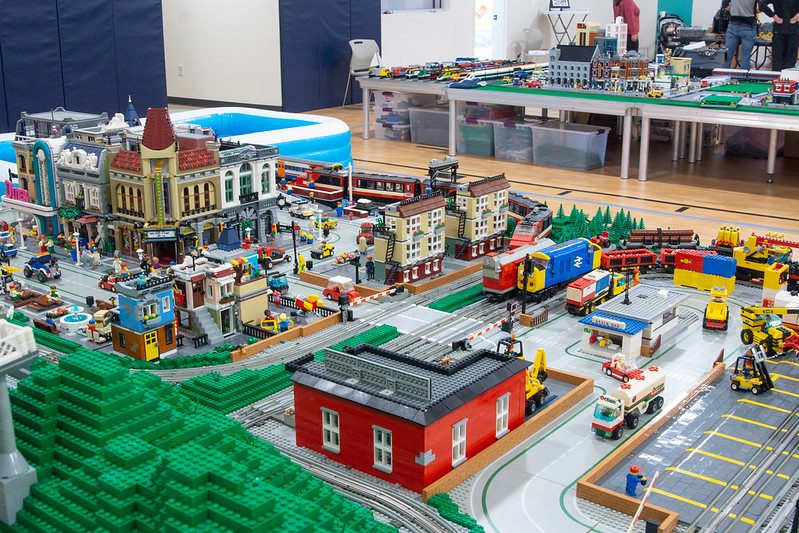
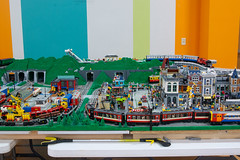
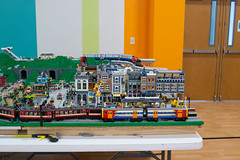
Ok, photo update! I had the whole layout at my LUGs show on Saturday, the first time I've seen all nine completed modules together, so yes, I took pics! I had hoped to stitch some together to make a single image with the whole thing from the front but that didn't work out, so here are the 4 pics that would have made that image up:
(I'm hoping at this size they'll come out side by side...)
These two show the full layout from either end/corner on:

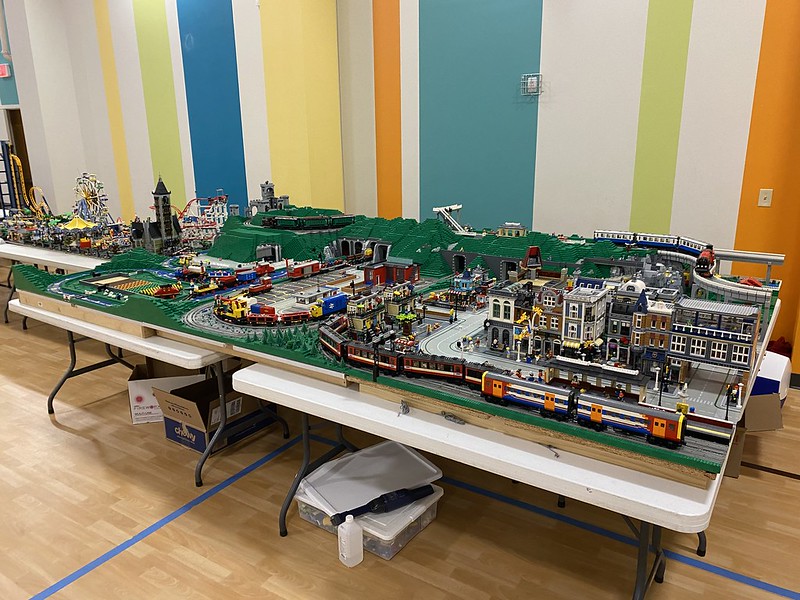
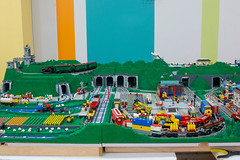
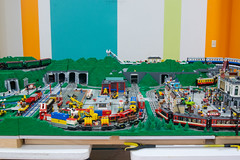
And then a few pics of different areas/angles:

There are a couple of other images over on Flickr too. I hope you enjoy the images, it's been a fun build so far, with a bit of luck the whole thing might be finished for Brickfair VA in August. Of 2026!
-
Thanks @Electricsteam, I took so,e pics yesterday and will sort through them and get them posted by tomorrow evening.
-
-
1 hour ago, Vilhelm22 said:Another fantastic expansion to the layout! Are we able to see multiple modules together or is this not possible with the amount of space you have?
Thank you. I'll be setting them all up next weekend at our LUG's show so will take pics of all 9 modules together then. Events are typically the only time I can put it all together.
-
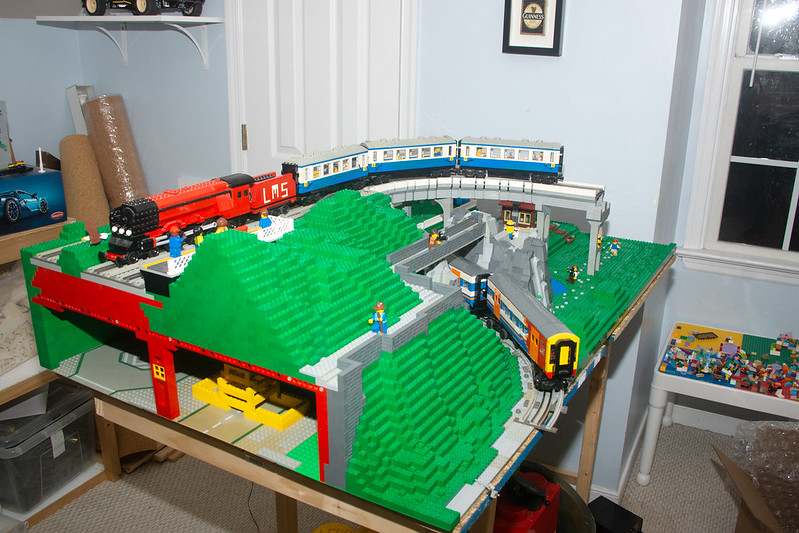
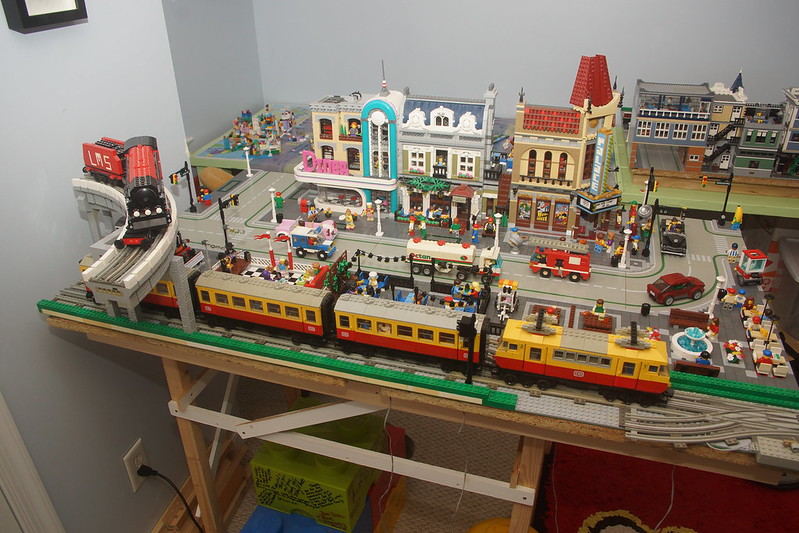
So, 2 years in and I'm officially half way, module 9 of 18 is complete, pics below. It's very satisfying to get this far, there were times I wondered if I had taken on too much... To be honest, I still think that occasionally! I've had to rebuild the storage and transport crates over this past winter too, which slowed progress somewhat. Next week I'll actually get to see all 9 modules together fore the first time at our LUG's annual show in Richmond, VA.
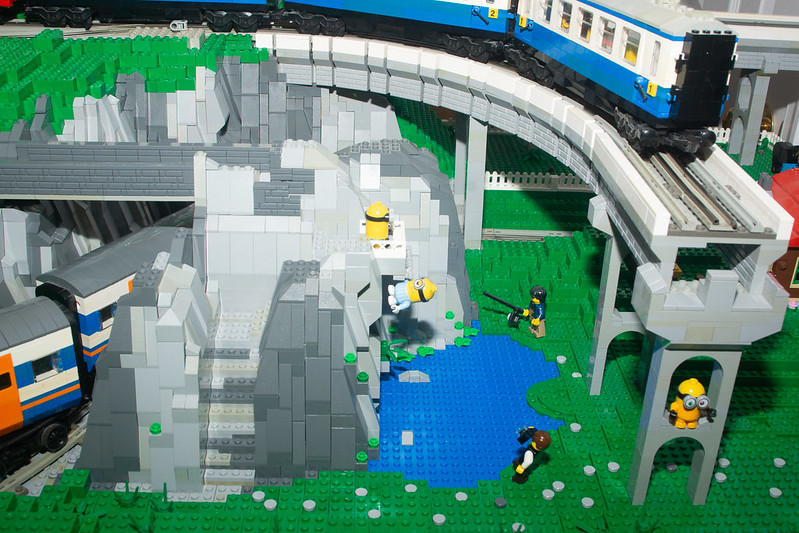
This one probably gives the best overall view of the module, the two ends of the upper track will eventually connect to make a loop, the lower section is a siding off the main city loop that will have a small station near a beach are on module 12...
From the other end showing some of the internal supports and old baseplates used! It has been a challenge to make sure the profile of this hill section matches the module it will be up against.
Lastly, who can resist a few Minions getting up to a bit of mischief?
-
That’s a radically different loco from the original submission…
-
30 minutes ago, Duq said:And as Dublin found out the hard way soon after the introduction of the 55m trams, if your tram is longer than the bridge in the centre of your city, and you have traffic light either end of that bridge, you end up with a tram stopped at the lights on one end, while it's tail still sits across some traffic lanes on the other...
Why am I not surprised by this….? 😂 🇮🇪
-
Very impressive @Duq, instantly recognizable and you’ve done a good job on the cab too with the different angles involved.
-
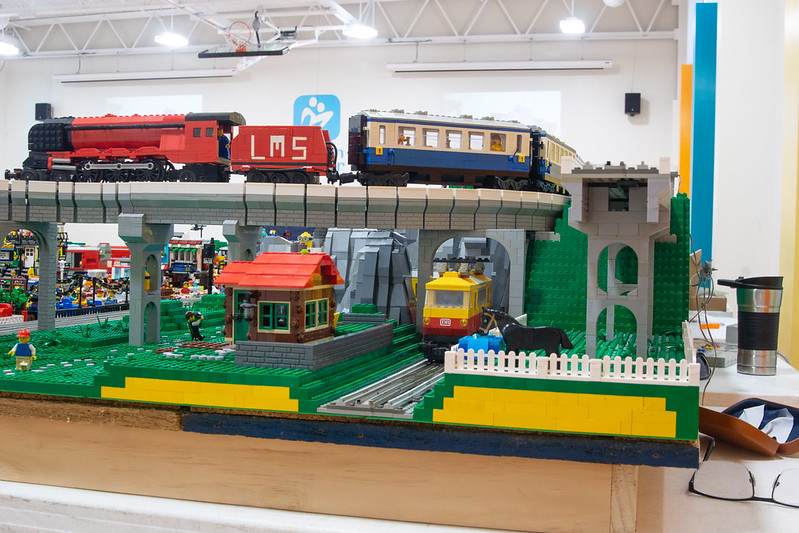
So, module 8 is complete. Not a huge amount of track on this one as it's in the middle of the city section of the project but it was challenging working out how to do the curved section of raised track. As well as crossing the lower level track it's also a point where the curve goes to another module so in the end I decided to build a 4-track section that drops in when the 2 modules are next to each other rather than try and fix it in pace and line the two sections up that way.
The full module.
The classic 7740 poses under the viaduct with my MOC Duchess of Sutherland loco (which is on the list for a full rebuild) on the viaduct.
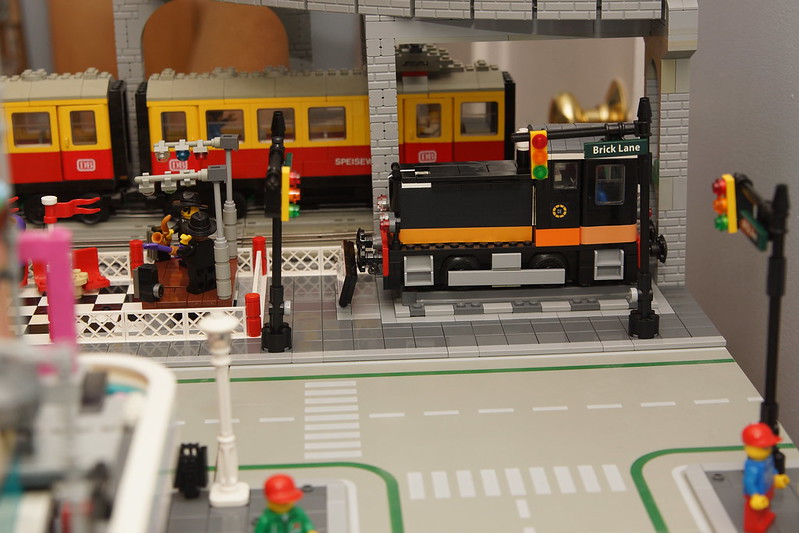
My Irish Rail G Class shunter has a static display space on the module and will probably run on the full layout occasionally.
-
Really nice carriages there!
-
My guess is the 9v motors will cope with 12v of power. I asked a similar question a few years ago and it’s safe to run a PF motor at that voltage so it may well be ok for the RC ones too.
-
But but but… 12volt…? Yeah, I’m living in the Lego past… 😂
-
That’s very impressive, particularly for a 6 wide loco!
-
In terms of 12v sets/trains @Reker1000000 I have a 7740 and 7745 as well as 5 MOC locos/trains.
@GoHabsGo I haven’t got the space for this either, it only gets set up in full at events.
-
A couple of years ago I picked up a pair of these 9v motors to see if I could use the motor inside to repair my 9v train motors - short story, no
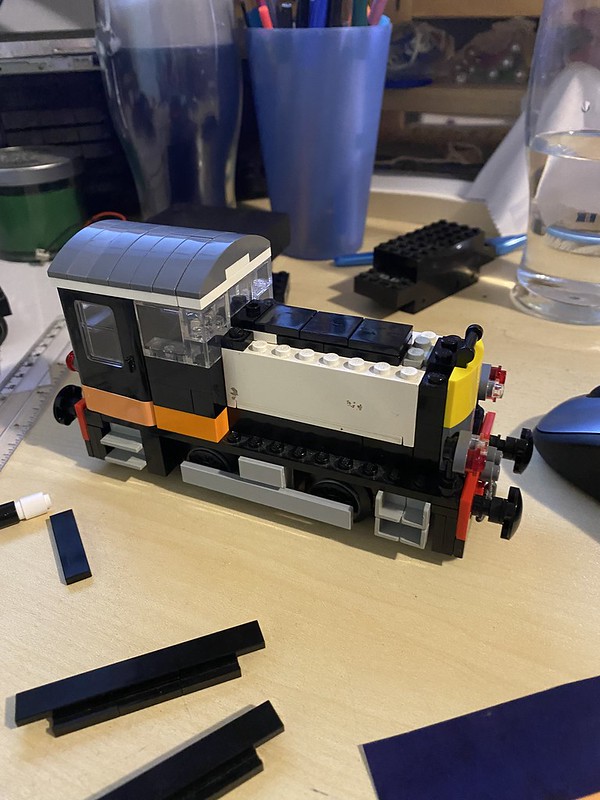
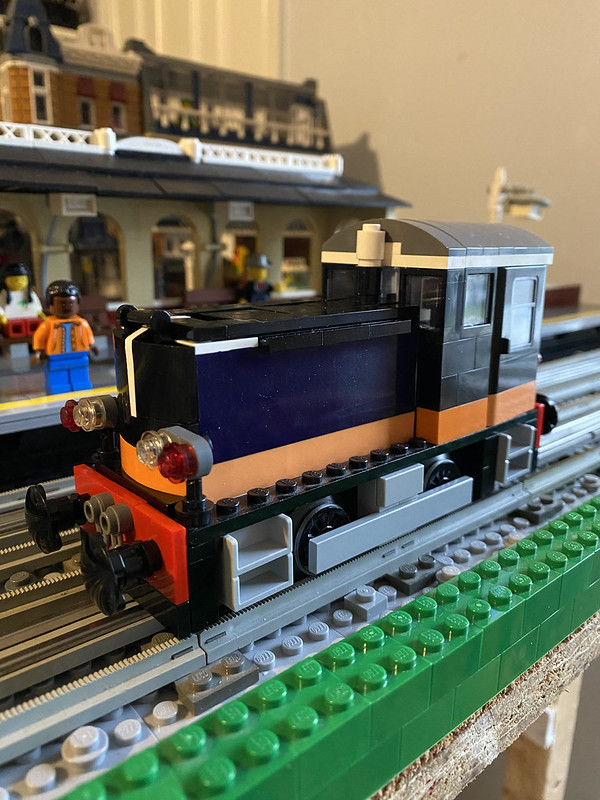
 - but they sat on my desk on and off ever since and I pondered how to use them. A couple of weeks ago I started playing with the idea of an Irish Rail (or CIE back in the day) Class 601 shunter:
(This and other reference pics from the Irish Traction Group and Downpatrick Railway). The 0-4-0 wheel arrangement and relatively simple body shape looked like a good fit for the motor powered by a 9v Light and Sound battery box sitting on top of it.
A couple of Bricklink orders later and I'm very happy with the finished product, even if the color matching on the stickers to cover the battery box is a little off.
It's a fun little engine to run, though it only goes in one direction thanks to the limits of the 9v battery box, but I wanted a pure Lego loco. (The only butchery I had to do was to the connector from battery box to motor, like most of them the insulation was crumbling so I cut it short and tidied it up). Overall, I'm really pleased with it and thought I'd share.
-
Well, that took longer than expected! I finally got started on the next module about a month ago after a 6 month or so break for other stuff (more on that later), but am back online with a couple of pics to update anyone following this thread. This loop will be the centerpiece so to speak of the whole project, a 12v loop with three trains featured though only one running at a time. Here's the plan for the loop, which when it's finished will have 2 other lops one the left and 1 more on the right (see previous posts).
The first complete module is for the bottom left of that, and includes a simple single platform station.
Also included is my first ever modular, which will connect the two blocks of modulars that will be the main part of the city.
It's been good to get back to building Lego again, after a couple of shows last year I realized I had to revamp my transportation system for getting the layout to events and so spent the winter building storage crates for each of the first 6 modules which double as the base for setup at shows. The next few modules shouldn't take too long to build so hopefully there'll be some more updates over the next few months.
-
18 hours ago, Electricsteam said:Biggest flaw, very hard to tension, one wrong move and you are knocking down half your towers.
You could cross brace the towers easily enough, if you’re at Ashland train day I can show you how I brace the mountaintops on my layout.
-
Good points about the different buttons @HoMa, I knew there were differences but don’t know the internals well enough.


Bending 12v crossing? (7857)
in LEGO Train Tech
Posted
Here you go - https://flic.kr/p/2pLJC3U