
Anto
-
Content Count
164 -
Joined
-
Last visited
Posts posted by Anto
-
-
Your prototype is interesting, but in order to be used, the axle connected to the 8t gear has to have positions multiple of 45°. Here, the positions are n times 45° + 22.75° - you can't make the cross axle perpendicular to the liftarm. If you want to correct this, you must change the lock-mechanism a little, but it will be way harder to create a clamp that is able to push the teeth of the gear. It's hard to explain, but if you try, you'll understand what I mean! (I hope
 )
)
-
@R0Sch: I also had the idea to use 2 knobs, but I don't have gray knobs to test in real life... Be careful when you try to design a stepper in Studio, because in real life, even when you think that it could work, you often have bad surprises. So with a virtual design, it's even worse!
Anyway, these prototypes are interesting and must be tested in real life!
3 hours ago, Davidz90 said:I wonder if it's possible to build something like this but with 8t gear. Did some experiments, I could do a single direction stepper no problem, but two-directional one eludes me.
I have quickly tried, and it seemed compromised. The tooth are so small that it's hard to push on them correctly. It's also difficult to make a good 45° lock-mechanism using 8t gears.
-
I'm back with something new!
For my new gearbox, I needed a 45° shifter. At first, I reproduced the one of the Yamaha MT-10 SP, but I was not satisfied with it. Indeed, I didn't like the feeling (you have to assist the lever until the gear is shifted, it doesn't feel like a keyboard touch) and the return to center doesn't work properly. This is why I decided to work on a new shifter having the following features:
- "Keyboard" touch
- Uses only one 8 tooth stepper gear
- More compact 45° lock-mechanism
- Working return to center
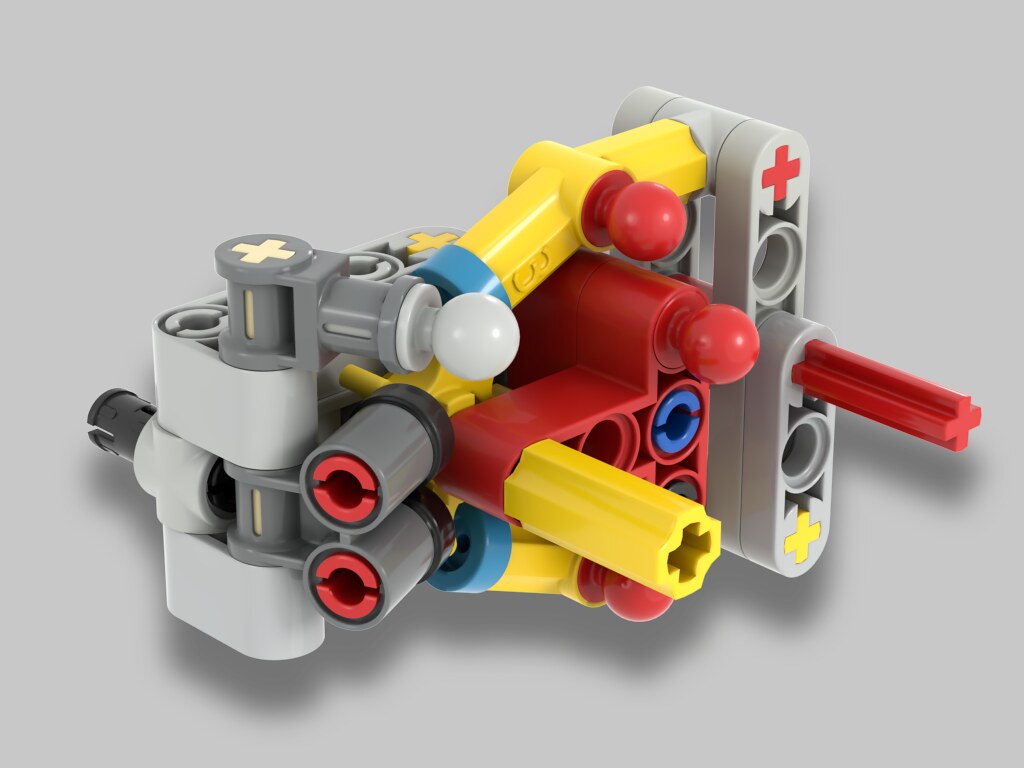
The architecture is based on the one of the shifter from the Bugatti Chiron, using 135° connectors. Here, I used a tile round with bar holder to obtain the right distance between the connectors and the gear.


The result is a compact shifter with a nice feeling, a working return to center and that only uses one 8 tooth shifter gear.

Link to Rebrickable: https://rebrickable.com/mocs/MOC-175515/Anto/45-stepper-mechanism
-
Here is the video!
-
23 hours ago, gyenesvi said:[...] or they go for 8 speeds rather, maybe adding a DNR selector before it, and whether we get clutch gears in new sizes.
It is the most probable option in my opinion, to stick with the previous 8+DNR gearbox architecture. But an 8-speed gearbox would be harder to make, because you can't easily get 4 different speeds on a same axle, like @Stereo explained.
15 hours ago, 2GodBDGlory said:Well, that one's not going to be possible without adding some kind of multiplier or secondary gearbox, because these wheels only have eight different positions! It'd be cool to see a more advanced one like that, though!
Yes, it's possible, but too complex for only 2 more gears. However, it's interesting to notice that the new 8 teeth stepper gear perfectly fits pins, so you can make something similar to my 8+N+R gearbox using a pin instead of a microphone, to have 1/8 of a turn in output for each turn in input - or more.
 28 minutes ago, SNIPE said:
One thing I found that works is this:
This is interesting, but what does this solution add compared to the forks, except the price of the parts?
-
I'm happy that you like this gearbox!
17 hours ago, 2GodBDGlory said:One other thing I was realizing is that linear clutches could be used to get any kind of offset desired, as long as there isn't enough resistance to make them skip. Do you think that could open up more options for gear orders, @Anto? It wouldn't fit in this gearbox, though
I didn't check if they can allow 45° offset - anyway, it's not an elegant solution to me, a fixed assembly is still the best in this way. Moreover, a clutch wouldn't allow more shifting options. On the selectors, all the letters have to be aligned, so you need a multiple of 45° offset.
13 hours ago, Davidz90 said:Very impressive! I thought that the new parts will result in a very large gearboxes, but this is remarkably compact.
Thanks! That's what I thought at first, but the new 2L driving rings allow to fit allmost everything inside the frames.
12 hours ago, Stereo said:Now that I see your calculations, it's making me puzzled why Lego did the 45 degree offset in the two axle holes of the drum. Cause I see that, to run shifters on the two sides of the drum, each drum has a LR**RL** pattern, which means they have to be 90 degrees offset from each other (+-90) to hit all 8 gear selections at different times. And flipping the drum end for end doesn't change its pattern, it's a symmetrical part that way. So you need to undo that 45 rotation between the drums. The text engraved in the drum means flipping end for end "shouldn't" be a problem for expert builders but maybe they wanted that symmetry.
I had the exact same reflexion. The best explanation I came up with is that it was the "less worse" configuration for:
- 4-speed gearbox, like the Yamaha, where the 45° offset is used.
- 8-speed gearbox, when the 45° offset can be cancelled. But it's impossible to make a dual-clutch gearbox structure.
- 6-speed gearbox, where 3 cylinders are on the same axle. But it requires more space than an 8-speed geabox for fewer gears and only 6 positions on 8 of the stepper are used, so this configuration seems useless.
So I can't figue out why they made this pattern neither the 45° offset, this seems to only bring issues.
 That's why I'm so curious to see the next supercar.
11 hours ago, Stereo said:
That's why I'm so curious to see the next supercar.
11 hours ago, Stereo said:Yeah, I've got a feeling there's some way of getting it to do the right thing, maybe with a new part or just different way of integrating things.
[...]
For example, bar with towball into a half pin could access the 45 degree points, or if you could place a ball just past the axle the shift fork slides on. (this second one's not really secure enough; the thin liftarm constrains rotation but not completely. I don't have the parts from the bike to test whether it functions in practice. A 'dummy' second fork would make it rigid but get in the way)
This is an interesting way to solve the 45° question, but it's a rather complex solution (more than the one I used), which doesn't explain why LEGO chose this design since they started from a scratch.
Like you said, the forks are really interesting to make a realistic manual gearbox.
-
INTRODUCTION
This gearbox is the successor of my previous 8+N+R-gearbox. It is based on the new parts released on the Yamaya MT-10 SP #42159. Thanks to these, I could make a new and better gearbox for 1:8 manual supercars.


Thanks to the 8 positions by rotation, I made a 6+N+R gearbox. The best arrangement I found was to put 2 cylinders between 2 shafts, each cylinder controlling 2 forks. Thus, I would need 2 cylinders to make the 8 positions I wanted.
VIRTUAL DESIGN
I started with simulations in Excel when the parts were not available yet. The purpose was to virtually recreate the functioning of the new rotary cylinders to find out a configuration that worked. So, I reproduced the sequence of the cylinders.
Then, I created an offset between the 2 cylinders. To make the best gearbox possible, it was necessary to obtain:
- Reverse gear on an extremity of a shaft
- Not 2 gears engaged at the same time on the same shaft
EXCEL TABLE
The Excel table may seem hard to understand, but the main difficulty is because I made written in French!

The first column represents the positions of the rotary cylinders.
The second column is used to create an offset between the 2 cylinders. I tested all the configurations and keeped the ones that respected the criteria above.
Then, I used the supposedly working configurations to calculate the possible gear ratios. The sub-table called “Transitions” corresponds to the ratio between the two main shafts.
Then, on the sub-tables on the right, I put the gears on the primary and secondary shafts to get 3 different ratios on each shaft, placed in the correct sequence, for each remaining possible
configuration.
I got only 2 possible configurations (A and B). Other configurations exist, but they are symmetries of these two configurations, so they are useless.
I finally came out with only one possible configuration, which is the one I realized in Stud.io and in real life.
IMPROVEMENTS
Compared to my previous gearbox, this new version features:
- Way better efficiency
- More compact, easier to integrate into a chassis
- More reliable gear selector
- More realistic and easier to understand
- The shifter can be less robust
- The input and the output are centred, and can easily be moved
- It is reversible, meaning that you can power both the input and the output
- Gears better staged
HOW IT WORKS?
The way it works is close to a dual-clutch gearbox - however, the exact same operation cannot be achieved due to the way the sequence of a rotary changeover cylinder is made.


The ratios are better staged than the ones of my previous gearbox. The reverse gear is situated between the 1st and the 2nd gear, making it more realistic.
- R: -0.375
- N: 0
- 1st: 0.25
- 2nd: 0.45
- 3rd: 0.50
- 4th: 0.75
- 5th: 0.90
- 6th: 1.50
A simple mechanism prevents from shifting from 6th to reverse gear. This mechanism can easily me moved to another place (for instance close to the shifter) though.

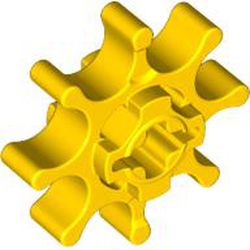
The centre changeover cylinder is used to create a 45° offset between the two other cylinders. However, to spare a part, you can use one of the following assemblies.

VIDEO
REBRICKABLE LINK
Here is the Rebrickable link if you want to test this gearbox! https://rebrickable.com/mocs/MOC-171508/Anto/ultimate-6nr-gearbox-with-forks/#details
I’m wondering what the gearbox on this summer’s supercar will look like. It should either be pretty similar, or totally different. What do you think?
-
Wow, the amount of functions you packed into this model is unbelivable! Even though the mechanism to select the pneumatic switches is not 100% reliable, that's a pretty good concept, never seen before!

Now I want one!
-
Your entry is absolutely incredible!
You made the right choice with the #8284. It's a quite empty set so you were able to reproduce everything without any compromise. Even the building of the chassis looks the same, every single part looks like the original one!
Great job!
-
Thanks!
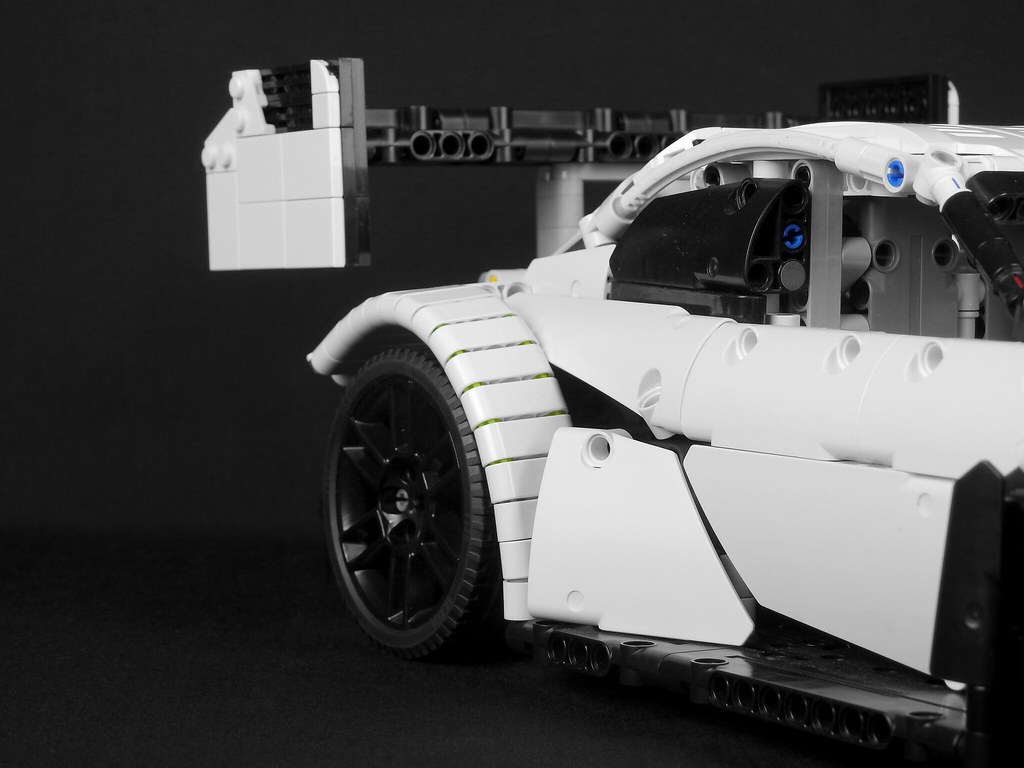
 On 4/25/2023 at 3:23 PM, Teo LEGO Technic said:
Did you find that the brick-built panels on the sides of the spoiler fall off easily, or was that not an issue?
They hold pretty well. They are attached by 4 half-pins and do not fall, even if you push a little on them.
On 4/25/2023 at 3:23 PM, Teo LEGO Technic said:My biggest question for you is what tools did you use for the video editing, cause it's just stunning

Thank you, I'm happy that you like the editing because I spent much time on it to try to make it look cool to watch!
I edited the video with Hitfilm Express. It's a free software but you can do a lot of things with it.
For the camera movements, I mainly used a GoPro Hero 9 fixed on a tripod, with wipe underneath, so it was easier to have smooth shots. For a few shots, I directly slided the camera on the background (homemade with plywood and a black fabric on it) or slided the camera with my hands between it and the fabric. Sometimes, several tries were necessary to obtain a satisfying result but it was not too much difficult. :)
-
Thanks! I'll make a RC version, I just need to find time to work on it!

-
Thank you!
Indeed the wheels were perfect for this model, since they look really close to the ones of the real car and I couldn't have done it with other rims of this diameter - because the ones of the Discovery have got an offset, allowing a shorter width!
On 1/26/2023 at 7:36 PM, Thirdwigg said:While I generally struggle with non-LEGO parts, the pink version looks terrific.
Yes, I didn't want to make a non-LEGO model just because I was asked to, I wanted to make something pretty unique that wouldn't seem a great idea when you thought about it (Barbie's car?) but that actually looks nice!
On 1/26/2023 at 7:36 PM, Thirdwigg said:Also, I love the wheel cart and jack. Perfect.
It's a while since I thought about this but I didn't have an appropriae model for this!
-
Thanks!
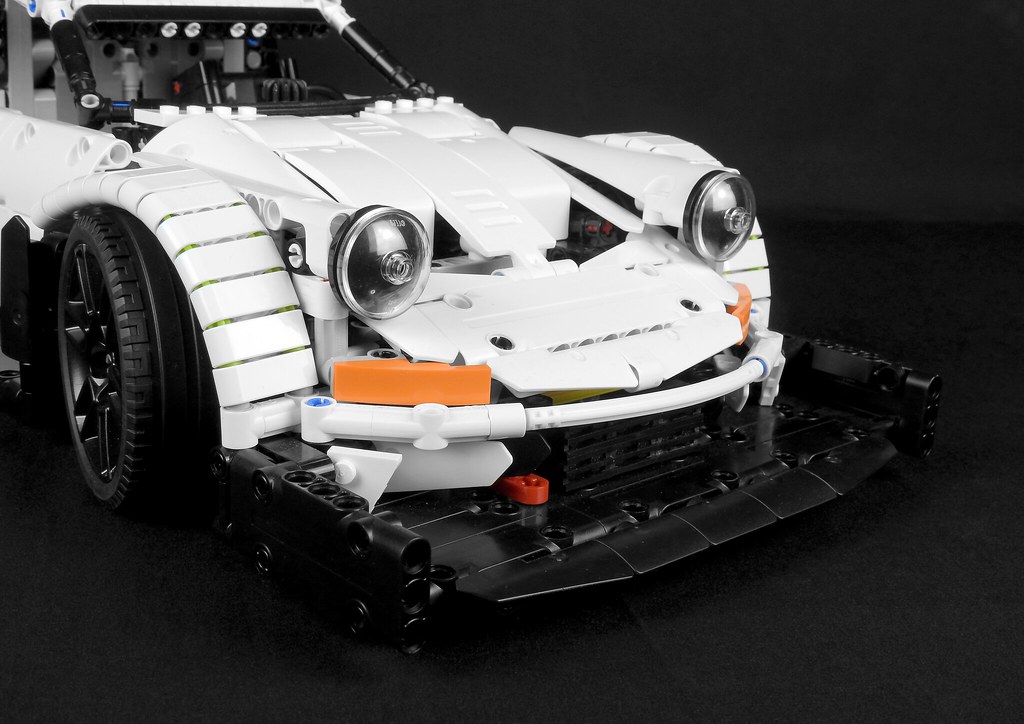
On 1/25/2023 at 10:24 AM, Aleh said:Critics: with those vertical front lights itseems that car was scared of something
I agree with that, it was a challenging point to make. I tried several things: using flex axles, other panels, studful... But I could only get an average result from every angle. With the panels I used, I got a pretty nice result when you look the car from the front and the sides, but not as convincing from the top. I prefered something really nice from most of the angles that something average from everywhere.
-
-
Thanks! Check your inbox. :)
-
Thank you for your comments!
18 hours ago, astyanax said:But may I ask why the Lego version has no taillights?
The original Hoonipigasus is still in developement and on the first pictures, there were no rear headlights nor visible exhausts (there were holes but no pipe). But more recently, I found pictures on which rear headlights were added. As I build two versions of the car, I thought it could be interesting to have a version with readlights and another one without.
-
My new model will be something quite unusual.
To begin, I would like to say a little word about Ken Block. After revolutionizing what’s possible with a car and cameras, including rallyes, snow board and more – he passed away in a snowmobile accident at the very beginning of the year. This model will rather be a tribute than the representation of the car that he was to drive at Pikes Peak this year...
The origin of the project
Back to July 2022, I was contacted by WeBrick. They asked me if I could build a model using their parts. They provide adaptable LEGO parts, and their main advantages are the number of available colors (no limitations contrary to LEGO, for instance due to the few colors for mudguards) and the cheap price.
This is why I accepted: it was an opportunity to create a model that I could’t have imagined with LEGO parts.
I could choose any color and avoid all the color issues that you meet when you build with LEGO parts. Furthermore, it was possible to bring a MOC that is not more expensive than the equivalent LEGO sets, whereas usually, MOCs are way more expensive than sets.
I won’t add more details about WeBrick, because this is not the main subject of this topic. I thought it was necessary to quickly explain why I accepted to build a model with non-LEGO parts and why I chose to reproduce the Hoonipigasus. So please, if you have any questions or remarks related to WeBrick, contact me by private message or by social media to keep this thread about my model.
And you know what? There's even a 100% LEGO version!

Choice of the model
My model had to be built around these two main aspects:
- A never seen color
- An affordable price for a nice looking and functionnal model
This led me to the Hoonipigasus in 1:10 scale (1:11 to be exact because the wheels are huge). The aim was simple: do better than LEGO’s 1:10 scale models.
Eventhough the Porsche and the Ferrari have got a pleasant design for a
lowless high price than the 1:8 supercars, they are missing interesting functions. I wanted to provide a design at least as good as these cars, but with more interesting features. My model includes:- Steering with return to the steering wheel and a HOG
- Openable doors and trunks
- F1-type suspension
- 4-speed sequential gearbox
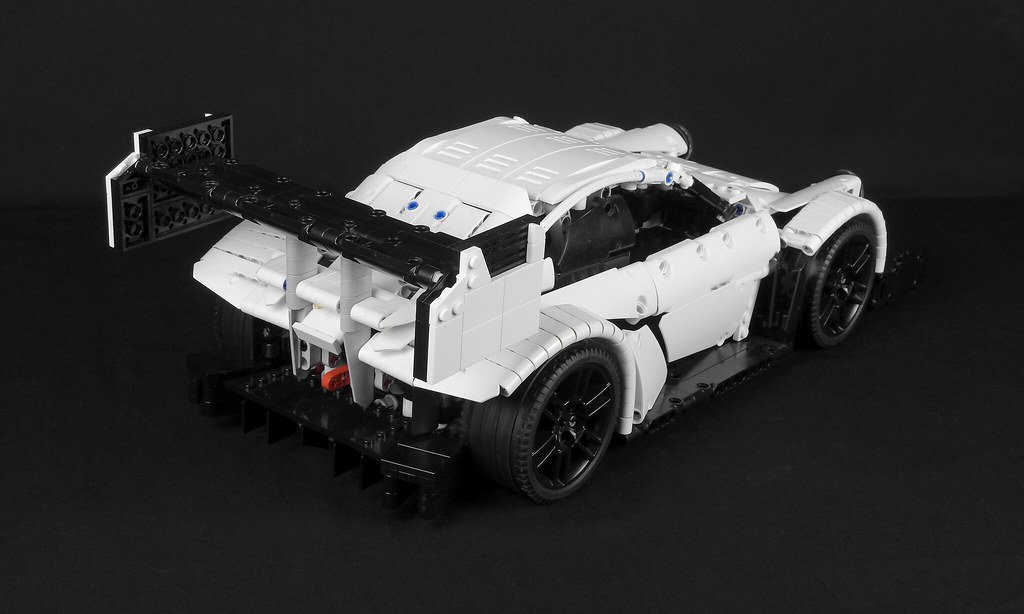
Here is the result:


Design
The most important thing I understood about design is that what looks best is when the panels are placed in the simplest manner, so the result looks simple. But it isn’t.
That’s what I noticed on the Predator and the 1:8 Porsche of LEGO: everything looks simple, without angles between the panels, but this looks really nice. I tried to do the same thing on my model, with parts tilted around one axis at most.


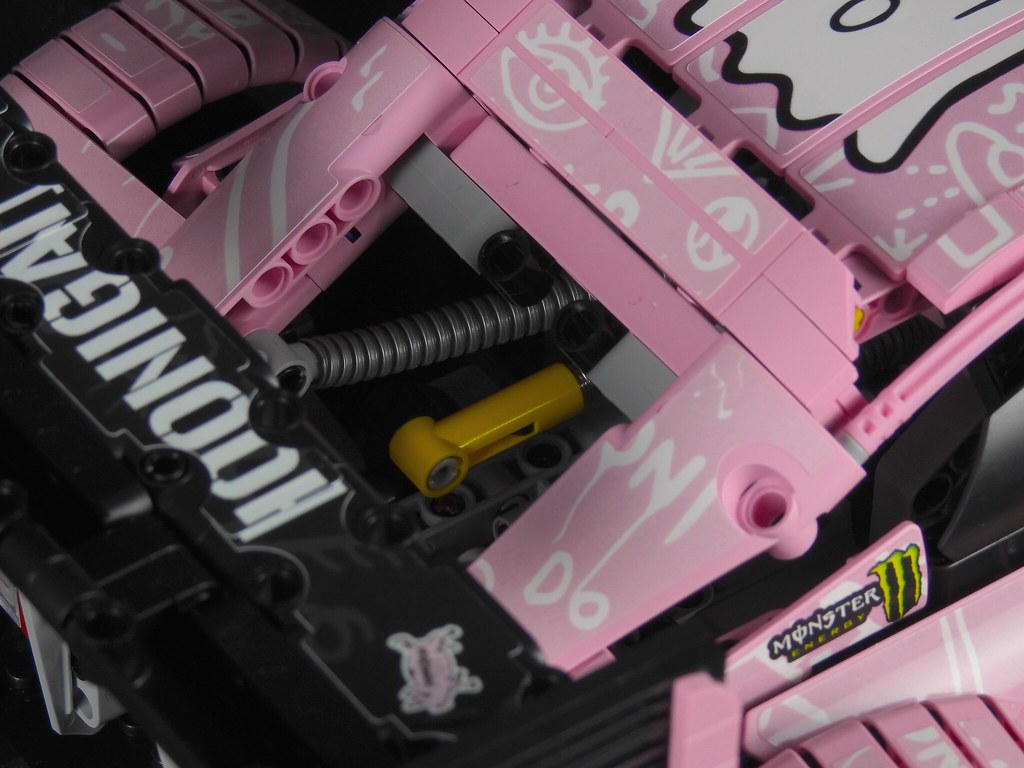
I longly wondered how I would replicate the mudguards. The real car was widened a lot, and the mudguards have got a really low profile, making impossible the use of LEGO mudguards. Flex only would have resulted in a too empty result, and I was afraid that using flex + beams would look too heavy. But finally, flex and beams look fine. On the rear, I even succeded in reproducing the slight inclination of the sides thanks to the use of 3x11 panels slightly pushing the mudguards on the exterior!
https://live.staticflickr.com/65535/52626681965_a4ea88c804_b.jpg[/img]
And a lot of stickers to make the design as faithful as possible!


LEGO Version
A few details change compared to the WeBrick version (12L flex instead of 14L, no rear headlights), otherwise they are identical.


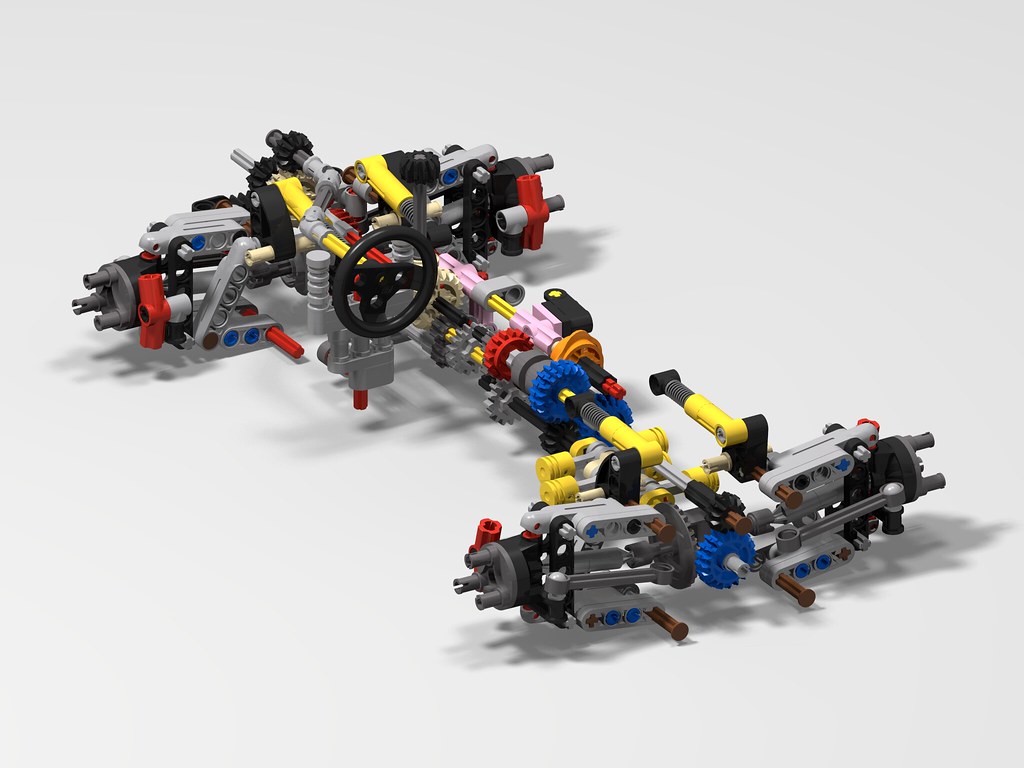
Steering
The system is simple, you can see the pictures of the 3D model below. The steering can be controlled using the HOG as well as the steering wheel. However, there is a little defect: if you move the car backwards using the HOG, a gear of the transmission may slightly touch a bush, producing some noise. This could easily be fixed by removing the HOG, but to me, the pros of the HOG beat the cons.

Openings
The doors and a panel of the front trunk can be opened, while the rear trunk can be removed to see the rear suspension.


F1-type suspension
The original car features a pushrod suspension. I wanted to reproduce the system, while having something reliable. And with space constraints. I can tell you that I spent hours and hours making messed up prototypes!
 It was necessary that everything worked in compression and not in traction. Because suspensions like on LEGO’s F1s work well when the model was just assembled, but after some time, nothing works anymore: there are too important constrainsts on the ball joints and the connectors. Also, I had to get a geometry allowig a perfect height of the car. That’s all, I think I summarized the issues quite well!
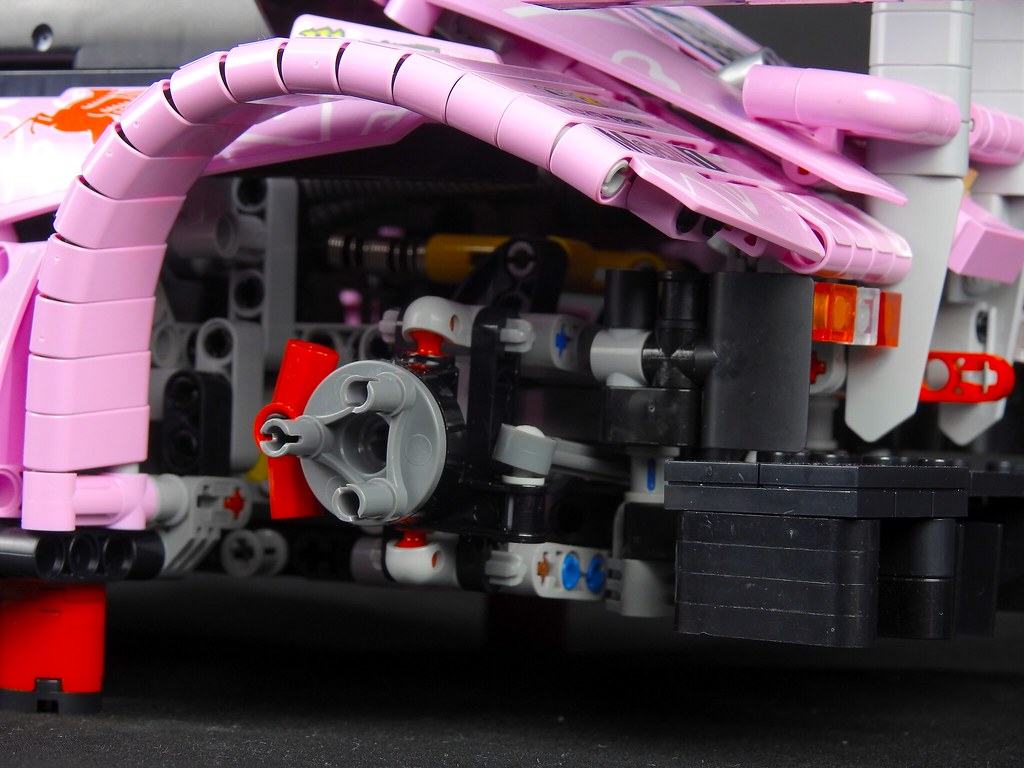
Gearbox
Due to space limits, it’s a 4-speed gearbox, with a paddle shifter. The shifter is almost exactly the one of Lego Technic Mastery. On the WeBrick version, it doesn’t work as well as the LEGO version if you take the paddles from the upper part. The 3L axles tend to bend the holes of the liftarms, so you have to be careful and take the paddles by at least the middle. But on the LEGO version, no issue.

Et voilà!

Other pictures of the 100% LEGO version :


To finish, the video !
Each model has got around 1750 parts. It’s a little more than LEGO’s 1:10 scale models, let’s say that it’s the fault of the mudguards. ^^ I also optimised the inventory: I managed to limit the number of references as much as possible by removing the useless colors and replacing some parts by others when it was possible.
All the pictures are available here for the LEGO version and there for the WeBrick version.
Fun fact: when I uploaded the pictures on FlickR, I realised that there were 43 images. What a coincidence!
Here are the instructions for the LEGO version.
If you are interested in building the pink version, reach me on social media (Antonin Laurent on Facebook of anto_lego_creations on Instagram). Please, don't use the forum to speak about the non-LEGO model.
Spacial thaks to @Milan and @Jim who authorized me to present the non-LEGO version on the forum.
-
On 12/19/2022 at 7:56 PM, gyenesvi said:I am curious how crazy performance it has!
Now you can see, video added to the first post! (Later than expected ^^)
The aim was to make a short video in the style of the ones with racing cars transporting a Christmas tree. And to show how fast this buggy is and how the suspension works. Merry Cristmas!
-
Thanks!
1 hour ago, Jim said:The pictures seen way too big though. Can you link to the max 1024 wide versions on Flickr?
Oops, I didn't use the right size! That's corrected now!
-
After a while without a new MOC (because of my studies ^^), I'm back with a new model!

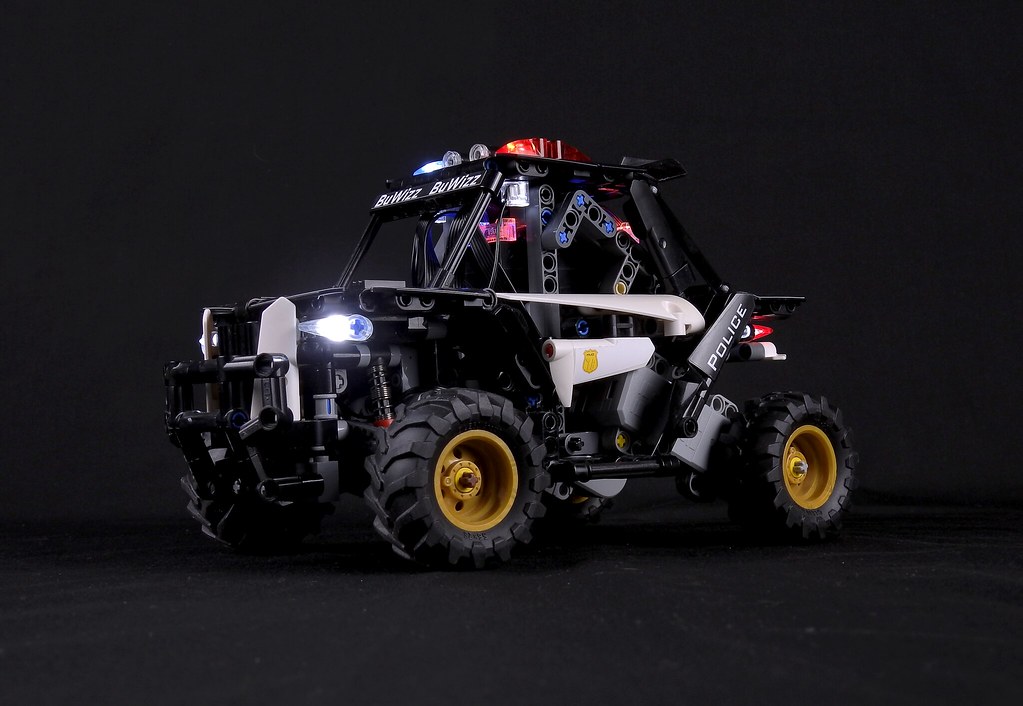
It was made for BuWizz. The aim was to make a model in the continuity of my cross kart. I wanted to get rid of the torque effect on the rear axle (as it was a suspended axle on my cross kart), that made the behaviour unsymmetrical in corners. So I used 2 BuWizz motors as wheel hubs instead!


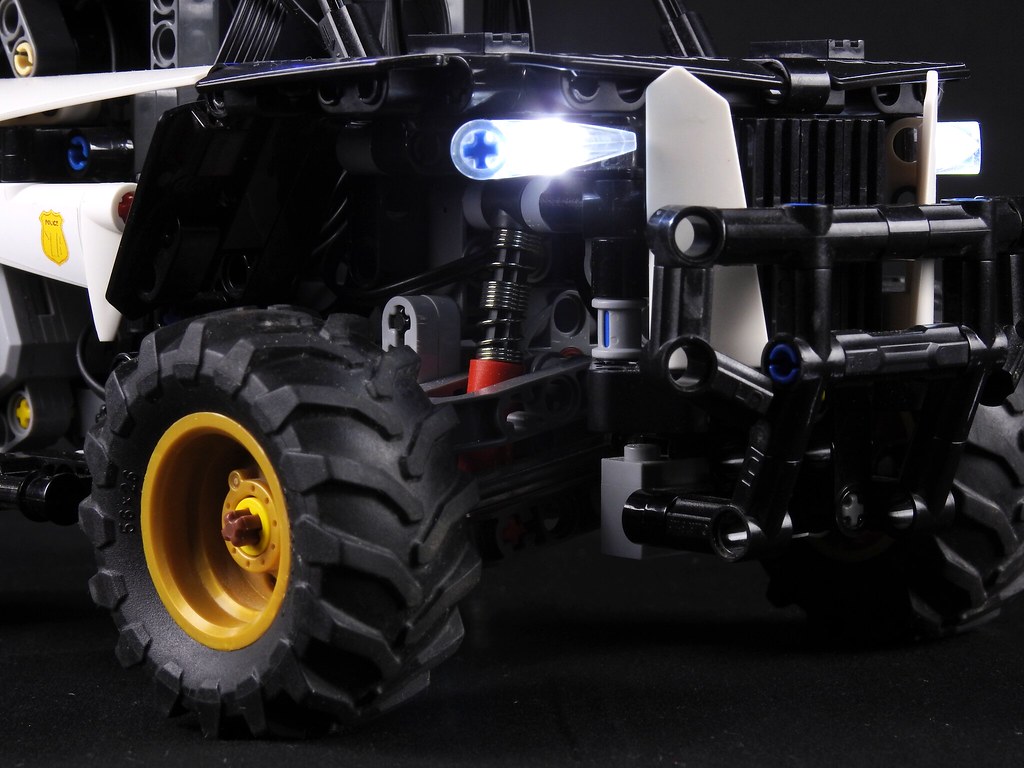
The rear suspension was made so the rear shock absorbers generate friction, in order to have a slow rebound. On my cross kart, the suspension was extremely reactive, but the kart was "jumping" on gravel. On this new buggy, having a slow rebound helps the wheels stick on the ground to gain adherence. However, I wasn't able to do the same thing on the front axle.

Why a police buggy? I have never seen this before, I thought it could be nice.
 I wanted the design to be as agressive and massive as possible. I wanted the design to be close to Polaris or Can-Am, looking heavy, indestructible but fast in any situation. People had to fear seing it in their mirror. You may have seen that the main part of the bodywork was made with 2x5 panels. This was a very useful part to achieve the shapes that I wanted, and to have simple assemblies (no one uses complex building techniques).


The BuWizz 3.0 has got 2 PF ports and 4 PU ports. The 2 BuWizz motors are connected to the PF ports while the PU L motor for the steering (acting as a servomotor) and the LED lights are connected to the PU ports.

The performance is really great! It is absolutely impossible to use more than the half of the power into a house! And outside, the suspension works well. You can go almost everywhere without being stuck or loosing grip. I also had some crashes but nothing was broken nor fell apart!


Little video:
And the instructions! https://rebrickable.com/mocs/MOC-132106/Anto/police-interceptor
I hope that you'll like this model, and see you soon for the next one!
-
On 2/12/2021 at 9:21 PM, Touc4nx said:Nice !
It's quite bulky, but I guess you can't really make it smaller…
You're right, but when it is integrated into a model it's possible to remove the parts with the frame so the shifter is more directly integrated into the model and that looks more compact!
@Bluehose: I've never had this issue. Maybe it comes from the column. Mine is able to limit the motion of the mini-LA, I don't know about yours.
-
After a lot of tries, I managed to get a paddle shifter with return to center!
The key to do this was to make a small shifter without any knobs, similar to the one in the Chron or in the Sian, but which is more compact.
There ae two main differences with @Charbel's design : since mine has a return to center, it is a bit heavier. Also, I put only one paddle instead of two (like in WRC cars) for two reasons. The first one is that I could get something a bit smaller. And the second one is that, to me, it's simpler to use. With a single paddle, no matters how the steering wheel is turned, we know that when we push the paddle we shift the gears down, and when we pull the paddle we shift the gears up. Whereas with two paddles we can do anything with one side.
-
Since the 2-speed gearbox also has a neutral and a reverse, this wouldn’t save space, it would just need more space to work and it would be more complex.
The old driving rings (2L instead of 3) would save space, but they are not used anymore. ^^ -
I made a real video!

[MOC] Peugeot 2008 DKR 1:10 (Dakar Rally)
in LEGO Technic, Mindstorms, Model Team and Scale Modeling
Posted
This is simple: there have been so many similar MOCs over the past decade that if I had to make list of the MOCs I am fascinated about, there would be two. Yours is the third one.
One question: are you really serious when you are wondering if it is recognizable?