
Lok24
-
Posts
1,241 -
Joined
-
Last visited
Content Type
Profiles
Forums
Gallery
Everything posted by Lok24
-
Indeed, that's a vision! But yet rather expensiv, that's why I showed my integration of the RPi with very old and cheap motors. Small and only one battery box for the complete layout. But wired. There might be interesting mixes of both techniques, sensors and loco via BT, but some wires for signals, switches and so on.
-
Thanks a lot for your additional information. There are very few modifications to LEGO parts. The PF cables are just clipsed into the connectors, but th 9V connectoers were opened to solder new long cables. Feedback ist given by reed contacs and magnets under the locos. In other words: that's all wired (and so very cheap)! Here's a picture of the "brain" with the relais modules, so it's a different approach: The "serial" cable is just 9 wires for the eight motors, no electronic at all. As the layout was shown at an exhibition in June, no PU was available, so there are 2 SBricks to setup BLE. See schematic includuing sound and some examples for command chains (usind things like "motor", "Wait" and so on): https://www.1000steine.de/de/gemeinschaft/forum/?entry=1&id=400516#id400516
-
I see! That's already very abstracted and easy to be handled due to the predefined classes. I'm not familiar with that all, my latest experiences were the Red Keep from Game of thrones (Four EV3 in a PAN, Java) and my fully automated train layout (Raspberry Pi, Python), have a look for some pictures and a short Video: https://www.1000steine.de/de/gemeinschaft/forum/?entry=1&id=400488#id400488 As I understand your solution is written in Java Script? Do you use some IDE like eclipse?
-
Hi, that's really awsome. Could you please tell us what you used, Arduino, tablet or other? And give a short example, just a few lines, of the code to see how complex that is?
-
For the EV3 there is a complete Communication Developer Kit and HardwareDeveloper Kit, both released by LEGO in 2013
-
Hi, i'm not a friend of these monolithic blocks. From point of architecture i would prefer using a PU Port as a bus, connecting more than one Sensor, a small 2x4 speaker, a LED brick 2x4 with 8 Outputs and so on.
-
What about the train motor? I see no electronical components at all (except fuse and C ). - Does that mean that there is a simple DC Motor connected to M1/M2 ? - Does that mean with an appropriate adapter-cable (connecting ID1/2 properly to tell teh Hub "Motor") we could use any old PF-Motor? Which leads to the next question: the max current supported by the H-Bridge in the Hub, which is unknown till now, right?
-
Yes , and accelerate slowly (starting the power with a predefined value, which will be automatically adjusted accorndig to battery power ) and also pause a predefined time at each end .
-
This is really amazing!
-
Yes and no Is the Boost App compatible with PoweredUp Hub? If not so: - wait for the PoweredUp App (which must be availble for Batman App-Mobile after release) Edit: just read that it was released on Jun 15th, fine., - use the hacked commands for Boost/WeDo to try to communicate with PoweredUp I prefer #2
-
The green tiles on the track, look at sec 0:51. On the left there are red ones. Building a simple sensor with a contact (like the EV3 Touch) could help: A reed-contact in the train and magnets hidden under the track, could be used for both, the pure Boost as well as for the Arduino solution, which should work with Boost/BLE too. Is there any documention about the WeDo/Boost/PoweredUp Hardware?
-
I need to get some feedback from SBrick. I want to send a command and then get 1bit of information back. But in the SBrick BLE Protocol 17 I did not find any hints to do that. Can somebody help? Alternatively: can I check if a port is connected? Or the load per port/total?
-

SBrick Watchdog
Lok24 replied to Lok24's topic in LEGO Technic, Mindstorms, Model Team and Scale Modeling
Hi, sorry for missunderstanding. It's a little Python-script running on a raspberry-Pi . Watchdog can be set and setting verified according to SBrick Protocol 17, but shows no effect. Maybe there is a more actual description? -
SBrick Watchdog
Lok24 replied to Lok24's topic in LEGO Technic, Mindstorms, Model Team and Scale Modeling
Hi, Thanks. @mocbuild101 : No Replies at all from Sbrick, the forum is not structured at all. @imurvai : SBrick has no "disconnect" command. The "Program" is only one Command: drive! Same is when loosing the BT connection. -
Hi all, got some trouble with my SBrick Hw 5.0 / FW 5.1. Writing the watchdog time with 0Dxx and reading it with 0E works, but there is no effect. Setting it to FF should give time of 25,5 sec, setting it to 0 should turn it off. But after program stops motor is stopped after less than 1 sec. Does anybody know why that doesn't work? Is there a description for the FW 51.? Any help is welcome!
-
Container crane
Lok24 replied to Lok24's topic in LEGO Technic, Mindstorms, Model Team and Scale Modeling
Hi, yes, when the childred were playing I had lots of discussions, especially why it shold be useful for kids to learn some programming. To me the most important point is that it is a good method to learn to strip down a complex task into single steps, this a useful strategy for many things. -
Container crane
Lok24 replied to Lok24's topic in LEGO Technic, Mindstorms, Model Team and Scale Modeling
Hi, thanks for your post. Sure, if someone supports me with a second EV3-Set To be honest it was also my intention to show the parents, that you can build several things without destroying it all for the next project. Therefore I also showed a standard-Tripod, but the motors just clipped in (and not beeing the essential part of the structure) -
Parking Deck
Lok24 replied to Lok24's topic in LEGO Technic, Mindstorms, Model Team and Scale Modeling
Hi Ed, many thanks for your feddeback. As I was asked to really show how it is working I decided to build it that way, and indeed the kids could easyly understand which motor drives a certain component. On the othe hand it is nice if it is "magic", look here So both is an approach to mindstorms in "normal" MOC, not only robots or technic-MOCs, as you can see I use a lot of the old parts. My Fork lifter (2015) is an example how to show both. There had been several children who watched it carefully and then explained to me what might happen, and for all of them I removed the house to show the technical details. -
Container crane
Lok24 replied to Lok24's topic in LEGO Technic, Mindstorms, Model Team and Scale Modeling
Hi Leonard, You need mindstorms - believe me.... No gears, testing very easy, automatic mode, no malfunctions cause motor is running to far etc... (except program errors ) Yes, there were lots of kids playing(!) with my models, I had six of them with me, have a look ( before openig exhibition) Additionnally I showed some small and very simple programs. -
Hi all, today I want to show some models I created for the exhibition „Fantasie und Technik“ in Abtsgemünd, Germany on 2./3. december 2017. All models were operated with only an EV3 Set(+1 small motor in one modelll), the motors and sensors have been plugged in just a few minutes from model to model, here the visitors could help. It was important to me that the mindstorms components are not hidden, visible and out,. to reveal their function. The models should show that it is also worth about the travelling robots to automate homemade models. There are almost no transmissions, which would unnecessarily complicate the whole thing, most everything is powered directly from the motor shaft. Most of the models could be operated with different programs. All were operated almost exclusively by the visitors. And here ist he transfer station … "Gravel" from the truck is transferred to small waggons with the loading station, the whole process is controlled by mindstorms EV3. It's again a model in which shows the Mindstorms components To illustrate the features a short schematic. The truck part (right) and the charging unit fort he train (left) work completely independently of each other, so one player can use the truck, others ride the train. Everything else is controlled by EV3. The IR sensor (1) in the blue part determines whether the truck is in position, then closes the barrier (2) and the truck is tilted (3). In the yellow part the touch sensor (4), the color sensor (5) checks whether it is empty, if so the motor (6) oft he conveyor belt starts. The truck The train The conveyor consists of two standard-LEGO conveyor belts In the picture the fill level indicator and the touch sensor, if the orange indicator on the waggon matches the column the conveyor belt starts A view from the rear, there is almost no visible mindstorms technology…. A short video on youtube (1:40) The „train“-part oft he program cu Werner
-
Container Crane Hi all, today I want to show some models I created for the exhibition „Fantasie und Technik“ in Abtsgemünd, Germany on 2./3. december 2017. All models were operated with only an EV3 Set(+1 small motor in one modelll), the motors and sensors have been plugged in just a few minutes from model to model, here the visitors could help. It was important to me that the mindstorms components are not hidden, visible and out,. to reveal their function. The models should show that it is also worth about the travelling robots to automate homemade models. There are almost no transmissions, which would unnecessarily complicate the whole thing, most everything is powered directly from the motor shaft. Most of the models could be operated with different programs. All were operated almost exclusively by the visitors. And here ist he container crane: I only used the mindstorms parts of sets 31313 (EV3 brick, 3 motors, 2 sensors). The container terminal provides two container spaces, a railway connection and a truck Here the part that controls the on/off of the claw. The four threads of the claw are summarized in a small sled and only one rope pulled by the motor. When the claw is up (black slide left) the touch sensor stops the motor. To sink the motor moves defined turns. The second unit is the trolley drive for right / left. Through the colored tiles on the chain the IR-sensor recognizes the position of the trolley (1st place, 2nd place, railway, truck) , the yellow tile is visible just below left The last element of the movement is the adjustment of the claw. To open the claw must be lifted with the outer threads, to close it with the inner wheels. This is done by simply extend of the lengtht oft he threads The trolley of the crane 3 The four ropes are on the left attached and can be adjusted by turning the blue pins, like guitar strings The claw with the four threads, if the two outer/upper carry the load the claw is open, if the two inner/lower carry the load it is closed There are two programs: one for the automatic operation, and one for the manual mode pressing the keys of the EV3-brick. Usually the visitors used second mode and played, especially the kids... Here is a short deo showing the funtions (1:31) and the automatic mode (2:44) Hope you like it. cu Werner
-
Hi all, today I want to show some models I created for the exhibition „Fantasie und Technik“ in Abtsgemünd, Germany on 2./3. december 2017. All models were operated with only an EV3 Set(+1 small motor in one modelll), the motors and sensors have been plugged in just a few minutes from model to model, here the visitors could help. It was important to me that the mindstorms components are not hidden, visible and out,. to reveal their function. The models should show that it is also worth about the travelling robots to automate homemade models. There are almost no transmissions, which would unnecessarily complicate the whole thing, most everything is powered directly from the motor shaft. Most of the models could be operated with different programs. All were operated almost exclusively by the visitors. First MOC ist the parking garage. Interestingly, the MOC consists of four individual parts which are only pushed together: the parking garage, the entrance with " card reader" and barrier, the baseplates to run the robot on and the mindstorms function block. The Park House itself is very classic, the grey palettes are not fixed. The entrance with the barrier, on the right hand side the parking tokens. Chip 13 (1st floor, 3rd place) is inserted. The three Motors move the slider for the plates in all directions: right / left, driving on / off, slider forward/back The entire MOC works with just one color sensor. There are various color markings: Blue (the high tile) left on the card reader adjust height ( yellow, right next to it), card reader with four colors 1 - recognize card(always green) 2 – floor 3 – place 4 - card taken out of reader? (always green) And many white dots to be counted for the position.... And here is the video (2:22) Enjoy! cu Werner
-
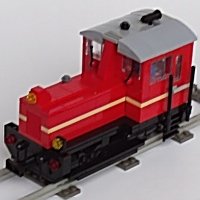
Thomas, here's a little video ( 32 sec) It shows a wagon with steel axles and what happens if you have an offset of 3 studs and 5 studs. Of course, I agree to you, this effect takes place with light wagons and very slow acceleration only. Therefore I see that your linear actuator is very useful. Saw your V100, good idea to shorten the cabin to 6 to use the windows with frame. Nice work cu Lok 24
-
Hi all, I presented them and different others here, and new ones will be presented in the future. My intention was to develop a solution for all wagons. My experience was, that even with the big linear actuator the way (and therefore the distance between loco magnet and wagon) is to small, if the wagon has steel axles. They are running that smooth that, if you drive the loco very slowly, they are following by the distant magnetic field only. As I have no layout my work is more experimental and should give ideas to others to try some "new" things. By the way, I've seen the pictures of your layout, that's really brilliant. cu lok24
-
Hi dr_spock, Yes, sure. Perhaps it might be different on a left/right combination, which you have behind a switch point, but normal curved tracks are no problem. The mechanism isn't that complex as it looks like. Start with the bogie with the two racks, two gears and the support with the technic plate with holes, as shown in the last picture. Add 4 wheels. The technic bricks to hold the wheels are connected below with a plate 4 wide with 2 wide tiles on, on this support the coupler is moving. Then you build a plate for the PF-train-motor - again with the technic plate with holes - , app. 2/3 of the length of the loco, add some bricks to reach the height of the support of the bogie, and then add a technic plate with holes to sit on the bogie support. Then you combine “loco” and “bogie with an axle, the lower bevel gear and the clutch. Use same other parts to stabilize the whole construction Then it should run on the track and if you turn the clutch the decoupling mechanism is moved. Put the motor for that somewhere and connect to the clutch (not the axle, of course). With remote control with the wheels you can easily test. Last you have to attach the stop for the vertical axle, choose an appropriate low gear to satisfy the way the coupler has to move. That’s all, as you can see you can build the construction in several steps and find your own best choice for the components, as each engine is different. cu Lok24