

steph77
-
Posts
925 -
Joined
-
Last visited
Content Type
Profiles
Forums
Gallery
Everything posted by steph77
-
[TC15] AH-77S - HUNTER
steph77 replied to steph77's topic in LEGO Technic, Mindstorms, Model Team and Scale Modeling
Hi all, Some news about the project. I do pass a command near TLG for some panel stock. Could someone please help me finding a pair of 90' swashplate element? or tell me where I could by two of them? thx. -
Hi Jeroen, This seems to be a grat start design. One question, witch is quiet generic, when rotating doesn't this engine vibrate a lot? As the pistons are moved by a non symmetrical shaft?
-
Great choice of model. I really like the proportion you already capture on your draft! If anyone care I would be glad if some of you all rebuild some of my own concept and stuff. I published with the help of @Ivan_M the instructions of Aw169. Fell free, all, to take inspiration of it.
-
Hi Igor. You didn't choose the easy way with this model, as all commands and links are separate from the main cockpit area. This is why (the not easy way choice) I think your model is one of the more promising one. Have fun on it!
-
[TC15] Red Baron
steph77 replied to Touc4nx's topic in LEGO Technic, Mindstorms, Model Team and Scale Modeling
hello. good start! I wonder if, on the lego model, the engine must be covered or not... -
[TC15] Skycrane helicopter
steph77 replied to Erik Leppen's topic in LEGO Technic, Mindstorms, Model Team and Scale Modeling
very good start! Curious about where you will place the joystic and handle of collective pitch. -
[TC15] AH-77S - HUNTER
steph77 replied to steph77's topic in LEGO Technic, Mindstorms, Model Team and Scale Modeling
I read previously on EB that creating an early topic wasn't for reserving an idea. Be sure I don't. I spend the two past days to think at my project and, today, is time for defining the overall technical aspects of my model. This is the expected functions I planed to realize: - Complete flying command retranscription - additional features like motorized opening of the ramp, winch (main on the underside and secondary lateral), - I think also at a retractable landing gears, even if real model does not have it - And that's it. Take 02: prototyping of the flying commands Building a Chinook is easy. Building the flight commands of a standards helicopter is quiet another cup of tea. Building Chinook commands is really harder. It is harder due to fact that, even if basic principles of flight are the same, the Chinook is a tandem helicopter. The pilot has exactly the same commands in the cockpit, and he had to act on the command exactly the same way than on a classic helicopter. From a technical point of view, behind the pilot's joystick, all action on the rotor are radically different. The following explanation is based on the pilot action POV. The pilots pull the main collective command (left hand): on a basic helicopter, this does lower the whole swashplate and increase the angle of the blades. On a Chinook it does exactly the same, but on the two rotors. The aircraft lift up. The pilot pulls the main cyclic joystick upwards or backwards: on a basic helicopter, the swashplate incline to the front or to the back. The angle of the main blades increase in the opposite direction of the wish translation movement and the aircraft goes to the front or to the back. On a Chinook it is different. When pilot push the joystick to the front, the COLLECTIVE increase to the rear main rotor when simultaneously it decrease on the front one. Therefore, the aircraft incline itself supported by rear rotor that as more lifting power on the rear. The pilot push the joystick laterally from to the left or right: on a standard helicopter, swashplate tilt to left or right, blades angle variate cyclically and aircraft follow the direction. On a Chinook it work the same way. Both swashplates tilt from left or right together increasing the lifting force correspondingly. It's a CYCLIC movement. The pilot push feet pedals left or right. On a classic copter, it is the rear small anti-torque rotor who is activated. In one direction it gives less resistance on the natural torque action of the main rotor and so, the aircraft turn on the vertical axis of the main rotor in one or the other direction. On a Chinook, as the two contro-rotative rotors annulated the torque effect, it is needed to create a torque effect. When a pilot push the feet pedals of a Chinook, both swashplate tilt in opposite direction from left to right. In this case, the front right area of front and left area of rear rotor increase their lifting power and the Chinook rotate on a vertical axis situated between the two rotors. So to summarize all this, Main joystic: Font and back movement : collective components - left and right: cyclic components Collective lever : only collective components pedals : only cyclic components There is therefore a mixing unit in the kinematic chain located between pilot's commands and the swashplate. On my lego model, intend to apply the same controls than on my AW169. Logically for the user, commands are to be at same position and oriented the same way. This will able the comparison between the two aircrafts. I figure out on how realizing this. I spend ours to fix the different element's positions. In my idea the entry of joystick command will be done by the underside of the mixer as the output will be located on the upper side in right alignment position in order to be able to link them to the front and rear swashplates. Here is the second prototype of mixing system. I put colors to explain, and this mixer has to be compacted. Action on this levers has for result that the 4 3X3 90° liftarm in yellow will move. I name them OUTPUT. These liftarms will be connected to both front and rear swashplates respectively. Connected to left side joystick of the Lego model: In RED you have pedals control (on my model placed on the right side together with main collective command) . The output move in order to basculate the two swashplates in opposite direction In GREEN, you have the main collective shaft. when you act on this lever the outputs are moving the same way together. Connected to right side joystick of the Lego model: In BLUE, you have the shaft of the front/back movement of the cyclic joystick. Output are movinc collectively in opposite direction In ORANGE: you have the shaft of the cyclic left/right movement. The output moves in order to basculate swashplates in left or right direction on a cyclic movement and together the same way. I hope this is clear. I read that this contest was all about design, not that much functionalities, at least according to some of us here. I won't follow that way ;) This said, I am quiet afraid by the timing. quiet short for me ;) . -
[TC15] AH-77S - HUNTER
steph77 replied to steph77's topic in LEGO Technic, Mindstorms, Model Team and Scale Modeling
I usually do this kind of test. Obviously, on a lego model, i never come to this extreme results. On a lego model the problem is not to look what happend when vibration happened, but the goal is to reduce the existing vibration at max. I do work on this aspect on my AW169 and get good results. At this stage, no idea on how a tandem rotor could behave. History will tell. -
[TC15] AH-77S - HUNTER
steph77 replied to steph77's topic in LEGO Technic, Mindstorms, Model Team and Scale Modeling
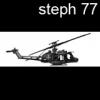
It Will be a chinook... -
[TC15] AH-77S - HUNTER
steph77 replied to steph77's topic in LEGO Technic, Mindstorms, Model Team and Scale Modeling
I do ? Link re-edited: -
When discovering the theme of this contest, one and only one model came to my mind. This is my holy grail, the project i try 10 times to work on and let down due to its complexity. It is the mother of all helicopters. It is the most complex linkage system I ever see and attempt to build. I feel it's this time or never. Here we go: Take 01 : basic preliminary rush and frame:
-
I know exactly what to build. Question is how can I do it. My project name will therefore be 'mission impossible'
-
Steph77's Moc corner - EW160E
steph77 replied to steph77's topic in LEGO Technic, Mindstorms, Model Team and Scale Modeling
First post edited with my main model since 2012. -
Steph77's Moc corner - EW160E
steph77 replied to steph77's topic in LEGO Technic, Mindstorms, Model Team and Scale Modeling
You're right for the angle of the arm. This is however the best result I can have with the MLA, as the large LAS where totally out of scale. Thanks. a)Thanks, b)Yes c)And yes, the wheel covering is something important but I do have only two large dish to achieve it and any yellow rim. Will see what to do. -
Steph77's Moc corner - EW160E
steph77 replied to steph77's topic in LEGO Technic, Mindstorms, Model Team and Scale Modeling
Oups. Thanks. -
Here is a new thread were i'll post all my new creations from now. I'll update this first post progressively with links to all the topics of my Mocs existing here on EB for more clearness . Pictures are linked too the respective topic 2012- BELL UH-1 HUEY 2012- CRANE TRUCK 2013- PORSCHE 911 2014- HYDROPLANE 2014- MANUTENTION TRUCK l 2014- AMPLIROLL TRUCK 2015- LMP1 2015- TOWTRUCK 2015- SUPERCAR 2015- SKYCRANE http://image.noelshack.com/fichiers/2015/40/1443614168-2015-0929-08a.jpg 2016- VOLVO TRACKED LOADER 2016- COASTGUARD MINI HELICOPTER 2016- PULLBACKROD http://imageshack.com/a/img923/919/cl6wup.jpg 2016- PORSCHE 919 HYBRID 2016- VOLVO FH 2016- VOLVO HANDLER 2016- FLATBED VAN 2017- QUADBIKES 2017- LAMBO MINICAR http://imageshack.com/a/img923/954/H33Q56.jpg 2017- GARBAGE TRUCK 2017- SHOPPER http://imageshack.com/a/img924/4078/YddquV.jpg 2017- SEMI DUMPTRUCK http://imageshack.com/a/img924/8052/7gjj7X.jpg 2017- VOLVO EXCAVATOR http://imageshack.com/a/img922/2012/XgZtkj.jpg 2018- FARMING TRACTOR http://imageshack.com/a/img922/6313/aQt2LF.jpg 2018- AW169 2018- FORKLIFT 2018- ENDURO BIKE 2018- VOLVO L250H This project is build and dedicated to my nest. I didn't see him that often, and we fix the rule that at each visit a new Moc will be there waiting him. So here is this one. A simple wheeloader with manual drive and steer and a double two-way gearbox controlling the bucket and arm movement. This model is built in a full 100% technic style. No model team pretension here. Main view: I worked hard on keeping a correct width to it. It's really not easy considering the mechanics passing through the central articulation and considering the scale of the model. I place a special attention to design part of the build. Here is a view of the driver's cab: The first function is the direction of the model. It's classically based on a central articulation. A large new turntable is connected with: 20T/12T / manual knob on roof. The turning radius is excellent. Note that initially the model had a pendular back suspension and I needed to lock it for better maneuverability. The weight on the back (BB) was a critical issue with pendular axle. The model has a fake 5 inline engine with working fan. all this mechanics is accessible through a large openable bonnet The main function are known and usual but not that simple to build, especially at this intermediate scale (the model fits to my helicopter and waste truck scale) A Large PFS motor activate a double gearbox. the commands are on the right side (theorange pieces) in accordance with Volvo's design and coloring The main lifting is assumed by two small LA. This was the hardest part to connect with the articulation. Tricky game but perfectly functional (if not I wouldn't present it). The bucket tilting is managed through a large LA and one 'Z' kinematics. The LA is connected to the gearbox via two universals joints. Here are the maximum movement range: End words: It took me 4 differents and successive models to get this result. To realize this kind of model you better have (in this order) to check: - articulation and gearbox design - Front end design - Arm movement design especially if you want to reproduce the Volvo Z linkage as this one does - Be careful to concentrate all mechanics in the center of the model to keep proportions right - have fun. Steph. Edit @jorgeopesi: post edited with full review
-
These decals are from a Revel scale model of a seaking helicopter.
-
Thanks all for kind comments. As you may now, I just never stop working on a project.I hesitate to continue posting about it since the topic was passed for a while, but as you pop it up here is the actual state of the art work on it. Take 08 : stickers time I know some of you (and I do also) may be purist in terms of design and consider this mean as a way to make design easier. I don't. But I try to input a more realistic touch in this model, so, what do you think guys of this: in more details: Steph
-
Generic Contest Discussion
steph77 replied to Jim's topic in LEGO Technic, Mindstorms, Model Team and Scale Modeling
+1 also for Something flying :) -
This contest didn't inspired me at all, but i must admit that the entries are mostly fun and great. Here is my vote: 1: 10 12: 6 10: 4 3: 3 6: 2 5: 1
-
You CAN do it Just build the second controler and go :) You have build a perfect proof of concept actually, the hardest par is done. Looking at your model i Wonder if it wouln't be better keep the gearbox behind the controler not one up the other to maintain a good scale proportion. And by the way this configuration is perfectly adapted to....linear actuators And at last, you need to fix quickly the position of the battery box Keep this up!
-
It also can become your own designed crane! You can or not choose to say your design is based on a real thing. So speeking of your existing model and only this existing model, I could perhaps give you some advice? Usually, you are at this point when I personally ask myself this: - Ok, now I have a functional model, great! - I have to separate function and design now. - About function, do all of them work properly? is the design and mechanics ok in regards to TLG standards, what could I do better? Look function by function, making sequences for each of them - is my build modular, can I extract difined sub assembly?, look at each subassembly and try to simplify them at max keeping all functionalities.Usualy I personaly remove 10 to 20% pieces from original rush to final model. - From design point point of view, what are my design guidelines and program? are them clearly understandable and do my model be in correspondence to my goal? - Can I simplify and clean my design elements like cab, chassis, crane cab, etc... Looking at each and every once a time I am sure this model could be way better. CAUTION! I am not telling you your model is not. I tell you that it has the potential to be still better! And, BTW, you already managed to build a functional crane, not everyone here could do it, so keep up with this work, with patience, carrefuly designing each element and constantly having your very own criticism spirit. Keep it on!
-
I never talk about money. I find you are right. My post was clear: get back to Mocs topics...
-
my opinion on this subject: 1 - Lego is a hobby, 2- Everyone do it with his experience and own knowledge, this mean I do accept everyone is not able to build top Mocs (I do not estimate myself be able to do so) 3- In each and every project, based on an subjective high implication of his builder, there are potentionaly things to learn, idea to emerge and go on further. 4-I estimate it's important to have respect to every people capacity. Commitment to work is more important. In that spirit I will quickly answer and comment a Moc of a young designer who gave all he had in his Moc than one of a known builder presenting it's 50th hypercar 5- Respect. Is mother of all in here With this all in mind, I understand your frustration receiving comments. But @Sariel is right, your crane is not a representation of any crane of any real brand. And this is not important. Important is that you've enjoy your build. I am sure that if you've done further in deep explanation of your build process, attention point, difficulties you've find and positive critisim on your own work, people (and I) would probably be there to say you've done good job and idea on how go further with your build. respectfully, Steph
-
BMW S1000/RR
steph77 replied to steph77's topic in LEGO Technic, Mindstorms, Model Team and Scale Modeling
Thanks! Here are some complementary views of the gearbox area: selector assembly: Front top view: gear selector connection: 4 engine detail front: underside view: Frame sub-assembly: Frame full assembly: