
Lipko
-
Posts
2,118 -
Joined
-
Last visited
Content Type
Profiles
Forums
Gallery
Everything posted by Lipko
-

[HELP] Generic Building Help Topic
Lipko replied to Jim's topic in LEGO Technic, Mindstorms, Model Team and Scale Modeling
That's simply genoius. -
It just doesn't look good. Maybe I'm in the minority, but I care about the looks of the chassis as well. Well, actually, it's not just stacking frames, the new trend is stacking beams too… Apart from looks, my problem with this that I don't think it gives that much extra stress, but adds to the weight and part count of the model, and hides interesting mechanisms. As for more attachment points: well, most of those points are used up for fixing the stacked parts to each other. Maybe I just don't have enough experience with it. Any time I almost used such a technique I found a much better solution (better looking, stronger and more possibilities to integrate it into the build).
-
So stacking 3 frames is the new standard of chassis building? :/
-
Wow, that is indeed a good and surprising story!
-
As I wrote earlier, I see no point in closed loop for air for everyday use, since you have it everywhere freely and it's not that hard to condition it. Venting things against a pressure (something that would build up in a finite volume closed loop) would just decrease the power you can get with using air (less force in a cylinder since you have a counter acting pressure).
-
It is called hydraulic system...
-
You are so overcomplicating it. My wife's gonna kill me. I have so much work to do, yet I'm doing this. Anyhoo, just a very quick sketch without drive: Blue: suspension links yellow: steering
-
I'm not following. Use long rods then. The suspension arm can be extended to any length. You have to make is sideways-sturdy anyways.
-
I though you mean this by steering linkage in the first place...
-
But why don't you use the pinholes in the H frame itself? You could use the middle hole with a ball-pin pointing upwards to add a suspension arm (part with small ball socket on one end and axle holes on the other) and two sideways holes (just below the U-joints) for the links. The links and the arm is parallel and should be equally long, so you have a "horizontal" H frame. The steering would go in front of the axle assembly. I don't understand why you are afraid of a linkage steering. Since it's not a trophy truck, it's not likely that the center of the axle will move too much vertically during operation. Just place the steering dragging link in a way that it'll be horizontal when the suspension is compressed under the weight of the vehicle. You have a pretty large space above the axle, so the attachment point of the dragging link onto the connecting rod between the wheels can be placed arbitrarily high to avoid any interference with other parts. For the drive, dunno... PS.: yes, your current linkage wouldn't work since it doesn't prevent sideways movement.
-
Hm... You have a pretty good starting point (a rigid axle and wheel hubs with tons of connection possibilities) and you ask for help with with the simplest thing (attaching to the chassis, with which you even have a general good idea (3 or 4 link)) and another thing that you are on the right track with ("using linkage to steer". You can even go for Ackermann geometry pretty easily). With what do you have problem actually? The frame itself and the drive? Because drive is the trickiest thing, not the others. I think it should be doable to come up with a solution without U-joints. Sorry if I misunderstood the question.
-
Sorry to be a smart a**, but that's not precise: the friction force is not dependant on the surface size, because force is distributed on a bigger surface (smaller surface pressure). However, the leverage is smaller in case of a smaller surface so the friction torque will be smaller indeed.
-
Then why I remember it otherwise? Or maybe it is/was the case only with system sets? Obviously I don't buy too much sets...
-
I know but usually you have to open all of them at some point early in the build. At least that was the case 2-3 years ago, I haven't bought any Technic since then...
-
Okay, sorry if it's obvious and was covered already in the thread and videos but I'm working so I can't spend to much time but can't wait either. So: The plastic bags are to be opened sequentially while building, and you don't have to open all plastic bags of a box at the beginning of a building stage, right? Like in case of The Saturn V for example. I'm asking because I have so little spare time (maybe 1 hour per session) and also little building space that it really matters, as this might be the nuance that could help me decide, because I'm really on the fence.
-
<script> console.log("there's hope to achieve this feature!"); </script> Seriously the blue pin comments are really tiresome. Why are pins visible in a Technic set anyhoos LIPKOMAD EDIT: script injection doesn't work :(
-
I was quite excited about the set a few hours ago, I almost considered buying it (I haven't bought the other two), but seeing the speed-build video was disappointing. The chassis lacks any elegance, maybe it looks worse than the other two UCS cars.
-
For be it's by far the prettiest from the three UCS sets. This doesn't look like an overly huge brick. Just don't look too much at the real car… Only the easily recognizable parts (front lights, maybe rear light) make it recognizable.
-
Maybe simply doubling the whole thing with a slight offset of the switching torques? Maybe it would only smooth in one direction...
-
Put the whole system in a big closed tank and voliá, closed system. seriously though, it should be possible but I don't how much practical usage would it have. Maybe on a submarine or is space or similar. Air is "free", if you have to put energy in the system anyway, you could just pump air and use it as the energy source. Hydraulics is quite close to a closed system. Any "vented" oil goes back into the oil tank. In case of pneumatics, you just vent to the atmosphere, no need to lead the "zero energy" air back anywhere.
-
You misspelled the car name on the box. It should be Lambordzsini
-
To add: If I build system sets, for example Creator expert which I'm not familiar with, I have harder time to recognize the parts, even though there's color vomit like crazy in those sets. I imagine how exhausting building would be without that color vomit. And Exhausting is not fun for me while building.
-
I guess it's the matter of task. I build pneumatic test benches regularly and not only the piping and electric cables are all color, but the valves, tube fixtures, other stock accessories too. A random aircraft engine for example: Obviously the same color coding can't be applied to LEgo as there is no complex cabling, piping and whatever in Lego, but the overall expression is similar, lot of color accent, even if LEgo has more colors. I'm not saying the Chiron is a good example, because it's not. Static frame elements should be in a consistent (or very few) colors. The all terrain crane is another good example of bad color vomit.
-
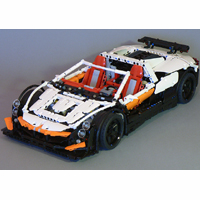
[TC18] VW Rally Car
Lipko replied to Surffikoira's topic in LEGO Technic, Mindstorms, Model Team and Scale Modeling
I feet the same. -
I love color vomit. And I don't love challenges when building a stock product. So wat.... It't just a matter op opinion. And whoever says that the internals of machines are not colorful haven't seen to much machines from the inside.